 Divisi
How to grow Bambara groundnut
Vigna subterranea · Fabaceae
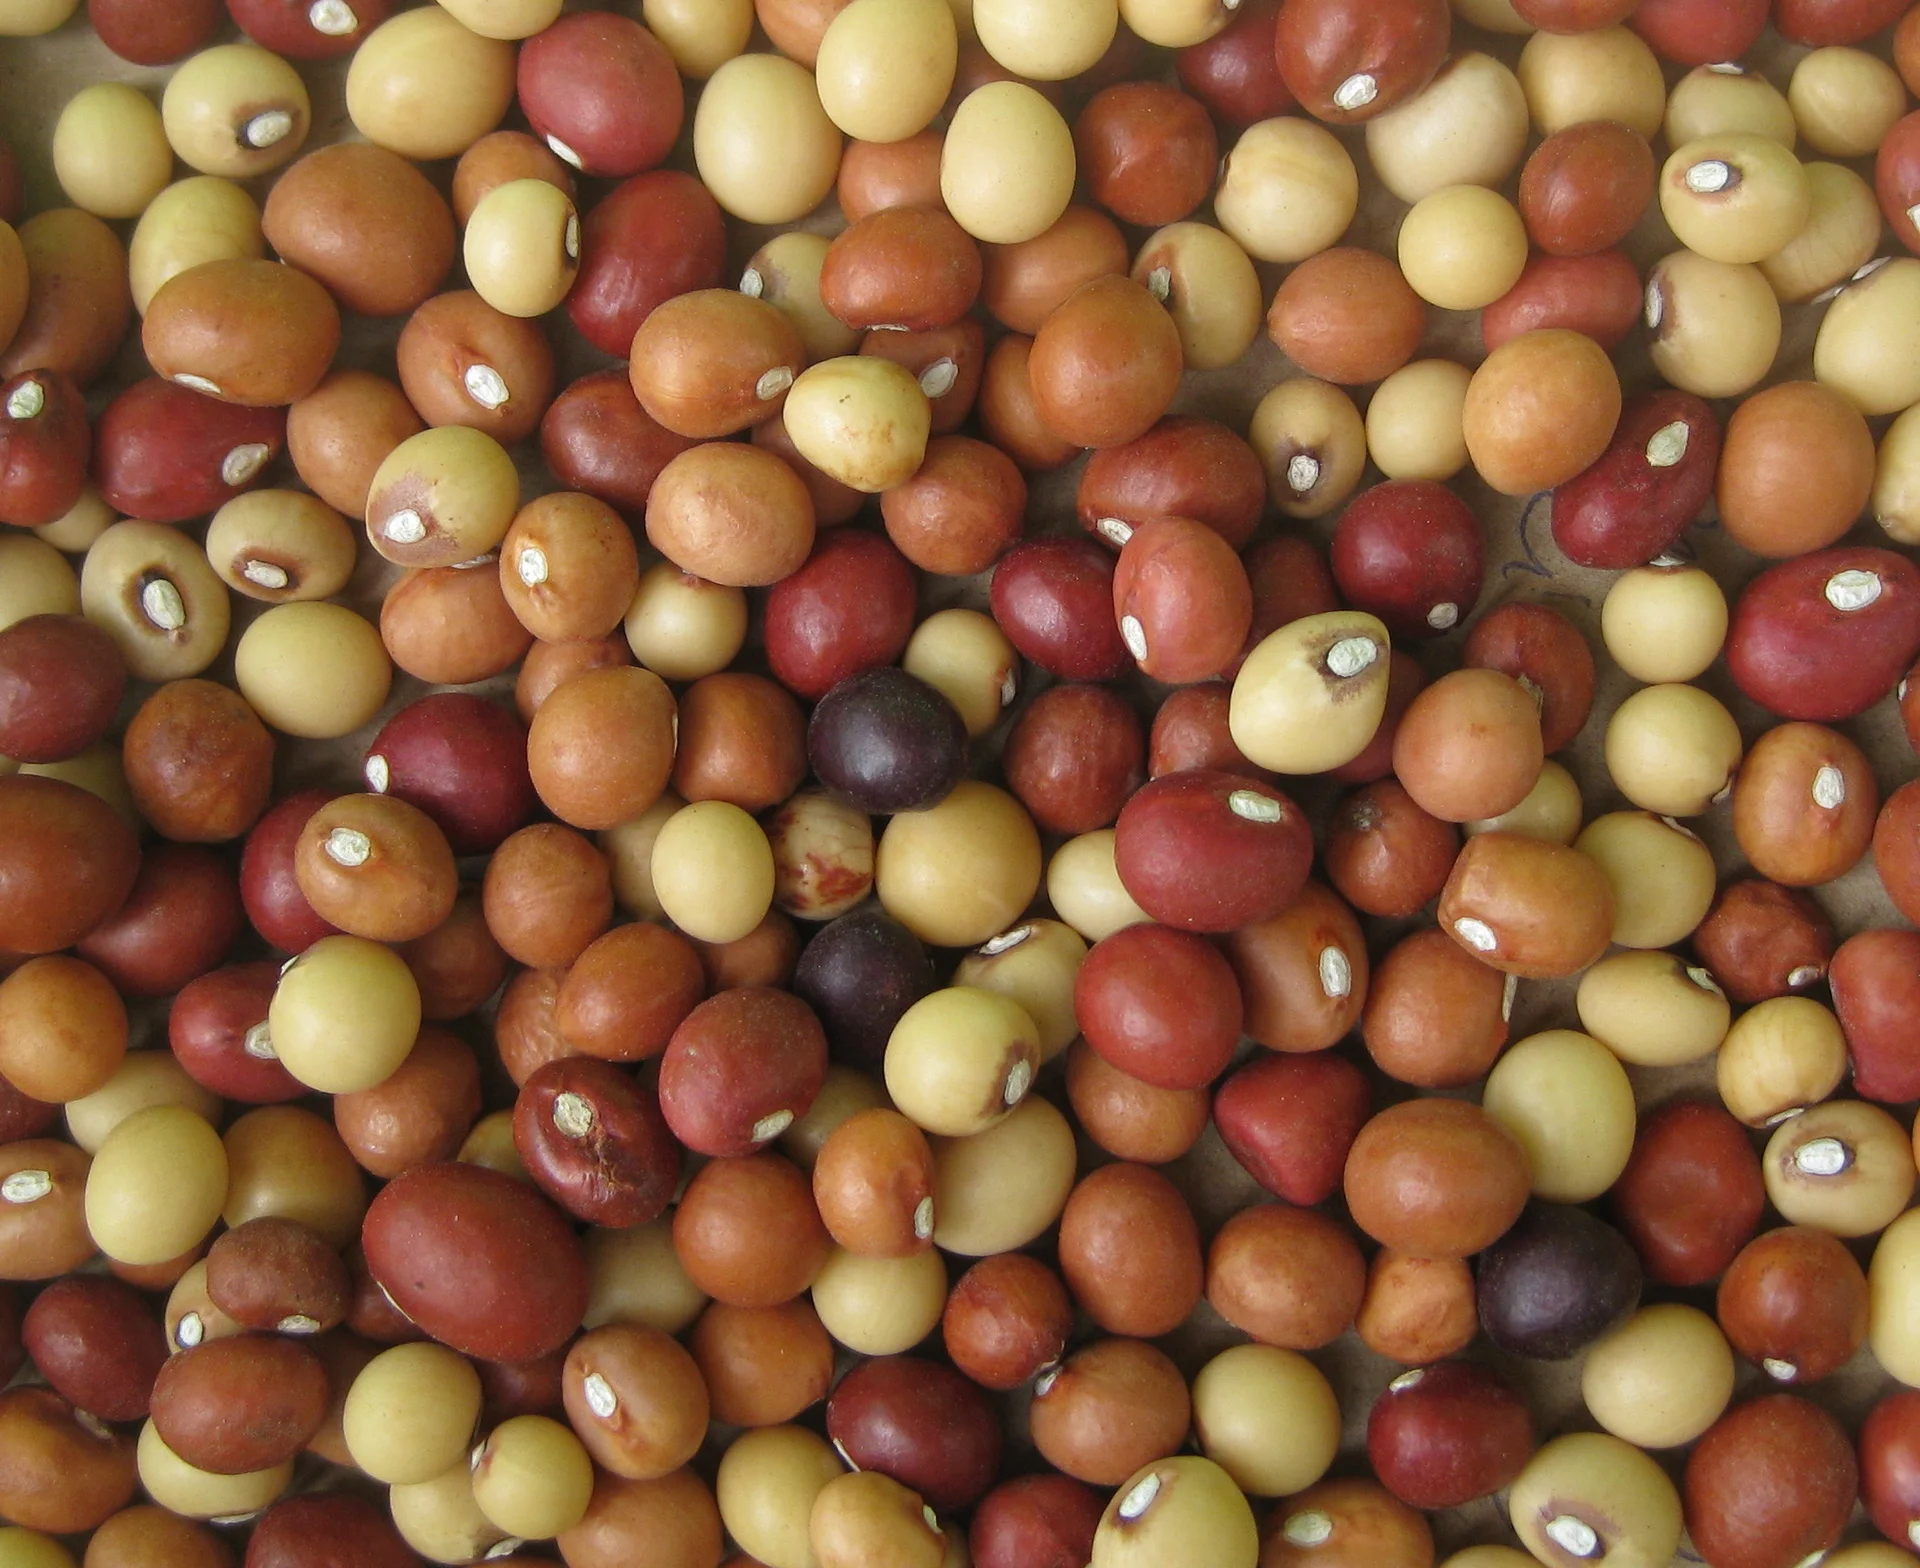
Photo: Ton Rulkens · CC BY-SA 2.0
Bambara groundnut (Vigna subterranea) is one of Africa's own beans — a tough, low, bushy plant, often grown by the women of the household on the poorest, sandiest land where maize would fail. Like the groundnut it is named after, it flowers above the ground, then each flower stalk bends over and pushes its young pod down into the soil, so the seeds swell and ripen underground. Being a bean, it makes its own plant-food (nitrogen) from the air through tiny knobs on its roots, so it needs almost no fertiliser and shrugs off heat and drought far better than maize. There are no bought hybrid varieties — you grow the local types (landraces, told apart mostly by seed colour) and save your own seed year after year.
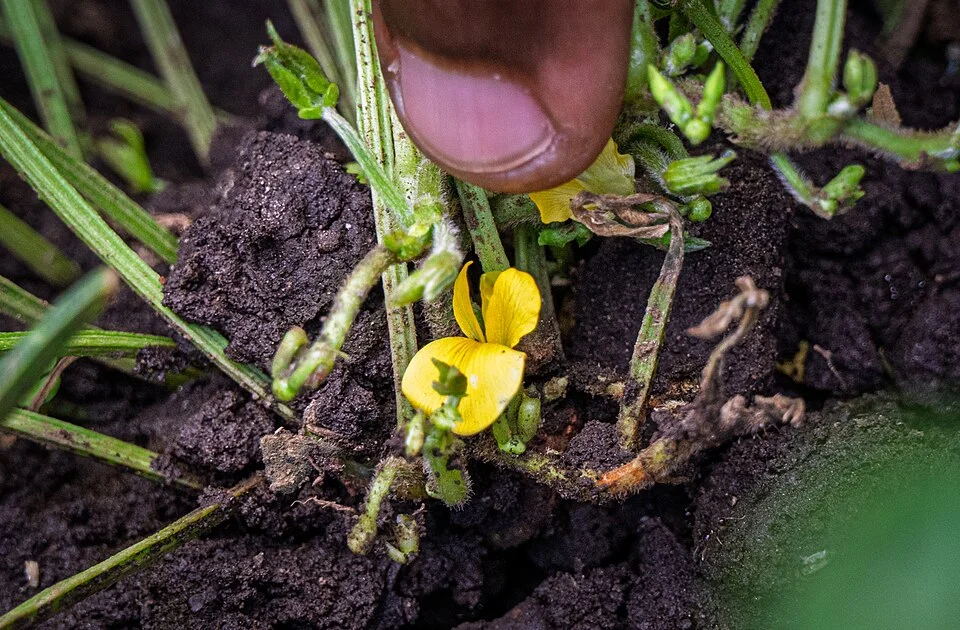
Crop Trust · CC BY-SA 4.0 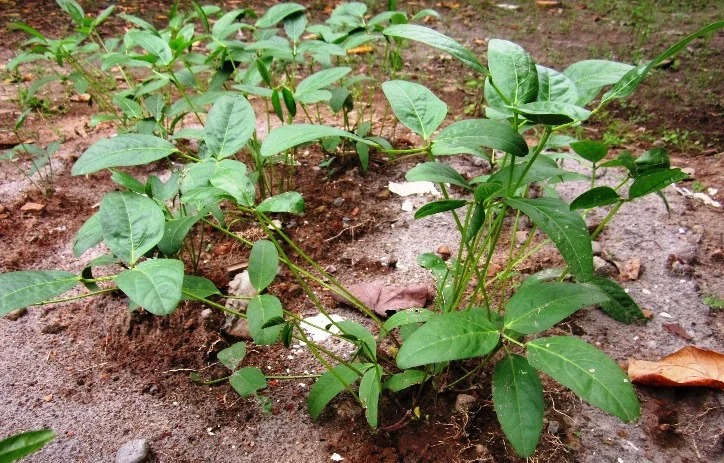
Kembangraps · CC BY-SA 3.0
- Days to maturity
- 90–170 days
- Row spacing
- 40 cm
- Plant spacing in the row
- 15 cm
- Sowing depth
- 3–5 cm
These are general figures for the crop, compiled from published agronomic references including FAO and CABI. The right choice for your field depends on your soil, rainfall and the yield you are aiming for.
Will Bambara groundnut actually do well on your field? Check your own field against every crop in the catalogue — no signup. Run the crop check →
Also known as
Bambara groundnut is also called Bambara bean.
- English
- Bambara bean
- Afrikaans
- jugoboontjie
- Chichewa
- nzama
- French
- pois bambara, voandzou
- Hausa
- gujiya
- Igbo
- okpa
- Ndebele
- indlubu
- Sesotho
- ditloo
- Setswana
- ditloo
- Shona
- nyimo
- Swahili
- njugu mawe
- Xhosa
- indlubu
- Yoruba
- epa-roro
- Zulu
- indlubu
Working in buckets, bags or paces? The farming glossary turns the measures growers actually use into kilograms and hectares — what a 20 litre bucket of each crop really weighs, and how to size a field by walking it — alongside the Shona, Swahili, Ndebele and Yoruba words used in the field. Open the glossary →
Growing Bambara groundnut, stage by stage
Your bambara groundnut season, step by step — from a soft, sandy seedbed and one good planting, through light, shallow weeding while the pods bury themselves underground, to lifting the whole plant and drying the pods rock-hard so weevils can't touch your harvest.
Get your field and seed ready
Almost everything that decides your harvest is set before the first seed goes in. This bean grows its pods underground — after flowering, the flower stalks bend down and push the young pods into the surface soil — so it needs a deep, loose, sandy, well-drained bed. Buy the right local seed and a little phosphorus in good time (but no nitrogen — this bean feeds itself), so you can plant the moment good rains arrive.
Prepare a loose, friable seedbed Recommended
This crop makes its seeds underground: after it flowers, the flower stalks bend down and push the young pods into the surface soil to swell. If that soil is hard, cloddy or waterlogged, the pods can't push in and set — and you lose the harvest before it even starts. A deep, loose, crumbly, well-drained bed is the foundation of the whole crop.
Choose light, sandy or sandy-loam land that drains well. Keep off low spots and heavy, sticky soil that holds water — there the pods rot, and hard ground won't let them push in.
Loosen the soil deeply, about 15–20 cm — a hoe-blade or spade's depth — so the roots go down and the surface stays soft.
Break up every clod and rake the top into a fine, crumbly tilth (soft, crumbly soil). The pods must push into soft surface soil, so make the top layer especially loose.
Level the surface so water can't pool. On a slope, work across the slope, not up-and-down, to hold the rain and stop the soil washing away.
- Tip:
Low, waterlogged or hard, compacted land — the pods can't push in to set, and they rot in wet soil.
- Do:
Keep the top few centimetres especially soft and crumbly — that is exactly where the pods will bury themselves.
Buy seed + basal P Critical
Good seed of a local type that suits your rains, plus a little phosphorus (P) — the root-and-pod food — sets up the whole season. Unlike maize, this is a bean: it makes its own nitrogen from the air through knobs on its roots, so you do not buy nitrogen fertiliser for it. Buy early, so everything is in hand the moment the planting rains arrive.
Get seed of a local type (a landrace — a traditional variety you can save and re-grow) that does well in your area: well-filled, whole, unbroken seed of a known colour. Because bambara pollinates itself, you can save and re-use your own seed year to year — it does not lose strength the way hybrid maize does.
Pick out plump, whole, undamaged seed. Throw away any with small round holes, loose powder, or shrivelled, mouldy grains — those carry weevils or won't grow.
Buy the small amount of phosphorus your recommendation gives for your field (for example single superphosphate, or a low-nitrogen compound). Phosphorus builds strong roots and helps fill the pods. Do not buy nitrogen top-dressing — on a bean it only grows leaf, wastes your money, and can cut your pod yield.
Bambara also likes calcium to fill its pods, just as the groundnut does. Well-rotted manure and a little clean wood-ash supply it — no special fertiliser is needed.
Store seed and fertiliser dry, off the floor, away from food, water and children. Keep planting seed in its pods until sowing — the whole pod shields the seed from weevils.
- Do:
Save your own seed from your best, healthiest plants each year — bambara breeds true, so good seed stays good.
- Tip:
Buying nitrogen fertiliser for this crop — it is a bean and feeds itself; extra nitrogen gives you leaf and few pods.
- Watch out:
Check bought or saved seed for weevil holes and powder before planting — one infested bag carries the weevil straight into your field and store.
Incorporate manure/compost Recommended
A little well-rotted manure or compost feeds the sandy soil slowly, helps it hold water, and adds some of the calcium and phosphorus this crop likes for filling pods. But fresh manure burns young roots and brings in weed seeds, so it must be well rotted first. Remember bambara is a light feeder — it needs far less than a hungry crop like maize, so go thin.
Use only well-rotted manure or compost — dark, crumbly, no strong smell. Fresh, strawy dung needs more months to rot down.
Spread it thinly and evenly — a light sprinkle, not a thick blanket. Because bambara is a light feeder, a light dressing is plenty; your recommendation gives the amount for your field.
Work it into the topsoil about one to two weeks before you sow, so it settles in and doesn't sit in lumps.
- Tip:
Fresh, raw manure at sowing — it scorches the young roots and carries weed seeds into a clean field.
- Watch out:
Wash your hands after handling manure, and keep it away from drinking water.
Sow and get a full stand
The number of healthy plants you set now is the most you can ever harvest — you can't add plants later, and in bambara a dense, even stand actually gives more seed. Sow one seed per station at the right depth and spacing into warm, moist soil, then fill any blanks within about two weeks. This is a drought crop, so water only sparingly until it is up and growing.
Sow + basal P Critical
A dense, even stand at the right spacing is the single biggest thing you control — and in bambara, denser stands raise seed yield, so aim to fill every station. Getting depth, spacing and phosphorus right on this one day pays back all season long.
Sow into warm, moist soil — on a good rain, or when the soil is damp a hand's-depth down. This is a drought crop: it does not need a big soaking like maize, just enough moisture to sprout.
Make your rows about 40 cm apart — two hand-spans — and drop one seed every 15–20 cm along the row — about a hand-span. This gives a good dense stand (roughly 100,000–150,000 plants a hectare); tighter spacing gives even more seed.
Set one seed per station, about one finger-joint deep (3–5 cm) — at the shallow end, about 3 cm, on soils that dry into a hard crust, so the shoot can break through.
Drop the small amount of phosphorus your recommendation gives right in the hole or furrow with the seed — phosphorus does not scorch seed the way nitrogen does, so it can sit beside it.
Cover and firm the soil gently over seed and fertiliser, so the seed sits snug in moist earth and comes up evenly.
- Do:
Fill every station — a dense, full stand is what gives bambara its best seed yield, so don't sow thin.
- Tip:
Sowing deeper than a finger-joint, especially on crusting soil — deep-sown seed rots or can't break the crust.
- Watch out:
Keep the phosphorus to the small recommended amount, off wet leaves, and wash your hands after handling it.
Scout (aphids, gaps) Recommended
The first few weeks decide your stand. Bambara is hardy, but young seedlings can be checked by aphids clustering on the tips, and by gaps where seed didn't come up (often from the soil crusting hard after rain). Ten minutes every few days lets you catch both while you can still fix them.
Every 3–4 days (from about 5 days after sowing), walk the young crop in a large 'W' across the field, so you cover all four corners and the middle — not just the edge by the path.
Check the growing tips and the underside of young leaves for aphids — tiny soft green or black insects clustered together, often with sticky, shiny 'honeydew' (their sap-waste), ants running about, or curled, puckered young leaves.
Bambara is tough, so don't rush to spray. Small aphid numbers are held down by ladybirds and other helpful insects. Act only if colonies build thickly on the growing points and no helpful insects are working — then squash them or wash them off with a little soapy water.
Also count the gaps — stations where nothing came up — so you know whether to re-sow (see the emergence check).
- Watch out:
A few aphids are normal and harmless — look for thick, spreading colonies on the tips before you do anything.
- Do:
If a spray is truly the last resort, cover your skin, nose and eyes, spray in the cool of the day with the wind behind you, keep it off food, wash well afterwards, and respect the waiting time on the label before harvest (the pre-harvest interval).
Check emergence / gap-fill Recommended
A thin, patchy stand caps your whole harvest — and in bambara a full, dense stand actually gives more seed. You can still fill gaps in the first two weeks, but not after, so check now while there's time. Soil that crusts (dries into a hard cap) after rain is the usual cause of blanks.
About 1–2 weeks after sowing (7–14 days), walk the rows and count how many stations have a seedling up against the number you sowed.
Work out the share that came up — for example, 85 seedlings from 100 stations = 85%.
85% or more, evenly spread → a good stand, carry on.
Below 85%, or big blank patches → the check has failed: re-sow the gaps now with fresh seed into moist soil, by about two weeks after sowing at the latest, so the fill-ins aren't left far behind the rest.
- Watch out:
Blanks after a heavy shower usually mean the soil crusted and the shoots couldn't push through — sow a touch shallower (about 3 cm) next time and break the crust gently after rain.
- Do:
Re-sow blanks straight away while the soil is still moist — fill-ins started late never catch up.
Build the plant — weed early and shallow
Now the plant builds its low, bushy clump. Weeding early is the biggest job and the biggest payoff of the season — keep it shallow and light, and finish before flowering and pegging begin, because once the pods start burying themselves you can only weed by hand. Remember: no nitrogen — this bean feeds itself.
1st weeding (shallow) Critical
Weeds now steal the water, light and soil-food the young crop needs, and a small bambara plant is slow to shade them out. Weeding early — before flowering and pegging start — is the highest-value job of the season, worth 10–25% of your yield. Once the pods begin burying themselves, weeding turns hard and risky, so get the field clean first.
Weed at about 3 weeks after sowing (around 18–25 days), before the weeds grow bigger than the crop and before flowering starts.
Weed shallowly — scrape or pull just below the surface. Deep hoeing tears the crop's roots and dries out the soft topsoil the pods will need.
Take weeds out roots and all where you can; chopping only the tops lets many grow straight back.
In dry areas, leave the pulled weeds lying between the rows as a light mulch (a soil cover) to hold moisture.
- Do:
Weed now, before flowering and pegging make weeding difficult and risky.
- Tip:
Deep, rough hoeing near the plants — it cuts the shallow roots and loosens the plant.
2nd weeding before canopy closes Recommended
A second flush of weeds will still rob the crop before its leaves grow together and cover the ground. This weeding, at about 5 weeks after sowing, keeps the field clean right up to the point where flowering and pegging begin — after that you must only weed by hand.
Weed again at about 5 weeks after sowing (around 32–40 days), before the leaves grow together and cover the ground (before the canopy closes) and before the pegs start going down.
Keep it shallow and light — the plant is now spreading and starting to flower, so deep hoeing damages the roots and the coming pegs.
Pull any big weeds close to the plants by hand rather than hoeing hard against them.
- Do:
Finish this weeding before flowers appear — it is your last chance to hoe; from pegging on, you only hand-pull.
- Watch out:
As flowers start to show at the base, switch to gentle hand-weeding to protect the pegs.
Scout (leaf spot, aphids) Recommended
As the leaves fill out, leaf spot can appear in damp weather and aphids cluster on the tips. Both are usually mild on this hardy crop, but a quick check every few days lets you catch a bad spell early and keep the leaves — the plant's food factory — working.
Every 3–4 days, walk the 'W' through the crop and look closely at leaves and growing tips on plants spread across the whole field.
Leaf spot (a common leaf disease): look for small dark brown or reddish-brown spots on the leaves, sometimes with a paler yellow ring around them, worse in warm, humid, wet spells. A few spots are normal and need nothing.
Aphids: look for clusters of tiny soft green or black insects on the tips and under young leaves, with sticky honeydew or ants. Squash small colonies; leave the rest to ladybirds where you can.
Step in only if leaf spot is spreading fast over most plants, or aphid colonies are building thickly on the tips — otherwise note it and move on.
- Watch out:
Dark spots with a yellow ring in humid weather are leaf spot — mild here; keep the stand open and airy and it stays down.
- Tip:
Working or brushing through the crop while the leaves are wet — that carries leaf spot from plant to plant.
Flowering and pegging — the pods go down
Small yellow flowers form at the base, then the flower stalks bend over and push the young pods into the soil — this is where the pods are set, and moisture matters most now. Weed only by hand and shallow, and never bury the crown (the central growing point where the stems and new leaves come from). A little loose soil at the base helps the pegs push in and makes lifting easier at harvest.
Shallow hand-weeding only Critical
Now the plant flowers and the flower stalks — the 'pegs' — bend down and push the young pods into the soil to grow. If you hoe now, or throw soil over the crown (the central base where the stems and new leaves come from), you snap the pegs and smother the plant, and no pods set. This is the make-or-break job of the whole season.
From about 6 weeks after sowing (around 40 days) until the pods are set (about 70 days), weed only by hand, gently pulling weeds close to the plants.
Do not hoe among the plants — a hoe cuts the pegs that are pushing the pods into the ground.
Keep the surface soil loose and open around the base, so the pegs can push in easily.
You may draw a little loose soil up to the base to give the pegs soft soil and make lifting easier later — but never cover the crown (the central growing point), or you smother the plant.
- Tip:
Throwing soil over the crown, or hoeing among the plants — the pegs must reach loose surface soil, and a hoe breaks them.
- Do:
Hand-pull weeds from now on, and keep a clean, open, loose surface around each plant — exactly what the pegs need.
Irrigate through flowering/pegging Recommended
Bambara is a drought crop, but flowering and pegging is the one time water matters most — this is when the pods set. If you have water, keeping the soil evenly moist now (not wet) can add 10–30% to your yield. If you don't, the crop will still set a fair pod load — that toughness is its strength.
Only if you irrigate: through flowering and pegging (about 30–70 days after sowing), give a moderate watering every 7–10 days to keep the soil evenly moist.
Water in the cool of the day, and let the surface dry a little between waterings — the crop hates sitting wet.
Avoid waterlogging — soggy soil rots the young underground pods. Drain any low spots.
- Watch out:
Even moisture at pegging is worth more than water at any other time — a little steady beats a big flood.
- Tip:
Heavy watering or waterlogging — wet soil rots the pods underground and undoes the whole crop.
Scout (pod-sucking bugs) Recommended
As flowers and young pods form, pod-sucking bugs can arrive to pierce and suck them, leaving shrivelled or empty seed. On bambara most pods are safely underground, so damage is usually light — but a weekly check on the flowers and low stems catches any build-up before it spreads.
Once a week (from about 30 days after sowing), look over the flowers, the low stems and any pods sitting near the surface, on plants across the field.
Look for pod-sucking bugs — small to medium green, brown or shield-shaped bugs, and narrow long-legged brown ones, sitting on the flowers and stems; they often drop or fly off when disturbed. Look too for shrivelled flowers and dark feeding spots.
A few bugs do little harm here. Act only if many gather — knock them into a tin of soapy water by hand in the cool of the morning, when they are slow.
If numbers are high and you choose to spray, cover skin, nose and eyes, spray in the cool with the wind behind you, keep it off food, wash afterwards, and respect the waiting time on the label before harvest (the pre-harvest interval).
- Watch out:
Because the pods are underground, bug damage is usually minor — don't spray for a handful of bugs.
- Do:
Hand-pick bugs early in the morning, when they are cold and slow, before they build up.
Fill the pods underground
The seeds are now filling inside the buried pods — this is where the weight and the plump seed come from. Keep moisture even through pod-fill, then ease off as the leaves yellow so the crop can dry down. Avoid late waterlogging, watch quietly for root-knot and rust, and otherwise leave the crop alone.
Maintain even moisture through pod-fill Recommended
The seeds are filling inside the buried pods, so steady, even moisture keeps them plumping up. A sharp dry-then-wet swing, or waterlogging late on, makes small, shrivelled or rotten seed. Near the end, easing off lets the crop dry down ready for storage.
Only if you irrigate: from about 70 days after sowing through pod-fill, water lightly every 10–14 days to keep the soil evenly moist — steady is the aim, never wet.
Avoid late waterlogging — soggy soil now rots the filling pods underground, where you can't see the damage until you lift.
As the leaves begin to yellow and die back near maturity, stop watering and let the crop dry down in the field, ready to lift.
- Tip:
Big swings from bone-dry to soaked — even moisture is what makes plump, evenly-filled seed.
- Watch out:
Ease off, then stop water as the leaves yellow, so the pods and seed dry down for safe storage.
Scout (root-knot, late leaf spot) Recommended
Late problems attack the seed you have almost grown. Root-knot (tiny soil worms that swell the roots) and rust (a leaf disease) can weaken the plant during pod-fill. Both are usually mild on bambara, but spotting them tells you whether to lift a weak patch early, and helps you plan next season's field.
Once a week, walk the crop and look over the leaves and the general health of the plants.
Rust: on the underside of the leaves, look for reddish-brown, powdery spots that rub off like rust-coloured dust on your finger; badly hit leaves yellow and dry early. Watch too for late dark leaf spots as before.
Root-knot worms (nematodes — tiny soil worms): watch for patches of stunted, yellow, wilting plants that don't perk up even after rain. Gently lift one — knotted, swollen lumps like beads on the roots mean root-knot.
These are mostly mild. If a patch is badly hit, lift that patch a little early rather than lose it — and don't plant bambara or other beans on that spot next year; rotate to a cereal like millet or maize to starve the worms out.
- Watch out:
Beads or knots on the roots of stunted plants mean root-knot worms — remember that spot and rotate away from beans there next season.
- Do:
Follow bambara with a cereal — rotation breaks the leaf-spot, rust and root-knot cycle for next time.
Lift the whole plant and pick the pods
Because the pods ripen unevenly and hide underground, harvest when most are mature: the leaves yellow and die back, and a lifted plant shows full, firm pods with hard seed. Loosen the soil, lift or pull the whole plant, hand-pick the pods off the roots, and dig for any that dropped off in the ground.
Lift whole plant + hand-pick pods Critical
Harvest at the right moment and get every pod out of the ground. Lift too early and the seed is soft and won't store; leave it too long and pods rot, sprout, or break off the plant and are lost in the soil. Because the pods are hidden underground, careful lifting is the difference between gathering your whole crop and leaving part of it buried.
Harvest when most plants have yellowed and started to die back — about 90 days or more after sowing, depending on your local type. To be sure, lift one plant and check the pods: ripe pods are full and firm, and the seed inside is hard, not soft or milky.
Choose a dry spell, and if the ground is hard, loosen the soil first with a hoe or fork all around each plant, so the pods don't tear off and stay behind.
Pull or lift the whole plant with its roots, and hand-pick the pods off the roots and stalks.
Search the loosened soil under and around each plant for any pods that dropped off — these are easy to miss and are pure lost harvest.
Gather the pods into baskets or bags for drying; if some plants are still green, leave them a few more days and lift them in a second round.
If a test plant shows soft pods or soft, milky seed, it is not ready — wait and check again in a week or two. If pods are already loose in the soil or sprouting, harvest at once and dig carefully to recover the buried ones.
- Do:
Loosen the soil before pulling — dry, hard ground snaps the pods off the plant and buries your harvest.
- Watch out:
Pods ripen unevenly and hide underground — harvest when most are ready and always dig for the ones left behind.
- Tip:
Waiting too long — over-ripe pods rot, sprout or drop off and are lost in the soil.
Dry the pods hard and beat the weevils
The crop is grown — now don't lose it to mould or weevils. Bruchid weevils (small bean weevils) can turn a good harvest to powder in the store within weeks. The two things that save it are drying the seed really hard and keeping air away from it. Store planting seed in the pod; shell eating seed and seal it airtight.
Sun-dry pods, then store Critical
The two enemies now are mould and bruchid weevils — small bean weevils that can eat a good harvest to powder in the store within weeks. Beating them comes down to drying the seed really hard and keeping air away from it. Damp seed moulds and is exactly what weevils love.
As soon as the pods are off the plant, spread them in the sun on a mat, rack or tarpaulin — never on bare ground — for several days, turning them so they dry evenly. Cover them or bring them in if rain threatens.
Dryness test: the pods should be hard and rattle, and a shelled seed should be hard — too hard to dent with your fingernail and it splits, not squashes, when bitten. That means it is dry enough to store (below about 13% moisture — that is, very little water left in the seed).
For planting seed: store it in the pod. The whole, unbroken pod is the crop's own armour — weevils struggle to get through it. Keep it cool and dry.
For eating seed: shell it, then store the fully-dry seed in an airtight (hermetic) container — a sealed drum, or triple-layer PICS bags (bags with two inner plastic liners that you tie tightly to seal out the air). Sealed, airtight storage suffocates any weevils with no chemicals. A handful of clean, dry wood-ash mixed through the seed adds extra protection.
Check the store once a month for small round holes in the seed, fine powder, or live beetles.
If the seed still dents, bends, or feels soft or cool-damp, it is not dry enough — dry it more in the sun before storing, or it will mould and feed weevils. If you find weevils later, dry the seed again in hot sun and re-seal it airtight at once.
- Do:
Store planting seed in the pod — the intact pod strongly resists the weevils.
- Tip:
Storing shelled seed loose in an open bag or tin — weevils find it and destroy it.
- Watch out:
Small round holes and fine powder in stored seed mean weevils are inside — re-dry in hot sun and seal it airtight straight away.
Pests and diseases that attack Bambara groundnut

Where to sell Bambara groundnut
Markets that trade this crop — what each one sells it by, when supply peaks there, and the currency used.


Grow Bambara groundnut with a plan, not a guess
This guide is the general answer. Divisi works out yours — the week to plant Bambara groundnut on your soil and your rainfall, and each job dated for your field.


When to plant Bambara groundnut, country by country
- When to plant Bambara groundnut in Algeria
- When to plant Bambara groundnut in Angola
- When to plant Bambara groundnut in Benin
- When to plant Bambara groundnut in Botswana
- When to plant Bambara groundnut in Burkina Faso
- When to plant Bambara groundnut in Burundi
- When to plant Bambara groundnut in Cabo Verde
- When to plant Bambara groundnut in Cameroon
- When to plant Bambara groundnut in Comores
- When to plant Bambara groundnut in Congo
- When to plant Bambara groundnut in Côte d'Ivoire
- When to plant Bambara groundnut in Egypt
- When to plant Bambara groundnut in Eritrea
- When to plant Bambara groundnut in Eswatini
- When to plant Bambara groundnut in Ethiopia
- When to plant Bambara groundnut in Gabon
- When to plant Bambara groundnut in Gambia
- When to plant Bambara groundnut in Ghana
- When to plant Bambara groundnut in Guinea Ecuatorial
- When to plant Bambara groundnut in Guinea-Bissau
- When to plant Bambara groundnut in Guinée
- When to plant Bambara groundnut in Kenya
- When to plant Bambara groundnut in Lesotho
- When to plant Bambara groundnut in Liberia
- When to plant Bambara groundnut in Libya
- When to plant Bambara groundnut in Madagascar
- When to plant Bambara groundnut in Malawi
- When to plant Bambara groundnut in Mali
- When to plant Bambara groundnut in Mauritanie
- When to plant Bambara groundnut in Mauritius
- When to plant Bambara groundnut in Morocco
- When to plant Bambara groundnut in Moçambique
- When to plant Bambara groundnut in Namibia
- When to plant Bambara groundnut in Niger
- When to plant Bambara groundnut in Nigeria
- When to plant Bambara groundnut in Rwanda
- When to plant Bambara groundnut in République centrafricaine
- When to plant Bambara groundnut in République démocratique du Congo
- When to plant Bambara groundnut in Sao Tome and Principe
- When to plant Bambara groundnut in Seychelles
- When to plant Bambara groundnut in Sierra Leone
- When to plant Bambara groundnut in Somalia
- When to plant Bambara groundnut in South Africa
- When to plant Bambara groundnut in South Sudan
- When to plant Bambara groundnut in Sudan
- When to plant Bambara groundnut in Sénégal
- When to plant Bambara groundnut in Tchad
- When to plant Bambara groundnut in Togo
- When to plant Bambara groundnut in Tunisie
- When to plant Bambara groundnut in Uganda
- When to plant Bambara groundnut in United Republic of Tanzania
- When to plant Bambara groundnut in Zambia
- When to plant Bambara groundnut in Zimbabwe
Where Bambara groundnut scores best
Districts where Divisi's engine currently rates this crop highest, ranked by fit.


Get Insights by email
A short digest of new Divisi articles. No email on quiet weeks.
Frequently asked questions
How do I grow Bambara groundnut?
How to grow Bambara groundnut: 90–170 days to maturity, 40 cm rows, 3–5 cm deep. Also called Bambara bean, jugoboontjie, nzama, pois bambara, gujiya, okpa.
What is jugoboontjie in English?
Jugoboontjie is the Afrikaans name for Bambara groundnut.
What is nzama in English?
Nzama is the Chichewa name for Bambara groundnut.
What is pois bambara in English?
Pois bambara (also voandzou) is the French name for Bambara groundnut.
What is gujiya in English?
Gujiya is the Hausa name for Bambara groundnut.
What is okpa in English?
Okpa is the Igbo name for Bambara groundnut.
What is indlubu in English?
Indlubu is the Ndebele, Xhosa and Zulu name for Bambara groundnut.
What is ditloo in English?
Ditloo is the Sesotho and Setswana name for Bambara groundnut.
What is nyimo in English?
Nyimo is the Shona name for Bambara groundnut.
What is njugu mawe in English?
Njugu mawe is the Swahili name for Bambara groundnut.
What is epa-roro in English?
Epa-roro is the Yoruba name for Bambara groundnut.
How long does Bambara groundnut take to grow?
Bambara groundnut takes about 90–170 days from sowing to maturity, though the exact length varies with variety, temperature and how the season runs.
What spacing should I use for Bambara groundnut?
Space Bambara groundnut rows about 40 cm apart, with roughly 15 cm between plants within the row.
How deep should Bambara groundnut be planted?
Sow Bambara groundnut at about 3–5 cm deep. Shallower risks drying out; deeper wastes seed energy before the shoot reaches light.
What pests and diseases attack Bambara groundnut?
The ones covered in this guide are Rust. Each has its own page explaining how to identify, check for and control it.