 Divisi
How to grow egusi melon
Citrullus lanatus subsp. mucosospermus · Cucurbitaceae
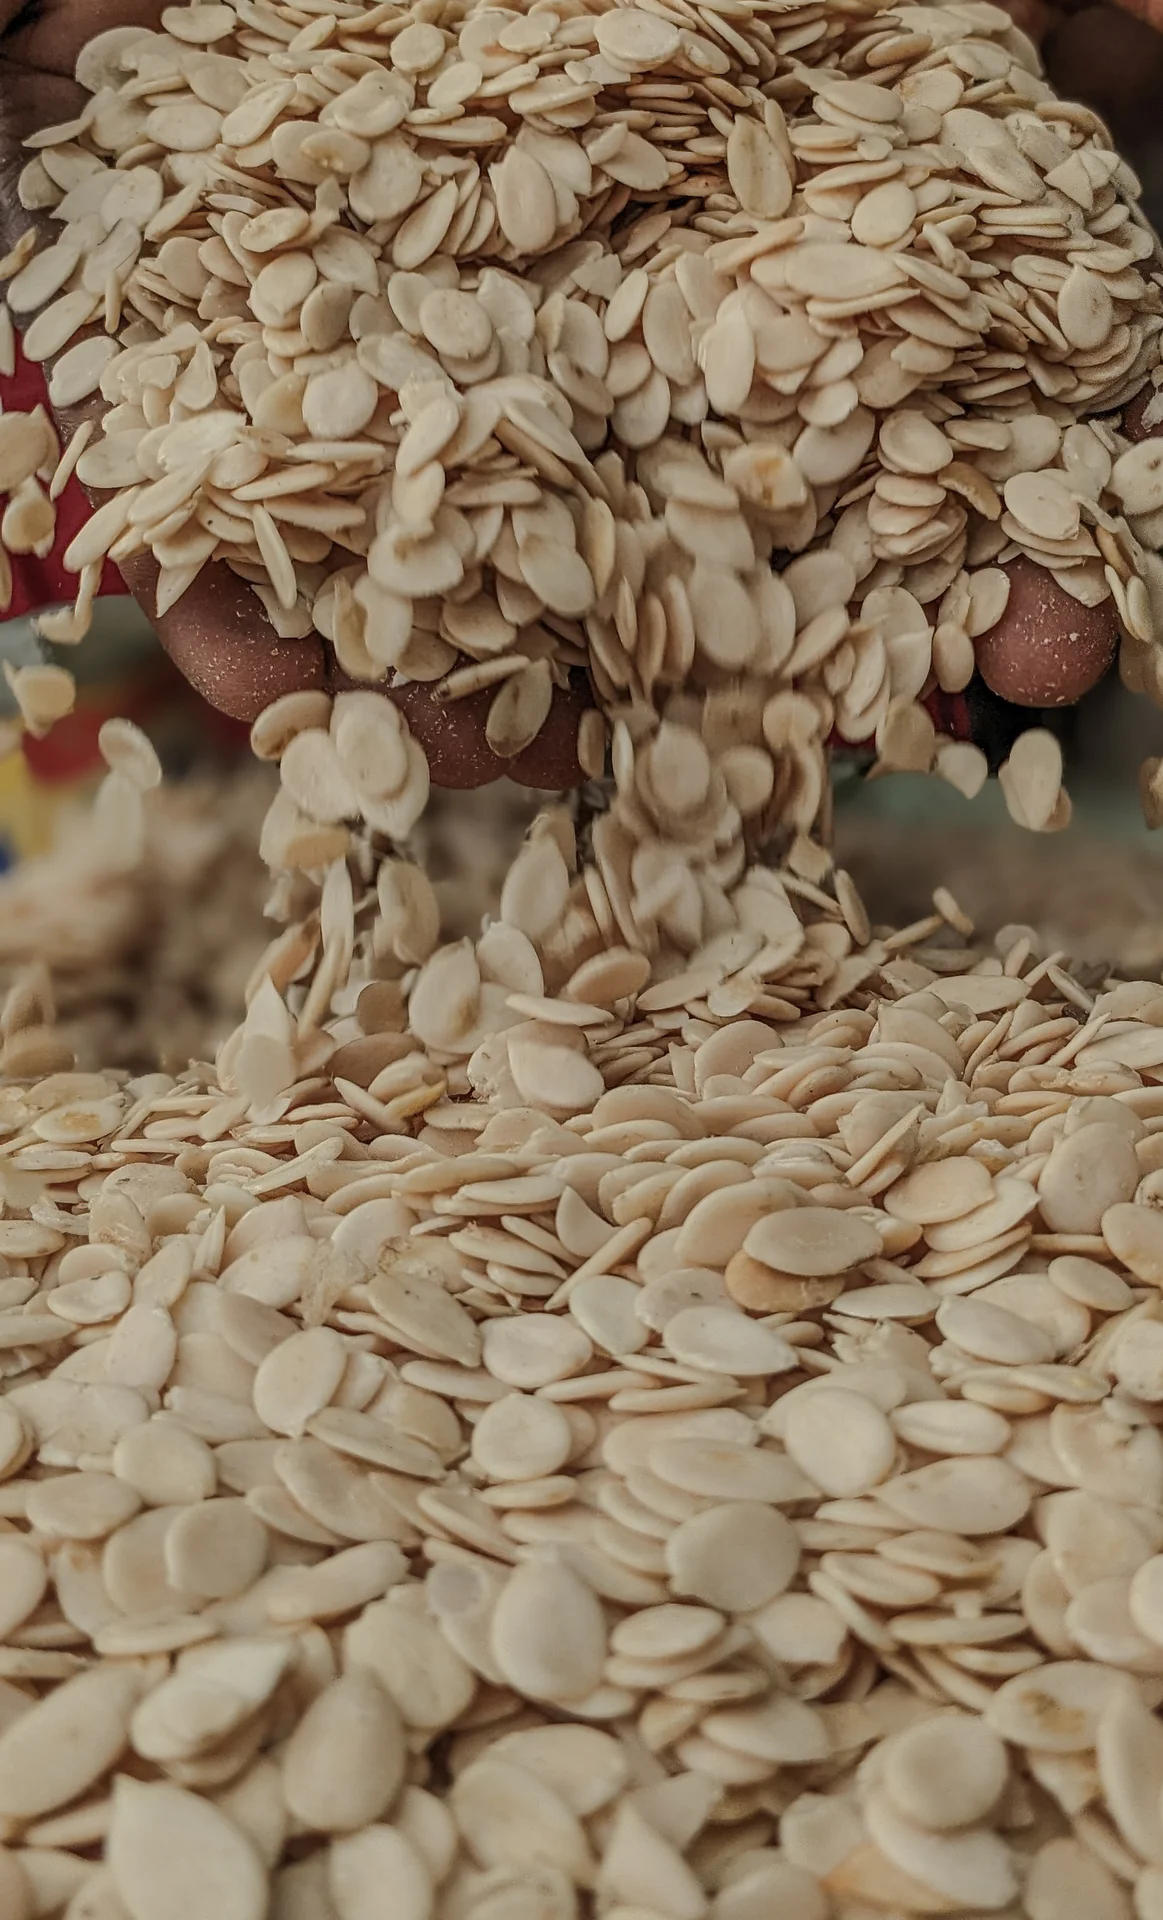
Photo: Ei'eke (Eiseke Bolaji) · CC BY-SA 4.0
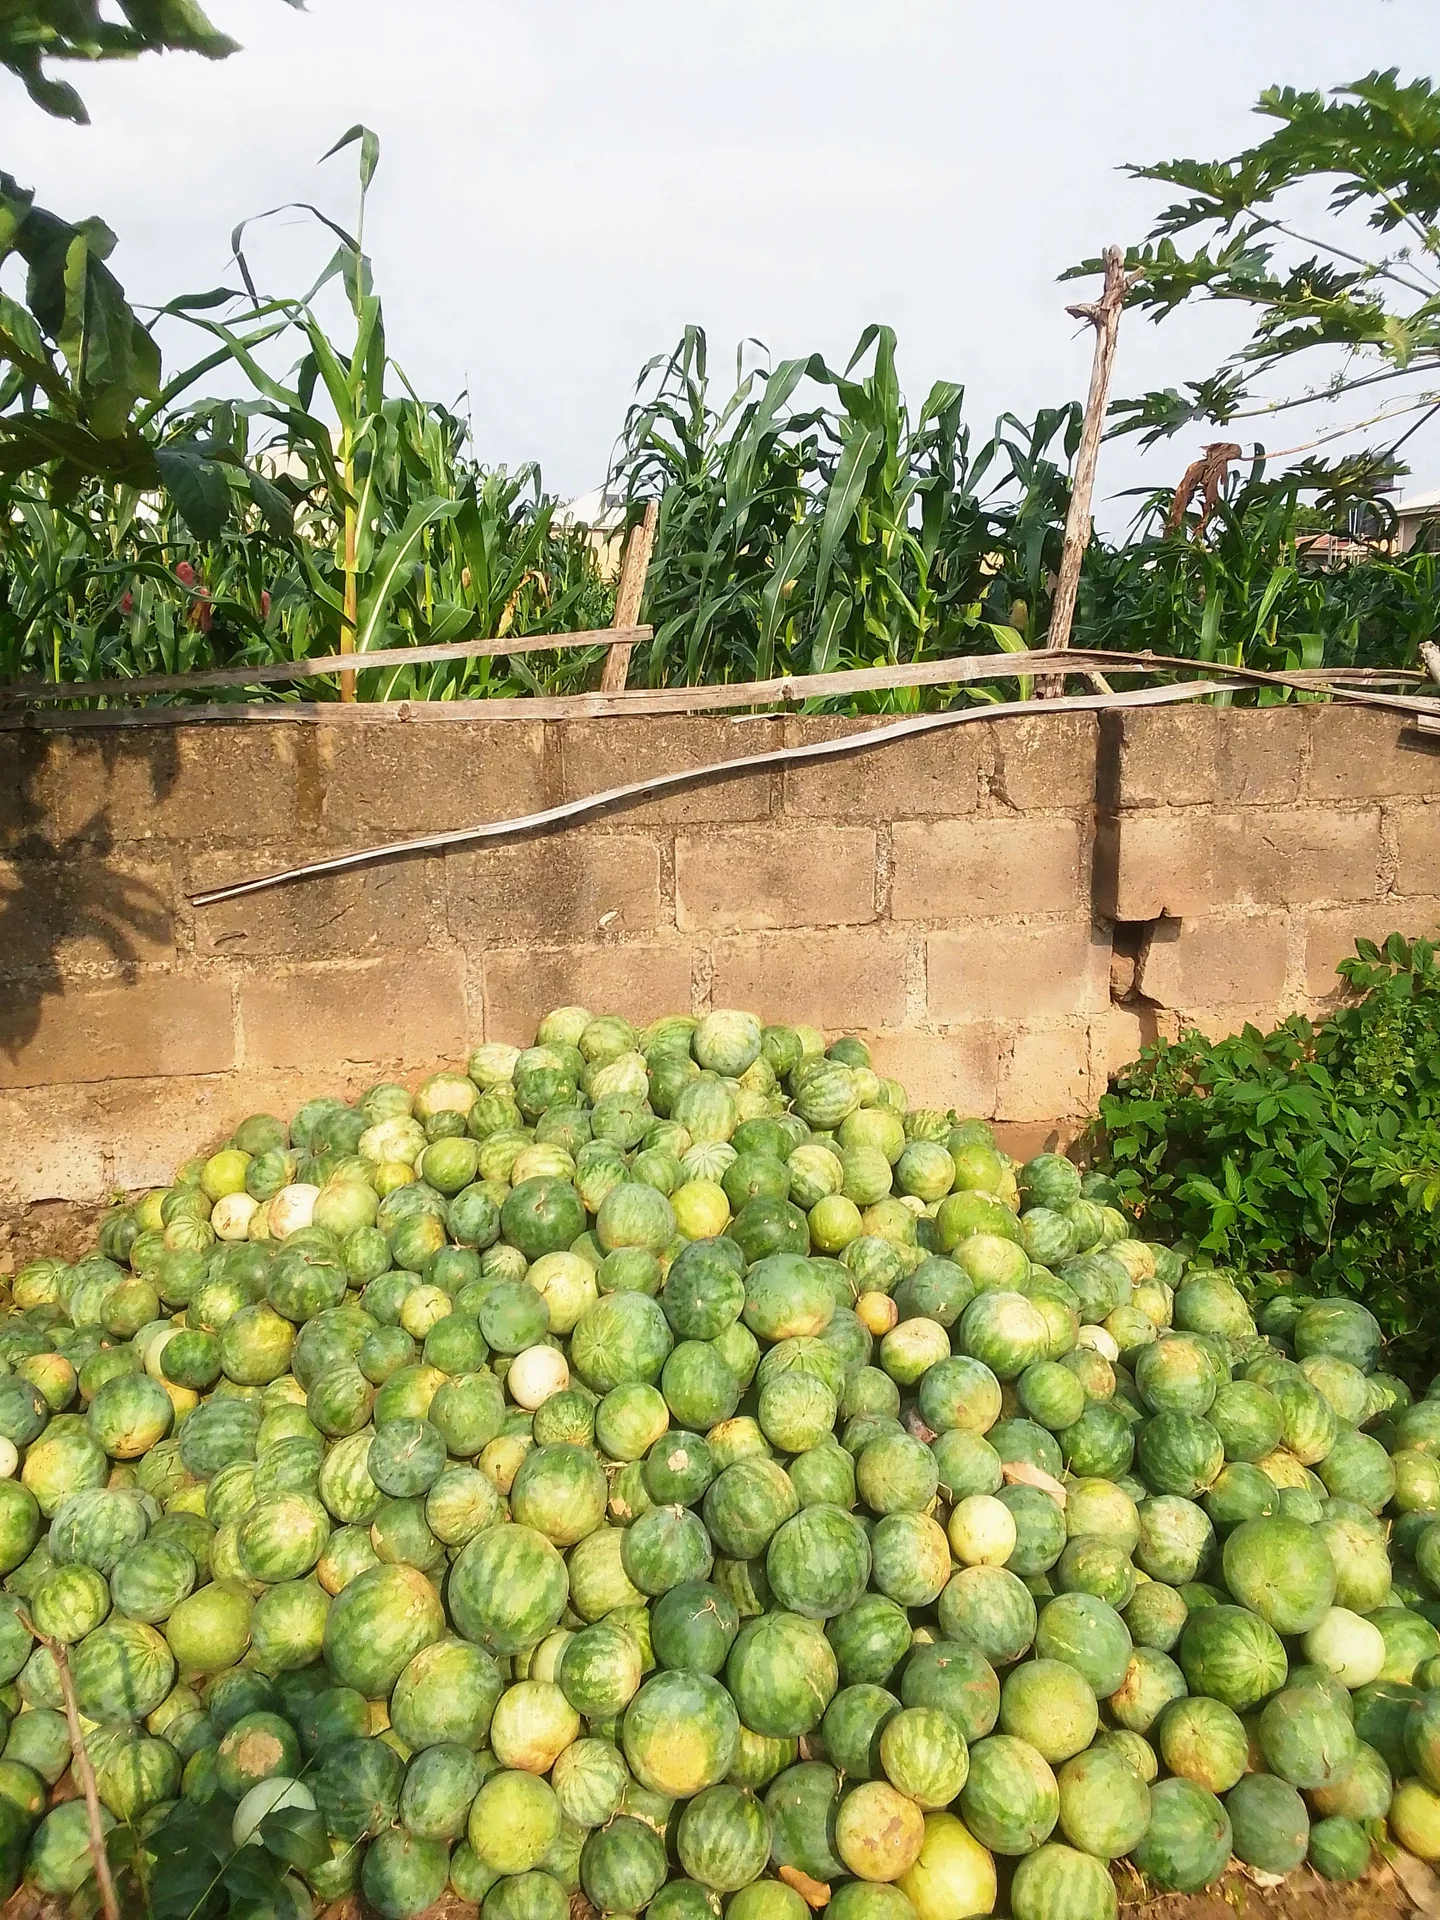
Egusi is a trailing melon vine — a cousin of the watermelon — but you do not grow it for the fruit. The flesh is bitter and no good to eat; the prize is inside: flat, oil-rich seeds that are shelled, ground and stirred into egusi soup. The vines run flat along the ground and knit into a thick mat, so egusi is a favourite ground-cover crop, planted between yam mounds, cassava or maize where it smothers weeds while the main crop grows above it. It is a light feeder that asks little of the soil, and it needs bees to set its fruit. The real work comes at the end: the ripe fruit is heaped to rot, the seed is washed out, and it must be dried rock-hard — or the oily seed moulds and spoils.
Abdurrazaq A.F.O · CC BY-SA 4.0 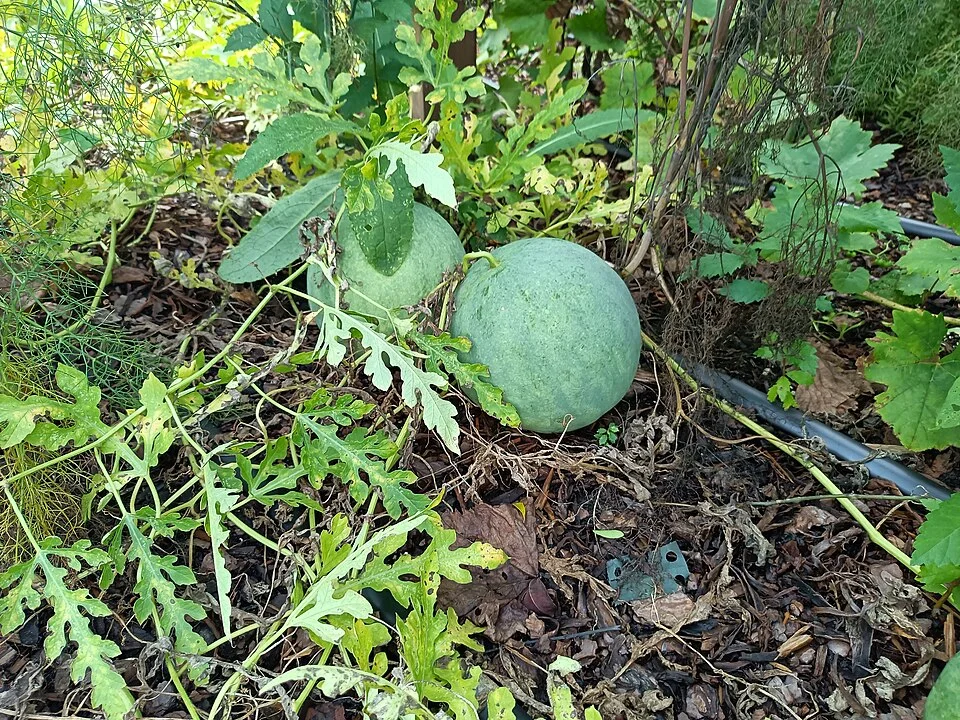
Brigade Piron · CC BY 3.0
- Days to maturity
- 90–150 days
- Row spacing
- 150 cm
- Plant spacing in the row
- 150 cm
These are general figures for the crop, compiled from published agronomic references including FAO and CABI. The right choice for your field depends on your soil, rainfall and the yield you are aiming for.
Will egusi melon actually do well on your field? Check your own field against every crop in the catalogue — no signup. Run the crop check →
Also known as
- Akan
- akatoa, agushi
- French
- pistache, melon égusi
- Hausa
- guna
- Igbo
- egwusi
- Yoruba
- egusi, ẹ̀gúsí
Working in buckets, bags or paces? The farming glossary turns the measures growers actually use into kilograms and hectares — what a 20 litre bucket of each crop really weighs, and how to size a field by walking it — alongside the Shona, Swahili, Ndebele and Yoruba words used in the field. Open the glossary →
Growing egusi melon, stage by stage
Your egusi season, step by step — sow the vines so they blanket the ground, protect the bees that set your fruit, then ferment, wash and dry the seed hard so it stores clean and never goes mouldy.
Get ready before you sow
Egusi rewards a good start you set before the first seed goes in: clean, well-filled seed saved from healthy fruit, a free-draining field (soggy ground rots the seed and the roots), and a planned layout — where the vines will run as ground cover between your yam mounds, cassava or maize. Egusi is a light feeder, so it asks little fertiliser; the big preparation choices are clean seed, good drainage, and keeping it away from where melons, cucumbers or pumpkins grew last year.
Source clean seed & plan the layout Critical
The seed you sow and the ground you pick decide the crop before it even starts. Well-filled seed from a healthy fruit comes up strong and even; thin, shrivelled seed leaves gaps. A free-draining site keeps the seed and roots from rotting in wet soil. And planting where melons, cucumbers or pumpkins grew last season hands your crop their leftover mildew, wilt and root pests — so plan to move it.
In the two weeks before you sow, choose your seed from big, healthy, fully-ripe fruit of a good local type — dark-margined seed for the common egusi, or plump white seed for the white-seed type. Keep only fat, well-filled seed and throw out thin, cracked or discoloured seed, which comes up weak and patchy.
Pick a free-draining field — gently sloping or sandy-loam ground where water never stands after rain. Egusi hates wet feet: soggy ground rots the seed and the young roots. Avoid low patches that hold water.
Plan the layout. Egusi is grown as a ground cover, so mark where the vines will run between your yam mounds, cassava or maize, or across its own field. Space the sowing hills about a pace and a half apart (≈1.5 m) each way, so the vines have room to spread and knit into a mat.
Plan a rotation: do not plant egusi where melon, cucumber, pumpkin, gourd or watermelon grew last year. These cousins share the same mildews, wilt and root pests, which build up in the soil — moving to fresh ground leaves them behind.
Remember egusi is a light feeder — it needs little or no fertiliser and often lives on the fertility and manure you already gave the main crop it runs beneath. If your soil is very poor, a little well-rotted manure worked in before sowing is plenty.
- Do:
Plan a rotation away from other cucurbits — melon, cucumber, pumpkin, gourd — because they share egusi's mildews, wilt and root pests.
- Do:
Save seed only from big, healthy, well-ripened fruit — the fruit you take your seed from sets next season's vigour.
- Tip:
Low, water-holding ground — egusi seed and roots rot in soil that stays wet after rain.
- Watch out:
If you work in any manure, wash your hands afterwards and keep it away from food and drinking water.
Sow the seed and get an even stand
This is where your stand is set. Sow 2–3 seeds per hill at the planned spacing and keep the soil just moist until they come up (about 5–10 days after sowing), then thin each hill to the strongest 1–2 plants. Young seedlings are at their most fragile now — beetles can lace the first leaves and damp, airless soil can rot them off at the ground — so keep a close eye until the vines are running.
Sow hills + thin Critical
The number of strong plants you set now is the most you can ever have — you cannot add vines later. Sowing a few seeds per hill and then thinning to the best 1–2 makes sure every station carries a healthy plant, not a gap and not a crowd.
Sow when the soil is moist — on a good planting rain, or where you can keep the hills watered. Egusi needs damp (not wet) soil to sprout evenly.
At each station — about a pace and a half apart (≈1.5 m) each way — make a hill and drop 2–3 seeds together, about one finger-joint deep (a few centimetres). Cover them lightly and press the soil down so the seed sits snug against moist earth.
Keep the soil just moist until the seedlings push through — usually 5–10 days after sowing. Do not let it dry out, but do not flood it either.
Once the seedlings open their first proper leaves, thin each hill to the strongest 1–2 plants: pinch or cut the weaker ones off at ground level rather than pulling them, so you do not disturb the roots of the one you keep.
Do all of this within about two weeks of sowing — an early, even thinning gives each vine room to run and knit into the ground-cover mat.
- Tip:
Over-watering. Egusi seed and seedlings rot in soggy soil (damping-off) — a free-draining site and a light hand with water prevent it.
- Watch out:
A seedling that suddenly flops over with a pinched, dark, water-soaked stem at the soil line is damping-off — ease off the water and never sow into wet, airless ground.
- Do:
Thin to the best 1–2 plants per hill — crowded seedlings stay weak and spindly and never make strong vines.
Scout seedlings (beetles, cutworms) Recommended
The first two or three weeks decide your stand. Cucurbit beetles can lace the young leaves and damping-off can rot seedlings off at the ground in days — and a seedling lost now is a gap you cannot fill. A quick look every few days lets you act while it still matters.
From about 5 days after sowing, walk the hills every 3–4 days for the first three weeks — right through emergence and thinning.
Turn over a few young leaves and look for beetles: small yellow-and-black striped or spotted beetles that chew the leaves into a lacy skeleton, leaving only the veins. A few are fine; heavy feeding on tiny seedlings is not.
Look for seedlings that have suddenly flopped over, with a pinched, dark, water-soaked stem right at the soil line — that is damping-off, a rot of wet, airless soil. Pull and discard the collapsed seedlings and ease off the watering.
Check for seedlings cut clean off at ground level (worst overnight) — scratch the soil nearby for a fat, curled caterpillar (a cutworm) — and re-sow any stations you lose while the soil is still moist.
If beetles are heavy, hand-pick them in the cool of the morning when they are slow, or spot-treat only the worst hills. Do not blanket-spray tiny seedlings when a few beetles are all you see.
- Do:
Hand-pick beetles in the cool early morning when they move slowly — on a small plot this often controls them without any spray.
- Tip:
Watering a collapsing seedling patch even more — damping-off feeds on wet soil; let it dry and improve the drainage instead.
- Watch out:
If you must spray, cover your skin, nose and eyes, spray in the cool with the wind at your back, keep it off food, and wash well afterwards.
Vines run and cover the ground
Now the vines run out fast and knit into a dense green mat. Once that mat closes over the soil it smothers weeds by itself — the very reason egusi is grown as a ground cover. Your job is to weed early, before the canopy closes (before the vines knit shut over the soil), so the vines win the race; after that the crop mostly looks after the ground itself. Keep the soil steadily moist and watch the spreading leaves for mildew and aphids.
Early weeding Recommended
For the first few weeks the young vines are small and weeds steal their water, light and space. But egusi pays you back: once the vines knit into a closed mat they smother weeds on their own. So one good early weeding — before the canopy closes — is usually all the crop needs.
Weed about 3–5 weeks after sowing (roughly 20–35 days), while the vines are still short and you can walk between the hills.
Hoe or pull the weeds out shallowly near the plants — egusi's roots run wide and near the surface, so deep chopping close to the crown cuts them.
Get the field clean before the vines close over. Once the mat knits shut you cannot weed inside it — and you will not need to, because little light reaches the ground.
In dry spots, leave the pulled weeds lying between the hills as a mulch to hold moisture while the vines spread.
- Do:
Weed early, before the canopy closes — once the vines knit into a dense mat they smother weeds for you, so this is usually the only weeding you need.
- Tip:
Deep hoeing close to the crown — egusi's shallow, spreading roots are easily cut.
- Watch out:
Do not drag or flip the running vines as you weed — leave them lying so they root down and spread.
Scout (mildew, aphids/virus) Recommended
As the vines spread, leaf diseases and sap-suckers move in. Mildews can grey over and kill the leaves that feed the developing fruit, and aphids both weaken the vines and spread a virus that stunts and deforms them. Catching these early — while you can still act — protects the leaf cover that makes your seed.
From about 3 weeks after sowing until around 7 weeks (20–50 days), walk the crop about once a week and turn some leaves over.
Downy mildew: on the upper side look for angular yellow patches boxed in by the leaf veins; in damp weather a grey-purple fuzz shows on the underside. It spreads fast in wet, humid spells.
Powdery mildew: look for white powdery patches, like flour dusted on the leaves and stems, that spread and turn the leaves yellow and brittle.
Aphids: turn over young leaves and shoot tips and look for clusters of tiny soft green or black insects, often with sticky, shiny leaves and ants running about.
Mosaic virus: look for leaves mottled light-and-dark green, puckered or distorted, on stunted plants. It is carried by aphids — pull out and remove (rogue) badly affected plants so they do not seed the rest.
Note what you see and where. Keep the vines on free-draining ground and avoid wetting the leaves late in the day — most mildews thrive on leaves that stay wet overnight.
- Do:
Rogue — pull out and remove — the odd virus-mottled, stunted plant early; there is no cure, and leaving it lets aphids carry the virus to healthy vines.
- Watch out:
Mildews take hold in warm, damp, crowded conditions — check most closely after humid, overcast spells.
- Watch out:
If you spray for mildew or aphids, wait for the cool of the day, keep it off any open flowers and off food, cover your skin and eyes, and wash afterwards.
Flowering — let the bees set your fruit
Egusi carries separate male and female flowers on the same plant, and a bee must carry pollen from the male flowers to the female ones for fruit to set. Poor pollination is a common, hidden reason for a thin crop — the little fruit simply yellows and drops. So this stage is about protecting bees (no spraying on open flowers) and keeping the soil steadily moist, because flowering and fruit-set is the crop's thirstiest, most make-or-break window.
Protect pollinators Critical
Every egusi fruit only forms if a bee moves pollen from a male flower to a female one. Spray insecticide while the flowers are open and you kill the bees that make your crop — the female flowers go unpollinated and the young fruit drops. Protecting bees for this one month is worth more than any spray.
Once the first flowers open, treat the field as bee territory for the whole flowering month (about 30 days).
Learn the two flowers: male flowers sit on a thin plain stalk and open first; female flowers have a tiny round baby-fruit (a little swelling) just behind the petals. Only the female ones become fruit, and only if a bee brings them pollen.
Do not spray insecticide on open flowers. If a pest truly forces your hand, spray only in the late afternoon or evening, once the flowers have closed and the bees have gone home — never on the open blooms.
Leave a few flowering weeds or hedgerow plants nearby if you can: more bees around the field means better fruit set.
If you see plenty of flowers but little fruit setting, poor pollination is the likely cause — protect the bees and stop spraying rather than reaching for more chemicals.
- Tip:
Any insecticide on open flowers — it kills the bees that set your fruit; if you truly must spray, wait until the flowers close in the late afternoon.
- Watch out:
Lots of flowers but few young fruits usually means too few bees, not a disease — spraying only makes it worse.
- Do:
When you must spray at all this month, do it late in the day, downwind, off food, with skin and eyes covered, and wash afterwards.
Keep moisture steady Recommended
Flowering and fruit-set is egusi's thirstiest stage — the one time the crop cannot take dry soil. If the vines wilt now, flowers abort and young fruit drops, and no later watering brings them back. Steady moisture holds the fruit you have set.
From the first open flower onward, do not let the crop dry out. If the rain is short and you can water, do it every 5–7 days.
Aim for steady, even moisture — neither bone-dry nor waterlogged. Swings between drought and flood shed flowers and fruit.
Check with a finger: if the soil is dry a finger-joint down, water. Egusi's roots run deep, so water enough to wet the root zone, not just dampen the surface.
Water in the cool of the morning or evening so less is lost to the sun, and keep the water off the open flowers where you can.
- Do:
If you can water at only one stage all season, water now — through flowering and fruit-set, the crop's most sensitive time.
- Tip:
Letting the vines wilt at flowering — dropped flowers and fruit never come back.
- Watch out:
This step is for irrigated crops; a rain-fed field rides on the rains, so at least avoid anything else that stresses the vines during flowering.
Fruit fills and ripens
The set fruit now swells and fills with seed, then ripens on the vine. Let it be — the fruit matures where it lies. Toward the end, ease off the water so the fruit and the seed inside begin to dry down; a dry, warm ripening spell is exactly what you want. Keep walking the crop to lift off any fruit that starts to rot on damp ground before it spoils its neighbours.
Scout (fruit rots) Recommended
Fruit lying on damp ground can rot from below, and fruit flies sting the fruit and breed maggots inside — one rotting fruit spoils those around it and costs you the seed within. A weekly walk to spot and remove bad fruit protects the seed you have grown.
From about 7 weeks after sowing right through to harvest (50–120 days), walk the crop about once a week, lifting leaves to see the fruit beneath the mat.
Look for fruit with soft, sunken, mouldy patches, especially where it sits on wet soil — that is fruit rot. Remove and discard rotting fruit so it does not spoil the sound fruit touching it.
Look for fruit with tiny sting punctures that ooze and weep, or that rot and drop early with maggots inside — that is fruit fly. Pick and destroy infested fruit (bury it deep or burn it) to break the fly's breeding, rather than leaving it in the field.
Slip a flat stone, dry grass or a few leaves under ripening fruit on wet ground so it sits dry and rots less.
As maturity nears, ease off the watering so the fruit and seed can dry down — see 'Ease water late'.
- Do:
Ease water toward maturity so the fruit and seed dry down.
- Do:
Rest ripening fruit on a stone or dry grass, off the wet soil, to cut down fruit rot.
- Watch out:
Do not leave fruit-fly fruit lying in the field — buried deep or burned, it stops the next generation of flies.
Ease water late Recommended
Right at the end, egusi needs to dry down, not drink. Easing off the water in the last few weeks lets the fruit and the oily seed inside firm up and dry, which makes the fermentation-and-drying that follows quicker and safer. Watering to the very end keeps the fruit soft and the seed damp.
In the last few weeks before harvest (about 100–120 days after sowing), start cutting back the water.
Once the fruit have stopped growing and the leaves begin to yellow and die back, stop watering altogether and let the crop dry in the field.
Let a dry, warm spell finish the ripening — the drier the fruit comes off the vine, the less rot and mould you fight when you extract the seed.
- Do:
Time your last watering to the fruit filling out — after that, dry-down beats more water.
- Tip:
Watering right up to harvest — soft, wet fruit and damp seed are far harder to ferment and dry safely.
- Watch out:
This step is only for irrigated crops; a rain-fed crop simply rides out the drier end of the season.
Harvest the ripe fruit
Egusi is ready 90–150 days after sowing, when the vine has done its work. You know it is mature when the fruit stop swelling and the rind dulls and hardens, the leaves yellow and die back, and a ripe fruit sounds hollow when you tap it — inside, the seed is fully formed and dark-margined (or plump white for the white-seed type). Gather or cut the mature fruit and carry them to a heap to begin fermentation — the next stage is where egusi is really made or lost. If the fruit is not there yet — still swelling, rind still glossy, seed still pale and soft — leave it on the vine a while longer, because picking it unripe means poorly-filled seed.
Ferment, wash out the seed, and dry it hard
The crop is grown — now you turn fruit into clean, storable egusi seed, and this is where the value is won or lost. Heap the ripe fruit to rot the flesh off the seed, wash the seed out in water, then dry it rock-hard on a clean, raised surface. The seed is oily, so if it goes into store damp it grows mould and can develop aflatoxin — a hidden poison. Dry until the seed snaps rather than bends, then store it cool, dry and airtight.
Heap-ferment, wash out seed & sun-dry hard Critical
This last step decides whether your season pays. The fermentation frees the seed, the washing cleans it, and the hard drying is the food-safety step: oily egusi seed stored even a little damp grows moulds and can develop aflatoxin — a poison you cannot see or taste that harms your family and gets your seed rejected at market. Dry it hard and it keeps for months; leave it damp and it spoils.
Heap the ripe fruit in a pile (in the shade is fine) and leave it about 1–2 weeks so the flesh softens and rots off the seed. The heap will smell — that is normal fermentation doing the work of freeing the seed.
When the fruit are soft, break them open and scoop the pulpy seed mass into a tub of water.
Rub and float: work the mass between your hands and swirl it. Good, heavy seed sinks, while pulp, skins and empty seed float — skim the floaters off. Pour off the dirty water and rinse with clean water until the seed is clean.
Spread the seed thinly on a clean, raised surface — a mat, rack or tarpaulin, never bare ground, which pushes damp back in and adds mould, grit and animal dirt. Dry it in the sun, turning it so it dries evenly.
Dry until the seed is hard and snaps rather than bends — this is the test that matters. Shell or de-coat the seed if your market wants it that way.
Store the hard-dry seed in a cool, dry, airtight container, off the floor and away from damp walls, and check it now and then for any musty or mouldy smell.
Before you store, test each batch: bend and press a seed. Hard and snaps → it is dry enough, store it. If it still bends or dents → it is too wet: spread it back out and dry it more before storing, or the whole lot can mould and turn poisonous.
- Do:
Dry the seed until it is hard and snaps rather than bends — this is the one food-safety test that matters.
- Tip:
Storing under-dried, oily seed — it grows moulds and can develop aflatoxin, a hidden poison. When in doubt, dry it longer.
- Watch out:
Dry on a mat, rack or tarpaulin, never on bare ground — the ground pushes damp and mould straight back into the seed.
Pests and diseases that attack egusi melon

Grow egusi melon with a plan, not a guess
This guide is the general answer. Divisi works out yours — the week to plant egusi melon on your soil and your rainfall, and each job dated for your field.


When to plant egusi melon, country by country
- When to plant egusi melon in Algeria
- When to plant egusi melon in Angola
- When to plant egusi melon in Benin
- When to plant egusi melon in Botswana
- When to plant egusi melon in Burkina Faso
- When to plant egusi melon in Burundi
- When to plant egusi melon in Cabo Verde
- When to plant egusi melon in Cameroon
- When to plant egusi melon in Comores
- When to plant egusi melon in Congo
- When to plant egusi melon in Côte d'Ivoire
- When to plant egusi melon in Egypt
- When to plant egusi melon in Eritrea
- When to plant egusi melon in Eswatini
- When to plant egusi melon in Ethiopia
- When to plant egusi melon in Gabon
- When to plant egusi melon in Gambia
- When to plant egusi melon in Ghana
- When to plant egusi melon in Guinea Ecuatorial
- When to plant egusi melon in Guinea-Bissau
- When to plant egusi melon in Guinée
- When to plant egusi melon in Kenya
- When to plant egusi melon in Liberia
- When to plant egusi melon in Libya
- When to plant egusi melon in Madagascar
- When to plant egusi melon in Malawi
- When to plant egusi melon in Mali
- When to plant egusi melon in Mauritanie
- When to plant egusi melon in Mauritius
- When to plant egusi melon in Morocco
- When to plant egusi melon in Moçambique
- When to plant egusi melon in Namibia
- When to plant egusi melon in Niger
- When to plant egusi melon in Nigeria
- When to plant egusi melon in République centrafricaine
- When to plant egusi melon in République démocratique du Congo
- When to plant egusi melon in Sao Tome and Principe
- When to plant egusi melon in Seychelles
- When to plant egusi melon in Sierra Leone
- When to plant egusi melon in Somalia
- When to plant egusi melon in South Africa
- When to plant egusi melon in South Sudan
- When to plant egusi melon in Sudan
- When to plant egusi melon in Sénégal
- When to plant egusi melon in Tchad
- When to plant egusi melon in Togo
- When to plant egusi melon in Tunisie
- When to plant egusi melon in Uganda
- When to plant egusi melon in United Republic of Tanzania
- When to plant egusi melon in Zambia
- When to plant egusi melon in Zimbabwe
Where egusi melon scores best
Districts where Divisi's engine currently rates this crop highest, ranked by fit.
-
 Onitsha North
 -
 Kitui South
 -
 Commonwealth
 -
 Kibangou
 -
 Banga
Banga -
 Plateaux
 -
 Buvuma
 -
 Mweka
Mweka -
 Tonkolili
 -
 Coyah
Coyah -
 Bugarama
 -
 Lekié
Lekié
Get Insights by email
A short digest of new Divisi articles. No email on quiet weeks.
Frequently asked questions
How do I grow egusi melon?
How to grow egusi melon: 90–150 days to maturity, 150 cm rows. Also called akatoa, pistache, guna, egwusi, egusi.
What is akatoa in English?
Akatoa (also agushi) is the Akan name for egusi melon.
What is pistache in English?
Pistache (also melon égusi) is the French name for egusi melon.
What is guna in English?
Guna is the Hausa name for egusi melon.
What is egwusi in English?
Egwusi is the Igbo name for egusi melon.
What is egusi in English?
Egusi (also ẹ̀gúsí) is the Yoruba name for egusi melon.
How long does egusi melon take to grow?
Egusi melon takes about 90–150 days from sowing to maturity, though the exact length varies with variety, temperature and how the season runs.
What spacing should I use for egusi melon?
Space egusi melon rows about 150 cm apart, with roughly 150 cm between plants within the row.
What pests and diseases attack egusi melon?
The ones covered in this guide are Cucurbit mosaic virus. Each has its own page explaining how to identify, check for and control it.