 Divisi
How to grow lablab
Lablab purpureus · Fabaceae
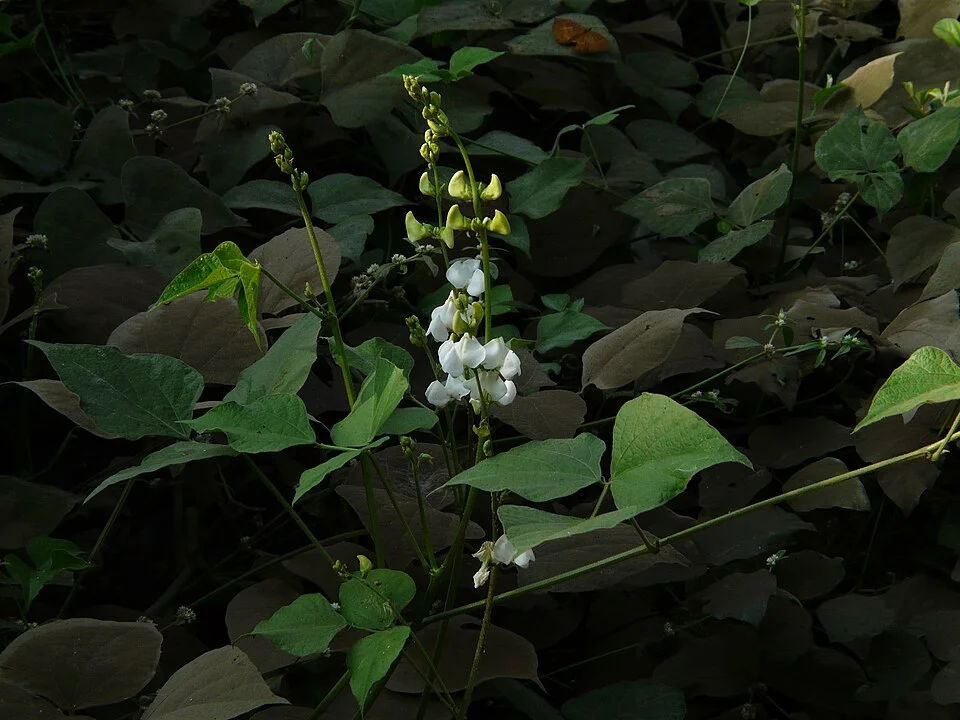
Photo: Dinesh Valke · CC BY-SA 4.0
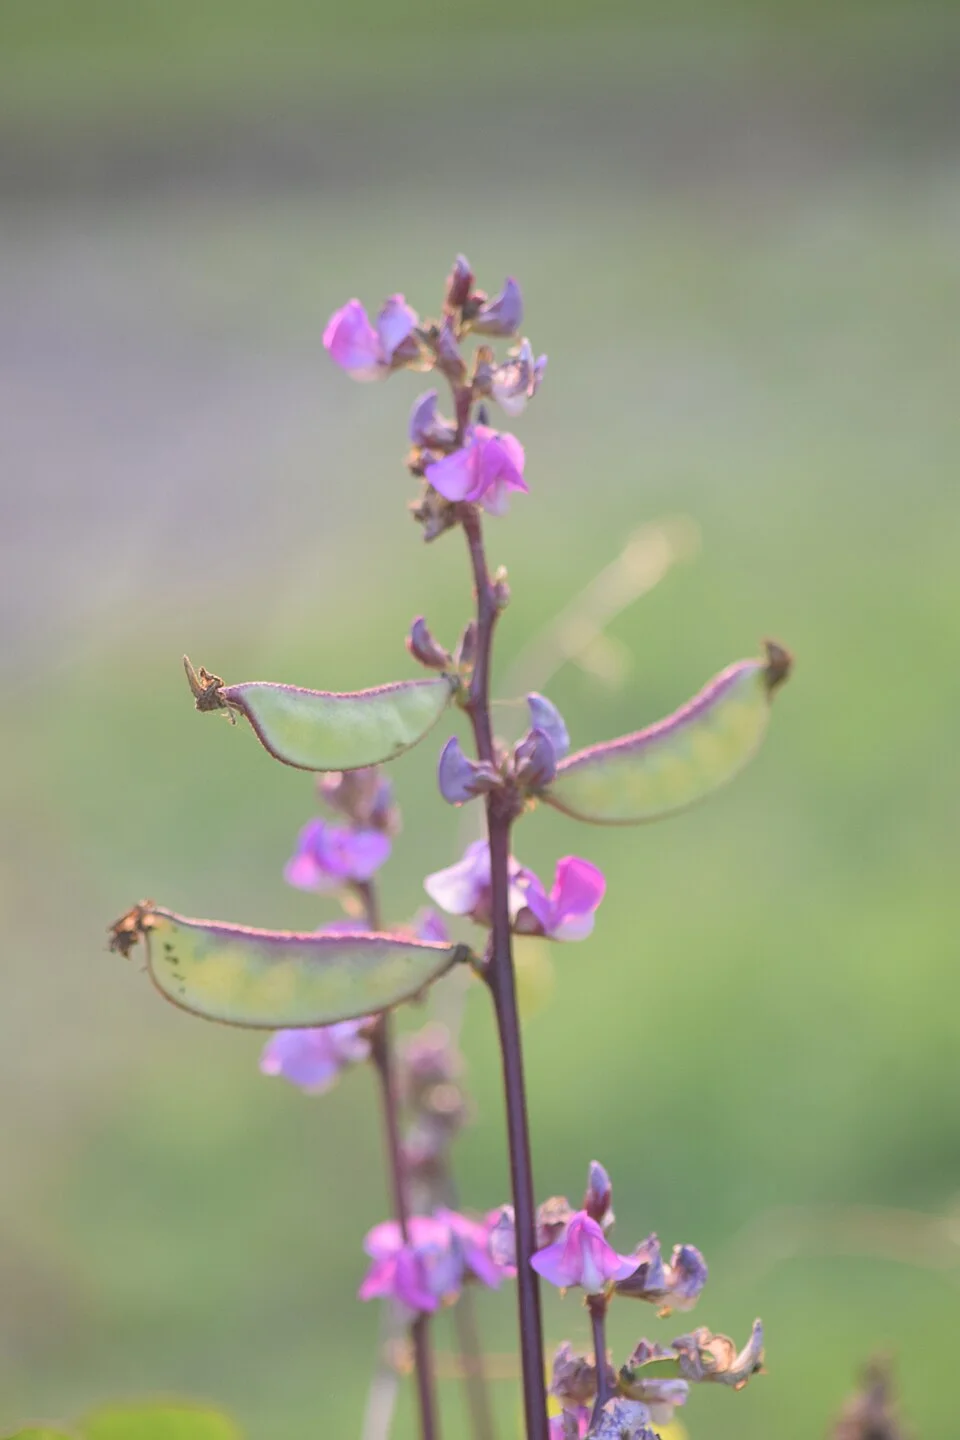
Lablab (also called hyacinth bean or dolichos; njahi in Swahili) is one of the toughest beans a smallholder can grow. It is a nitrogen-fixing legume — given the right root partners it pulls most of its own fertiliser out of the air — and its deep taproot (about 2 m, deeper than you are tall) keeps it green through dry spells that wilt other crops. One planting can pay you three ways: dry beans to eat and sell, leafy fodder or hay for your animals, and a green crop you slash back into the soil to feed it. It grows either as a low bush (knee- to waist-high, 0.6–1 m) or as a long climber (well over head height, up to 6 m) that will run up a maize or sorghum stalk. One firm rule at the table: the mature dry beans hold natural antinutrients (substances that upset your stomach if eaten raw), so they must be soaked and boiled well before eating — never raw.
Md. Mahian · CC BY-SA 4.0 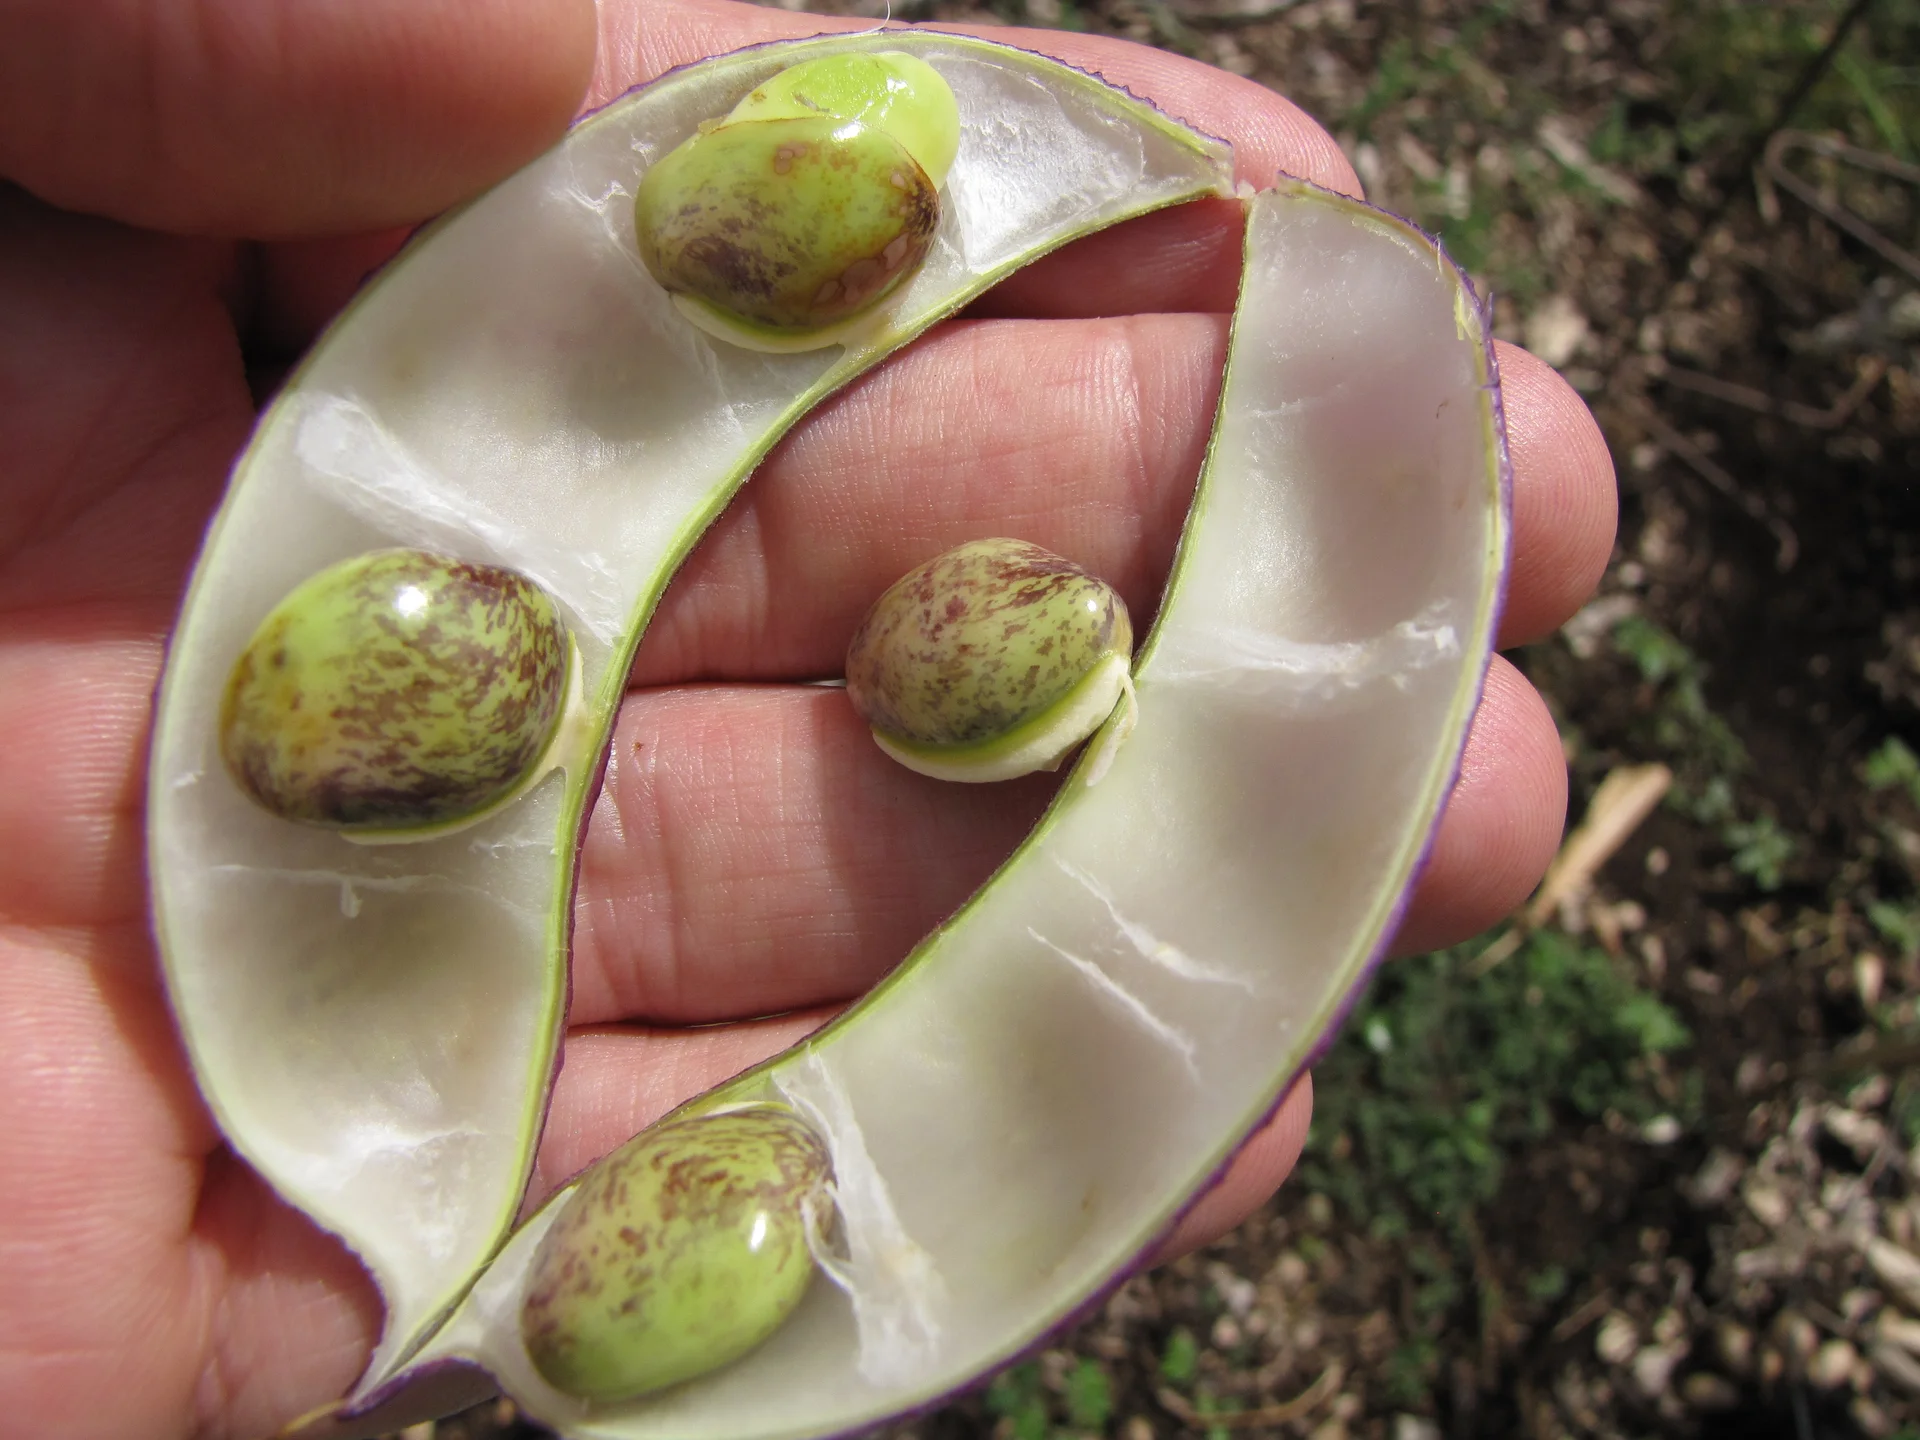
Forest and Kim Starr · CC BY 3.0
- Days to maturity
- 100–150 days
- Row spacing
- 75 cm
- Plant spacing in the row
- 30 cm
- Sowing depth
- 3–5 cm
These are general figures for the crop, compiled from published agronomic references including FAO and CABI. The right choice for your field depends on your soil, rainfall and the yield you are aiming for.
Will lablab actually do well on your field? Check your own field against every crop in the catalogue — no signup. Run the crop check →
Also known as
Lablab is also called hyacinth bean and dolichos.
- English
- hyacinth bean, dolichos
- French
- dolique, dolique d'Égypte
- Hindi
- sem
- Portuguese
- lab-lab, feijão-lablab
- Swahili
- njahi, fiwi
Working in buckets, bags or paces? The farming glossary turns the measures growers actually use into kilograms and hectares — what a 20 litre bucket of each crop really weighs, and how to size a field by walking it — alongside the Shona, Swahili, Ndebele and Yoruba words used in the field. Open the glossary →
Growing lablab, stage by stage
Your lablab season, step by step — a tough, drought-beating bean that feeds itself, your animals and your soil in one planting. Choose what it is mainly for before you sow, be patient (it is slow to come up), weed it clean while it is small, guard the flowers from pod borers, then pick the dry pods before they shatter and seal the beans away from weevils.
Get your field and inputs ready
Almost everything that makes lablab easy later is decided before you sow. Choose what the crop is mainly for — beans, animal feed, or feeding the soil — because that sets your type, your spacing and when you cut. Buy clean seed and, on land that has never grown lablab, the root powder (inoculant) that lets it make its own nitrogen. Pick a well-drained field, because lablab shrugs off poor soil and drought but rots in standing water — and where the soil is poor in phosphorus, get a little starter to push out strong roots.
Plan the field / use Recommended
Lablab can pay you three different ways, but you choose which before you sow — it decides your variety, your spacing, and when you cut. Picking a fresh field (not one that grew beans or lablab last year) also stops soil pests and root diseases building up, and lets the free nitrogen lablab leaves behind feed next season's cereal.
Decide the main use now — up to about 4 months before sowing and no later than 2 weeks before — because it shapes everything else: dry beans to eat and sell, fodder or hay for animals, or a green manure (a crop you slash and dig back in while still green) to feed the soil and smother weeds. You can still take a little of each, but plan for the main one.
Match the type to the use: for dry beans, a bushy type in its own field is simplest; for fodder or ground cover, a spreading or climbing type sown thicker gives more leaf; for green manure, any vigorous type you will cut and dig in while green.
Choose a well-drained field. Lablab beats drought with its deep taproot but hates wet feet — avoid low spots and hollows that puddle after rain.
Rotate: do not plant lablab where lablab or any other beans grew last season. A fresh field — for example after maize or sorghum — starves bean pests and root diseases, and the nitrogen lablab leaves behind then feeds your next cereal crop.
- Do:
Follow a cereal like maize or sorghum with lablab, then a cereal again — the bean puts nitrogen back into the soil for the crop that comes after it.
- Watch out:
If you want a climbing lablab to run up a standing cereal, choose that field now — you will sow the two together (see the support task).
Buy seed + inoculant (+ P where P-poor) Critical
Clean seed and — on new land — the right root powder (inoculant) are what let lablab feed itself. The powder carries tiny living helpers (rhizobia) that settle on the roots and pull nitrogen out of the air, so you buy little or no nitrogen fertiliser all season. Buy in good time, before the rains, so nothing holds up planting.
In the 3 weeks before sowing, buy clean, whole, plump seed — unbroken, with no small round holes (a hole means a weevil is already inside). Buy enough for your field size; your recommendation gives the amount.
On land that has never grown lablab before, buy a sachet of Bradyrhizobium inoculant — the dark root powder of living root helpers. It is cheap, and it is the difference between a crop that feeds itself and one that goes hungry. Keep it cool and out of the sun — heat kills the helpers inside.
Lablab makes its own nitrogen, so do not buy nitrogen fertiliser (urea or AN — ammonium nitrate) for it — extra nitrogen only grows lazy leaf and can even switch off the free root-nitrogen. What it does reward is phosphorus (P), a root-and-flower nutrient: buy a small P starter (for example single superphosphate) only if your soil is known to be poor in phosphorus, or past bean crops came up weak and pale.
Store seed and any fertiliser dry, off the floor, away from food, water and children. Keep the inoculant sachet cool and safe for planting day.
- Do:
Buy the inoculant fresh each season and check the date — old or overheated powder has dead helpers and simply will not work.
- Tip:
Nitrogen fertiliser on lablab — a legume makes its own; added nitrogen grows leaf at the cost of pods and shuts down the free nitrogen the roots fix.
- Watch out:
Reject any seed with small round holes — that is the bruchid weevil (bean weevil) already inside, and it will carry the pest straight into your new crop.
Prepare a well-drained field Recommended
Lablab is not fussy about rich soil — its deep taproot and root helpers find their own food and water. The one thing it will not forgive is waterlogging (roots left standing in water): they rot, and the crop yellows and dies. A rough seedbed is fine here; good drainage is what really matters.
In the weeks before sowing, clear the planting lines of weeds and old crop trash. You do not need the fine, powdery seedbed maize wants — lablab seed is big and pushes up through rougher soil.
Loosen the soil so rain soaks in and the deep taproot can drive straight down to reach water in a dry spell.
Fix drainage on heavy or low-lying ground: work across the slope, open a shallow drain to lead water away, or plant on ridges or mounds so the roots sit above any standing water.
In dry areas, instead make basins or tied ridges to catch and hold the rain — lablab uses light rain well, but the roots must never sit in a puddle.
- Do:
Plant on ridges or mounds on clay or low ground, so water drains away from the roots.
- Tip:
A field that floods or stays wet after rain — lablab rides out drought far better than it survives wet feet.
(Climbing types) plan support / a cereal to climb Recommended
A climbing lablab can run well over head height (up to 6 m), and with nothing to climb it sprawls into a tangled mat on the ground — hard to weed and harvest, holding damp that rots the lowest pods, and hiding pod borers. Decide its support before you sow so it goes up, not sideways. (Bushy types stand on their own and can skip this.)
First know your type: a bushy lablab (knee- to waist-high) needs no support — skip this task. A climbing type needs something to grip.
The cheapest support is a living one: grow the climber up maize or sorghum. Plan to sow the lablab into the cereal — either at the same time, or once the cereal is about knee-high (≈45 cm) — so the vines climb the stalks.
If you have no cereal, gather stakes, poles or a simple trellis (branches, reeds, or string strung between posts), enough for the field, ready for when the vines start to twine a few weeks after sowing.
Where you use a cereal as the support, space it so there is room for both — do not crowd the cereal so tightly that neither crop yields.
- Do:
Use a standing cereal as a free trellis — you then harvest grain from the cereal AND beans from the vine off one field.
- Watch out:
A climber left with no support becomes a ground mat that traps damp, hides pod borers and rots its lowest pods — sort the support out now, not later.
Sow and get a good stand
This is where the crop starts — and lablab starts slowly. Unlike maize, it can take two to four weeks to come up, so the soil must stay moist right through the strike while you keep weeds and pests off the small, slow seedlings. Sow at the right depth and spacing for its type, coat the seed with the root powder on new land, and be patient while it establishes.
Sow + inoculant Critical
How you sow sets the whole crop. On new land, coating the seed with the root powder (inoculant) is what turns lablab into a plant that feeds itself — miss it, and on land that has never grown lablab the crop can go nitrogen-hungry. The right depth and spacing give an even, healthy stand you can weed and pick easily.
Sow into moist soil, once the rains have truly started — the seed needs steady damp for the 2–4 weeks it takes to come up. (Optional: soak the seed in warm water for about 2 hours first to soften the coat and speed the strike.)
On new land, coat the seed with the inoculant just before sowing: moisten the seed with a splash of clean water (or a little sugar-water so the powder sticks), sprinkle on the dark powder, and turn it until every seed is coated. Do this in the shade and sow within a few hours — sun and heat kill the living helpers.
Sow one or two seeds per station, 3–5 cm deep — about your first finger-joint — a little deeper in dry, sandy soil, shallower in heavy soil.
Space by type: climbing types wider apart — roughly a stride between rows (≈75 cm) and a hand-span and a half between stations (≈30 cm); bushy types closer and denser. The wider rows for climbers leave room for their support.
If you bought a phosphorus (P) starter (poor-P soils only), work a little into each station or band it beside the seed as you sow — never heaped on the seed, or it can burn the sprout.
Cover and firm the soil over the seed so it sits snug in moist earth, and keep the surface damp until the seedlings show.
- Do:
Coat the seed with inoculant in the shade and sow it the same day — heat and direct sunlight kill the root helpers before they reach the soil.
- Tip:
Sowing into dry soil and hoping for rain — lablab is slow to strike, and seed left in dry ground sits, rots, or is eaten before it comes up.
- Watch out:
Keep the inoculant powder off any fertiliser and out of the sun until the moment you coat the seed — both destroy the helpers.
Scout (aphids, gaps) Recommended
The first three weeks are when the slow seedlings are most at risk. Aphids (small sap-sucking insects) can settle on the soft new shoots, and because lablab comes up unevenly you need to spot gaps — stations where nothing came up — while there is still moisture and time to fill them.
From about a week after sowing, walk the field every 3–4 days — lablab emerges over two to four weeks, so keep checking as more seedlings appear.
Look for aphids: small soft green, grey or black insects clustered on the growing tips and under the young leaves, often with sticky, shiny honeydew (the sweet waste they leave) and ants running over them. A few are normal; dense colonies curling the tips need action.
Count the gaps: note the stations where nothing has come up. Some seed is just slow, but large bare patches may need re-sowing while the soil is still moist and the crop is only days old.
Rub out small aphid colonies by hand or with a splash of soapy water; ladybirds and hoverflies usually clean up the rest — only think about spraying if colonies explode across many plants.
- Watch out:
Look under the leaves and at the soft growing tips, not just the top of the plant — aphids hide on the underside.
- Do:
Note bare patches now; the only time you can fill a lablab gap is while the soil is still moist and the crop is only a few days old.
Keep moist for the strike Recommended
Lablab is slow out of the ground — two to four weeks to come up — and if the topsoil dries out in that time the seed sits, cracks unevenly, or dies. Steady moisture through the strike gives you a full, even stand. (Only where you can water; a rain-fed crop leans on the rains.)
From sowing until the seedlings are all up (about 2–4 weeks), keep the top few centimetres of soil moist — damp, never flooded.
Where you can water, wet the rows every 4–6 days, more often on hot days and quick-drying sandy soil.
Check with a finger: if the top finger-joint (3–5 cm) of soil is dry, water; if it is still damp, wait.
Once the seedlings are up and growing, ease off — the deep taproot soon finds its own water and the crop needs far less.
- Tip:
Flooding the field to save trips — standing water rots lablab seed and young roots faster than dryness does.
- Do:
Spread a light mulch between the rows to hold soil moisture through the slow strike.
Weed early and train the climbers
Now the plant builds its frame — leaves, stems, and for climbers the first twining shoots. This is lablab's one demanding stretch of work: early weeding. While it is small it is slow and easily smothered; once it takes off, its deep taproot and spreading leaf make it tough and self-reliant. Weed it clean early, and get any climbers up onto their support.
Scout (aphids, leaf spots) Recommended
As the leaf canopy builds, watch for aphids on the shoots and the first leaf diseases — cercospora leaf spot and rust — which eat into the green leaf that feeds the crop. Caught early on a hardy plant like this, they rarely need spraying.
Keep walking the crop every 3–4 days through weeks 3 to 7 after sowing, checking the shoots and both the tops and undersides of the leaves.
Aphids: clusters of soft green, grey or black insects on the growing tips with sticky honeydew — usually cleaned up by ladybirds; act only on heavy, spreading colonies.
Cercospora leaf spot (a fungal disease): small round brown spots, often with a paler grey centre and a darker ring, scattered on the leaves. Bad attacks turn leaves yellow and drop them.
Rust (another fungal disease): tiny reddish-brown powdery bumps (pustules) on the underside of the leaves that rub off like rusty dust on your finger.
For the low levels this hardy crop usually shows, note it and keep the crop healthy: pick off and destroy badly spotted lower leaves, keep the weeds down for airflow, and only spray if disease races across much of the field.
- Watch out:
Rust and leaf spot spread fastest in crowded, damp, weedy stands — the airflow from good weeding and proper spacing is your first defence.
- Tip:
Reaching for a sprayer at the first few spots — on this hardy crop, picking off badly spotted lower leaves and keeping it weed-free usually holds leaf disease without chemicals.
Weed early and thoroughly Critical
This is the job that makes or breaks lablab. Because it is slow to cover the ground, weeds in the first weeks steal its water, light and root-space and can cost you 10–30% of your yield. Weed it clean now and, once it spreads its leaf and drives down its taproot, it looks after itself and smothers later weeds.
Weed the first time by about 3 weeks after sowing, and again if needed by about 6 weeks after sowing — this is the critical weed-free window.
Hoe shallowly between and within the rows — lablab's feeder roots run near the surface, and deep hoeing cuts them.
Pull the weeds closest to the plants by hand, so you do not tear the stems, roots or twining shoots.
In dry areas, leave the pulled weeds lying between the rows as a mulch to hold moisture.
After this window, ease off — a well-established lablab canopy shades out most new weeds on its own.
- Do:
Get the first weeding done early, while the crop is still small and slow — it is the cheapest yield you will ever gain on lablab.
- Tip:
Deep hoeing close to the plants — it slices the shallow feeder roots and knocks off the nitrogen-fixing root nodules (the little lumps on the roots where the free nitrogen is made).
- Watch out:
Do not uproot the lablab seedlings themselves by mistake — early on, the slow, small crop can look weedier than the weeds around it.
Support / intercrop climbing types Recommended
A climbing lablab that finds nothing to grip sprawls into a ground mat — hard to weed and harvest, holding damp that rots the lowest pods, and hiding pod borers. Getting the vines up onto a support as they start to twine (send out curling shoots that wrap around things) keeps the crop open, healthy and easy to pick. (Bushy types do not climb — skip this.)
Watch for the vines to start twining — sending out curling shoots that reach for something to wrap around (roughly 3–7 weeks after sowing).
If you planned a living support, this is when the lablab begins climbing the maize or sorghum. If you sowed the cereal separately, guide or thin the lablab beside it once the cereal is about knee-high (≈45 cm).
If using stakes or a trellis, push them in now — before the vines are long — and gently lift the first shoots onto them; the plant grips and climbs on its own after that.
Guide any shoots running along the ground up onto the support, so the plant grows tall and open instead of into a tangled mat.
- Do:
Get supports in as the vines start to twine — it is far easier to guide a short shoot upward than to untangle a sprawled mat later.
- Watch out:
Keep the climbers off your hut, fence and trees unless you want them there — a vigorous lablab will climb anything nearby.
Flowering — guard it from pod borers
This is the make-or-break window. As the days shorten, lablab flowers — and the flowers are both its thirstiest moment and the target of its worst pest, the pod borer (a caterpillar that eats into buds, flowers and young pods). Every flower a borer eats is a pod of beans you never get. Scout the buds and flowers closely every 2–3 days, spray only if the pests cross the threshold, and hold moisture if you can water.
Scout pod borers at bud/flower Critical
Pod borers — the caterpillars of the bollworm / Maruca group — do their damage right now, hiding in the buds and flowers and boring into the young pods. By the time you see holes in the pods, the caterpillar is already inside eating the beans. Catching them at flowering, before they bore in, is the only cheap way to stop them.
From about 7 weeks after sowing (when buds and the first flowers appear), check the crop closely every 2–3 days — this pest moves fast.
Look into the buds and flowers, not just at the leaves. The Maruca pod borer webs flowers and young pods together with silk and hides inside — pull apart a few clusters of webbed flowers and look for a small caterpillar and its dark droppings.
The African bollworm (Helicoverpa) is a fatter, striped caterpillar that chews round holes into buds, flowers and pods — look for the holes and the dark droppings around them.
On about 10 plants at several spots, count how many flowers or young pods hold a caterpillar. Roughly one caterpillar per flower or pod — or webbed-and-bored flowers on many plants — means it is time to spray (see the spray task).
Glance too for aphids still on the shoots — usually minor by now, but note any heavy colonies.
- Watch out:
Pull open the webbed flowers to check inside — Maruca hides in the silk web, so a clean-looking outside can still hide a borer.
- Do:
Scout in the early morning or evening, when the caterpillars are active and easier to spot on the flowers.
Pod-borer spray (if over threshold) Recommended
If borers cross the threshold at flowering, a well-timed spray saves the pods — but only if you hit the caterpillars while they are still out on the flowers, before they bore inside where no spray can reach. Spray only when scouting says to; needless spraying kills the ladybirds and bees that work for free.
Spray only if scouting crosses the threshold (about one caterpillar per flower or pod, or webbed-and-bored flowers across many plants) — never on a fixed calendar.
Choose a softer product first: Bt (a natural, caterpillar-killing bacterium, sold as a powder or liquid) or a neem spray — both hit young caterpillars while sparing bees and ladybirds. Use an approved chemical insecticide only if borers are heavy.
Aim at the buds and flowers, where the caterpillars feed — that is where the crop is being lost. Repeat after 10–14 days only if scouting still shows them over threshold.
Safety: spray in the cool of early morning or evening, with the wind at your back; cover your skin, nose and eyes; keep the spray off food; and wash yourself and the sprayer well afterwards.
Respect the pre-harvest interval — the waiting time printed on the label between spraying and picking — so no poison is left on pods you will eat or sell. This matters most on any pods you are picking green.
- Do:
Spray in the evening — it is cooler, the wind usually drops, and the bees are off the flowers.
- Tip:
Spraying by the calendar — hitting a crop that is under threshold wastes money and kills the natural enemies that keep aphids and borers down.
- Watch out:
Once a caterpillar has bored inside a pod, no spray can reach it — timing your spray at flowering is everything.
Irrigate where possible Recommended
Lablab is a drought-beater the rest of the season, but flowering is its one thirsty stage — the water-critical window. Dry soil now makes it drop its flowers and young pods, straight off your yield. If you can water at only one time in the whole season, water now. (Only where you can irrigate.)
From flowering onward (about 7–11 weeks after sowing), keep the soil evenly moist through the flowering and early-podding stretch.
Where you can water, irrigate every 7–10 days, more often in heat or on sandy soil — but never leave the roots standing in water.
Watch the plants in the heat of the day: flowers and young pods dropping is the sign it is too dry — water before it gets that far.
This is the stage that most rewards water; once the pods are set and filling, lablab can once again ride out dry spells on its deep root.
- Do:
If your water is limited, save it for flowering — this is the one stage where every drop pays back most.
- Tip:
Watering to the point of waterlogging — even thirsty at flowering, lablab roots still rot in standing water.
Fill the pods, watch for weevils
The flowers become pods, and the pods fill with beans — but unevenly, over many weeks, some ready while others are still tiny. Keep water coming through the fill if you can, keep watching for pod borers and now pod-sucking bugs, and start watching for the bruchid weevil (bean weevil) laying eggs on maturing pods — the pest that follows your beans into store.
Scout (pod borers, pod bugs, bruchids) Recommended
The pods you are now growing are the harvest — and three pests attack them: pod borers still boring in, pod-sucking bugs draining the developing beans, and the bruchid weevil laying eggs on maturing pods that hatch into grubs inside the seed. Spotting bruchid egg-lay now warns you to harvest promptly and store carefully.
Keep walking the crop every 3–4 days through podding and grain fill, checking pods of all ages.
Pod borers: round holes and dark droppings on the pods, with caterpillars inside — as at flowering. Pick and destroy badly bored pods.
Pod-sucking bugs: shield- or stink-bug-shaped bugs (green, brown or spotted) sitting on the pods; they leave sunken, dark spots on the pod wall and shrivelled, pitted beans inside. Knock heavy numbers off by hand, or spot-spray if bad.
Bruchid weevils: look on the maturing pods for tiny beetles and small eggs stuck to the pod skin. This is your early warning — those grubs bore into the seed and carry on eating it in store, so plan to harvest promptly and seal it.
Note what you find and act at the thresholds; on this hardy crop, hand-picking and spot action beat blanket spraying.
- Watch out:
Eggs or small beetles on the maturing pods mean bruchids are moving in from the field — the store is where they do their real damage, so harvest and seal promptly.
- Do:
Pick and destroy any bored or rotten pods as you scout — it lowers the pest load on the pods still filling.
(Green pod use) pick young pods Optional
Young, tender lablab pods are a vegetable you can pick, eat and sell fresh — an early return from the same crop, weeks before the dry beans are ready. (Only if you want green pods; leave them to grow on for dry grain otherwise. And note: green pods are eaten cooked — never raw.)
Start picking from about 10 weeks after sowing, when pods are young, flat, green and tender — before the beans inside swell hard and the pod turns stringy.
Pick every 3–4 days, taking the pods at the right stage and leaving the rest to grow on; regular picking keeps the plant flowering and podding.
Snap or cut the pods off cleanly without tearing the vine.
Cook green pods well before eating (boil them; do not eat raw) — like the dry beans, raw lablab does not agree with you.
If your plan is dry grain or seed, skip green-picking on those plants and let the pods fill and dry on the vine.
- Do:
Pick the young pods often to keep the plant setting more — a regularly picked vine keeps flowering.
- Watch out:
If you sprayed for pod borers, respect the pre-harvest interval on the label before picking green pods to eat or sell.
- Tip:
Eating any lablab pods or beans raw — always cook them first.
Harvest — grain, fodder or green manure
Now you take what you planned for. For dry beans, the pods ripen unevenly over many weeks, so you pick the dry ones in several passes before they shatter (split open and spill the beans on the ground). For fodder, cut the leafy crop at flowering. For green manure, slash it in while still green to feed the soil. Time it right and pick before the pods burst.
Pick the dry pods in passes Critical
This is your bean harvest. Lablab pods ripen a few at a time over weeks, and a ripe, dry pod will shatter — split open and drop its beans onto the ground — if you leave it too long. Picking the dry pods in repeated passes, before they burst, is how the grain ends up in your basket instead of on the soil.
Start when the first pods are dry — from about 130 days (over 4 months) after sowing — and keep coming back every 7–10 days as more ripen. Grain fill is uneven, so one pass will never get it all.
Know a ready pod: it has turned dry, tan or brown and papery, and when you shake it the seeds rattle loose inside and feel hard (not soft or green). That rattly, papery pod is ready; a green or leathery one is not.
Pick the dry pods only, leaving the greener ones to ripen for the next pass. Pick in the cooler morning, when pods are less brittle and shatter less as you handle them.
Do not wait for the whole field to dry — the earliest pods will have shattered by then. Little and often beats one late pass.
Shell the picked pods, then dry the beans and store them weevil-tight (see the drying-and-storage stage).
If the pods are not yet dry (still green or leathery, the seeds soft) → leave them to ripen on the vine and come back in a few days; only pick pods that are papery and rattle.
- Tip:
Letting the pods shatter — pick the dry pods in several passes before they split and drop their beans.
- Do:
Pick in the cool of the morning, when dry pods are slightly tougher and spill fewer beans as you handle them.
- Watch out:
For fodder instead of grain, cut the leafy crop at flowering / early pod and never below about 25 cm — roughly a hand-span above the soil so it regrows; for green manure, slash and dig it in while still green, for the most nitrogen.
Dry and store weevil-tight
The beans are grown — now don't let the weevils eat them. The bruchid (bean weevil) moves in from the field and, in an open bag, its grubs can hollow out much of your crop within weeks. Dry the beans hard and seal them airtight to starve the weevils of air. For fodder, cure the hay dry. This last step is where a good lablab crop is kept or lost.
Dry & store bruchid-safe Recommended
The bruchid weevil you saw laying eggs on the pods carries into store inside the beans, and its grubs drill through the seed — in an open bag it can hollow out much of the crop within weeks, and the beans left behind are holed and hard to sell or plant. Drying the beans hard and sealing them airtight suffocates the weevil with no chemicals.
Dry the beans hard in the days right after harvest — spread them on a mat, rack or tarpaulin (never on bare ground, which pushes damp back in and adds mould and dirt), turn them, and cover them if rain threatens. They are dry enough when a bean is too hard to dent with a fingernail and cracks rather than squashes when you bite it.
Winnow out the chaff, dust, broken beans and any holed ones (pour the beans in a light wind so the trash blows away) — weevils breed fastest in the trash and the damaged seed.
Store in airtight (hermetic) storage — PICS or triple-layer bags, or a clean, sealed drum or airtight container. Sealed tight, the trapped weevils use up the air and die, so no poison is needed. (A traditional stand-in is coating the beans with wood ash, which blocks the weevils.)
Keep the store cool, dry, off the floor and away from the wall, and check it once a month for small round holes, fine powder, or moving weevils — act early if you see them.
Before eating, remember the mature dry beans carry natural antinutrients (substances that upset your stomach raw): soak them, throw away the soaking water, and boil them well — never eat lablab raw or half-cooked.
- Do:
Cook mature dry seed thoroughly (soak, change the water, then boil) to remove the antinutrients before eating.
- Tip:
Storing lablab in an open sack — bruchids move straight in and hollow out the beans within weeks. Dry hard and seal airtight.
- Watch out:
For fodder, cure and dry the hay well before you stack or bale it — damp hay heats, moulds and can even catch fire.
Pests and diseases that attack lablab

Grow lablab with a plan, not a guess
This guide is the general answer. Divisi works out yours — the week to plant lablab on your soil and your rainfall, and each job dated for your field.


When to plant lablab, country by country
- When to plant lablab in Algeria
- When to plant lablab in Angola
- When to plant lablab in Benin
- When to plant lablab in Botswana
- When to plant lablab in Burkina Faso
- When to plant lablab in Burundi
- When to plant lablab in Cabo Verde
- When to plant lablab in Cameroon
- When to plant lablab in Comores
- When to plant lablab in Congo
- When to plant lablab in Côte d'Ivoire
- When to plant lablab in Egypt
- When to plant lablab in Eritrea
- When to plant lablab in Eswatini
- When to plant lablab in Ethiopia
- When to plant lablab in Gabon
- When to plant lablab in Gambia
- When to plant lablab in Ghana
- When to plant lablab in Guinea Ecuatorial
- When to plant lablab in Guinea-Bissau
- When to plant lablab in Guinée
- When to plant lablab in Kenya
- When to plant lablab in Lesotho
- When to plant lablab in Liberia
- When to plant lablab in Libya
- When to plant lablab in Madagascar
- When to plant lablab in Malawi
- When to plant lablab in Mali
- When to plant lablab in Mauritanie
- When to plant lablab in Mauritius
- When to plant lablab in Morocco
- When to plant lablab in Moçambique
- When to plant lablab in Namibia
- When to plant lablab in Niger
- When to plant lablab in Nigeria
- When to plant lablab in Rwanda
- When to plant lablab in République centrafricaine
- When to plant lablab in République démocratique du Congo
- When to plant lablab in Sao Tome and Principe
- When to plant lablab in Seychelles
- When to plant lablab in Sierra Leone
- When to plant lablab in Somalia
- When to plant lablab in South Africa
- When to plant lablab in South Sudan
- When to plant lablab in Sudan
- When to plant lablab in Sénégal
- When to plant lablab in Tchad
- When to plant lablab in Togo
- When to plant lablab in Tunisie
- When to plant lablab in Uganda
- When to plant lablab in United Republic of Tanzania
- When to plant lablab in Zambia
- When to plant lablab in Zimbabwe
Where lablab scores best
Districts where Divisi's engine currently rates this crop highest, ranked by fit.


Get Insights by email
A short digest of new Divisi articles. No email on quiet weeks.
Frequently asked questions
How do I grow lablab?
How to grow lablab: 100–150 days to maturity, 75 cm rows, 3–5 cm deep. Also called hyacinth bean, dolique, sem, lab-lab, njahi.
What is dolique in English?
Dolique (also dolique d'Égypte) is the French name for lablab.
What is sem in English?
Sem is the Hindi name for lablab.
What is lab-lab in English?
Lab-lab (also feijão-lablab) is the Portuguese name for lablab.
What is njahi in English?
Njahi (also fiwi) is the Swahili name for lablab.
How long does lablab take to grow?
Lablab takes about 100–150 days from sowing to maturity, though the exact length varies with variety, temperature and how the season runs.
What spacing should I use for lablab?
Space lablab rows about 75 cm apart, with roughly 30 cm between plants within the row.
How deep should lablab be planted?
Sow lablab at about 3–5 cm deep. Shallower risks drying out; deeper wastes seed energy before the shoot reaches light.
What pests and diseases attack lablab?
The ones covered in this guide are Rust. Each has its own page explaining how to identify, check for and control it.