 Divisi
How to grow pumpkin and butternut (winter squash)
Cucurbita moschata · Cucurbitaceae
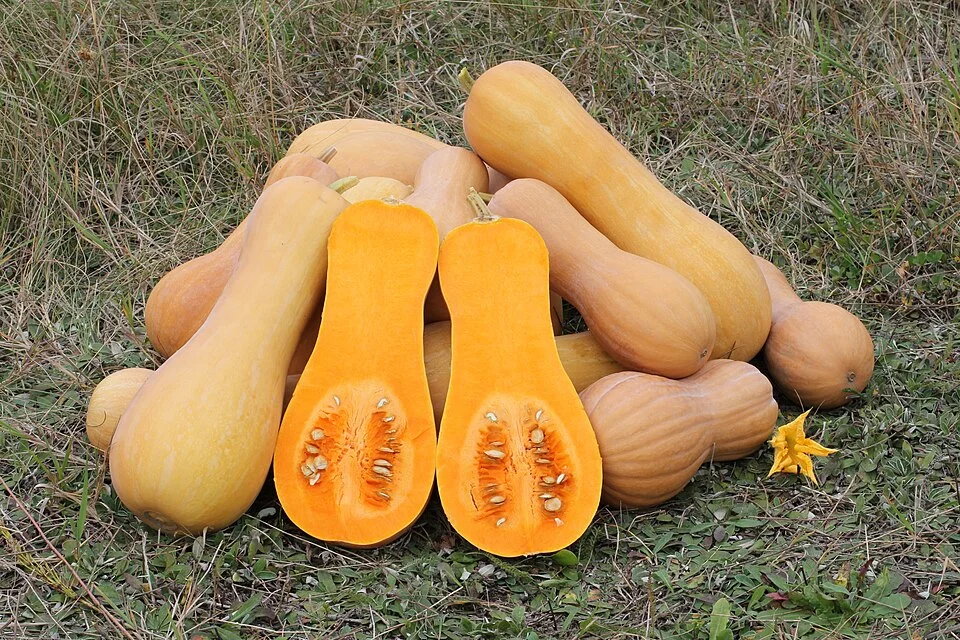
Photo: George Chernilevsky · Public domain
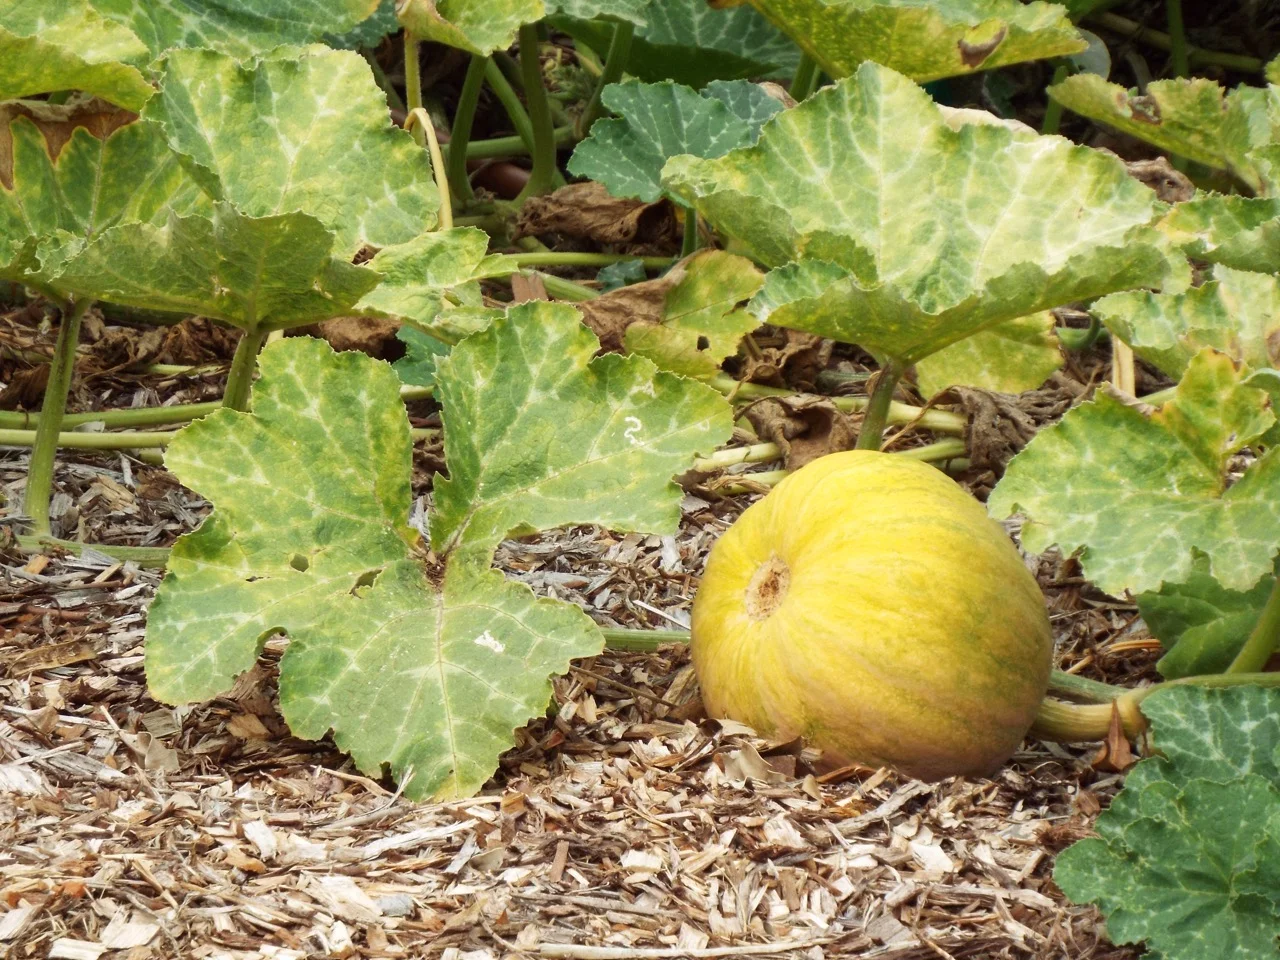
Pumpkin and butternut are warm-season trailing vines of the squash family — Cucurbita moschata, the tough, heat- and disease-hardy squash bred for hot, humid Africa. One planting feeds you three ways: young shoots and leaves picked all season as a favourite relish (muboora, ithanga), mature fruit that cures and keeps for months, and seed to eat or save for next year. The vines run along the ground and knit into a leafy mat that shades out weeds. Each plant carries separate male and female flowers, so a bee must carry pollen from one to the other before any fruit can form — look after the bees and you look after your harvest.
Forest and Kim Starr · CC BY 2.0 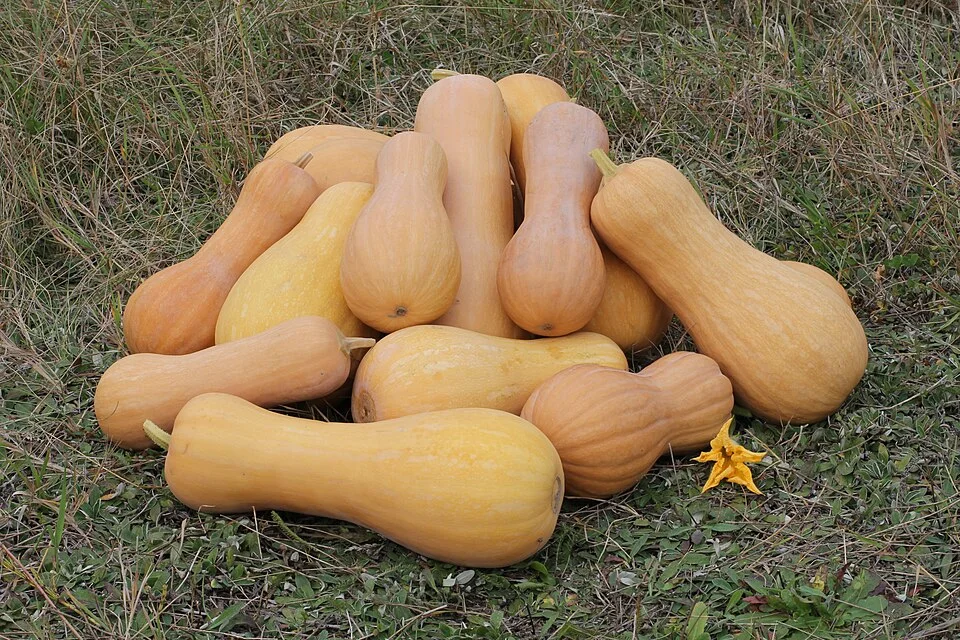
George Chernilevsky · Public domain
- Days to maturity
- 90–120 days
- Row spacing
- 180 cm
- Plant spacing in the row
- 150 cm
These are general figures for the crop, compiled from published agronomic references including FAO and CABI. The right choice for your field depends on your soil, rainfall and the yield you are aiming for.
Will pumpkin and butternut (winter squash) actually do well on your field? Check your own field against every crop in the catalogue — no signup. Run the crop check →
Also known as
- Afrikaans
- pampoen, botterskorsie
- Chichewa
- dzungu
- French
- courge, citrouille, potiron
- Ndebele
- ithanga
- Sesotho
- lephutshe
- Setswana
- lephutse
- Shona
- muboora
- Swahili
- malenge, boga
- Xhosa
- ithanga
- Yoruba
- elegede
- Zulu
- ithanga
Working in buckets, bags or paces? The farming glossary turns the measures growers actually use into kilograms and hectares — what a 20 litre bucket of each crop really weighs, and how to size a field by walking it — alongside the Shona, Swahili, Ndebele and Yoruba words used in the field. Open the glossary →
Growing pumpkin and butternut (winter squash), stage by stage
Your pumpkin and butternut season, step by step — warm the soil and sow on rich, free-draining hills, pick young leaves for the pot while the vines run, protect the bees that set your fruit, then cure the mature fruit so it keeps for months.
Get ready before you sow
Almost everything that decides your crop is set before the seed goes in: clean seed of the right type, a field that hasn't grown pumpkins or their cousins recently, and rich, well-drained planting hills. Pumpkins are hungry and hate wet feet, so build them a fertile, free-draining home now.
Source clean seed Recommended
The seed you choose decides how well the crop shrugs off heat and disease. In hot, humid areas the tough butternut / tropical-pumpkin type (Cucurbita moschata) stands up to mildew and heat far better than large soft pumpkins — pick it, and start with clean, healthy seed so you don't plant disease into your field.
In the month before you sow, choose the moschata type — butternut and tropical pumpkins — for hot, humid areas; it carries the best heat and disease tolerance. Big soft pumpkins suit cooler, drier spots.
Get clean, healthy seed: plump, fully-filled seed from a trusted dealer, or well-dried seed saved from a strong, ripe, disease-free fruit of an open-pollinated (not hybrid) plant. Seed off a sickly plant carries its troubles into the next crop.
Keep enough for 2–3 seeds per hill at your wide spacing, plus a little spare to fill gaps.
Sort out any shrivelled, mouldy or insect-bored seed — it comes up weak and patchy — and store the good, plump seed dry, cool and away from insects until you sow.
- Do:
Save seed only from a strong, ripe, disease-free fruit of an open-pollinated type — seed from a sickly plant carries its troubles into your next crop.
- Tip:
Sowing shrivelled, mouldy or insect-bored seed — it gives weak, patchy stands. Sort to plump, sound seed.
Prepare stations + manure Recommended
Pumpkins are heavy feeders that hate wet feet. A hill of loose, rich, well-rotted manure gives the young plant a warm, free-draining pocket to race away in — and stops water sitting around the stem, which rots young roots.
In the two weeks before sowing, at each planting spot dig a hole about two hand-spans wide and one deep (≈40 cm across, ≈20 cm down), at the wide spacing your plan gives.
Mix in 2–4 kg of well-rotted manure or compost — a spadeful or two — with the topsoil, then heap it back into a low, broad hill (mound) about a hand-span (≈20 cm) high.
Use only well-rotted manure — dark, crumbly, no sharp smell. Fresh manure burns the young roots and brings weed seeds, so let it rot first.
Build the hills on well-drained ground; on flat or heavy soil raise them higher so water drains away from the stem. Water once so the hill settles before you sow.
- Tip:
Planting in a low spot or a hard pan where water pools — pumpkin roots rot in wet feet. Raise the hill and pick free-draining ground.
- Watch out:
Wash your hands after handling manure, and keep it away from drinking water.
Plan a cucurbit rotation Recommended
Growing pumpkins, cucumbers, melons or gourds on the same land year after year lets their shared enemies — powdery and downy mildew, wilt, and root-knot nematodes (tiny soil worms that swell the roots) — build up in the soil until they wreck the crop. A break of a few years starves those enemies out.
When you pick the field — up to two months before sowing — choose ground where no cucurbit (pumpkin, squash, cucumber, melon, gourd or watermelon) has grown for at least 2–3 years.
Follow pumpkins with unrelated crops such as maize, beans, groundnuts or leafy greens, which don't share the same diseases.
Clear away volunteer pumpkin plants and old vine heaps nearby; they carry beetles and disease over to your new crop. Watch too for plants that suddenly wilt and die, or roots dug up swollen and knotted — signs those soil enemies are already there.
Choose a sunny, open, well-drained field; shade and trapped, still, damp air feed mildew.
- Tip:
Back-to-back cucurbits on the same land — mildew, wilt and nematodes build up in the soil and hit the next crop harder.
- Do:
Keep a simple note of what grew where, so you can space your cucurbits years apart.
Sowing & establishment
Pumpkin seed only wakes up in warm soil — sown into cold, wet ground it just rots. Wait until frost is past and the soil is warm, sow a few seeds on each rich hill, keep them moist, and guard the tender seedlings, because a few beetles can strip a hill in days.
Sow hills (2–3 seeds) Critical
This is the start of everything. Seed dropped into warm, moist soil at the right depth comes up fast and even; sown too early into cold, wet ground it rots before it sprouts. Getting the warmth, depth and spacing right now sets the whole crop.
Sow only once frost risk has passed and the soil is warm — it should feel warm, not cold, to the back of your hand. Cold soil rots the seed, so a warm start beats an early date.
Drop 2–3 seeds into each rich hill, laid flat or edge-down, about one finger-joint deep (3–5 cm) — a little deeper in dry, sandy soil, shallower in heavy, wet soil.
Keep the wide spacing your plan gives — roughly two strides between rows (≈1.8 m) and a stride and a half between hills (≈1.5 m) along the row — the vines need room to run.
Cover and firm the soil gently over the seed so it sits snug in moist earth, and keep the hill moist (not soaked) until seedlings show in about 5–10 days.
Once they are up with their first rough (true) leaves, you'll thin to the strongest 1–2 plants per hill (next task).
- Tip:
Sowing too early into cold or waterlogged soil — the seed simply rots. Wait for warm soil.
- Do:
Keep the hill damp until seedlings show — steady moisture gives an even stand.
- Watch out:
Water gently at the hill; a hard splash on bare seed washes it out or caps the soil so seedlings can't push through.
Thin to 1–2 plants/hill Recommended
You sow a few seeds per hill for insurance, but leaving them all crowds the hill — the plants fight for food, water and light and all stay small. Thinning to the best 1–2 gives each strong plant room to run and fruit.
About 10–14 days after sowing, once the seedlings have their first true (rough-edged) leaves, pick the 1–2 strongest on each hill.
Snip the weaker ones off at ground level with a knife or your nails — don't pull them, or you tear the roots of the one you keep.
Leave 1–2 sturdy plants per hill, evenly spread. A stray gap can be filled by shifting a spare seedling with a ball of soil in the cool of evening and watering it in.
- Tip:
Pulling seedlings out by hand — it disturbs the roots of the neighbour you want to keep. Cut them off instead.
- Do:
Thin on a cool, moist evening so the plants you keep aren't stressed.
Scout (beetles, cutworms) Recommended
The first two weeks decide your stand. Cucumber beetles and cutworms can clear a hill of seedlings in a night or two, and damping-off can rot them at the soil line — all fixable only if you catch them early. Ten minutes every few days protects the whole crop.
From a few days after sowing, walk the hills twice a week while the plants are small — look closely at the seed leaves (the first, smooth pair) and the first true leaves.
Cucumber / red pumpkin beetles: look for shiny reddish, striped or spotted beetles and the round holes and window-scars they chew in the leaves. A few can skeletonise a seedling — hand-pick them in the cool of morning when they're slow, and squash any egg clusters.
Cutworms: look for seedlings cut clean off at ground level (worst overnight); scratch the soil by the stump to find the fat, grey, curled caterpillar and destroy it.
Damping-off: look for seedlings that suddenly topple with a thin, water-soaked, pinched brown stem at the soil line, and bare patches spreading on the hill — a rot brought on by cold, wet, over-watered soil.
Count what you're losing. If beetles are stripping seedlings, act now — hand-pick them, and only if numbers are high treat as your beetle guide advises. If damping-off starts → ease off watering, improve drainage, and re-sow the bare spots on a fresh, better-drained hill.
- Watch out:
Beetles are slow and easy to catch in the cool of early morning — that's the time to hand-pick them off the seedlings.
- Do:
Let the hill surface dry between waterings once seedlings are up — soggy soil is what breeds damping-off.
Vines run, ground covers & leaf harvest
Now the vines run out and knit into a leafy mat that smothers weeds — and you can start picking the young shoots and leaves (muboora / ithanga) for the pot and the market. Keep the field weeded until the canopy closes, watch for mildew and aphids, and don't overstrip the vines you'll need to carry the fruit.
Early weeding (until vines cover ground) Critical
While the vines are still small and haven't covered the ground, weeds steal the water, food and light the crop paid for. Keeping it clean until the canopy closes is the cheapest yield you'll ever gain — after that the pumpkin's own leaf-mat keeps weeds down for you.
Weed from about two weeks after sowing until the vines cover the ground (roughly 5 weeks after sowing) — before the weeds get bigger than the crop.
Hoe shallowly between and around the hills — deep hoeing near the plant cuts the surface roots and the running vines.
Lift and move the vine tips gently to weed under them, then lay them back pointing the same way — don't flip a vine over.
Once the leaf-mat closes over the soil, stop weeding — the canopy now shades weeds out on its own.
- Tip:
Overstripping the vines for leaf while you weed — leave enough canopy to shade the ground and carry the fruit.
- Watch out:
Step carefully among the running vines; a trodden or snapped vine is lost fruit.
Start leaf/shoot picking Optional
The young shoots and leaves (muboora / ithanga) are a prized relish and an early income — food from the field weeks before any fruit. Picked the right way (cut-and-come-again, meaning you take a little and the plant regrows more) the vine keeps throwing new shoots; picked too hard, you strip the leaves the plant needs to make fruit.
Start from about a month after sowing (~30 days), once the vines are running strongly and have plenty of leaf to spare.
Pinch or cut the soft shoot tips and young tender leaves — the top two hand-spans (≈40 cm) of a running vine — leaving the older leaves and the main vine in place.
Take only a few shoots from each plant each time, every 7–10 days; the vine branches and gives you more (cut-and-come-again).
Leave most of the canopy — the leaves are the plant's food factory for the fruit. Growing mainly for fruit? Pick lightly. Growing for leaf? Pick more, but never bare a vine.
Leaves are perishable — use them fresh within a day or two, or blanch and dry them for the dry season.
- Do:
Pick in the cool of morning and keep the shoots shaded and damp — they wilt fast in the sun.
- Tip:
Stripping a vine bare for leaf — you trade away the fruit. Leave enough leaf to shade the ground and feed the fruit.
Scout (mildew, aphids/virus) Recommended
As the canopy thickens, mildews and aphids move in fast in the humid air under the leaves. Powdery and downy mildew shut down the leaf factory, and aphids suck the sap and spread viruses that stunt and mottle the plant. Catch them early, before they spread over the whole mat.
Walk the field once a week, from about two weeks after sowing — turn leaves over and check the shoot tips and the shaded lower leaves.
Powdery mildew: look for white-to-grey powdery patches on leaves and stems, like a dusting of flour, that spread and turn leaves yellow and dry. It likes warm days and humid nights — even without rain.
Downy mildew: look for pale-yellow, angular patches boxed in by the leaf veins on the upper side, with a matching grey or purplish furry growth on the underside in damp weather; the patches brown and the leaf dies.
Aphids: look for clusters of tiny green, grey or black insects on the shoot tips and leaf undersides, curled and distorted leaves, and sticky honeydew with black sooty mould. Yellow, mottled, crinkled young leaves mean they've spread virus.
Act early: pick off and destroy the first mildewed leaves, and squash or wash off aphid colonies; rogue out (uproot and remove) badly virus-mottled plants so aphids don't carry it on. For spreading mildew, treat as your disease guide advises — and never spray once flowers are open, to spare the bees.
- Do:
Keep weeds down and don't over-shade the crop — dense, still, damp canopies are where mildew starts. Airflow keeps it dry.
- Watch out:
If you must spray, first cover your skin, nose and eyes, spray in the cool of day with the wind at your back and off open flowers, then wash well. Mind the pre-harvest interval — the safe wait between spraying and picking — it matters doubly here because you eat the leaves.
- Tip:
Watering the leaves in the evening — leaves that stay wet overnight feed downy mildew. Water at the base, in the morning.
Flowering & pollination
This is the make-or-break window. Each plant opens male flowers first, then female flowers — and a female flower only becomes a fruit if a bee carries pollen to it. If bees can't work, the tiny fruit yellows and drops and you get flowers but no pumpkins. Protect the bees above all, and keep the moisture steady so the young fruit sets and holds.
Protect pollinators Critical
No bees, no pumpkins. The female flower must receive pollen from a male flower, and it's bees that carry it. An insecticide sprayed on open flowers kills the very bees that set your fruit — one careless spray during flowering can cost you the crop.
From when the first flowers open, learn the two flowers apart: the male sits on a thin straight stalk; the female has a tiny pumpkin — a little swelling — just behind its petals. Only females become fruit, and only if pollinated.
Do not spray any insecticide on or near open flowers, and never during bee hours (the cool of morning, when flowers are open and bees are working). If a pest truly must be treated, do it late in the evening after the flowers close, and keep it off the blooms.
Keep bees welcome — leave a few flowering weeds nearby and avoid anything that drives them off. The more bees visiting, the better the fruit set.
Only where bees are truly scarce, hand-pollinate in the early morning: pick a freshly-open male flower, tear off its petals, and dab its powdery centre onto the sticky centre of each open female flower. One male can serve several females — and do it early, as the flowers are only good for a few hours after they open.
- Tip:
Spraying open flowers — it kills the bees that set the fruit. Time any pest treatment for after dark and keep it off the blooms.
- Watch out:
Flowers that open, wither and drop with a tiny fruit that yellows and shrivels mean pollination failed — hand-pollinate the next few mornings until bees return.
- Watch out:
As young fruit forms, watch for fruit flies: tiny sting punctures that ooze sap on the little fruit. Pick off and bury stung fruit, and use bait traps rather than sprays that would harm the bees.
Keep moisture steady through set Recommended
Flowering and fruit-set is one of the crop's thirstiest, most sensitive times. If the soil dries out now, the plant drops its flowers and young fruit to save itself — steady moisture holds that young fruit on the vine.
Through flowering and fruit set, keep the soil evenly moist in the root zone — water every 5–7 days, more often in heat and on sandy soil.
Water at the base, in the morning, and try to keep the leaves and open flowers dry — wet flowers and overnight leaf-wetness invite rot and mildew.
Check with a finger: water when the soil a hand-span down (≈20 cm) is dry; don't wait for the vines to wilt.
Keep it steady — don't swing between bone-dry and flooded. If water is short, a mulch of dry grass under the vines holds moisture and keeps young fruit off wet soil.
- Do:
Water in the morning at the roots so leaves and flowers dry quickly — that spares the bees and starves the mildews.
- Tip:
Letting the crop wilt during flowering — a single hard dry spell now sheds the flowers and young fruit.
Fruit set & fill
Now the fruit swells and fills — the thirstiest, hungriest window of the whole season (about 8–13 weeks after sowing). Steady water and potassium now build big, heavy, well-shaped fruit; short the crop now and you lose the most marketable yield. Keep every fruit off wet soil and watch for rots.
Potassium at fruit fill Recommended
As the fruit fills, the plant's biggest hunger is for potassium (K) — the nutrient that builds firm, sweet, heavy, well-coloured fruit that stores well. A feed of potash now, as the first fruits set, goes straight into fruit weight and quality.
Apply about 8 weeks after sowing (~55–65 days), as the first fruits begin to swell.
Band the potassium fertiliser (such as muriate of potash) in a shallow line a hand-span (≈20 cm) to the side of the plants — not touching the stems or roots — about a small handful per plant (your recommendation gives the exact amount).
Apply on moist soil and cover it or water it in so it reaches the roots and doesn't just sit on top.
Keep the fertiliser off the leaves and fruit — brush off any grains that land on them.
- Do:
Weed first, then feed — so the potassium goes to the crop, not the weeds.
- Tip:
Piling fertiliser against the stem — it scorches the plant. Band it to the side and water it in.
- Watch out:
Wash your hands after handling fertiliser, keep it off wet leaves, and store it away from food, water and children.
Steady water through fill Critical
This is the top watering priority of the season. The fruit is mostly water and it's filling fast now — a dry spell here gives small, misshapen, few fruit, and no later watering can win that weight back.
From about 8 weeks after sowing through fruit fill, keep the soil steadily moist — water every 5–7 days, more often in heat and on sandy soil.
Water deeply each time so moisture reaches the deep roots (pumpkin roots go down over a metre), rather than a daily light sprinkle.
Water at the base, not over the fruit, and keep a dry mulch (grass or straw) under each fruit so it fills on dry bedding, not wet soil.
Never let the crop wilt through fruit fill — if water is short all season, this is the stage to spend it on.
As the fruit nears full size and the rind starts to harden and colour, ease off the watering to let the fruit firm up for storage.
- Watch out:
If water is limited, spend it here, on fruit fill — it pays back more than at any other stage.
- Tip:
A sudden heavy soaking after a dry spell — a fast-drinking fruit can split. Keep the water steady.
Scout (fruit rots) Recommended
Now the fruit you've grown is on the line. Fruit rots attack where a fruit lies on wet soil or where its skin is broken — a fruit lost to rot now is a whole plant's season gone. Weekly checks let you save it.
Once a week, from about 8 weeks after sowing, lift and look under each swelling fruit and along the vines.
Fruit rot / belly rot: look for soft, sunken, watery or mouldy patches — often on the underside where the fruit touches damp soil, or a soft, darkening blossom end (the old flower end). A fuzzy grey or white mould may cover it.
Slip a dry pad under each fruit — a flat stone, tile, board, or a thick pad of dry grass — to lift it off the wet ground, and turn fruit gently now and then so no one side stays damp.
Cut off and bury or bin any rotting fruit the day you see it, so the rot doesn't spread to healthy ones, and keep watering at the base to keep the fruit skins dry.
Watch too for fruit-fly stings (sap-oozing punctures) on the fruit and any late mildew on the leaves. If rot is spreading fruit to fruit → remove every rotten one at once and get the rest up onto dry pads.
- Do:
Get every fruit off the bare soil onto a dry pad — it's the single best guard against belly rot.
- Watch out:
Rot spreads from fruit to fruit in a damp canopy — remove the first rotten one the day you spot it.
Maturity & harvest
Pick the fruit fully mature so it stores — an under-ripe pumpkin won't keep. The plant tells you when: the rind hardens, the fruit sounds hollow, the stem dries and corks, and the patch where it sat changes colour. Cut it with a stub of stem and handle it like eggs — a broken stem or a bruise is where rot gets in. Leaves can still be picked to the end.
Harvest mature fruit with a stem stub Critical
Only a fully mature fruit will cure and store for months — picked too soon it shrivels and rots in weeks. And a fruit is only as good as its stem: carry it by the stem and the stem snaps off, opening a wound that lets rot straight in.
From about 3 months after sowing (~90–120 days), check each fruit for the four ripe signs: the rind is hard and resists your thumbnail, it sounds hollow when you tap it, the stem has gone dry and corky, and the ground-spot (where it sat on the soil) has turned a deep cream or orange.
Cut the fruit off with a knife, leaving a short stem stub (≈5–8 cm, about two finger-joints) on the fruit — never twist or tear it off.
Carry and set fruit down gently, by the body — never by the stem. A snapped stem or a bruise is an open door for rot.
Harvest on a dry day, and before frost if a cold snap threatens — frost damages the fruit and ruins storage.
Leaves and shoots can still be picked as you clear the vines — use them fresh or dry them.
If the rind still dents under your thumbnail or the stem is still green → it isn't ready. Leave it on the vine to finish, and check again in a week or two.
- Tip:
Carrying fruit by the stem — a broken stem lets in rot and cuts storage life to nothing. Carry by the body.
- Do:
Cure and store only sound, unbruised, fully-ripe fruit; eat the nicked, cut or immature ones soon.
- Watch out:
Handle every fruit gently — bruises you can't even see turn into rot in the store.
Curing & storage
A pumpkin is grown to keep — but only if you cure it first. About ten days in warm, airy shade hardens the rind and heals the little wounds, so the fruit can then sit in a cool, airy store for 2–3 months. Skip the curing and it rots long before you've eaten or sold it. Leaves don't keep — eat them fresh or dry them.
Cure mature fruit Recommended
Curing is what turns a fresh fruit into a storable one. About ten days in warm, airy shade hardens the rind, heals harvest wounds, and slows the fruit's breathing — skip it and even a perfect fruit rots in weeks instead of keeping for months.
Straight after harvest, lay the sound fruit in a warm, airy, shaded spot out of the rain and sun — a warm room, a shaded veranda, or under a roof — not left in the field overnight where dew and frost reach it.
Hold it there for about 10 days, warm and a little humid (around 27–29 °C — comfortably warm, not baking), with air moving around every fruit (space them out, don't pile them).
Over the ten days the rind hardens so your thumbnail won't mark it, and the stem scar and any little wounds dry and heal over.
If after ten days the rind still dents easily, or a fruit is soft, bruised or rotting → it isn't fit to store. Cure the firm ones a little longer, and eat or sell the soft ones now.
- Do:
Cure the fruit before storing — skipping it shortens storage life sharply.
- Watch out:
Keep curing fruit off wet ground and out of frost — a single cold night undoes the curing.
Store cured fruit Recommended
Stored right, cured pumpkins feed you for 2–3 months into the dry season, when food and prices are tight. Stored wrong — piled up, damp, or too warm — they sweat, bruise and rot, and one bad fruit can take the whole heap.
Store only cured, sound, unbruised fruit — set aside any with cuts, soft spots or broken stems to eat first.
Keep them in the coolest, driest, airiest place you have (ideally around 10–13 °C — cool but not cold, and never frosty, which turns the flesh to mush).
Spread the fruit in a single layer, not touching, off the floor on a shelf, rack or slatted bench — so air moves around each one and one bad fruit can't rot its neighbours.
Don't stack or bag pumpkins, and keep them dry — no washing before storage; wetness and piling cause rot.
Check the store every week or two and pull out any fruit that softens or spots before it spreads. Good moschata fruit keeps 2–3 months this way.
- Do:
Store fruit in a single layer, off the floor, not touching — airflow is what makes them keep.
- Tip:
Piling pumpkins in a heap or a sack, or storing them damp — they sweat, bruise and rot from the middle out.
- Watch out:
A soft spot, a leak or a whiff of rot means that fruit is going — take it out at once so it doesn't spread.
Where to sell pumpkin and butternut (winter squash)
Markets that trade this crop — what each one sells it by, when supply peaks there, and the currency used.


Grow pumpkin and butternut (winter squash) with a plan, not a guess
This guide is the general answer. Divisi works out yours — the week to plant pumpkin and butternut (winter squash) on your soil and your rainfall, and each job dated for your field.


When to plant pumpkin and butternut (winter squash), country by country
- When to plant pumpkin and butternut (winter squash) in Algeria
- When to plant pumpkin and butternut (winter squash) in Angola
- When to plant pumpkin and butternut (winter squash) in Benin
- When to plant pumpkin and butternut (winter squash) in Botswana
- When to plant pumpkin and butternut (winter squash) in Burkina Faso
- When to plant pumpkin and butternut (winter squash) in Burundi
- When to plant pumpkin and butternut (winter squash) in Cabo Verde
- When to plant pumpkin and butternut (winter squash) in Cameroon
- When to plant pumpkin and butternut (winter squash) in Comores
- When to plant pumpkin and butternut (winter squash) in Congo
- When to plant pumpkin and butternut (winter squash) in Côte d'Ivoire
- When to plant pumpkin and butternut (winter squash) in Egypt
- When to plant pumpkin and butternut (winter squash) in Eritrea
- When to plant pumpkin and butternut (winter squash) in Eswatini
- When to plant pumpkin and butternut (winter squash) in Ethiopia
- When to plant pumpkin and butternut (winter squash) in Gabon
- When to plant pumpkin and butternut (winter squash) in Gambia
- When to plant pumpkin and butternut (winter squash) in Ghana
- When to plant pumpkin and butternut (winter squash) in Guinea Ecuatorial
- When to plant pumpkin and butternut (winter squash) in Guinea-Bissau
- When to plant pumpkin and butternut (winter squash) in Guinée
- When to plant pumpkin and butternut (winter squash) in Kenya
- When to plant pumpkin and butternut (winter squash) in Lesotho
- When to plant pumpkin and butternut (winter squash) in Liberia
- When to plant pumpkin and butternut (winter squash) in Libya
- When to plant pumpkin and butternut (winter squash) in Madagascar
- When to plant pumpkin and butternut (winter squash) in Malawi
- When to plant pumpkin and butternut (winter squash) in Mali
- When to plant pumpkin and butternut (winter squash) in Mauritanie
- When to plant pumpkin and butternut (winter squash) in Mauritius
- When to plant pumpkin and butternut (winter squash) in Morocco
- When to plant pumpkin and butternut (winter squash) in Moçambique
- When to plant pumpkin and butternut (winter squash) in Namibia
- When to plant pumpkin and butternut (winter squash) in Niger
- When to plant pumpkin and butternut (winter squash) in Nigeria
- When to plant pumpkin and butternut (winter squash) in Rwanda
- When to plant pumpkin and butternut (winter squash) in République centrafricaine
- When to plant pumpkin and butternut (winter squash) in République démocratique du Congo
- When to plant pumpkin and butternut (winter squash) in Sao Tome and Principe
- When to plant pumpkin and butternut (winter squash) in Seychelles
- When to plant pumpkin and butternut (winter squash) in Sierra Leone
- When to plant pumpkin and butternut (winter squash) in Somalia
- When to plant pumpkin and butternut (winter squash) in South Africa
- When to plant pumpkin and butternut (winter squash) in South Sudan
- When to plant pumpkin and butternut (winter squash) in Sudan
- When to plant pumpkin and butternut (winter squash) in Sénégal
- When to plant pumpkin and butternut (winter squash) in Tchad
- When to plant pumpkin and butternut (winter squash) in Togo
- When to plant pumpkin and butternut (winter squash) in Tunisie
- When to plant pumpkin and butternut (winter squash) in Uganda
- When to plant pumpkin and butternut (winter squash) in United Republic of Tanzania
- When to plant pumpkin and butternut (winter squash) in Zambia
- When to plant pumpkin and butternut (winter squash) in Zimbabwe
Where pumpkin and butternut (winter squash) scores best
Districts where Divisi's engine currently rates this crop highest, ranked by fit.
-
 Bomongo
 -
 Firestone
 -
 Shagamu
 -
 Moyamba
 -
 Cacuso
 -
 Okano
Okano -
 Zanaga
 -
 Ebebiyin
 -
 Naivasha
 -
 Bangui-Rapides
 -
 Maracha
 -
 Prefecture de M diq Fnideq
Get Insights by email
A short digest of new Divisi articles. No email on quiet weeks.
Frequently asked questions
How do I grow pumpkin and butternut (winter squash)?
How to grow pumpkin and butternut (winter squash): 90–120 days to maturity, 180 cm rows. Also called pampoen, dzungu, courge, ithanga, lephutshe, lephutse.
What is pampoen in English?
Pampoen (also botterskorsie) is the Afrikaans name for pumpkin and butternut (winter squash).
What is dzungu in English?
Dzungu is the Chichewa name for pumpkin and butternut (winter squash).
What is courge in English?
Courge (also citrouille and potiron) is the French name for pumpkin and butternut (winter squash).
What is ithanga in English?
Ithanga is the Ndebele, Xhosa and Zulu name for pumpkin and butternut (winter squash).
What is lephutshe in English?
Lephutshe is the Sesotho name for pumpkin and butternut (winter squash).
What is lephutse in English?
Lephutse is the Setswana name for pumpkin and butternut (winter squash).
What is muboora in English?
Muboora is the Shona name for pumpkin and butternut (winter squash).
What is malenge in English?
Malenge (also boga) is the Swahili name for pumpkin and butternut (winter squash).
What is elegede in English?
Elegede is the Yoruba name for pumpkin and butternut (winter squash).
How long does pumpkin and butternut (winter squash) take to grow?
Pumpkin and butternut (winter squash) takes about 90–120 days from sowing to maturity, though the exact length varies with variety, temperature and how the season runs.
What spacing should I use for pumpkin and butternut (winter squash)?
Space pumpkin and butternut (winter squash) rows about 180 cm apart, with roughly 150 cm between plants within the row.