 Divisi
How to grow African nightshade
Solanum scabrum · Solanaceae
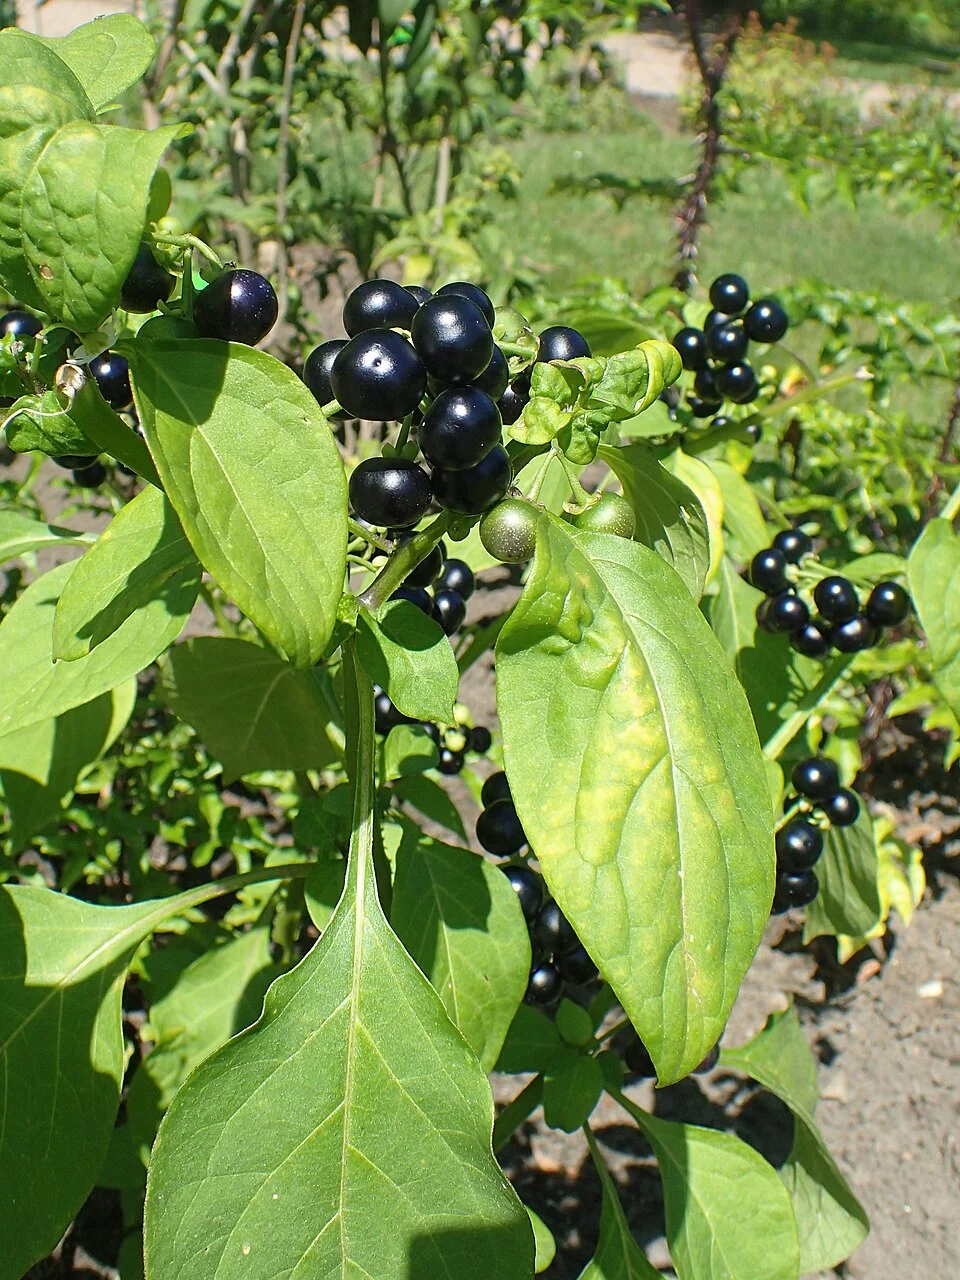
Photo: Krzysztof Ziarnek, Kenraiz · CC BY-SA 4.0
African nightshade (Solanum scabrum — mnavu, managu, osuga, nsugga, umsobo) is one of Africa's most-loved traditional leafy vegetables: soft, dark, iron- and vitamin-rich leaves that cook down fast and sell steadily at market. You grow it quickly from tiny, dust-fine seed — first raised close together in a small nursery, then transplanted into a rich bed — and then you harvest the same plants again and again (cut-and-come-again) for two to four months. It is a hungry, thirsty crop that pays you back in tender leaf when you keep feeding it nitrogen and keep its shallow roots moist. One warning: it is a cousin of tomato, potato, pepper and eggplant, so it catches the same bacterial wilt and blight — never plant it where those grew last season. And eat only the cooked leaves and the fully ripe, purple-black berries of cultivated types; unripe green berries and unknown wild forms can be poisonous.
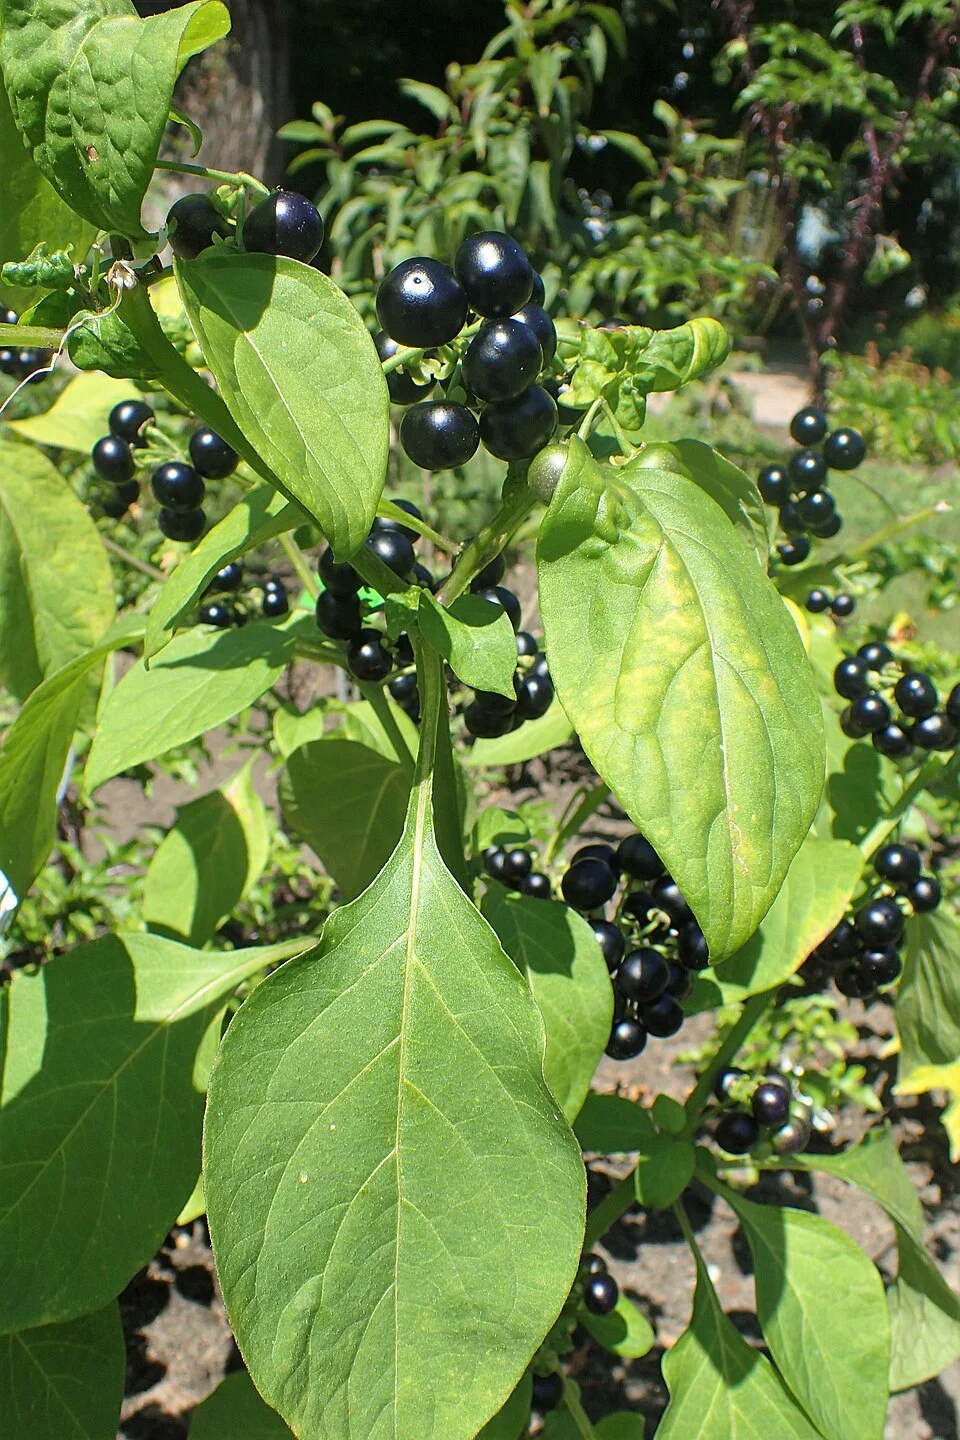
Krzysztof Ziarnek, Kenraiz · CC BY-SA 4.0 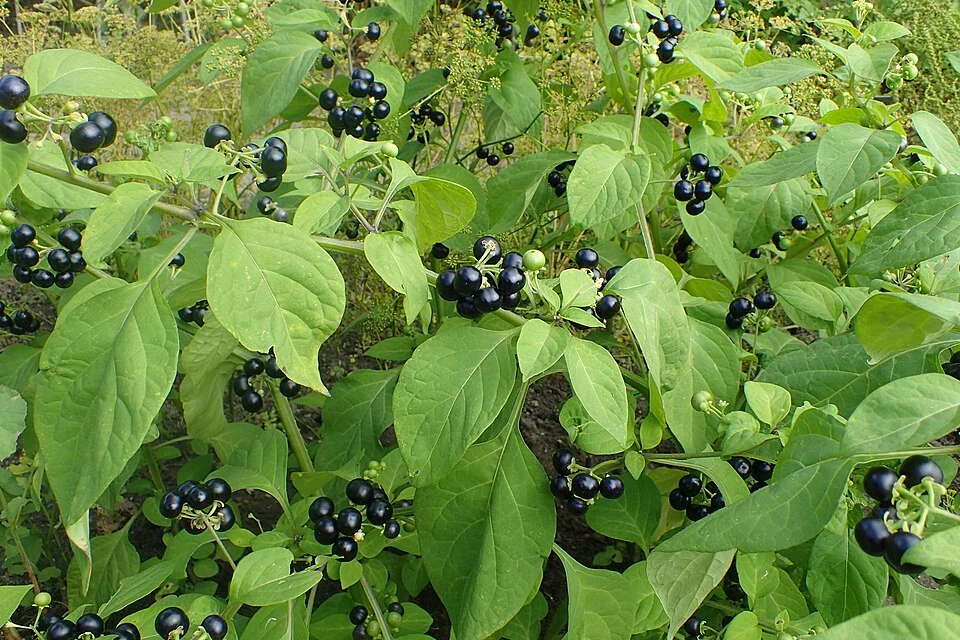
Krzysztof Ziarnek, Kenraiz · CC BY-SA 4.0
- Days to maturity
- 60–120 days
- Row spacing
- 40 cm
- Plant spacing in the row
- 20 cm
- Sowing depth
- 0.5–1 cm
These are general figures for the crop, compiled from published agronomic references including FAO and CABI. The right choice for your field depends on your soil, rainfall and the yield you are aiming for.
Will African nightshade actually do well on your field? Check your own field against every crop in the catalogue — no signup. Run the crop check →
Also known as
African nightshade is also called black nightshade and garden huckleberry.
- English
- black nightshade, garden huckleberry
- Afrikaans
- nastergal
- Kikuyu
- managu
- Luganda
- nsugga
- Luo
- osuga
- Swahili
- mnavu, mnafu
- Yoruba
- odu
- Zulu
- umsobo
Working in buckets, bags or paces? The farming glossary turns the measures growers actually use into kilograms and hectares — what a 20 litre bucket of each crop really weighs, and how to size a field by walking it — alongside the Shona, Swahili, Ndebele and Yoruba words used in the field. Open the glossary →
Growing African nightshade, stage by stage
Your African nightshade season, step by step — raise strong seedlings in a nursery, transplant them into a rich, well-drained bed, feed and water them for tender leaf, then harvest the same plants again and again while dodging the wilt and blight of the tomato family.
Sow the nursery and prepare the bed
African nightshade seed is as fine as dust, and the seedlings are delicate — you cannot throw such tiny seed straight into a rough field and expect an even crop. So you raise the seedlings close together in a small, sheltered nursery where you can water gently and watch them, then move only the strongest out. The danger to beat here is damping-off — seedlings rotting off at the base when the bed is sown too thick, kept too wet, or too shaded.
Sow fine seed in a moist seedbed Critical
African nightshade seed is as fine as dust — one gram holds well over a thousand seeds. Sown too thick or too deep, most never reach the light, or they come up crowded and rot. A careful nursery turns that tiny, costly seed into strong, even seedlings you can pick the best from.
Make a small, sheltered nursery bed of fine, crumbly soil, raised a little so water drains away. A bed about a stride wide (1 m) is easy to reach across without treading on the seedlings.
The seed is dust-fine, so mix a pinch of seed into a tin of dry sand or fine dry soil first. The sand carries the seed and lets you scatter it thinly and evenly — sown on its own it lands in clumps.
Scatter the sand-and-seed mix thinly over the moist bed, then barely cover it — no deeper than a fingernail (about 0.5 cm). Fine seed buried deep never reaches the light.
Water gently with a fine rose or a soft sprinkle — a hard splash washes the seed into heaps. Keep the bed evenly moist, never soaked, until the seedlings show, which takes about 5 to 21 days.
Once they crowd each other, thin out or prick out the weaker seedlings so the ones you keep stand about a finger-joint apart (3–5 cm) and grow sturdy, not thin and leggy.
Watch for damping-off: seedlings that suddenly flop over with a thin, dark, water-soaked pinch at the soil line, dying in spreading patches. It comes from sowing too thick, too wet, or too shaded — so sow thin, ease off the water, and give them light and air.
- Tip:
Siting the nursery or the crop where tomato, potato, eggplant or pepper grew — they share the same bacterial wilt and blight, which live on in the soil.
- Tip:
Sowing thick or keeping the bed soaked — both invite damping-off, which rots seedlings off at the base in patches.
- Do:
Sow a little more than you think you need, so you can transplant only the strongest seedlings and throw the weak ones away.
Build a fertile, well-drained bed
While the nursery grows, build the bed it will move into. African nightshade is a hungry, thirsty leaf crop, so the whole job here is a deep, fertile, well-drained bed — rested away from tomato, potato, pepper and eggplant, and worked full of well-rotted manure. If you're not raising your own seedlings, buy strong, clean ones now.
Build a fertile, well-drained bed + manure Critical
African nightshade is a hungry, thirsty crop grown for its leaf, and leaf comes from rich, living soil. A deep, fertile bed full of rotted manure holds the moisture the shallow roots need and feeds steady leaf growth — and good drainage is your first defence against the wilt and blight that rot this crop in soggy ground.
About two weeks before you transplant, choose a well-drained spot that did not grow tomato, potato, pepper, eggplant or nightshade last season — a rest of two to three seasons from those crops starves out the shared wilt and blight.
Dig the bed deep and break it to a fine, crumbly tilth, so the fine roots spread easily and rain soaks in instead of pooling.
Work in plenty of well-rotted manure or compost — dark, crumbly and sweet-smelling, never fresh and strawy. About two good handfuls (a kilo or so) forked into every square pace (1 m × 1 m) of bed is a generous rate for a leaf crop.
On heavy or wet ground, raise the bed into ridges or a mound so the roots never sit in water — waterlogged nightshade rots and wilts.
Let the finished bed settle for a week or two before transplanting, so the manure is well mixed in and won't scorch the young roots.
- Do:
Give the bed a two-to-three-season break from tomato, potato, pepper and eggplant — the single best guard against bacterial wilt, which has no cure.
- Tip:
Fresh, raw manure — it burns young roots and brings weed seeds. Let it rot down to dark crumbs first.
- Watch out:
Wash your hands after handling manure, and keep it away from drinking water.
Source healthy seedlings Critical
If you're not raising your own, the seedlings you buy are your crop — a weak or wilt-carrying transplant never fully recovers, and this crop shares its worst disease, bacterial wilt, with tomato, potato, pepper and eggplant. Buy strong, clean plants from a trusted nursery in the week before you transplant.
Buy stocky, dark-green seedlings 4 to 6 true leaves, thick as a matchstick — not tall, thin or pale ones.
Check each one for wilting, blighted spots, or curled leaves — reject the whole batch if many look sick, since bacterial wilt has no cure once it's in your bed.
Buy from a nursery that raises seedlings well away from tomato, potato, pepper or eggplant plots — those crops carry the same wilt and blight.
Transplant them within a day or two of buying, keeping them shaded and watered until you do.
- Do:
Pick short, stocky, dark-green seedlings — they root fast and start giving you leaf sooner.
- Tip:
Buying cheap, leggy or wilted-looking seedlings from a nursery grown near tomato-family crops — you're buying a wilt risk with no cure.
Transplant and settle them in
Moving the seedlings is the shock point of the whole crop: lift them gently, set them at the right spacing into the rich bed with phosphorus at their roots, and keep the soil moist for the first two weeks while they take hold. This is also where the deadly bacterial wilt strikes — a plant that suddenly flops while its leaves stay green. There is no cure, so your job is to spot and pull the first sick plants fast and never spread their soil.
Transplant + basal manure/P Critical
Transplanting is the crop's biggest shock. Seedlings set at the right spacing, into moist, rich soil with phosphorus at their roots, recover fast and race away; crowded, dry or starved seedlings sulk — and a leaf crop that sulks early never fully catches up. Phosphorus in the planting hole builds the strong root system that carries every future harvest.
Transplant when the seedlings have 4 to 6 true leaves — usually about 3 to 4 weeks after you sowed the nursery — and are as thick as a matchstick.
Do it in the cool of late afternoon or on a dull day, never in hot sun. Water the nursery well an hour before lifting, so each seedling comes up with a ball of soil on its roots instead of bare and torn.
Space them two hand-spans apart between rows (about 40 cm) and one hand-span apart along the row (about 20 cm) — close enough to shade the ground, open enough for air to move through and keep blight down.
In each planting hole mix in a good handful of well-rotted manure and the phosphorus fertiliser your recommendation gives, then cover it with a little soil so the tender roots never touch the fertiliser directly.
Set the seedling at the same depth it grew in the nursery, firm the soil gently so no air pockets remain, and water it in straight away to settle the roots.
Keep the bed moist but never waterlogged for the first two weeks — this is the make-or-break window while the roots take hold.
- Do:
Transplant late in the day and water in at once — seedlings moved in hot sun wilt and die before they can root.
- Tip:
Letting fertiliser touch the roots in the hole — cover it with soil first, or it scorches them.
- Watch out:
Keep fertiliser off the leaves and out of reach of children and animals, and wash your hands after handling it.
Keep moist through establishment Critical
For the first two weeks the roots are tiny and shallow and dry out in a day. Steady moisture now decides how many seedlings live and how fast they take off — this is the crop's most water-sensitive moment. Let them wilt hard even once and you lose plants and set the whole crop back.
Water every 2 to 3 days through the first two weeks, and more often in hot, windy weather or on sandy soil that dries fast.
Water in the cool of morning or evening, at the base of the plants, so less is lost to the sun.
Aim for soil that is moist like a wrung-out cloth, not soaked. Push a finger in and water when the top few centimetres feel dry.
Where you can, keep water off the standing leaves in the evening — leaves that stay wet overnight invite blight.
- Tip:
Flooding the bed — nightshade roots rot and wilt in standing water. Keep it moist, not soggy.
- Do:
Lay a light mulch between the plants to hold moisture in and cut how often you must water.
Scout (damping-off, cutworms, wilt) Critical
The first two weeks after transplanting are when the deadliest problems strike — above all bacterial wilt, which can drop a healthy-looking plant dead in a single day. Catching and pulling the first sick plants, and stopping cutworms early, protects every plant around them. Ten minutes, twice a week, is your cheapest insurance.
Walk the bed twice a week, from a couple of days after transplanting, and look closely at plants all over the bed — not just the edge by the path.
Bacterial wilt (no cure — the big danger): look for a plant that suddenly flops in the heat while its leaves are still green, not yellow. To be sure, cut the stem near the ground and stand it in a glass of clean water — milky threads ooze out within minutes.
If you find wilt, pull the whole plant with its soil and carry it right away (never onto the compost), and do not move wet soil or tools from that spot into the rest of the bed. No spray cures it — pulling sick plants fast is the only defence.
Cutworms: look for young transplants cut clean through at ground level overnight and toppled. Scratch the soil around the stump to find the fat, greasy, grey caterpillar curled like a 'C', and squash it.
Damping-off: look for seedlings that flop with a thin, dark, water-soaked pinch at the soil line, dying in spreading patches — a sign the bed is too wet. Ease off the water and improve the drainage.
Act on the first sick plants you see. One plant pulled today can save the whole bed.
- Watch out:
A plant wilting with green (not yellow) leaves that does not perk up overnight is bacterial wilt until proven otherwise — pull it, don't wait.
- Do:
Handle healthy plants first and any sick ones last, and don't carry mud from a wilt patch on your hoe or your feet.
Feed and grow the leaf
Now the plant piles on the tender leaf you sell and eat. Two things drive it: steady nitrogen, fed little and often, and clean, moist, weed-free soil. This is also when the leaf-eaters and blights arrive — aphids and whitefly under the leaves, red spider mite in hot dry spells, beetles chewing holes, and blight in wet weather. Keep feeding, keep scouting, and pinch off any flower buds so the plant stays in leaf instead of running to seed (bolting).
Top-dress nitrogen Recommended
Leaf is built from nitrogen. In a cut-and-come-again crop you carry that nitrogen off with every harvest, so you must keep feeding it back — a steady supply is the single biggest thing that decides how much tender, dark leaf you cut, worth 10 to 25% of your yield. Starve it and the leaves turn small, pale and bitter.
Give the first feed of nitrogen about two weeks after transplanting, once the plants are growing away, and feed again after each big leaf harvest to power the next flush.
Side-dress the nitrogen — the amount your recommendation gives — in a band a hand-width (about 10 cm) to the side of the plants, not on top of them, then cover it or water it in so it doesn't gas off and go to waste.
No bought fertiliser? Well-rotted manure, or a manure 'tea' (a sack of manure steeped in a drum of water for a few days, then poured around the roots) feeds the leaf too.
Leave a few days between feeding nitrogen and cutting leaf to eat or sell — freshly fed leaf stores up nitrate (a substance that builds up when a plant is force-fed), so let it settle first.
Keep fertiliser off the wet leaves (it sticks and scorches them), away from food, water and children, and wash your hands afterwards.
- Do:
Mulch around the plants to hold moisture and smother weeds — it means less watering and less weeding.
- Tip:
Piling on one big dose — a heavy rain washes it straight past the roots. Feed little and often, after each cut.
- Watch out:
Pale, yellowing lower leaves and slow growth mean the crop is hungry for nitrogen — feed it.
Weed + mulch Recommended
Young nightshade is low and leafy and loses to weeds fast — they steal the water, light and nitrogen you're feeding it, and they shelter the pests and diseases that attack it. A clean, mulched bed grows more leaf with less watering.
Weed every 2 to 3 weeks from about two weeks after transplanting, while the weeds are still small and easy to pull.
Hoe shallowly, or pull by hand near the plants — the roots run shallow and wide, and deep hoeing cuts them.
After weeding, lay a mulch of dry grass or leaves between the plants — it holds moisture, keeps the soil cool for the shallow roots, and stops new weeds coming up.
Keep the mulch a hand-width (about 10 cm) back from the stems so damp material doesn't sit against them and start rot.
- Do:
Weed just before you feed nitrogen, so the food goes to your crop and not the weeds.
- Tip:
Deep hoeing close to the plants — nightshade's shallow roots are easily cut.
Scout (aphids, mites, beetles, blight) Critical
As the leaf canopy fills out, the leaf-eaters and blights move in — and on a crop you sell for its leaves, holes, specks and rot are lost money and lost meals. Aphids and whitefly also carry virus. Catching the first small colonies or spots, before they spread, is far easier than fighting a full outbreak.
Walk the bed twice a week and turn over leaves to check the undersides, where most pests hide, on plants right across the bed.
Aphids: clusters of tiny soft green, grey or black insects on the soft shoot tips and under leaves, with sticky 'honeydew' (a shiny, sticky coating they leave behind) and curled young leaves. Whitefly: tiny white flies that puff up in a little cloud when you shake a plant. Both suck sap and spread virus.
Red spider mite (worst in hot, dry spells): leaves turn pale and dusty with fine pale speckling (stippling), then bronze, with faint webbing underneath. Look for moving specks no bigger than dust.
Beetles: tiny flea beetles that hop away leave the leaves peppered with round 'shot-hole' pinpricks; epilachna (hadda) beetles and their spiny larvae scrape leaves to a lacy, dry skeleton.
Blight (in wet, humid weather): early blight shows brown spots with rings inside them, like a target, on the older lower leaves; late blight shows dark, greasy, water-soaked patches that spread fast and rot the leaf, with a whitish mould underneath in cool, damp weather.
Act on the first colonies or spreading spots — squash or wash off small pest patches, pick off the first blighted leaves, and open the matching pest or disease guide before it takes the bed.
- Watch out:
Hot, dry, dusty weather brings red spider mite — check leaf undersides for speckling and webbing then; a spray of plain water knocks back small numbers.
- Do:
Pick off and carry away the first blighted leaves — don't leave them lying in the bed to spread spores.
- Tip:
Working the wet bed while blight is about — you carry the spores from plant to plant on your hands and clothes.
Harvest again and again
This is the payoff — and the trick is that you don't harvest once, you harvest the same plants over and over for weeks. Cut only the tender young tips, leave enough leafy stem for the plant to regrow, feed and water after each cut, and pinch off flowers so it keeps making leaf instead of seed. Handle the leaf gently and keep it cool — it wilts and loses its value within a day.
First harvest Critical
Your first cut comes fast — often just two to three weeks after transplanting, sometimes as early as 10 days on a strong stand. Taking it at the right moment, while the tips are tender, gives you sweet, soft leaf that fetches the best price and wakes the plant up to throw out even more shoots. Leave it too long and the stems go stringy and bitter and the plant starts running to seed.
Take the first harvest from about 10 days to three weeks after transplanting, once the plants are bushy and leafy.
Harvest one of two ways: pick or snap off the tender top shoots (about a hand-length, 10–15 cm), or uproot whole young plants where you sowed thick and want to thin the stand.
Test for tenderness: a ready tip is soft and snaps off cleanly between your fingers. If the stem is stringy and just bends instead of snapping, it has grown too old and tough.
When you cut tips, leave at least a hand-width (10 cm) of leafy stem standing, with some leaves on it, so the plant has the strength to push a fresh flush.
Pinch off any flower buds as you go — once the plant flowers it slows leaf-making and the leaves turn bitter, so removing flowers keeps it in tender leaf for longer.
Harvest in the cool of the morning, keep the leaf shaded, and get it to the pot or market the same day — nightshade leaf wilts and loses its value within a day.
If the tips are already stringy and won't snap → the plant has over-grown or bolted: cut it back harder to force new soft shoots, feed nitrogen and water well, and use the older leaves cooked (still good, just tougher).
- Do:
Pinch out flowers whenever you see them — it keeps the plant making tender leaf instead of seed.
- Tip:
Cutting leaf to eat or sell right after a heavy nitrogen feed — fed leaf stores nitrate, so leave a few days' gap.
- Watch out:
Cut only clean, healthy tips — leave blighted or pest-eaten leaves behind, and don't bunch them in with the good leaf.
Re-harvest + feed Critical
This is where the money is: the same plants keep giving leaf for two to four months if you treat them right. Every cut followed by a feed and a good watering brings another flush; skip the feeding and watering and the plant tires, the leaves shrink, and it runs to seed.
Come back and cut fresh tender tips every 1 to 2 weeks, right through the plant's life — the more regularly you cut (without stripping it bare), the more it branches and gives.
Each time, leave at least a hand-width (10 cm) of leafy stem so the plant can regrow, and take only the soft tips about a hand-length (10–15 cm) long.
Feed nitrogen and water well after each cut — this is what powers the next flush. A dose of manure tea or side-dressed nitrogen after every big harvest keeps it coming.
Keep pinching off flowers. A plant left to flower and fruit stops making tender leaf — unless you have chosen it to save seed from.
Keep scouting and weeding between cuts — an ageing, repeatedly-cut crop tires and is easier for pests and blight to overrun.
When leaves stay small and tough even after feeding, and the plant is mostly flowering, the leaf run is over — let your best plants set seed and pull the rest.
- Do:
Feed and water within a day or two of each big cut — the flush that follows depends on it.
- Watch out:
Leave a gap of a few days between feeding nitrogen and cutting leaf for the pot or market.
- Tip:
Stripping a plant bare — with no leaf left it starves and is slow to come back. Always leave leafy stem.
Save seed and handle the leaf
Two jobs close out the crop. First, the leaf you're still cutting is highly perishable — bunch it, keep it cool and moist, and sell it the same day, or it's worth little. Second, for next season, let a few of your best, healthiest plants flower and fruit, then save seed from the fully ripe berries. Good seed, saved dry and clean, plus your habit of rotating away from the tomato family, is what carries this crop forward.
Save seed from ripe berries Optional
African nightshade comes true enough from your own seed that you need never buy it again — and your own saved seed is free, suited to your soil, and ready when you want to sow. A pinch of seed from a few ripe berries plants a whole new nursery.
From about two months after transplanting, choose a few of your best, healthiest, most leafy plants — never one that showed any wilt or blight — and stop harvesting them, so they can flower and fruit.
Wait until the berries are fully ripe: soft and deep purple-black, never green. Unripe green berries make poor seed and can be poisonous, so never eat them.
Squeeze or lightly mash the ripe berries in a little water and let them sit a day or two to ferment, then wash the pulp away — the good, heavy seed sinks and the pulp and empty seed float off.
Dry the clean seed in the shade, not in hot direct sun, spread thin on a cloth or paper until it is bone dry.
Store the dry seed in a clean, airtight tin or bottle, somewhere cool and dark, labelled with the crop and the date. Kept dry, it stays good to plant for years.
- Do:
Save seed only from your healthiest plants — never from one that wilted or blighted, or you plant the disease into next season.
- Do:
For the leaf you're still cutting: harvest in the cool morning, keep it shaded and moist, and sell it within a day or two.
- Watch out:
Never eat the unripe green berries, or the leaves of unknown wild nightshades — only the cultivated leafy type, cooked, is safe.
Pests and diseases that attack African nightshade


Where to sell African nightshade
Markets that trade this crop — what each one sells it by, when supply peaks there, and the currency used.

Grow African nightshade with a plan, not a guess
This guide is the general answer. Divisi works out yours — the week to plant African nightshade on your soil and your rainfall, and each job dated for your field.


When to plant African nightshade, country by country
- When to plant African nightshade in Algeria
- When to plant African nightshade in Angola
- When to plant African nightshade in Benin
- When to plant African nightshade in Botswana
- When to plant African nightshade in Burkina Faso
- When to plant African nightshade in Burundi
- When to plant African nightshade in Cabo Verde
- When to plant African nightshade in Cameroon
- When to plant African nightshade in Comores
- When to plant African nightshade in Congo
- When to plant African nightshade in Côte d'Ivoire
- When to plant African nightshade in Egypt
- When to plant African nightshade in Eritrea
- When to plant African nightshade in Eswatini
- When to plant African nightshade in Ethiopia
- When to plant African nightshade in Gabon
- When to plant African nightshade in Gambia
- When to plant African nightshade in Ghana
- When to plant African nightshade in Guinea Ecuatorial
- When to plant African nightshade in Guinea-Bissau
- When to plant African nightshade in Guinée
- When to plant African nightshade in Kenya
- When to plant African nightshade in Lesotho
- When to plant African nightshade in Liberia
- When to plant African nightshade in Libya
- When to plant African nightshade in Madagascar
- When to plant African nightshade in Malawi
- When to plant African nightshade in Mali
- When to plant African nightshade in Mauritanie
- When to plant African nightshade in Mauritius
- When to plant African nightshade in Morocco
- When to plant African nightshade in Moçambique
- When to plant African nightshade in Namibia
- When to plant African nightshade in Niger
- When to plant African nightshade in Nigeria
- When to plant African nightshade in Rwanda
- When to plant African nightshade in République centrafricaine
- When to plant African nightshade in République démocratique du Congo
- When to plant African nightshade in Sao Tome and Principe
- When to plant African nightshade in Seychelles
- When to plant African nightshade in Sierra Leone
- When to plant African nightshade in Somalia
- When to plant African nightshade in South Africa
- When to plant African nightshade in South Sudan
- When to plant African nightshade in Sudan
- When to plant African nightshade in Sénégal
- When to plant African nightshade in Tchad
- When to plant African nightshade in Togo
- When to plant African nightshade in Tunisie
- When to plant African nightshade in Uganda
- When to plant African nightshade in United Republic of Tanzania
- When to plant African nightshade in Zambia
- When to plant African nightshade in Zimbabwe
Where African nightshade scores best
Districts where Divisi's engine currently rates this crop highest, ranked by fit.
-
 Gwer East
 -
 Oyo
Oyo -
 Poko
Poko -
 Plahn Nyarn
 -
 Boumba-et-Ngoko
 -
 Pujehun
 -
 Emir Abdelkader
 -
 Obo
Obo -
 Rio Campo
 -
 Agou
Agou -
 Yambio
 -
 Gichugu
Get Insights by email
A short digest of new Divisi articles. No email on quiet weeks.
Frequently asked questions
How do I grow African nightshade?
How to grow African nightshade: 60–120 days to maturity, 40 cm rows, 0.5–1 cm deep. Also called black nightshade, nastergal, managu, nsugga, osuga, mnavu.
What is nastergal in English?
Nastergal is the Afrikaans name for African nightshade.
What is managu in English?
Managu is the Kikuyu name for African nightshade.
What is nsugga in English?
Nsugga is the Luganda name for African nightshade.
What is osuga in English?
Osuga is the Luo name for African nightshade.
What is mnavu in English?
Mnavu (also mnafu) is the Swahili name for African nightshade.
What is odu in English?
Odu is the Yoruba name for African nightshade.
What is umsobo in English?
Umsobo is the Zulu name for African nightshade.
How long does African nightshade take to grow?
African nightshade takes about 60–120 days from sowing to maturity, though the exact length varies with variety, temperature and how the season runs.
What spacing should I use for African nightshade?
Space African nightshade rows about 40 cm apart, with roughly 20 cm between plants within the row.
How deep should African nightshade be planted?
Sow African nightshade at about 0.5–1 cm deep. Shallower risks drying out; deeper wastes seed energy before the shoot reaches light.
What pests and diseases attack African nightshade?
The ones covered in this guide are Early blight, Late blight. Each has its own page explaining how to identify, check for and control it.