 Divisi
How to grow amaranth
Amaranthus spp. · Amaranthaceae
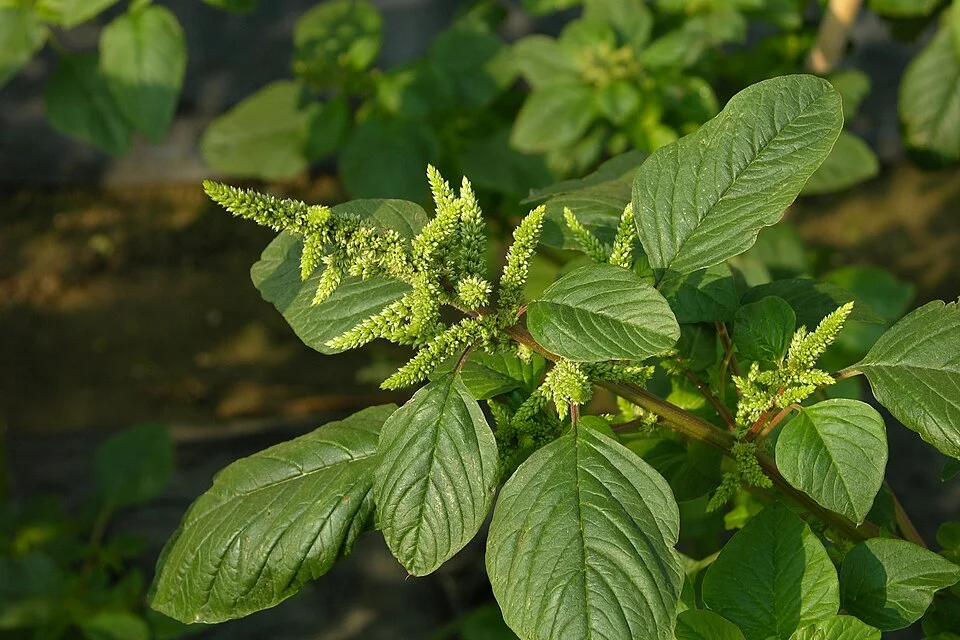
Photo: Earl Benton · CC BY-SA 4.0
Amaranth (Amaranthus spp.) is a fast, heat-loving plant that gives you two harvests from one crop — tender leaves and tiny grain. You may know it as African spinach, callaloo, mchicha, terere, imbuya, ododo or efo tete. It is a C4 plant (built to keep growing hard in full sun and heat), so it thrives in the hot months when cooler greens wilt. Its seed is as fine as dust — a thousand seeds weigh less than a gram — so it is sown shallow and barely covered. Grow it as a cut-and-come-again leaf crop (cut the tender shoots young and they push out again), with your first pickings in just 3–4 weeks; or let it run up tall flower heads for grain (a pseudocereal — a grain-like seed from a broadleaf plant, not a true cereal). For both leaf and grain from the same plants, A. cruentus is the safest all-rounder.
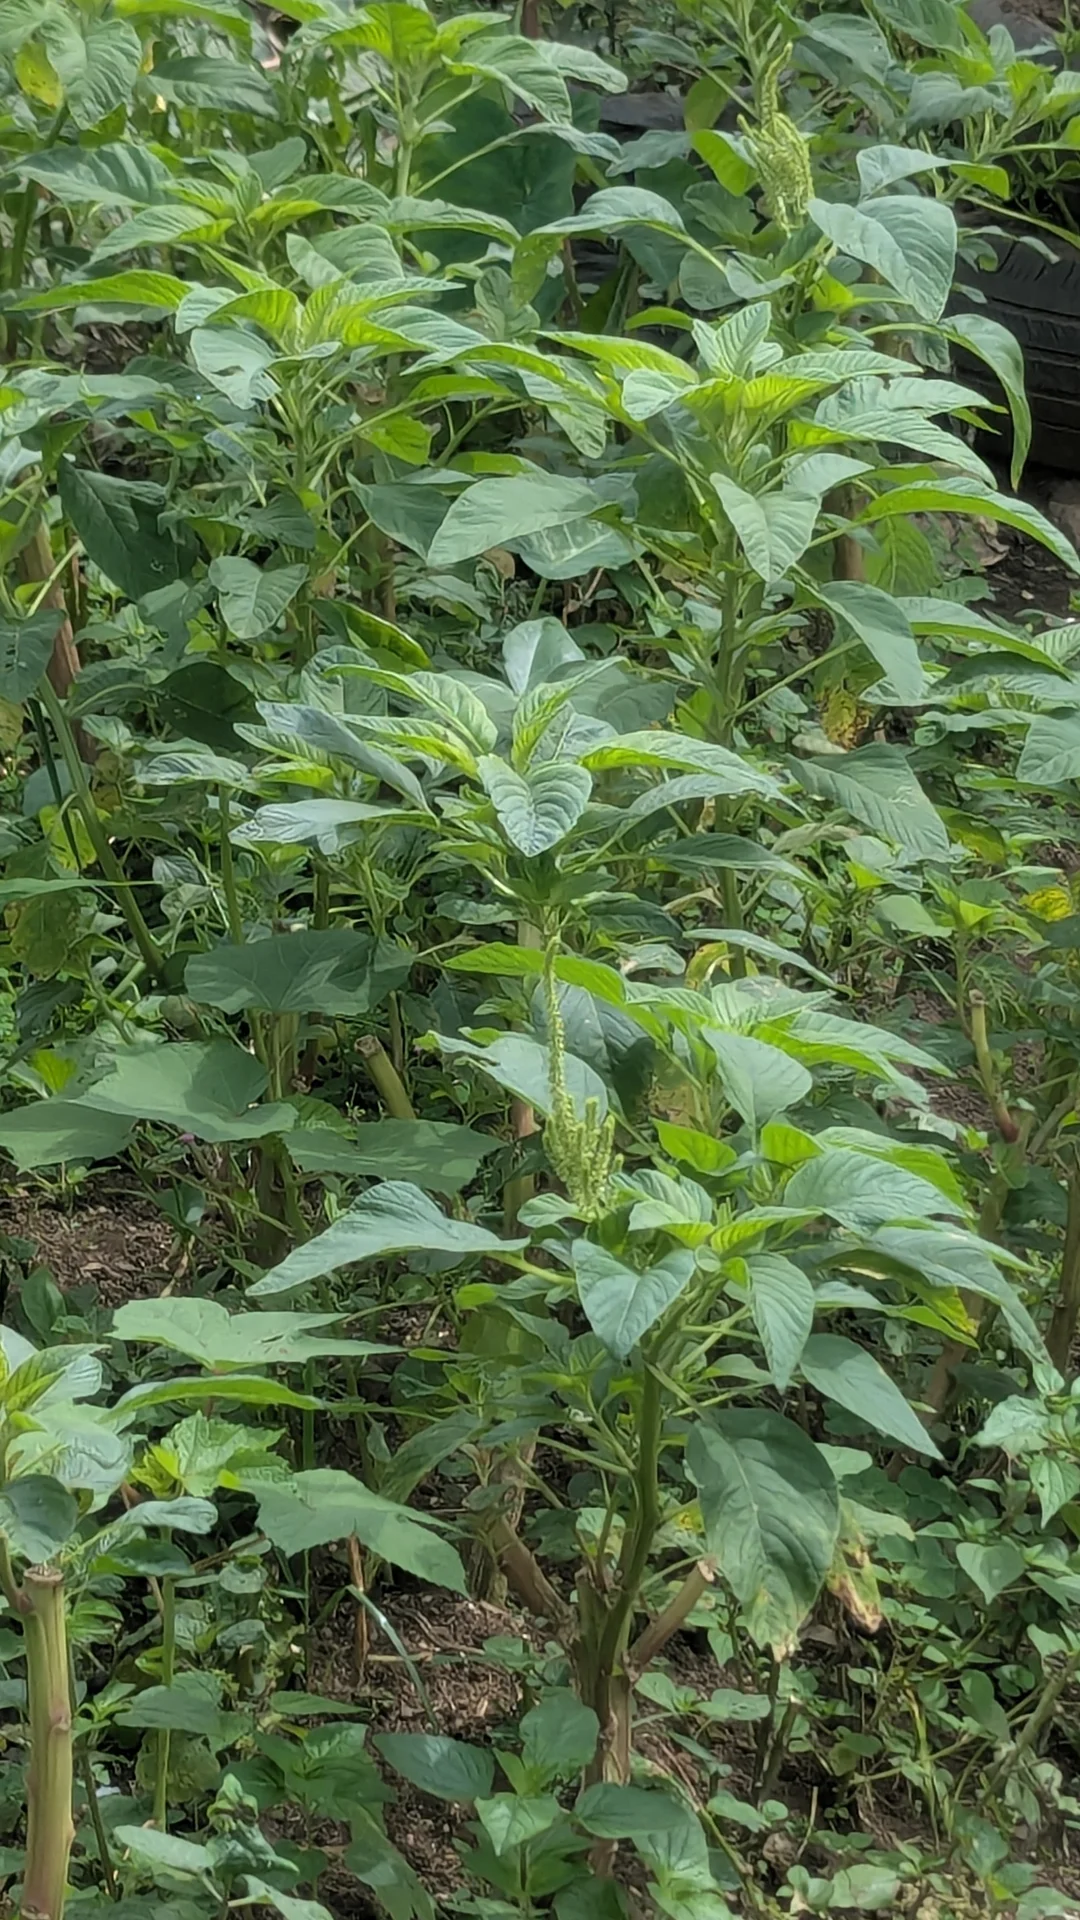
Senator BNB · CC BY-SA 4.0 
Wee Hong · CC BY-SA 4.0
- Days to maturity
- 30–150 days
- Row spacing
- 10 cm
- Plant spacing in the row
- 10 cm
- Sowing depth
- 0.5–1 cm
These are general figures for the crop, compiled from published agronomic references including FAO and CABI. The right choice for your field depends on your soil, rainfall and the yield you are aiming for.
Will amaranth actually do well on your field? Check your own field against every crop in the catalogue — no signup. Run the crop check →
Also known as
Amaranth is also called African spinach and callaloo.
- English
- African spinach, callaloo
- Afrikaans
- misbredie
- Bemba
- bondwe
- Chichewa
- bonongwe
- French
- amarante
- Hausa
- alayyafu
- Kikuyu
- terere
- Luo
- ododo
- Ndebele
- imbuya
- Sesotho
- theepe
- Setswana
- thepe
- Shona
- mowa
- Swahili
- mchicha
- Xhosa
- imbuya
- Yoruba
- efo tete
- Zulu
- imbuya
Working in buckets, bags or paces? The farming glossary turns the measures growers actually use into kilograms and hectares — what a 20 litre bucket of each crop really weighs, and how to size a field by walking it — alongside the Shona, Swahili, Ndebele and Yoruba words used in the field. Open the glossary →
Growing amaranth, stage by stage
Your amaranth season, step by step — from a fine, rich seedbed and dust-fine seed, through fast, tender leaf you cut again and again, to (for grain) cutting the heads at just the right moment, before they drop their tiny seed.
Get ready before sowing
Amaranth seed is as fine as dust, so it needs a fine, firm, rich bed to catch it — rough clods and hungry, cold soil give a thin, patchy stand you can never fix later. In the two weeks before sowing, clean the plot right out (amaranth cannot fight weeds), break the soil to a fine crumb like coarse flour, and dig in plenty of well-rotted manure so the bed is rich enough for fast, tender leaf. Sow only into warm soil, after the last frost.
Prepare a fine, fertile seedbed + manure Recommended
Dust-fine amaranth seed can only sprout evenly if it lands on fine, firm, moist soil. A cloddy or hungry bed gives gaps and weak, slow plants — and amaranth is a weak competitor (it cannot out-grow weeds), so a poor, gappy start hands the plot to weeds. A rich, fine bed now is what sets up the fast, tender growth that makes amaranth worth growing.
Clear the plot of all weeds and old crop trash, and break up any hard crust or cap on the surface. Amaranth cannot fight weeds, so you must start on clean ground.
Dig and break the soil down to a fine, crumbly tilth (loose crumbs, like coarse flour). The seed is as fine as dust — big clods leave it stranded in air pockets where it never comes up.
Dig in plenty of well-rotted manure or compost — dark, crumbly, no strong smell — about 5–10 tonnes per hectare, a wheelbarrow-load every few strides. This feeds the soil, helps it hold water, and supplies the phosphorus for strong roots and the potassium and nitrogen that drive fast, tender leaf.
Firm the bed lightly with the back of a rake or your feet, then level it, so water spreads evenly instead of washing the tiny seed into heaps and bare patches.
Sow only into warm soil, after the last frost — amaranth loves heat and sprouts best at about 18–24 °C (comfortably warm to the back of your hand, never cold). Cold, wet soil rots the dust-fine seed before it can sprout.
- Do:
Wait for warm soil — germination is best at about 18–24 °C. Cold, wet soil rots the dust-fine seed before it sprouts.
- Tip:
Leaving big clods or a rough surface — dust-fine seed sown onto clods comes up thin and patchy, and you cannot fill the gaps afterwards.
- Watch out:
Use only well-rotted manure; fresh manure scorches the tender seedlings and brings in weed seeds. Wash your hands after handling it, and keep it off food and drinking water.
Sowing & establishment
This is where your stand is won or lost. The seed is dust-fine, so it must be sown shallow — no more than 1 cm deep, about a fingernail — and barely covered, then kept damp until it comes up in about 5–10 days. Keep the bed moist but never swampy: soggy soil brings damping-off (a soil rot that topples young seedlings at the ground), and cutworms can mow down a young stand overnight. Walk the bed every few days.
Sow shallow / transplant Critical
Amaranth seed is as fine as dust — a thousand seeds weigh less than a gram. Sow it too deep and it never reaches the light; drop it in clumps and you get a thick mat you must thin hard. Even, shallow sowing into a fine, moist bed is the whole secret of a good stand — and you get one chance, because you cannot fill gaps in dust-fine seed later.
Mix the tiny seed with dry sand or fine ash — about one handful of seed to five or ten of sand — so you can see where it falls and spread it evenly. On its own it pours out in clumps.
Sow shallow: either broadcast (scatter) the seed-and-sand thinly and evenly over the bed, or trickle it along shallow drills (little furrows) about 10 cm apart — half a hand-span.
Barely cover the seed — just a fine sprinkle of soil or sifted compost, no more than 1 cm deep, about a fingernail's depth. Rake it in gently or press it down with a board. Covering too deep is the number-one reason a stand fails.
Keep the surface damp (see the next task) until the seedlings show, in about 5–10 days.
If the stand comes up thin or patchy → re-sow the bare patches at once, while the bed is still warm and moist; dust-fine seed leaves no way to fill gaps later.
- Tip:
Sowing the dust-fine seed too deep — barely cover it, or the stand fails. This is the number-one mistake with amaranth.
- Do:
Mix the seed with dry sand or ash before sowing — it is the easy way to spread such tiny seed evenly and dodge thick clumps.
- Do:
Want a neat, even stand with less thinning? Raise the seed in a small nursery bed and move the seedlings out after 2–3 weeks, planting them 10 cm — half a hand-span — apart.
Keep moist, not waterlogged Critical
For the first two weeks the seed and its tiny roots sit right at the surface, where the soil dries out fastest. Let the top dry and the sprouting seed dies; keep it swampy and it rots (damping-off — young seedlings toppling and rotting at the ground). Steady, gentle moisture is what carries the stand through to a strong start.
Water gently — a fine rose on the can, or a soft sprinkle — so you don't wash the tiny seed into heaps or wash it clean out of the bed.
Keep the surface damp, not soaked. Check with a finger and water when the very top is just starting to dry — about every 2–3 days, more often in heat and wind.
Never let it puddle or stay swampy. Amaranth hates wet feet — standing water brings the rot (damping-off) that kills young seedlings. Drain or fill any low spots that hold water.
Once the seedlings are up and growing (about two weeks in), ease off and let the surface dry a little between waterings, to draw the roots down and firm the plants up.
- Tip:
Heavy watering or waterlogging — soggy soil brings damping-off (seedlings toppling and rotting at the ground) and washes the tiny seed about.
- Do:
Water in the cool of morning or evening — less is lost to the sun, and the surface stays damp longer for the sprouting seed.
Scout (cutworms, damping-off) Recommended
The first two weeks decide whether you have a stand at all. Cutworms can mow down rows of young seedlings overnight, and damping-off can rot out whole patches in damp, crowded soil. A quick look every few days lets you act while there is still a crop to save — before you lose the plants you cannot replace.
From a few days after sowing, walk the bed every 3–4 days, in the early morning, and look closely along the little seedlings.
Cutworms: look for seedlings cut clean off at ground level and lying wilted, as if snipped with scissors. Scratch the soil right there and you will often find a fat, greasy, grey-brown caterpillar curled up — pick it out and crush it.
Damping-off: look for seedlings that flop over and rot at the soil line, their stems pinched thin and dark, often in a spreading damp patch. Pull out and remove the collapsed ones.
If damping-off is spreading, stop over-watering, improve the drainage, and thin out crowded seedlings to let air move between them — the rot thrives in wet, still, crowded beds.
If cutworms are cutting several seedlings a night → search the soil around fresh-cut plants at dusk or dawn and crush the grubs, and clear the weedy edges where they shelter; a bad, spreading attack on a young stand may mean re-sowing the worst patches.
- Watch out:
Cutworms feed at night and hide by day — search the soil right around a freshly-cut seedling to find the fat, curled grub.
- Do:
Scout in the morning, when overnight cutworm damage is freshest and easiest to spot.
Vegetative / leaf growth & harvest
Now amaranth does what it does best — grow fast. Thin the crowded stand so each plant can bush out, keep it weed-free through these first weeks (amaranth is a weak competitor), and feed nitrogen for tender, dark-green leaf. Start cutting at about three weeks after sowing: cutting the young shoots triggers fresh regrowth (cut-and-come-again), and a light feed after each cut keeps the leaf tender and delays bolting (running up a flower stalk, which turns leaf tough and bitter). Watch hard for the leaf-webber, the crop's worst pest.
Thin + early weeding Critical
Amaranth is a weak competitor and comes up crowded from broadcast seed. Thinning gives each plant room to bush out into strong leaf, and early weeding stops weeds stealing the water, light and food in these first few weeks — exactly when the crop can least defend itself. Getting this right is worth 10–25% of your leaf yield.
At about 2–3 weeks after sowing, when the seedlings are small (a few finger-joints tall, roughly 5–10 cm), thin them to about 10 cm apart — half a hand-span — pull or snip out the weakest, leaving the strongest, evenly spaced.
Eat the thinnings. The pulled young seedlings are your very first tender picking, so nothing is wasted.
Weed at the same time, and do it gently — hoe only shallowly, or hand-pull. Amaranth's roots are shallow and sit close to the surface, so deep or rough hoeing cuts them and sets the crop back.
Keep the plot clean for these first few weeks. Once the crop bushes out and shades the ground, it holds its own against weeds.
- Do:
Thin on a damp day — seedlings lift out cleanly without disturbing the ones you keep, and the thinnings stay fresh to eat.
- Tip:
Deep or rough hoeing close to the plants — amaranth's roots are shallow and easily cut, which checks the crop just as it should be racing away.
Side-dress N / manure Recommended
Tender, dark-green leaf is built from nitrogen, and amaranth is nitrogen-hungry. Every cut you take removes leaf the plant must regrow — so a feed now, and a light feed after each cut, keep the flushes coming tender and green instead of small and pale.
At about 2–3 weeks after sowing, once the plants are thinned and growing away, feed nitrogen — either a nitrogen fertiliser, or (better for leaf you will eat fresh) well-rotted manure, a lighter band than you dug into the bed.
Place it in a band beside the rows, not on top of the plants, then water it in so it reaches the roots instead of sitting on the surface or gassing off.
Feed again, lightly, after each leaf cut to drive the next tender flush of regrowth — little and often, not one heavy dose.
Leave a few days between feeding and cutting for the pot. Too much nitrogen makes the leaf store nitrate (a substance that is not good to eat in large amounts), and well-rotted manure gives lower-nitrate leaf than strong fertiliser.
- Tip:
Over-feeding nitrogen — past a point it doesn't grow more leaf, it just raises nitrate in the leaf and can scorch it. Little and often beats one heavy dose.
- Watch out:
Keep fertiliser off the leaves (it scorches them, and you will be eating them soon), and off food, water and children. Wash your hands after handling it.
- Do:
For leaf you will eat fresh, prefer well-rotted manure — it feeds steadily and keeps leaf nitrate low.
Cut-and-come-again leaf harvest Critical
This is the payoff — and how you harvest decides how long it keeps giving. Cut the shoots young and tender, and the plant pushes out fresh leaf again and again (cut-and-come-again). Leave them too long and the plant bolts — runs up a flower stalk — turning the leaf tough and bitter for good.
Start at about 3 weeks after sowing, when the shoots are about 20–25 cm tall — a hand-span, tender, and not yet flowering.
For repeat harvests (cut-and-come-again): cut or pinch off the top few finger-joints of each shoot with a knife or your nails, leaving the lower leaves and stem to regrow — fresh shoots push out from below the cut.
For a one-off harvest: pull the whole young plant, roots and all, while it is still tender.
Cut in the cool of morning, keep the leaf shaded and cool, and eat or sell it the same day — amaranth wilts fast and does not store.
Come back every 1–2 weeks for the next cut, feeding lightly after each one.
If the shoots have already grown tall and tough, or are running up a flower stalk (bolting) → cut them right back hard, or pull them and re-sow that patch; that leaf will not turn tender again.
- Do:
Harvest young and often — frequent light cuts of tender shoots give more, and better, leaf than a few big, tough cuts.
- Watch out:
Once flower heads start to form, leaf quality drops fast — plan to cut a patch right out and re-sow it, so you always have a young patch coming for tender leaf.
Scout (leaf-webber, flea beetle, aphids) Critical
This is when amaranth's real enemies arrive — above all the leaf-webber, which can shred a leaf crop. Because you eat this crop fresh and often, catching pests early, by eye lets you pick them off by hand and avoid spraying poison onto leaf you are about to eat.
From about 2 weeks after sowing, walk the crop twice a week and look over the leaves — tops and undersides — and the growing tips.
Leaf-webber (the worst one): look for young leaves spun and webbed together with fine silk, eaten to lace, with a small green caterpillar hiding in the fold. Pick off and crush the webbed leaves the moment you see the first ones.
Flea beetles: look for leaves peppered with tiny round shot-holes, and tiny dark beetles that hop away when you touch the plant.
Aphids: look for clusters of small, soft green or black insects on the growing tips and leaf undersides, with sticky, shiny leaves. Rub small colonies off by hand, or knock them off with a splash of water.
Act on the first signs by hand — picking, crushing and rubbing off — before the numbers build up and spread down the bed.
- Watch out:
This is leaf you eat within days. If a pest ever forces you to spray, use only a product cleared for leafy vegetables and respect the pre-harvest interval (the waiting time between spraying and when the leaf is safe to eat). Cover your skin, eyes and nose, spray in the cool with the wind behind you, keep it off other food, and wash afterwards.
- Do:
Handpick the leaf-webber and rub off aphids while numbers are small — on a fast leaf crop you eat fresh, hand control beats spray every time.
Flowering & grain fill (grain types)
This stage is for those growing amaranth for grain (or letting a patch run to seed). Once the plants bolt — run up tall flower heads — the leaf turns tough and bitter, so leaf-growers keep cutting and re-sowing young patches instead. For grain, let the plants flower and fill: seed ripens about 35–45 days after flowering. Keep watching the heads and ease off the water as they mature, to help them dry down. Fierce heat over 35 °C at flowering can leave heads half-empty.
Ease water toward maturity Recommended
Grain heads need to dry down on the plant to ripen properly and store well. Keeping the soil wet late holds the plants green and soft, slows drying, and invites head rot. Easing the water now steers the plant from growing more leaf to filling and drying its seed.
From about 6 weeks after sowing, once the plants are flowering and setting seed, stretch out the gap between waterings — water about every 7–10 days instead of every few days.
Give less each time, as the heads fill and start to colour and dry.
Stop watering once the heads are clearly drying and the seed is hardening, so they can dry down fully in the field.
Don't let the plants wilt badly while seed is still filling — ease off gradually; don't cut the water off all at once.
- Do:
Time your last waterings so the heads dry into a spell of dry weather — dry-down is faster and cleaner then.
- Tip:
Watering right up to harvest — wet, green heads dry slowly and are far more likely to rot, or sprout on the head before you can cut them.
Scout grain heads Recommended
The seed you are growing now sits exposed in the heads, where birds, caterpillars and rot can take it. Watching the heads weekly tells you when seed is filling well, when it is drying, and when you must cut early to beat a loss.
From about 6 weeks after sowing (once flowering starts), check the heads about once a week.
Look for birds feeding on the ripening heads — they can strip a lot of the tiny seed fast as it hardens. Note which heads are worst hit.
Look for caterpillars or bugs feeding down inside the flower heads, and for mould or dark rot on heads after damp weather.
Rub a head gently over your open palm: as it ripens, firm seed starts to drop into your hand. This tells you harvest is near.
If birds, rot, or heavy shatter are taking the seed → cut the affected heads early and finish drying them under cover, rather than lose them standing in the field.
- Watch out:
Heat above about 35 °C during flowering can leave heads with gappy, half-empty seed — poor fill can mean the flowers were cooked, not that anything ate them.
- Do:
Watch the birds closely as the seed hardens — they, not insects, are usually the biggest robber of a grain-amaranth crop.
Grain harvest
Ripe amaranth seed does not wait — the heads shatter, dropping their tiny seed on the ground where you cannot gather it. The whole game here is to cut the heads just as they ripen but before they shed, on a dry morning, then cure them under cover so the last seed loosens without falling on the soil.
Cut whole heads before shatter Critical
Amaranth seed is tiny and loose — once a head is fully ripe it shatters (drops its seed on its own), and seed on the ground is lost for good. Cutting the heads at the right moment, just before they shed, is the difference between filling a bag and feeding the ants.
From about 2 months after sowing, watch the heads turn from green to their ripe colour — creamy, gold, red or brown, depending on your type — and begin to dry.
Test for ripeness: rub a head gently over your open palm — when ripe seed drops freely into your hand, the crop is ready to cut.
Cut the whole heads on a dry morning, once the dew has just lifted, with a knife or sickle. Handle them gently — every knock spills seed.
Slip a sheet, basket or tarpaulin under each head as you cut, and lay the cut heads on it (never on bare ground), so the seed that loosens falls where you can keep it.
If the seed does not drop yet (heads still green and soft) → wait a few more days, but keep checking daily, because once ripe they shatter quickly. If birds, rain or shatter threaten → cut now and finish ripening the heads under cover.
- Tip:
Leaving ripe heads standing to over-dry — shatter loss is the single biggest risk here, and dropped seed is gone for good.
- Do:
Cut in the cool, still morning — heads shatter far less when slightly damp with dew than in the hot, dry afternoon.
- Watch out:
Slip a sheet or basket under each head as you cut, so the seed that loosens falls where you can keep it, not on the soil.
Post-harvest
The seed is grown — now don't lose it to mould. Amaranth seed is tiny and dries fast, but it must be threshed clean, winnowed, and dried hard before it goes into a sealed store, or it cakes and spoils. (For a leaf crop there is little to store — the rule there is simply to keep it cool and eat or sell it the same day.)
Thresh, winnow & dry the seed Recommended
Clean, bone-dry seed keeps for months; seed stored even slightly damp goes mouldy and is wasted. A day or two of threshing, winnowing and drying now protects everything you grew — and gives you clean seed to eat, sell, or sow next season.
First cure the cut heads for about 7–10 days in the shade with good airflow — on a rack or hung up — until they are crisp and dry.
Thresh (knock the seed loose): rub the dry heads between your hands, or beat them gently, over a sheet or tarpaulin — the tiny seed falls out easily.
Winnow (clean it): on a breezy day, pour the seed slowly from one container to another — the light chaff and dust blow away and the heavy, clean seed drops straight down.
Dry the seed hard in the sun on a mat or sheet, turning it now and then, until it is fully dry.
Test it: bite a few seeds — dry seed is hard and shatters, it does not squash. If a seed squashes or dents, it is still too wet → spread it back in the sun and dry it more before storing, or it will mould in the container.
Store the dry seed in a clean, sealed container — a tin, jar or airtight bag — kept cool, dry and up off the floor.
- Do:
For leaf: harvest in the cool morning, keep it shaded and cool, and eat or sell it the same day — it wilts fast and does not store.
- Tip:
Storing seed that is not fully dry — even a little moisture makes the tiny seed cake and mould in the container.
- Watch out:
Winnow with the wind at your back and to the side, so the blowing chaff and dust carry away from your face, not into it.
Pests and diseases that attack amaranth


Where to sell amaranth
Markets that trade this crop — what each one sells it by, when supply peaks there, and the currency used.


Grow amaranth with a plan, not a guess
This guide is the general answer. Divisi works out yours — the week to plant amaranth on your soil and your rainfall, and each job dated for your field.


When to plant amaranth, country by country
- When to plant amaranth in Algeria
- When to plant amaranth in Angola
- When to plant amaranth in Benin
- When to plant amaranth in Botswana
- When to plant amaranth in Burkina Faso
- When to plant amaranth in Burundi
- When to plant amaranth in Cabo Verde
- When to plant amaranth in Cameroon
- When to plant amaranth in Comores
- When to plant amaranth in Congo
- When to plant amaranth in Côte d'Ivoire
- When to plant amaranth in Egypt
- When to plant amaranth in Eritrea
- When to plant amaranth in Eswatini
- When to plant amaranth in Ethiopia
- When to plant amaranth in Gabon
- When to plant amaranth in Gambia
- When to plant amaranth in Ghana
- When to plant amaranth in Guinea Ecuatorial
- When to plant amaranth in Guinea-Bissau
- When to plant amaranth in Guinée
- When to plant amaranth in Kenya
- When to plant amaranth in Lesotho
- When to plant amaranth in Liberia
- When to plant amaranth in Libya
- When to plant amaranth in Madagascar
- When to plant amaranth in Malawi
- When to plant amaranth in Mali
- When to plant amaranth in Mauritanie
- When to plant amaranth in Mauritius
- When to plant amaranth in Morocco
- When to plant amaranth in Moçambique
- When to plant amaranth in Namibia
- When to plant amaranth in Niger
- When to plant amaranth in Nigeria
- When to plant amaranth in Rwanda
- When to plant amaranth in République centrafricaine
- When to plant amaranth in République démocratique du Congo
- When to plant amaranth in Sao Tome and Principe
- When to plant amaranth in Seychelles
- When to plant amaranth in Sierra Leone
- When to plant amaranth in Somalia
- When to plant amaranth in South Africa
- When to plant amaranth in South Sudan
- When to plant amaranth in Sudan
- When to plant amaranth in Sénégal
- When to plant amaranth in Tchad
- When to plant amaranth in Togo
- When to plant amaranth in Tunisie
- When to plant amaranth in Uganda
- When to plant amaranth in United Republic of Tanzania
- When to plant amaranth in Zambia
- When to plant amaranth in Zimbabwe
Where amaranth scores best
Districts where Divisi's engine currently rates this crop highest, ranked by fit.
-
 Kinshasa
 -
 St. John River City
 -
 Plateaux
 -
 Allembe
 -
 Sanza Pombo
 -
 Mubende
 -
 Opobo/Nkoro
 -
 Magarini
 -
 Gisagara
 -
 Bukoba Urban
 -
 Cogo
Cogo -
 Lekié
Lekié
Get Insights by email
A short digest of new Divisi articles. No email on quiet weeks.
Frequently asked questions
How do I grow amaranth?
How to grow amaranth: 30–150 days to maturity, 10 cm rows, 0.5–1 cm deep. Also called African spinach, misbredie, bondwe, bonongwe, amarante, alayyafu.
What is misbredie in English?
Misbredie is the Afrikaans name for amaranth.
What is bondwe in English?
Bondwe is the Bemba name for amaranth.
What is bonongwe in English?
Bonongwe is the Chichewa name for amaranth.
What is amarante in English?
Amarante is the French name for amaranth.
What is alayyafu in English?
Alayyafu is the Hausa name for amaranth.
What is terere in English?
Terere is the Kikuyu name for amaranth.
What is ododo in English?
Ododo is the Luo name for amaranth.
What is imbuya in English?
Imbuya is the Ndebele, Xhosa and Zulu name for amaranth.
What is theepe in English?
Theepe is the Sesotho name for amaranth.
What is thepe in English?
Thepe is the Setswana name for amaranth.
What is mowa in English?
Mowa is the Shona name for amaranth.
What is mchicha in English?
Mchicha is the Swahili name for amaranth.
What is efo tete in English?
Efo tete is the Yoruba name for amaranth.
How long does amaranth take to grow?
Amaranth takes about 30–150 days from sowing to maturity, though the exact length varies with variety, temperature and how the season runs.
What spacing should I use for amaranth?
Space amaranth rows about 10 cm apart, with roughly 10 cm between plants within the row.
How deep should amaranth be planted?
Sow amaranth at about 0.5–1 cm deep. Shallower risks drying out; deeper wastes seed energy before the shoot reaches light.
What pests and diseases attack amaranth?
The ones covered in this guide are Amaranth leaf webber, Flea beetles. Each has its own page explaining how to identify, check for and control it.