 Divisi
How to grow green gram
Vigna radiata · Fabaceae
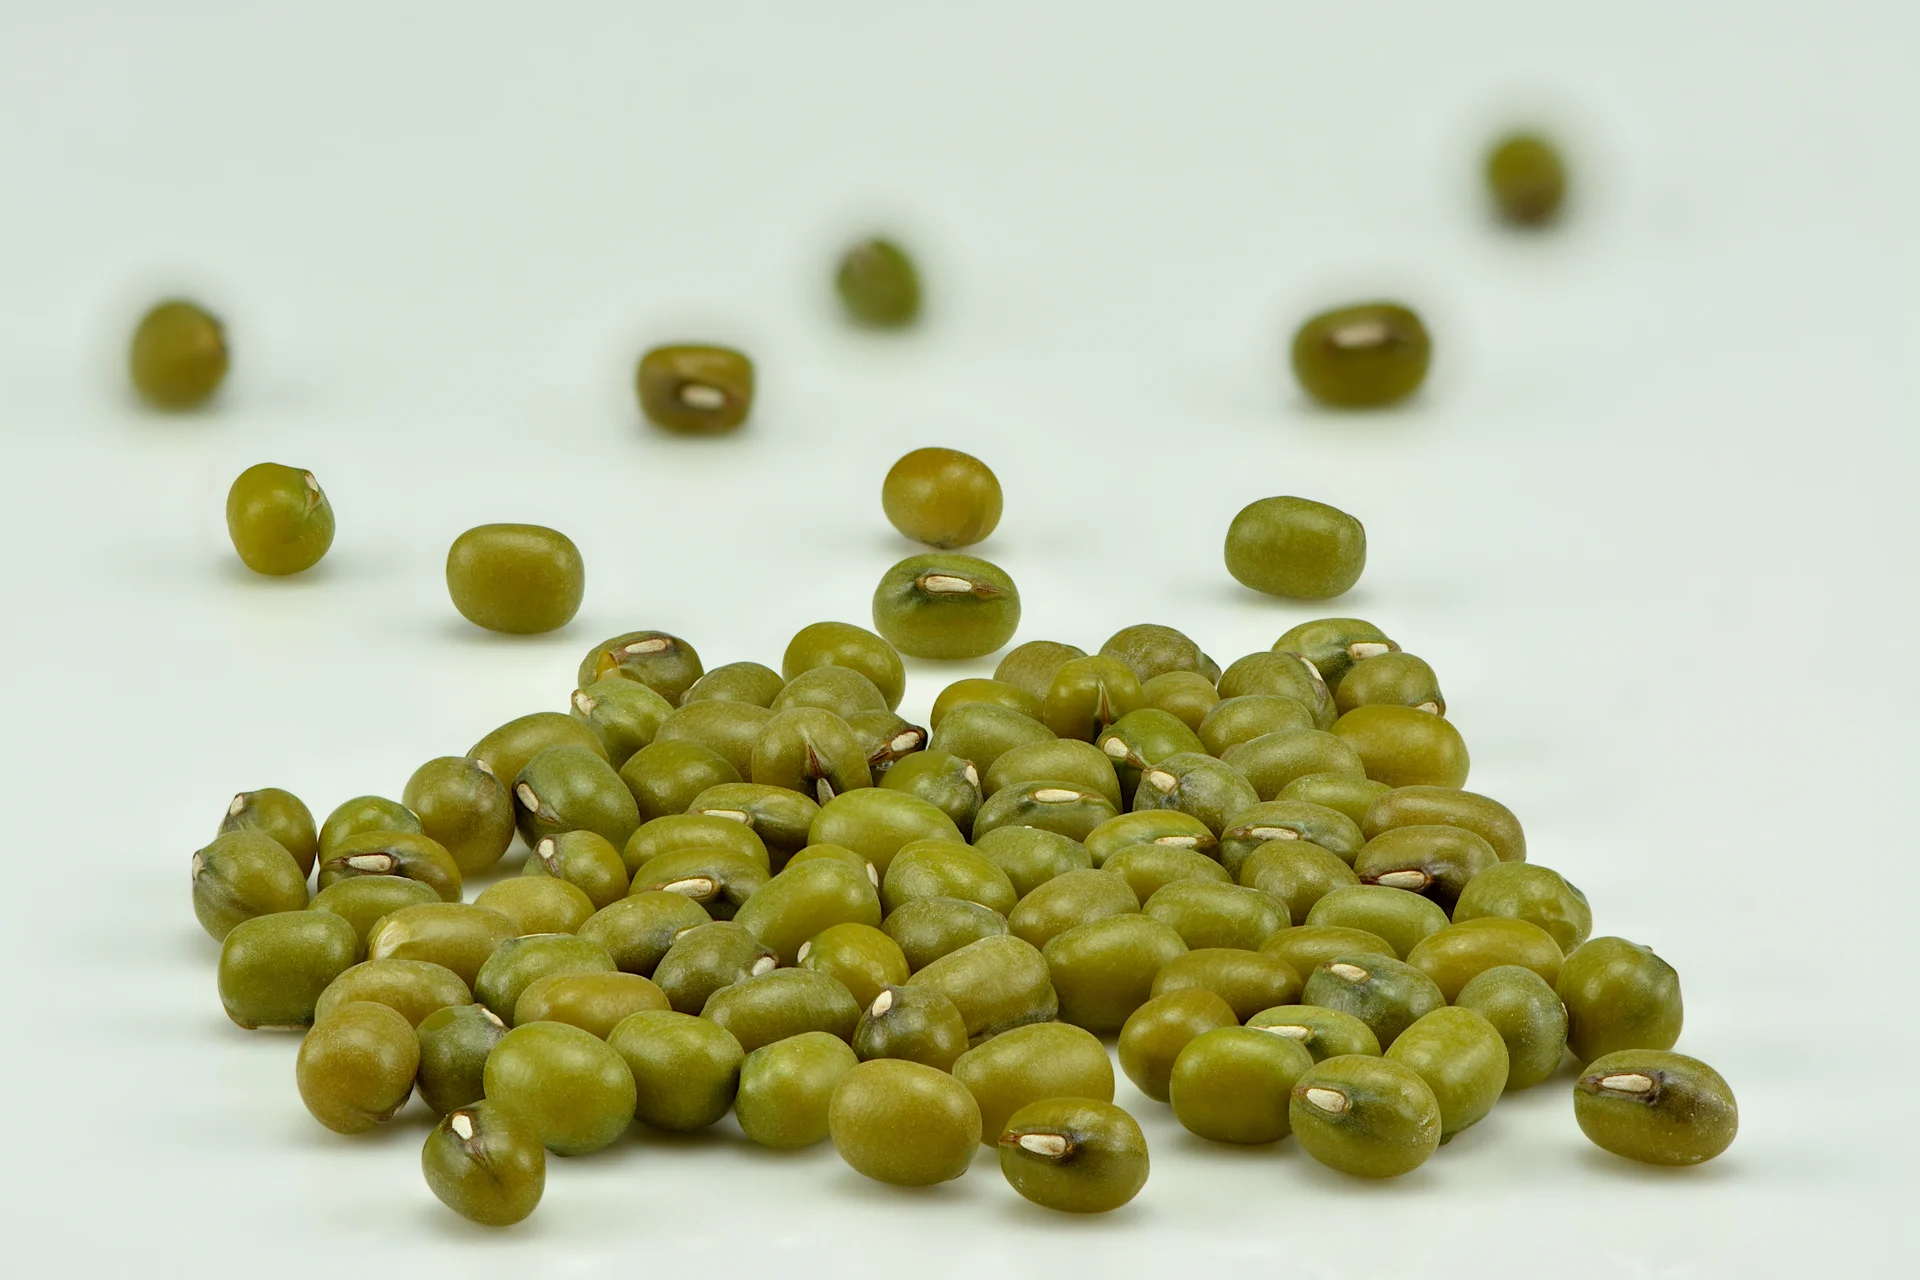
Photo: Ivar Leidus · CC BY-SA 4.0
Green gram (also called mung bean or ndengu) is a fast, warm-weather bean that goes from seed to harvest in just 60–90 days — quick enough to dodge a dry spell and to slot in after your maize, sorghum or millet. Like all beans, it makes its own nitrogen from the air through its roots, so it needs almost no fertiliser and even leaves the soil richer for the next crop — just a little phosphorus to build strong early roots. It sells well, fresh or dry. Two things decide whether you get a good crop: keeping the tiny whitefly (which spreads a yellow-leaf virus) off the young plants, and drying and sealing the seed hard so the storage beetle doesn't eat it in the store.
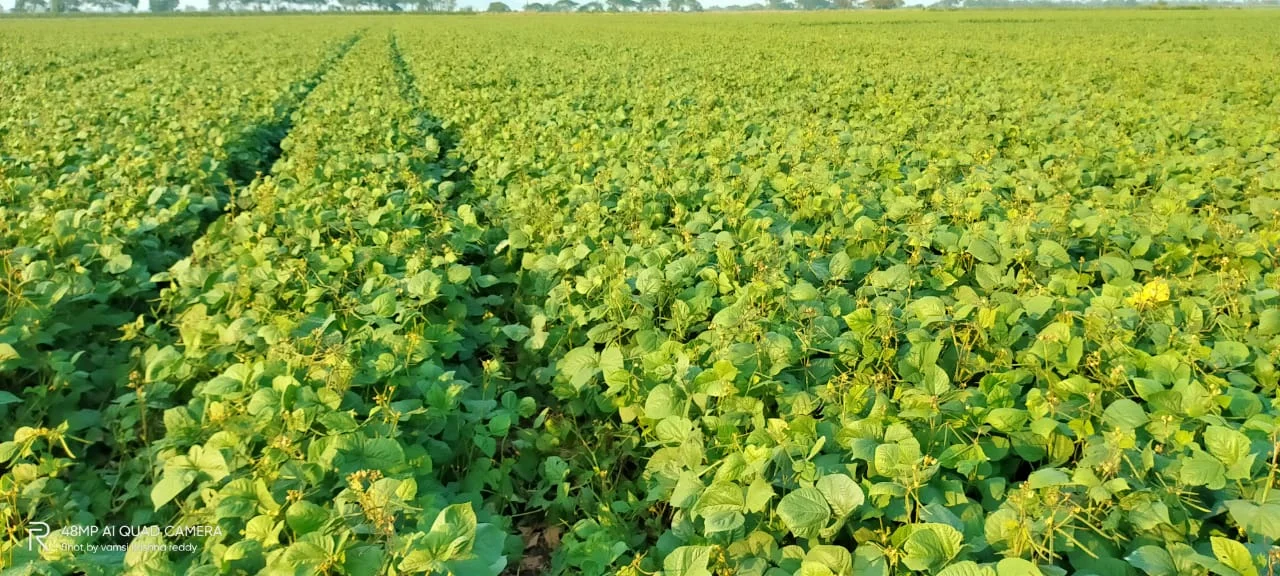
Lakshmi Narasimha Reddy Jonnala · CC BY-SA 4.0 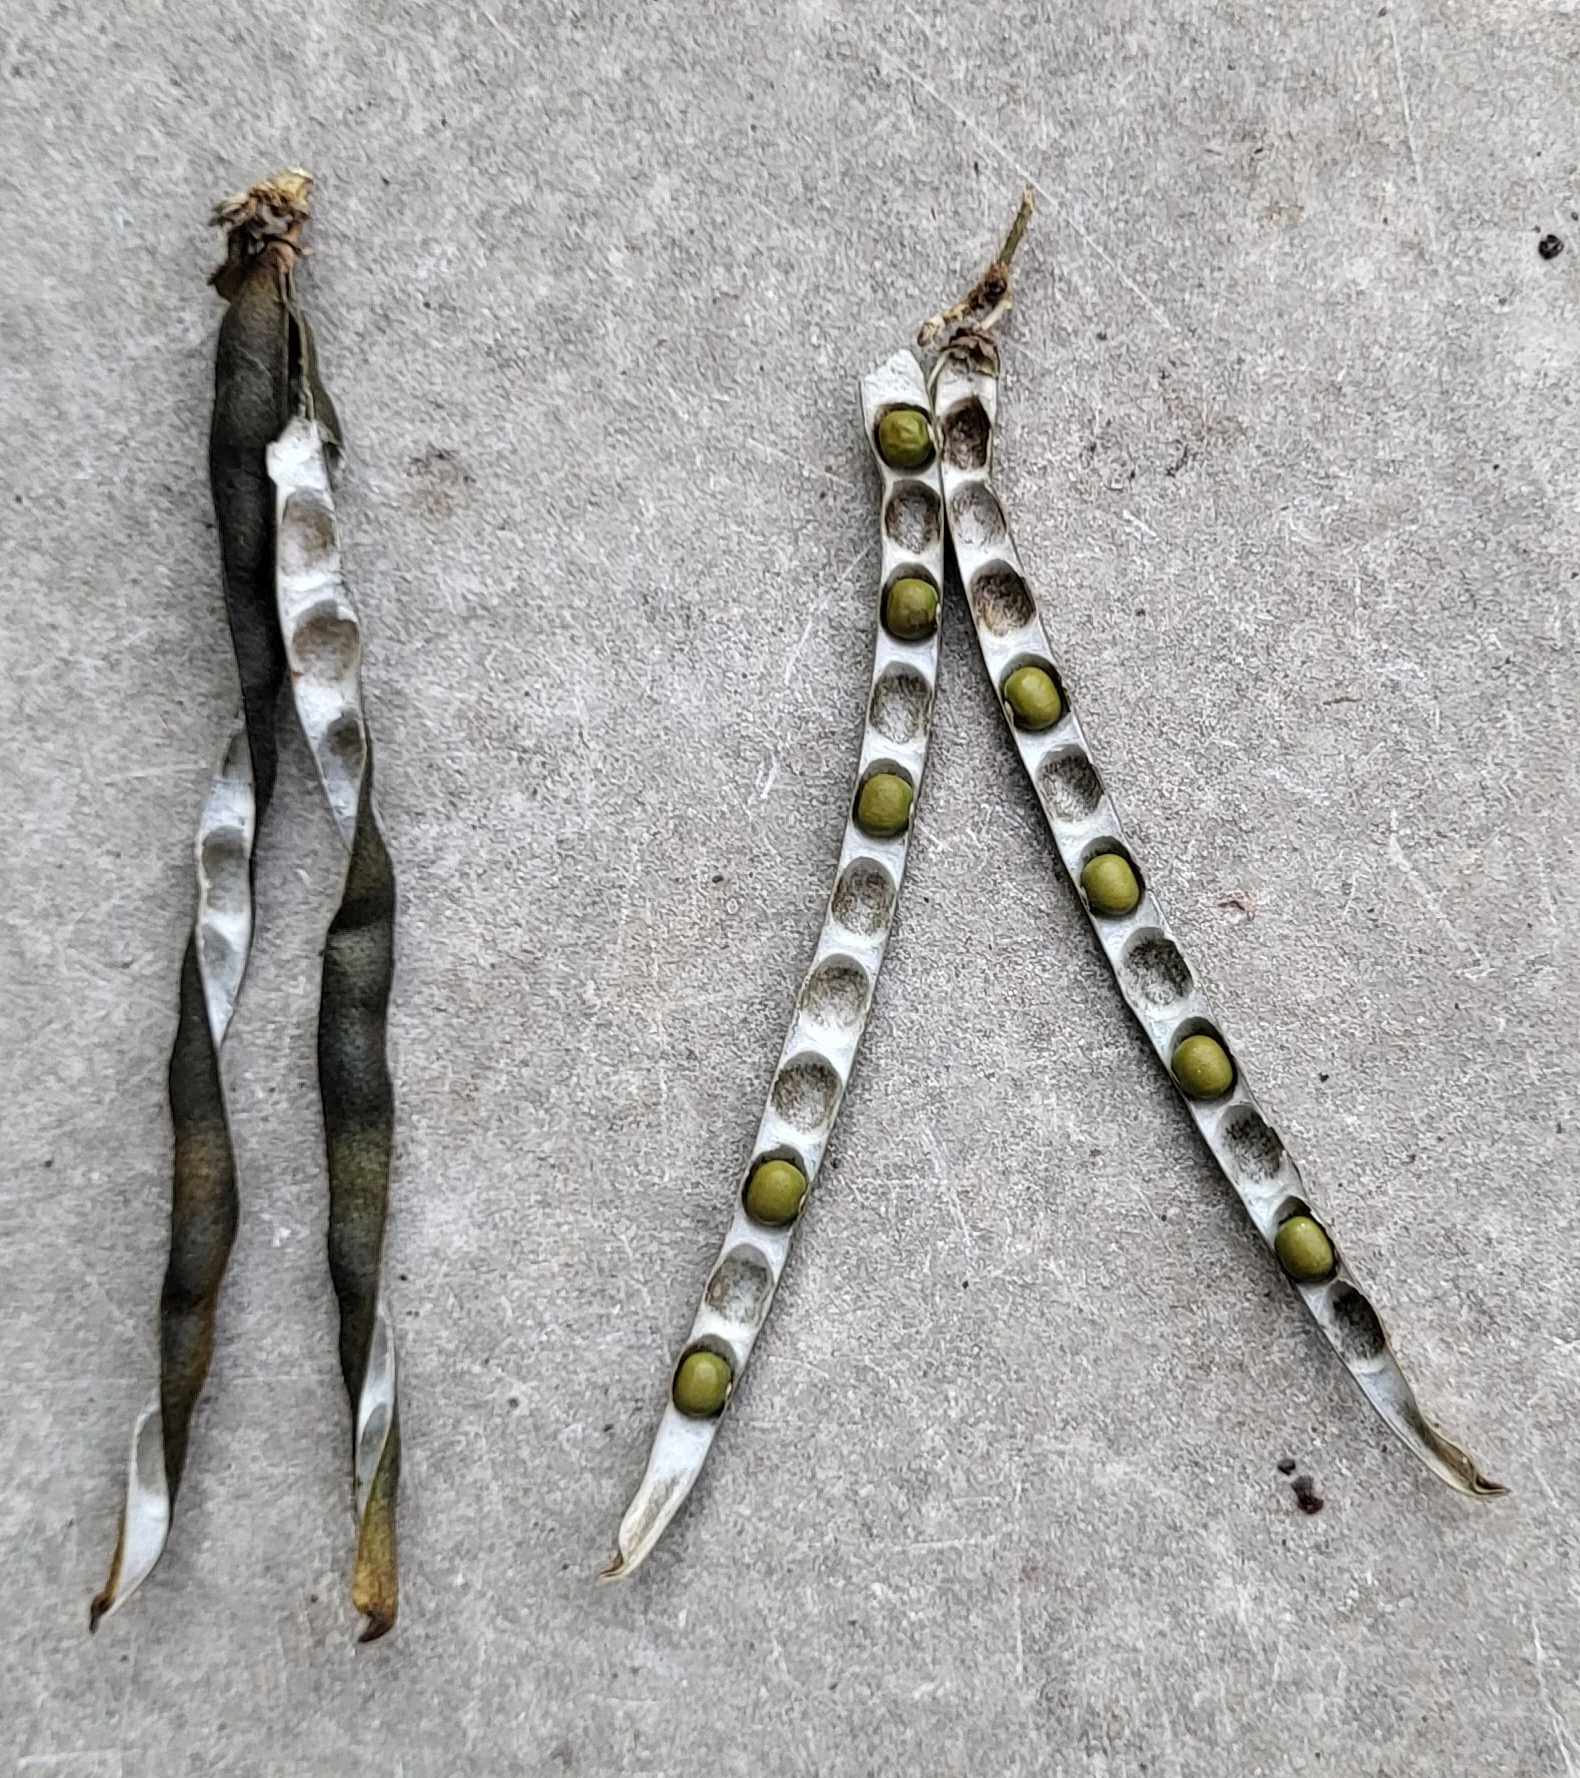
Arn · CC BY-SA 4.0
- Days to maturity
- 60–90 days
- Row spacing
- 37 cm
- Plant spacing in the row
- 10 cm
- Sowing depth
- 3–5 cm
These are general figures for the crop, compiled from published agronomic references including FAO and CABI. The right choice for your field depends on your soil, rainfall and the yield you are aiming for.
Will green gram actually do well on your field? Check your own field against every crop in the catalogue — no signup. Run the crop check →
Also known as
Green gram is also called mung bean and golden gram.
- English
- mung bean, golden gram
- French
- haricot mungo, ambérique
- Portuguese
- feijão-mungo
- Swahili
- pojo, ndengu, mchooko
Working in buckets, bags or paces? The farming glossary turns the measures growers actually use into kilograms and hectares — what a 20 litre bucket of each crop really weighs, and how to size a field by walking it — alongside the Shona, Swahili, Ndebele and Yoruba words used in the field. Open the glossary →
Growing green gram, stage by stage
Your green gram season, step by step — from clean seed and a firm, well-drained seedbed, through beating the whitefly virus and the weeds in the first month, to picking the pods in rounds and sealing dry seed away from the storage beetle.
Before you plant: get the field and inputs ready
Green gram is a short, fast crop — 60–90 days and it's done — so there is no time to fix a bad start. Almost everything that gives you a strong, even, healthy stand is decided now: the right variety (one that resists the yellow-leaf virus where that virus is around), clean seed with its root-bacteria powder, a little phosphorus starter, and a fine, well-drained seedbed. Get it all ready in the weeks before the rains so you can sow the moment the soil is warm and wet.
Plan the field / rotation Recommended
The two biggest yield-robbers of green gram — the yellow mosaic virus and soil-borne pests and diseases — are far cheaper to dodge than to fight. Picking a virus-resistant variety and a field that grew a cereal last season (maize, sorghum or millet), not another bean, starves those problems before you even sow.
Plan this in the weeks before you sow — as early as two months out, and settle it at least a week before sowing, while you can still choose the field and order the seed.
Choose a field that grew a cereal last season — maize, sorghum or millet — not beans, cowpeas or groundnuts. Rotating this way breaks the cycle of root diseases and soil pests that build up under beans.
Where the yellow mosaic virus is known in your area (plants that go bright yellow and stunted — see the scouting task), choose a virus-resistant or tolerant variety. Ask your dealer or extension officer for one by name.
Pick a well-drained spot. Green gram hates wet feet — it rots and yellows in low ground that stays soggy after rain.
Aim the crop at the short rains or a slot right after your cereal harvest — the fast 60–90-day crop fits neatly into either.
- Do:
Choose a virus-resistant variety where the yellow mosaic virus occurs, and always rotate with a cereal — never bean after bean.
- Tip:
Following green gram after another legume (beans, cowpea, groundnut) — shared root diseases and pests carry straight over and hit the new crop harder.
Buy resistant/clean seed + inoculant + P starter Critical
Clean, fresh seed of a virus-resistant variety, its root-bacteria powder, and a little phosphorus are the cheapest and most important things you buy all season — together they set a strong, even, healthy stand. Buy them in the two weeks before sowing so everything is in hand the day the soil is ready.
Buy certified seed — a sealed, labelled bag from a registered dealer, with the variety name and this season's packing date — not grain scooped from a sack, which may be old, mixed or diseased.
Ask for a virus-resistant or tolerant variety where the yellow mosaic virus is a problem. Keep the label and receipt in case the seed grows poorly.
Buy a sachet of rhizobium inoculant — a cheap powder of helpful root bacteria (Bradyrhizobium) that lets green gram pull its own nitrogen from the air. Buy the type made for green gram / mung bean, check it is not past its expiry date, and keep it cool and out of the sun — heat kills the bacteria.
Buy a little phosphorus starter — a small amount of DAP (di-ammonium phosphate, a starter fertiliser) or single superphosphate. Green gram is a bean: it feeds itself with nitrogen, so it needs almost no nitrogen fertiliser — just phosphorus to build strong early roots. Your recommendation gives the amount for your field.
Store seed, inoculant and fertiliser dry, off the floor, and away from food, water and children, and use the inoculant before its expiry date.
- Do:
Match the seed you buy to your field size so you plant about 12–20 kg per hectare — too little leaves gaps, far too much crowds the plants and feeds disease.
- Tip:
Buying plain nitrogen fertiliser like urea for green gram — as a bean it makes its own nitrogen, and extra N just grows leaf, delays pods and wastes your money. Phosphorus is what it wants.
- Watch out:
Check the inoculant's expiry date and keep it out of the sun — it is living bacteria, so old or overheated powder does nothing.
Prepare a well-drained seedbed Recommended
Green gram seed is small, and its roots hate standing water. A fine, firm, well-drained seedbed lets every seed press against moist soil and sprout evenly, and lets rain drain away instead of drowning the young roots.
In the two weeks before sowing, clear weeds and old crop trash off the planting lines so weeds don't get a head start.
Loosen the soil to about a hand-span deep (≈20 cm) so roots go down and rain soaks in, then break the clods to a fine, crumbly tilth — small seed sown into big clods sits in air pockets and comes up patchy.
Keep off low, waterlogging-prone ground. If your only field holds water, make raised beds or ridges and plant on top, so the roots stay above the wet.
Level the surface so water doesn't pool. On a slope, work across the slope (not up-and-down) to catch and hold the rain.
- Tip:
Sowing into a low spot that puddles after rain — green gram roots rot and the plants turn yellow and die in waterlogged soil.
- Do:
If you have a little well-rotted compost, work a light dressing into the topsoil — it helps a poor, sandy soil hold moisture for the fast crop.
Sow and get a full, even stand
You sow now, and the number of healthy plants that come up is the ceiling on your harvest — you cannot add plants later. Green gram comes up fast: 3–7 days after sowing into warm, moist soil. The big danger in these first weeks is the tiny whitefly, which carries the yellow mosaic virus from plant to plant — so hit the first whiteflies and pull out the first yellow-mottled plants before the virus spreads through the field.
Sow + inoculant + P starter Critical
This is your one shot at the plant stand — get the spacing, depth, root-bacteria powder and phosphorus right in a single pass. A full, even stand of strong seedlings is the biggest thing you control, and it all rides on how you sow today.
Sow on a good planting rain into warm, moist soil, so the seed comes up fast and even in 3–7 days. Push your hand in — the soil should be wet below the surface, not just damp on top.
On land that has not grown green gram or beans before, coat the seed with the rhizobium inoculant first: moisten the seed with a little clean water or thin sugar-water, dust the powder over it in the shade until the seed looks dark, and sow within a couple of hours. This gives the plant its own nitrogen supply — keep the coated seed out of the sun.
Open furrows just under two hand-spans apart (≈37 cm) — narrow rows, so the crop shades out weeds fast.
Space the seed about half a hand-span apart (≈10 cm) down the row, and cover it about one finger-joint deep (3–5 cm) — a touch deeper in dry, sandy soil, shallower in heavy, wet soil.
Band the little phosphorus starter (DAP) about a finger-joint (3–5 cm) to the side of the seed and slightly below it — never touching the seed, or the fertiliser burns and kills the sprout. Remember: as a bean, it wants phosphorus, not nitrogen.
Cover and firm the soil so each seed sits snugly in moist earth, aiming for a seed rate of about 12–20 kg per hectare.
- Watch out:
As the crop comes up, turn a few leaves: whiteflies are tiny white moth-like flies on the leaf undersides that puff up in a little cloud when you shake the plant. They bring the yellow mosaic virus — deal with the first colonies at once (see scouting).
- Do:
Inoculate the seed in the shade and sow it quickly — sunlight and heat kill the root bacteria, and dead powder gives no nitrogen.
- Tip:
Letting the phosphorus fertiliser touch the seed in the furrow, or landing on wet leaves — keep a gap of soil between seed and fertiliser, and wash your hands after handling it.
Scout (whitefly, cutworms, gaps) Critical
The first month decides your stand and whether the yellow mosaic virus gets a grip. Whiteflies spread it plant to plant, cutworms fell seedlings overnight, and gaps can still be filled if you catch them now. Ten minutes, twice a week, protects the whole short season.
From about 5 days after sowing, walk the crop twice a week — cover the corners and the middle, not just the edge by the path.
Whitefly: turn leaves and look at the undersides for tiny white moth-like flies that lift off in a cloud when you shake the plant. These are the ones that carry the virus.
Yellow mosaic virus (MYMV, short for mungbean yellow mosaic virus): look for young leaves with bright yellow-and-green patches (mottling), puckered, on plants that stay small. Pull out and destroy any mottled plant the moment you see it — this is called roguing, and it removes a source the whiteflies would spread to the rest.
Cutworms: look for young seedlings cut clean off at ground level (worst in the morning). Scratch the soil nearby to find the fat, grey, curled caterpillar and squash it.
Count the gaps (stations with no plant) as you go, so you know whether to fill them while the crop is still only a few days old.
- Do:
Rogue the first virus-mottled plants at once — one pulled today saves the many a whitefly would carry it to tomorrow.
- Watch out:
A cloud of tiny white flies rising as you brush the plants means whitefly numbers are climbing — act before the virus spreads.
Irrigate until established Recommended
Young green gram roots are shallow and dry out fast. If you can water, steady moisture in the first 10 days gives even emergence and a strong, uniform start.
If you irrigate, keep the topsoil moist but never waterlogged from sowing through the first 10 days — green gram rots in standing water.
Water every 3–5 days, more often on sandy soil and in heat; check by pushing a finger in, and water when the top few centimetres are dry.
Water gently, so you don't wash out seed or beat the soil into a hard crust the seedlings can't push through.
- Tip:
Flooding the field or leaving water standing — green gram roots rot and the seedlings yellow and die in waterlogged soil. Drain any low spots.
Leafy growth and the critical weeding
Now the plant builds its leafy frame — and the single most important job of the whole season happens here: keeping the field weed-free from about 15 to 35 days after sowing. Weeds left in that window can cost you half to nine-tenths of your crop. Keep watching for whitefly and pull out any yellow-mottled plants — no spray reliably cures the virus, so clean plants and few whiteflies are your only real defence.
Scout (whitefly/MYMV, aphids) Critical
Through leafy growth the yellow mosaic virus can still race across the field on whiteflies, and aphids start to build on the shoot tips. Catching them early — and roguing virus plants — keeps the leaf factory whole for the pods to come.
Keep walking the crop twice a week, from about 10 days after sowing on.
Whitefly and virus: turn leaves for whiteflies on the undersides, and pull out any plant showing bright yellow-and-green mottling — rogue it straight away, roots and all.
Aphids: look for clusters of tiny soft green or black insects on the growing tips and leaf undersides, often with sticky, shiny leaves and ants running about. A few are normal; dense colonies curling the tips need action.
While you are in the crop, judge how weedy it is — this is the critical weeding window, so if weeds are coming, weed now (see the weeding task).
- Tip:
Weeding late — uncontrolled weeds in the 15–35-day window cost 50–90% of the crop. Nothing else you do this season matters more.
- Watch out:
Sticky, shiny leaves with ants running about usually mean aphids feeding above — check the shoot tips.
Weeding — critical window Critical
This is the most valuable job of the season. Weeds between about 15 and 35 days after sowing steal the water, light and root-room green gram needs just as it builds up — leaving them costs 20–50% of your yield (and up to 90% if they take over). A clean field now is the cheapest yield you will ever gain.
Weed the crop clean between 15 and 35 days after sowing — the earlier in that window, the better, before the weeds get bigger than the crop.
Hoe shallowly between and within the rows — green gram roots run near the surface, and deep hoeing close to the plants cuts them and the nitrogen-fixing nodules on them (the little pinkish knobs on the roots where the root bacteria make the plant's own nitrogen).
Pull weeds close to the plants by hand so you don't disturb the crop, and take them roots and all where you can — chopping only the tops lets many regrow.
The narrow rows (≈37 cm) work for you: once green gram closes its canopy and shades the ground, new weeds struggle — so your job is just to keep it clean until it covers over.
In dry areas, leave the pulled weeds lying between the rows as a mulch to hold moisture.
- Do:
Weed while the weeds are still small and the crop is in its 15–35-day window — this one job protects more yield than anything else you do.
- Tip:
Deep hoeing right against the plants — it slices the shallow roots and the nitrogen-fixing nodules, setting the crop back.
Irrigate in dry spells Recommended
Green gram is built to take some dryness, but a hard dry spell during leafy growth stunts the frame that must carry the pods. If you irrigate, a drink about once a week in dry weather keeps it growing.
If you irrigate, water every 7–10 days during dry spells through leafy growth (about 10 to 30 days after sowing).
Let the surface dry a little between waterings — green gram would far rather be a bit dry than waterlogged.
Don't let the crop wilt badly at this stage; a stunted frame carries fewer pods.
- Tip:
Watering little and often to a soggy field — green gram roots rot in constantly wet soil. Water well, then let the top dry before the next drink.
Flowering — protect the flowers
Flowering is the water-critical stage — the pods you will pick are being set right now, and dry soil or heat here cuts straight into your harvest. It is also when thrips and the Maruca pod borer attack the buds and flowers. Keep the soil evenly moist and spray at bud / half-flowering to protect the flowers that become your pods.
Scout (thrips in flowers, Maruca webbing) Critical
The flowers are your future pods, and two pests hit them hard right now: thrips rasp the buds so flowers drop, and the Maruca pod borer webs flowers together and eats inside. You have to look inside the flowers to catch them — and act at bud / half-flowering, before they hide away in the pods.
From about 30 days after sowing, when flower buds appear, scout every 2–3 days — flowering is short and these pests move fast.
Thrips: open a few buds and flowers and look for tiny, thin, fast-moving slivers (yellow to black) inside; damaged flowers dry up and drop without setting a pod. Tap a flower over your pale palm to see them move.
Maruca pod borer: look for flowers and young pods webbed together with silk, with droppings caught in the webbing; pull the web apart and you'll find a caterpillar feeding inside.
Keep turning leaves for whitefly, and rogue any late yellow-mottled virus plants you still find.
If you find thrips or Maruca webbing in the flowers, spray at bud / 50% flowering (see the flowering-spray task) — that is the moment they are out in the open.
- Do:
Spray at bud / 50% flowering for thrips and the Maruca pod borer — Maruca hides inside webbed flowers, so a later spray misses it.
- Watch out:
Flowers drying and dropping without leaving a pod is the tell-tale sign of thrips — open the buds and look inside.
Flowering spray (thrips + Maruca) Recommended
One well-timed spray at bud / half-flowering protects the flowers that turn into your pods from thrips and the Maruca pod borer. Timing beats strength here: hit them while they are on the open flowers, before Maruca burrows into a pod where no spray can reach.
Spray at first flowers / 50% flowering — not before the buds show, and not after the pods have formed and the caterpillars are already inside.
Measure the approved product with its own cap into a full knapsack sprayer (15–20 litres) exactly as the label says — don't guess or over-mix.
Cover your skin, eyes, nose and mouth, and spray in the cool of early morning or evening with the wind behind you, so the mist blows away from your face. Wet the flowers and the leaf undersides until just before it drips.
Where the pests keep coming, spray again about 10 days later, and rotate to a different chemical group so the pests don't get used to one.
Respect the pre-harvest interval — the number of days the label says to wait after spraying before it is safe to pick and eat. Wash yourself and the sprayer afterwards, well away from wells, rivers and food.
- Do:
Spray in the cool of the day with the wind at your back, skin and face covered — and keep the spray off any pods you will pick within the pre-harvest interval.
- Tip:
Spraying in the heat of the midday sun or into the wind — you lose the chemical, scorch the crop and dose yourself.
- Watch out:
Bees and other helpful insects visit the flowers — spraying at dusk, when they have gone home, spares them.
Irrigate — flowering is water-critical Recommended
Flowering is the thirstiest, most water-sensitive stage of green gram — the plant is drinking hardest (its water need more than doubles from the early crop). Dry soil or heat now makes flowers drop and pods fail to set, so if you can water at only one stage, water now.
From about 30 days after sowing, through flowering, keep the soil evenly moist — water every 5–7 days, more often in heat.
Never let the crop wilt during flowering, even for a day — wilted plants shed their flowers and set fewer pods.
Water in the cool of the day to lose less to evaporation, and keep it even — big swings from bone-dry to flooded knock the flowers off.
- Watch out:
Flowers dropping in a hot, dry spell is the crop telling you it's thirsty — flowering is the one stage never to let go dry.
- Tip:
Letting the field swing from bone-dry to flooded — sudden stress at flowering knocks the flowers off. Keep it steadily moist.
Pods forming and filling
The flowers have become pods, and they are filling with seed — this is where your grain weight comes from. Pods set in waves, so they will ripen unevenly. Keep the soil moist through filling, keep watching for the pod borer and pod-sucking bugs that feed on the seed inside, and get ready to pick in 2–3 rounds.
Scout (pod borer, pod bugs) Recommended
The seed forming inside the pods is the crop itself, and two pests eat it there: the Maruca pod borer bores in and hollows the seeds, and pod-sucking bugs pierce the wall and shrivel the grain. Spotting them now means you can act before they spoil a pod you have already grown.
From about 45 days after sowing, check the pods twice a week as they form and fill.
Pod borer (Maruca): look for pods webbed together, small bore-holes with droppings at the entry, and hollowed or eaten seeds inside when you split a pod open.
Pod-sucking bugs: look for green, brown or spiny shield-shaped bugs sitting on the pods; the seeds beneath their feeding spots turn sunken, dark and shrivelled.
Pull and open a few suspect pods to judge how many are hit — light numbers you can tolerate, but heavy attack on filling pods needs a spray (same care as the flowering spray).
- Watch out:
Green or brown shield-bugs clinging to the pods, and shrivelled dark seeds inside, are pod-sucking bug damage — check the filling pods, not just the leaves.
- Do:
Open a few pods to look at the seeds inside — the real damage from borers and bugs is hidden in the seed, not always on the pod surface.
Irrigate — maintain through fill Recommended
Seed weight is laid down as the pods fill. If the crop goes dry now, the seeds stay small and light and you lose grain you had already made. Steady moisture through filling keeps the seeds plump — until it's time to let the crop dry down for harvest.
If you irrigate, keep the soil moist through pod-fill (about 45 to 65 days after sowing), watering every 5–7 days.
Keep the water even while the pods and leaves are still green and filling.
As the first pods turn black or brown and dry, start to ease off the water so the crop can dry down for picking — don't keep it wet into ripening.
- Tip:
Watering right up to harvest — wet soil at ripening slows drying, splits pods and rots seed. Ease off as the pods start to blacken.
Harvest — pick the pods in rounds
Because the pods ripened in waves, they won't all be ready at once — so you pick in 2–3 rounds, about a week apart, taking only the dry pods each time. The pods shatter (burst open and scatter their seed) if you leave them too long, so timing each pass matters. A pod is ready when it is black or brown, dry, and rattles when you shake it and the seed is hard.
Hand-pick dry pods each pass Critical
Green gram pods ripen in flushes and shatter — burst open and drop their seed on the ground — if left too long. Picking the dry pods in 2–3 weekly rounds catches each flush at its peak and stops your grain spilling away, which is pure loss you can never get back.
Start the first pick from about 60 days after sowing, as soon as the earliest pods are black or brown, dry and hard. Pick in the cool of the morning, when dry pods are less likely to burst as you handle them.
Take only the fully dry, dark, rattling pods each pass — leave the green and part-filled ones on the plant to ripen for the next round.
Come back about every 7 days for a second and, if needed, a third pass, until you have gathered the last of the pods.
Readiness check: a ready pod is black or brown, dry, and rattles when shaken, with hard seed. If the pods are still green or leathery and the seed is soft → they are not ready; leave them and pick them in the next pass — soft seed shrivels and won't store.
Carry the picked pods in to dry further before threshing — don't leave them heaped in the sun to overheat.
- Do:
Pick the dry pods before they shatter — the crop matures unevenly, so a weekly round beats waiting for one big harvest that spills on the ground.
- Watch out:
Pods split and scatter their seed most on hot afternoons — pick in the cool morning to save grain.
- Tip:
Waiting for every pod to ripen together — by then the first pods have burst and dropped their seed. Pick in rounds.
Thresh dried pods Recommended
Threshing knocks the seed free of the dry pods. Doing it once the pods are fully dry, and gently, gives clean, whole seed; rushing it while pods are leathery, or beating too hard, leaves seed in the husk or cracks the grain — and cracked seed rots and won't germinate.
Let the picked pods dry fully first — in the sun on a mat, tarpaulin or clean hard floor, never on bare earth, which pushes damp back in and adds stones and dirt.
Put the dry pods in a sack or on a tarpaulin and beat or tread them gently to split the pods and free the seed — don't pound so hard you crack the grain.
Winnow the seed: pour it slowly in a light wind or in front of a fan so the chaff and dry pod-bits blow away and the clean, heavy seed drops.
Pick out any stones, trash and holed or broken seeds — clean, whole seed stores far better.
- Do:
Thresh only fully dry pods — leathery pods hold onto their seed and force you to beat harder, which cracks the grain.
- Tip:
Threshing on bare ground — the seed picks up damp, stones and animal dirt, and damp seed moulds in the store.
Dry hard and store — beat the storage beetle
Your crop is grown — now don't lose it in the store. The bruchid (a small bean beetle) lays its eggs in the pods out in the field, and its grubs hatch and eat the seed from the inside, turning a good harvest to powder. Beat it by drying the seed hard (to about one part water in eight — ≤12% moisture) and sealing it airtight: with no air, the beetles smother and die.
Dry & seal in hermetic bags Critical
The bruchid beetle rides in from the field inside the seed and multiplies in the store, hollowing the grain and leaving round holes and powder. Drying the seed hard and sealing it in an airtight bag starves and suffocates the beetle with no chemical — the difference between seed that keeps for months and a crop eaten from the inside.
Dry the threshed seed hard on a mat, rack or tarpaulin (never bare ground), turning it so it dries evenly and covering it if rain threatens.
Moisture check — bite test: seed dry enough to store is hard and shatters when you bite it, not squashy or dented. That's about ≤12% moisture — roughly one part water in eight. If it squashes or dents → it is still too wet; dry it more before you seal it, or it will mould and heat in the bag.
For extra protection, sun-disinfest first: spread the dry seed thin in strong sun for a few hours, or seal it in a clear plastic bag or bottle in full sun — the heat kills eggs and beetles already in the seed.
Seal the fully-dry seed in a hermetic (airtight) bag — a PICS or triple-layer 'grain-saver' bag — pressing out the air and tying each liner tightly. The airtight seal suffocates the bruchid; no chemical needed.
Keep the sealed bags off the floor and away from the wall, in a cool, dry, shaded place, and try not to open them often. Check monthly for round exit-holes, fine powder or moving beetles, and re-dry and re-seal if you find any damp.
- Tip:
Storing green gram in ordinary open sacks — the bruchid comes in from the field and breeds fast, riddling the seed with holes in a few weeks.
- Do:
Store the seed bone-dry and airtight — dry it hard, press out the air, and seal it. That alone beats the storage beetle without any chemical.
- Watch out:
Small round holes in the seeds, fine powder in the bag, or tiny beetles moving mean bruchids are active — sun the seed again and re-seal, and use that batch for eating first.
Pests and diseases that attack green gram


Where to sell green gram
Markets that trade this crop — what each one sells it by, when supply peaks there, and the currency used.

Grow green gram with a plan, not a guess
This guide is the general answer. Divisi works out yours — the week to plant green gram on your soil and your rainfall, and each job dated for your field.


When to plant green gram, country by country
- When to plant green gram in Algeria
- When to plant green gram in Angola
- When to plant green gram in Benin
- When to plant green gram in Botswana
- When to plant green gram in Burkina Faso
- When to plant green gram in Burundi
- When to plant green gram in Cabo Verde
- When to plant green gram in Cameroon
- When to plant green gram in Comores
- When to plant green gram in Congo
- When to plant green gram in Côte d'Ivoire
- When to plant green gram in Egypt
- When to plant green gram in Eritrea
- When to plant green gram in Eswatini
- When to plant green gram in Ethiopia
- When to plant green gram in Gabon
- When to plant green gram in Gambia
- When to plant green gram in Ghana
- When to plant green gram in Guinea Ecuatorial
- When to plant green gram in Guinea-Bissau
- When to plant green gram in Guinée
- When to plant green gram in Kenya
- When to plant green gram in Lesotho
- When to plant green gram in Liberia
- When to plant green gram in Libya
- When to plant green gram in Madagascar
- When to plant green gram in Malawi
- When to plant green gram in Mali
- When to plant green gram in Mauritanie
- When to plant green gram in Mauritius
- When to plant green gram in Morocco
- When to plant green gram in Moçambique
- When to plant green gram in Namibia
- When to plant green gram in Niger
- When to plant green gram in Nigeria
- When to plant green gram in Rwanda
- When to plant green gram in République centrafricaine
- When to plant green gram in République démocratique du Congo
- When to plant green gram in Sao Tome and Principe
- When to plant green gram in Seychelles
- When to plant green gram in Sierra Leone
- When to plant green gram in Somalia
- When to plant green gram in South Africa
- When to plant green gram in South Sudan
- When to plant green gram in Sudan
- When to plant green gram in Sénégal
- When to plant green gram in Tchad
- When to plant green gram in Togo
- When to plant green gram in Tunisie
- When to plant green gram in Uganda
- When to plant green gram in United Republic of Tanzania
- When to plant green gram in Zambia
- When to plant green gram in Zimbabwe
Where green gram scores best
Districts where Divisi's engine currently rates this crop highest, ranked by fit.


Get Insights by email
A short digest of new Divisi articles. No email on quiet weeks.
Frequently asked questions
How do I grow green gram?
How to grow green gram: 60–90 days to maturity, 37 cm rows, 3–5 cm deep. Also called mung bean, haricot mungo, feijão-mungo, pojo.
What is haricot mungo in English?
Haricot mungo (also ambérique) is the French name for green gram.
What is feijão-mungo in English?
Feijão-mungo is the Portuguese name for green gram.
What is pojo in English?
Pojo (also ndengu and mchooko) is the Swahili name for green gram.
How long does green gram take to grow?
Green gram takes about 60–90 days from sowing to maturity, though the exact length varies with variety, temperature and how the season runs.
What spacing should I use for green gram?
Space green gram rows about 37 cm apart, with roughly 10 cm between plants within the row.
How deep should green gram be planted?
Sow green gram at about 3–5 cm deep. Shallower risks drying out; deeper wastes seed energy before the shoot reaches light.
What pests and diseases attack green gram?
The ones covered in this guide are Legume pod borer, Mungbean yellow mosaic virus. Each has its own page explaining how to identify, check for and control it.