 Divisi
How to grow jute mallow
Corchorus olitorius · Malvaceae
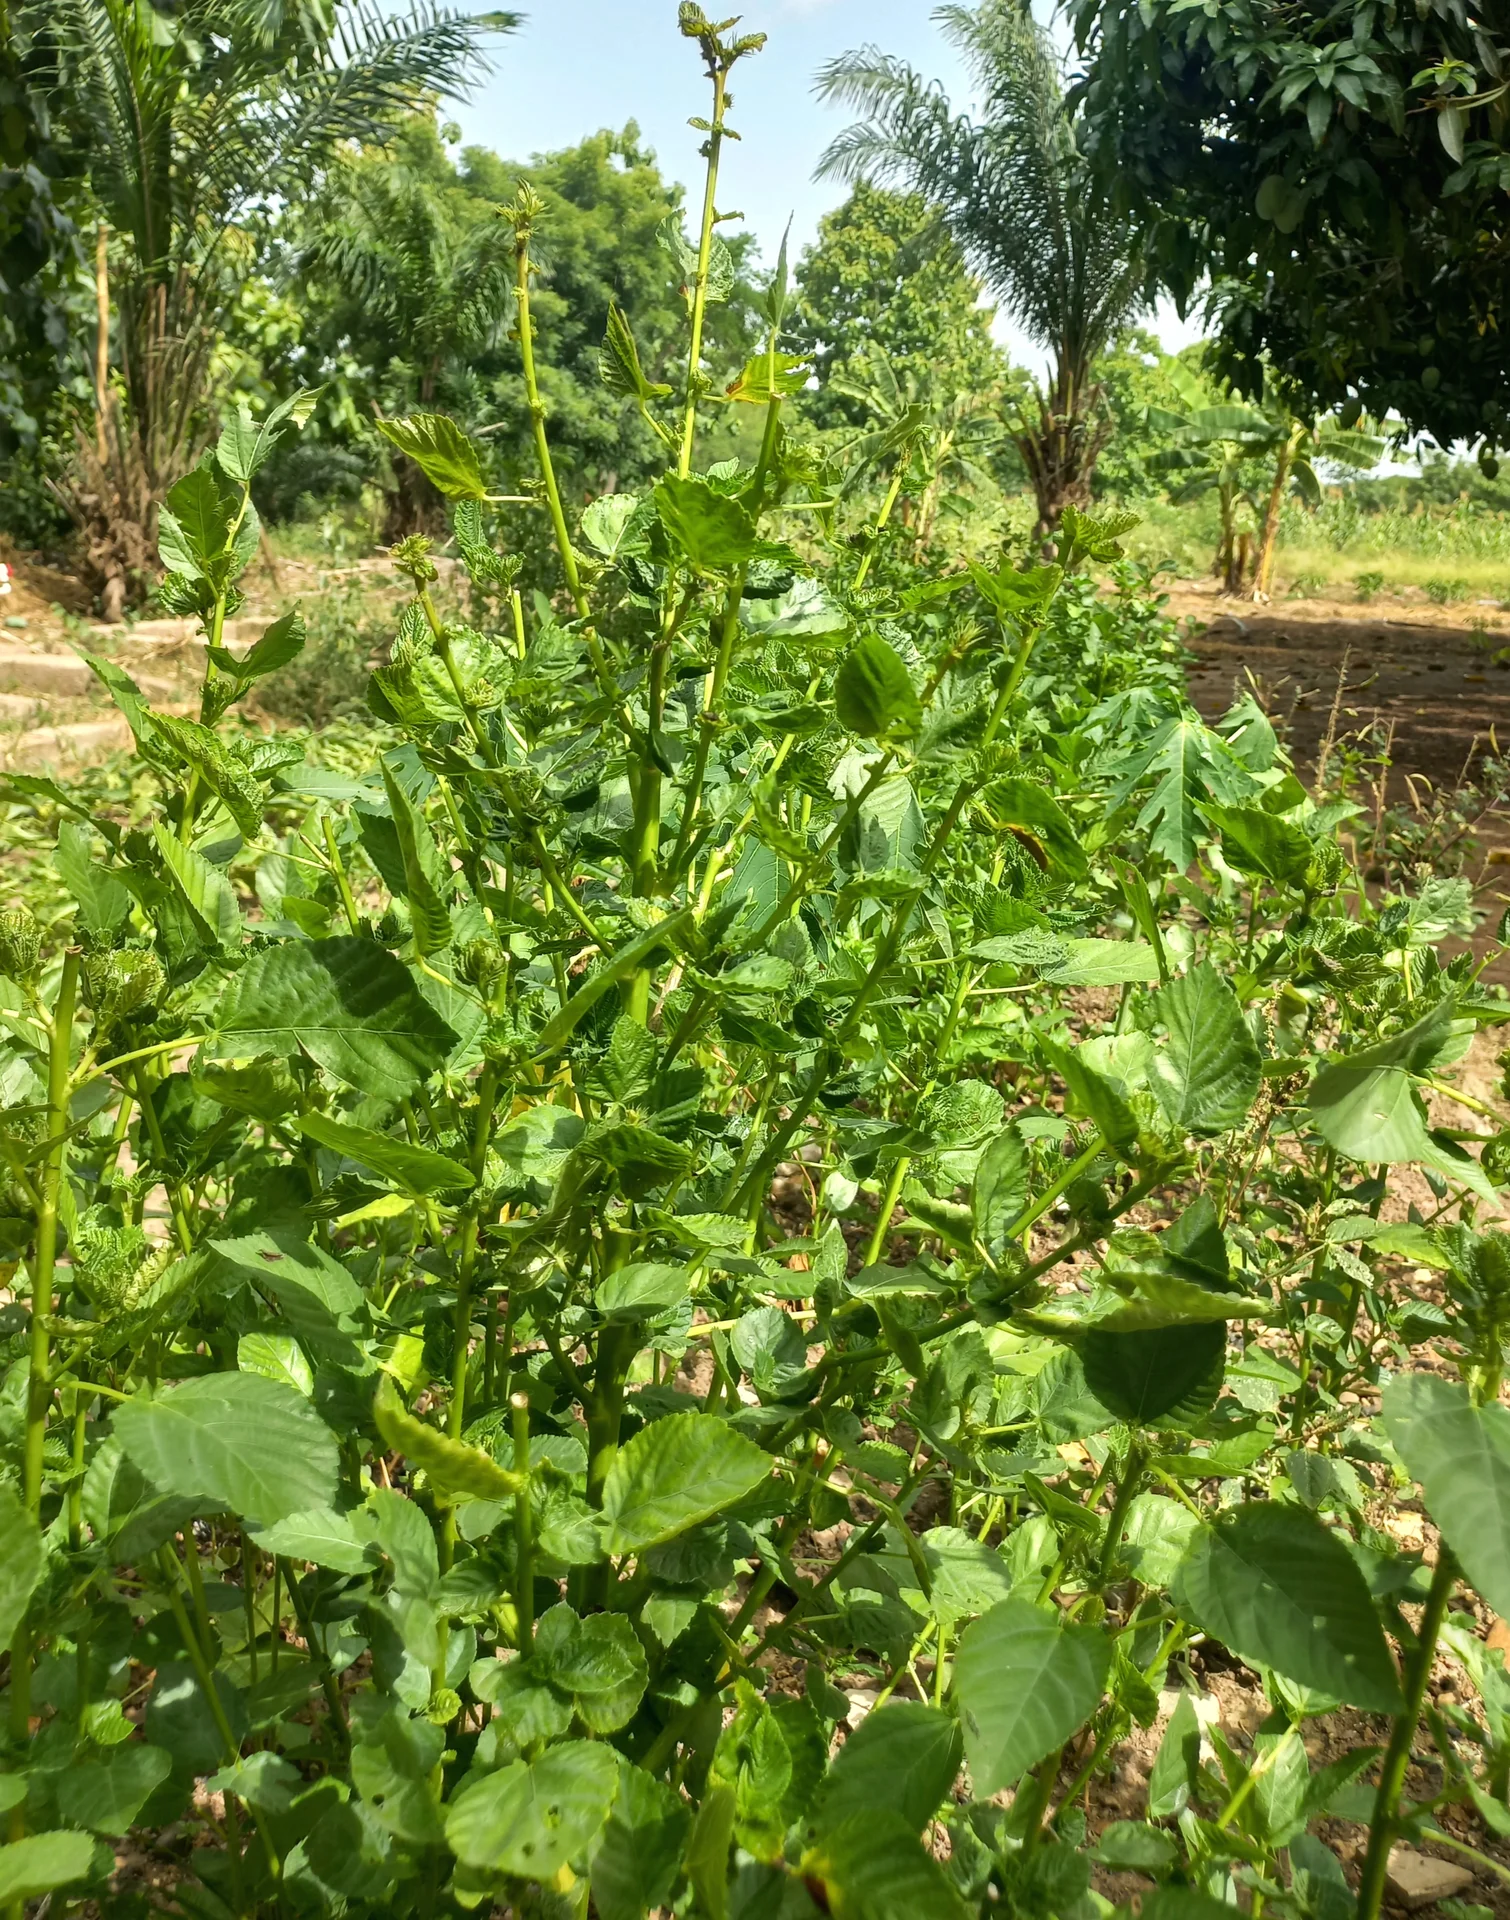
Photo: Colesman25 · CC BY-SA 4.0
Jute mallow (Corchorus olitorius) — known as ewedu, molokhia, mrenda, murere, gusha and bush okra — is a fast, hot-season leafy vegetable grown for its tender leaves and soft shoot tips. Cooked, the leaves turn pleasantly slippery — this "draw" is what thickens molokhia and ewedu soups. It races from a dust-fine seed to your first pot of greens in just a few weeks, and — kept young by regular cutting and by pinching off its flowers — one sowing gives you cut after cut of soft leaf. Two things make or break it: cracking the hard seed coat so the whole bed comes up together, and keeping the plant leafy before the shortening days push it to flower and turn woody.
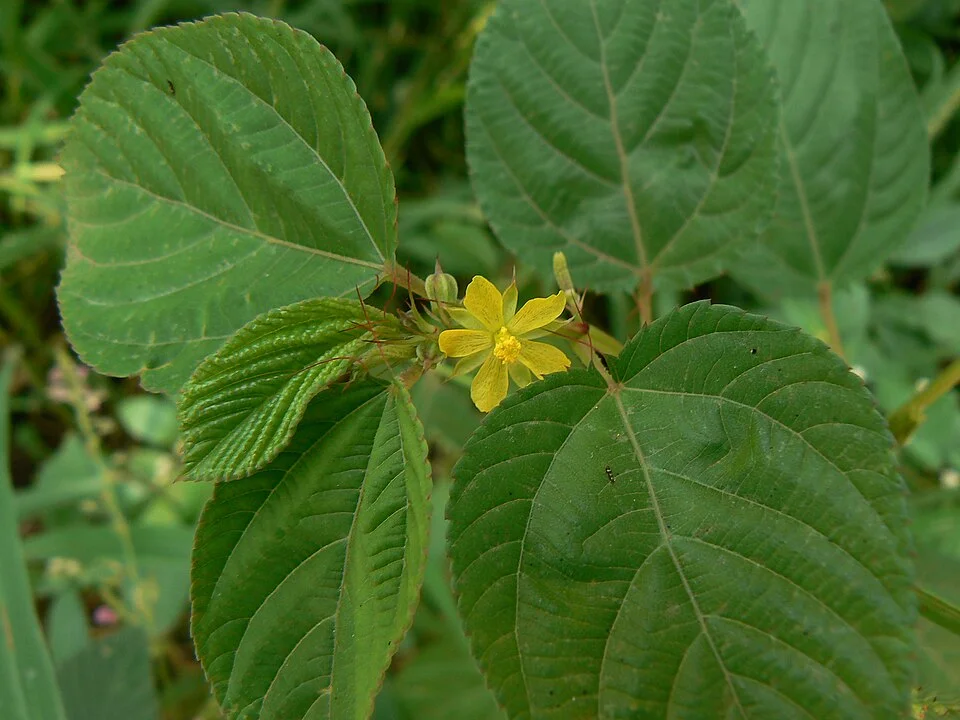
Dinesh Valke from Thane, India · CC BY-SA 2.0 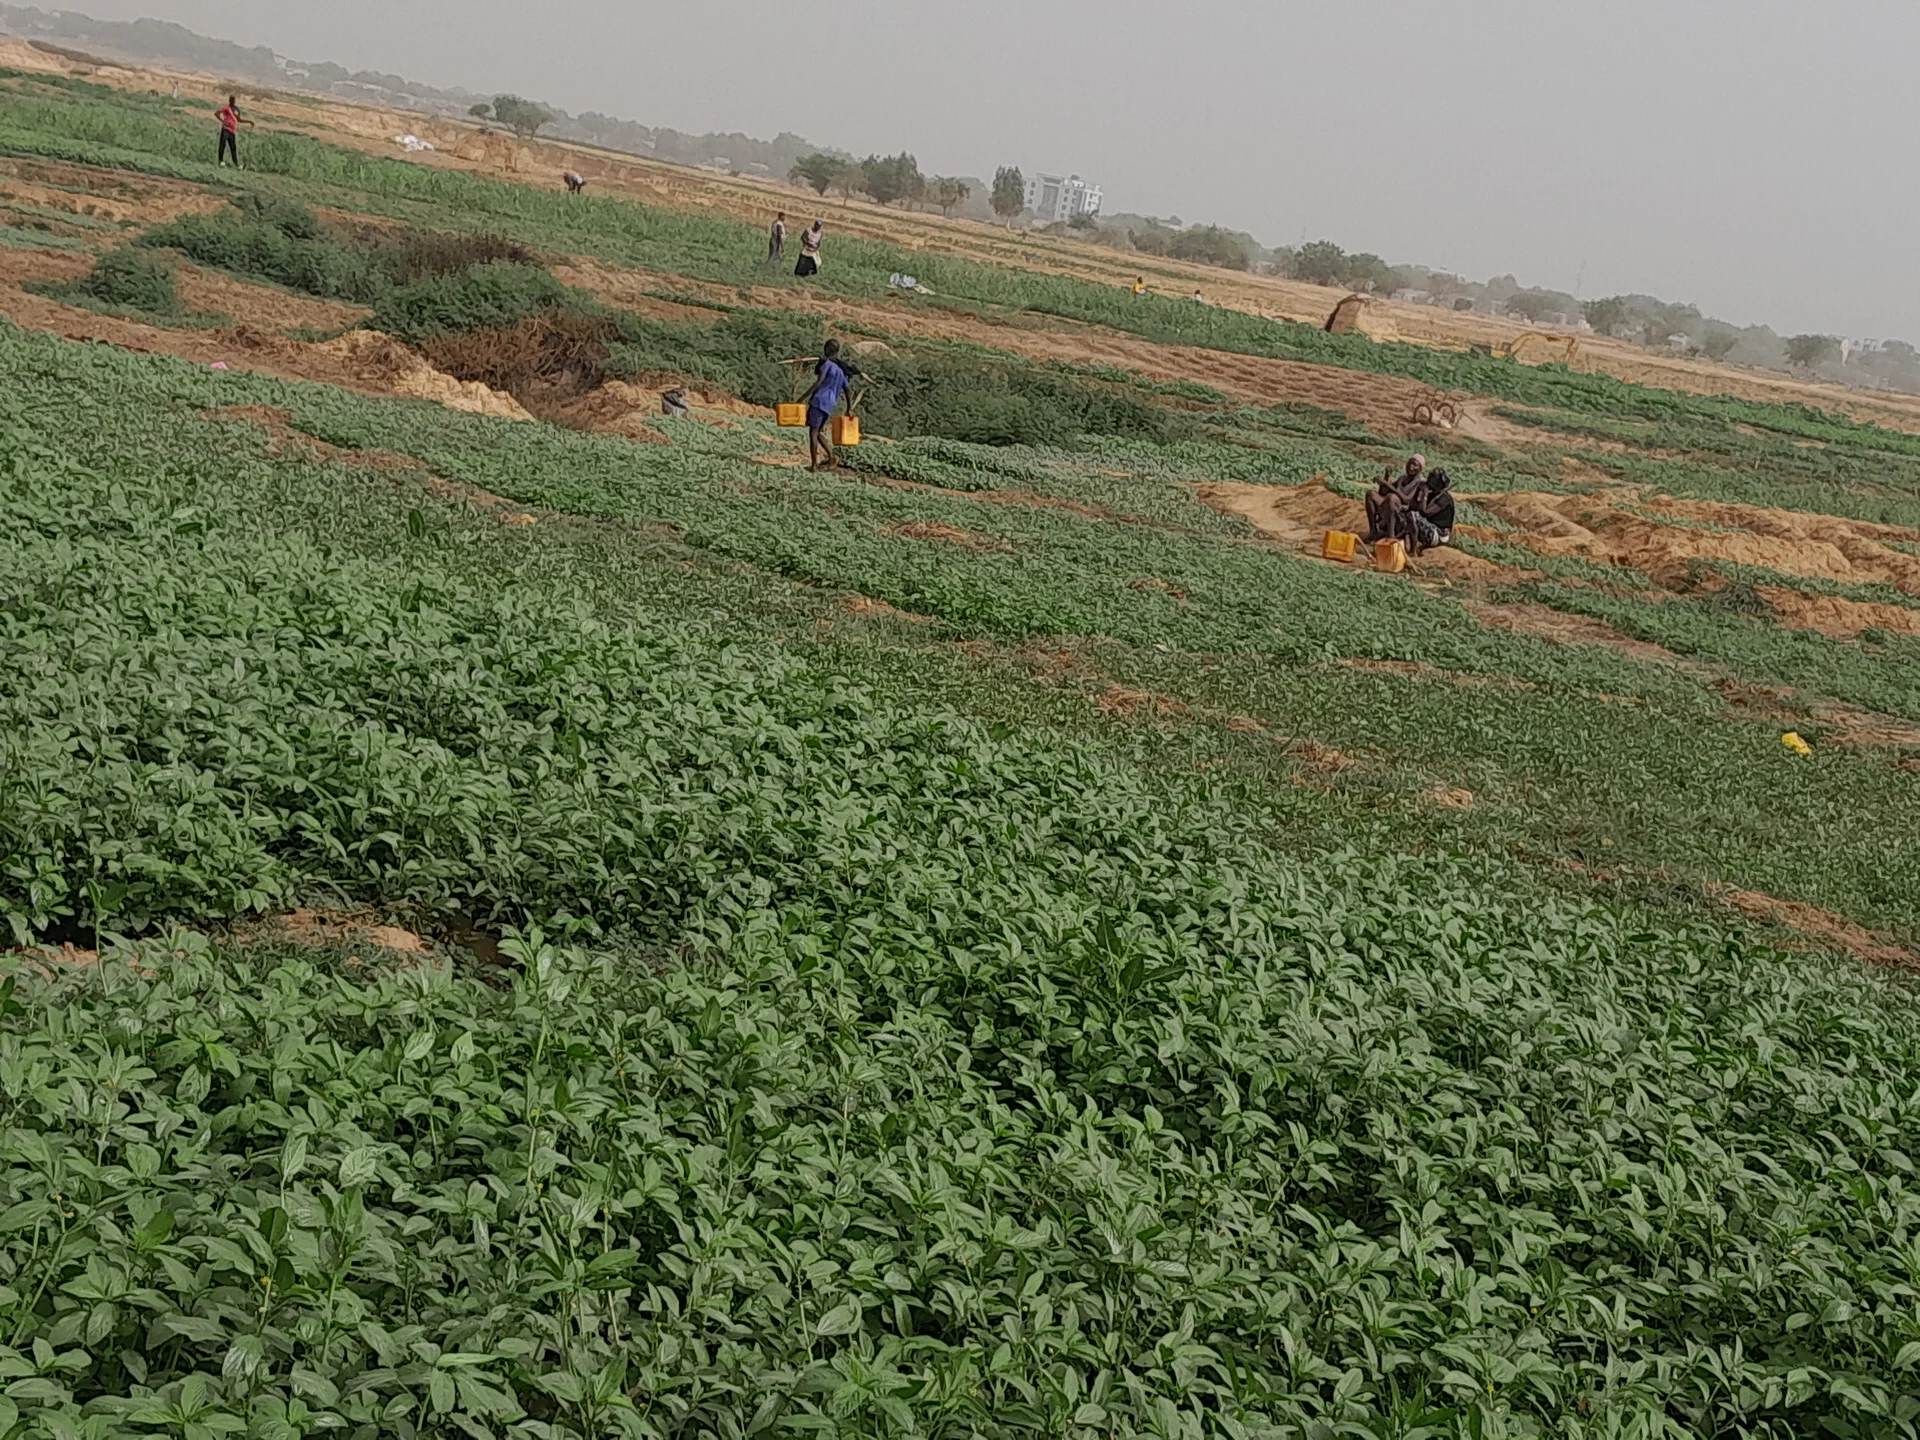
Abdeldjelil Souleyman · CC BY-SA 4.0
- Days to maturity
- 40–60 days
- Row spacing
- 47 cm
- Plant spacing in the row
- 12 cm
- Sowing depth
- 0.5–2 cm
These are general figures for the crop, compiled from published agronomic references including FAO and CABI. The right choice for your field depends on your soil, rainfall and the yield you are aiming for.
Will jute mallow actually do well on your field? Check your own field against every crop in the catalogue — no signup. Run the crop check →
Also known as
Jute mallow is also called bush okra, Jew's mallow and Egyptian spinach.
- English
- bush okra, Jew's mallow, Egyptian spinach
- Arabic
- molokhia, mulukhiyah
- Hausa
- lalo, ayoyo
- Igbo
- ahinghara
- Shona
- nyenje, gusha
- Swahili
- mlenda, mrenda, murere
- Yoruba
- ewedu
- Zulu
- idelele
Working in buckets, bags or paces? The farming glossary turns the measures growers actually use into kilograms and hectares — what a 20 litre bucket of each crop really weighs, and how to size a field by walking it — alongside the Shona, Swahili, Ndebele and Yoruba words used in the field. Open the glossary →
Growing jute mallow, stage by stage
Your jute-mallow (ewedu / molokhia) season, step by step — crack the hard seed for an even bed, feed and weed for soft leaf, then cut tender greens again and again while pinching off every flower, and save your own seed to sow next time.
Get ready — seed and seedbed
Jute mallow is won or lost before it comes up. Its seed has a hard, waterproof coat and will sprout slow and patchy unless you crack it first. Give it a fine, fertile, well-drained bed rich with well-rotted manure — this is a hungry, fast leafy crop — and plan a break from jute mallow on this ground so root-knot nematode doesn't build up. The engine sets your variety, spacing, fertiliser and sowing date; your job here is the seed, the bed and the rotation.
Hot-water dip / scarify seed Critical
Jute-mallow seed has a hard, waterproof coat that keeps it asleep (dormant) — sow it untreated and it comes up slowly and in patches, over weeks instead of days. Cracking that coat so the seed can drink water is the difference between one quick, even stand and a thin, straggly bed you can never even up.
Do this just before you sow, on the same day — treated seed will not keep, so only ever treat the amount you will plant now.
Pick one way to break the hard coat. (a) Hot-water dip: take water off the boil, let it stop bubbling, dip the seed in for only a few seconds, then drain and cool it at once. (b) Warm soak: put the seed in hot-but-not-boiling water — about as hot as tea you can just bear to hold a finger near — and leave it to cool and soak overnight. (c) Scratch it (scarify): rub the seed between two sheets of sandpaper, or in a tin with a handful of coarse sand, until the shine is scratched off.
Check it worked: drop a few seeds in a cup of water. Seed that has taken up water swells and sinks; seed still shut stays hard and floats.
The seed is dust-fine (a thousand seeds weigh under two grams), so mix the treated seed with a few handfuls of dry sand or wood ash — now you can scatter it evenly instead of dropping it in clumps.
If the water-test shows most seed still hard and floating, it isn't cracked enough → dip or scratch that seed again before you sow, or the bed comes up patchy.
- Do:
Treat only the seed you will sow today — soaked or scratched seed spoils if you keep it.
- Tip:
Boiling the seed. Water straight off a rolling boil, or too long a dip, cooks the seed and kills it — a few seconds only, then drain and cool.
- Watch out:
Very hot water — pour and dip carefully so you don't scald your hands.
Prepare fertile, drained bed + manure Recommended
This is a fast, hungry leafy crop with shallow roots — it grows most of its bulk in a few weeks and pulls its feed from the top of the soil. A fine, crumbly, richly-manured, well-drained bed gives the tiny seed firm, moist contact and the fast, tender leaf you want. In a cloddy, poor or soggy bed the seedlings starve, damp off, and the leaf stays small and bitter.
Loosen and break the topsoil to a fine, crumbly tilth and rake the surface smooth — the seed is dust-fine, so big clods leave it sitting in air pockets and it comes up in gaps.
Work in plenty of well-rotted manure or compost — dark, crumbly, no strong smell. This crop feeds heavily, and the organic matter also helps the bed hold moisture. Your recommendation gives the amount for your bed.
Make sure the bed drains — jute-mallow seedlings rot in soggy soil. On flat or heavy ground, raise the bed about a hand-span high (20 cm), or make ridges, so water runs off.
Pick a spot in full sun and, if you can, one where jute mallow (or another mallow) has not grown in the last year, to keep root-knot nematode down (see the rotation task).
- Do:
Spread the manure a week or two before sowing so it settles and finishes rotting into the soil.
- Tip:
Fresh, raw manure — it scorches the fine seedlings, robs nitrogen as it rots, and brings in weed seeds. Use only well-rotted manure or compost.
- Watch out:
Wash your hands after handling manure, and keep it well away from drinking water.
Plan nematode rotation Recommended
Root-knot nematode is a tiny soil worm you cannot see that swells the roots into knots and beads, so the plant can't drink or feed — leaves go pale and stunted and yield collapses. It builds up wherever jute mallow and its relatives grow year after year. A break of a season or more starves it out — and it's the one big pest you must beat before sowing, because there is no cure once the crop is in the ground.
Plan to grow jute mallow on a different piece of ground from last season — give any bed at least one year off jute mallow (longer if you can), and off its close relatives, before coming back to it.
Fill the break with non-host crops — cereals like maize or sorghum, or a planting of marigold, are good at knocking nematodes back. Avoid following jute mallow straight with tomato, okra or other known nematode hosts.
Keep feeding the soil with well-rotted manure or compost every season — a living, organic-rich soil holds more of the natural enemies that keep nematodes down.
When you pull the old crop, look at the roots: smooth, clean roots are fine; roots covered in knots and beads mean that ground needs a longer break and more organic matter before jute mallow returns.
- Do:
Rotate with cereals or marigold and pile on the compost — it's the cheapest, surest nematode control you have.
- Tip:
Growing jute mallow on the same bed season after season — the nematodes build until the crop simply fails.
- Watch out:
Knotted, galled roots when you uproot a crop are your warning to rest that ground next season.
Sow and raise an even stand
Now you sow the treated seed shallow and bring up a full, even bed of seedlings. Two things decide it: don't bury the fine seed (it can't push up from deep), and keep the bed steadily moist but never soggy — the seedlings are the thirstiest, most fragile part of the whole crop, and in wet or crowded soil they damp off and collapse. A good, even stand here is the base of every cut you'll take later.
Sow treated seed shallow Critical
The whole harvest rests on the stand you raise now. Jute-mallow seed is dust-fine and weak — it can only push up from the top half-centimetre to two centimetres of soil. Bury it deeper and it runs out of strength before it reaches the light; scatter it in clumps and you get a thick, weak, uneven bed. Sow it shallow and even, and you get the quick, full stand that carries every later cut.
Sow the treated seed shallow — only ½ to 2 cm deep, a fingertip-thin cover of fine soil (less than one finger-joint). Buried a whole finger deep (about 8 cm) it will never reach the surface.
Because the seed is so fine, mix it with dry sand or wood ash first and scatter that — it spreads far more evenly than seed dropped on its own.
Pick your method: broadcast (scatter) about 5–8 kg of seed per hectare over the bed, or drill it in rows about half a stride apart (45–50 cm) at roughly 2.5 kg/ha. Rows make weeding and cutting much easier later.
Rake a thin layer of soil over, or press the seed in with the back of the rake, and firm it lightly so the seed sits snug in moist soil. With the coat cracked, seedlings show in about 3–7 days.
- Tip:
Sowing deep. The fine seed fails from about 8 cm down — keep it a fingertip-thin ½–2 cm.
- Tip:
Scattering neat seed on its own — it drops in clumps and you get thick, weak, uneven patches. Mix with sand or ash first.
- Watch out:
The seedlings are very thirsty and weak at first — don't let the bed dry out or crust over (see 'keep the bed moist').
Scout emergence Recommended
The first two weeks tell you whether you got a full stand or a patchy one — and it's the only time you can still fix gaps by re-sowing. Miss it and the bare patches stay bare all season. It's also when tiny seedlings damp off or the first leaf-eaters arrive, while the plants are far too small to lose any leaf.
From about day 3 after sowing, walk the bed every 3–4 days and check the seedlings are coming up evenly across the whole bed, not just in strips.
Where a patch has come up thin or bare, re-sow treated seed into the gaps straight away, while the crop is only days old and the soil is still moist — a late re-sow can never catch up.
Look for damping-off: seedlings that keel over and collapse at the soil line, with a pinched, dark, water-soaked spot on the stem, often in a spreading wet patch. It thrives in soggy, over-watered, crowded beds — so ease off the water, improve drainage, and don't re-sow the gaps too thick.
Watch for the first flea beetles while plants are tiny: many tiny "buckshot" holes peppering the leaves, and little dark beetles that jump when you disturb them. Note them now — you'll act on them in the next stage.
If gaps stay bare after re-sowing (or the seed was old and never came up), treat fresh seed and sow again quickly, while there's still time in the season.
- Do:
Re-sow thin patches in the first few days — it's your last chance to even up the stand.
- Watch out:
Collapsing, pinched-stem seedlings in a wet patch are damping-off — dry the bed out and open up crowded spots; don't just water more.
- Tip:
Watering more to 'help' weak seedlings — soggy soil is exactly what makes damping-off spread.
Keep the bed evenly moist Critical
This is the crop's thirstiest, most fragile moment — the seedlings have tiny, shallow roots and can dry out and die within a day if the top of the bed bakes or crusts over. Steady moisture now is the single biggest thing you do for an even stand; it matters more here than at any later stage.
Keep the top of the bed evenly damp — check morning and evening in hot weather, and water lightly whenever the surface starts to dry or crust.
Water with a fine rose or a gentle sprinkle, never a hard splash — a heavy stream washes the fine seed and tiny seedlings out of place and cakes the surface hard.
Keep it damp, never soggy. Standing water and constantly water-logged soil rot the roots and spread damping-off — if water pools, drain it and ease off.
A very thin scatter of light mulch (fine grass, not a thick mat) between the rows helps hold moisture and stops the surface crusting — keep it off the seedlings themselves.
- Do:
Water little and often — a light daily sprinkle beats an occasional flood for these fragile seedlings.
- Tip:
Waterlogging the bed — soggy soil rots the young roots and brings on damping-off. Keep it just damp and draining.
- Watch out:
A dry, crusted surface stops the fine seedlings breaking through — sprinkle before it sets hard.
Thin, feed and grow tender leaf
Now the plants stretch up and bush out — this is where the tender leaf is built. Thin the crowded seedlings so each has room, keep the bed weed-free until the leaves close over and shade the ground, and feed nitrogen to push soft, fast growth. Watch for the leaf-eaters that love this stage — flea beetles, the looping jute semilooper caterpillar, and (in hot dry spells) red spider mite — and keep an eye below ground for root-knot nematode.
Thin to ~10 cm Recommended
Sown broadcast, jute mallow comes up thick, and crowded plants stay thin, spindly and pale, all fighting for the same light and food. Thinning so each strong plant has room lets them bush out with the soft, full leaf you want — and the young plants you pull are your first tender picking, so nothing is wasted.
At about 4–5 weeks after sowing, when the plants are roughly a hand-span tall (about 15 cm), thin them so the ones you keep stand about half a hand-span apart (10 cm).
Pull or snip out the weakest, smallest seedlings and leave the strongest, evenly spaced — thin along the row, or even out the thick clumps in a broadcast bed.
Eat the thinnings — the whole young seedlings you pull are tender and good in the pot. This is your first small harvest.
Thin on a moist bed, then water again afterwards to settle the plants you've kept so they aren't left loose in the soil.
- Do:
Thin on a moist bed so the plants you keep aren't loosened — firm them back down and water them in.
- Do:
Weed at the same time, while you're already down among the plants (see early weeding).
- Tip:
Leaving it thick and hoping for more — crowded plants give small, tough, pale leaf, not more food.
Early weeding + mulch Critical
For its first few weeks jute mallow is small and slow to shade the ground, so weeds race ahead and steal the water, light and nitrogen you're giving it — right when it can least fight back. Weeding early, until the leaves close over and shade out new weeds, protects the whole crop; let it go and the bed chokes and the leaf stays small and tough.
Start weeding early — from about 2 weeks after sowing — and keep the bed clean until the canopy closes (the leaves meet and shade the ground), after which few new weeds get going.
Weed by hand, or hoe shallowly — jute mallow's feeding roots sit near the surface, so keep it shallow or you tear them.
Weed little and often while the weeds are small — a big weed pulled late rips the crop's roots out with it.
Lay the pulled weeds and some light mulch between the rows to hold moisture and smother the next flush of weeds — but keep the mulch off the young plants.
- Do:
Get the bed clean in the first few weeks — weeded early and mulched, a jute-mallow bed almost weeds itself once the leaves close over.
- Tip:
Deep hoeing close to the plants — the roots are shallow and easily cut.
- Watch out:
Weeds hiding under the closing canopy — part the leaves and check, they rob the crop unseen.
Top-dress nitrogen Recommended
Jute mallow is grown for leaf, and leaf is built from nitrogen — the one feed this crop responds to most. It is not a legume, so it does not make its own nitrogen and must be fed. A nitrogen top-up during fast growth pushes soft, dark-green, tender leaves, and more of them, and picks the plant back up after each cut. Starved of it, the leaves go pale, small and tough.
From about 3 weeks after sowing, once the plants are growing away and thinned, top-dress (feed the growing crop) with nitrogen — urea, or a nitrogen fertiliser such as AN (ammonium nitrate).
Side-band it — lay a thin, even line of fertiliser about a hand-span (15–20 cm) to the side of the rows, not touching the plants or leaves; on a broadcast bed, scatter it thinly and evenly between the plants. Then cover it or water it in, so it doesn't gas off and go to waste.
Keep the total nitrogen modest — up to about 60 kg N/ha across the season. Beyond that the crop barely responds, so you'd just waste money and grow soft, floppy plants. Your recommendation gives the amount and the splits for your bed.
Feed after cutting too — a light nitrogen feed after each harvest brings the tender regrowth back fast (see the harvest stage).
- Do:
Feed onto moist soil (after weeding or a light rain) and cover or water it in — nitrogen left on a dry surface just gasses away.
- Tip:
Piling on nitrogen past about 60 kg N/ha — it doesn't grow more leaf, and over-soft plants attract more pests and flop over.
- Watch out:
Keep fertiliser off the wet leaves (it scorches them), away from food, water and children, and wash your hands after handling it.
Scout (flea beetle, semilooper, mites) Recommended
The leaf is both your crop and the pests' target, so a few minutes twice a week now protects everything you're growing. Flea beetles riddle the leaves, the jute semilooper caterpillar can strip a plant, and in hot dry spells red spider mite drains the leaf pale. And because you'll be eating these leaves within days, you want to catch trouble early and beat it with the gentlest methods, not harsh sprays.
Twice a week, walk the bed and look closely at the leaves — top and underside — at several spots across the bed, not just the edge by the path.
Flea beetles: many tiny "buckshot" holes peppered through the leaves, and tiny dark beetles that jump when disturbed. A few holes are fine on a strong crop; act when the young plants are being riddled.
Jute semilooper: green "looping" caterpillars that arch their backs like a bridge as they walk, chewing the leaves from the edges. Act when you find about one caterpillar per leaf — hand-pick them, or spot-spray Bt (a natural germ spray, Bacillus thuringiensis, that harms only caterpillars and is safe for you and for bees) before they strip the plants.
Red spider mite (in hot, dry weather): leaves turning dull, dusty and speckled with tiny pale dots, sometimes with fine webbing on the underside; the mites themselves look like moving specks of dust. Keep the crop watered and washed down — mites thrive on dry, dusty, stressed plants.
Root-knot nematode: you won't see it on the leaf, but plants that stay pale, stunted and wilt in the heat for no clear reason may have it — pull a weak plant and check for knots and beads on the roots. If you find them, rest and rotate that ground next time (see the rotation task).
Whenever you spot-spray, even Bt: spray in the cool of the day with the wind behind you, cover your nose, skin and eyes, keep it off any nearby food, and wash afterwards.
- Do:
Prefer hand-picking, Bt and neem, and keeping the crop healthy, over chemical pesticides — you're cutting and eating this leaf every couple of weeks.
- Watch out:
If you ever must use a chemical spray, check its pre-harvest interval on the label (the days you must wait between spraying and safely eating). On a leaf you cut every 2–3 weeks there is often no safe gap, so lean on Bt and hand-picking instead.
- Tip:
Spraying a harsh insecticide just before a cut — you'd be eating the residue. If you did spray, wait out the label's pre-harvest interval before you harvest.
Cut and come again — keep it tender
This is the payoff — repeated pickings of tender leaf and soft shoot tips. The secret is to keep the plant young and leafy and stop it flowering. Jute mallow is a short-day plant, so as the days shorten it tries to run to flower (bolt), and once it flowers it turns woody and bitter and the tender harvest ends. Cut regularly, pinch out every flower bud, and feed after each cut, and one sowing gives you cut after cut. When you see yellow flower buds, pinch them off — that keeps the leaves tender.
First harvest (uproot or cut) Critical
Your first tender leaves are ready in just 3–6 weeks — jute mallow is one of the fastest crops you'll grow. How you take this first cut sets up everything after: uproot the whole young plants for one clean harvest, or cut just the tender tops and let the plant regrow for many more pickings. Cut on time, before the plant toughens or flowers, and the leaf is at its most tender.
Take the first harvest at about 3–6 weeks after sowing, while the leaf is soft and before the plant flowers.
Pick your method. (a) Uproot whole young plants once they're about two hand-spans tall (30–40 cm) — pull the lot, roots and all, for one clean harvest (good where you'll re-sow). (b) Cut-and-come-again: with a knife, cut off the top hand-span of tender growth (the upper 15–20 cm), leaving the lower stem and a few leaves so the plant re-shoots.
Take the tender shoot tips and young leaves and leave the tough lower stems. Harvest in the cool of the morning, when the leaf is crisp and full of water.
If you're cutting-and-coming-again, pinch out any yellow flower buds as you cut, then give a light feed and a water to push soft regrowth (see the re-cut task).
If you missed it and the plant has flowered and toughened, cut it hard back to a few lower leaves, strip off all the buds, then feed and water — it may throw a fresh tender flush. If it has gone fully woody and is setting pods, pull it and re-sow (or keep a few plants for seed).
- Do:
Harvest in the cool of the morning and get the leaf into shade at once — it wilts within hours in the heat.
- Do:
Pinch off any flower buds as you cut — flowering turns the plant woody and ends your tender harvest.
- Watch out:
Leaves turning tough or bitter, or yellow buds forming where a leaf meets the stem, mean the plant is starting to flower — cut and pinch now, don't wait.
Re-cut + pinch flowers + feed Critical
Every regrowth cut is only as tender as the plant is young. Left alone, the plant ages, hardens and — as the days shorten — flowers, and the harvest is over. Re-cutting every 2–3 weeks, pinching off every flower bud, and feeding after each cut keeps it forced into fresh soft leaf, so one sowing gives you many cuttings — as many as 8 — instead of just one.
Every 2–3 weeks, cut the top hand-span of tender regrowth (about 15–20 cm) again, always leaving some lower leaves and stem so the plant can re-shoot.
Pinch or cut out every flower bud each time — those little yellow buds where a leaf meets the stem are the plant trying to flower. Remove them and it stays leafy and tender. This is the single most important thing keeping your harvest going.
As the days grow shorter through the season, the plant is pushed harder to flower, so pinch more diligently the later it gets.
After each cut, give a light nitrogen feed and a good water — this brings the tender regrowth back fast (jute mallow's leaf is built from nitrogen and water).
If pinching no longer holds it and it keeps flowering despite you, let a few of the best plants go on for seed (see saving seed), or pull them and re-sow for a fresh tender crop.
- Do:
Feed and water right after cutting — a fed plant re-shoots tender in days; a starved one comes back thin and tough.
- Do:
Pinch every flower bud, every cut — one missed flowering shoot pulls the whole plant toward woodiness.
- Watch out:
As the days shorten toward the cool/dry season, the plant flowers more eagerly — pinch harder, and be ready to close the bed out for seed.
Save your own seed
You don't have to buy seed again. Let a few of your best, healthiest plants stop being cut and go on to flower and pod, and they'll give you seed for next season. Jute mallow flowers as the days shorten, sets slender pods, and is ready when the pods dry and brown — about 6 weeks after flowering, when roughly 80% of the pods have turned brown. Save only from strong, disease-free plants; that's how you keep a good line going.
Harvest, dry & thresh seed Optional
Saving your own seed gives you a free, locally-adapted seed source next season — and jute mallow makes plenty. The key is to leave the pods on the plant until they are truly mature (about 6 weeks after flowering, when most have dried and browned), because seed picked green won't sprout well. Dried hard, it keeps for the best part of a year.
Choose a few of your strongest, healthiest, best-tasting plants and stop cutting them — let them flower and set pods. Never save seed from weak, diseased or root-knotted plants.
Leave the slender pods on the plant until about 80% have turned from green to brown and dry — roughly 6 weeks after flowering. Green pods give weak seed.
Cut the podded plants, or pick the dry pods, and sun-dry them 2–3 days on a mat, cloth or tarpaulin — never on bare ground — until they are crisp.
Thresh — rub or beat the dry pods to shake out the tiny seeds — then winnow (fan off the light chaff), and re-dry the clean seed until it is very hard (about 10% moisture).
Store the dry seed in a sealed, dry container out of the light; kept dry it stays good for 8–12 months. Remember it has a hard coat, so you'll hot-water treat it again before you sow (see 'treat seed').
If fewer than about 80% of the pods have browned, wait for them to finish. But if rain or birds threaten first, cut the whole plants and finish drying them under cover.
- Do:
Save seed only from your best, healthy plants — next year's crop is only as good as the seed you keep.
- Tip:
Picking pods while still green — the seed inside isn't ripe and won't come up.
- Watch out:
Pods left too long shatter and drop their seed on the ground — once about 80% are brown, harvest before they burst.
Keep the leaf fresh to market
Jute-mallow leaf is highly perishable — it wilts within hours of cutting, especially in the heat. Whatever you grew is only worth what reaches the pot or the market still fresh, so handle it gently, keep it cool and shaded, and sell or cook it fast. Leaf you can't use fresh can be dried for a storable soup-thickener.
Handle gently, keep cool & market fast Recommended
This leaf is fragile and lives only a day or two off the plant — bruise it, heat it or leave it in a heap and it wilts, yellows and is worth nothing. Gentle, cool, quick handling is the difference between leaf that sells at full price and leaf you throw away. It's the last, easily-lost step after all your work.
Harvest in the cool of the morning and move the cut leaf straight into shade — never leave it standing in the sun.
Handle it gently — pack it loosely in a basket, not crushed into a tight sack; bruised leaf blackens fast.
Sprinkle it lightly with water and keep it cool and covered (a damp cloth over the basket) on the way to the pot or market, and sell or cook it the same day — it does not keep.
Leaf you can't sell or eat fresh can be spread thin and dried in the shade, then stored as a soup-thickener or tea — a good way to save a glut.
- Tip:
Harvesting into the heat of the day and leaving the leaf in the sun — it wilts within hours. Cut in the cool and shade it at once.
- Do:
Keep it damp, cool and loosely packed, and get it to market the same day for the best price.
- Watch out:
Leaf going limp, warm or yellow is losing value by the hour — cool it, or dry it, before it spoils.
Pests and diseases that attack jute mallow

Grow jute mallow with a plan, not a guess
This guide is the general answer. Divisi works out yours — the week to plant jute mallow on your soil and your rainfall, and each job dated for your field.


When to plant jute mallow, country by country
- When to plant jute mallow in Algeria
- When to plant jute mallow in Angola
- When to plant jute mallow in Benin
- When to plant jute mallow in Botswana
- When to plant jute mallow in Burkina Faso
- When to plant jute mallow in Burundi
- When to plant jute mallow in Cabo Verde
- When to plant jute mallow in Cameroon
- When to plant jute mallow in Comores
- When to plant jute mallow in Congo
- When to plant jute mallow in Côte d'Ivoire
- When to plant jute mallow in Egypt
- When to plant jute mallow in Eritrea
- When to plant jute mallow in Eswatini
- When to plant jute mallow in Ethiopia
- When to plant jute mallow in Gabon
- When to plant jute mallow in Gambia
- When to plant jute mallow in Ghana
- When to plant jute mallow in Guinea Ecuatorial
- When to plant jute mallow in Guinea-Bissau
- When to plant jute mallow in Guinée
- When to plant jute mallow in Kenya
- When to plant jute mallow in Lesotho
- When to plant jute mallow in Liberia
- When to plant jute mallow in Libya
- When to plant jute mallow in Madagascar
- When to plant jute mallow in Malawi
- When to plant jute mallow in Mali
- When to plant jute mallow in Mauritanie
- When to plant jute mallow in Mauritius
- When to plant jute mallow in Morocco
- When to plant jute mallow in Moçambique
- When to plant jute mallow in Namibia
- When to plant jute mallow in Niger
- When to plant jute mallow in Nigeria
- When to plant jute mallow in Rwanda
- When to plant jute mallow in République centrafricaine
- When to plant jute mallow in République démocratique du Congo
- When to plant jute mallow in Sao Tome and Principe
- When to plant jute mallow in Seychelles
- When to plant jute mallow in Sierra Leone
- When to plant jute mallow in Somalia
- When to plant jute mallow in South Africa
- When to plant jute mallow in South Sudan
- When to plant jute mallow in Sudan
- When to plant jute mallow in Sénégal
- When to plant jute mallow in Tchad
- When to plant jute mallow in Togo
- When to plant jute mallow in Tunisie
- When to plant jute mallow in Uganda
- When to plant jute mallow in United Republic of Tanzania
- When to plant jute mallow in Zambia
- When to plant jute mallow in Zimbabwe
Where jute mallow scores best
Districts where Divisi's engine currently rates this crop highest, ranked by fit.
-
 Owensgrove
 -
 Wawa
Wawa -
 Enyelle
 -
 Djémah
 -
 Arrah
Arrah -
 Ohimini
 -
 Ouidah
 -
 Denkyembour
 -
 Kabeya-Kamwanga
 -
 Toamasina I
 -
 Haut-Nyong
 -
 Koundara
Get Insights by email
A short digest of new Divisi articles. No email on quiet weeks.
Frequently asked questions
How do I grow jute mallow?
How to grow jute mallow: 40–60 days to maturity, 47 cm rows, 0.5–2 cm deep. Also called bush okra, molokhia, lalo, ahinghara, nyenje, mlenda, ewedu.
What is molokhia in English?
Molokhia (also mulukhiyah) is the Arabic name for jute mallow.
What is lalo in English?
Lalo (also ayoyo) is the Hausa name for jute mallow.
What is ahinghara in English?
Ahinghara is the Igbo name for jute mallow.
What is nyenje in English?
Nyenje (also gusha) is the Shona name for jute mallow.
What is mlenda in English?
Mlenda (also mrenda and murere) is the Swahili name for jute mallow.
What is ewedu in English?
Ewedu is the Yoruba name for jute mallow.
What is idelele in English?
Idelele is the Zulu name for jute mallow.
How long does jute mallow take to grow?
Jute mallow takes about 40–60 days from sowing to maturity, though the exact length varies with variety, temperature and how the season runs.
What spacing should I use for jute mallow?
Space jute mallow rows about 47 cm apart, with roughly 12 cm between plants within the row.
How deep should jute mallow be planted?
Sow jute mallow at about 0.5–2 cm deep. Shallower risks drying out; deeper wastes seed energy before the shoot reaches light.
What pests and diseases attack jute mallow?
The ones covered in this guide are Jute semilooper. Each has its own page explaining how to identify, check for and control it.