 Divisi
How to grow passion fruit
Passiflora edulis · Passifloraceae
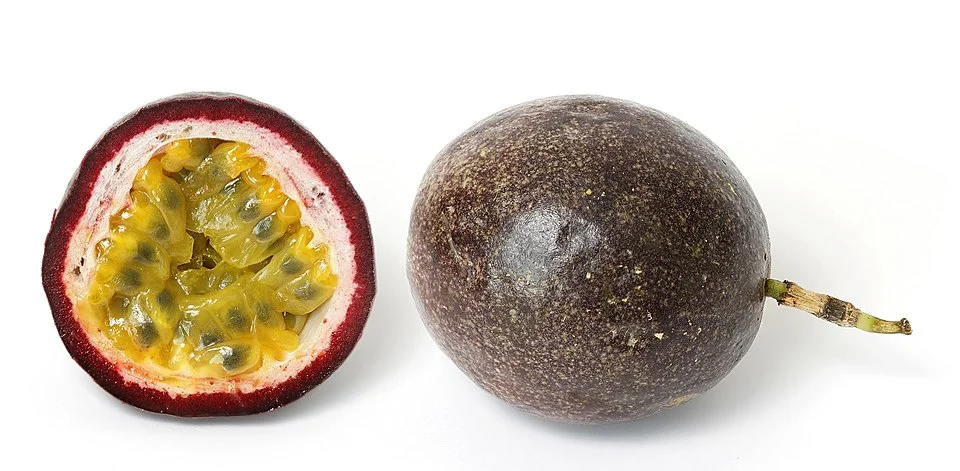
Photo: fir0002 flagstaffotos [at] gmail.com Canon 20D + Sigma 150mm f/2.8 · GFDL 1.2
Passion fruit is a fast-growing climbing vine that must have a strong frame of posts and wires — a trellis — to climb on; it never does well sprawled on the ground. Plant it once and, cared for, it feeds you for 2–3 years before you replant. There are two kinds: a sweeter purple vine for the cooler highlands (it sets fruit on its own), and a tougher, more vigorous yellow vine for the warm lowlands (better against disease). The best plants are grafted — a sweet purple top joined onto a hardy yellow root — so the roots shrug off the diseases that otherwise kill passion fruit. Its big flowers are pollinated mostly by heavy carpenter bees; where bees are few, a farmer with a soft brush can do their work by hand and get far more fruit.
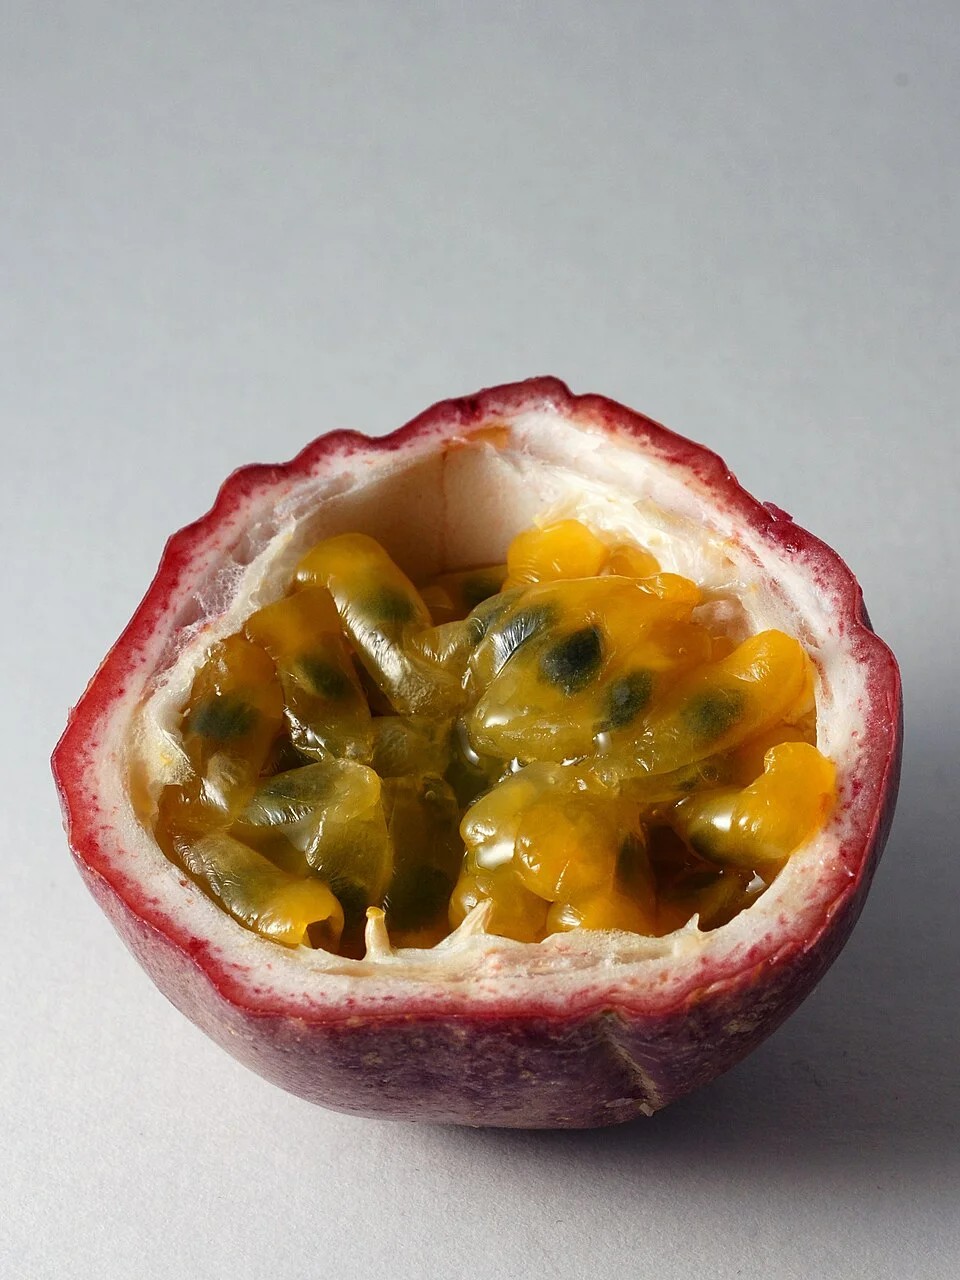
Alexander Klink · CC BY 3.0 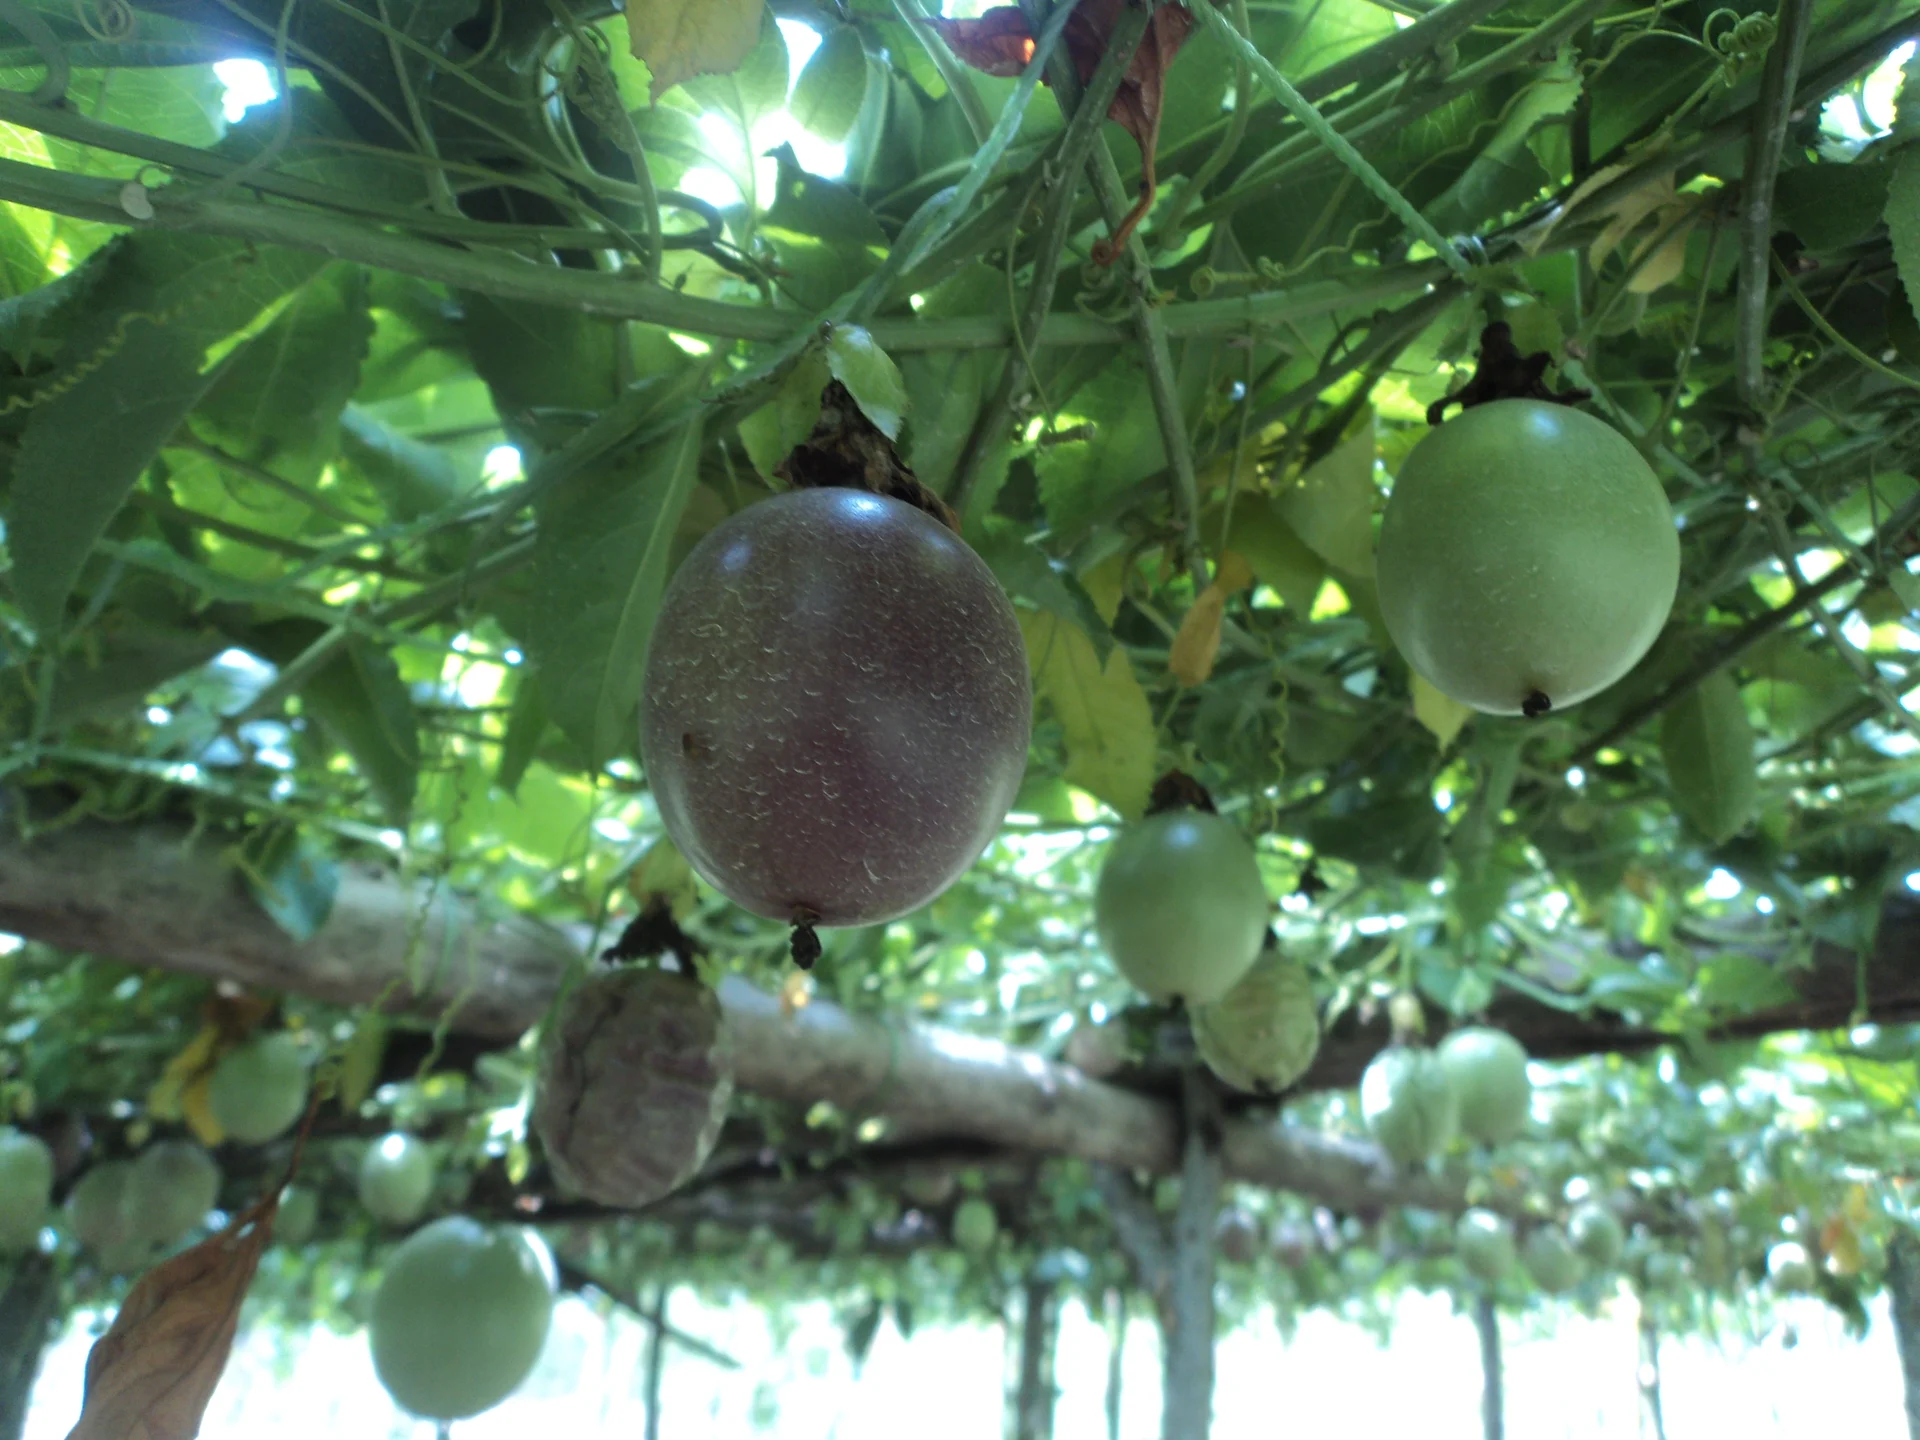
Kitakapeter · CC BY-SA 4.0
- Days to maturity
- 60–90 days
- Row spacing
- 150 cm
- Plant spacing in the row
- 300 cm
These are general figures for the crop, compiled from published agronomic references including FAO and CABI. The right choice for your field depends on your soil, rainfall and the yield you are aiming for.
Will passion fruit actually do well on your field? Check your own field against every crop in the catalogue — no signup. Run the crop check →
Also known as
Passion fruit is also called purple granadilla.
- English
- purple granadilla
- Afrikaans
- grenadella
- French
- fruit de la passion, grenadille
- Portuguese
- maracujá
- Swahili
- pasheni, karakara
Working in buckets, bags or paces? The farming glossary turns the measures growers actually use into kilograms and hectares — what a 20 litre bucket of each crop really weighs, and how to size a field by walking it — alongside the Shona, Swahili, Ndebele and Yoruba words used in the field. Open the glossary →
Growing passion fruit, stage by stage
Your passion-fruit plot, step by step — building a strong trellis, planting a grafted vine, training it up the wires, feeding and hand-pollinating it, then picking sweet ripe fruit again and again for two to three years.
Set up the plot: site, trellis and planting
Passion fruit lives on this same spot for 2–3 years, so the choices you make now are hard to undo. Three things set up the whole plot: a deep, well-drained, disease-free site; a strong trellis built before you plant; and healthy grafted planting material. Get these right and the vine thrives — get them wrong, with soggy ground, a weak trellis, or diseased land, and you can lose the whole planting.
Choose a deep, drained, disease-free site Recommended
The vine sits on this spot for 2–3 years, and its worst enemy — collar rot, a soil fungus that rots the stem-base — lives in the ground for about 4 years with no cure. Choosing deep, well-drained land with no history of collar rot is the cheapest protection you will ever buy, because you cannot move the plot later.
Pick deep, well-drained soil. Passion-fruit roots rot in wet ground, so avoid low spots, heavy clay, and anywhere water stands after rain. A gentle slope that sheds water is good.
Avoid any land where passion fruit died of collar rot before — a vine that wilted and died with a brown, rotten stem-base. The fungus stays in that soil about 4 years, and replanting there invites the same death.
Aim for slightly sour to nearly neutral soil — pH 5.5–6.5. If earlier crops there grew well, it is likely fine; a simple soil test confirms it.
Choose a sunny, not-too-windy spot within reach of water for the dry spells — the vine needs steady moisture and strong light to fruit well.
Match the type to your altitude: the sweeter purple vine for cooler highlands, the tougher yellow vine for warm lowlands. Your recommendation sets this for your farm.
- Do:
Walk the plot the morning after heavy rain — if water is still standing, choose somewhere else or plan to plant on raised mounds.
- Tip:
Old collar-rot land — the fungus persists about 4 years and there is no cure once a vine catches it.
- Watch out:
Very heavy clay or a low, boggy corner will drown the roots and start collar rot — pass it by even if it is close to home.
Build the trellis first Critical
A passion-fruit vine grows heavy with leaf and fruit and it climbs — it cannot stand on its own. The trellis (the frame of posts and wires it climbs) carries the whole crop for 2–3 years, so build it before you plant and build it strong. A trellis that sags or falls once the fruit is on it drags the crop into the dirt and snaps the vine.
Get strong hardwood posts about 15 cm thick and 3 m long — treated or naturally termite-resistant wood, because they must stand for years.
Set the posts in a straight line, about 8 big strides apart (8 m), each buried a little deeper than knee height (0.6 m) and rammed firm so it will not lean under a loaded vine.
Strain a galvanised (rust-proof) wire tightly along the tops of the posts. This top wire, about 2 m off the ground, is what the vine will spread along.
Brace the end posts especially well and set them deepest — they take the whole pull of the strained wire.
Finish the whole trellis before planting day, so the young vine has its string and wire waiting the moment it goes into the ground.
- Do:
Use rust-proof wire and durable posts — you are building this to hold a heavy crop for 2–3 years, not one season.
- Tip:
Thin, soft posts or slack wire — a full-grown vine loaded with fruit is heavy, and a collapsed trellis can end the whole planting.
- Watch out:
Set and brace the corner posts firmest of all — if a strained end post pulls loose, the whole line goes slack.
Plant grafted (purple-on-yellow) or clean seedling Critical
This is the vine you will harvest from for 2–3 years, so start it right. A grafted seedling — a sweet purple top joined onto a hardy yellow root — resists the root diseases that kill passion fruit, and planting at the start of the rains into a well-prepared hole gives the strong, fast start that brings earlier fruit.
Use grafted plants where you can (a sweet-fruiting purple top joined onto a disease-resistant yellow root) — that join is the vine's best defence against collar rot. If grafted plants are not available, use clean, healthy seedlings from a trusted nursery.
For each vine, dig a hole about knee-deep and knee-wide (45 cm each way), and set the dark topsoil to one side.
Mix that topsoil with up to one 20-litre tin (about 10 kg) of well-rotted manure — dark and crumbly, no sharp smell — and return it to the hole.
Space the vines about 3 big strides apart (3 m) along the row, with rows a stride to a stride-and-a-half apart (1.2–1.8 m). That gives roughly 1,900–2,700 vines a hectare and lets light and air through — crowding breeds disease.
Plant so the graft join stays a good hand-span above the soil — burying it lets the disease-prone top grow its own roots and defeats the whole point of grafting. Firm the soil and water in well.
- Do:
Keep the graft join above the ground for the vine's whole life — never mound soil or mulch up to it, or you invite collar rot.
- Tip:
Planting at close vegetable spacing — passion fruit is a big vine and needs its full 3 m in the row to stay open and healthy.
- Watch out:
Plant at the start of the rains so the young vine settles in with reliable moisture, and water it by hand if the rains pause.
Settle it in and train one stem up to the wire
The young vine has one job now: race a single clean stem up to the top wire, because that stem becomes the trunk that carries the whole vine for years. Guide that one leader up its string, keep it mulched, weeded and steadily watered, and give it its first feed about a month in. Watch closely for aphids and virus now — a vine infected while young never comes right.
Train a single leader up the string Recommended
You want one strong stem — the leader — to reach the top wire fast and clean, because that single stem becomes the trunk that carries the whole vine for years. Left to itself the vine makes a low, fruitless tangle that traps disease. A few minutes each week now shapes the whole plant.
Run a string from a peg by the stem up to the top wire, and tie the single strongest shoot to it loosely — this shoot is your leader (the one main stem you keep).
Every week or so as it grows, wind or tie the tip a little further up the string so it climbs straight up, not sideways.
While it climbs, rub off the side-shoots, curly tendrils and any early flowers on the lower stem — send all the vine's strength up to the wire first.
When the leader reaches the top wire, pinch out its growing tip. That stops it climbing higher and pushes it to send out the two side-arms you will train along the wire next stage.
Always tie loosely with soft material (a cloth strip, banana fibre or soft twine) — a tight tie cuts into the stem as it thickens and strangles it.
- Do:
Keep only one leader — if two shoots climb together, choose the stronger and remove the other.
- Tip:
Hard wire or tight string knotted round the stem — it chokes the stem as it fattens.
- Watch out:
A leader that stays thin and stunted may be virus-struck — check the tip leaves for a patchy light-and-dark mottling (see scouting) before you rely on that vine.
Scout (aphids/PWV, collar rot) Recommended
The vine you are establishing must stay clean, because its two worst problems now have no cure: woodiness virus, carried by aphids, twists the leaves and ruins the fruit; and collar rot kills the whole vine from the stem-base. Catching them in the first weeks — pulling one sick vine, squashing the first aphids — stops them spreading down the row.
Walk the rows once a week, looking closely at the growing tips, the undersides of young leaves, and the collar (the stem-base at the soil line) of every vine.
Aphids: look for clusters of tiny soft green or black insects on the shoot tips and under young leaves, often with sticky honeydew (the sweet, shiny liquid the aphids leave behind) and curling leaves. Squash small clusters by hand or wash them off — they are the main carriers of the virus.
Woodiness virus: look for a patchy light-and-dark mosaic mottling and crinkling on the young leaves. There is no cure — rogue the vine (dig it out and destroy it well away from the plot) before aphids carry it to its neighbours.
Collar rot: look for a vine that suddenly wilts with a brown, soft, cracked stem-base at the soil line. There is no cure — remove and destroy it, and do not replant passion fruit in that exact spot.
Keep mulch and soil pulled back from the stem-base so the collar stays dry — a wet collar is how the rot starts.
- Watch out:
Ants running up and down a vine usually mean aphids above — follow them to the colony on the tips.
- Do:
Wipe your knife with bleach or pass it through a flame between vines whenever you cut anything — dirty tools carry the virus vine to vine.
- Tip:
Heaping mulch against the stem — keep the collar open and dry to keep collar rot out.
Mulch + steady water + first feed Recommended
In its first months the young vine is building the roots and trunk that must carry years of fruit. A mulch to hold moisture, steady water, and a first feed about a month after planting keep it growing without a check — a vine that stalls now is slow to ever catch up.
About a month after planting, feed each vine — your recommendation gives the exact amount and type (a balanced compound fertiliser).
Spread the feed in a ring about a hand-span (20 cm) out from the stem, out under the leaves — never heaped against the stem, which burns the roots and wets the collar.
Lay a mulch of dry grass or leaves around the vine to hold moisture and smother weeds — but keep it a hand-span clear of the stem-base so the collar stays dry.
Water steadily so the topsoil stays just moist — never bone-dry and never waterlogged. Push a finger in and water when the top few centimetres are dry.
Wash your hands after handling fertiliser, and keep it off food and water and away from children.
- Do:
Feed onto moist soil (after rain or watering) and cover it lightly, so it soaks to the roots instead of blowing or washing away.
- Tip:
Fertiliser or mulch piled against the stem — it scorches the young collar and holds the damp that starts collar rot.
- Watch out:
Keep the young vine's water steady — a long dry spell now stunts it, and it may never fully catch up.
Build the framework along the wire
Now the vine builds the framework that will carry all its fruit: the two arms spreading along the top wire, and the curtain of fruiting shoots that will hang from them. Feed it a balanced diet (go easy on nitrogen), keep it clean of brown spot and mites, and open it up so light and air get right in.
Train 2 laterals along the top wire Recommended
The two side-arms you train along the top wire — the laterals — become the vine's shoulders. From them will hang the curtain of shoots that carries your whole crop. Spread them out evenly now and clear the clutter below, and the vine fruits in an open, airy canopy instead of a disease-trapping tangle.
Once the pinched leader has pushed out shoots at the top, pick two strong ones and train them in opposite directions along the top wire — these are your laterals (the two main arms).
Tie them loosely along the wire as they extend, so they run straight out either way like a pair of outstretched arms.
Remove all growth below the wire on the trunk — you want one clean stem up to the wire and the whole canopy up top, in the light and air.
Let the shoots that grow downward from the laterals hang freely — these hanging shoots are where the flowers and fruit will come.
Disinfect your knife or secateurs between vines (wipe with bleach or pass through a flame) — cutting tools carry woodiness virus from a sick vine to a healthy one.
- Do:
Disinfect pruning tools between vines to avoid spreading woodiness virus.
- Tip:
Too much nitrogen feed now — it drives leafy vine at the expense of flowers and pulls in aphids.
- Watch out:
Keep the trunk below the wire clean and bare — every low shoot wastes the vine's strength and is a ladder for pests up from the ground.
Scout (brown spot, mites, aphids) Recommended
As the leafy framework fills out, brown spot disease and red spider mites move in — both eat into the leaf area that must feed the coming fruit. Spotting the first brown lesions or the first fine speckling lets you act while it is small and cheap, before it spreads across the whole canopy.
Walk the rows once a week and look over the leaves, stems and shoots — tops and undersides.
Brown spot: look for brown spots with paler centres or ring-marks on the leaves, and dark sunken patches on the stems — worst in warm, humid, wet weather. At the first spots, start a copper spray (a protectant — it coats the surface to stop new infection but will not cure spots already there) and repeat every 2–3 weeks while it stays humid.
Red spider mites: look for fine pale stippling on leaves that turn dull and bronzed, sometimes with fine webbing underneath — worst in hot, dry spells. Hose them off or spray only the affected patches.
Aphids: keep squashing any clusters of soft green or black insects on the tips — they spread the virus.
When you spray copper, cover your skin, nose and eyes, spray in the cool of the day with the wind behind you, keep it off any ripe fruit and food, and wash well afterwards.
- Do:
Open up the canopy — remove dead and crowded shoots as you scout, because dry, airy leaves get far less brown spot.
- Watch out:
Mites explode in hot, dry weather — check the undersides of the leaves closely then, as the tiny specks are easy to miss.
- Tip:
Spraying copper in the heat of the day or into the wind — it scorches the leaves and blows back onto you.
Balanced feed (not excess N) Recommended
A growing vine on this hungry, high-demand crop needs regular feeding to build its frame — but the diet must be balanced. Too much nitrogen (the leaf-growth food) gives you a jungle of leaf, few flowers, and a plague of aphids. Balanced feeding builds a frame that will actually fruit.
Every month or so, feed each vine a balanced N–P–K compound (nitrogen, phosphorus and potassium together) — your recommendation gives the amount and type.
Spread it in a ring under the outer leaves, a hand-span or more (20 cm+) out from the stem — never against the trunk.
Feed onto moist soil and cover it lightly (a light hoeing or some mulch), so it feeds the roots instead of gassing off or washing away.
Go easy on plain nitrogen — resist pushing growth with lots of urea, and save the vine's big appetite for potassium for the fruiting stage.
Wash your hands afterwards, and keep fertiliser off food and water and away from children.
- Tip:
Excess nitrogen — it drives vine over fruit and pulls in the aphids that carry woodiness virus.
- Do:
Split feeding into small monthly rings rather than one big dose — steady feeding beats a flood the rain just carries away.
- Watch out:
Keep every feed off the stem-base — fertiliser against a wet collar helps collar rot take hold.
Flowering and pollination
This is where the crop is won or lost, from about 5–7 months after planting. The hanging shoots flower — but a passion-fruit flower only makes fruit if pollen reaches it, and the vine's heavy pollen needs carpenter bees or your hand to move it. Keep the soil steadily moist (dry soil drops the flowers), and where bees are scarce, hand-pollinate. In very hot spells (above about 30 °C) the vine tends to grow leaf instead of flowers, so the best set comes in the cooler, calmer weather.
Scout (PWV, brown spot, poor set) Recommended
At flowering, poor fruit set — flowers that fall without making fruit — is the biggest threat to your crop, and it is often just missing pollination, which you can fix. Watching the flowers also catches virus (which ruins fruit shape) and brown spot before they spread onto the young fruit.
Walk the rows once a week through flowering, checking the open flowers and the shoots carrying them.
Fruit set: look at whether open flowers are swelling into little green fruit behind the petals, or just dropping off. Lots of flowers dropping with no fruit means poor pollination — plan to hand-pollinate (next task).
Bees: watch the flowers mid-morning for big carpenter bees working them. Few or no bees is your signal that hand-pollination will pay.
Woodiness virus: look again for mosaic mottling on new leaves and for flowers or tiny fruit coming hard and misshapen — rogue (remove and destroy) affected vines, as there is no cure.
Brown spot: at the first ring-marked brown spots on leaves or young fruit, keep up the copper protectant spray every 2–3 weeks in humid weather — and respect the pre-harvest interval (the number of days the label says to wait between your last spray and picking fruit).
- Do:
Hand-pollinate mid-morning with a soft brush if set is poor or bees are scarce — it markedly raises set and fruit size.
- Watch out:
Count how many open flowers are setting fruit — if most are dropping, act on pollination now, because a flower missed is a fruit lost for good.
- Tip:
Blaming disease for a light crop when the real problem is no bees — check for pollination first, it is the commonest cause of empty flowers.
Hand-pollinate mid-morning Recommended
Passion-fruit pollen is heavy and sticky — wind cannot move it, so every fruit depends on a carpenter bee or your hand carrying pollen from flower to flower. Where bees are few, doing it yourself is the best-paid job on the plot: it can raise your fruit set and size by 15–40%.
Go out mid-morning, when the flowers are freshly open and the pollen is ripe and dry — this is the window that works.
Look at a flower: the pollen sits on the lower parts (the anthers) as a yellow dust, and the stigmas are the three little knobs held above them. Fruit forms only when pollen reaches those stigmas.
With a soft, dry brush (or a fingertip), pick up the yellow pollen from a freshly open flower and dab it onto the stigmas of other open flowers.
Move from flower to flower, ideally between different vines — passion fruit sets better with pollen from another plant, and the yellow type will not set with its own pollen at all.
Do this every 2–3 days through flowering, because each flower opens for only about a day.
- Do:
Work in the mid-morning window on a dry day — pollen picked up wet or late in the day will not set fruit.
- Tip:
Brushing hard — a soft touch moves the pollen without bruising the delicate stigmas.
- Watch out:
Look for carpenter bees first; if they are working the flowers well, you may only need to hand-pollinate the shaded or missed parts of the vine.
Steady irrigation through flowering Recommended
A passion-fruit vine drops its flowers and tiny fruit if the soil goes dry at flowering — this is the crop's thirstiest, most delicate moment. Steady water now holds onto the flowers and the fruit just setting, turning blossom into a real harvest.
Keep the soil evenly moist right through flowering — check by pushing a finger in, and water before the top few centimetres dry out.
Water every 5–7 days, and more often in heat or on sandy soil that dries fast.
Keep it steady and even — a long dry spell followed by a flood makes the vine drop its flowers and split its young fruit; little and regular is far better.
Wet the root zone out under the leaves, and keep water off the stem-base so the collar stays dry.
- Watch out:
Dry soil at flowering makes the vine shed its flowers and young fruit — if you can water at only one stage all season, water now.
- Tip:
Letting the plot swing from bone-dry to waterlogged — both drop flowers, and standing water invites collar rot.
- Do:
Mulch under the vines to hold the moisture steady between waterings.
Fill the fruit
The set fruit now swells and fills over about 2–3 months from flower to ripe. Two things build heavy, sweet fruit: even moisture (dry-then-wet cracks and drops fruit) and plenty of potassium (the fruiting food passion fruit is hungriest for). Keep the canopy open and airy against brown spot, and collect every fallen fruit to starve the fruit flies.
Scout (brown spot, fruit flies) Recommended
As the fruit fills, fruit flies sting it to lay eggs, and their maggots rot it from the inside so it drops early. Brown spot scars the skin. Finding stung or spotted fruit early, and clearing every fallen fruit, stops the flies breeding up and wrecking the whole hanging crop.
Walk the rows once a week and look over the hanging fruit as well as the leaves.
Fruit flies: look for tiny sting marks or dimples on the fruit skin, fruit that rots and drops early, and maggots inside a dropped fruit when you cut it open.
Collect every fallen and stung fruit and bury it deep or burn it — never leave it lying, or the maggots finish in the soil and next week's flies are worse. This picking-up is your main fruit-fly control.
Brown spot: look for dark, ring-marked spots on the fruit skin and leaves; keep up the copper protectant spray every 2–3 weeks in humid weather, respecting the pre-harvest interval before you pick.
When spraying, cover skin, nose and eyes, spray in the cool with the wind behind you, keep it off ripe fruit and food, and wash afterwards.
- Do:
Clear fallen fruit every few days — a clean orchard floor is the cheapest fruit-fly control there is.
- Watch out:
A sudden rise in dropped, rotting fruit means fruit flies are breeding up — tighten your collection and check for sting marks.
- Tip:
Leaving stung or rotten fruit on the ground or in a heap near the plot — it is a fly nursery.
Even irrigation through fill Recommended
Filling fruit is mostly water, so steady moisture now decides whether the fruit swells big and smooth or stays small, shrivels and drops. A dry spell followed by heavy watering makes the skins crack. Even watering builds heavy, juicy, unblemished fruit.
Keep the soil evenly moist all through fruit fill — never let it dry out hard between waterings.
Water every 7–10 days, more often in heat or on fast-draining sandy soil.
Keep it even — sudden swings from dry to soaked split the fruit skins and drop fruit; regular, moderate watering is what you want.
Mulch under the vines to hold the moisture steady and cut how often you must water.
Wet the root zone under the canopy and keep water off the collar — a wet stem-base invites collar rot.
- Watch out:
Fruit that shrivels or drops half-grown is usually thirsty — check that your watering is steady, not stop-start.
- Tip:
A big flood after a long dry spell — it splits the fruit skins; water little and regularly instead.
- Do:
Keep a mulch layer under the vines through fill — it is the easiest way to hold moisture even.
Potassium feed through fill Recommended
Potassium is the nutrient that fills fruit — it builds size, weight and sweetness, and passion fruit takes up more potassium than any other food. Feeding potassium every month through fruit fill turns your set fruit into a heavy, sweet, sellable crop.
Every month or so through fruit fill, feed a potassium fertiliser (such as muriate of potash) — your recommendation gives the amount and type. Well-rotted wood ash is a useful local source of potash if bought fertiliser is short.
Spread it in a ring under the outer leaves, a hand-span or more (20 cm+) out from the stem — never against the trunk.
Feed onto moist soil and lightly cover it, so it reaches the roots.
Keep leaning on potassium, not nitrogen, now — nitrogen at fruiting just pushes leaf and delays ripening.
Wash your hands afterwards, and keep fertiliser off the fruit, off food and water, and away from children.
- Do:
Favour potassium (and wood ash) through fruiting — it is what puts sugar and weight into the fruit.
- Tip:
Piling on nitrogen now — it grows leaf instead of fruit and softens the crop against disease.
- Watch out:
Keep fertiliser off the stem-base and off the hanging fruit — spread it out under the canopy edge.
Remove tangled tendrils Recommended
Passion fruit climbs by curly tendrils (the little grabbing threads), and left alone they knot the hanging shoots into a dense, damp mat. That trapped, still air is exactly where brown spot thrives. Clearing the tangles every couple of weeks keeps the canopy open, dry and disease-free.
Every 2–3 weeks, work along the vine and pull or snip out the tendrils that are tying the hanging fruiting shoots into knots.
Let the fruiting shoots hang free and separate, like a loose curtain, so light and air reach right through the canopy.
Take out any dead or crowded shoots at the same time — open, airy foliage dries fast after rain and gets far less brown spot.
Disinfect your knife between vines (bleach or flame) so you do not carry woodiness virus from vine to vine.
- Do:
Keep the canopy open and airy — good airflow is your cheapest defence against brown spot.
- Watch out:
Tendrils also grab and choke swelling fruit and neighbouring vines — free them before they scar the fruit.
- Tip:
Cutting vine after vine with the same dirty blade — wipe it clean between plants to stop spreading the virus.
Pick the ripe fruit
The vine starts bearing from about 8–12 months and then fruits on and off through the rest of its 2–3 years. Fruit is ripe when it turns fully deep purple or canary yellow and drops or picks off easily. Gather it every 2–3 days so none over-ripens or spoils on the ground.
Collect / pick ripe fruit Critical
Passion fruit ripens a few at a time over months, so the harvest is many small pickings, not one big cut. Gathering ripe fruit every 2–3 days catches each fruit at its best and keeps it off the ground where flies and rot find it — this steady picking is where your income actually comes in.
Judge ripeness by colour: the fruit is ready when it turns fully deep purple (purple type) or full canary yellow (yellow type), with no green left.
A ripe fruit drops to the ground on its own or picks off with the lightest twist — if you have to tug, it is not ready, so leave it.
For juice or processing: let fruit fully colour and even drop, then collect it off the ground every 2–3 days — slightly wrinkled fruit is over-ripe but the sweetest, ideal for juice.
For fresh sale or export: pick at full colour before it wrinkles, handle it gently, and keep it out of the sun.
Gather into a clean basket or bucket and get it into the shade — never leave picked or fallen fruit sitting in the heat.
If a fruit is still part-green and will not pick off with a light twist, it is not ripe yet — leave it on the vine and check again in a few days.
- Do:
Collect fallen ripe fruit every ~2 days (best for processing), or pick at full colour before shrivelling for fresh sale or export.
- Tip:
Pulling hard-green fruit — it never ripens properly off the vine and just turns leathery.
- Watch out:
Clear every fallen fruit as you pick — leftover fruit on the ground breeds the fruit flies that sting next week's crop.
Handle the fruit and prune for the next flush
Two jobs keep the plot paying: handle the fruit right so it reaches market sound (clean, dry and cool, it keeps 2–3 weeks), and prune after each fruiting flush so the vine throws fresh fruiting wood for the next round. After 2–3 years the vine tires — replant a new plot to keep going.
Clean, dry & cool the fruit Recommended
Passion fruit only keeps about 2–3 weeks, and only if you handle it gently and keep it cool — rough handling and heat turn a good fruit soft and mouldy within days, and one spoiled fruit in the basket rots the rest. Simple cleaning and cooling is what gets your fruit to market saleable.
Sort as you go — set aside any cut, stung, rotten or over-soft fruit so it cannot spoil the sound fruit around it.
Wipe or gently wash the fruit clean and let it dry fully — surface water speeds rot.
Keep it cool and shaded — around 10 °C in a cool room or store if you have one, out of the sun otherwise. Cool fruit keeps 2–3 weeks; fruit left in the heat keeps only days.
Pack into clean baskets or crates that let air through, and get it to market while it is firm — slightly wrinkled fruit is sweeter but shorter-lived, so send that for juice.
- Do:
Prune after each fruiting flush (disinfecting tools) and replant the plot after about 2–3 years, when yields fall.
- Tip:
Leaving fruit in the sun or in a closed sack — it heats, sweats and rots fast.
- Watch out:
One rotten fruit taints a whole basket — pull out the spoilers every time you handle the crop.
Prune after the fruiting flush Recommended
After a flush of fruit, the wood that bore it is spent. Pruning out the old, dead and tangled wood pushes the vine to grow fresh shoots — and fresh shoots are what carry the next round of flowers and fruit. Skip it and the vine turns into a dark, disease-ridden tangle that fruits less each year.
Once the flush of fruit is picked, cut out the dead, weak, tangled and spent wood, thinning the hanging curtain so light and air get right in.
Keep the main trunk and the two laterals along the wire — you are refreshing the hanging fruiting shoots, not rebuilding the whole frame.
Cut back over-long, worn-out fruiting shoots so strong new shoots grow to flower for the next flush.
Disinfect your blade between vines (wipe with bleach or pass through a flame) — pruning is the classic way woodiness virus is carried from a sick vine to a healthy one.
Prune in dry weather so the cuts heal cleanly and disease does not enter the wounds.
- Do:
Disinfect tools between vines every time you prune — dirty blades spread the incurable woodiness virus.
- Tip:
Cutting away the main trunk and laterals — those are your permanent framework; only the fruiting shoots are renewed.
- Watch out:
After about 2–3 years the whole vine tires and fruits poorly — that is the time to replant a fresh plot, not to prune harder.
Pests and diseases that attack passion fruit


Where to sell passion fruit
Markets that trade this crop — what each one sells it by, when supply peaks there, and the currency used.


Grow passion fruit with a plan, not a guess
This guide is the general answer. Divisi works out yours — the week to plant passion fruit on your soil and your rainfall, and each job dated for your field.


When to plant passion fruit, country by country
- When to plant passion fruit in Angola
- When to plant passion fruit in Botswana
- When to plant passion fruit in Burundi
- When to plant passion fruit in Cabo Verde
- When to plant passion fruit in Cameroon
- When to plant passion fruit in Comores
- When to plant passion fruit in Congo
- When to plant passion fruit in Côte d'Ivoire
- When to plant passion fruit in Egypt
- When to plant passion fruit in Eritrea
- When to plant passion fruit in Eswatini
- When to plant passion fruit in Ethiopia
- When to plant passion fruit in Gabon
- When to plant passion fruit in Guinea Ecuatorial
- When to plant passion fruit in Guinée
- When to plant passion fruit in Kenya
- When to plant passion fruit in Libya
- When to plant passion fruit in Madagascar
- When to plant passion fruit in Malawi
- When to plant passion fruit in Mauritius
- When to plant passion fruit in Morocco
- When to plant passion fruit in Moçambique
- When to plant passion fruit in Namibia
- When to plant passion fruit in Nigeria
- When to plant passion fruit in Rwanda
- When to plant passion fruit in République centrafricaine
- When to plant passion fruit in République démocratique du Congo
- When to plant passion fruit in Sao Tome and Principe
- When to plant passion fruit in Somalia
- When to plant passion fruit in South Africa
- When to plant passion fruit in South Sudan
- When to plant passion fruit in Sudan
- When to plant passion fruit in Togo
- When to plant passion fruit in Tunisie
- When to plant passion fruit in Uganda
- When to plant passion fruit in United Republic of Tanzania
- When to plant passion fruit in Zambia
- When to plant passion fruit in Zimbabwe
Where passion fruit scores best
Districts where Divisi's engine currently rates this crop highest, ranked by fit.
-
 Karongi
 -
 Kasongo-Lunda
 -
 East Borena
 -
 Igembe South
 -
 Cangola (Alto Cauale)
 -
 Ibanda
 -
 Rebola
 -
 Fako
Fako -
 Muleba
 -
 Kerouane
 -
 Ugu
Ugu -
 Naivasha
Get Insights by email
A short digest of new Divisi articles. No email on quiet weeks.
Frequently asked questions
How do I grow passion fruit?
How to grow passion fruit: 60–90 days to maturity, 150 cm rows. Also called purple granadilla, grenadella, fruit de la passion, maracujá, pasheni.
What is grenadella in English?
Grenadella is the Afrikaans name for passion fruit.
What is fruit de la passion in English?
Fruit de la passion (also grenadille) is the French name for passion fruit.
What is maracujá in English?
Maracujá is the Portuguese name for passion fruit.
What is pasheni in English?
Pasheni (also karakara) is the Swahili name for passion fruit.
How long does passion fruit take to grow?
Passion fruit takes about 60–90 days from sowing to maturity, though the exact length varies with variety, temperature and how the season runs.
What spacing should I use for passion fruit?
Space passion fruit rows about 150 cm apart, with roughly 300 cm between plants within the row.
What pests and diseases attack passion fruit?
The ones covered in this guide are Passion fruit brown spot, Passion fruit collar rot, Passion fruit woodiness virus. Each has its own page explaining how to identify, check for and control it.