 Divisi
Corm rot
Erwinia carotovora · Bacterial
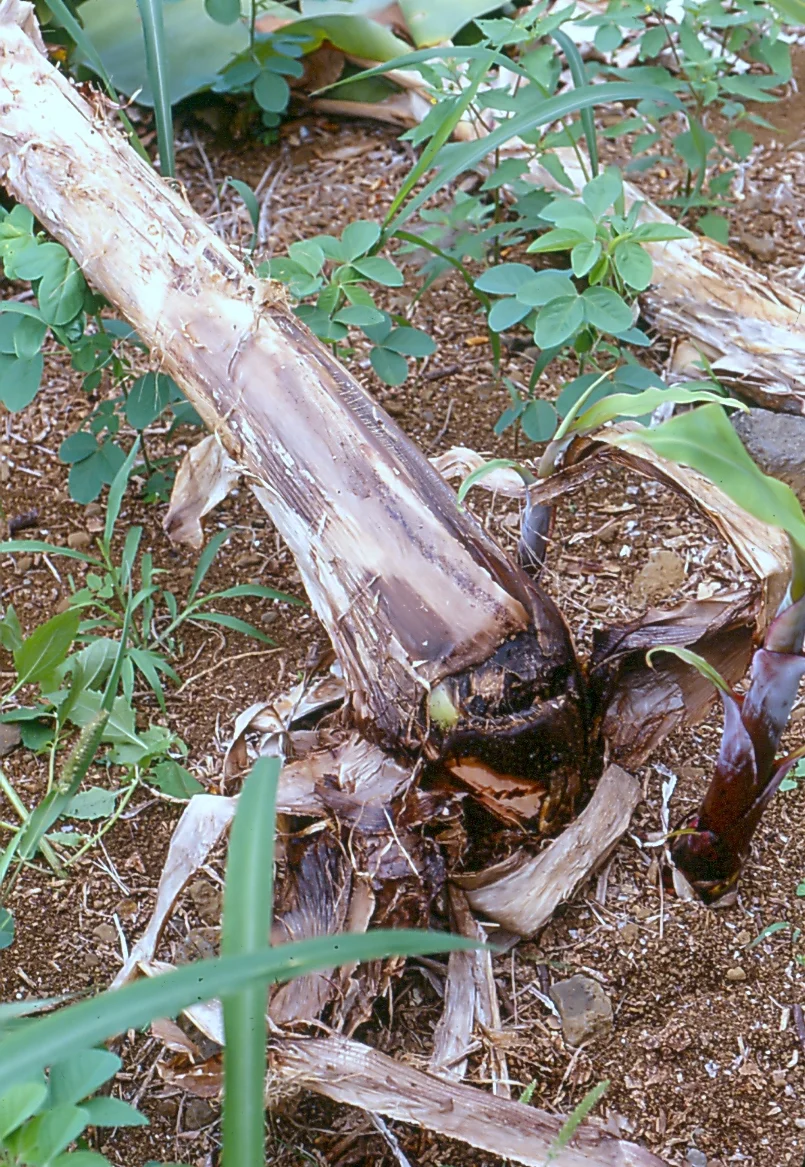
Photo: Scot Nelson · CC0
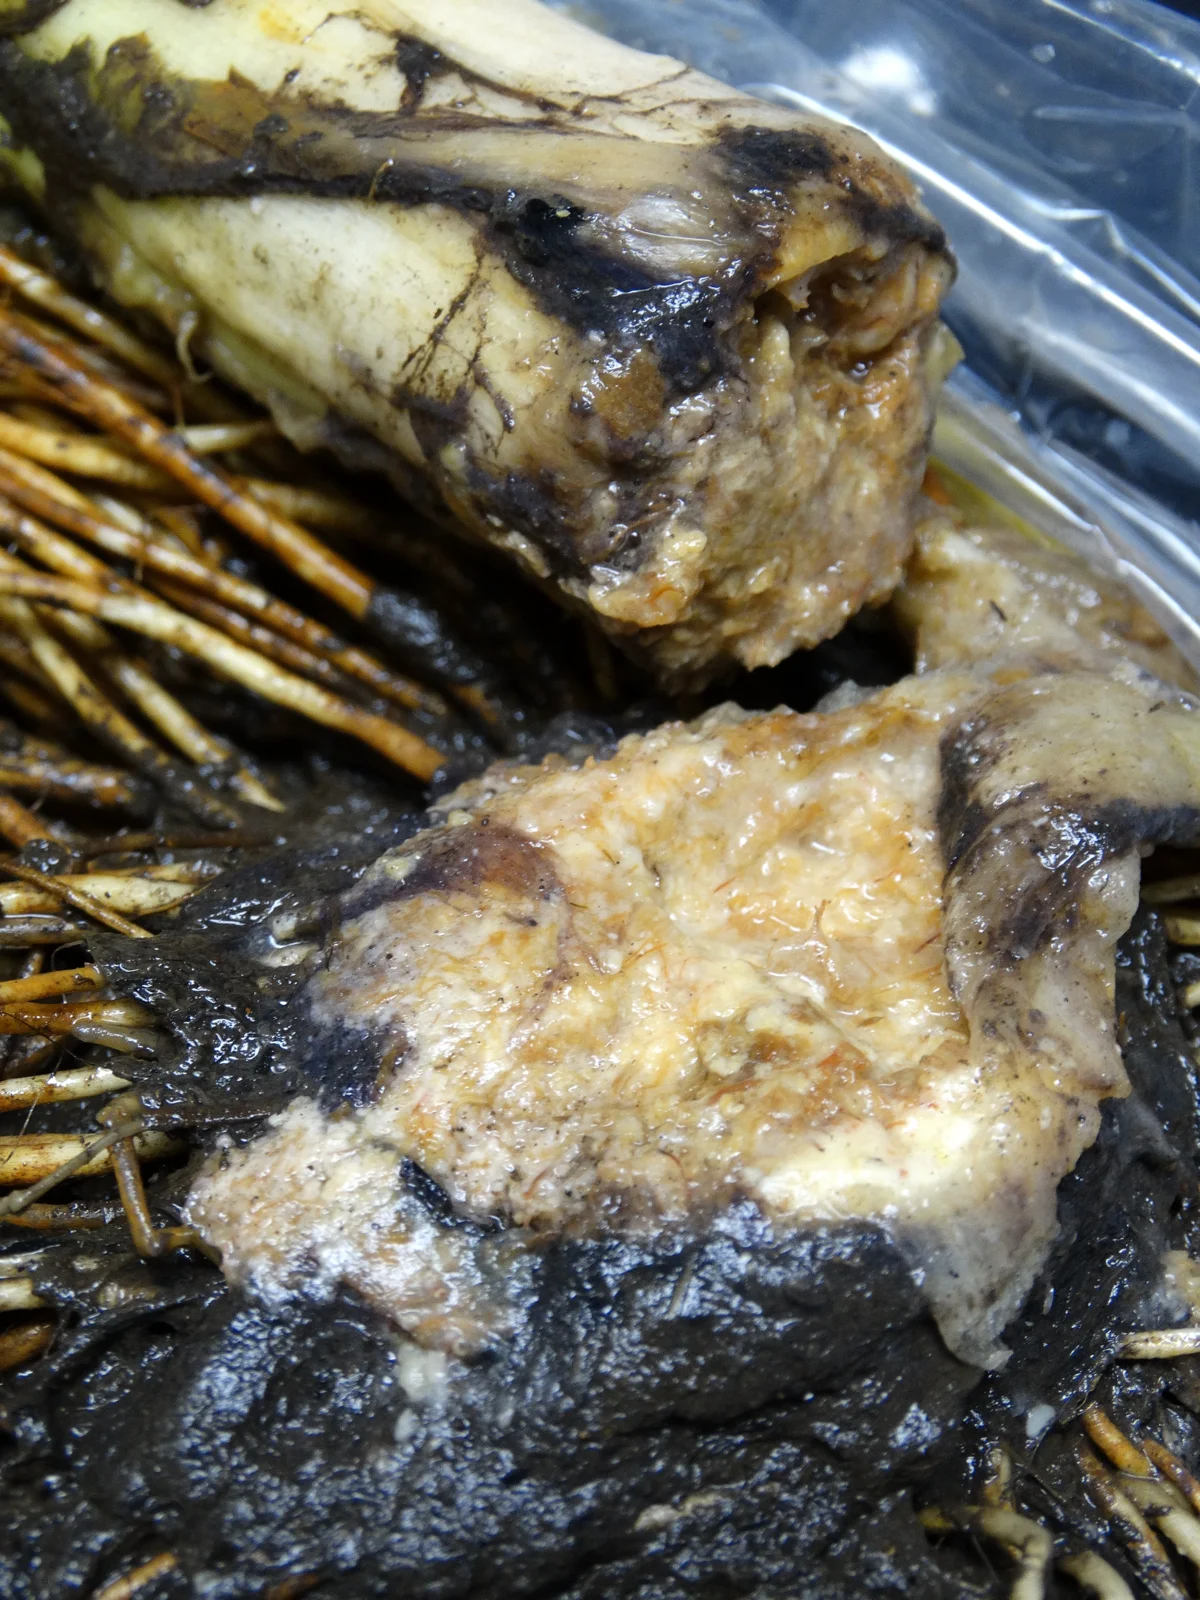
Corm rot is a soft, wet rot of the corm — the fat underground stem that a banana, taro or cocoyam grows from. It is caused mainly by bacteria (and sometimes fungi) that sneak in through cuts and bruises on suckers and roots. Warm, waterlogged, poorly drained soil and the planting of infected or damaged suckers set it off. The rot eats out the corm tissue, so the plant cannot root or hold itself up: it yellows, wilts and topples.
Scot Nelson · CC0 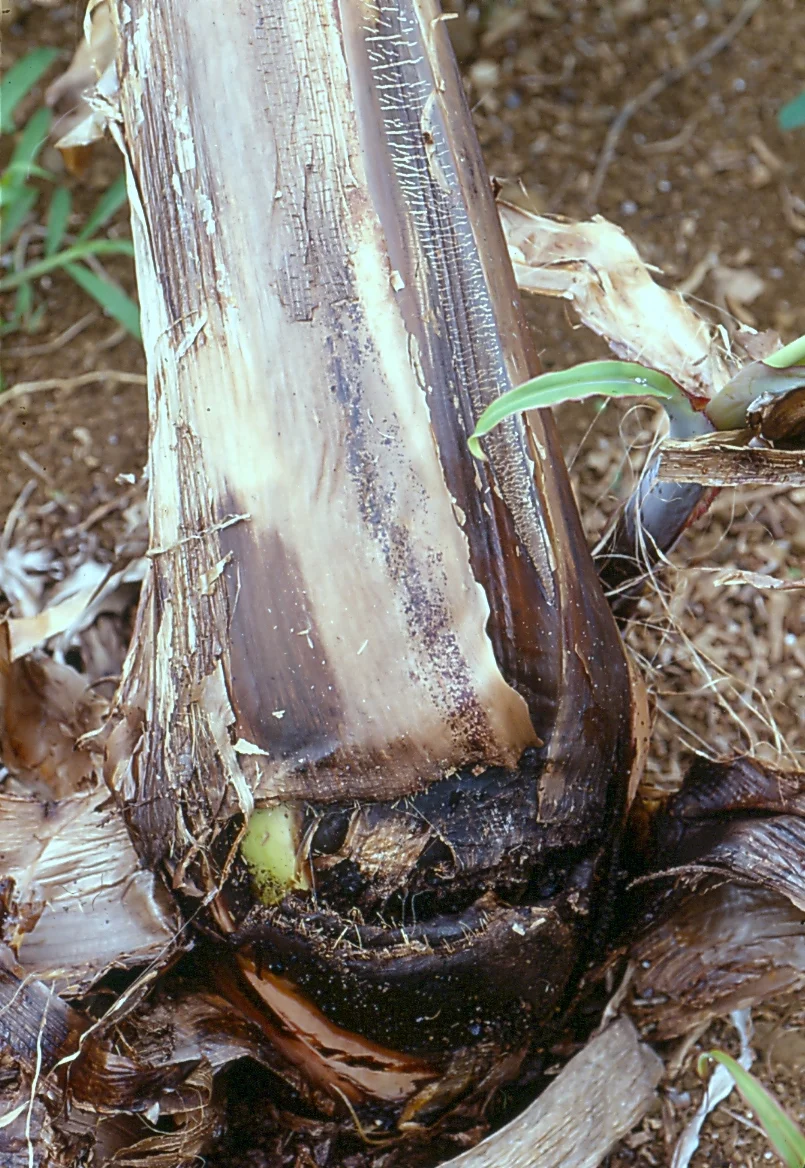
Scot Nelson · CC0
Why it matters
Corm rot attacks the one part the whole plant stands on — the underground stem. A bad outbreak can wipe out up to 60% of your crop, because a plant with a rotten corm cannot root, cannot feed itself, and simply topples over and dies. Worst of all, the rot works underground where you cannot see it and spreads through wet soil and dirty planting material, so by the time a plant wilts on top the corm below is often already destroyed and cannot be saved. That is why everything here is about keeping it OUT — clean suckers and dry, well-drained ground — not curing it after.
When to act
Newly planted suckers failing to establish or young plants toppling with a soft rotten base.
This guidance is general, compiled from published agronomic references including FAO and CABI. Thresholds and timing shift with your crop, your variety and the season.
In much of the region a spray is simply called mushonga — medicine. But a chemical group you cannot name is one you cannot rotate, and a product you did not write down has no pre-harvest interval you can observe. Mushonga, and other farming words →
The full Corm rot field guide
Identify it
The first thing you see (above ground)
a young plant that yellows, wilts and leans or topples over even though there is no drought — give it a gentle push and it rocks loosely in the soil because the rotten corm no longer anchors it. Newly planted suckers may simply fail to sprout and sit there dying.
The sure sign (below ground)
dig up the base and cut the corm open. Healthy corm is firm and white or cream. Rotten corm is a soft, wet, water-soaked brown-to-black mush with hollow cavities, and it gives off a strong, foul, rotten smell — the smell is the giveaway. Roots are few, dark and slimy instead of white and firm.
Don't confuse it
with drought wilt (soil is dry, plant is firmly anchored, corm inside is still hard and white and does NOT stink) or with a corm eaten by the banana weevil (that leaves dry, tunnelled holes and you may find a fat grub — not a soft, smelly, water-soaked rot). Corm rot is always soft, wet and foul-smelling, and it strikes hardest in the low, wet spots of the field.
Scout for it
Check BEFORE you plant — this is your best chance
Corm rot hits hardest at the just-planted and young-plant stages, so inspect every single sucker as you prepare it. Cut off the outer skin (pare it) and reject any that show soft, discoloured or smelly patches inside — one rotten sucker can seed the whole field.
After planting, walk the field twice a week
through the first months while plants are establishing and growing. Walk a big "W" so you cover all four corners and the middle, not just the row by the path, and pay special attention to low, wet, poorly drained patches where the rot loves to sit.
Stop at about 10 spots
and at each one gently push a few young plants. Any that rock loosely, lean, yellow or fail to grow — dig one up and cut the corm to check for the soft, smelly, water-soaked rot.
The action number
if you find even 1 in 10 young plants toppling or soft and rotten at the base — or new suckers failing to establish — act now. This rot spreads fast through wet soil, so one or two confirmed plants is already your signal to pull them out and protect the rest; do not wait for more.
Control it
Prevent it
-
plant clean material (your strongest tool):
start only with clean, healthy suckers or, best of all, tissue-cultured plantlets (lab-raised, disease-free baby plants). Pare each sucker — trim off the outer skin and roots — and cut away any brown or smelly spot. Never replant a sucker from a plant that rotted, and avoid bruising or wounding corms when you dig, carry or plant them, because every cut is a door for the bacteria.
-
keep the ground dry:
this rot needs wet, waterlogged soil. Plant on well-drained sites and build raised mounds or ridges so water drains away from the corm. Do not replant into a spot where corm rot struck before — rotate to a fresh, well-drained area and give the old ground a long break.
Treat the suckers before planting
give pared suckers a hot-water dip (soaking in hot water to kill the bacteria inside) and then dip them in an approved biocide before they go in the ground. Whenever you handle any dip or treatment, cover your skin, eyes and nose, keep it away from food, drinking water, children and animals, and wash well afterwards.
Act early — give clean roots a helping hand:
drench the planting hole and suckers with beneficial microbes (Trichoderma — a helpful fungus that crowds out and fights the rot-causing organisms). It is safe to handle and works best as protection at planting, not as a cure for a plant already rotting.
Rogue and destroy the sick plants immediately
as soon as you confirm a rotten plant, dig out the whole plant AND its corm, carry it out of the field, and burn or bury it deep — do not leave it lying around or toss it on the compost, or it will keep infecting healthy plants. Clean the soil off your tools afterwards.
If it keeps spreading
the rot is winning because the ground is too wet or the planting material was already infected. Stop planting into that block, dig proper drains or move to raised beds and a fresh well-drained site, and re-start only with certified clean tissue-cultured plantlets. Where a whole low, waterlogged patch is going down, cut your losses: clear and destroy the affected plants, rest that ground from bananas and their relatives, and put your effort into a clean, well-drained new plot rather than fighting a rot that cannot be cured underground.
Catch Corm rot before it costs you the harvest
This guide is the general answer. Divisi works out yours — the week to scout your own field for Corm rot, and what to do the day you find it.


Crops it affects
Plan the crops it attacks


All planting calendars, country by country
Get Insights by email
A short digest of new Divisi articles. No email on quiet weeks.
Frequently asked questions
How do I identify Corm rot?
The first thing you see (above ground). a young plant that yellows, wilts and leans or topples over even though there is no drought — give it a gentle push and it rocks loosely in the soil because the rotten corm no longer anchors it. Newly planted suckers may simply fail to sprout and sit there dying.
When should I take action against Corm rot?
Newly planted suckers failing to establish or young plants toppling with a soft rotten base.
How do I control Corm rot?
Prevent it — plant clean material (your strongest tool):. start only with clean, healthy suckers or, best of all, tissue-cultured plantlets (lab-raised, disease-free baby plants). Pare each sucker — trim off the outer skin and roots — and cut away any brown or smelly spot. Never replant a sucker from a plant that rotted, and avoid bruising or wounding corms when you dig, carry or plant them, because every cut is a door for the bacteria.
Which crops are attacked by Corm rot?
Among the crops covered here: Cocoyam / Taro, Enset.