 Divisi
How to grow cocoyam and taro
Colocasia esculenta · Araceae
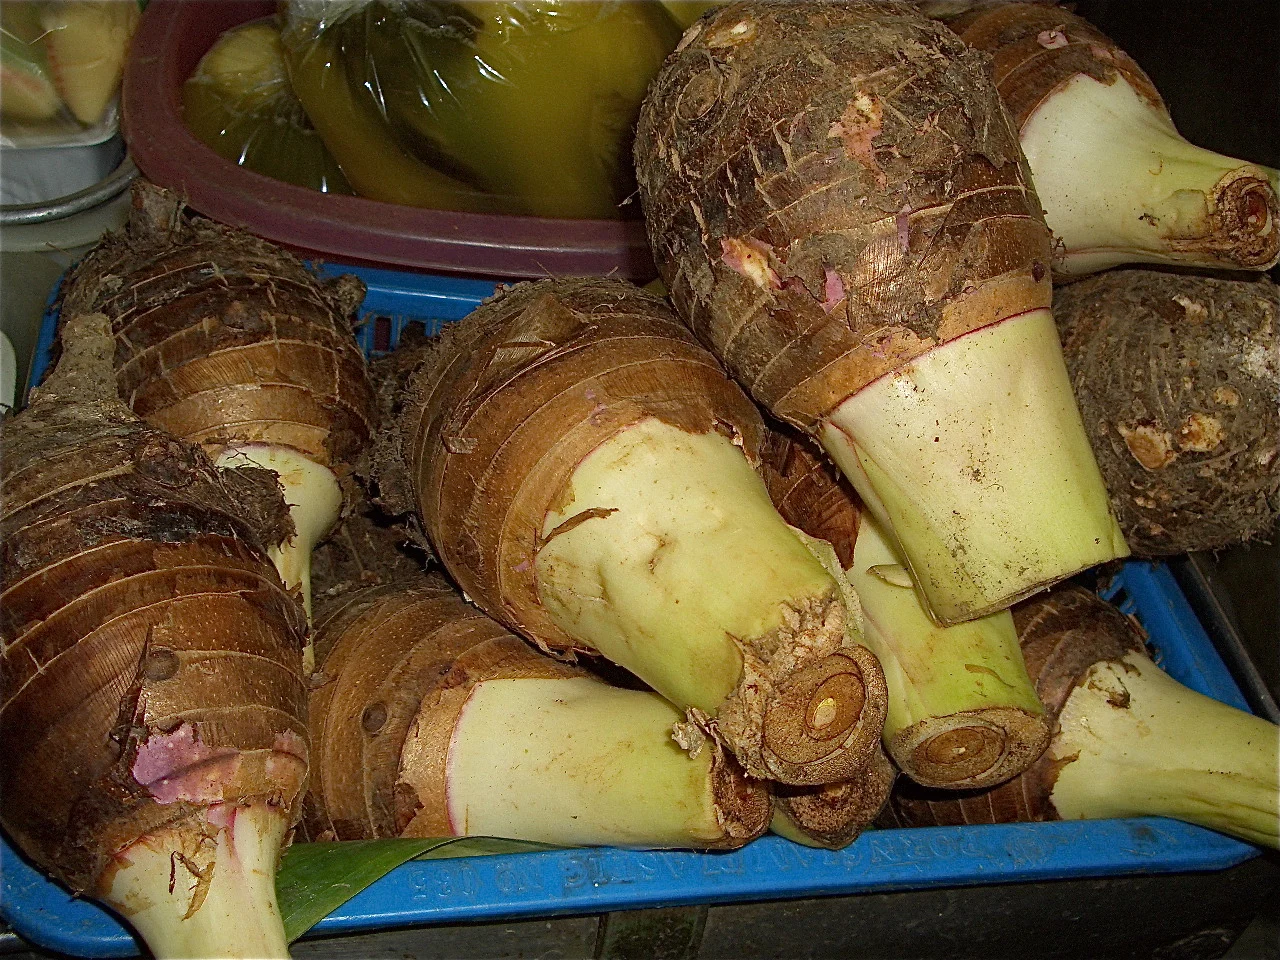
Photo: Susan Slater · CC BY-SA 4.0
Cocoyam, or taro (Colocasia esculenta), is a broad-leaved plant grown for its corm — a heavy, potato-like food store that swells underground — and, in some types, for its tender young leaves. You do not grow it from seed. Instead you plant a living piece of another taro plant: a small corm, a cormel (a little side-corm), a headsett (the leafy top of a corm) or a sucker (a side-shoot). Taro is one of the very few food crops that will grow standing in shallow water, like rice, as well as on well-drained moist ground — so your first and biggest decision is wet ground or dry ground. It is a patient crop: the corm takes many months (often 7–15) to fill, feeding heavily the whole time, above all on potassium. One warning — raw corms and leaves carry tiny needle-like crystals (calcium oxalate) that itch and burn the mouth and throat, so they must always be well cooked or dried before eating.
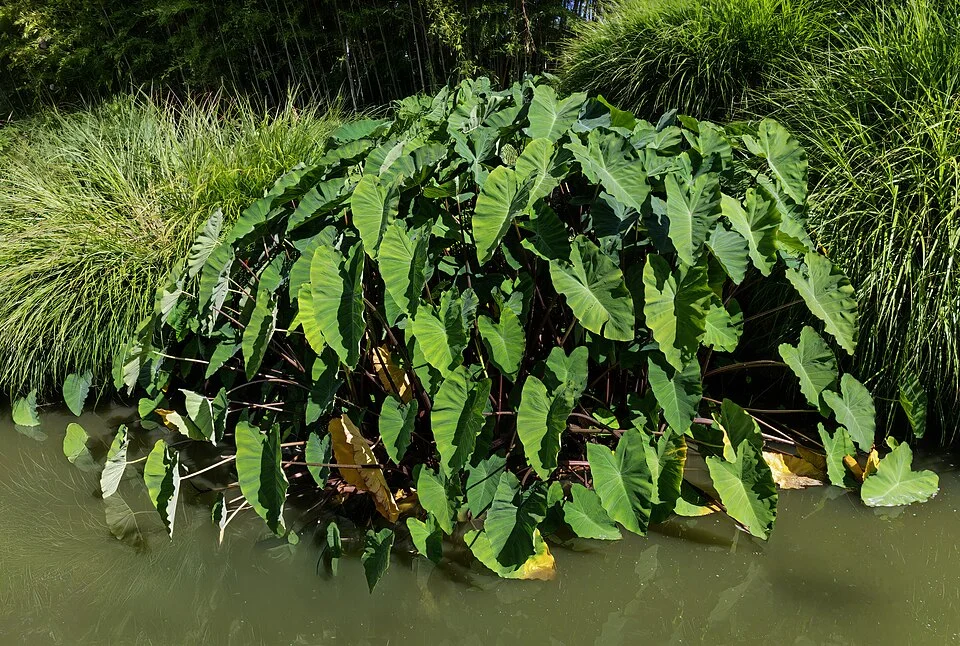
Didier Descouens · CC BY-SA 4.0 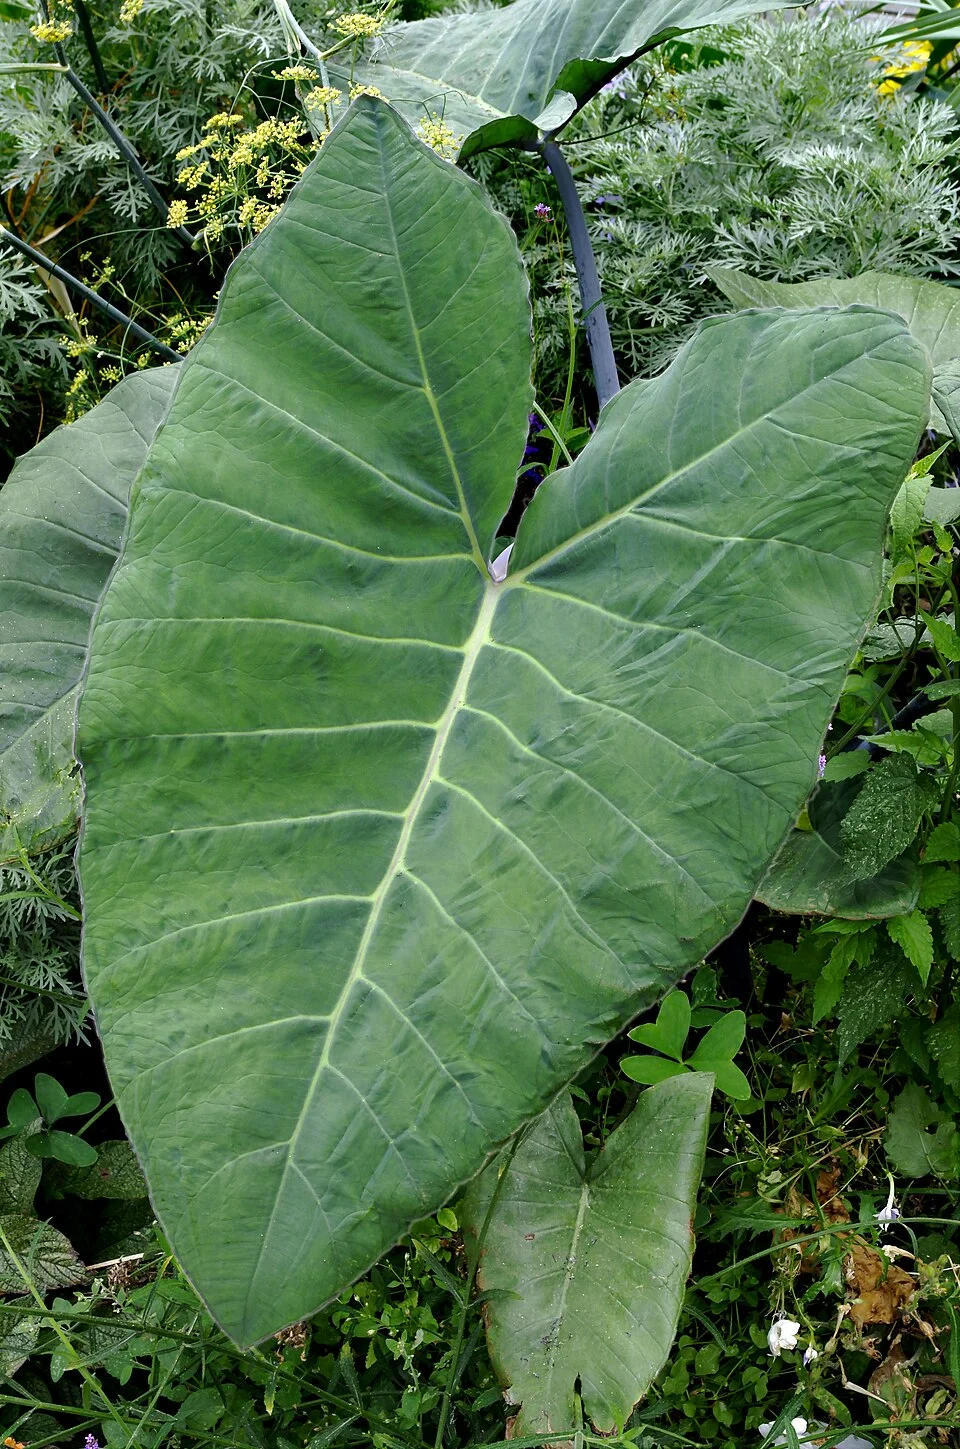
JLPC · CC BY-SA 3.0
- Days to maturity
- 180–540 days
- Row spacing
- 70 cm
- Plant spacing in the row
- 70 cm
- Sowing depth
- 5–10 cm
These are general figures for the crop, compiled from published agronomic references including FAO and CABI. The right choice for your field depends on your soil, rainfall and the yield you are aiming for.
Will cocoyam and taro actually do well on your field? Check your own field against every crop in the catalogue — no signup. Run the crop check →
Also known as
Cocoyam and taro is also called dasheen and eddoe.
- English
- dasheen, eddoe
- French
- taro
- Igbo
- ede
- Ndebele
- amadumbe
- Shona
- madhumbe
- Swahili
- majimbi, jimbi
- Xhosa
- amadumbe
- Yoruba
- koko
- Zulu
- amadumbe
Working in buckets, bags or paces? The farming glossary turns the measures growers actually use into kilograms and hectares — what a 20 litre bucket of each crop really weighs, and how to size a field by walking it — alongside the Shona, Swahili, Ndebele and Yoruba words used in the field. Open the glossary →
Growing cocoyam and taro, stage by stage
Your taro season from first to last — choose wet or dry ground, plant clean setts bud-up, keep the crop steadily moist and fed with potassium through the long months the corm swells underground, then lift and cure corms that store and eat well.
Get ready — choose wet or dry ground, and clean setts
Almost everything that decides your taro harvest is settled before you plant: the one big choice of wet ground or dry ground, clean planting material taken from healthy plants, and rich, moisture-holding soil for a crop that will feed heavily for many months. Do all of this in the weeks before planting, so the ground and the setts are ready together.
Choose the water regime (wetland vs upland) Critical
Taro is unusual — it will grow standing in shallow water (like rice) or on well-drained moist ground — and this one choice shapes everything after it: how you lay out the field, how you water, how much you weed, and how much you harvest. Choose wrong — trying to hold water where you can't, or leaving dry-ground taro sitting in a stagnant puddle — and you can lose the whole crop. Decide in the month before you plant, while you can still shape the land.
Make this choice in the month before planting, before you shape the ground — there are two ways to grow taro, and you pick the one your land and water actually suit.
Wetland (paddy) taro — choose it only if you have water you can rely on all season and flat, water-holding ground (heavy clay or clay-loam). You build bunds (low walls of packed soil around the plot) to hold a shallow sheet of water, like a rice paddy. It gives the highest yields and smothers most weeds — but it needs water you can count on for many months.
Upland (dry-ground) taro — choose it where your water comes from rain or the odd watering and the land drains freely. You keep the soil steadily moist but never flooded; dry-ground taro rots if it stands in still water. Yields are lower than a paddy, but it works where you cannot hold standing water.
Match the choice to your own water and soil, not your neighbour's: low, flat, wet-bottom land near a stream suits a paddy; free-draining ground suits upland. Fix your choice now — planting, watering and weeding all follow from it.
- Watch out:
Don't attempt a paddy unless your water is reliable for the whole season — a paddy that dries out mid-way loses its yield advantage and the soil cracks.
- Tip:
Letting upland taro sit in a stagnant puddle — still, airless water rots the corm. Upland means moist and draining, not flooded.
- Do:
Pick low, wet, heavy ground for a paddy and free-draining ground for upland — you are matching the crop to the water the land naturally holds.
Select clean seed-corms from healthy plants Critical
You grow taro from a piece of another taro plant, and most taro diseases ride in that piece — leaf blight, corm rots and mosaic virus all travel in the sett. A clean sett from a healthy plant is the single cheapest disease control you have; a cheap, sick sett plants the disease into your field with your own hands.
In the two weeks before planting, choose your planting material — small whole corms, cormels (the little side-corms), headsetts (the leafy top of a corm, cut off with a thumb-length of firm corm left on) or suckers (side-shoots). Any of these will grow — they are all called setts.
Take setts only from healthy, high-yielding mother plants — clumps with clean green leaves and no leaf spots, no rot and no yellow mottling.
Reject any suspect sett. Throw out any piece that is soft, rotting or smelly; any from a plant with dark, wet-looking spots on the leaves (leaf blight); or any from a plant whose leaves show a feathery pale-and-dark green mottle (mosaic virus). These sicknesses are inside the piece — you cannot wash them off.
Trim off old roots and any rotten patches with a clean knife, and let cut headsetts dry in the shade for a day or two so the cut skins over — a healed cut rots far less in the ground.
- Do:
Take setts from your best, healthiest clumps — you are choosing next season's health right now.
- Tip:
Planting soft, spotted or mottled setts just so as 'not to waste them' — one sick sett can seed blight or virus across the whole field.
- Watch out:
A sett that feels light for its size, or oozes when you squeeze it, is already rotting inside — bin it.
Prepare land / paddy + organic matter Recommended
Taro is a heavy feeder that stays in the ground for many months, so it needs soil that is rich and stays damp the whole time. Plenty of well-rotted manure or compost feeds it slowly all season and helps the soil hold moisture — exactly what a long, thirsty crop wants. But fresh manure burns young setts and brings in weed seeds, so it must be well rotted first.
In the 2–3 weeks before planting, prepare the ground to match the water regime you chose.
Upland: dig the soil over deep so it is crumbly and free-draining, and make ridges or mounds if your ground tends to waterlog. Paddy: build the bunds (low soil walls) and puddle the wet soil — work it wet with a hoe until it is soft and slightly sealed underneath, so it holds water like a rice field.
Work in plenty of well-rotted manure or compost — dark, crumbly, with no sharp smell. Taro wants more organic matter than a quick crop like maize: spread it thick — a good wheelbarrow-load for every few strides of ground you cover (a stride is about 1 m) — and dig it into the topsoil.
Do this 1–2 weeks before planting so the manure settles in and any heat from rotting has passed before the setts go in.
- Do:
Use only well-rotted manure or compost — dark and crumbly, with no sharp ammonia smell.
- Tip:
Fresh, raw manure at planting — it scorches the young setts, robs the soil of nitrogen as it rots, and carries weed seeds.
- Watch out:
Wash your hands after handling manure, and keep it out of drinking water.
Plant the setts and get a full stand
The number of setts that sprout and root now is the ceiling on your harvest — you cannot add plants later. Taro is also slow to wake up, so you must give it time and keep the ground moist while it does. Plant at the right depth, bud pointing up, at the right spacing; settle into your water regime; then check the stand and fill the gaps.
Plant setts (5–10 cm, bud up) Critical
This is the start of your season, and every later date is counted from today. Getting the depth, the bud direction and the spacing right now sets a full, even stand — and an even stand of well-fed corms is the harvest. Setts planted upside-down, buried too deep in cold wet soil, or crowded together never catch up.
Plant on your prepared ground at about 70 cm apart each way — roughly three to four hand-spans (a hand-span, thumb-tip to little-finger-tip on a spread hand, is about 20 cm). Even, generous spacing gives each plant room to build one big corm.
Set each sett 5–10 cm deep — about two finger-joints (a finger-joint is 3–5 cm) — with the bud pointing up. The bud is the pale, pointed eye the new shoot grows from; plant it downward and the shoot wastes days fighting to turn around.
Firm the soil gently around each sett so it sits snugly in moist earth, then cover it.
Upland: keep the soil continuously moist from planting day. Paddy: plant into wet, puddled soil and let the setts root and shoot first, then raise a shallow sheet of standing water over them — just a few centimetres deep, not a pond. Never drown a sett that hasn't rooted yet.
Be patient — taro sprouts slowly, often taking 2–4 weeks to show. Don't dig up 'failures' or gap-fill in the first couple of weeks; you'll pull up setts that were about to shoot.
- Do:
Plant with the bud pointing up — it's the pale, pointed eye, and that's where the shoot comes from.
- Tip:
Planting too deep in cold, wet soil — deep setts in soggy ground rot before they sprout. Stay at about two finger-joints.
- Watch out:
Sprouting is slow — give a sett 2–4 weeks before you judge it dead.
Keep moist / manage shallow water Critical
The water regime you chose is only as good as how you run it in these first six weeks, while the setts root and wake up. Too little and upland setts dry out; too much stagnant water and they rot. Getting the water right now is what turns planted setts into an established stand.
From planting through about the first six weeks, tend the water every 5–10 days to suit your regime.
Paddy: keep the bunds sound and the soil puddled, and once the setts have rooted and started shooting, hold a shallow sheet of standing water over the field — a few centimetres deep, not a deep pond. Top it up as it soaks away or evaporates.
Upland: keep the soil steadily moist — push a finger in and water when the top few centimetres are dry. Never let it dry right out, but never leave it in a stagnant puddle either: upland corms rot in still, airless water.
Watch the weather — water more often in heat and on lighter soils, and less when it rains.
- Tip:
Letting upland taro sit in stagnant water — a still puddle rots the corm.
- Watch out:
Don't flood a paddy before the setts have rooted — an unrooted sett rots instead of shooting.
- Do:
Keep the water steady — taro hates swinging between bone-dry and flooded.
Check emergence & leaf blight Recommended
Taro sprouts slowly and unevenly, so you must check the stand once it has had time to come up — a thin stand is lost corms, and you can still fix gaps now with fresh setts. Leave it too late and the gap-fills stay so far behind the rest that they never make a proper corm.
From about 3 to 6 weeks after planting — once slow-sprouting taro has had its time — walk the rows and count how many setts have pushed up a shoot against how many you planted.
Work out the share that came up (for example, 85 sprouted from 100 planted = 85%).
About 85 in 100 (85%) or more → a good stand, carry on.
While you're there, look at the young leaves for the first signs of leaf blight — small dark, wet-looking (water-soaked) spots that spread fast in damp weather. Pick off and carry away any spotted leaves at once.
If fewer than 85 in 100 sprouted → gap-fill the misses now with fresh, clean setts from a healthy plant, while there's still time for them to catch up. First scratch up a few non-sprouters: if they are soft and rotten, that's corm rot — replant with sounder setts and ease off the water.
- Watch out:
Don't count too early — taro is slow, so a 'gap' at 2 weeks may still sprout. Wait until at least 3 weeks.
- Do:
Gap-fill with clean setts from a healthy clump, not leftover soft ones — a rotten replacement just re-opens the gap.
Grow the canopy — earth up, weed and guard the leaves
Now the plant throws up its big leaves and builds the leaf factory that will fill the corm. Two jobs protect it: keep the ground clean and the corms covered until the broad leaves shade everything out, and scout hard for taro leaf blight — the disease that can strip the leaves and starve the corm.
Earth up Recommended
As the corm swells it pushes upward and its shoulders poke out of the soil. Light turns the bared part green and bitter (acrid), and an exposed corm dries and spoils. Drawing soil up around each plant keeps the corm covered, fed and swelling in the dark where it belongs.
Starting about 2 months after planting, and again every month or so, draw loose soil up around the base of each plant into a low mound.
Cover any corm shoulders showing above the ground — the pale or greening top of the swelling corm.
Work gently and shallow near the plant: taro's feeding roots sit shallow, and deep hoeing at the base tears them.
On upland ground, mounding also sheds heavy rain off the crown so water doesn't pool there and rot it.
- Do:
Keep the top of the corm covered every time you pass through — a mounded plant makes a cleaner, sweeter corm.
- Watch out:
Green shoulders on a corm mean light has reached it — earth up before the green spreads.
- Tip:
Deep, hard hoeing at the base — you'll cut the shallow feeding roots and can nick the corm.
Weed Recommended
Until taro's big leaves close over and shade the ground, weeds steal the water, food and light the corm needs — and a long-season crop gives weeds a long time to take hold. Keeping it clean through these first months protects the corm you're growing.
Weed from about 6 weeks after planting, and again every 3–5 weeks (about once a month), until the leaf canopy closes over and shades out new weeds — usually 2–3 weedings in all.
Hoe or pull shallowly: taro's feeding roots are near the surface, so scratch the weeds out of the top of the soil rather than digging deep near the plants.
In a paddy you'll weed far less — the shallow standing water smothers most weeds by itself. Just pull the few that push through.
In dry areas, leave the pulled weeds lying between the plants as a mulch to hold moisture in the soil.
- Do:
Weed while the weeds are still small and before the canopy closes — that's the cheapest yield you'll ever save.
- Tip:
Deep hoeing close to the plants — it cuts the shallow roots and can wound the swelling corm.
Scout (leaf blight, beetle, aphids) Critical
These months are when taro leaf blight can explode in wet weather and rot the leaves off the plant, and when beetles, virus and root pests first show. The leaves are the factory that fills the corm — catch trouble on the first few spots and you keep that factory running; wait, and blight can strip the crop in a week or two.
Walk the whole crop once a week — every few days in warm, wet, blight-favouring weather — and look closely at the leaves, the stems and a few plants' bases.
Taro leaf blight (the big one): look for dark, wet-looking (water-soaked) spots on the leaves, often with a yellow edge and, in the damp of morning, a faint fuzzy growth underneath. The spots spread fast, merge, and whole leaves rot, collapse and hang down. Pick off and carry away affected leaves on the very first spots — don't wait for it to spread, and never drop them in the field.
Taro beetle: look for wilting or collapsing plants; scratch at the base and you'll find holes and tunnels bored into the corm. Dig out and destroy any grubs and beetles you find — flooding a paddy helps drive them off.
Dasheen mosaic virus: look for a feathery pattern of pale and dark green running along the leaf veins, and crinkled, distorted young leaves. There is no cure — pull out and carry away badly mottled plants so they don't infect the rest, and never save setts from them.
Root-knot nematode (a tiny soil worm): if a plant is stunted and sickly for no clear reason, lift it and check the roots for knots or beads (little swellings). Where you find them, don't plant taro on that ground again next season — rotate to another crop.
- Watch out:
Warm, wet weather is when leaf blight runs fastest — scout more often after rain, and act on the first spots.
- Do:
Rogue (pull out and carry away) virus-mottled and blight-struck material — sick leaves left standing are next week's outbreak.
- Tip:
Saving planting setts from any plant you saw with mottling, spots or rot — you'd carry the disease straight into next season.
Fill the corm — the make-or-break months
This is where your yield is actually built: the corm swells fast, and this is the crop's thirstiest and hungriest stretch and its most moisture-sensitive stage. Keep water non-limiting, put on the potassium that fills and firms the corm, and keep roguing blight so the leaves go on feeding it.
Keep water non-limiting Critical
Corm bulking is the most moisture-sensitive stage of the whole crop — a dry spell now, when the corm is swelling fastest, shrinks your harvest more than dry weather at any other time. Steady water through these months is the difference between full, heavy corms and small, light ones.
From about 4 months to 8 months after planting, keep the water coming every 5–10 days — never let the crop go short while the corm is filling.
Paddy: hold the shallow standing water steady and top it up promptly; don't let a paddy dry out and crack now of all times.
Upland: keep the soil moist at all times — check with a finger and water before the top dries out. In heat, water more often.
If you can water at only one stage of the whole season, water now — this stage pays back water better than any other.
- Watch out:
This is the stage where drought hurts most — a single hard dry spell now can cost you a big slice of the corm.
- Do:
Keep it steady — even short dry-then-wet swings check the swelling corm.
Final K feed Recommended
Taro is a big user of potassium — the 'K' in fertiliser — and potassium is the nutrient that fills and firms the corm. A last potassium feed as the corm bulks builds the weight and keeping-quality of your harvest; skip it and the corms come up small, soft and poor-keeping.
Around 4 to 6 months after planting, as the corm is bulking, give the crop its final potassium feed — a potassium fertiliser such as muriate of potash (MOP), or a K-rich compound. Your recommendation gives the exact amount for your field.
Band it — lay it in a line about a hand-span (≈20 cm) to the side of each plant, not on top of it — then cover it with soil or water it in so it isn't wasted.
Feed onto moist soil (after watering or light rain) so the potassium washes down to the roots.
Handle fertiliser safely: keep it off the leaves (wet grains stick and scorch), away from food, water and children, and wash your hands afterwards.
- Do:
Give the potassium feed — it's the nutrient taro turns into corm weight and firmness.
- Tip:
Dropping fertiliser on wet leaves or against the stem — it burns them; keep it a hand-span to the side.
- Watch out:
Store and handle it away from food and children, off any water source, and wash your hands after.
Continue blight scouting Recommended
Leaf blight doesn't stop at bulking — and now every leaf you lose is corm weight you don't gain, because these are the leaves filling the harvest. Keeping the disease knocked back through the wet middle of the season protects the yield you've spent months building.
Keep walking the crop every 7–10 days — more often in warm, wet weather — right through the bulking months (about months 4 to 8).
Check the leaves for the same dark, water-soaked spots with yellow edges that spread and rot the leaf — that's taro leaf blight.
Pick off and carry away affected leaves as soon as you see them — strip the worst-hit leaves rather than let the blight run through the canopy. Never drop them among the plants.
Keep an eye out too for bored, wilting plants (taro beetle) and feathery pale-and-dark mottled leaves (mosaic virus), and rogue out any badly affected plants.
- Watch out:
A run of warm, wet days can flare blight fast — scout straight after rain.
- Do:
Remove blighted leaves from the field — left lying, they spread spores (the disease's dust-like seeds) to the healthy leaves.
Dig the corms at the right time
After many months (average 7–10; a paddy ~10–12, dry ground ~12–15) the leaves yellow and die back — the plant's own sign that the corm has finished filling. Drain a paddy first, then lift the corms carefully, because a bruised corm rots in store.
Dig the corms Critical
Harvest is where the whole season is either saved or spilled. Dig too early and the corms are small and watery; dig carelessly and every bruise becomes a rot in store. Lifting mature corms gently is what turns a grown crop into food that keeps.
Wait for the plant's maturity sign: the leaves yellow, wither and die back, and a corm feels firm and full when you press or probe it. The wide window opens from about 7 months after planting (a paddy ~10–12 months, dry ground ~12–15).
If you grew a paddy, drain the water off first and let the field firm up for a few days — you can't dig clean corms out of mud, and standing water at harvest invites rot.
Loosen the soil around each clump with a fork or by hand, and lift the corms out gently — work wide of the plant so you don't stab the corm.
Handle every corm carefully — taro bruises easily, and a bruised corm rots. Set them down softly; don't tip or throw them into a heap.
If the leaves are still green and standing and the corm feels soft or small, it isn't ready — leave it longer and check again. The harvest window is wide, so there is never a need to lift an unripe corm.
- Do:
Drain a paddy and let it firm before digging — dry footing means clean, unbruised corms.
- Tip:
Bruising, cutting or dropping corms — every knock is a rot waiting to start in store.
- Watch out:
Green, upright leaves mean the corm is still filling — don't dig it early.
Save the best clean corms/headsetts Recommended
Next season's health is decided at this harvest. Because taro diseases travel in the planting piece, the corms and headsetts you keep for seed are either your cheapest disease control or the way you carry blight and virus into next year. Choosing setts from your best, cleanest clumps now sets up a healthy crop before it's even planted.
As you dig, mark your healthiest, highest-yielding clumps — the ones with clean green leaves, no spots and no mottling, that gave the biggest, soundest corms.
From those clumps only, set aside headsetts (the leafy top cut with a thumb-length of firm corm) and small, clean corms or cormels for next season's planting.
Reject anything from a plant that showed leaf spots, mottling, wilting or corm rot — never carry a disease forward in your own seed.
Keep the saved setts cool, shaded and airy until planting, and let any cut surfaces dry so they skin over.
- Do:
Save setts only from your best, cleanest clumps — you are choosing next year's crop health today.
- Tip:
Keeping setts from spotted, mottled or rotten plants to save money — they plant the disease straight back into your field.
Cure, store and use the corms safely
The crop is dug — now don't lose it. Taro corms bruise and spoil easily, so handle them gently and cure and store them cool and airy. And always cook or dry the corms and leaves before eating, to destroy the itch-and-burn crystals inside.
Cure & store Recommended
A corm you grew for the better part of a year can rot in a week if it's bruised, damp or too warm. Curing and storing them well keeps your harvest sound to eat and to sell — and cooking or drying is not optional: raw corms and leaves carry crystals that burn the mouth and throat.
Handle gently — corms bruise, and bruised corms rot. Sort out any cut, bruised or soft corms to eat first; only sound, clean corms go into store.
Cure briefly: let the corms sit a short while in a cool, shaded, airy place so the skins firm up and small nicks dry over.
Store cool and airy — spread out, off the bare ground, out of sun and rain, where air can move around them. Taro does not keep for long, so check the store often and use the corms while they're still sound.
Always cook (boil, bake or fry) or thoroughly dry the corms and leaves before eating. Raw taro carries tiny needle-like crystals (calcium oxalate) that make the mouth and throat itch and burn; heat and drying destroy them.
- Watch out:
Corms are perishable and bruise easily — handle them softly, store them cool and airy, and eat the damaged ones first.
- Do:
Always cook or dry corms and leaves before eating — never eat them raw.
- Tip:
Storing bruised, cut or damp corms with your good ones — one rot spreads through the whole pile.
Pests and diseases that attack cocoyam and taro


Where to sell cocoyam and taro
Markets that trade this crop — what each one sells it by, when supply peaks there, and the currency used.


Grow cocoyam and taro with a plan, not a guess
This guide is the general answer. Divisi works out yours — the week to plant cocoyam and taro on your soil and your rainfall, and each job dated for your field.


When to plant cocoyam and taro, country by country
- When to plant cocoyam and taro in Algeria
- When to plant cocoyam and taro in Angola
- When to plant cocoyam and taro in Benin
- When to plant cocoyam and taro in Botswana
- When to plant cocoyam and taro in Burkina Faso
- When to plant cocoyam and taro in Burundi
- When to plant cocoyam and taro in Cabo Verde
- When to plant cocoyam and taro in Cameroon
- When to plant cocoyam and taro in Comores
- When to plant cocoyam and taro in Congo
- When to plant cocoyam and taro in Côte d'Ivoire
- When to plant cocoyam and taro in Egypt
- When to plant cocoyam and taro in Eritrea
- When to plant cocoyam and taro in Eswatini
- When to plant cocoyam and taro in Ethiopia
- When to plant cocoyam and taro in Gabon
- When to plant cocoyam and taro in Gambia
- When to plant cocoyam and taro in Ghana
- When to plant cocoyam and taro in Guinea Ecuatorial
- When to plant cocoyam and taro in Guinea-Bissau
- When to plant cocoyam and taro in Guinée
- When to plant cocoyam and taro in Kenya
- When to plant cocoyam and taro in Liberia
- When to plant cocoyam and taro in Madagascar
- When to plant cocoyam and taro in Malawi
- When to plant cocoyam and taro in Mali
- When to plant cocoyam and taro in Mauritanie
- When to plant cocoyam and taro in Mauritius
- When to plant cocoyam and taro in Moçambique
- When to plant cocoyam and taro in Namibia
- When to plant cocoyam and taro in Niger
- When to plant cocoyam and taro in Nigeria
- When to plant cocoyam and taro in Rwanda
- When to plant cocoyam and taro in République centrafricaine
- When to plant cocoyam and taro in République démocratique du Congo
- When to plant cocoyam and taro in Sao Tome and Principe
- When to plant cocoyam and taro in Seychelles
- When to plant cocoyam and taro in Sierra Leone
- When to plant cocoyam and taro in Somalia
- When to plant cocoyam and taro in South Africa
- When to plant cocoyam and taro in South Sudan
- When to plant cocoyam and taro in Sudan
- When to plant cocoyam and taro in Sénégal
- When to plant cocoyam and taro in Tchad
- When to plant cocoyam and taro in Togo
- When to plant cocoyam and taro in Uganda
- When to plant cocoyam and taro in United Republic of Tanzania
- When to plant cocoyam and taro in Zambia
- When to plant cocoyam and taro in Zimbabwe
Where cocoyam and taro scores best
Districts where Divisi's engine currently rates this crop highest, ranked by fit.
-
 Kaskazini A
 -
 Ikolomani
 -
 Buvuma
 -
 Monkoto
 -
 Mbadjini Ouest
 -
 Vatomandry
 -
 Praslin
 -
 Sirisia
 -
 Lubutu
 -
 Itsandra-Hamanvou
 -
 Kampala
 -
 Sainte Marie
Get Insights by email
A short digest of new Divisi articles. No email on quiet weeks.
Frequently asked questions
How do I grow cocoyam and taro?
How to grow cocoyam and taro: 180–540 days to maturity, 70 cm rows, 5–10 cm deep. Also called dasheen, ede, amadumbe, madhumbe, majimbi, koko.
What is taro in English?
Taro is the French name for cocoyam and taro.
What is ede in English?
Ede is the Igbo name for cocoyam and taro.
What is amadumbe in English?
Amadumbe is the Ndebele, Xhosa and Zulu name for cocoyam and taro.
What is madhumbe in English?
Madhumbe is the Shona name for cocoyam and taro.
What is majimbi in English?
Majimbi (also jimbi) is the Swahili name for cocoyam and taro.
What is koko in English?
Koko is the Yoruba name for cocoyam and taro.
How long does cocoyam and taro take to grow?
Cocoyam and Taro takes about 180–540 days from sowing to maturity, though the exact length varies with variety, temperature and how the season runs.
What spacing should I use for cocoyam and taro?
Space cocoyam and taro rows about 70 cm apart, with roughly 70 cm between plants within the row.
How deep should cocoyam and taro be planted?
Sow cocoyam and taro at about 5–10 cm deep. Shallower risks drying out; deeper wastes seed energy before the shoot reaches light.
What pests and diseases attack cocoyam and taro?
The ones covered in this guide are Corm rot, Dasheen mosaic virus, Taro beetle. Each has its own page explaining how to identify, check for and control it.