 Divisi
How to grow Moringa (drumstick tree)
Moringa oleifera · Moringaceae
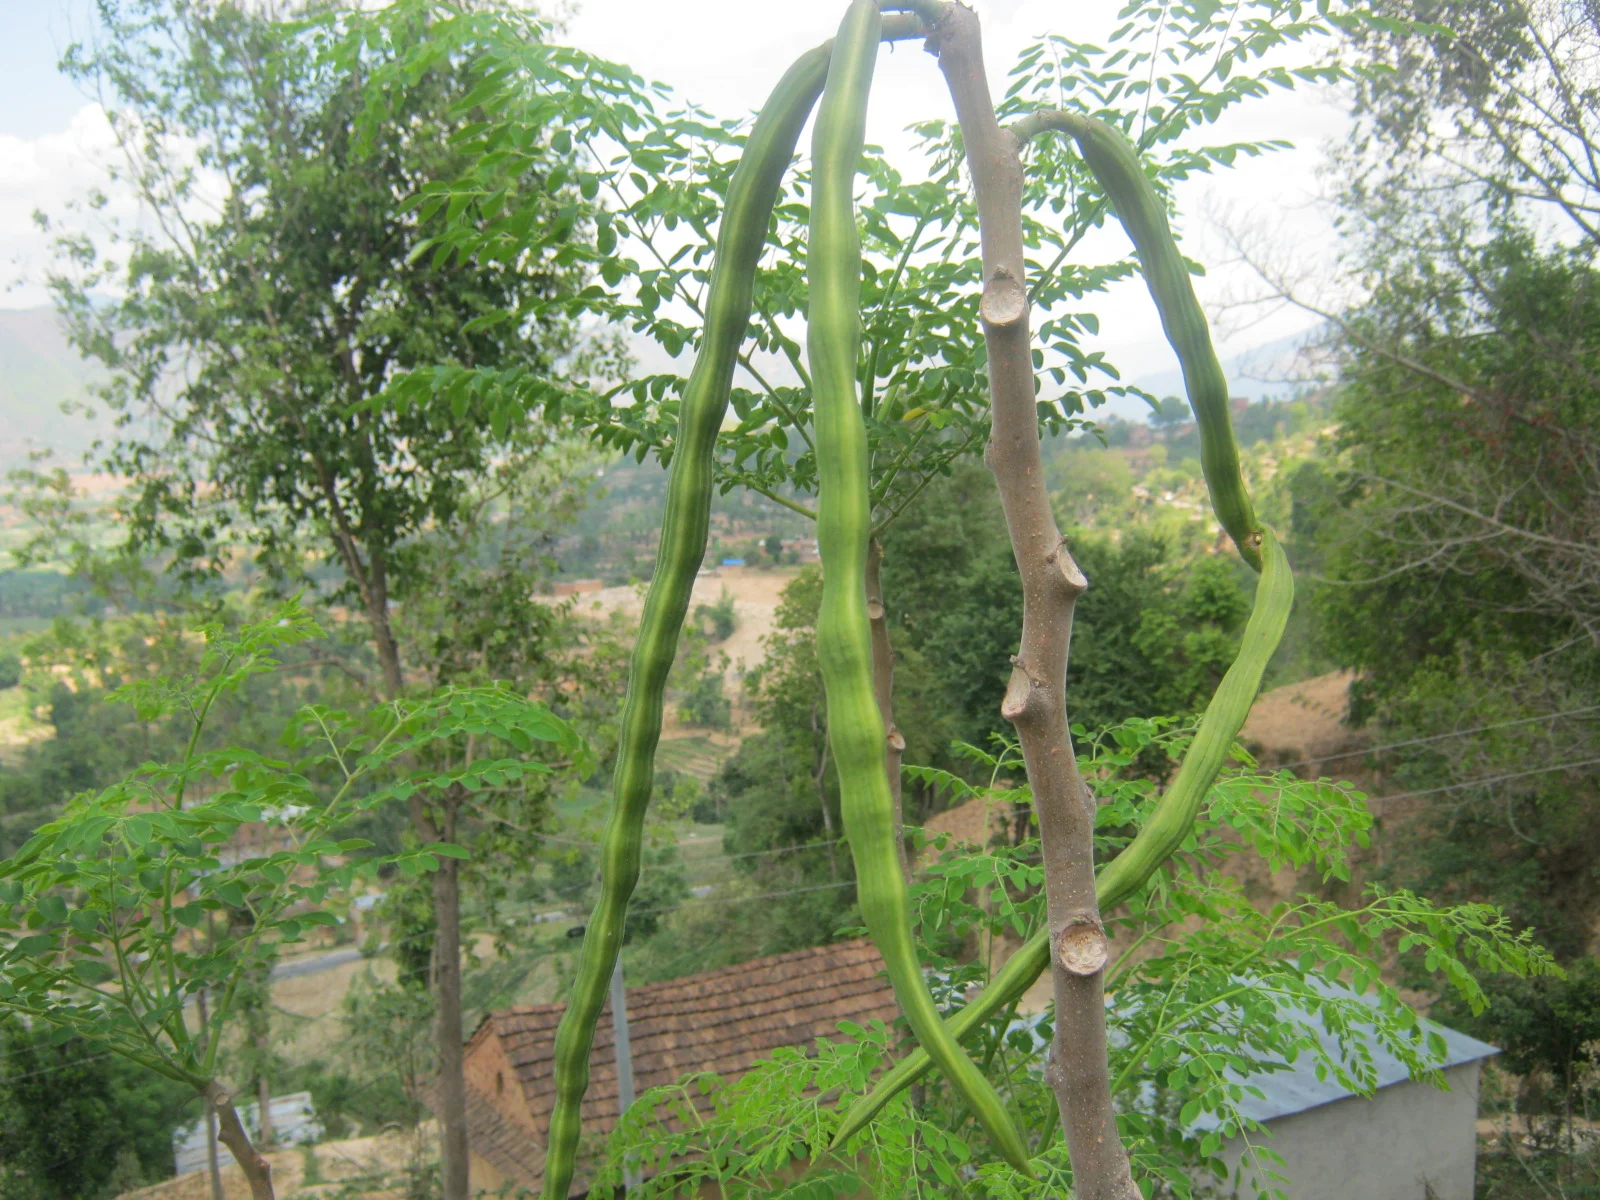
Photo: Krish Dulal · CC BY-SA 3.0
Moringa (Moringa oleifera), the drumstick or horseradish tree, is one of the fastest-growing and most drought-hardy trees you can plant — and almost every part of it feeds you. Its feathery leaves are picked again and again as a rich green vegetable and dried into a keeping powder; its young 'drumstick' pods are cooked like a vegetable; and its seeds press for oil and, crushed, help clean muddy water. It is not a plant-once, harvest-once crop — it is a tree you run for years on cutting cycles, and the whole skill is keeping it short and bushy, because left alone it shoots up into a tall bare pole with the leaves only at the top, out of reach. It loves heat and shrugs off dry spells, but it has two hard enemies: wet feet and frost — a single waterlogging or one light frost can kill it. Grow it from seed, which drives a deep, drought-proof taproot, or from a large stem cutting, which fruits sooner but roots shallower.
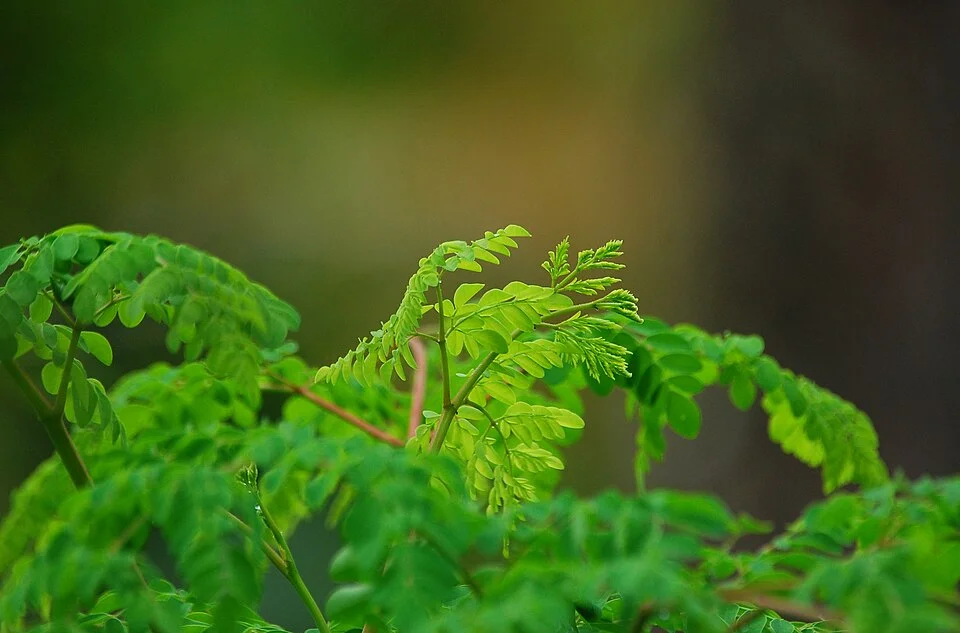
Challiyan at Malayalam Wikipedia · CC BY 3.0 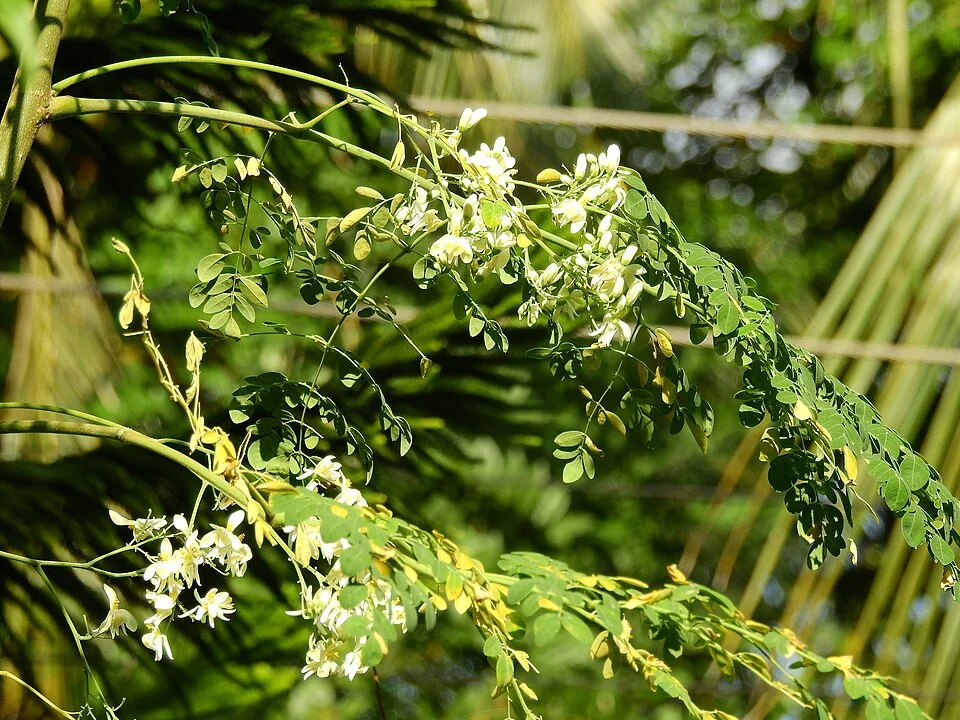
Rehman Abubakr · CC BY-SA 4.0
This guide is compiled from published agronomic references including FAO and CABI. The right choice for your field depends on your soil, rainfall and the yield you are aiming for.
Will Moringa (drumstick tree) actually do well on your field? Check your own field against every crop in the catalogue — no signup. Run the crop check →
Also known as
Moringa (drumstick tree) is also called horseradish tree and ben tree.
- English
- horseradish tree, ben tree
- French
- moringa, néverdier, ben ailé
- Hausa
- zogale
- Swahili
- mlonge, mronge
- Wolof
- nébéday
- Yoruba
- ewe ile
Working in buckets, bags or paces? The farming glossary turns the measures growers actually use into kilograms and hectares — what a 20 litre bucket of each crop really weighs, and how to size a field by walking it — alongside the Shona, Swahili, Ndebele and Yoruba words used in the field. Open the glossary →
Growing Moringa (drumstick tree), stage by stage
Grow moringa as a low, bushy tree you cut for its rich leaves again and again for years — with drumstick pods and seed too — by planting it on dry-footed, frost-free ground and pruning it hard to keep the leaves within reach.
Get ready: a dry-footed site and your planting material
Almost everything that decides whether your moringa thrives or dies is set before you plant. Moringa is tough in drought but it rots in wet ground and dies in frost — so the one choice that matters most is the site: full sun, free-draining, frost-safe. Now is also when you decide how to plant it — seed for a deep, drought-proof root, or a big cutting for a faster start — and dig the planting pits.
Choose a free-draining, frost-safe, sunny site Critical
Moringa's soft, fleshy taproot rots and the whole tree dies if it sits in wet ground, and a single frost can kill it outright. No amount of good care later fixes a bad site. Getting this one choice right, in the weeks before you plant, is the difference between a tree that lives and feeds you for years and one that never gets going.
Pick a spot in full sun — moringa needs all-day light and grows slow and weak in shade.
Make sure the ground drains freely. Avoid low spots, heavy clay, and anywhere water pools or stands after rain — wet feet drown and rot the root.
Test the drainage: dig a hole about knee-deep (45 cm), fill it with water, and let it drain. Fill it a second time — if that water is gone within a few hours, the site drains well. If water still stands after half a day, the site is too wet → plant on a raised mound or ridge, or choose a better spot.
Check for frost. Moringa is killed at about −1 °C, so avoid frost pockets — the low valley bottoms where cold air settles overnight — and time planting so the young tree grows through the warm, frost-free months.
- Tip:
Wet or heavy-clay ground, and low spots that pool after rain — the taproot rots (this is Diplodia root rot) and the tree dies.
- Do:
If the only land you have holds water, plant on a raised mound or ridge so the root crown sits above the wet.
- Watch out:
Cold, still valley bottoms trap frost — even one frosty night can kill a young moringa.
Choose seed vs large cutting Recommended
How you plant sets the kind of tree you get, and you cannot change it later. Seed grows a deep taproot that makes the tree far tougher in drought — best where water is scarce. A big cutting gives you a faster start and earlier pods, but its roots stay shallow, so it topples and dries out more easily. Choose for your land and your goal before you plant.
Choose seed if you want the toughest, most drought-proof tree, or if you are planting a leaf hedge — the deep taproot anchors it and reaches water in a dry spell. Use fresh seed; old moringa seed loses its sprouting power.
Choose a large hardwood cutting if you want pods and seed sooner and you can water it while it roots — it starts faster but stays shallow-rooted and less drought-hardy.
For a cutting, pick a green, firm branch from a healthy, well-cropping mature tree: about as thick as a fence post (10 cm across) and from knee-high to head-high (45 cm–1.5 m) long.
Match your choice to your mode: an intensive leaf hedge is usually grown thickly, while a pod/seed orchard is grown as spaced-out trees. Your recommendation gives the spacing for your mode.
- Do:
Take cuttings from a tree you know crops well — the cutting grows into a copy of its parent.
- Tip:
Thin, whippy, green-tip shoots as cuttings — they have no reserves and rot instead of rooting. Use thick, firm hardwood.
Prepare pits / high-density bed + manure Recommended
A planting pit filled with loose, rich soil gives the young root an easy, well-fed start and lets water soak away instead of pooling. Moringa is a low-fertility crop that does not need heavy feeding, but a little well-rotted manure in the pit helps it romp away and sets the tree up for years of leaf cutting.
In the last week or two before planting, dig your planting pits (for spaced orchard trees) or loosen a bed (for a close leaf hedge), at the spacing your recommendation gives.
Dig each pit about knee-deep and knee-wide (roughly 45 cm each way) so the taproot can drive straight down.
Mix one to two buckets of well-rotted manure or compost (about 10–20 kg) per pit into the soil you dug out, then return it to the pit. Use only well-rotted manure — dark and crumbly with no strong smell; fresh manure burns the young root.
On wet-prone ground, heap the filled pit into a low mound so the root crown sits proud of any standing water. Let the pit settle before planting.
- Do:
Fill pits a week or two ahead so the soil settles — planting into a fresh, fluffy pit leaves the seedling sitting too deep once it sinks.
- Tip:
Fresh or raw manure in the pit — it scorches the tender young root and robs the soil as it rots. Rot it down first.
- Watch out:
Wash your hands after handling manure, and keep it away from drinking water and where children play.
Establishment
From planting to about 6–8 weeks. This is the one stage when moringa truly needs steady moisture — the young seedling or cutting has no deep root yet, so it can dry out and die. Yet it still must not sit in water. Keep it just-moist, guard the tender base from termites, frost and standing water, and it will grow astonishingly fast once it is up.
Sow seed / set cutting Critical
This is the moment the tree begins — get it right and moringa grows faster than almost any tree you know. Seed set at the right shallow depth in moist, free-draining soil sprouts strongly in 5–14 days; a cutting set firm and kept just-moist roots and shoots away. Plant into a water-holding hollow and the base rots before it ever gets going.
Plant at the start of the warm, rainy season so the young tree has frost-free months and some rain to establish.
For seed: soak it in water for about 12 hours first to wake it up. Then sow it about 2 cm deep — one finger-width — one seed per station into moist, free-draining soil. It sprouts in 5–14 days. In dry areas, sow two or three per station and keep the strongest.
For a cutting: take your thick, firm hardwood piece and bury about a third of it upright in the pit, firming the soil around it. Keep it just moist — never soggy — while it roots; too much water rots the buried end.
Protect the base from termites: clear dry trash away from the stem, and check the ground is not an active termite run before you plant.
Never plant into a hollow that holds water. If in doubt, plant on a slight mound so the base stays above any standing water.
- Do:
Soak seed for about half a day before sowing — it comes up faster and more evenly.
- Tip:
Sowing deep. Moringa seed goes in shallow (about 2 cm); buried too deep it rots or exhausts itself before it reaches the light.
- Watch out:
Termites at the base — look for mud tunnels or a crust of soil built up the stem, and seedlings that wilt and pull out with a chewed, hollow base.
Guard against waterlogging & frost Critical
Waterlogging and frost are moringa's two killers, and they strike hardest now while the tree is small. At the same time, establishment is the one stage moringa really needs water — the young root is shallow and dries out fast. So you walk a fine line: keep it moist enough to grow, but never let it sit wet, and keep frost off it.
Water little and often through these first weeks so the topsoil stays moist — the young root cannot yet reach deep water. Check with a finger and water when the top few centimetres are dry.
But drain any standing water fast. After heavy rain, break the edge of a pooling basin or open a small channel so the water runs off — a single day with wet feet can rot the root.
Watch the weather for frost. If a cold, clear, still night threatens, cover young plants overnight — grass, a cloth, or an upturned tin — and uncover them in the morning.
Keep a light mulch near, but not touching, the stem to hold moisture and steady the soil, pulling it back from the stem so the base stays dry and termite-free.
- Tip:
Letting water pool around the base even once — moringa's fleshy root rots quickly in standing water.
- Watch out:
A young plant that wilts and dies even though the soil is wet is rotting at the root (Diplodia root rot), not thirsty — the cure is better drainage, not more water.
- Do:
In frost-prone areas, time planting for after the last frost so the tree is never caught out while small.
Scout the seedlings Recommended
In the first weeks a moringa seedling has no reserves — termites can ring-bark the stem and damping-off can topple a whole patch in days. A quick look every few days catches trouble while you can still act, before you lose the young stand.
From a few days after planting, walk your seedlings every 5–7 days and look closely at the base of each young plant.
Termites: look for mud tunnels or a crust of soil built up the stem, a chewed or hollowed base, and seedlings that wilt and lift out easily. Clear trash from the stems and treat a bad termite run before you replant.
Damping-off: look for seedlings that suddenly flop over with a thin, dark, water-soaked pinch right at the soil line, often in wet patches that spread. It thrives in too-wet, airless soil.
Count the gaps — stations with no seedling up — so you know whether to resow while the season is still young.
If damping-off is spreading → stop watering, improve the drainage, and let the surface dry. If termites are attacking → clear trash and treat the base. Resow empty stations early.
- Watch out:
Damping-off travels in wet, crowded, airless soil — the fix is drier, better-drained conditions, not more water.
- Do:
Resow empty stations early, while there is still warm, growing weather ahead.
Train it low and bushy — the key step
This is the make-or-break skill with moringa. Left alone, it shoots straight up into a tall, bare pole with all the leaves at the top — out of your reach and useless to you. By pinching out the top you force it to throw side branches, and by cutting it back (pollarding) you hold it at a low, branchy 1–2 m — a leafy hedge you can pick standing on the ground.
Top the growing tip Critical
This one cut decides the whole shape of your tree. A moringa left to grow keeps a single stem with leaves only at the top — you would need a ladder to pick it. Pinching out the growing tip breaks the tree's upward drive and forces side branches, turning it into the low, bushy, pickable tree you actually want.
Wait until the young tree reaches about waist-high (0.75–1 m) — usually around 2–3 months after planting.
Pinch or cut out the single growing tip at the top of the main stem, with your fingers, a knife or secateurs. This removes the tree's 'leader' and signals the side buds to burst out.
Within a few weeks side branches shoot out below the cut — the tree starts to bush outward instead of up.
As it regrows, cut it back (pollard) to hold the canopy at a reachable 1–2 m — aim for a branchy hedge, not a tall bare pole.
- Do:
Top it at waist-high (0.75–1 m), then keep pollarding to hold it low and branchy — a tree you can pick without a ladder is a tree that feeds you.
- Tip:
Letting it run up unpruned 'because it is growing so well' — a tall bare pole gives you leaves you cannot reach and pods you cannot pick.
- Watch out:
Use a clean, sharp blade and cut just above a leaf node, so the wound heals fast and the branches break cleanly.
Pollard to keep it low Recommended
Moringa grows back fast and keeps trying to shoot upward, so keeping it low is not a one-time job. Cutting it back every couple of months holds the leaves within arm's reach, keeps the tree throwing fresh, tender growth, and stops it turning back into a tall bare pole.
Every 2–4 months, whenever the canopy pushes up past what you can comfortably reach, cut it back down.
Pollard the main branches back to hold the whole canopy at 1–2 m — no taller than you can reach standing.
Cut to an outward-facing bud so the new growth spreads outward and bushy, not straight up.
The tree reshoots vigorously within weeks — each pollard renews the flush of tender, pickable leaves.
- Do:
Keep it at a height you can both pick and prune standing on the ground — that is the whole point of pollarding.
- Watch out:
Feed and, if you can, water after a hard cut-back — a big pollard asks the tree to regrow a lot of leaf fast.
Pick the leaves, cycle after cycle
Now the tree pays you back — for years. Every 30–45 days you cut or strip the leafy shoots, leave a short stub, and vigorous new growth comes again. The first cuts start around 2–3 months after planting. Feed the tree after each cut and watch the leaves for pests, and one moringa keeps giving flush after flush of rich green leaf.
Cut/strip shoots Recommended
Cutting on a regular cycle is what keeps the leaves young, tender and within reach — and each cut triggers a fresh flush of vigorous new growth. Leave a short stub to reshoot from and the same tree feeds you again and again for years; cut too hard or too rarely and the flushes weaken.
Start the first cut about 2–3 months after planting, once the branchy tree carries plenty of leaf, then repeat every 30–45 days.
Cut or strip the leafy shoots when about six fully-expanded leaves are present on them — that is the sweet spot of tender, high-quality leaf.
Leave a stub about 10 cm tall (a fist high) on each cut branch — the tree reshoots strongly from this stubble.
Expect vigorous regrowth within a couple of weeks. Feed after each cut (next task) to keep the next flush coming strong.
Move the cut leaf into the shade straight away — never let it sit in the sun — to hold its colour and goodness for drying.
- Do:
Cut on a steady rhythm — a tree picked every 30–45 days stays young, tender and productive.
- Tip:
Stripping the branch bare to the wood or cutting below the stub — leave the fist-high stub with a few buds so it can reshoot.
Feed between cuts Recommended
Every time you cut leaves you carry off the food the tree pulled from the soil. Feeding after each cut replaces it, so the next flush comes back thick and green instead of thin and pale. Moringa is not a heavy feeder, but a cut-and-come-again leaf tree still needs its plate refilled to keep yielding.
After each cut, spread food around the base of the tree, out to the edge of the branches where the feeding roots reach.
Use well-rotted manure or compost — the steady, gentle feed a leaf crop likes best — or a modest dose of nitrogen (N) to push fast, leafy regrowth. Your recommendation gives the amount.
Spread it evenly on moist soil and lightly work it in or water it, so it feeds the roots rather than gassing off or washing away. Moringa responds to N, P and K (nitrogen, phosphorus and potassium) — a balanced feed or good compost covers all three.
Keep it up every cycle — a fed tree gives flush after flush; a starved one thins out.
- Tip:
Piling fertiliser against the stem or onto wet leaves — it scorches. Spread it out around the tree, off the trunk.
- Watch out:
Wash your hands after handling fertiliser, and keep it off the leaves you will eat and away from drinking water and children.
- Do:
Lean on compost and manure — a leaf you eat is better grown on gentle organic feed than forced hard with chemicals.
Scout each cycle Recommended
Your crop here is the leaf itself, so pests that chew or suck the leaves hit you directly. Caterpillars strip the leaves, spider mites dry them to a dull bronze, and aphids curl the tender tips. A quick check each cycle catches them before they spoil a flush — and because you eat these leaves, catching early means little or no spraying.
Each cycle, before you cut, walk the trees and look over the leaves — tops and undersides — and the tender shoot tips.
Leaf caterpillars: look for ragged, chewed leaves, green droppings, and the caterpillars themselves on the undersides. Handpick them — on a few trees this is often all you need.
Red spider mites: look for fine pale speckling that turns leaves dull, bronzed and dry, with fine webbing underneath — worst in hot, dry spells. Tap a leaf over a white cloth to see the tiny moving dots.
Aphids: look for clusters of tiny soft green or black insects on the shoot tips and young leaves, sticky honeydew, curling tips, and ants running up to them.
If a pest is spreading: for caterpillars and aphids, handpick or wash off with soapy water first; for mites, a strong water spray under the leaves helps. Because you eat these leaves, spray only if you must — and respect the days-to-harvest wait on any product (the pre-harvest interval: the gap you must leave between spraying and eating).
- Watch out:
Spider mites explode in hot, dry weather — check harder in a dry spell, especially the undersides of the leaves.
- Do:
Handpick caterpillars and hose off aphids — on a leaf crop you eat, the gentlest control that works is the right one.
- Tip:
Reaching for strong sprays on leaves you will eat within days — if you must spray, wait out the product's pre-harvest interval before picking.
Let it flower and set pods — pod & seed trees
This stage is only for trees grown for pods and seed — not for a cut-back leaf hedge. From bearing age (about 6–12 months after planting), you let chosen trees grow taller and flower. The one thing to watch is the budworm at flowering — it bores into the buds and can shed most of your flowers before a single pod sets.
Let trees flower (pod/seed mode) Recommended
You cannot have it both ways on one tree: hard leaf-cutting keeps a tree from flowering, so pods and seed come only from trees you let grow. Setting aside pod/seed trees and letting them flower is how you get drumstick pods for the pot and seed for planting, oil and cleaning water.
Choose the trees you want for pods and seed, and stop hard-cutting them — let them grow taller and come into flower, from about 6–12 months old.
Keep your leaf-hedge trees separate and keep cutting those — this task is not for intensive-leaf hedges.
Where it is warm, moringa can flower more than once a year; let the flowers stand rather than stripping the tree, and watch them closely for budworm (next task).
A little water as the buds and flowers form helps them set into pods rather than drop, especially in a dry spell.
- Do:
Keep leaf trees and pod/seed trees as separate jobs — one is cut low and often, the other is left to grow and flower.
- Watch out:
The change from bud to set pod is the fragile moment — a heavy budworm attack now can cost you nearly the whole pod crop.
Scout budworm at flowering Recommended
The budworm can shed most of your buds before they ever become pods — losses run as high as about 78% if you miss it. Because it works fast and hides inside the buds, you have to catch the very first bored or dropping buds. A close look every few days through flowering is what saves the pod crop.
From about a week before flowering and right through it, check the flower clusters every 5–7 days.
Budworm: look for buds and flowers bored, webbed or spun together, buds turning brown and dropping, and a small caterpillar tucked inside a damaged bud. Fallen buds under the tree are the early warning.
Pod fly (as pods start): look for young pods that bend, distort or ooze, with maggots inside, and small pods dropping early.
Act on the first signs — do not wait. Pick off and destroy bored buds and fallen buds to break the cycle, and keep the ground under the tree clean. Spray only if the attack is spreading, and keep any spray off pods you will eat soon (respect the days-to-harvest wait).
If damage keeps escalating despite handpicking → treat promptly with a recommended product, because budworm losses climb steeply once they take hold.
- Watch out:
Buds dropping in numbers under the tree are the budworm's calling card — act the moment you see it, not when the flowers are already gone.
- Do:
Rake up and destroy fallen buds and pods — you are clearing out the next generation of the pest.
- Tip:
Waiting to 'see how bad it gets' — budworm damage escalates fast, toward losing most of the crop.
Pick the pods, and save seed
About 1–2 months after flowering, the pods are ready. Pick them young, green and tender to cook as a vegetable — the classic 'drumstick'. To save seed instead, leave the pods on the tree until they turn brown and dry, then collect them. The rule of thumb: a good veg pod snaps tender; a seed pod is left until it is fully dry and brown on the tree.
Pick pods (green or dry for seed) Recommended
Timing is everything with pods. Picked young and tender, they are a prized vegetable; left a little too long they turn woody and stringy and are fit only for seed. For planting seed, the opposite is true — you want them fully dry and brown. Going over the tree on the right day, every week or two, is how you get the most from each one.
Start picking about 1–2 months after flowering, then go over the tree every 1–2 weeks as more pods reach size.
For eating: pick while the pod is young, green and tender — thin, and snapping cleanly when you bend it, before the seeds inside swell and harden. Test: a good veg pod snaps tender; if it bends like leather or feels stringy and lumpy, it is too old to eat.
For seed: leave chosen pods on the tree until they turn brown, dry and hard and rattle when shaken, then collect them.
Pick with a gentle twist or a snip so you do not tear the branches; use a hook or picker for pods up high.
If a pod is already woody and stringy (too old for the pot) → leave it on the tree to finish drying and use it for seed instead — do not waste it.
- Do:
Go over the tree often — pods pass quickly from tender-and-prized to woody-and-stringy.
- Watch out:
Once the seeds inside a pod swell and it feels lumpy and tough, that pod's vegetable window has passed — redirect it to seed.
Dry and store — leaf powder and seed
Now keep what you grew. Leaf: dry it in the shade, never the sun — sun bleaches out the colour and goodness — then rub it off the stalks and mill it to a keeping powder; about 8 kg of fresh leaf makes 1 kg of powder. Seed: dry the pods fully, then shell out the seed and store it dry — to plant, to press for oil, or crushed to help clean muddy water.
Shade-dry leaves & mill Recommended
Moringa leaf is prized because it keeps its deep green colour and its goodness — but direct sun destroys both in hours. Drying in the shade is the single thing that turns a cut of fresh leaf into a valuable, long-keeping powder instead of a pale, worthless one.
Right after cutting, spread the leaves in a shaded, airy place — under a roof, tree or verandah with air moving through. Never dry them in direct sun.
Spread them thin and turn them now and then so they dry evenly and do not go mouldy in the middle.
Once they are crisp-dry, rub the leaflets off the stalks and mill or pound them to a fine green powder. Expect about 1 kg of powder from every 8 kg of fresh leaf.
Store the powder dry and airtight, out of the light, so it keeps its colour and goodness.
- Tip:
Sun-drying the leaves — it bleaches out the green and destroys the nutrients, leaving a pale, low-value powder.
- Do:
Dry in breezy shade and get the leaf fully crisp before milling — any softness left means damp, and damp powder moulds in store.
- Watch out:
Store the powder in a sealed, dry container away from light — moisture and sun both rob it in storage.
Dry & shell seed Optional
Dry, clean seed is the start of your next trees, your oil, and your water-cleaning powder — but only if it is stored properly. Seed that goes into store damp moulds and will not sprout, so drying it hard before shelling is what protects its value.
Let the seed pods dry fully on the tree — brown, hard and rattling — before you pick them for seed.
Shell (decorticate — crack open) the pods and pick out the winged seeds; throw away any mouldy or shrivelled ones.
If any seed still feels soft, dry it a little more in the shade until it is hard.
Store the seed dry, cool and airtight, off the floor and away from pests, and labelled for its use — planting, oil pressing, or crushing to clarify water.
- Do:
Keep your biggest, soundest seed for planting — a fat, well-filled seed grows the strongest tree.
- Watch out:
Store bone-dry and sealed — damp seed moulds, loses its sprouting power, and goes rancid if you meant it for oil.
- Tip:
Bagging seed while it is still soft or fresh from the tree — give it time to dry hard first, or it spoils in store.
Pests and diseases that attack Moringa (drumstick tree)


Grow Moringa (drumstick tree) with a plan, not a guess
This guide is the general answer. Divisi works out yours — the week to plant Moringa (drumstick tree) on your soil and your rainfall, and each job dated for your field.


When to plant Moringa (drumstick tree), country by country
- When to plant Moringa (drumstick tree) in Algeria
- When to plant Moringa (drumstick tree) in Angola
- When to plant Moringa (drumstick tree) in Benin
- When to plant Moringa (drumstick tree) in Botswana
- When to plant Moringa (drumstick tree) in Burkina Faso
- When to plant Moringa (drumstick tree) in Burundi
- When to plant Moringa (drumstick tree) in Cabo Verde
- When to plant Moringa (drumstick tree) in Cameroon
- When to plant Moringa (drumstick tree) in Comores
- When to plant Moringa (drumstick tree) in Congo
- When to plant Moringa (drumstick tree) in Côte d'Ivoire
- When to plant Moringa (drumstick tree) in Egypt
- When to plant Moringa (drumstick tree) in Eritrea
- When to plant Moringa (drumstick tree) in Eswatini
- When to plant Moringa (drumstick tree) in Ethiopia
- When to plant Moringa (drumstick tree) in Gabon
- When to plant Moringa (drumstick tree) in Gambia
- When to plant Moringa (drumstick tree) in Ghana
- When to plant Moringa (drumstick tree) in Guinea Ecuatorial
- When to plant Moringa (drumstick tree) in Guinea-Bissau
- When to plant Moringa (drumstick tree) in Guinée
- When to plant Moringa (drumstick tree) in Kenya
- When to plant Moringa (drumstick tree) in Liberia
- When to plant Moringa (drumstick tree) in Libya
- When to plant Moringa (drumstick tree) in Madagascar
- When to plant Moringa (drumstick tree) in Malawi
- When to plant Moringa (drumstick tree) in Mali
- When to plant Moringa (drumstick tree) in Mauritanie
- When to plant Moringa (drumstick tree) in Mauritius
- When to plant Moringa (drumstick tree) in Morocco
- When to plant Moringa (drumstick tree) in Moçambique
- When to plant Moringa (drumstick tree) in Namibia
- When to plant Moringa (drumstick tree) in Niger
- When to plant Moringa (drumstick tree) in Nigeria
- When to plant Moringa (drumstick tree) in Rwanda
- When to plant Moringa (drumstick tree) in République centrafricaine
- When to plant Moringa (drumstick tree) in République démocratique du Congo
- When to plant Moringa (drumstick tree) in Sao Tome and Principe
- When to plant Moringa (drumstick tree) in Seychelles
- When to plant Moringa (drumstick tree) in Sierra Leone
- When to plant Moringa (drumstick tree) in Somalia
- When to plant Moringa (drumstick tree) in South Africa
- When to plant Moringa (drumstick tree) in South Sudan
- When to plant Moringa (drumstick tree) in Sudan
- When to plant Moringa (drumstick tree) in Sénégal
- When to plant Moringa (drumstick tree) in Tchad
- When to plant Moringa (drumstick tree) in Togo
- When to plant Moringa (drumstick tree) in Tunisie
- When to plant Moringa (drumstick tree) in Uganda
- When to plant Moringa (drumstick tree) in United Republic of Tanzania
- When to plant Moringa (drumstick tree) in Zambia
- When to plant Moringa (drumstick tree) in Zimbabwe
Where Moringa (drumstick tree) scores best
Districts where Divisi's engine currently rates this crop highest, ranked by fit.
-
 Mbon
Mbon -
 Quiculungo
 -
 Bodae
Bodae -
 Luiza
Luiza -
 Mkoani
 -
 Andapa
 -
 Gisagara
 -
 Aconibe
 -
 Mitsamiouli-Mboudé
 -
 East Mahe
 -
 Doutsila
 -
 Bugabira
Get Insights by email
A short digest of new Divisi articles. No email on quiet weeks.
Frequently asked questions
How do I grow Moringa (drumstick tree)?
How to grow Moringa (drumstick tree). Also called horseradish tree, moringa, zogale, mlonge, nébéday, ewe ile.
What is moringa in English?
Moringa (also néverdier and ben ailé) is the French name for Moringa (drumstick tree).
What is zogale in English?
Zogale is the Hausa name for Moringa (drumstick tree).
What is mlonge in English?
Mlonge (also mronge) is the Swahili name for Moringa (drumstick tree).
What is nébéday in English?
Nébéday is the Wolof name for Moringa (drumstick tree).
What is ewe ile in English?
Ewe ile is the Yoruba name for Moringa (drumstick tree).
What pests and diseases attack Moringa (drumstick tree)?
The ones covered in this guide are Leaf-eating caterpillar, Moringa root and collar rot, Noorda budworm. Each has its own page explaining how to identify, check for and control it.