 Divisi
How to grow roselle
Hibiscus sabdariffa · Malvaceae
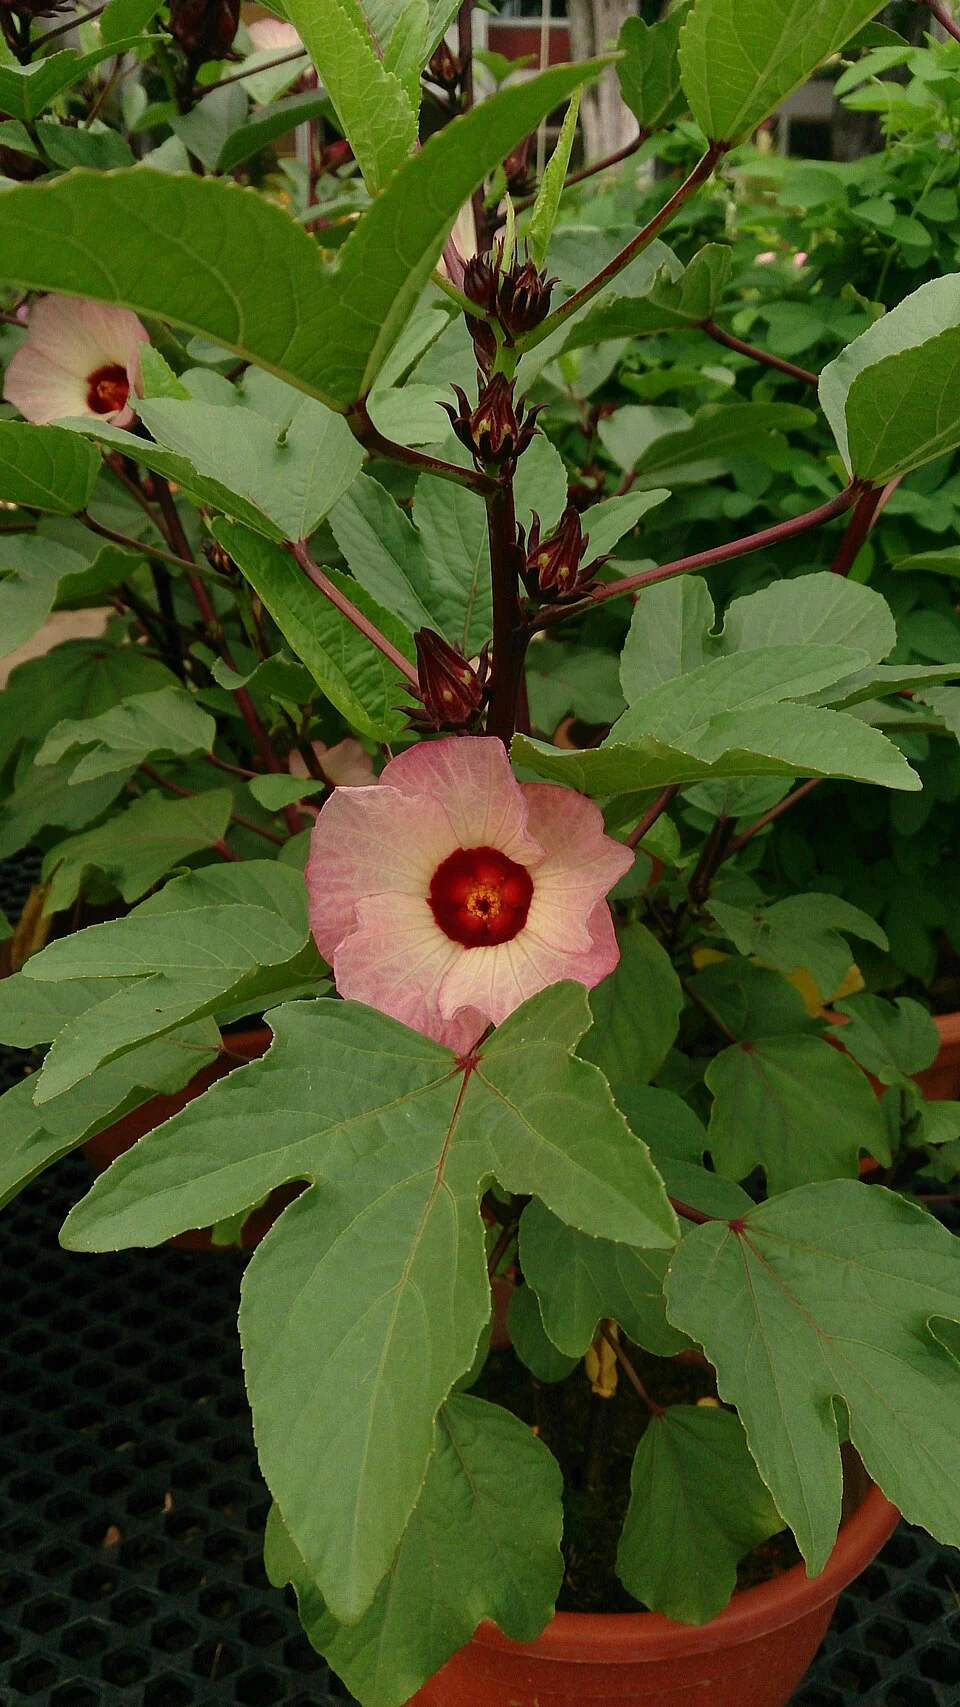
Photo: Mokkie · CC BY-SA 3.0
Roselle — you may know it as bissap, zobo, karkade or sorrel — is a tall, warm-season hibiscus grown for the fleshy red cups (the calyces) that swell at the base of each flower once the petals drop. Those red cups make the famous tart drink and jam; the young leaves cook up as a sour relish too. Roselle behaves unlike most crops in two ways you must plan around. First, it reads the length of the day: it will not flower until the days shorten to about 12–13 hours, so your sowing date, more than anything else, decides your harvest — sow early and the plant spends the long days building a big frame that later carries a heavy load of calyces; sow late and short days catch a small plant that flowers early and gives almost nothing. Second, the prize is perishable on the plant: each calyx must be picked while it is still fleshy, plump and fully red, before the seed pod inside dries and splits — then dried hard until it snaps, so it keeps for months. Get the sowing date right, then pick and dry on time, and the rest is steady, patient work.
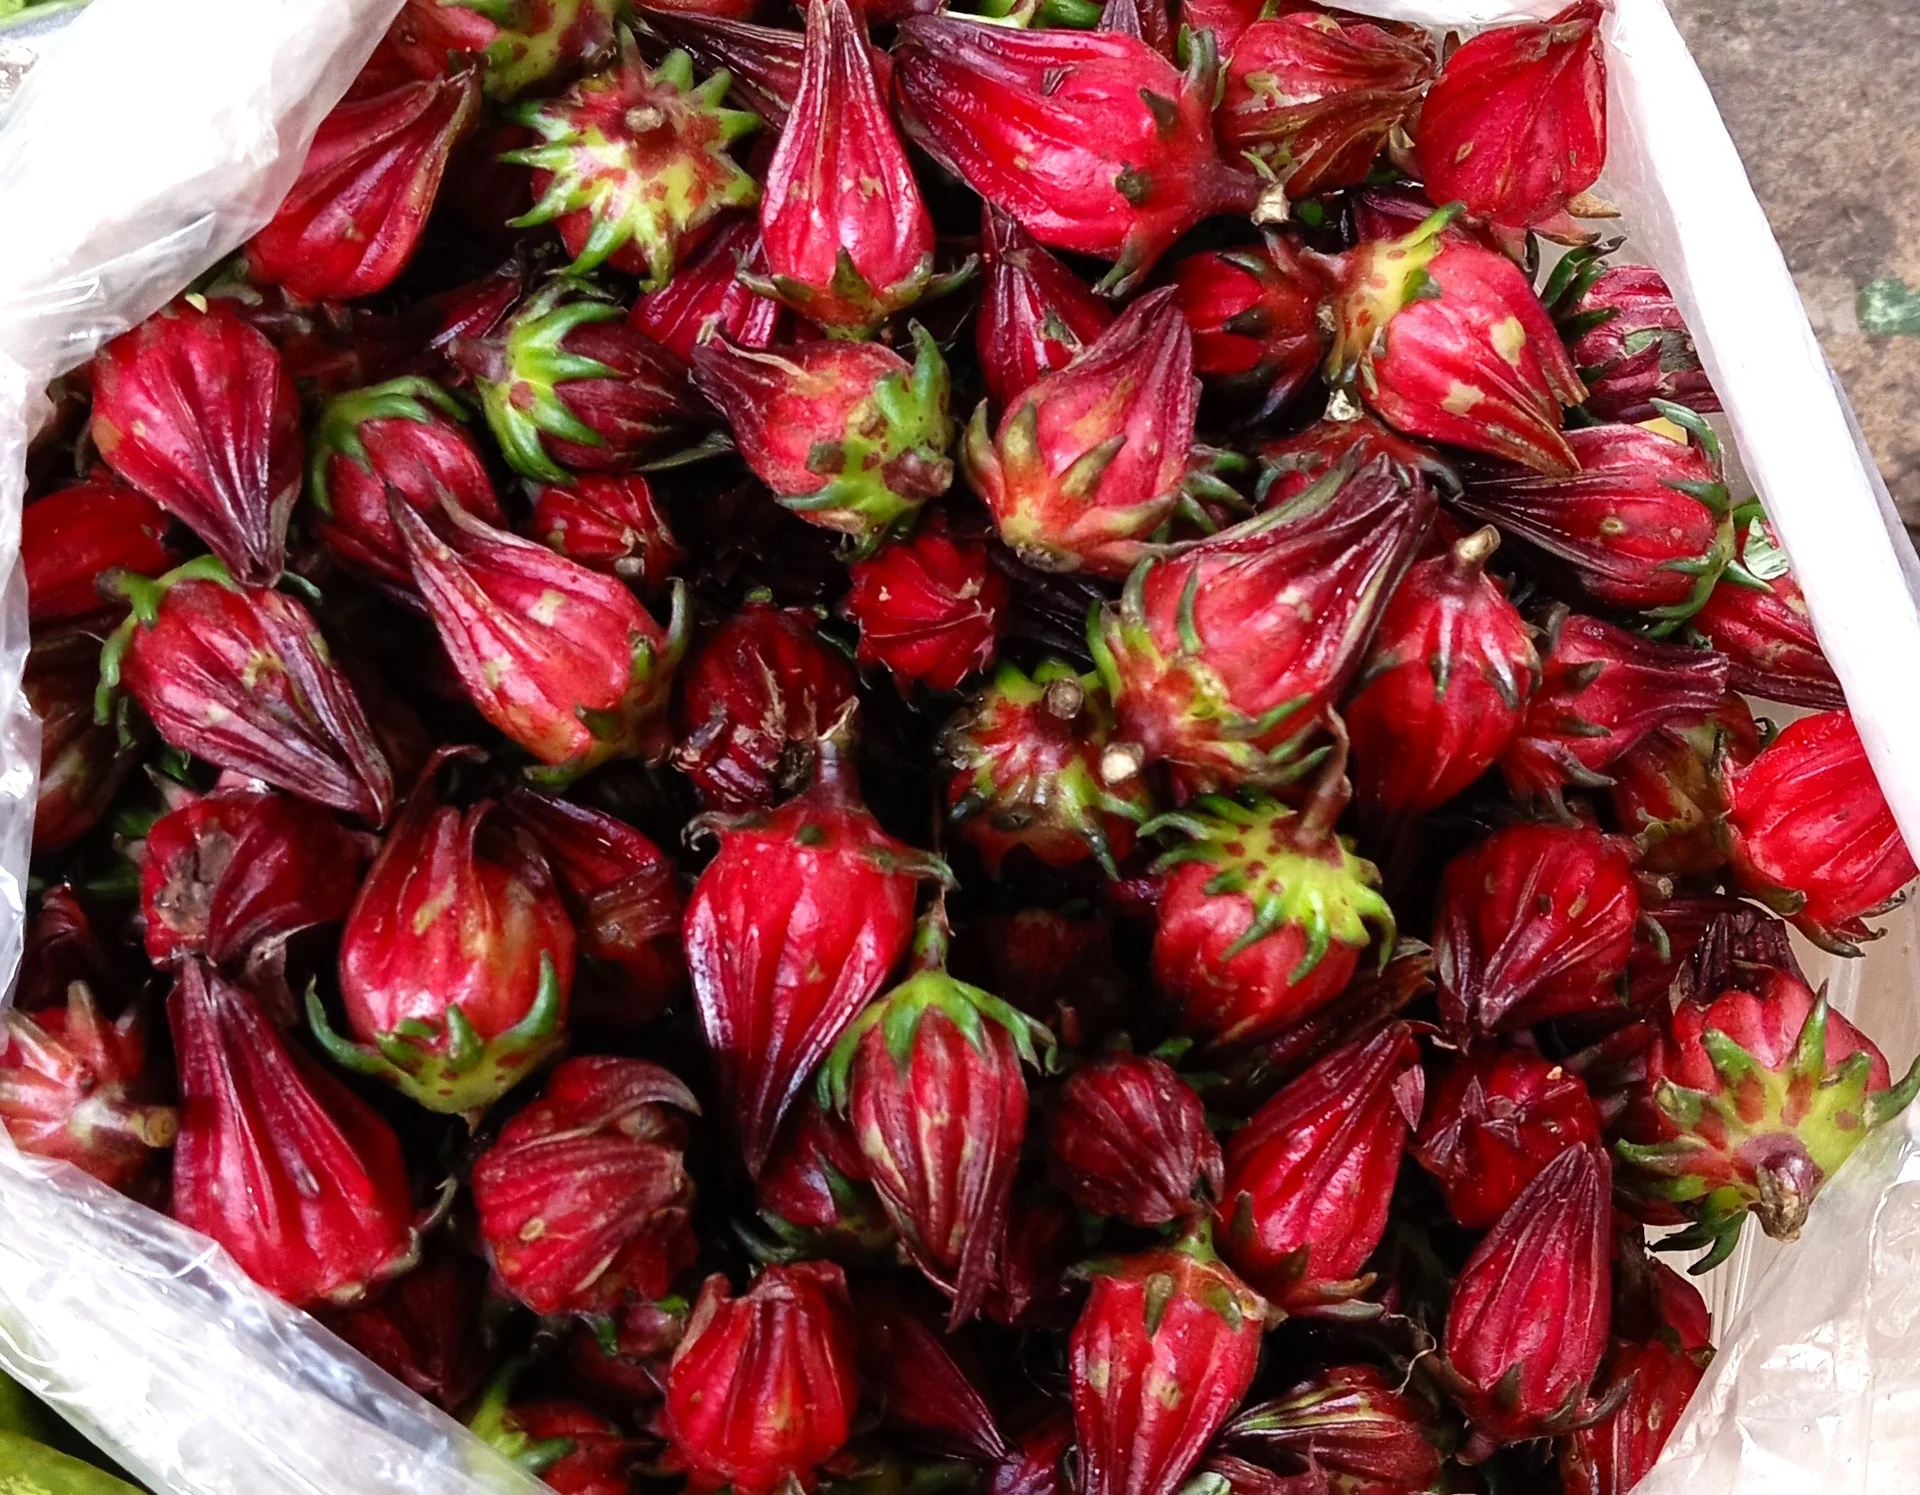
Salil Kumar Mukherjee · CC BY-SA 4.0 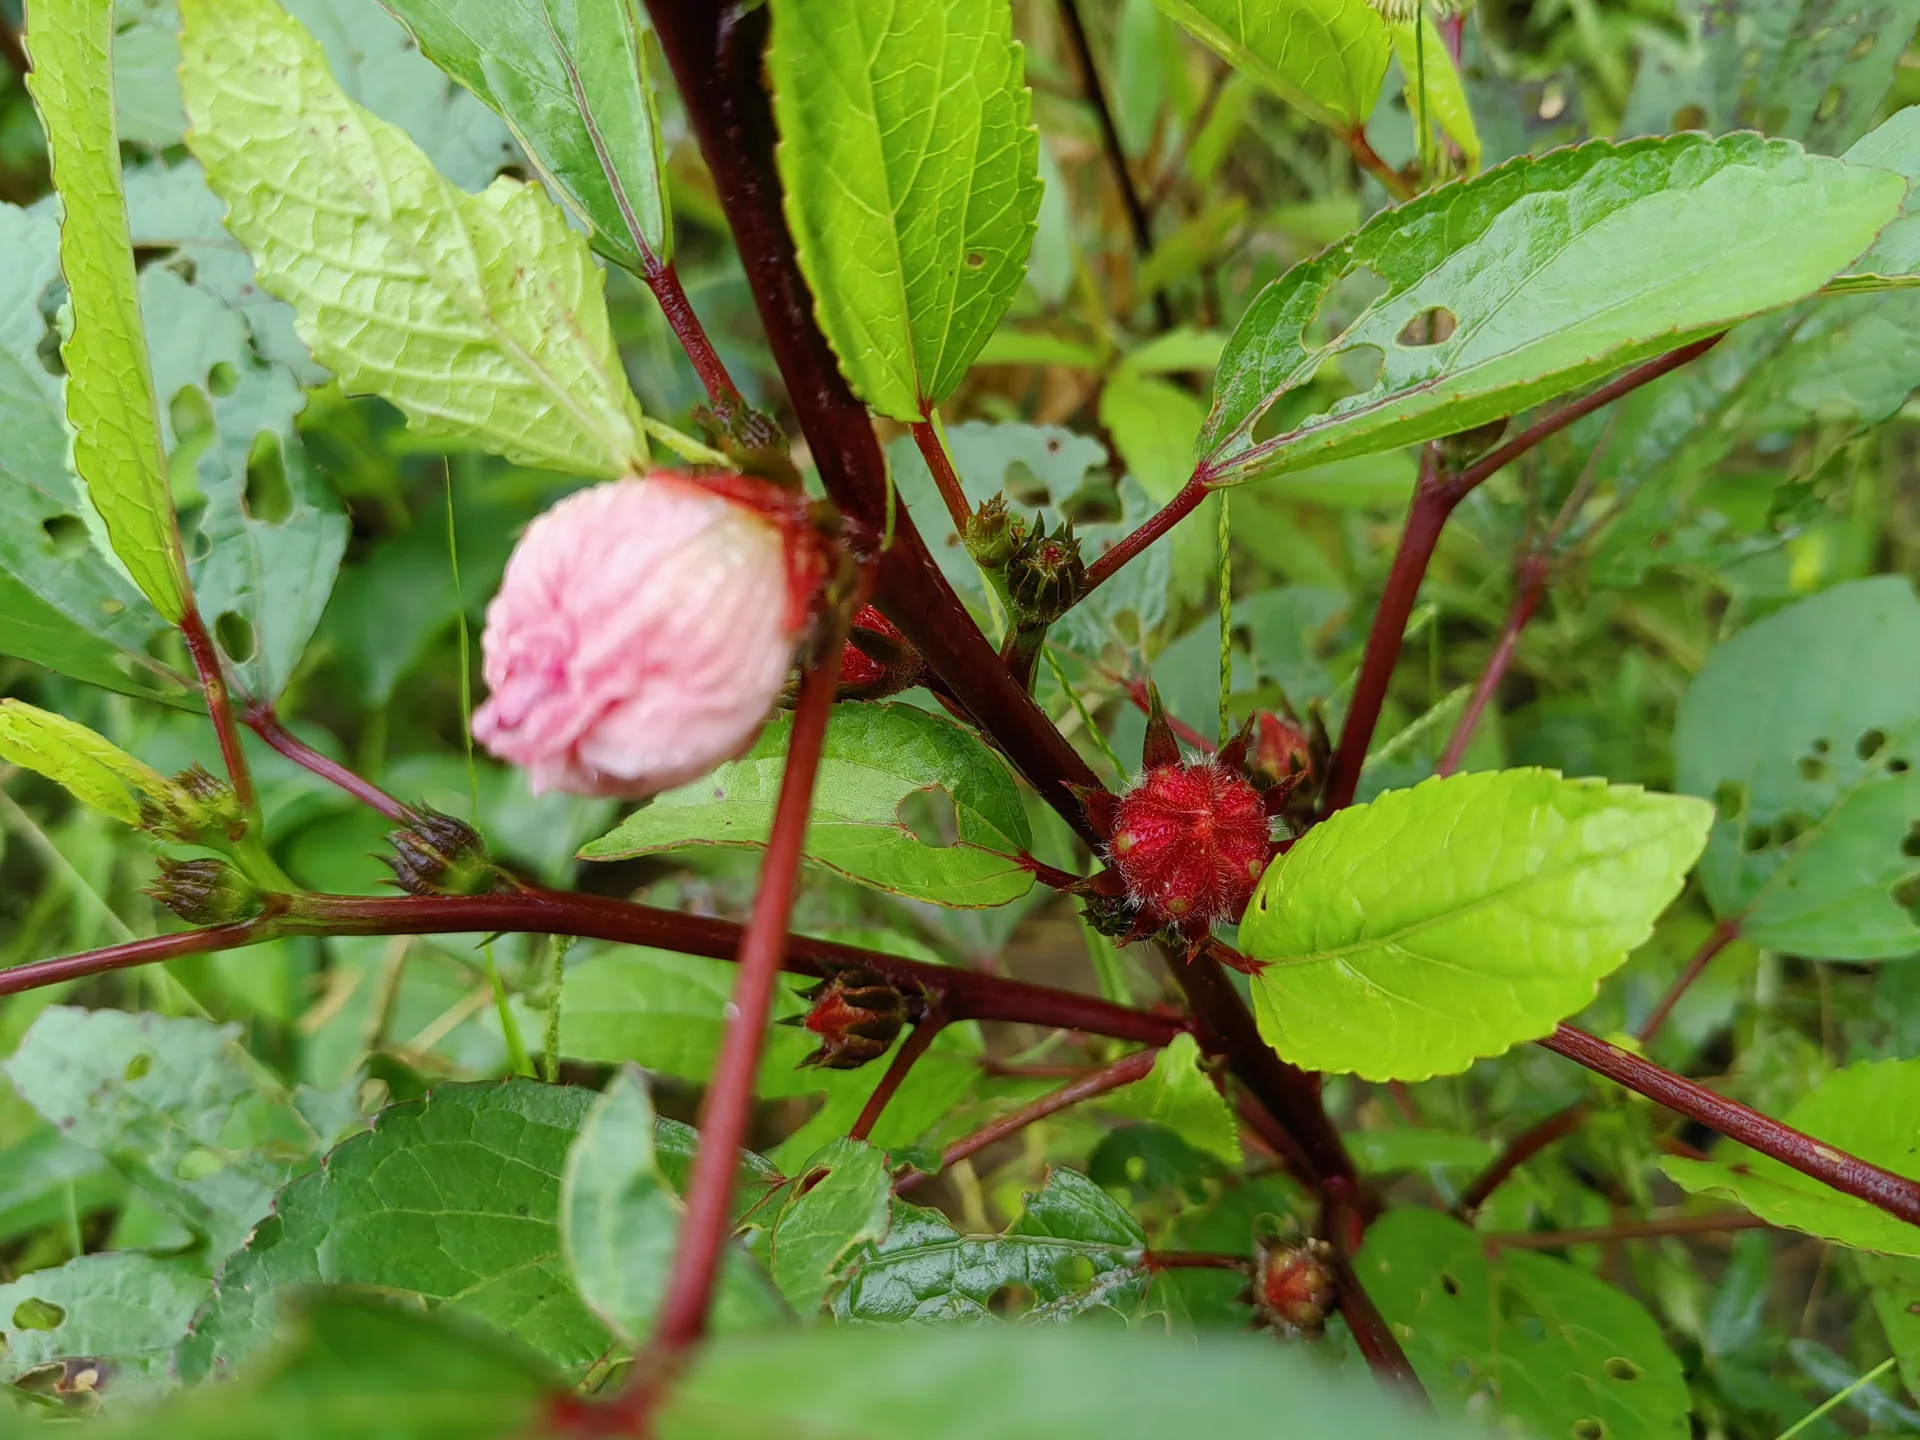
Ibrahim Somgalia Guitti · CC BY-SA 4.0
- Days to maturity
- 120–180 days
- Row spacing
- 80 cm
- Plant spacing in the row
- 60 cm
These are general figures for the crop, compiled from published agronomic references including FAO and CABI. The right choice for your field depends on your soil, rainfall and the yield you are aiming for.
Will roselle actually do well on your field? Check your own field against every crop in the catalogue — no signup. Run the crop check →
Also known as
Roselle is also called sorrel.
- English
- sorrel
- Arabic
- karkade
- French
- oseille de Guinée, bissap, foléré
- Hausa
- yakuwa, zobo
- Swahili
- choya
- Wolof
- bissap
Working in buckets, bags or paces? The farming glossary turns the measures growers actually use into kilograms and hectares — what a 20 litre bucket of each crop really weighs, and how to size a field by walking it — alongside the Shona, Swahili, Ndebele and Yoruba words used in the field. Open the glossary →
Growing roselle, stage by stage
Your roselle season, step by step — sow early on the daylength-tuned date so the plant builds a big frame before the short days trigger flowering, then pick each red calyx while it is still fleshy and dry it hard for store and market.
Get ready — before you sow
Almost everything that decides your roselle harvest is set before the seed ever goes in: clean seed you can trust, a deep, well-drained bed for the long taproot, and — the single biggest decision of the whole season — sowing on the right date, so the plant gets months of long days to grow big before the short days switch it to flowering. Sow late and the crop flowers small and yields next to nothing, however well you tend it afterwards.
Source clean seed Recommended
Your whole crop starts with the seed. Clean seed from a healthy crop gives strong, even seedlings; seed off sick plants can carry root rots and nematodes (tiny worms that knot the roots) into your soil for years. Unlike hybrid maize, roselle comes true from saved seed — so you can keep your own from a healthy past crop or buy clean seed, as long as it is plump, whole and free of disease.
Get your seed together in the three weeks before you plan to sow, so a poor batch can still be swapped in good time.
You can save your own roselle seed (it breeds true, unlike hybrid maize) or buy it — either way, take seed only from healthy, heavy-cropping plants, never from plants that wilted, rotted at the base, or grew stunted.
Do a quick sprout test: wrap about 20 seeds in a damp cloth for a week; if most push out a little white root, the batch is good to sow.
Pick out plump, whole, firm seed and throw away shrivelled, holed or mouldy seed and any trash.
Store it somewhere dry, cool and off the ground, away from food, water and children, until sowing day.
- Do:
Sprout-test a pinch of seed a week or two before sowing — that leaves you time to find better seed if the batch comes up weak.
- Tip:
Holding seed back to sow late — roselle flowers by daylength, so a late start means a small plant and a poor crop, however good the seed.
- Watch out:
Never save seed from plants that wilted or rotted at the stem base — that seed carries foot-rot and nematodes straight into next year's field.
Prepare a deep, well-drained bed Recommended
Roselle drives down a deep taproot and cannot stand wet feet — waterlogged soil brings on foot-rot that kills plants at the base. A deep, loose, well-drained bed lets the root go straight down (so the crop rides out dry spells) and lets water drain away (so it does not rot).
Clear the weeds and old crop trash off the field.
Dig or plough deep — a full spade-blade, about 20–30 cm — so the taproot can drive straight down, then break the clods to a crumbly tilth.
Work in a modest, even dressing of well-rotted manure or compost. Roselle is only a medium feeder, so it needs far less than a hungry crop like maize — this mainly feeds the soil slowly, helps it hold moisture, and supplies the phosphorus and potash the crop wants.
On flat or low ground that holds water after rain, make ridges or raised beds and plant on top, so the roots never sit in standing water.
Level the surface so rain soaks in evenly. On a slope, work across the slope to catch the rain and stop the soil washing away.
- Do:
On any land that puddles after rain, plant on ridges or raised beds — good drainage is your best protection against foot-rot.
- Tip:
Fresh, raw manure — it burns young roots and brings weed seeds; use only dark, crumbly, well-rotted manure or compost.
- Watch out:
Wash your hands after handling manure, and keep it away from anything you will eat or drink.
Confirm the daylength-tuned sowing date Critical
This is the single most important decision of the whole season. Roselle only flowers when the days grow short (around 12–13 hours of daylight). Sow on the tuned date and the plant gets months of long days to build a big frame — then it flowers heavy with calyces. Sow even a few weeks late and short days catch a small plant: it flowers early, stays small, and yields almost nothing — and no amount of feeding or watering can fix it.
Roselle reads the length of the day. It holds off flowering while days are long and only starts once they shorten — so the earlier you sow (within the safe warm window), the bigger the plant grows before it flowers, and the more calyces it carries.
Use the daylength-tuned sowing date in your recommendation — it is set for your exact place, because daylength depends on how far you are from the equator.
Have everything — seed, bed and tools — ready to sow on that date. The tuned date also lines the crop up to ripen in dry weather and to finish before any cold, which roselle cannot survive.
If you have already missed the window this year, sow as early as you still can and expect a smaller crop — then plan to sow on time next season.
- Tip:
Treating roselle like a crop you can plant 'any time before the rains end' — a late roselle crop is a wasted one.
- Do:
If you are unsure, sow on the earlier side of your window rather than the later side.
Sowing & getting a full stand
Now you put the seed in and get an even stand of strong seedlings. Sow into warm soil (roselle seed rots in cold ground), keep to the right spacing, and once the seedlings are up, thin to one strong plant per station so each has room for its deep root and wide frame. Watch closely — flea beetles and damping-off can thin your stand in the first two weeks.
Direct-sow Critical
The number of strong, evenly-spaced plants you set now is the frame that will carry every calyx — you cannot add plants later. Right depth, right spacing and warm soil give quick, even germination; sow into cold or cloddy soil and the seed rots or comes up in gaps you can never fill.
Sow only once the soil is warm — at least 21 °C (comfortably warm to the back of your hand, well after the cold has passed). In cold soil the seed rots instead of sprouting.
Mark out your rows about four hand-spans apart (≈80 cm), and stations about three hand-spans apart (≈60 cm) along each row — roselle grows into a big, branching bush and needs this room.
At each station drop 2–3 seeds, sowing shallow — only about 1–2 cm deep (about one finger-width), just covering the seed. The seed is small, so shallow is best; go a touch deeper only if the topsoil is drying out.
Cover lightly and firm the soil over the seed with your hand or foot, so it sits snug in moist earth. Seedlings should show in 5–10 days.
Keep the bed moist (not soaked) until the seedlings are up and standing.
- Do:
Sow into warm, moist soil and firm it down — good seed-to-soil contact gives the fast, even emergence roselle needs.
- Tip:
Sowing deep — small roselle seed buried too far uses up its strength before it reaches the light and comes up patchy or not at all.
- Watch out:
Sow 2–3 seeds per station as insurance against gaps, then thin to the single strongest plant later.
Thin to one strong plant per station Recommended
Two or three plants crammed into one station fight each other for water, light and root room, and all of them stay small. Thinning to the one strongest plant per station gives it the room to build the big frame that carries a heavy calyx crop.
About 10–14 days after sowing, once the seedlings are a few centimetres tall with their first proper leaves, pick out the single strongest, straightest seedling at each station.
Snip the extra seedlings off at ground level with a knife or your nails — do not pull them, or you tear the taproot of the one you are keeping.
Aim for one strong plant at every station, evenly spaced down the row.
Fill any big gaps by lifting a spare seedling with a ball of soil into the gap in the cool of evening and watering it in — do this early, while the plants are still tiny.
- Do:
Thin on time — the longer you leave crowded seedlings, the more they set each other back.
- Tip:
Pulling seedlings out — it disturbs the deep taproot of the plant you want to keep; always cut them off at the ground instead.
Scout (flea beetles, cutworms) Recommended
The first two weeks decide your stand. Flea beetles can riddle the young leaves and cutworms can fell whole seedlings overnight — and gaps you catch early can still be filled, while gaps found late cannot. Ten minutes every few days protects the frame of the whole crop.
From a few days after sowing, walk the field every 3–4 days and look closely at the young seedlings — not just along the edge by the path.
Flea beetles: look for tiny beetles that jump away when you disturb them, and young leaves peppered with small round 'shot-holes' as if sprinkled with buckshot. A few holes are fine; heavy peppering on tiny seedlings is not.
Cutworms: look for seedlings cut clean through at ground level (worst in the early morning). Scratch the soil around a felled plant to find the fat, greasy, curled grey caterpillar.
Damping-off: look for seedlings that flop over and die in patches, pinched and dark and rotten right at the soil line — a rot of cold, wet, crowded seedbeds.
Count the gaps as you go. If pests or rot are spreading, act now — open the matching pest guide — and gap-fill or re-sow while the crop is still only days old.
- Watch out:
Damping-off spreads in wet, airless soil — if seedlings are rotting off at the base, ease back on watering and make sure the bed drains.
- Do:
Catch problems in the first two weeks — that is the only window when you can still fill gaps or re-sow and stay even.
The long grow — building the frame
This is the long, patient stretch where the plant builds its big frame (from waist-high to taller than you, 1–2.5 m) through the long days — and that frame is what will carry the calyces. Keep it weed-free while it is small, feed a modest, split dose of nitrogen (too much delays flowering and grows leaf instead of calyx), and watch for stainer bugs, aphids, nematodes and foot-rot. You can pick a few young leaves for the pot along the way.
Weeding (slow early canopy) Critical
Roselle is slow to shade the ground, so weeds get a long open window to steal its water, light and food while it is small. Keeping it clean through these first weeks — until the canopy finally closes over — protects the frame that carries your whole calyx crop.
Start weeding from about 2 weeks after sowing, and repeat every 2–3 weeks until the plants meet across the rows and shade out new weeds (roughly the first two months).
Hoe shallowly between and around the plants — roselle's feeder roots run near the surface, and deep hoeing cuts them.
Pull weeds close to the stems by hand so you do not wound the plant.
In dry spells, leave the pulled weeds lying between the rows as a mulch to hold moisture.
- Do:
Weed while the weeds are small, and just before you top-dress, so your fertiliser feeds the roselle and not the weeds.
- Tip:
Deep hoeing close to the plants — it tears the surface feeder roots and the taproot.
Moderate split N Recommended
Roselle needs only a modest amount of nitrogen — enough to build a healthy frame, no more. Too much nitrogen delays flowering and grows big leafy bushes with few calyces, exactly the opposite of what you want. Splitting the modest dose in two, and banding it beside the plants, feeds the crop steadily without pushing it to run to leaf.
Apply the first half at about 3–4 weeks after sowing, when the plants are established and growing well; save the second half for a few weeks later. Your recommendation gives the amount for your field.
Lay it in a shallow band about a hand-span (≈20 cm) to the side of the row, not touching the stems — fertiliser against the plant burns it.
Apply onto moist soil (after a weeding or a light rain) and cover it lightly, so it soaks down to the roots instead of gassing off into the air.
Roselle also wants some phosphorus and potash — the well-rotted manure you worked in at bed-prep supplies most of that, so keep the nitrogen modest on top of it.
Keep the grains off wet leaves (they stick and scorch), keep fertiliser away from food, water and children, and wash your hands afterwards.
- Tip:
Piling on nitrogen to 'push' the crop — with roselle it just delays flowering and grows leaf instead of calyx, cutting your harvest.
- Do:
Split the dose — half now, half a few weeks later — so a heavy rain does not wash it all straight past the roots at once.
- Watch out:
The well-rotted manure worked in at bed-prep already feeds the crop — go easy with nitrogen on top of it.
Optional leaf-picking (potherb) Optional
Roselle leaves are an edible sour relish — a free extra harvest from the same plant. Picking a few young leaves for the pot costs you nothing as long as you pick lightly and leave the plant its frame; strip it hard and you cut into the calyx crop that is the main prize.
From about a month after sowing you can start picking young, tender leaves and shoot-tips for cooking — they taste pleasantly sour, like a tangy spinach.
Take only a few leaves from each plant and leave the main growing tips and most of the canopy in place.
Pick every 10–14 days if you want a steady supply of relish.
- Watch out:
Do not over-pick the leaves — every leaf you take is frame the plant needs to carry calyces, and the calyces are worth far more.
- Tip:
Stripping leaves once flowering is near — the plant needs its full canopy to fill a heavy calyx crop.
Scout (stainer, aphids, nematode) Recommended
Through the long grow, cotton-stainer bugs, aphids, root-knot nematodes and foot-rot all build up quietly. Catching them early — before they spread — keeps the leaf-and-stem 'factory' working so the plant can carry a full load of calyces.
Once a week, walk the field and check plants at several spots — leaf tops and undersides, stems, growing tips, and the base of the stem.
Cotton-stainers: look for red-and-black bugs clustering on the stems, buds and shoots; they pierce the plant and later stain the calyces and seed. Handpick and destroy them where you can.
Aphids: look for small soft green or black insects massed on the shoot-tips and under young leaves, often with sticky honeydew (their sugary droppings), a sooty black mould, and curling leaves.
Root-knot nematode: watch for plants that are stunted and yellow and wilt in the heat even when the soil is moist. Pull up a poor plant and look for knots and beady swellings on the roots — that is the nematode.
Foot-rot: look for a dark, rotten patch at the stem base on a plant that wilts or topples — it thrives in wet, poorly-drained soil. Pull and destroy affected plants and improve the drainage.
Note what you see and where. If any pest or rot is spreading, act — open the matching pest guide.
- Do:
Handpick stainer bugs early and clear weedy hosts nearby — a small colony now becomes a calyx-staining swarm by harvest.
- Watch out:
Nematode-hit patches come back year after year in the same soil — next season, plant roselle somewhere else (rotate) to starve them out.
Flowering — the daylength trigger
Now the days have grown short enough (around 12–13 hours) and the plant switches to flowering — the moment everything has been building toward. When this happens depends on your sowing date and how far you are from the equator, not on a fixed number of days. Each flower lasts about a day, then drops its petals and a red calyx swells around the seed pod. Keep the crop healthy as flowering sets in, then start easing water back for a firm, well-coloured, well-drying calyx.
Watch for first flowers Recommended
The first flowers are the starting gun for your harvest — every calyx is ready to pick about 10–21 days after its own flower opened. Spotting the first flowers tells you the picking season is about to begin and starts the clock the whole harvest is timed from.
As the season moves into shorter days, check the plants every 3–4 days for the first open flowers — pale cream or yellow petals with a dark red centre, sitting where the leaves meet the stem.
Note when the first flowers open — this is the anchor your picking dates are counted from.
Watch what each flower does: it lasts about a day, the petals fall, and a fleshy red cup — the calyx — swells around the green seed pod. That red cup is your crop.
While you are looking, check the buds and young calyces for capsule-borer — a small entry hole or grainy droppings on a bud that then fails to open properly. Pick off and destroy any affected buds.
- Watch out:
If flowers appear while the plants are still small, the crop was sown too late and short days caught it young — note it, and sow earlier next season.
- Do:
Mark or remember the date of the first flowers — your first pick comes about 10 days later.
Ease water for ripening Recommended
A drier finish makes a better calyx — firmer, deeper red, and quick to dry once picked — and it keeps the fleshy calyces from rotting on the plant in wet soil. So as flowering sets in, you gradually ease the water back rather than keep the crop lush and green.
Once the plant is flowering well, gradually cut back your watering — do not stop dead while lots of flowers are still setting, but ease it down over the next couple of weeks.
Aim for a soil that is on the dry side through calyx ripening, so the calyces firm up, colour well, and dry fast once picked.
If you are rain-fed, this usually happens on its own as the dry season comes in — just do not irrigate to keep the crop green.
- Watch out:
If heavy rain keeps the crop wet as calyces ripen, they can rot on the plant — pick promptly and do not let ripe calyces sit in the wet.
- Tip:
Cutting the water off suddenly while the plant is still throwing lots of flowers — ease it down instead, so you do not drop the flowers you want.
Picking the calyces
Now the reward comes in — but it comes in waves, not all at once. Each calyx is ready about 10–21 days after its flower, and because the plant keeps flowering, you pick over several weeks, going back every 7–10 days. The whole skill is timing each pick: take the calyx while it is still fleshy, plump and fully red — before the seed pod inside dries, browns and splits and the calyx turns papery and worthless.
Repeated calyx picking Critical
This is where the crop is won or lost. A calyx picked fleshy and full-red makes a heavy, bright, top-grade product; leave it a week too long and the seed pod inside dries and splits, the calyx goes papery and dull, and both the weight and the price collapse. Because calyces ripen in turn, going back every week to pick the ready ones is the single most important job of the season's end.
Start your first pick about 10 days after the first flowers, then return every 7–10 days for several weeks as more calyces ripen.
How to tell a calyx is ready: it is plump, fleshy and fully red, and the seed pod inside is still soft and green — not yet dry, brown or split. Squeeze one: a ready calyx is firm and juicy, not papery.
Snap or cut each ready calyx off by hand at its little stalk. Leave the unripe ones to keep filling — you will get them on the next round.
Drop the picked calyces into a basket or bag, keep them out of the hot sun, and get them home for coring the same day, while they are still fresh and easy to core.
If it fails — you left it too late and the calyx is papery with the pod inside dried, browned or split: pick it anyway to tidy the plant, but keep it separate (it is low grade), and do not let it hang — a hanging over-ripe calyx only invites capsule-borer and gall-midge. Pick earlier on your next round.
- Do:
Go back on a fixed rhythm — every 7–10 days — so no calyx is left to over-ripen; a missed round is lost grade.
- Tip:
Waiting for the whole plant to be 'ready' — it never is; the calyces ripen a few at a time, so you must pick again and again.
- Watch out:
As soon as the seed pod inside starts to dry, brown or split, quality drops fast — that is your signal you are picking a touch late.
Scout (capsule borer, gall midge) Recommended
Right when your calyces are forming, capsule-borers and gall-midges attack the buds, calyces and seed pods — the very part you sell. Spotting them early lets you strip out and destroy the affected buds and calyces before the pests spread through your picking crop.
Each week, as you pick, look over the buds, flowers and forming calyces.
Capsule-borer: look for a small hole bored into a bud or calyx, with grainy droppings around it, and the calyx or seed pod eaten out inside. Pick off and destroy these.
Gall-midge: look for buds and young calyces that swell into hard, deformed lumps and never open or set properly — the maggots of a tiny fly are inside. Remove and destroy the galled buds.
Clear fallen buds and old calyces from under the plants, where these pests breed. If damage is spreading, open the matching pest guide.
- Do:
Pick ripe calyces promptly and clear the fallen ones — a clean, well-picked plant gives borers and midges far fewer places to breed.
- Watch out:
Holed calyces and swollen, deformed buds both mean pests are inside — destroy them, do not just drop them on the ground.
- Watch out:
You are picking calyces every week, so favour handpicking over spraying now — any spray needs a pre-harvest interval (the safe wait between spraying and picking) or it leaves residues on the very cups you eat and sell.
Coring, drying & storing
The calyces you picked are fleshy and perishable — they will mould within a day or two if you leave them. So after every pick you do two quick jobs: core each calyx (pop out the seed pod) and dry the red cups hard, until they snap like a dry twig. Done right, roughly 10–12 kg of fresh calyces become 1 kg of dried that keeps for months and fetches the best price.
Core the calyces Recommended
The seed pod in the middle of each calyx is not sellable and holds moisture that slows drying and breeds mould. Popping it out — coring — leaves you just the clean red cup, which dries fast and evenly into a top-grade product. Cored fresh, on the same day you pick, it is a quick, easy job.
Core the calyces the same day you pick them, while they are still fresh and fleshy — they core far more easily than once they start to wilt.
By hand: hold the calyx and push the green seed pod out from the base with your thumb, so the red cup stays whole.
With a corer: push a short metal tube (or a sharpened bamboo or reed) through the base of the calyx to punch the seed pod straight out — much faster when you have a lot to do.
Keep the red cups in one clean basket for drying, and the seed pods in another — the pods can be fed out or, from your late pick, saved for next year's seed.
- Do:
Core and dry on the same day as each pick — do not let a heap of fresh calyces sit overnight, or they heat up and mould.
- Watch out:
If your hands get sore coring a big harvest, a simple metal-tube corer pays for itself in speed.
Sun-dry cored calyces to brittle Recommended
Dried hard and brittle, cored calyces keep for many months and sell at the best price; left even slightly soft, they grow mould in the bag and the whole lot is spoiled. Fast, thorough drying right after each pick is what turns a perishable crop into money in store.
Spread the cored red cups in a single layer on a clean mat, rack or raised tray — not on bare ground, which pushes damp back in and adds dirt and mould.
Dry them in full sun (or a clean, airy shade if you are protecting the colour), turning them now and then so they dry evenly. Bring them under cover at night and if rain threatens.
Test for dryness: a properly dried calyx is brittle and crisp and snaps cleanly between your fingers, like a dry twig — it should not bend, feel leathery, or squash.
Only once they snap cleanly, pack them into clean, dry bags and store them off the floor, in a cool dry place away from damp and pests. Roughly 10–12 kg fresh gives 1 kg dried.
If it fails — they bend or feel leathery instead of snapping — they are still too wet: spread them back out and dry them more before bagging, or they will mould in store.
If you want your own seed for next year, leave some of the late calyces on the plant to ripen and dry fully, then thresh out the seed and store it dry.
- Tip:
Bagging calyces that still bend — even a little trapped moisture moulds the whole bag; when in doubt, dry another day.
- Do:
Dry on a raised rack or mat, turn regularly, and cover at night — even, thorough drying protects both colour and keeping quality.
- Watch out:
Sun keeps the deep-red colour buyers pay for; long damp spells dull it, so dry as fast as conditions allow.
Pests and diseases that attack roselle


Where to sell roselle
Markets that trade this crop — what each one sells it by, when supply peaks there, and the currency used.
-
 Grand Marché de Bamako
-
 Marché Dantokpa
-
 Marché de Kaolack
-
 Marché Ocass
-
 Marché de Diourbel
-
 Grand Marché de Niamey
Grow roselle with a plan, not a guess
This guide is the general answer. Divisi works out yours — the week to plant roselle on your soil and your rainfall, and each job dated for your field.


When to plant roselle, country by country
- When to plant roselle in Algeria
- When to plant roselle in Angola
- When to plant roselle in Benin
- When to plant roselle in Botswana
- When to plant roselle in Burkina Faso
- When to plant roselle in Burundi
- When to plant roselle in Cabo Verde
- When to plant roselle in Cameroon
- When to plant roselle in Comores
- When to plant roselle in Congo
- When to plant roselle in Côte d'Ivoire
- When to plant roselle in Egypt
- When to plant roselle in Eritrea
- When to plant roselle in Eswatini
- When to plant roselle in Ethiopia
- When to plant roselle in Gabon
- When to plant roselle in Gambia
- When to plant roselle in Ghana
- When to plant roselle in Guinea Ecuatorial
- When to plant roselle in Guinea-Bissau
- When to plant roselle in Guinée
- When to plant roselle in Kenya
- When to plant roselle in Liberia
- When to plant roselle in Libya
- When to plant roselle in Madagascar
- When to plant roselle in Malawi
- When to plant roselle in Mali
- When to plant roselle in Mauritanie
- When to plant roselle in Mauritius
- When to plant roselle in Morocco
- When to plant roselle in Moçambique
- When to plant roselle in Namibia
- When to plant roselle in Niger
- When to plant roselle in Nigeria
- When to plant roselle in Rwanda
- When to plant roselle in République centrafricaine
- When to plant roselle in République démocratique du Congo
- When to plant roselle in Sao Tome and Principe
- When to plant roselle in Seychelles
- When to plant roselle in Sierra Leone
- When to plant roselle in Somalia
- When to plant roselle in South Africa
- When to plant roselle in South Sudan
- When to plant roselle in Sudan
- When to plant roselle in Sénégal
- When to plant roselle in Tchad
- When to plant roselle in Togo
- When to plant roselle in Tunisie
- When to plant roselle in Uganda
- When to plant roselle in United Republic of Tanzania
- When to plant roselle in Zambia
- When to plant roselle in Zimbabwe
Where roselle scores best
Districts where Divisi's engine currently rates this crop highest, ranked by fit.
-
 Rutshuru
 -
 Xá-Muteba
 -
 Kinyinya
 -
 Geita
Geita -
 Rwamagana
 -
 Nyatike
 -
 Rukungiri
 -
 Bouanila
 -
 Vatomandry
 -
 Ugu
Ugu -
 Saurimo
 -
 Kayogoro
Get Insights by email
A short digest of new Divisi articles. No email on quiet weeks.
Frequently asked questions
How do I grow roselle?
How to grow roselle: 120–180 days to maturity, 80 cm rows. Also called sorrel, karkade, oseille de Guinée, yakuwa, choya, bissap.
What is karkade in English?
Karkade is the Arabic name for roselle.
What is oseille de Guinée in English?
Oseille de Guinée (also bissap and foléré) is the French name for roselle.
What is yakuwa in English?
Yakuwa (also zobo) is the Hausa name for roselle.
What is choya in English?
Choya is the Swahili name for roselle.
What is bissap in English?
Bissap is the Wolof name for roselle.
How long does roselle take to grow?
Roselle takes about 120–180 days from sowing to maturity, though the exact length varies with variety, temperature and how the season runs.
What spacing should I use for roselle?
Space roselle rows about 80 cm apart, with roughly 60 cm between plants within the row.
What pests and diseases attack roselle?
The ones covered in this guide are Cotton stainers, Foot rot, Spiny bollworm. Each has its own page explaining how to identify, check for and control it.