 Divisi
How to grow Swiss chard
Beta vulgaris subsp. vulgaris · Amaranthaceae
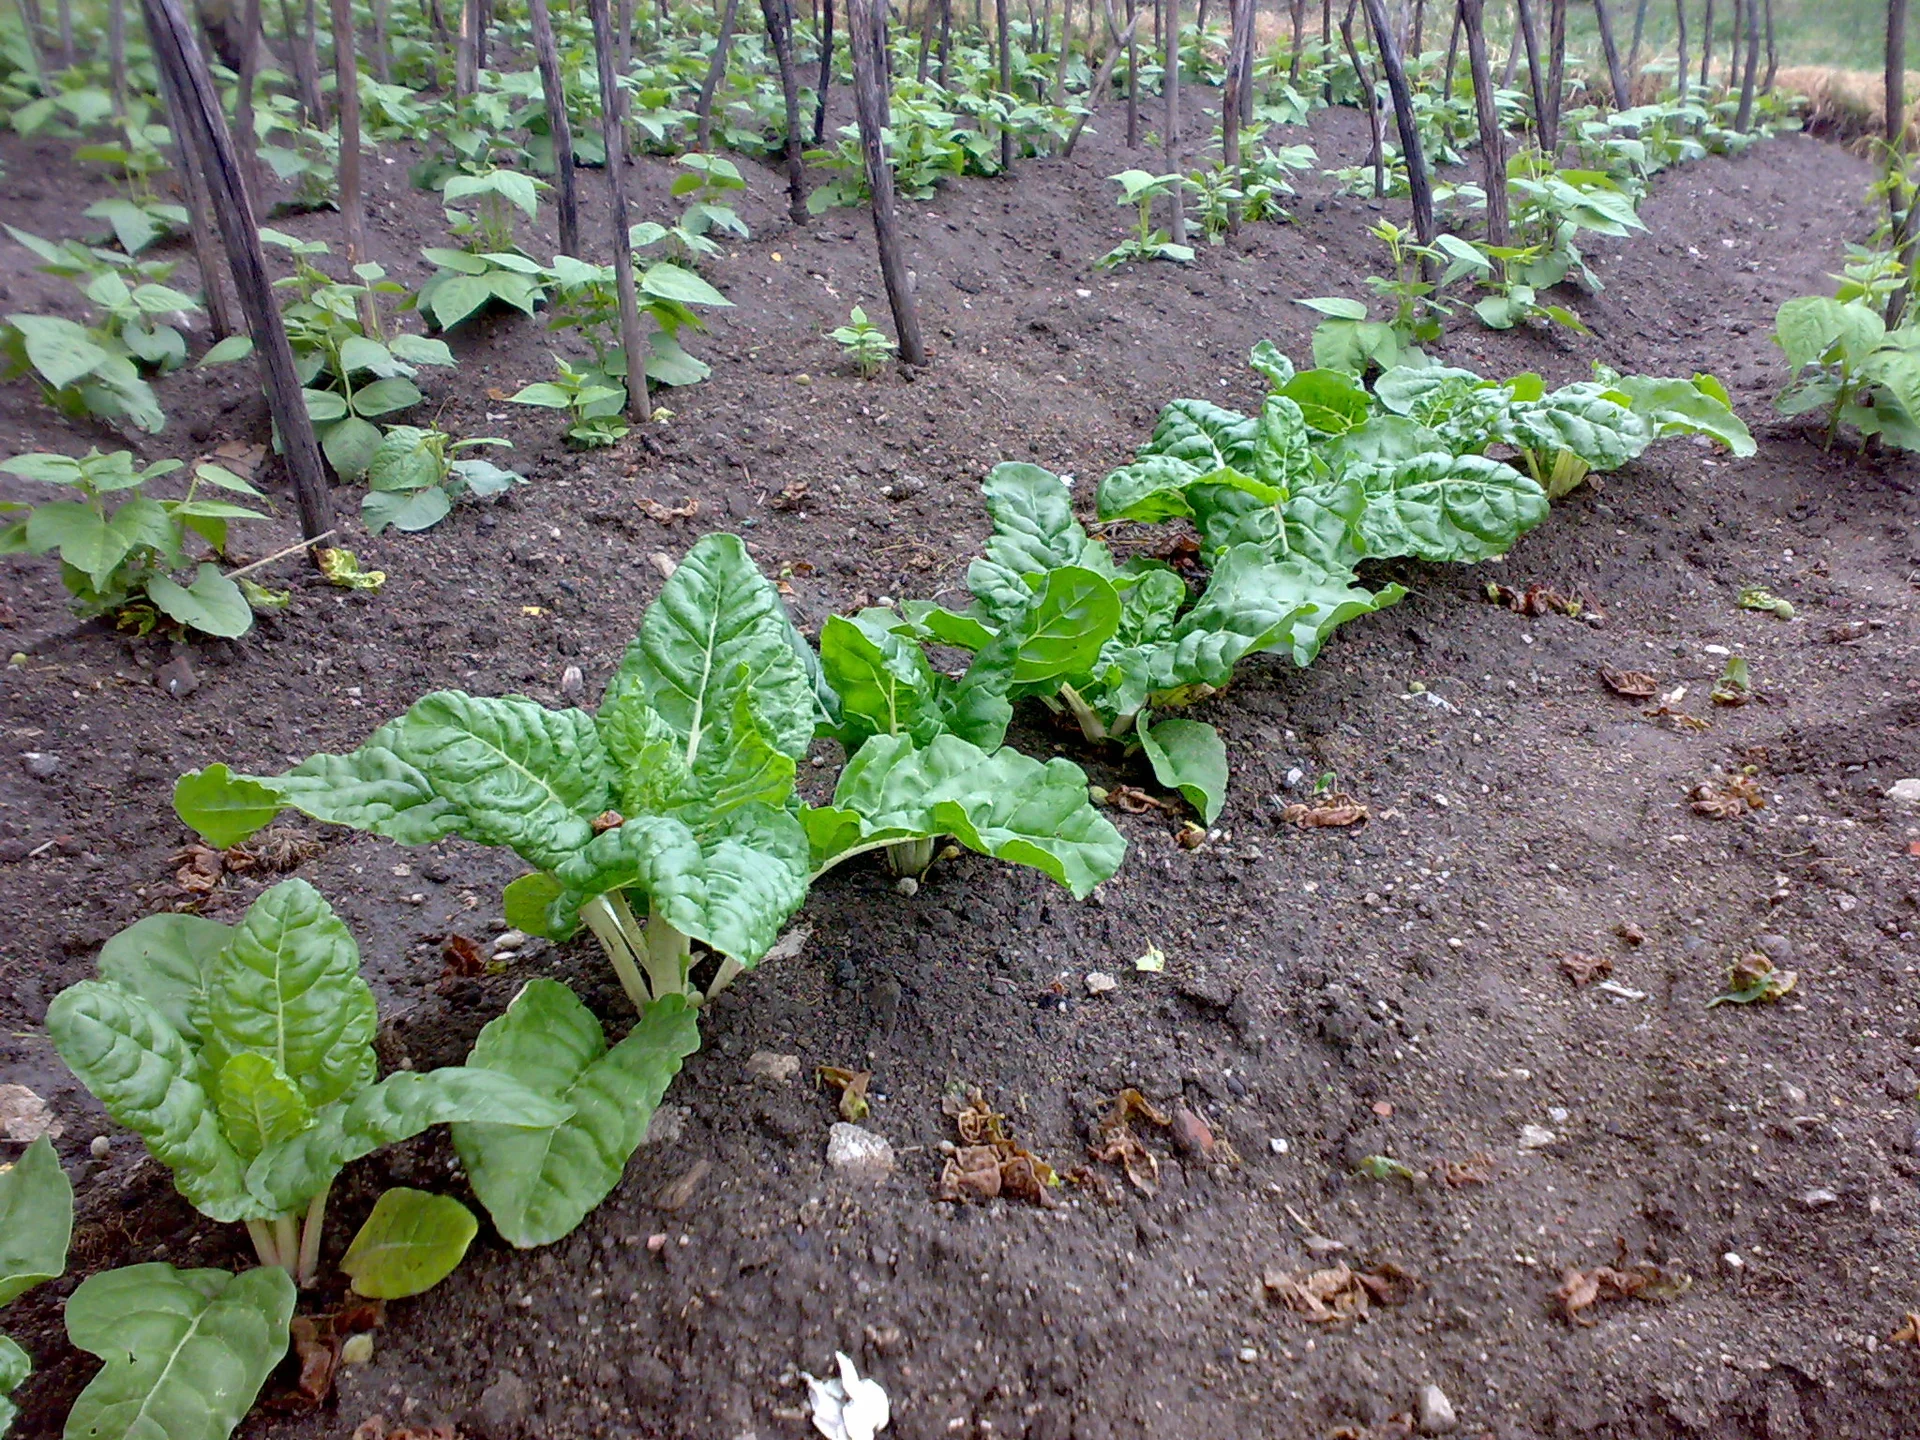
Photo: Arturo3 · CC BY-SA 4.0
Swiss chard — muriwo, mchicha, silverbeet, spinach beet — is the dependable 'spinach' of African markets and home gardens, though it is not true spinach. It is really a leaf form of beet, grown for its big glossy leaves and thick, juicy stalks (the white, red or gold stems), not for a root. Its great gift is toughness: it shrugs off heat and is slow to run to seed, so it keeps giving through months when true spinach would have bolted and quit. And you harvest it the generous way — you never pull the whole plant, you pick the outer leaves and it grows fresh ones from the middle, feeding your family and your market for four to six months from a single sowing. Know one quirk from day one: each chard 'seed' is really a knobbly ball holding several seeds, so it comes up as a little clump you must thin down to one strong plant.
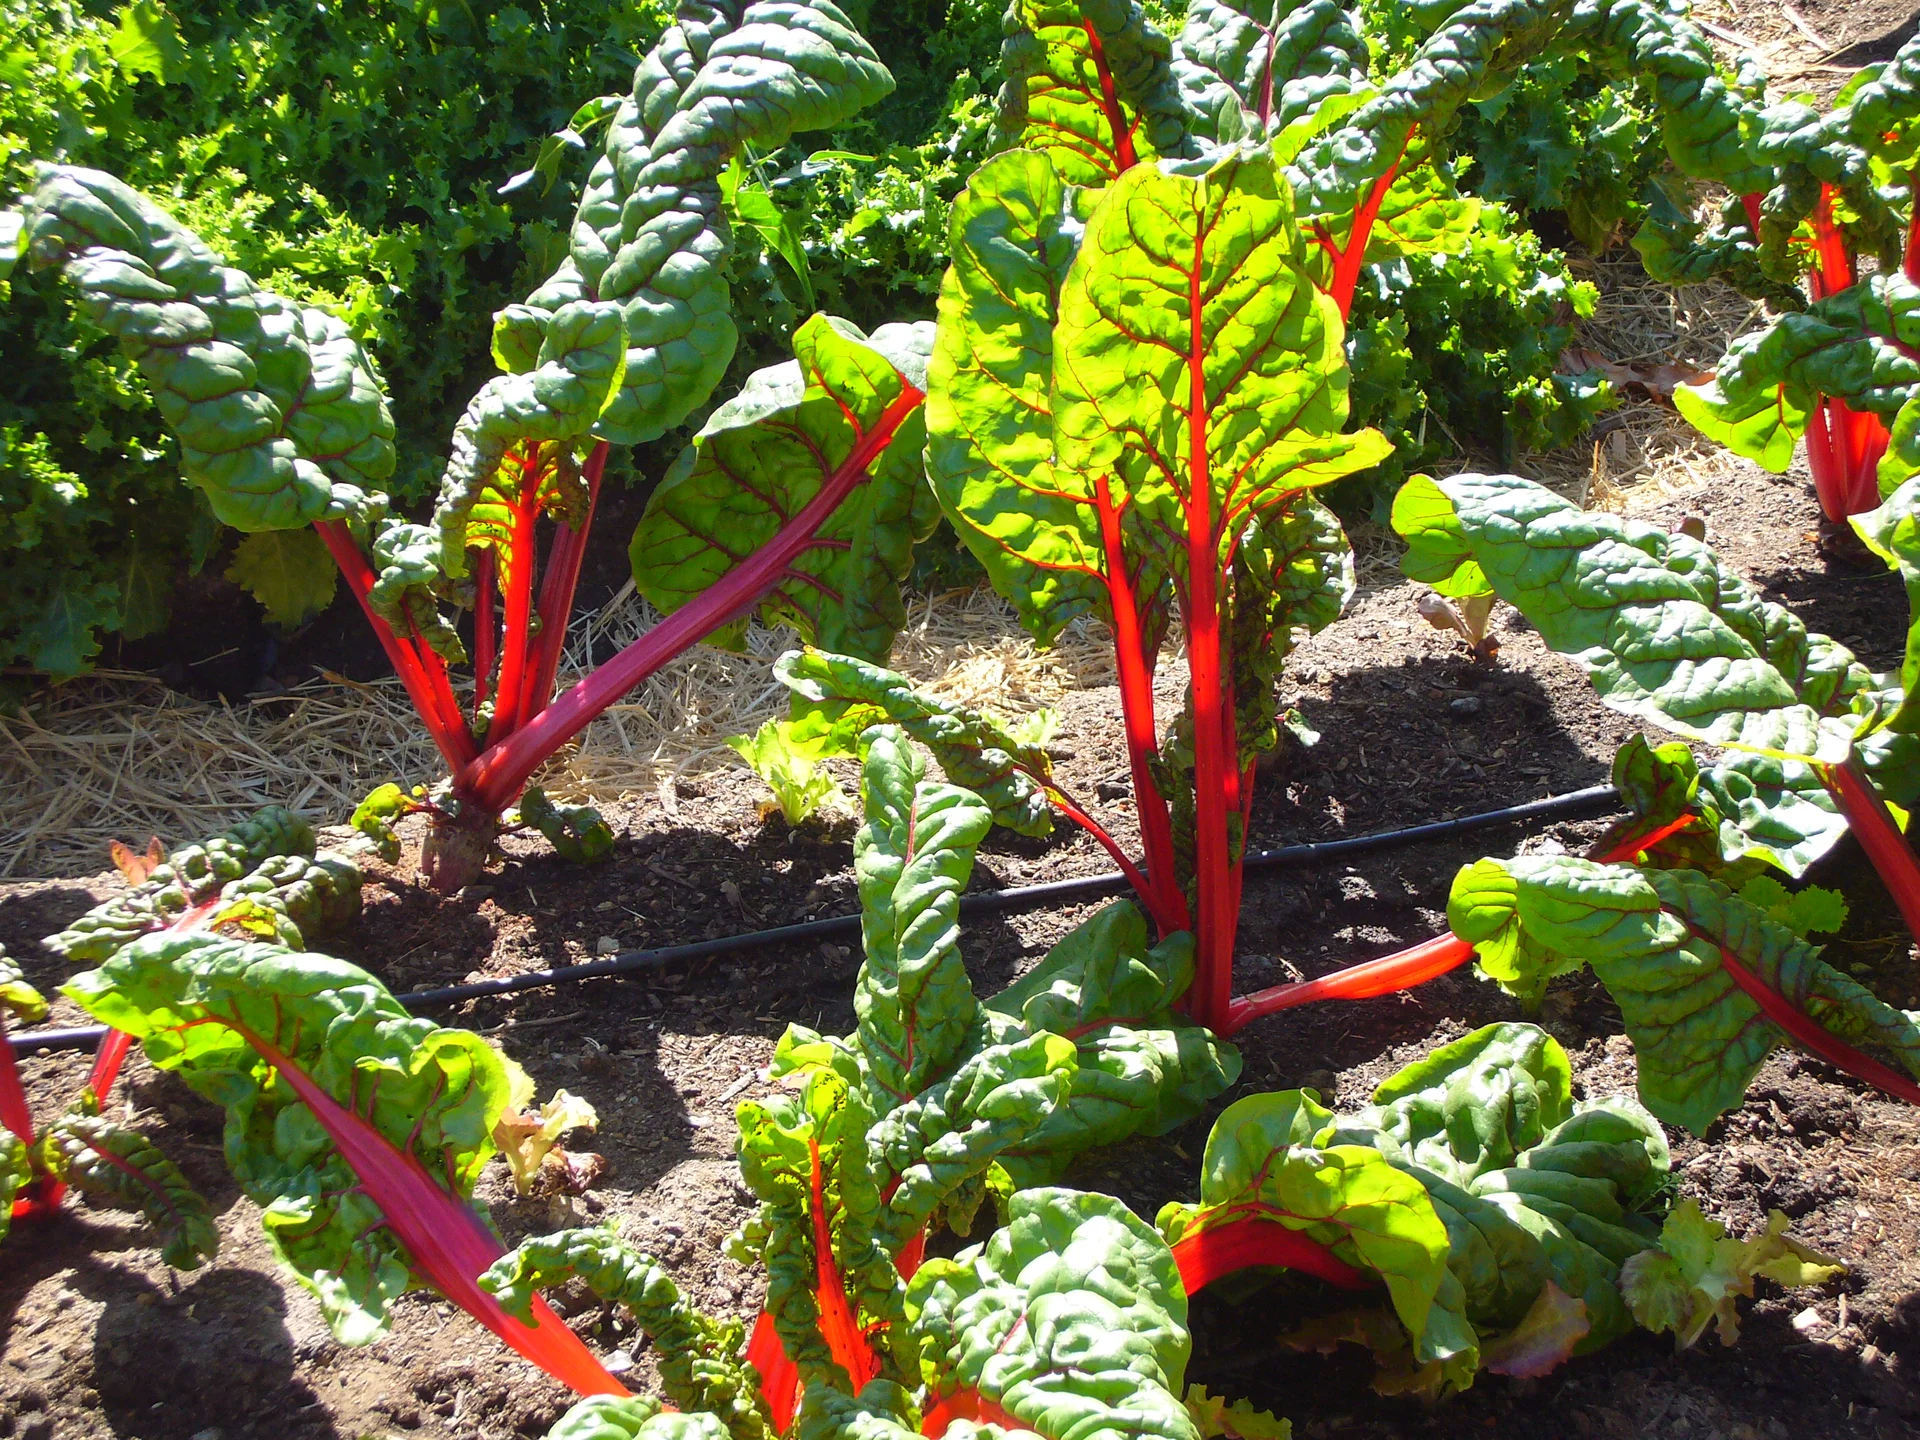
Krzysztof Ziarnek, Kenraiz · CC BY-SA 4.0 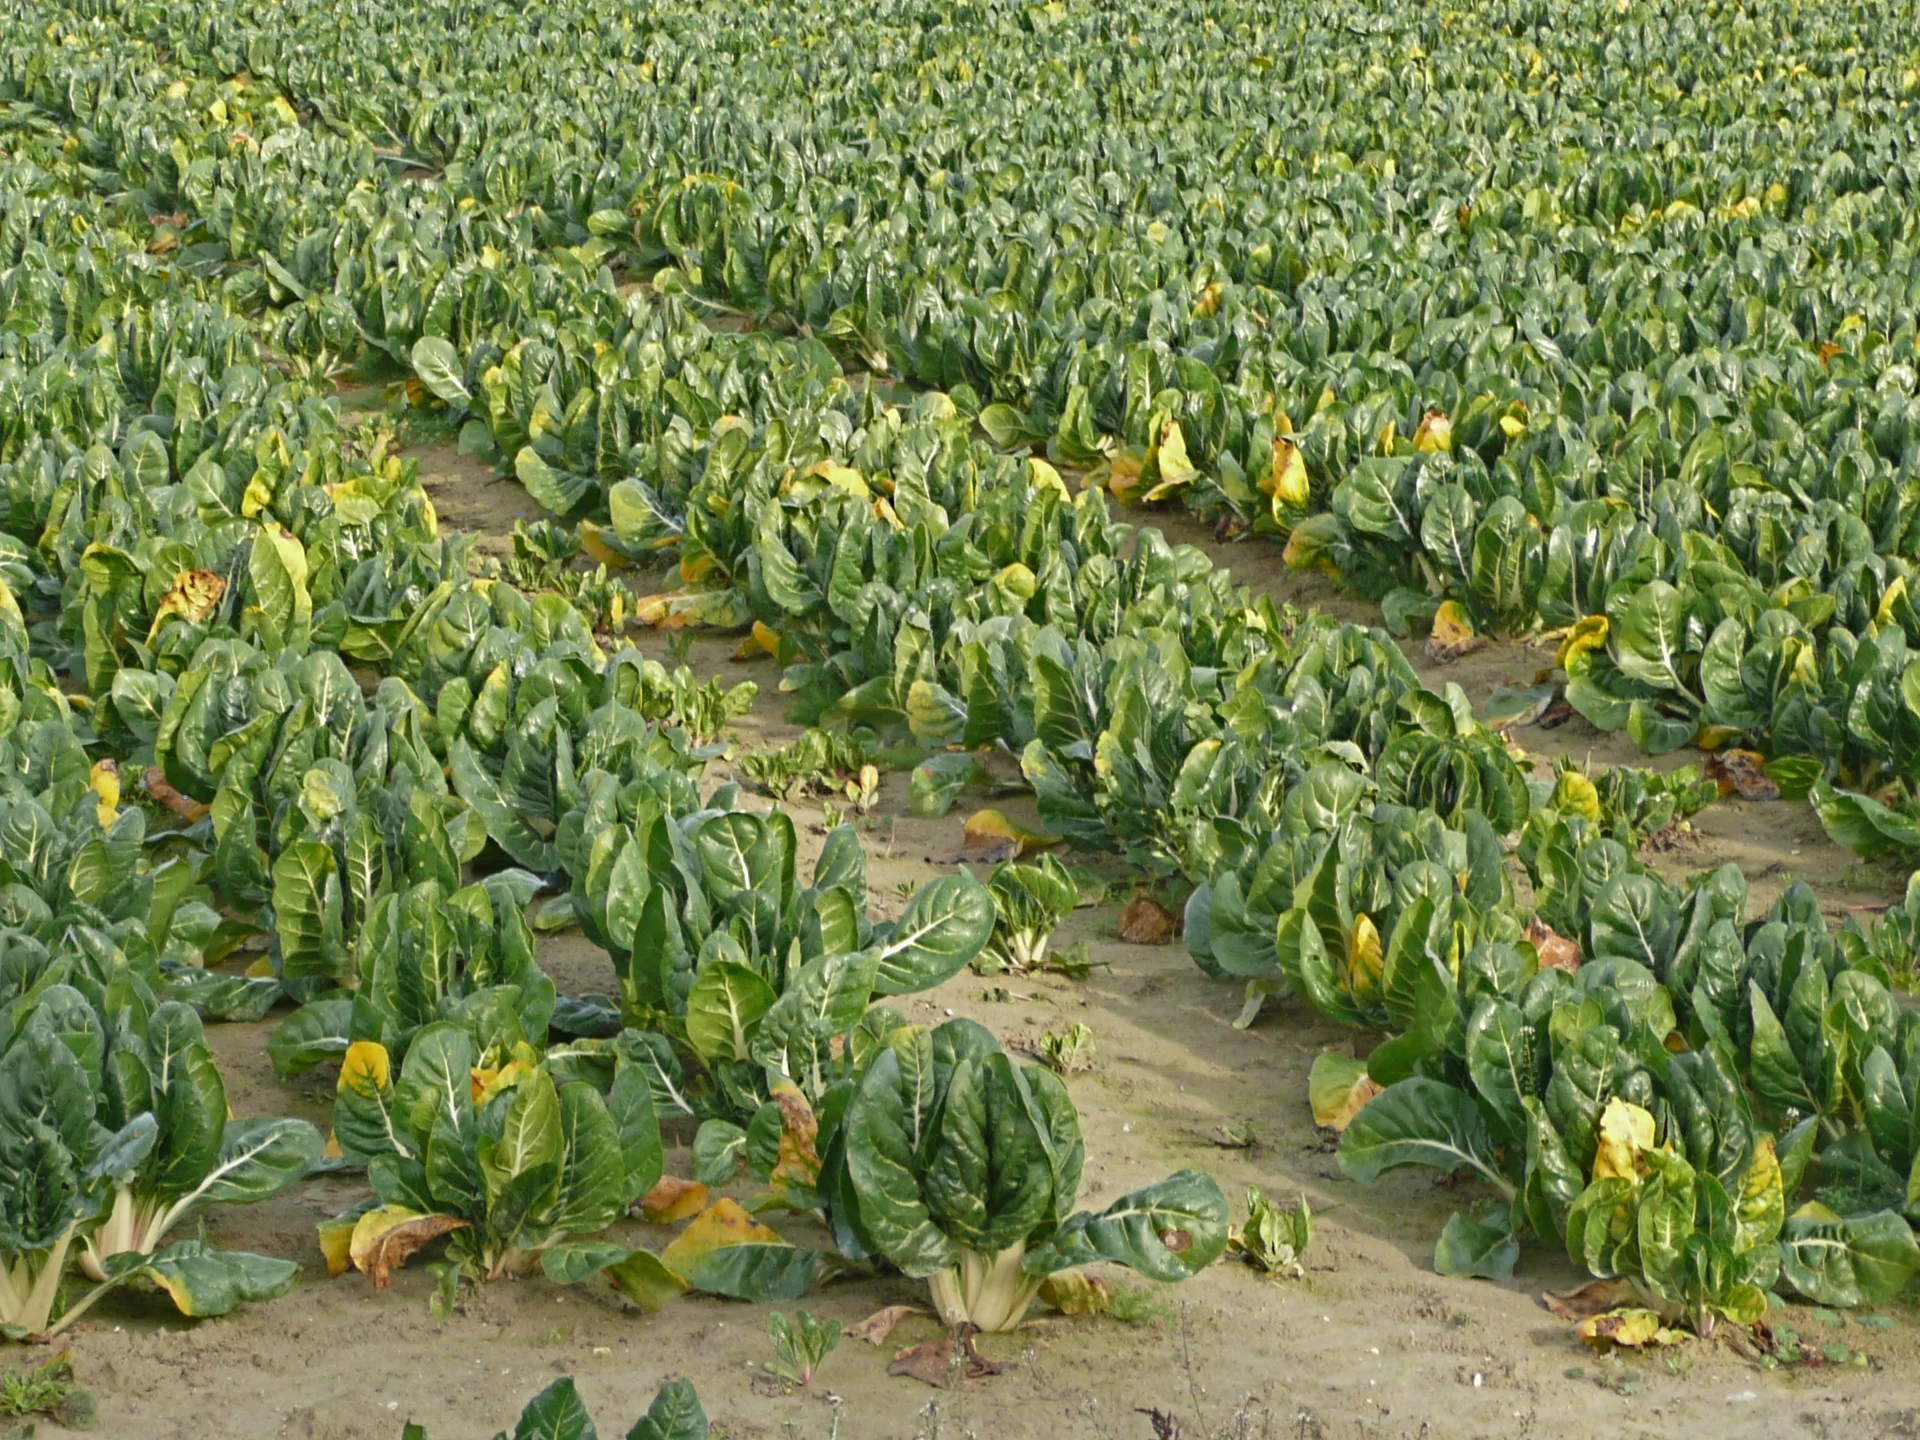
Peter Forster · CC BY-SA 2.0
- Days to maturity
- 120–180 days
- Row spacing
- 50 cm
- Plant spacing in the row
- 27 cm
- Sowing depth
- 1.5–2.5 cm
These are general figures for the crop, compiled from published agronomic references including FAO and CABI. The right choice for your field depends on your soil, rainfall and the yield you are aiming for.
Will Swiss chard actually do well on your field? Check your own field against every crop in the catalogue — no signup. Run the crop check →
Also known as
Swiss chard is also called silverbeet, spinach and spinach beet.
- English
- silverbeet, spinach, spinach beet
- Afrikaans
- snybeet, spinasie
- French
- bette, blette
- Sesotho
- moroho
- Setswana
- morogo
- Shona
- muriwo
- Swahili
- mchicha
Working in buckets, bags or paces? The farming glossary turns the measures growers actually use into kilograms and hectares — what a 20 litre bucket of each crop really weighs, and how to size a field by walking it — alongside the Shona, Swahili, Ndebele and Yoruba words used in the field. Open the glossary →
Growing Swiss chard, stage by stage
From one sowing to months of cutting: build a rich, deep, well-drained bed, thin each seed-clump to one strong plant, feed and water for lush leaf, then pick the outer leaves again and again — a single sowing can feed you for four to six months.
Get your bed and seed ready
Chard is a hungry, thirsty leaf crop that lives in the same bed for months of cutting, so the richness, depth and drainage you build in now feed every leaf you will ever pick. In the two weeks before sowing, get clean seed in hand and make a deep, fertile, free-draining bed. One catch to remember: chard shrugs off salty soil once it is up and growing, but the seed struggles to sprout in salty ground — so keep the top of the seedbed low in salt for germination.
Source clean seed Recommended
The seed you buy decides how much fiddly thinning you face and how evenly the bed fills. Fresh, clean seed sprouts strong and even; old seed comes up thin, slow and patchy, leaving gaps you cannot fill later. Buying in good time means you can sow the moment your bed and the weather are ready.
Buy fresh chard seed from a known, registered dealer, and check the packing date on the packet — buy this season's seed, because last year's leftover chard seed sprouts poorly and unevenly.
Know what you are buying: ordinary chard seed is a knobbly ball holding several seeds, so each ball sprouts a clump of 2-4 seedlings you must thin later. If you can get a monogerm (single-seed) type, one seed makes one plant and you skip the thinning altogether.
Buy a little extra — enough to run a quick sprouting test (lay a few seeds on a damp cloth for a week and count how many wake up) and to fill any gaps.
Keep the seed cool, dry and out of the sun until sowing day, so it stays alive and ready.
- Do:
Keep the top of the seedbed low in salt — chard shrugs off salty soil once it is growing, but the seed itself struggles to sprout in salty ground. Water salty soil through with clean water first.
- Watch out:
Check the packing date and buy this season's seed — old chard seed comes up patchy and weak, and no bed prep can rescue a weak start.
Prepare fertile, well-drained bed + manure Recommended
Chard is a heavy feeder that will live in this same bed for months of repeated cutting, so the richness and drainage you build in now feed every leaf you ever pick. Well-rotted manure gives slow, steady food all season and helps the soil hold water — but it must be well rotted, or it burns the young roots and carries in weed seeds.
Pick a sunny, well-drained spot — chard's roots rot in soil that stays wet, so keep off low patches where water pools after rain.
Dig the bed over one spade deep (about 20 cm) and break up the clods, so roots go down easily and rain soaks in instead of running off.
Spread well-rotted manure or compost — dark, crumbly, no strong smell — and fork it into the topsoil. A full wheelbarrow (about 50 kg) feeds a ten-stride by ten-stride patch (about 100 m², a square ten paces each way); spread more on poor, sandy soil.
Work in a balanced handful of compound fertiliser as well — it covers the potassium chard leans on for strong, juicy stalks (your recommendation gives the exact amount for your bed).
Rake the top into a fine, crumbly bed. If your soil or water is salty, water it through with clean water first so the surface is low in salt and the seed can sprout.
- Tip:
Fresh or raw manure — it scorches young roots, robs nitrogen as it rots, and brings in weed seeds. Use only well-rotted, crumbly manure or compost.
- Do:
Build the bed where water drains away freely — chard hates wet feet, and standing water rots the roots and breeds seedling disease.
- Watch out:
Wash your hands after handling manure, and keep manure and its runoff well away from where you draw drinking water.
Sow, sprout and thin to single plants
The make-or-break early job here is thinning the clumps. Each seedball comes up as a little bunch of seedlings crowded on one spot; leave the bunch and every plant chokes the others and all stay small. So sow shallow into moist soil, keep it damp for the week it takes to sprout, then thin each clump down to one strong plant a hand-span apart. All the while, watch the tiny seedlings for pests and seedling rot — the first two weeks decide whether you even get a stand.
Sow seedballs ~20 mm Critical
Sowing sets your spacing and your stand for the whole four-to-six-month run — get it right once and you cannot easily change it later. Sow too deep or into dry soil and the clumps come up thin and patchy; get the depth, moisture and spacing right and you get an even bed that is easy to thin and quick to fill with leaf.
Sow on moist soil and keep it damp every day — chard is slow to wake up, taking about 5-7 days to show in warm soil, and longer when it is cold.
Draw shallow drills (little furrows) about half a stride apart (≈50 cm; anywhere from 45 to 60 cm is fine).
Drop the seedballs along each row about a hand-span apart (≈25-30 cm) and cover them about 2 cm deep — no deeper than the top joint of your thumb. Too deep and they struggle to push up; too shallow and they dry out.
Firm the soil gently over every ball with your hand, so it sits snug against moist earth and sprouts strongly.
Remember each ordinary seedball is a cluster — expect 2-4 seedlings to come up together at every spot, which you will thin next week. (A monogerm type comes up one plant per seed — no thinning.)
- Do:
Count the seedlings at each spot once they show — a bunch of 2-4 confirms you have ordinary seedballs that need thinning.
- Watch out:
Keep the bed damp every day until the seedlings show — a seedbed that dries out mid-sprout leaves big gaps you cannot fill.
- Tip:
Sowing into hot, dry soil without watering first — chard sprouts poorly in heat and drought, and you lose the stand before it even starts.
Thin clumps to single plants Critical
This is the single most important early job for chard. Each seedball sprouts a bunch of seedlings crammed onto one spot; leave them and they starve each other and all stay small and weak. Thinning down to one strong plant per spot is what turns a choked clump into the big, productive plant that will feed you for months.
Thin about 1-2 weeks after sowing (day 7-14), once each seedling has its two true leaves — the second pair, the ones that look like real chard leaves rather than the first round seed-leaves.
At each spot, pick the single strongest, sturdiest seedling to keep, and remove all the rest.
Snip or pinch the extras off at ground level — do not pull them, or you tear the roots of the one you are keeping.
Aim for one plant every hand-span along the row (≈25-30 cm), with half a stride between rows (≈50 cm) — the very spacing you sowed at.
Don't waste the thinnings — the little leaves are good to eat, so rinse and cook them like any tender green.
If it fails — you left thinning late and the plants are already crowded and leggy — thin anyway, at once. A slightly set-back single plant still beats a choked clump every time.
- Do:
Thin when the soil is damp — the extras come away cleanly and the keeper's roots stay undisturbed.
- Tip:
Leaving two or three 'to be safe' — they all stay stunted; one strong plant yields far more than a crowded bunch.
- Watch out:
Pinch or snip, never pull — pulling lifts and tears the roots of the plant you meant to keep.
Scout (flea beetles, cutworms, damping-off) Recommended
The first two weeks decide whether you even get a stand. Tiny pests and a seedling rot can clear whole patches of young chard in a few days, and you can only replace plants while they are still small. A quick, close look every few days catches trouble before it spreads across the bed.
From a few days after sowing, walk the bed every 3-4 days and look closely at the young seedlings, right across the bed — not just the row by the path.
Flea beetles: look for lots of tiny round pin-holes ('shot-holes') peppering the young leaves, and tiny dark beetles that hop away the moment you touch the plants. A bad attack can shred small seedlings to lace.
Cutworms: look for seedlings cut clean off at ground level overnight. Scratch the soil around a cut plant to find the culprit — a fat, greyish, curled-up caterpillar hiding just under the surface.
Damping-off: look for seedlings that suddenly topple over, pinched thin, dark and wet right at the soil line, often collapsing in a spreading patch. It is driven by wet, airless soil.
If it fails — you find damping-off spreading — ease right off the watering and let the surface dry between waterings; keep the worst patch driest, and don't re-sow into the same soggy spot until it has dried out.
- Watch out:
Damping-off spreads fastest in soil that stays soggy — water in the morning so the surface dries by nightfall.
- Do:
Catch flea beetles early, while the seedlings are tiny and a few holes can still cost you the whole plant.
Feed and water for big, leafy plants
Now the plant piles on leaf — which is exactly what you eat and sell — so this is where feeding and watering pay off most, and it is one of chard's two thirstiest stages. Nitrogen drives the flush of green, but go easy: too much builds up nitrate in the leaves you eat and grows soft, sappy growth that pests love. Keep the bed evenly moist (never waterlogged), keep the weeds down, and watch closely — this is the stage Cercospora leaf spot, leaf miners and aphids arrive, along with boron hunger and the first signs of bolting.
Side-dress N Recommended
Leaf is nitrogen made visible — this feed is what turns a small plant into big, dark, tender leaves. Feeding a little every couple of weeks keeps a steady flush coming, instead of one big burst that the next rain washes straight past the roots. But because you eat these leaves, more nitrogen is not always better — feed steadily, not heavily.
Start feeding about 2 weeks after sowing, once the plants are up and growing away, and repeat every 2 weeks.
Lay the nitrogen as a thin band along the row, about a hand's width (≈10 cm) to the side of the plants — close enough for the roots to reach, but not touching the stems, or it scorches them. Your recommendation gives the amount.
Feed onto moist soil (after watering or light rain) and water it in, so it soaks down to the roots instead of gassing off into the air and going to waste.
Keep the fertiliser off the leaves — brush any grains off, because these are leaves you will eat, and grains stuck on wet leaves burn holes in them.
Wash your hands afterwards, and keep the bag off food, off water, and away from children.
- Tip:
Piling on nitrogen — too much builds up nitrate in the leaves (not good to eat in quantity) and grows soft, pest-prone growth. Feed little and often.
- Do:
Cover potassium at bed prep and keep an eye out for boron hunger — chard leans on both for strong stalks and a healthy central heart (watch for it in the scout task).
- Watch out:
Cercospora leaf spot flares in warm, muggy, damp weather (after rain or heavy dew) — act on the first spots you find (see the scout task).
Weed + mulch Recommended
Young chard is low and slow to cover the ground, so weeds steal its water, light and the fertiliser you paid for, right when it can least fight back. Keeping the bed clean early — and mulching between the plants — protects the leaf and saves you watering later.
Weed from about 2 weeks after sowing, and again every 2-3 weeks while the plants are still small and open to competition.
Hoe shallowly — chard's feeding roots run just under the surface, so deep hoeing near the plants slices them.
Pull the weeds closest to the stems by hand, so you don't nick the plant you are growing.
Lay a mulch (dry grass, straw or leaves) between the plants to hold moisture and smother new weeds — but keep it a hand's width clear of the stems, so they don't sit damp and rot.
- Do:
Weed while the weeds are still small — a clean bed in the first weeks is the cheapest leaf you will ever grow.
- Watch out:
Keep mulch just clear of the stems; piled against them it traps damp and rots the plant at the base.
Scout (Cercospora, leaf miner, aphids) Critical
This is the stage chard's main enemies arrive. Cercospora leaf spot can pepper and kill leaves in warm muggy weather, leaf miners tunnel inside them, and aphids colonise the tips and spread virus. Catching them on the first few leaves, once a week, is the difference between picking off a few bad leaves and losing the whole bed.
Once a week, walk the bed and turn over leaves on plants right across it — not just the edge by the path.
Cercospora leaf spot: look for round, pale-tan spots the size of a match-head, each ringed with a reddish-purple border, on the older leaves. In warm, muggy, damp weather they multiply until the leaves look peppered and dry up. Pick off and bin or burn the first spotted leaves — never drop them in the bed or the compost.
Leaf miner: look for pale, winding tunnels or papery blotches inside the leaf, between its top and bottom skin. Squash the little grub inside the tunnel, and pick off and destroy badly-mined leaves the moment you see them.
Aphids: look for clusters of tiny soft green or black insects packed on the undersides of leaves and in the young centre, sometimes with a sticky, shiny film (honeydew — the sweet mess they leave behind). Rub out the first colonies by hand — they breed fast and spread virus.
Downy mildew (in cool, damp spells): look for pale yellow patches on top of a leaf with a greyish-purple furry mould underneath. Pick off the affected leaves and open up the airflow between plants.
Boron hunger: look for black, corky patches in the stalks, cracked stalks, or a blackened, dying central heart — chard is prone to it. A very light boron feed fixes it: a tiny pinch of borax dissolved in plenty of water. Go sparingly — too much boron is a poison to the plant.
Early bolting: look for the centre pushing up a thick stalk while the newest leaves turn small and narrow, almost arrow-shaped — note it, and see the bolting task in the harvest stage.
If anything is spreading, act at once — pick off and destroy the worst leaves, and open the matching pest or disease guide.
- Watch out:
Warm, muggy, damp weather (after rain or heavy dew) is when Cercospora explodes — scout harder in those spells.
- Do:
Bin or burn spotted and mined leaves — never leave them in the bed or drop them on the compost, or the trouble carries straight on to the new leaves.
Irrigate Recommended
This is one of chard's two thirstiest stages. Leaf is mostly water, and a plant that dries out even briefly makes small, tough, bitter leaves and is quicker to run to seed. Steady, even moisture is what keeps the leaves big, tender and mild.
Keep the bed evenly moist — water about every 5-7 days, and more often in heat or on sandy soil that dries out fast.
Check with a finger: water when the top few centimetres are dry.
Water at the base of the plants, in the cool of the morning or evening, so the leaves dry off quickly and less water is lost to the sun.
Never let the bed dry right out, and never let it sit waterlogged — chard's roots rot in standing water, so drain any low, boggy spots.
- Tip:
Letting the crop wilt and recover, over and over — the swings toughen the leaves and push the plant to bolt.
- Watch out:
Standing water rots the roots and invites disease — aim for a bed that is moist, never swampy.
Pick the outer leaves, and keep picking
This is the payoff — and the clever trick that makes chard so generous. You pick only the outer, oldest leaves and leave the central growing point untouched, so the plant keeps pushing out fresh new leaves from the middle. Cut little and often, feed and water between cuts, and snap off any flower stalk the moment it shows, and one sowing will feed you for four to six months. Keep watching for Cercospora spots and aphids every time you pick — harvesting is also your clean-up.
Harvest outer leaves Recommended
How you cut decides how long the plant keeps giving. Take the outer leaves and spare the centre and it produces for months; strip it bare or cut out the middle and it stops for good. Cutting little and often, from the outside in, is what turns one sowing into a long, rolling harvest.
Start the first cut about 6-8 weeks after sowing (day 45-60), once the outer leaves are a good hand-span long (≈25 cm), then pick every 1-2 weeks after that.
Take only the outer, oldest leaves — the big ones on the outside. Leave the small young leaves and the central growing point (the spot in the very middle where new leaves push out) completely alone.
Cut or snap each leaf off low, about a finger-joint above the crown (≈4 cm) — the crown is the base where all the stalks meet — so you never wound the centre.
Never take more than one leaf in three at a single cut. Leaving two-thirds of the leaves keeps the plant strong enough to grow the next flush.
As you pick, remove and bin any spotted (Cercospora) or aphid-covered outer leaves — harvesting is also your clean-up.
Snap off any flower stalk rising from the centre the moment you see it (see the bolting task) — it turns the leaves bitter and stops new growth.
Pick in the cool of the morning when the leaves are crisp and full of water, and get them into shade straight away.
- Do:
Remove any flower stalk the moment it shows — it keeps the leaf coming and the flavour mild.
- Tip:
Cutting the central growing point or stripping the plant bare — that ends the harvest for good.
- Watch out:
Take no more than a third at a time; over-picking starves the plant and the next flush comes back thin and pale.
Feed + water between cuts Recommended
Every cut takes food out of the plant, and it has to rebuild the flush from the centre. A light feed and a good drink after each cut is what keeps the new leaves coming tender and green instead of small and pale. Steady feeding is the engine of a long cut-and-come-again harvest — picking the same plant again and again for months.
After a cut (every 2-3 weeks), give a light nitrogen feed and a good watering to power the next flush of leaf.
Scatter or band the feed around the plants, water it in, and keep it off the leaves you will eat. Your recommendation gives the amount.
Wait a few days after feeding before you cut again — this is the pre-harvest interval, the safe gap between treating a crop and eating from it — so the leaves aren't loaded with fresh nitrate.
Keep the water steady between feeds; hungry, thirsty plants bolt sooner and turn bitter.
Wash your hands after feeding, and keep the fertiliser off food, off water, and away from children.
- Tip:
Cutting leaves to eat right after a heavy feed — give it a few days first, so the leaves aren't loaded with fresh nitrate.
- Do:
Feed little and often rather than one big dose — steady feeding keeps the flush tender and the harvest long.
- Watch out:
Keep fertiliser grains off the leaves — brush any off, since these are leaves you eat.
Remove bolting stalks Recommended
Bolting — the plant shooting up a flower stalk to run to seed — is the thing that ends a chard harvest. Once it flowers, it pours all its strength into seed, the leaves turn bitter and tough, and new leaf stops coming. Snapping the stalk out the moment it shows buys you weeks more leaf.
From about 2 months after sowing, and every time you pick, check the centre of each plant for a flower stalk starting.
Look for the middle pushing up a thick, fast-growing stalk, with the newest leaves turning small and narrow, almost arrow-shaped — that is bolting beginning.
Snap or cut the stalk right out at its base as soon as you spot it, before it opens into flower.
Keep the plant well fed and evenly watered — cold snaps, drought stress and plain old age all push chard to bolt, so steady care holds it off longest.
If it fails — a plant bolts hard and its leaves have gone bitter and tough despite removing the stalk — it is done. Pull it, eat or sell what is still usable, and let its neighbours carry the harvest on.
- Watch out:
Bolting speeds up in long, hot days and after a cold spell — check the plant centres more often in those spells.
- Do:
Remove stalks the moment they show; even a day's delay costs you leaf quality.
Cool it and sell it fresh
Chard leaf wilts fast — its whole value is in how fresh and crisp it reaches the pot or the market. Everything here is about speed and cool: cut in the cool of the morning, get it out of the sun at once, keep it damp and cool, and move it quickly. (Saving your own seed is a second-year job: chard is a biennial, so hold a few plants through a cool spell and they will bolt and set seed the next season.)
Cool & market fast Recommended
A crisp bunch sells; a wilted one doesn't. Chard leaf loses water and freshness within hours of cutting in the heat, so how fast you cool and move it decides what it is worth. This step protects the value of everything you grew.
Cut in the cool of the early morning, when the leaves are full of water and crisp — never in the midday heat.
Get the cut leaves into shade straight away — never leave them lying in the sun, even for a few minutes.
Cool them down — dip or sprinkle them with clean, cool water and keep them in a shaded, airy spot or a cool room.
Keep them damp and bunched, and move them to market or the pot as fast as you can — chard does not keep like a bag of grain does.
Trim off any yellow, spotted or bruised leaves before you bunch, so the whole bundle looks fresh and lasts longer on the stall.
- Do:
Cool the leaf within an hour or two of cutting — it wilts fast in the heat.
- Watch out:
Use clean water to cool and freshen the leaves — dirty water spreads rot and disease through the whole bunch.
- Tip:
Piling cut leaves in a heap in the sun — they heat up and wilt within minutes.
Pests and diseases that attack Swiss chard


Where to sell Swiss chard
Markets that trade this crop — what each one sells it by, when supply peaks there, and the currency used.

Grow Swiss chard with a plan, not a guess
This guide is the general answer. Divisi works out yours — the week to plant Swiss chard on your soil and your rainfall, and each job dated for your field.


When to plant Swiss chard, country by country
- When to plant Swiss chard in Algeria
- When to plant Swiss chard in Angola
- When to plant Swiss chard in Benin
- When to plant Swiss chard in Botswana
- When to plant Swiss chard in Burundi
- When to plant Swiss chard in Cabo Verde
- When to plant Swiss chard in Cameroon
- When to plant Swiss chard in Comores
- When to plant Swiss chard in Congo
- When to plant Swiss chard in Côte d'Ivoire
- When to plant Swiss chard in Egypt
- When to plant Swiss chard in Eritrea
- When to plant Swiss chard in Eswatini
- When to plant Swiss chard in Ethiopia
- When to plant Swiss chard in Gabon
- When to plant Swiss chard in Ghana
- When to plant Swiss chard in Guinea Ecuatorial
- When to plant Swiss chard in Guinea-Bissau
- When to plant Swiss chard in Guinée
- When to plant Swiss chard in Kenya
- When to plant Swiss chard in Lesotho
- When to plant Swiss chard in Liberia
- When to plant Swiss chard in Libya
- When to plant Swiss chard in Madagascar
- When to plant Swiss chard in Malawi
- When to plant Swiss chard in Mali
- When to plant Swiss chard in Mauritanie
- When to plant Swiss chard in Mauritius
- When to plant Swiss chard in Morocco
- When to plant Swiss chard in Moçambique
- When to plant Swiss chard in Namibia
- When to plant Swiss chard in Niger
- When to plant Swiss chard in Nigeria
- When to plant Swiss chard in Rwanda
- When to plant Swiss chard in République centrafricaine
- When to plant Swiss chard in République démocratique du Congo
- When to plant Swiss chard in Sao Tome and Principe
- When to plant Swiss chard in Seychelles
- When to plant Swiss chard in Sierra Leone
- When to plant Swiss chard in Somalia
- When to plant Swiss chard in South Africa
- When to plant Swiss chard in South Sudan
- When to plant Swiss chard in Sudan
- When to plant Swiss chard in Sénégal
- When to plant Swiss chard in Tchad
- When to plant Swiss chard in Togo
- When to plant Swiss chard in Tunisie
- When to plant Swiss chard in Uganda
- When to plant Swiss chard in United Republic of Tanzania
- When to plant Swiss chard in Zambia
- When to plant Swiss chard in Zimbabwe
Where Swiss chard scores best
Districts where Divisi's engine currently rates this crop highest, ranked by fit.
-
 Mbarara
 -
 Quibala
 -
 Kuresoi South
 -
 Rubavu
 -
 Kabongo
 -
 Bunda
Bunda -
 Matana
 -
 Suba South
 -
 Rwampara
 -
 Londuimbale
 -
 Ilebo
Ilebo -
 Nyabihu
Get Insights by email
A short digest of new Divisi articles. No email on quiet weeks.
Frequently asked questions
How do I grow Swiss chard?
How to grow Swiss chard: 120–180 days to maturity, 50 cm rows, 1.5–2.5 cm deep. Also called silverbeet, snybeet, bette, moroho, morogo, muriwo, mchicha.
What is snybeet in English?
Snybeet (also spinasie) is the Afrikaans name for Swiss chard.
What is bette in English?
Bette (also blette) is the French name for Swiss chard.
What is moroho in English?
Moroho is the Sesotho name for Swiss chard.
What is morogo in English?
Morogo is the Setswana name for Swiss chard.
What is muriwo in English?
Muriwo is the Shona name for Swiss chard.
What is mchicha in English?
Mchicha is the Swahili name for Swiss chard.
How long does Swiss chard take to grow?
Swiss chard takes about 120–180 days from sowing to maturity, though the exact length varies with variety, temperature and how the season runs.
What spacing should I use for Swiss chard?
Space Swiss chard rows about 50 cm apart, with roughly 27 cm between plants within the row.
How deep should Swiss chard be planted?
Sow Swiss chard at about 1.5–2.5 cm deep. Shallower risks drying out; deeper wastes seed energy before the shoot reaches light.
What pests and diseases attack Swiss chard?
The ones covered in this guide are Beet leaf miner, Cercospora leaf spot. Each has its own page explaining how to identify, check for and control it.