 Divisi
How to grow finger millet
Eleusine coracana · Poaceae
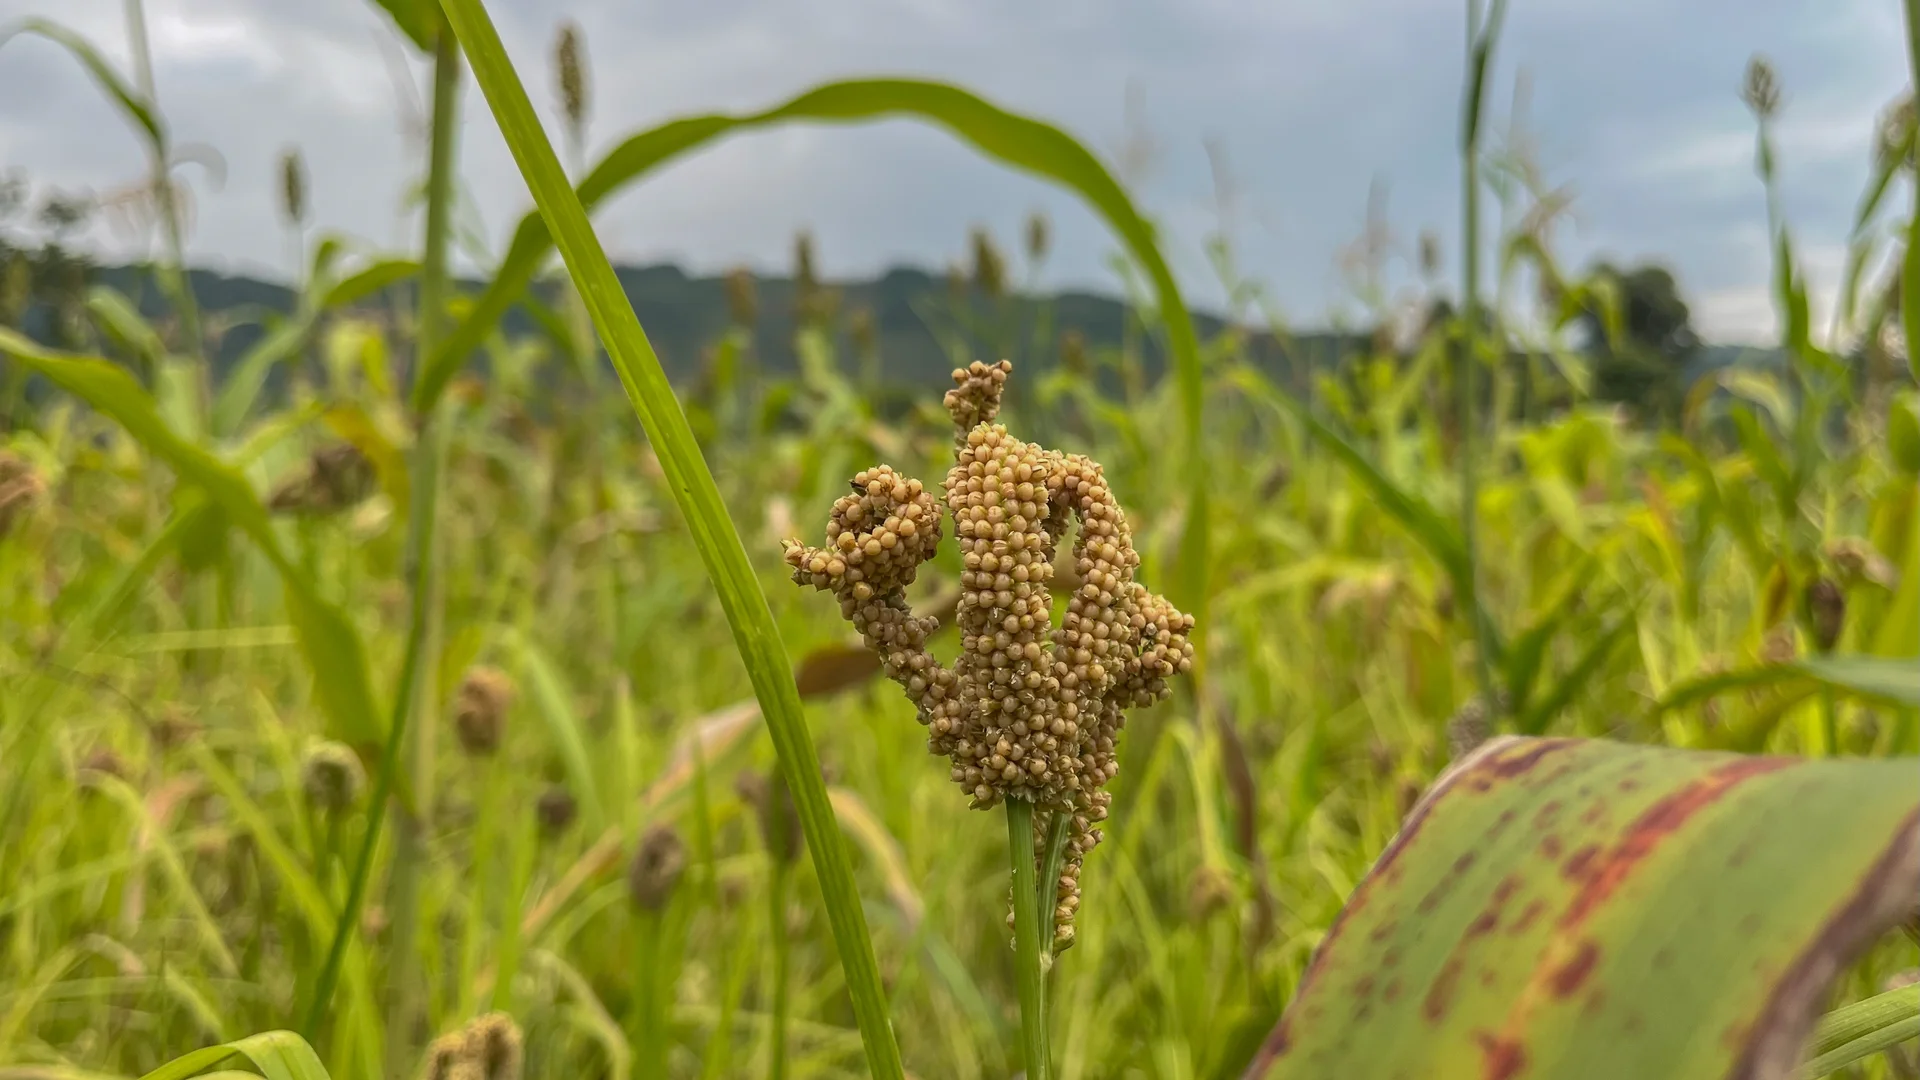
Photo: Otukei Moses · CC BY-SA 4.0
Finger millet (rapoko, rukweza, zviyo, wimbi, uphoko, mawere, dagussa, uburo) is a hardy highland grain that grows where maize and sorghum give up — high up cool slopes and right through dry spells that would wilt other crops. Each plant sends up many shoots (tillers), and every shoot carries a hand-shaped bunch of finger-like spikes — the 'fingers' that give the crop its name — filled with tiny reddish-brown grains. It pollinates itself, so it will not cross with a neighbour's crop and you can keep your own clean seed year after year. The grain makes thick porridge, malt and brew, and a first food for babies — and, stored dry on the head, it keeps for years without spoiling, the classic hungry-season reserve. Your two hardest jobs all season are telling the slow young crop apart from its weed look-alike, and guarding the heads from blast disease and from birds.
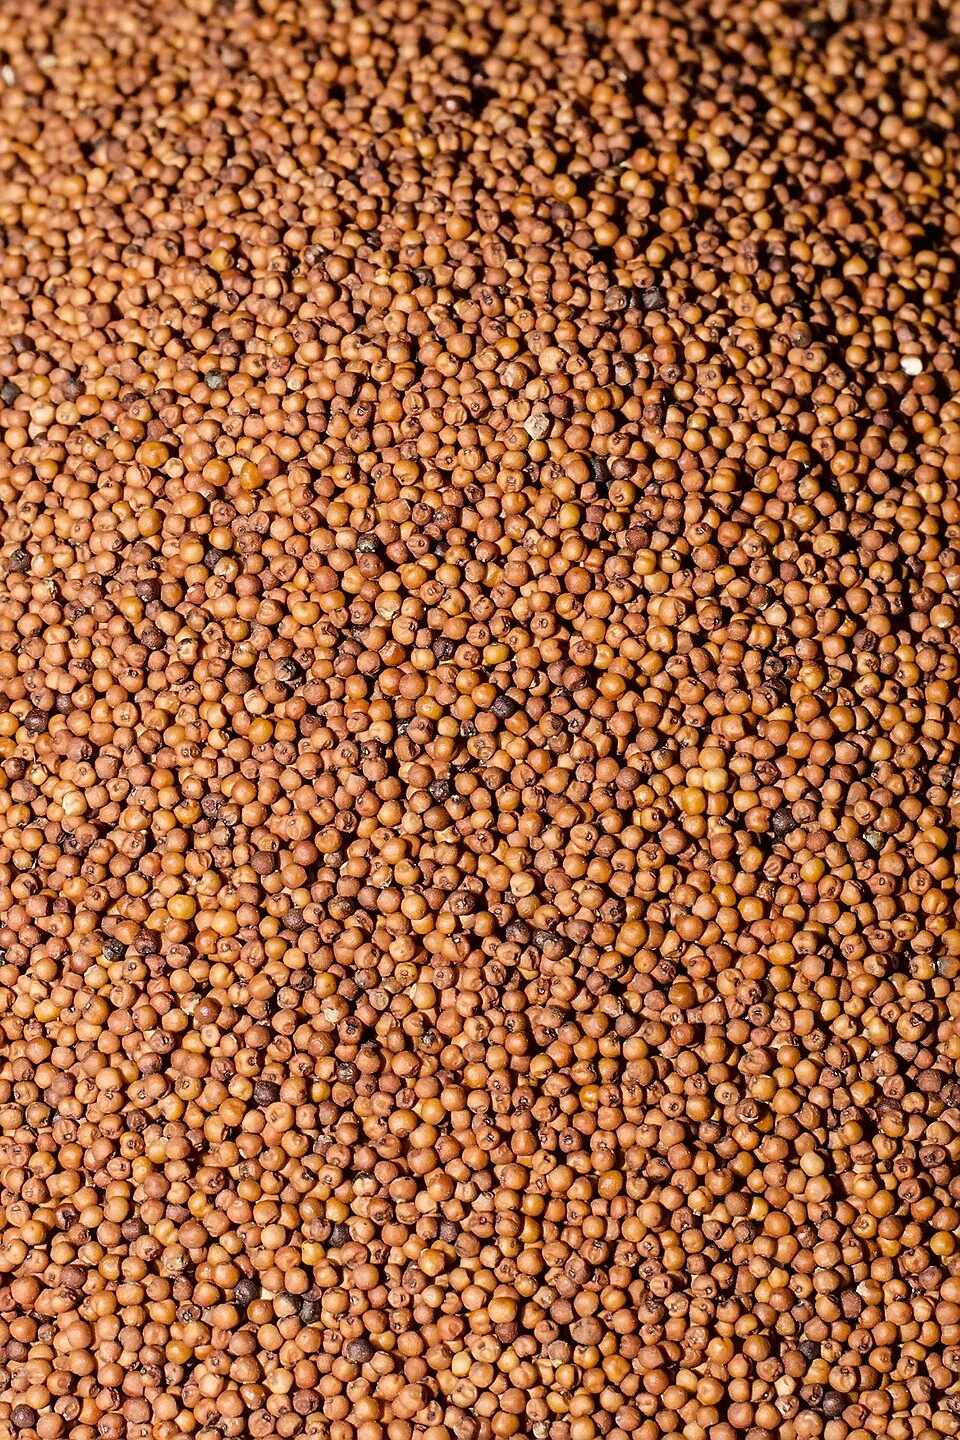
Prathyush Thomas · GFDL 1.2 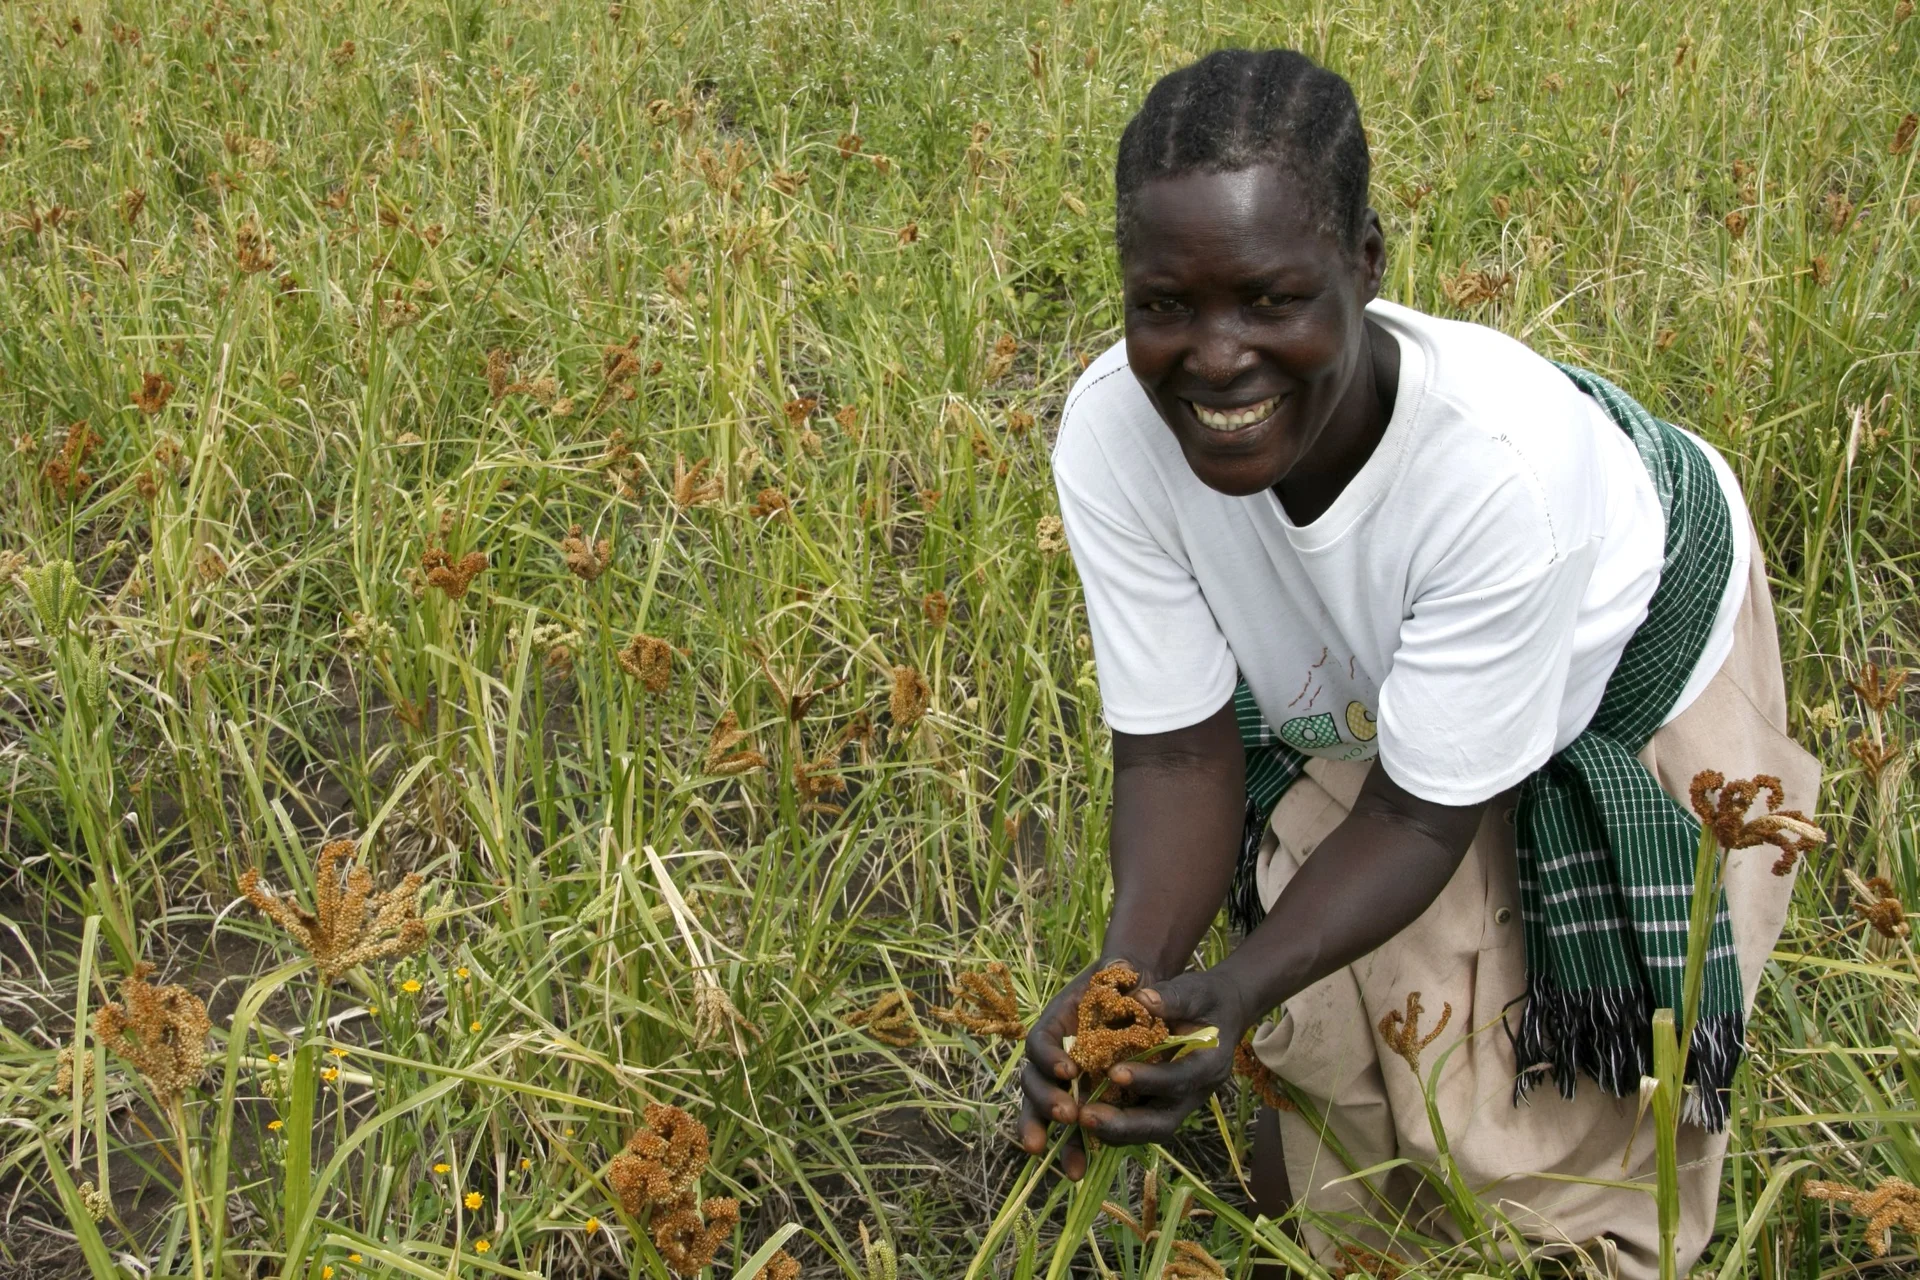
DFID - UK Department for International Development · CC BY 2.0
- Days to maturity
- 90–130 days
- Row spacing
- 25 cm
- Plant spacing in the row
- 10 cm
- Sowing depth
- 1–3 cm
These are general figures for the crop, compiled from published agronomic references including FAO and CABI. The right choice for your field depends on your soil, rainfall and the yield you are aiming for.
Will finger millet actually do well on your field? Check your own field against every crop in the catalogue — no signup. Run the crop check →
Also known as
Finger millet is also called African millet and koracan.
- English
- African millet, koracan
- Amharic
- dagussa, dagusa
- Chichewa
- mawere, lipoko
- Hausa
- tamba
- Kinyarwanda
- uburo
- Luganda
- bulo
- Ndebele
- uphoko
- Shona
- rapoko, rukweza, zviyo
- Swahili
- wimbi, ulezi
Working in buckets, bags or paces? The farming glossary turns the measures growers actually use into kilograms and hectares — what a 20 litre bucket of each crop really weighs, and how to size a field by walking it — alongside the Shona, Swahili, Ndebele and Yoruba words used in the field. Open the glossary →
Growing finger millet, stage by stage
Your whole finger-millet season on one page: a fine, firm seedbed and clean, treated seed; line-sowing (never scattering) so you can tell the crop from its weed twin; an on-time first weeding — the single biggest job of all; a light feed of nitrogen; blast control the moment the heads come out; then day-long bird-scaring and drying the heads hard so the grain keeps for years.
Get your field and seed ready
Almost everything that decides your finger-millet harvest is settled before the first seed touches the ground. The seed is dust-fine — about 400 seeds in a single gram — so it must have a fine, firm, level bed to come up evenly. Start with clean, treated seed, because blast — the disease that later bleaches the heads white — hides on and inside the seed itself. Do this work in the weeks before the rains, and if you mean to transplant, sow a small nursery about a month ahead.
Buy treated seed & basal fertiliser Critical
Blast — the disease that later rots the neck of the head and turns the whole head white and empty — is seed-borne, meaning it travels on and inside the seed. Dirty saved seed can plant the very disease that ruins your harvest. Clean, treated seed gives a healthy start, and a pinch of starter phosphorus (P — the nutrient that builds roots) helps the tiny seedlings grip the soil fast. Finger millet is a light feeder, so buy only a little fertiliser — and buy it all early, in the three weeks before you sow, before the rains close the roads.
Ask the dealer for treated (dressed) seed — seed coated with a fungicide (a medicine that kills disease-causing fungus) — or clean certified seed of a named variety, because blast rides on the seed itself.
If you must use your own seed, take it only from a healthy crop that had no whiteheads last season, and treat it with a seed dressing before you sow.
Match the variety to your place: finger millet grows higher and drier than maize, so pick a short-season type where the rains are short, and check your recommendation.
Buy only a small amount of basal (starter) fertiliser — this crop feeds lightly and mainly wants a little phosphorus (P) to build roots. Your recommendation gives the amount. Do not buy heavy nitrogen for basal.
Store seed and fertiliser dry, up off the floor, away from food, water and children, and keep the label and receipt in case the seed turns out poor.
- Do:
Rotate with a legume (beans, groundnut, cowpea) the season before — it leaves free nitrogen in the soil and starves out the parasite weed Striga.
- Tip:
Buying heavy nitrogen as basal — this is a light feeder, and too much nitrogen makes the crop flop over (lodge) and invites blast.
- Watch out:
Treated seed is coated with poison: never eat it or feed it to animals, keep it away from children and food, and wash your hands after handling it.
Prepare a fine, firm seedbed Critical
The seed is dust-fine (about 400 seeds in one gram). On a lumpy, cloddy bed it falls into air pockets and never comes up; on a loose, fluffy bed it sinks too deep or dries out. A fine, firm, level bed — like a well-swept floor — is the single thing that gives you an even stand from this tiny seed. Do it in the weeks before you sow.
Plough or dig early, in the weeks before sowing, then break every clod down small — rub a handful and it should crumble into fine crumbs, not lumps.
Clear out stones, roots and old weeds so the tiny seed meets bare, fine soil with nothing in its way.
Firm the bed — press it down with a plank, a light roller, or your own feet — so it is firm underfoot, not fluffy; the tiny seed needs soil pressed close around it.
Level the surface so rain spreads evenly and does not wash the light seed into heaps. On a slope, work across the slope to hold the soil and water.
- Do:
Aim for a bed as fine and level as a swept floor — the finer the soil, the more even your stand.
- Tip:
A loose, fluffy bed — the light seed sinks too deep or washes into clumps, leaving gaps.
- Watch out:
If your soil sets into a hard crust after rain, a light mulch or a gentle break of the crust helps the weak seedlings push through.
(If transplanting) sow the nursery Optional
Transplanting is more work but gives a stronger, more even stand, and lets a small patch of seed plant a big field — handy if your rains start late or your ground is weedy. You raise seedlings for about 3–4 weeks on a small, well-drained bed, then move them out. Skip this task entirely if you are line-sowing straight into the field.
About 3–4 weeks before you plant out, pick a small, well-drained patch near water and make the soil very fine and firm, just like the main bed.
Water the bed, then sow the tiny seed thinly — first mix it with a few handfuls of dry sand or ash so it spreads instead of falling in clumps.
Cover with only a whisper of fine soil (about one finger-joint, ~1 cm) and firm gently; shade or lightly mulch until the seedlings show, then take the cover off.
Keep the bed moist but never soaked — soggy, crowded beds rot the seedlings off at the soil line (damping-off). They are ready to move at about 3–4 weeks, when they stand roughly a hand-span tall (~20 cm).
- Do:
Mix the fine seed with dry sand or ash before sowing — it spreads the dust-fine seed evenly and stops thick, weak patches.
- Tip:
A soggy, shaded, over-thick nursery — it breeds damping-off, where seedlings rot and topple over at the soil line.
- Watch out:
Water the bed well the evening before you lift the seedlings, so they come up with their roots whole.
Sow (or transplant) and get an even stand
Finger-millet seedlings are slow and weak, and look almost exactly like the weed goosegrass (Eleusine indica). Getting a clean, even stand — and telling crop from weed — is the single biggest job of the whole season. Line-sow, never broadcast, so your straight rows show you which is which, and weed on time (about 15–20 days after sowing). A late first weeding is the biggest avoidable loss of all — up to 70% of your harvest. Keep the young crop just moist; the seedling stage is the one drought-sensitive moment early on.
Line-sow / transplant Critical
The number of healthy plants you set now is the ceiling on your harvest — you cannot add plants later. And one choice makes the whole season easier: line-sowing instead of broadcasting (scattering seed loose by hand). Straight rows let you tell the crop from its weed twin and weed fast, while broadcasting triples your weeding and buries the crop among the weeds.
Sow as soon as the seedbed is moist from a good planting rain — the tiny seed must go into damp, warm soil to catch.
Line-sow, never broadcast. Open shallow furrows about a hand-span apart (≈25 cm) — scattering seed loose everywhere triples the weeding, because you can no longer tell the crop rows from the weeds.
Because the seed is dust-fine, mix it with dry sand or ash (a few handfuls) and trickle the mix thinly along each furrow so it spreads evenly.
Cover only 1–3 cm — one finger-joint at most; any deeper and the tiny seedling never reaches the light. Firm the soil over it for good contact.
If transplanting instead: lift your 3–4-week nursery seedlings (bed watered the night before) and set them a hand-span apart (≈25 cm) between rows and half a hand-span (≈10 cm) along the row, at the depth they grew, then firm and water them in.
- Tip:
Broadcasting — it triples the weeding cost and makes telling crop from weed impossible. Line-sow in rows.
- Do:
Sow shallow (1–3 cm) into a fine, firm, moist bed — deep sowing is the commonest cause of a thin, patchy stand.
- Watch out:
If a row later comes up far too thick, thin to about a finger-width between plants so each one has room to throw its shoots.
Scout (seedling blast, weeds vs crop) Critical
The first three weeks decide your stand. Right now your crop looks almost exactly like the weed goosegrass, early leaf blast (a fungus disease) can start on the little leaves, and gaps from damping-off (seedlings rotting off at the soil line) appear. Catching these early is the difference between a clean field and a lost one.
Walk the field every 2–3 days right through the first three weeks after sowing, looking down the rows.
Crop or weed? Finger millet sits in your straight sown rows and stands a little stiffer and darker; goosegrass, the look-alike weed, is limper, paler, and sprawls flat between the rows. Anything off the row line is almost always weed.
Seedling blast: look on the little leaves for small grey, spindle- or diamond-shaped spots with brown edges, and mark where you see them.
Gaps: note bare patches where seedlings have rotted and toppled at the soil line (damping-off) — usually the wettest, most crowded spots.
Write down what you find, and act at the next weeding — or sooner if blast is spreading. If blast keeps spreading in wet weather, keep nitrogen light and be ready to spray once the heads come out (see the blast-spray task).
- Do:
Learn one difference by heart: the crop is on the row and stands stiffer; goosegrass sprawls off the row and is limp and pale.
- Watch out:
Blast starting now on the leaves is the same disease that later whitens the heads — clean seed and moderate nitrogen hold it back.
1st weeding (critical) Critical
This is the most valuable job of the whole season — weeding on time is worth 30–70% of your yield. Finger millet is small and slow, and the weed goosegrass looks almost the same, so weeds smother the crop unless you clear them by about 15–20 days after sowing.
Weed by about 15–20 days after sowing (2–3 weeks), before the weeds grow taller than the crop — this one window is worth up to 70% of your harvest.
Tell crop from weed first: the crop is in your straight rows and stands stiffer and darker; goosegrass is limp, pale, and sprawls off the row. When unsure, leave whatever is sitting on the row line.
Weed shallowly with a hand hoe or by hand, between and within the rows — deep hoeing tears the crop's shallow roots.
Pull the weeds right out, roots and all; in dry areas leave them lying between the rows as a light mulch to hold moisture.
- Do:
Weed on time even if nothing else gets done — a late first weeding is the single biggest loss in finger millet (up to 70%).
- Tip:
Deep hoeing close to the plants — the roots are shallow and easily cut.
- Watch out:
If you truly cannot yet tell crop from weed, wait a day or two until the straight rows show clearly — but do not let weeding slip past about 20 days after sowing.
Irrigate Recommended
Finger millet shrugs off dry spells later, but as a seedling it is at its most fragile — a dry patch now thins the stand you can never rebuild. If you can water, keep the young crop just moist through the first three weeks after sowing.
Keep the topsoil just moist through the first ~3 weeks after sowing — the seedlings root shallow and dry out fast.
Water lightly every 4–7 days, more often on sandy soil or in heat; push a finger in and water when the top few centimetres are dry.
Water gently — a hard flow washes the tiny seedlings and light seed into heaps and leaves bare patches.
- Tip:
Flooding the young bed — a strong flow sweeps seed and seedlings into clumps and leaves gaps.
- Watch out:
Ease off once the crop is past three weeks; finger millet then handles dry spells well right up to flowering.
Tiller up and keep it clean
The plant now throws out many shoots (tillers) — and each tiller will carry its own head of grain — then closes over into a leafy canopy. The weed-free window runs to about 30–45 days after sowing, and the parasite weed Striga (witchweed) latches onto hungry crops from below the ground. Finish the second weeding, give a moderate feed of nitrogen (never heavy — too much drives blast and makes the crop fall over), and pull any Striga before it flowers and seeds.
Scout (leaf blast, Striga, stem borer) Critical
As the crop bulks up, three things bite: leaf blast (a fungus disease) spreads in wet weather, Striga (witchweed, a weed that plugs into the crop's roots) latches onto hungry plants, and stem borers (caterpillars) tunnel inside the shoots. Each is cheap to stop early and costly to ignore.
Walk the field every 3–4 days from about 3 to 6 weeks after sowing, checking the leaves, the base of the plants, and the central shoots.
Leaf blast: grey, spindle- or diamond-shaped spots with brown edges on the leaves — worse in wet, lush, over-fed crops.
Striga (witchweed): small purple- or pink-flowered weeds coming up near the crop base, with the crop around them stunted and yellow even where you have fed it — Striga is robbing it from below ground.
Stem borer: the central leaf whorl dries and dies while the outer leaves stay green (this is called a 'dead-heart') and pulls out easily — caterpillars are tunnelling inside the stem.
Note what you find, then hand-pull Striga now, keep nitrogen moderate against blast, and cut and destroy any borer-hit shoots. If Striga keeps coming back, plan a legume rotation next season to run down its seed in the soil.
- Tip:
Excess nitrogen — it drives blast and makes the crop fall over (lodge). Keep nitrogen moderate.
- Watch out:
Striga showing up means hungry, tired soil — plan a legume rotation next season to starve it out.
2nd weeding Critical
A second flush of weeds still robs the crop until it shades the ground for itself. Finishing this weeding by about 30–35 days after sowing, before the canopy closes over (around 45 days), locks in the clean field you won with the first weeding.
Weed again at about 30–35 days after sowing, before the crop closes over and shades the ground for itself.
Hoe shallowly between and within the rows; the crop's roots now spread near the surface.
Time it just before you top-dress nitrogen, so the feed goes to the crop and not to the weeds.
Pull out any Striga you meet as you weed (see the hand-pull-Striga task).
- Do:
Finish the second weeding before about 45 days after sowing — that is when the weed-free window closes.
- Tip:
Deep hoeing near the plants — you cut the shallow roots and knock off the tillers that will carry your heads.
N top-dress at tillering Recommended
A moderate feed of nitrogen (N — the nutrient that drives leafy growth) as the crop starts tillering pushes out more shoots — and more shoots means more heads of grain. But finger millet is a light feeder: too much nitrogen backfires, driving blast and making the crop flop over (lodge), so keep the feed modest.
Top-dress nitrogen at about 25–35 days after sowing, when the crop is starting to throw side-shoots (tillers) — ideally straight after the second weeding.
Use only the modest amount your recommendation gives — this is a low-feeding crop, and more is not better.
Band it to the side of the row, about a hand's width (≈10 cm) off the plants, never on top of them — fertiliser sitting on the crop scorches it.
Feed onto moist soil (after weeding or a light rain) and lightly cover it, so the rain does not wash it away and the sun does not gas it off.
- Tip:
Heavy nitrogen — extra N drives blast and lodging (the crop flopping over) and wastes your money; keep it moderate.
- Watch out:
Keep fertiliser off wet leaves, off food and water, and away from children, and wash your hands afterwards — it burns leaves and is not safe to handle carelessly.
- Do:
No bag fertiliser? Well-rotted manure worked in earlier does the same gentle job for this light feeder.
Hand-pull Striga Recommended
Striga (witchweed) is a parasite — it plugs into the crop's roots and drains it from below ground — and a single plant drops thousands of dust-fine seeds that haunt the field for years. Pulling it before it flowers stops this season's theft and next year's seed.
From about 3 weeks after sowing, check every 7–10 days for small purple- or pink-flowered weeds near the crop base.
Pull them out by hand before they flower and seed — once they flower they may already be dropping seed.
Carry them off the field and burn or bury them — never leave them lying and never put them in compost; the seeds survive.
Where Striga is bad, plan a legume rotation (cowpea, groundnut) next season — legumes make Striga seeds sprout with no crop to attack, so they die off (a 'trap crop').
- Do:
Pull Striga early and often — every plant stopped before flowering saves thousands of seeds next year.
- Watch out:
Striga thrives on poor, hungry soil — feeding the crop moderately and rotating legumes is the long game against it.
Protect the heads — the make-or-break window
The fingers emerge and flower (finger millet pollinates itself, so there is no cross-pollination to worry about). Neck and finger blast now is the yield-deciding threat — it rots the neck just below the head, so the whole head bleaches white (a 'whitehead') and the grain inside shrivels. Heavy rain at flowering also cuts the grain set, so keep the field draining. Spray at heading and again about 15 days later if the weather stays wet, and pull and burn any whitehead plants. Flowering is also finger millet's one truly thirsty stage.
Scout the heads (neck/finger blast) Critical
Now the fingers are out and flowering, neck and finger blast is the single highest-value threat of the season — it strikes the neck just below the head, bleaching the whole head white and shrivelling the grain inside. Catching it in the first days lets you spray and rogue (pull out the diseased plants) before it spreads.
From the moment the heads emerge, walk the field every 2–3 days — this is the tightest watch of the whole season.
Neck blast: look at the neck just below each head for a brown-black rot; above it the head turns pale and white (a 'whitehead') and stays empty.
Finger blast: look on the fingers themselves for dark, brown-black rotten patches among the developing grain.
Rogue (pull out) and carry off and burn any whitehead or neck-blast plant you find — do not leave it standing to seed the disease.
If blast is showing and the weather is wet, spray at heading (see the blast-spray task) and write down the date so you know when to repeat.
- Watch out:
Neck and finger blast now is the highest-value threat of all — it bleaches heads (whiteheads) and shrivels grain; act the same day you see it.
- Do:
Check especially after rain and in humid, muggy spells — blast explodes in wet weather.
Blast spray at heading Critical
A well-timed fungicide (a spray that stops fungal disease) at heading is worth 15–50% of your grain, because it shields the heads from neck and finger blast in exactly the wet window when the disease strikes. In dry weather you may not need it; in wet weather it saves the crop.
Spray at heading, when the fingers are out, if the weather is humid or rainy and you are seeing blast — this is the payback window.
Use an approved fungicide ('fungicide' = a medicine that stops fungal disease). Measure the dose with the cap supplied and mix it into a full knapsack (15–20 litres).
Spray to wet the leaves and heads evenly, without letting it drip off.
Repeat once, about 15 days later, if the weather stays wet; in a dry spell one spray — or none — may be enough.
Safety: wear a long-sleeved shirt and cover your nose and mouth, spray in the cool of the day with the wind behind you, keep people and animals away, keep it off food and water, wash yourself and the sprayer afterwards, and wait the number of days the label states before you harvest — this wait, the 'pre-harvest interval', lets the spray fade before the grain is eaten.
- Do:
Time the spray to heading and to wet weather — too early, or in a dry spell, wastes it; blast needs damp to strike.
- Tip:
Spraying into the wind, in the heat, or just before handling food — cover up, spray cool with the wind behind you, and wash after.
- Watch out:
Respect the pre-harvest interval on the label (the wait between your last spray and harvest) so no spray traces reach the porridge.
Irrigate through flowering Recommended
Flowering is finger millet's one truly thirsty moment — the crop is drought-hardy everywhere else, but dry soil now means poorly-filled heads. Keep it watered through flowering, then ease off so the grain can ripen dry.
Keep the soil moist right through flowering — water every 5–7 days, more often in heat.
Do not let the crop wilt while the fingers are flowering; this is the one stage where water pays back most.
As flowering finishes, taper the water off — finger millet needs a dry finish to ripen cleanly and store well.
Make sure the field drains — heavy standing water at flowering also cuts the grain set (this is waterlogging).
- Do:
If you can water at only one stage all season, water at flowering — it is the crop's single critical window.
- Tip:
Waterlogging — standing water at flowering rots roots and cuts grain set; drain the low spots.
- Watch out:
Ease the water off after flowering so the heads ripen and dry — this crop's famous keeping quality starts with a dry finish.
Fill the grain and keep the birds off
The fingers fill and turn brown. Birds are the main loss now — one bird eats about 10 g of grain a day, and finger millet is a favourite, so the field must be guarded every day, dawn to dusk, from the soft-dough stage. Keep pulling any whitehead (neck-blast) plants so they do not seed the disease into your saved grain. The crop needs a dry spell to ripen — hold back any late nitrogen and let it dry down.
Bird-scaring Critical
Grain-eating birds like quelea can strip a finger-millet field — one bird eats about 10 g a day, and a flock clears heads fast. From the soft-dough stage until harvest, the field must be guarded every day, dawn to dusk, or you lose grain you have already grown.
Start guarding at soft-dough — squeeze a grain and it is still soft and pasty inside (about 75 days after sowing) — and keep on right up to harvest.
Guard from dawn to dusk every day; birds feed hardest in the early morning and the late afternoon.
Use noise and movement: shout, bang tins, crack a whip, hang rattling strips and flags, and keep a scarecrow that you move about.
Work with your neighbours — if you all scare at once, the flocks cannot just shift from one field to the next; guard alone and they all land on you.
- Do:
The crop needs a dry spell to ripen cleanly — hold back any late nitrogen, which keeps it green and soft and invites both birds and blast.
- Watch out:
Birds hit edge rows and lone fields hardest — scare together with neighbours and watch the field margins.
- Do:
Move your scares often (shift the flags and scarecrows) — birds quickly learn to ignore a scare that never moves.
Scout (neck blast on late heads) Recommended
Late-forming heads can still catch neck blast, and a few whiteheads left standing will seed the disease into next season — and into any grain you keep for seed. A weekly check-and-rogue keeps both the harvest and your seed clean.
Once a week, from about 70 days after sowing, walk the field and look over the heads as they fill and turn brown.
Neck blast on late heads: spot any whitehead — a head gone pale and empty above a brown-black rotten neck.
Rogue (pull out) and carry off and burn every whitehead — especially if you plan to save seed, since blast rides on the seed into next year.
Note whether the crop is drying evenly toward harvest — heads browning, lower leaves dried.
- Do:
Never save seed from a blast-hit head — the disease is seed-borne, so you would plant it straight back next season.
- Watch out:
Keep an eye on drainage in wet spells right up to harvest — late waterlogging still rots roots and heads.
Harvest the heads
The heads are ready about 100–130 days after sowing (roughly 40 days after flowering). They are ripe when the ear-heads have turned brown, the grain is hard and cannot be dented with a thumbnail, and the lower leaves have dried. Cut the finger-heads by hand and carry them off to dry — harvest into a dry spell, never into rain, so the grain stays sound and does not sprout or go mouldy on the head. If the grain still dents under your thumbnail, it is not ready — leave it a few more days to harden. If rain is coming and the crop is close, cut and shelter the heads rather than let them get wet.
Dry hard, store on the head
The crop is grown — now do not lose it. Dry the heads right through in the sun; dryness is the secret to finger millet's legendary keeping. Stored dry and unthreshed, the whole heads shrug off storage pests for 10+ years — the classic hungry-season reserve. Store the dry heads on the head, and thresh (beat out the grain) only what you need, because threshed or milled grain spoils far faster. The grain is safe to store once the heads have dried right through and the grain is hard and dry; if it still feels soft or damp, dry it longer before you store it.
Pests and diseases that attack finger millet


Where to sell finger millet
Markets that trade this crop — what each one sells it by, when supply peaks there, and the currency used.
-
 GMB Aspindale Depot
-
 GMB Bulawayo Depot
-
 GMB Chinhoyi Depot
-
 Gulu Main Market
-
 GMB Concession Depot
-
 GMB Gweru Depot
-
 GMB Marondera Depot
-
 GMB Masvingo Depot
Grow finger millet with a plan, not a guess
This guide is the general answer. Divisi works out yours — the week to plant finger millet on your soil and your rainfall, and each job dated for your field.


When to plant finger millet, country by country
- When to plant finger millet in Algeria
- When to plant finger millet in Angola
- When to plant finger millet in Benin
- When to plant finger millet in Botswana
- When to plant finger millet in Burkina Faso
- When to plant finger millet in Burundi
- When to plant finger millet in Cabo Verde
- When to plant finger millet in Cameroon
- When to plant finger millet in Comores
- When to plant finger millet in Congo
- When to plant finger millet in Côte d'Ivoire
- When to plant finger millet in Egypt
- When to plant finger millet in Eritrea
- When to plant finger millet in Eswatini
- When to plant finger millet in Ethiopia
- When to plant finger millet in Gabon
- When to plant finger millet in Gambia
- When to plant finger millet in Ghana
- When to plant finger millet in Guinea Ecuatorial
- When to plant finger millet in Guinea-Bissau
- When to plant finger millet in Guinée
- When to plant finger millet in Kenya
- When to plant finger millet in Lesotho
- When to plant finger millet in Liberia
- When to plant finger millet in Libya
- When to plant finger millet in Madagascar
- When to plant finger millet in Malawi
- When to plant finger millet in Mali
- When to plant finger millet in Mauritanie
- When to plant finger millet in Mauritius
- When to plant finger millet in Morocco
- When to plant finger millet in Moçambique
- When to plant finger millet in Namibia
- When to plant finger millet in Niger
- When to plant finger millet in Nigeria
- When to plant finger millet in Rwanda
- When to plant finger millet in République centrafricaine
- When to plant finger millet in République démocratique du Congo
- When to plant finger millet in Sao Tome and Principe
- When to plant finger millet in Seychelles
- When to plant finger millet in Sierra Leone
- When to plant finger millet in Somalia
- When to plant finger millet in South Africa
- When to plant finger millet in South Sudan
- When to plant finger millet in Sudan
- When to plant finger millet in Sénégal
- When to plant finger millet in Tchad
- When to plant finger millet in Togo
- When to plant finger millet in Tunisie
- When to plant finger millet in Uganda
- When to plant finger millet in United Republic of Tanzania
- When to plant finger millet in Zambia
- When to plant finger millet in Zimbabwe
Where finger millet scores best
Districts where Divisi's engine currently rates this crop highest, ranked by fit.


Get Insights by email
A short digest of new Divisi articles. No email on quiet weeks.
Frequently asked questions
How do I grow finger millet?
How to grow finger millet: 90–130 days to maturity, 25 cm rows, 1–3 cm deep. Also called African millet, dagussa, mawere, tamba, uburo, bulo, uphoko.
What is dagussa in English?
Dagussa (also dagusa) is the Amharic name for finger millet.
What is mawere in English?
Mawere (also lipoko) is the Chichewa name for finger millet.
What is tamba in English?
Tamba is the Hausa name for finger millet.
What is uburo in English?
Uburo is the Kinyarwanda name for finger millet.
What is bulo in English?
Bulo is the Luganda name for finger millet.
What is uphoko in English?
Uphoko is the Ndebele name for finger millet.
What is rapoko in English?
Rapoko (also rukweza and zviyo) is the Shona name for finger millet.
What is wimbi in English?
Wimbi (also ulezi) is the Swahili name for finger millet.
How long does finger millet take to grow?
Finger millet takes about 90–130 days from sowing to maturity, though the exact length varies with variety, temperature and how the season runs.
What spacing should I use for finger millet?
Space finger millet rows about 25 cm apart, with roughly 10 cm between plants within the row.
How deep should finger millet be planted?
Sow finger millet at about 1–3 cm deep. Shallower risks drying out; deeper wastes seed energy before the shoot reaches light.
What pests and diseases attack finger millet?
The ones covered in this guide are Ergot, Fusarium head blight, Grain-eating birds. Each has its own page explaining how to identify, check for and control it.