 Divisi
How to grow Niger seed (noug)
Guizotia abyssinica · Asteraceae
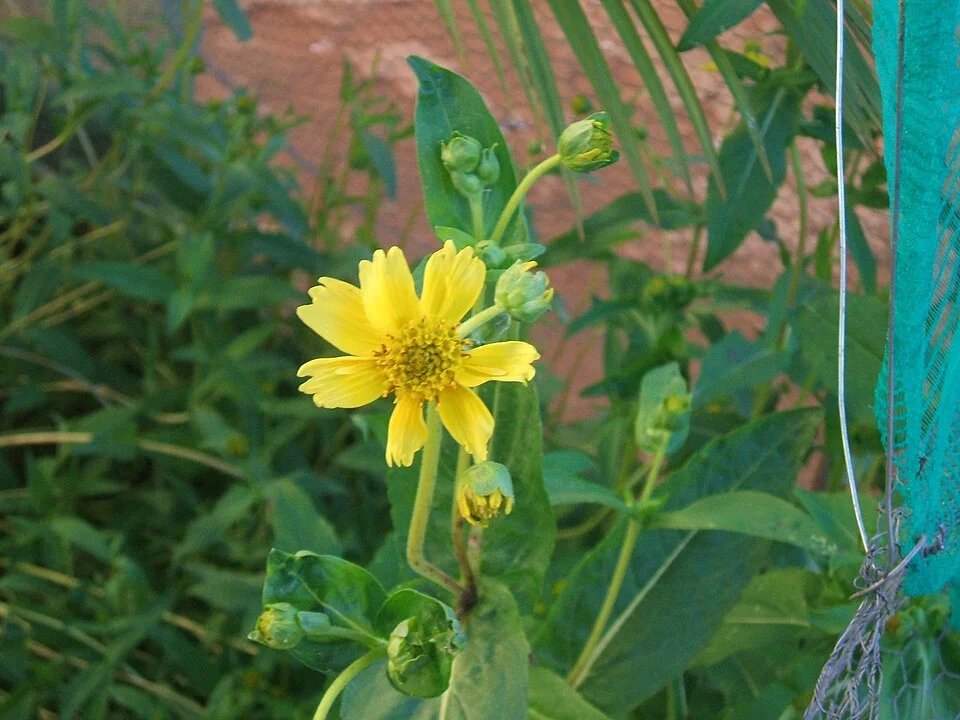
Photo: Silvestresbrasileiros · Public domain
Niger seed — noug — is a tall, upright plant with bright yellow, daisy-like flowers, grown for the small black, oily seeds that are pressed into sweet, light noug cooking oil. It is a highland, cool-weather crop and a survivor: it grows happily on the heavy black clay that waterlogs and drowns most other oilseeds. But it has one hard rule — it cannot set seed on its own. Each flower must be visited by bees carrying pollen from a different plant, or the beautiful yellow heads stay empty. A good noug crop is really three things done right: sow into the wet clay on time, keep the bees working the flowers, and get the seed off the field the moment it ripens — before birds and shattering steal it.
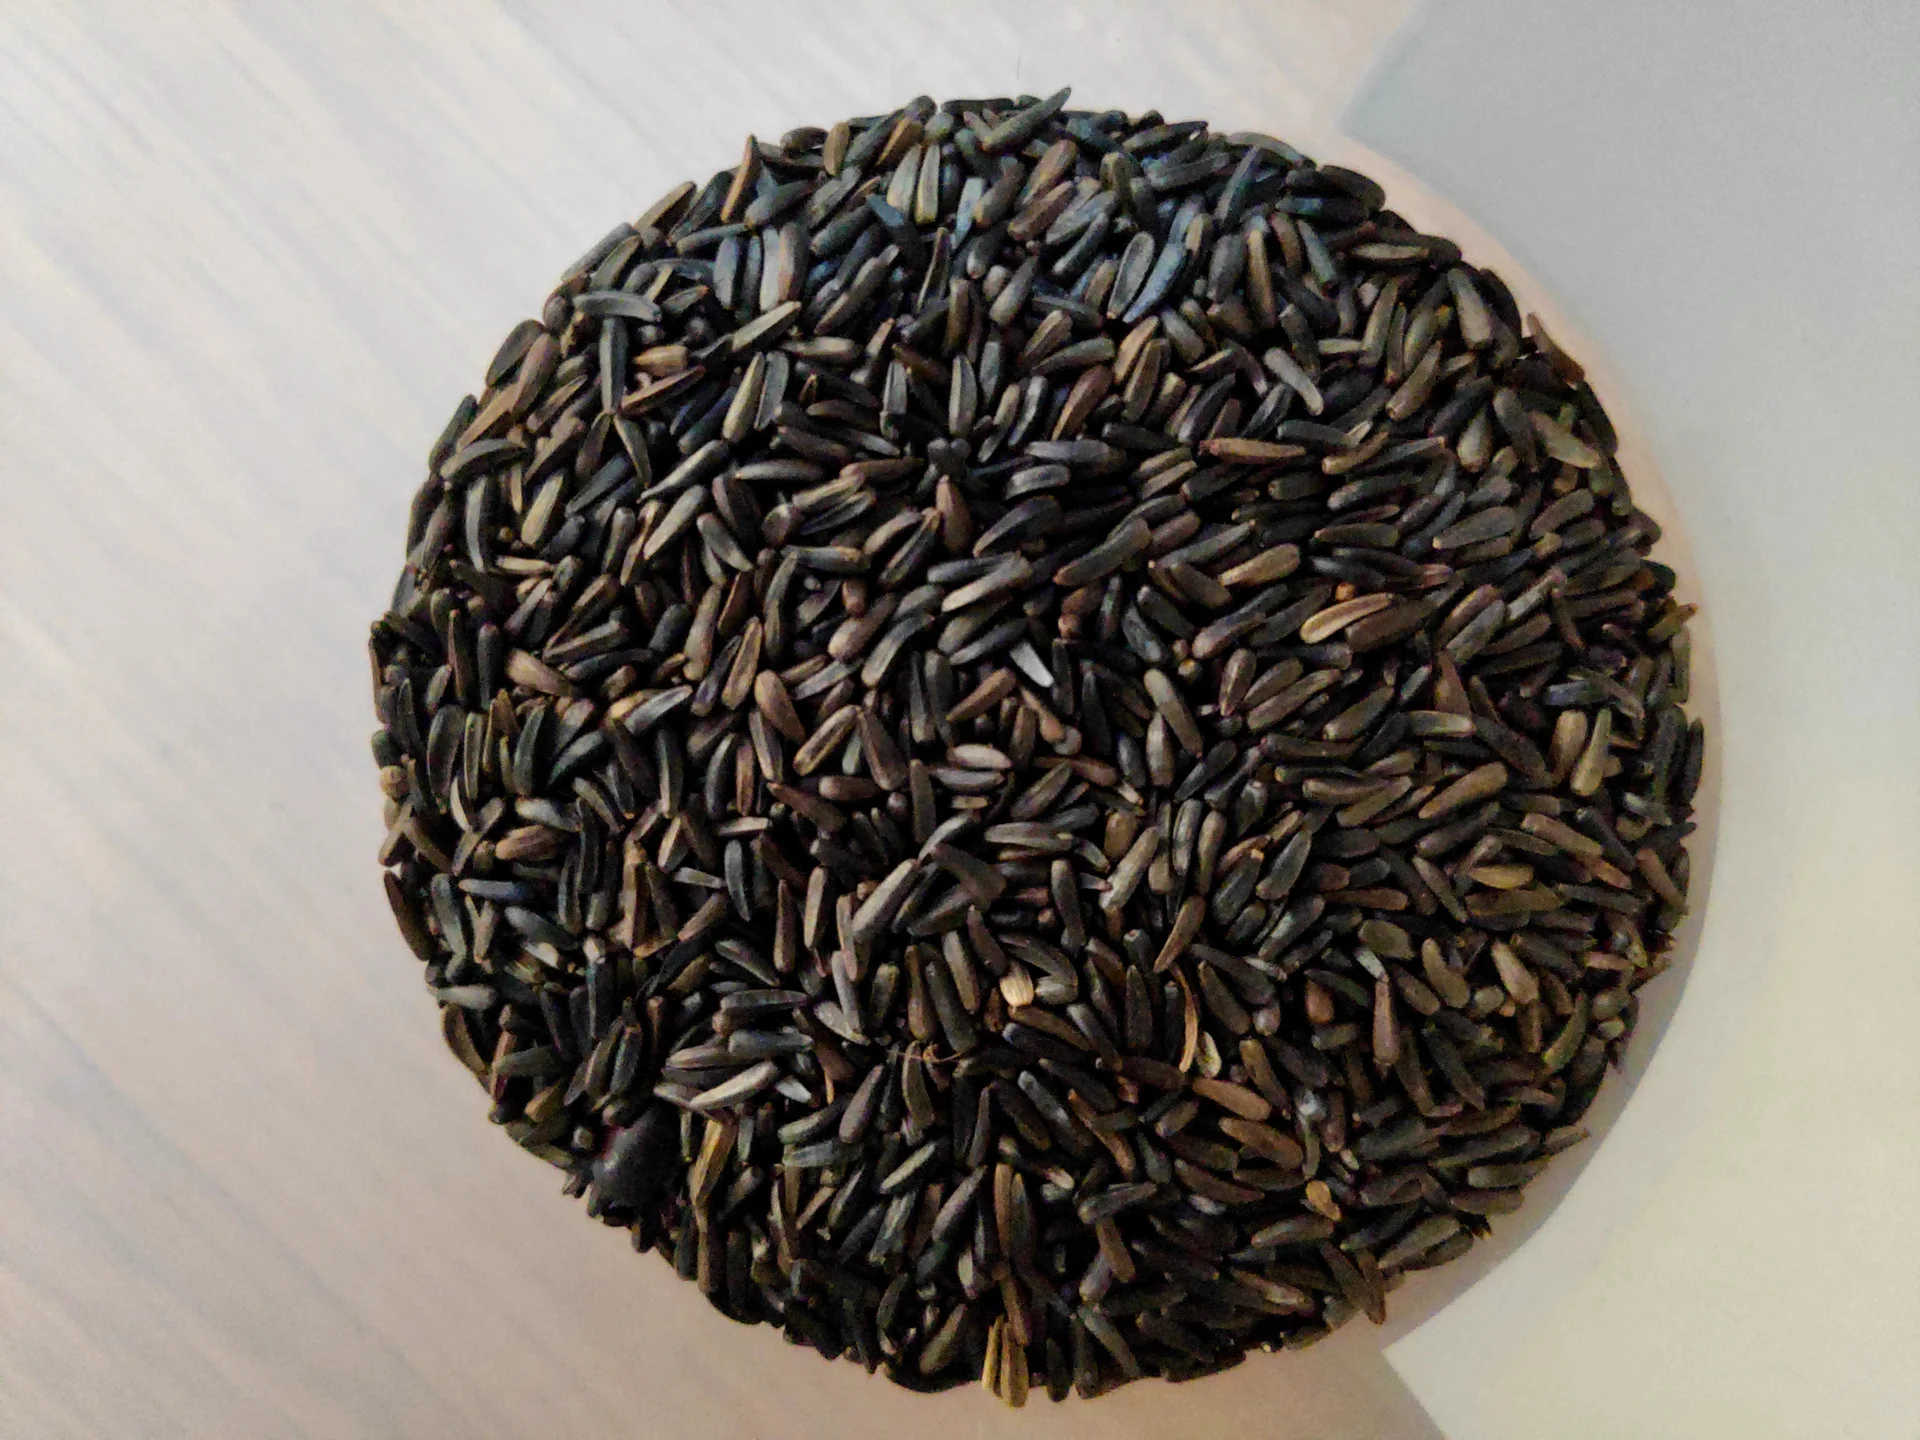
Gaurav Dhwaj Khadka · CC BY 4.0 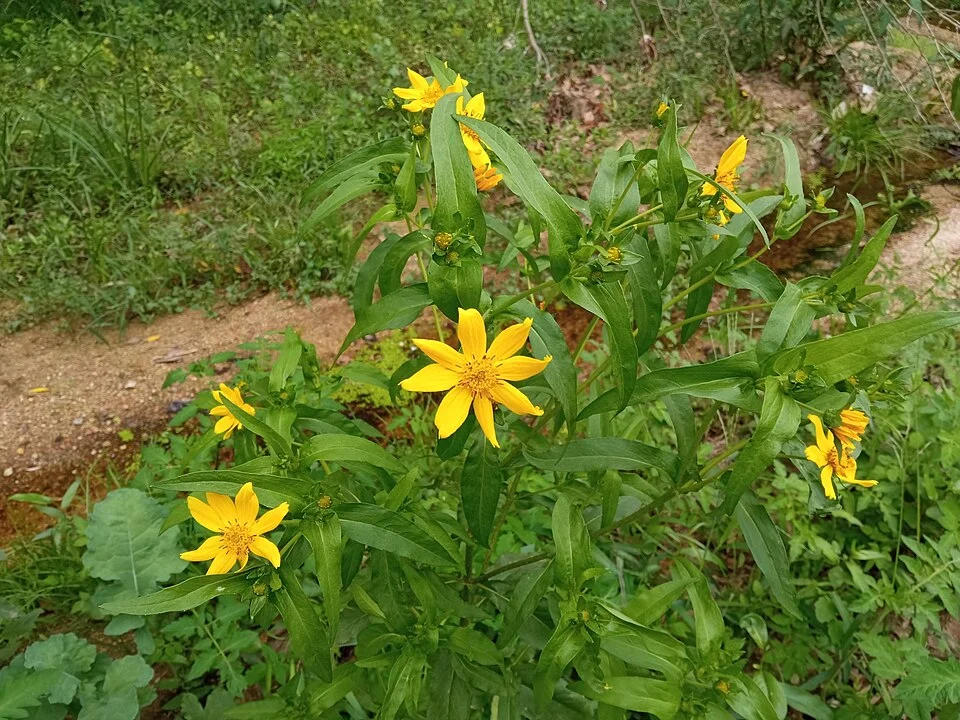
Josep Gesti · CC BY-SA 4.0
- Days to maturity
- 90–150 days
- Sowing depth
- 1–2 cm
These are general figures for the crop, compiled from published agronomic references including FAO and CABI. The right choice for your field depends on your soil, rainfall and the yield you are aiming for.
Will Niger seed (noug) actually do well on your field? Check your own field against every crop in the catalogue — no signup. Run the crop check →
Also known as
Niger seed (noug) is also called nug and ramtil.
- English
- nug, ramtil
- Amharic
- ኑግ (nug)
- Oromo
- nuugii
Working in buckets, bags or paces? The farming glossary turns the measures growers actually use into kilograms and hectares — what a 20 litre bucket of each crop really weighs, and how to size a field by walking it — alongside the Shona, Swahili, Ndebele and Yoruba words used in the field. Open the glossary →
Growing Niger seed (noug), stage by stage
Your noug season, step by step — scatter the tiny seed onto the heavy clay, keep it weed-free while it is small, let the bees fill the yellow heads, then beat the birds and the shattering to the ripe seed.
Get ready before you sow
The size of your noug crop is mostly decided before the first seed lands: clean, plump seed of this season, a rough, moist seedbed on the heavy clay, and a field placed near bees and away from bird flocks. Noug asks little else — it is a low-input crop — so getting these few things right in the weeks before sowing is most of the job.
Source clean seed Critical
Noug seed is tiny — a small tin holds a huge number of seeds — so one bad batch plants your whole field with weaklings. Plump, current-season seed sprouts fast and even; old, thin or empty seed leaves bare patches you cannot fill once the crop is up. Buy it in the month before you sow so you are ready the day the clay is wet enough.
Get seed from a trusted source — this season's harvest, kept dry. Old noug seed is oily and goes stale and weak in store, so last year's leftover seed often comes up poorly.
Look at the seed: good noug is plump, shiny and black, all roughly the same size. Reject seed full of dust, chaff, grey or shrivelled empty seeds, or other crop and weed seeds.
Rub a pinch between your palms and blow gently — heavy, solid seed stays in your hand; light, empty husks blow away. A lot of light chaff means a weak, low-quality batch.
Test it before you trust it: wrap about 100 seeds in a damp cloth, keep it warm and damp (not dripping) for a week, then count how many sprout. If far fewer than most sprout, get fresh seed before sowing day.
Keep the seed dry, cool and off the floor, away from food, water and children until you sow.
- Do:
Set aside a little more seed than you think you need — the seed is cheap, a slightly thicker sowing is easy to thin, but bare patches are not.
- Tip:
Sowing last season's leftover noug — the oily seed loses its life in store and comes up thin.
- Watch out:
Chaff and weed seeds mixed in the bag become weeds in your field — clean seed now saves weeding later.
Prepare the heavy clay Recommended
Noug's home is the heavy black clay (Vertisol) that other crops drown in — but that same clay turns to rock when dry and glue when wet. Working it into a rough, crumbly bed while it is just moist gives the tiny seed the fine, firm soil it needs to catch and sprout evenly.
Watch the clay's moisture. Work it when a handful crumbles as you squeeze it — not when it is baked hard (too dry to break) and not when it smears and sticks to your hoe (too wet). On heavy clay this good window is short, so be ready.
Rough-plough or dig to break the big clods, then knock them down to a finer, crumbly surface. Tiny noug seed sown onto big clods falls into air pockets and comes up patchy.
Clear old crop stalks and big weeds off the surface so your scattered seed lands on soil, not trash.
Level the bed roughly so water spreads instead of pooling — but a slightly rough surface and the clay's own cracks actually help hold the small seed and the first rain.
- Do:
Get the seedbed ready and waiting ahead of time — on heavy clay the good-to-work window can open and close in a day.
- Tip:
Working the clay when it is sticky-wet — you only make hard clods and a sealed surface the seedlings cannot push through.
- Watch out:
If the ground is still dust-dry and rock-hard, wait for a wetting rain rather than fighting it dry — dry tillage just makes cloddy lumps.
Plan for pollinators & birds Recommended
Two things outside the soil decide a noug crop: bees (which set the seed — no bees, no harvest) and grain-eating birds (which steal it at the end). You can stack the odds now, before you sow, by where you plant — near where bees already feed, and out of the daily flight-path of quelea and weaver flocks.
Pick a field near bee forage — flowering bushes, other flowering crops, natural veld, or your own beehives. Bees are the only thing that will fill your yellow heads with seed, so you want plenty of them close by.
If you can, keep the field away from the daily flight-lines of flocking seed-birds — the routes big flocks of quelea and weavers (small seed-eating birds that move in clouds) follow between roost and feeding grounds. A field right under that path takes the worst bird damage.
A patch near homesteads, paths and daily activity is easier to guard — birds shy from people and noise, so a field you pass often is a field you can defend.
Plan not to spray insecticide on this land or nearby crops once noug nears flowering — if you or your neighbours keep bees, keep them safe for when the yellow heads open.
- Do:
If you keep bees, plan to place hives beside the field for flowering — more bees means fuller heads and more seed.
- Watch out:
A small, isolated plot in a sea of grain can draw every flock around; weigh that against the bee advantage of being near other flowering plants.
- Tip:
Planting directly under a known flock flight-line or beside a big roost tree — you will fight birds the whole seed-fill season.
Sow and get an even stand
The first three weeks. Noug is broadcast — scattered by hand, not planted in neat holes — so the whole game is an even, thin spread and a shallow cover on moist clay. The seed is tiny: sow too thick and the plants choke and fall over, too thin and weeds take the ground. Seedlings show in about 1–2 weeks.
Broadcast + light cover Critical
This is your one shot at the plant stand — with broadcast noug there are no rows to fix later, so an even, thin scatter now is the difference between a full field and a patchy, weedy one. Sow the moment the clay is moist enough to sprout the seed and hold it.
Sow onto a moist, rough seedbed — right after a wetting rain, when the clay is damp a finger deep. Noug seed is small with little food inside, so it must land on soil that will sprout it quickly.
Mix the seed with dry sand or ash — about one part seed to four or five parts sand (say a tin of seed to a bucket of sand). This bulks up the tiny seed so you can see where it lands and spread it far more evenly.
Split the seed-and-sand into a few equal heaps, one per strip of the field, so no strip gets a double dose. Aim for the whole field at about 4–8 kg of seed per hectare — a fairly thin scatter, because it is very easy to sow noug far too thick.
Scatter it by hand in overlapping passes, walking a steady grid so no strip is bare and none is caked thick. Throw with a low, wide sweep so wind does not pile it in one place.
Cover it shallowly — drag a light branch, thorn bush or harrow across the surface so the seed is just barely buried, no deeper than 1–2 cm (about the length of your fingernail). Buried deep in heavy clay, the small seed runs out of strength before it reaches the light.
- Do:
Sow on a still morning — even a light wind blows tiny noug seed into drifts and leaves bare streaks.
- Tip:
Burying the seed deep or under thick soil — noug is a surface-shallow sowing; deep seed simply never comes up.
- Watch out:
It is far easier to sow noug too thick than too thin — a thick stand makes weak, spindly plants that flower late and fall over. Hold back and spread wide.
Scout emergence Recommended
The first 1–2 weeks after sowing tell you whether your scatter worked. Noug can still be re-sown into bare patches now, while the clay is moist and the season is young — but once the crop is up and growing, empty patches just grow weeds. So look early.
From about 5 days to 2 weeks after sowing, walk the field and look for the fine, thread-like seedlings coming up — noug starts with two small seed-leaves, easy to miss on dark clay.
Judge the evenness: is there a light, even fuzz of seedlings across the whole bed, or are there bare patches and thin streaks? Note where the gaps are.
A thin but even cover is fine — noug branches out and fills in. What you are hunting for is bald patches where almost nothing came up.
If bare patches are large, re-sow them now — scatter a little more seed over the thin areas and drag it in lightly, while the soil is still moist and there is time. Small thin spots you can leave; the crop will close over them.
- Watch out:
Whole bare streaks usually mean the seed was buried too deep there, or wind piled it elsewhere — sow the re-fill even shallower.
- Watch out:
If seedlings come up then collapse and rot at the soil line in wet spots (this is damping-off, a seedling rot), those patches look bare or full of toppled, pinched seedlings. Re-sow the bare patches, and next time avoid sowing too thick, which keeps the bed damp and airless.
- Do:
Check again after the next rain — a hard crust on drying clay can trap seedlings underneath; a light scratch of the surface helps them through.
Grow on and weed early
About weeks 3–7 after sowing. Young noug is a poor fighter against weeds — while it is small, weeds steal its water, light and food, and this is the biggest yield loss you can actually control (after birds). Weed once or twice while the crop is short; once noug branches out and shades the ground (the canopy closes), it smothers most later weeds itself. A modest feed of nitrogen can go on here — but keep it light; noug is a low-input crop.
Weed before canopy closes Critical
Early weeds are the main loss you can control in noug — worth 10–30% of your seed. The young crop is short and slow and simply cannot out-race weeds in the first weeks. Clear them now, while the crop is small, and the closing canopy handles the rest.
Weed from about 3 weeks after sowing, as soon as you can walk the field and tell crop from weed — do not wait for the weeds to get big.
Because noug is broadcast (no rows), weed by hand-pulling and light hand-hoeing among the plants — you cannot run a hoe down a straight row. Take out the weeds and leave the noug.
Hoe shallowly. Noug roots sit near the surface; deep chopping cuts them and topples the plants.
Get the weeds out whole, roots and all where you can — snapped-off tops of many weeds just sprout again.
If weeds keep coming, weed a second time a week or two later, before the crop closes over. Once noug branches and shades the ground, new weeds struggle and you can stop.
Watch for broomrape while you weed — a parasite weed that taps into noug roots and steals its food. It shows as short, fleshy, pale yellow-brown stalks with no green leaves, poking up in clusters at the base of your plants, while the noug above looks stunted and yellow. Pull and destroy these spikes before they flower and seed — never let them shed seed, which haunts the field for years.
- Do:
Weed while weeds are small and the soil is moist — they pull out easily, roots and all.
- Tip:
Deep or rough hoeing close to the plants — noug is shallow-rooted and topples easily.
- Watch out:
A thin, patchy stand weeds up fast — the more bare ground, the more weeds; that is why an even sowing pays off now.
Light top-dress N (if used) Optional
Noug is a low-feed crop — it gives a fair harvest on poor clay with nothing added. But on tired soil a small dose of nitrogen (N), the nutrient that drives leafy growth, can lift a thin crop: the step from low to modest inputs is roughly the difference between about half a tonne and a full tonne of seed per hectare. The key word is modest — too much N grows tall, soft, leafy plants that flower late and lodge (fall flat).
Only feed if the soil is poor or the crop looks pale and weak. On decent clay noug often needs nothing — do not spend on fertiliser it will not repay.
If you do feed, apply a modest amount of nitrogen at about 3–4 weeks after sowing, while the crop is growing fast and still short. Your recommendation gives the amount for your field — keep it light.
Because noug also answers to phosphorus (P) and sulphur (S), a compound fertiliser carrying N with some P and S is a good choice if you have it — but still apply it sparingly.
Scatter (broadcast) it evenly over the crop when the soil is moist (after a weeding or light rain), so it washes down to the roots instead of gassing off into the air. Keep the grains off wet leaves, where they stick and scorch.
Wash your hands after handling fertiliser, and keep it away from food, water and children.
- Tip:
Over-feeding nitrogen — a lush, leafy noug crop lodges (falls flat), flowers late, and can set more heads than the bees will ever pollinate. More N is not more seed.
- Do:
Put the little N you use on moist soil and let rain or watering carry it in — surface fertiliser on dry clay is wasted.
- Watch out:
Feed before flowering, not during — you want the plant to build its frame now, then pour its energy into seed later.
Flowering — let the bees set the seed
About weeks 7–13 after sowing. The field turns yellow as the daisy-like heads open, a few at a time, over several weeks. Here is noug's one hard rule: the plant cannot pollinate itself. Pollen must be carried from one plant to another, and only insects — mainly bees — do that. A field full of flowers with no bees sets empty heads. So the whole job now is simple and strict: keep the bees working, and never spray anything that kills them. This is also the crop's thirstiest stage.
Protect pollinators Critical
No bees, no seed — it is that simple. Noug is self-incompatible: a flower cannot be fertilised by its own plant's pollen, so a bee must bring pollen from a different plant. If bees are missing or poisoned while the heads are open, the crop can look beautiful and yield almost nothing. Protecting pollinators through flowering is the single most important thing you do this stage.
From about 7 weeks after sowing, when the first yellow heads open, treat the field as a bee sanctuary until flowering ends (around 13 weeks).
Do not spray any insecticide while the flowers are open — it kills the bees that set your seed, and there is no crop without them. If you ever must treat a pest, do it before flowering starts or after it ends, never during.
Keep bees close and busy: leave flowering weeds and wild plants at the field edges as extra bee food, and if you keep hives, have them beside the field now.
Walk the field on a warm, calm, sunny mid-morning and simply watch — you should see and hear bees working the yellow heads. Plenty of bee traffic means seed is being set.
If you see very few bees, do not reach for chemicals — instead protect every one you have: stop all spraying nearby, and keep wild forage close so bees stay in your field.
- Tip:
Spraying insecticide while the flowers are open — it kills the bees that set the seed, and empties your heads.
- Do:
Time any pest spraying for before or after the flowering weeks — never during them.
- Watch out:
A field that flowers beautifully but sets little seed almost always means too few bees — look for pollinators, not disease, first.
- Watch out:
Head mould (grey/pink head rot) — a mould that rots the flower heads — likes wet, humid, crowded heads. Look for heads that go brown or bleached too early, with pinkish or whitish mould and shrivelled, empty seed. Keep the stand from being too thick; and never press mouldy heads into oil or feed — the mould can carry a hidden poison (a mycotoxin, a mould poison).
Keep moisture steady Recommended
Flowering into early seed-fill is noug's thirstiest, most sensitive time — the one stage the crop most needs steady moisture. A dry spell now, just as the heads are setting and starting to fill, empties the heads and shrivels the seed. If you can water, hold the soil evenly moist from flowering through fill; if you are rain-fed, this is simply when a dry spell hurts most.
If you irrigate, water every 7–10 days from about 7 weeks after sowing through flowering and early seed-fill — keep the clay evenly moist, never bone-dry then flooded.
The clay holds water well, so check before you water: push a finger in and water when it is drying below the surface, not while it is still damp.
Aim for steady moisture. It is the swings — hard dry, then soaked — that shed flowers and shrivel seed.
As flowering ends and the heads start to fill and colour, hold moisture steady a while longer, then begin easing off as maturity nears (see the next stage).
- Tip:
Letting the crop go through a hard dry spell at flowering — of all the stages, this is the worst time for noug to run short of water.
- Do:
Feel the soil before watering — steady and moist beats a big soak followed by drought.
- Watch out:
Noug stands wet feet better than most crops, but soggy, crowded heads still invite head-rot — keep the stand open and do not turn the bed into a swamp.
Seed fill and bird guarding
From about 13 weeks after sowing until harvest. The petals drop and the heads fill with small black, oily seed — and that seed is a magnet for flocking grain-birds (quelea, weavers). At this stage birds are usually the single biggest loss in noug, able to strip a field in days. Guard the crop hard during the early-morning and late-afternoon flock hours, and ease off watering as the heads dry down toward harvest.
Bird-scaring Critical
Once the black seed forms, flocks can empty your heads in a few days — birds are the biggest single threat to a noug harvest, rated high at this stage. There is no spraying your way out of it: the crop must be actively guarded, every day, through the weeks of seed-fill until you cut.
Start the day the seed begins to fill (from about 13 weeks after sowing) and keep it up every day until harvest — a few unguarded days can cost the crop.
Be in the field at the flock hours — early morning and late afternoon — when birds feed hardest. Look for clouds of small seed-eating birds (quelea, weavers) settling onto the heads, and heads left stripped and empty where they have fed.
Make noise and movement: shout, bang tins, crack a whip or plastic sheet, use clappers and rattles. Keep moving — birds learn where you are not.
Add fixed scares: hang strips of reflective tape, old cassette tape, foil or bright cloth on lines across the field, and set up scarecrows — but move them often, because flocks quickly learn a scare that never changes.
Net small plots if you can — a net thrown over a small stand of noug is the surest guard of all.
Team up with neighbours so you all scare at once — otherwise you just chase the flock onto their field and they chase it back onto yours. And harvest promptly once the heads ripen: the fastest way to end bird losses is to get the seed off the field.
- Do:
Guard hardest at dawn and dusk — that is when flocks hit hardest.
- Watch out:
Birds learn a scarecrow or tape that never moves — shift and change your scares every few days to keep them jumpy.
- Tip:
Leaving the ripe crop standing to 'guard it a bit longer' — standing ripe noug both shatters and feeds birds; cutting it is the real fix.
Ease water Recommended
Near the end, the crop needs to dry down, not drink. Once the seed is filled, easing off the water lets the heads and seed harden and dry evenly, ready to cut — and keeps soft late growth from feeding rot instead of seed.
From about 16–18 weeks after sowing, as most heads have filled and begun to turn yellow-brown, cut back the watering.
Let the crop dry down naturally in the field — you are now aiming for hard, dry seed and brittle heads, not more growth.
Stop watering entirely as the heads colour and the seed hardens, so the crop is ready to cut at first ripeness (see harvest).
- Do:
Read the crop: yellowing heads and hardening seed are your signal to ease off and then stop the water.
- Tip:
Watering right up to harvest — it keeps the crop green and soft, delays the cut, and invites head-rot.
Cut at first ripeness
About weeks 14–21 after sowing. Noug ripens over a short window and then punishes waiting — a fully-dry standing crop shatters (the ripe heads split open and drop their seed), straight onto the ground and into the birds. Cut at the first ripeness, in the cool of the morning when the heads are least brittle, and finish the drying off the plant. Do not wait for 'perfectly dry' in the field — you will harvest an empty crop.
Cut & stook at first ripeness Critical
This is a race against shattering and birds. Left standing until bone-dry, noug splits its heads and drops the seed — onto the ground and into the flocks. Cutting at first ripeness and finishing the drying off the plant saves the seed you spent all season growing. It is rated a high risk — do not wait.
Watch for ripeness: the leaves and most heads turn yellow-brown and dry, the small seeds are hard and black, and the heads just begin to open. That is the signal — cut now, do not wait for the whole field to go bone-dry.
Cut or pull the plants in the cool of the morning, when the heads are damp with dew and less brittle — they shed far less seed than in the dry heat of midday.
Handle the cut plants gently and as little as possible — every rough shake spills seed. Carry them heads-up on a sheet if you can.
Tie the plants into small bundles (stooks) and stand or lay them on a clean surface, mat or sheet, heads up and off the bare ground, to finish drying.
Let them field-dry a few days until the seed is hard and rattles, then thresh (see the next stage). Waiting for the crop to fully dry standing only loses the seed to shatter and birds.
- Tip:
Leaving the crop to over-dry standing — the heads shatter, drop their seed, and feed the birds.
- Do:
Cut in the cool, dewy morning — brittle midday heads throw seed with every touch.
- Watch out:
Ripeness comes unevenly across a noug field — harvest when most heads are ready rather than chasing the last green ones, or the first-ripe heads shatter while you wait.
Thresh, winnow and store dry
The seed is grown — now do not let it spoil. Once the stooked heads are field-dry, beat or tread out the seed, winnow the light chaff away in the wind, and — because noug seed is oil-rich — dry it hard before you bag it. Under-dried oily seed goes rancid and mouldy in store. Keep the finished seed dry, cool and safe from weevils.
Thresh, winnow & dry Critical
The last few days decide whether your crop keeps or spoils. Noug seed is full of oil, so seed bagged even a little damp turns rancid (the oil goes off and bitter) and mouldy, and ruins the oil. Threshing clean, winnowing well, and drying hard before storage turns a good harvest into food and cash months later.
Thresh only once the stooked heads are properly field-dry — the seed should bite hard with no give. Damp heads do not release their seed cleanly.
Beat or tread the dry heads on a clean tarp, mat or swept hard floor — lay them out and thresh with a stick or by treading — to knock the small black seed free. Work on a sheet so none is lost into the ground.
Winnow to clean it: on a breezy day, pour the seed slowly from a height (or toss it in a basket) so the wind carries off the light chaff, husk and dust while the heavier seed falls straight down. Repeat until the seed is clean.
Dry the clean seed hard in the sun on a mat or tarp — never on bare ground, which pushes damp back in and adds dirt and mould. Turn it so it dries evenly, and cover it if rain or heavy dew threatens.
Test before you bag: well-dried noug bites hard with no give — it should crack, not squash. If it still dents, or feels soft or cool-damp, dry it more before storing, or the oily seed will go rancid and mouldy in the bag.
Store the dry seed cool, dry and off the floor in a clean, sealed container — an airtight bag or tin starves storage pests of air. Check the store now and then and act early if you see trouble.
- Watch out:
Niger seed weevil and other storage weevils — look for tiny beetles or weevils in the seed, fine dust, and hollowed, holed seeds. Store the seed clean, hard-dry and sealed to shut them out. If you use a storage dust, follow the label, keep it off seed you will press for oil soon, and wash your hands.
- Tip:
Bagging oily seed even slightly damp — it goes rancid and mouldy fast and spoils the oil. When in doubt, dry it another day.
- Do:
Winnow on a breezy day and pour from a height — clean seed stores far better than seed left full of chaff and dust, where pests breed fastest.
Pests and diseases that attack Niger seed (noug)


Where to sell Niger seed (noug)
Markets that trade this crop — what each one sells it by, when supply peaks there, and the currency used.


Grow Niger seed (noug) with a plan, not a guess
This guide is the general answer. Divisi works out yours — the week to plant Niger seed (noug) on your soil and your rainfall, and each job dated for your field.


When to plant Niger seed (noug), country by country
- When to plant Niger seed (noug) in Algeria
- When to plant Niger seed (noug) in Angola
- When to plant Niger seed (noug) in Botswana
- When to plant Niger seed (noug) in Burundi
- When to plant Niger seed (noug) in Cabo Verde
- When to plant Niger seed (noug) in Cameroon
- When to plant Niger seed (noug) in Comores
- When to plant Niger seed (noug) in Congo
- When to plant Niger seed (noug) in Côte d'Ivoire
- When to plant Niger seed (noug) in Egypt
- When to plant Niger seed (noug) in Eritrea
- When to plant Niger seed (noug) in Eswatini
- When to plant Niger seed (noug) in Ethiopia
- When to plant Niger seed (noug) in Gabon
- When to plant Niger seed (noug) in Ghana
- When to plant Niger seed (noug) in Guinea Ecuatorial
- When to plant Niger seed (noug) in Guinée
- When to plant Niger seed (noug) in Kenya
- When to plant Niger seed (noug) in Lesotho
- When to plant Niger seed (noug) in Liberia
- When to plant Niger seed (noug) in Libya
- When to plant Niger seed (noug) in Madagascar
- When to plant Niger seed (noug) in Malawi
- When to plant Niger seed (noug) in Mali
- When to plant Niger seed (noug) in Mauritanie
- When to plant Niger seed (noug) in Mauritius
- When to plant Niger seed (noug) in Morocco
- When to plant Niger seed (noug) in Moçambique
- When to plant Niger seed (noug) in Namibia
- When to plant Niger seed (noug) in Niger
- When to plant Niger seed (noug) in Nigeria
- When to plant Niger seed (noug) in Rwanda
- When to plant Niger seed (noug) in République centrafricaine
- When to plant Niger seed (noug) in République démocratique du Congo
- When to plant Niger seed (noug) in Sao Tome and Principe
- When to plant Niger seed (noug) in Sierra Leone
- When to plant Niger seed (noug) in Somalia
- When to plant Niger seed (noug) in South Africa
- When to plant Niger seed (noug) in South Sudan
- When to plant Niger seed (noug) in Sudan
- When to plant Niger seed (noug) in Sénégal
- When to plant Niger seed (noug) in Tchad
- When to plant Niger seed (noug) in Togo
- When to plant Niger seed (noug) in Tunisie
- When to plant Niger seed (noug) in Uganda
- When to plant Niger seed (noug) in United Republic of Tanzania
- When to plant Niger seed (noug) in Zambia
- When to plant Niger seed (noug) in Zimbabwe
Where Niger seed (noug) scores best
Districts where Divisi's engine currently rates this crop highest, ranked by fit.
-
 Ngoma
Ngoma -
 Kore
Kore -
 El Hadjar
 -
 Ebo
Ebo -
 Isiolo North
 -
 Lwengo
 -
 Ruyigi
 -
 Prefecture of Sale
 -
 Kasenga
 -
 Bukoba
 -
 Faratsiho
 -
 Lobamba
Get Insights by email
A short digest of new Divisi articles. No email on quiet weeks.
Frequently asked questions
How do I grow Niger seed (noug)?
How to grow Niger seed (noug): 90–150 days to maturity, 1–2 cm deep. Also called nug, ኑግ (nug), nuugii.
What is ኑግ (nug) in English?
ኑግ (nug) is the Amharic name for Niger seed (noug).
What is nuugii in English?
Nuugii is the Oromo name for Niger seed (noug).
How long does Niger seed (noug) take to grow?
Niger seed (noug) takes about 90–150 days from sowing to maturity, though the exact length varies with variety, temperature and how the season runs.
How deep should Niger seed (noug) be planted?
Sow Niger seed (noug) at about 1–2 cm deep. Shallower risks drying out; deeper wastes seed energy before the shoot reaches light.
What pests and diseases attack Niger seed (noug)?
The ones covered in this guide are Broomrape, Damping-off, Niger seed weevil. Each has its own page explaining how to identify, check for and control it.