 Divisi
How to grow tea
Camellia sinensis · Theaceae
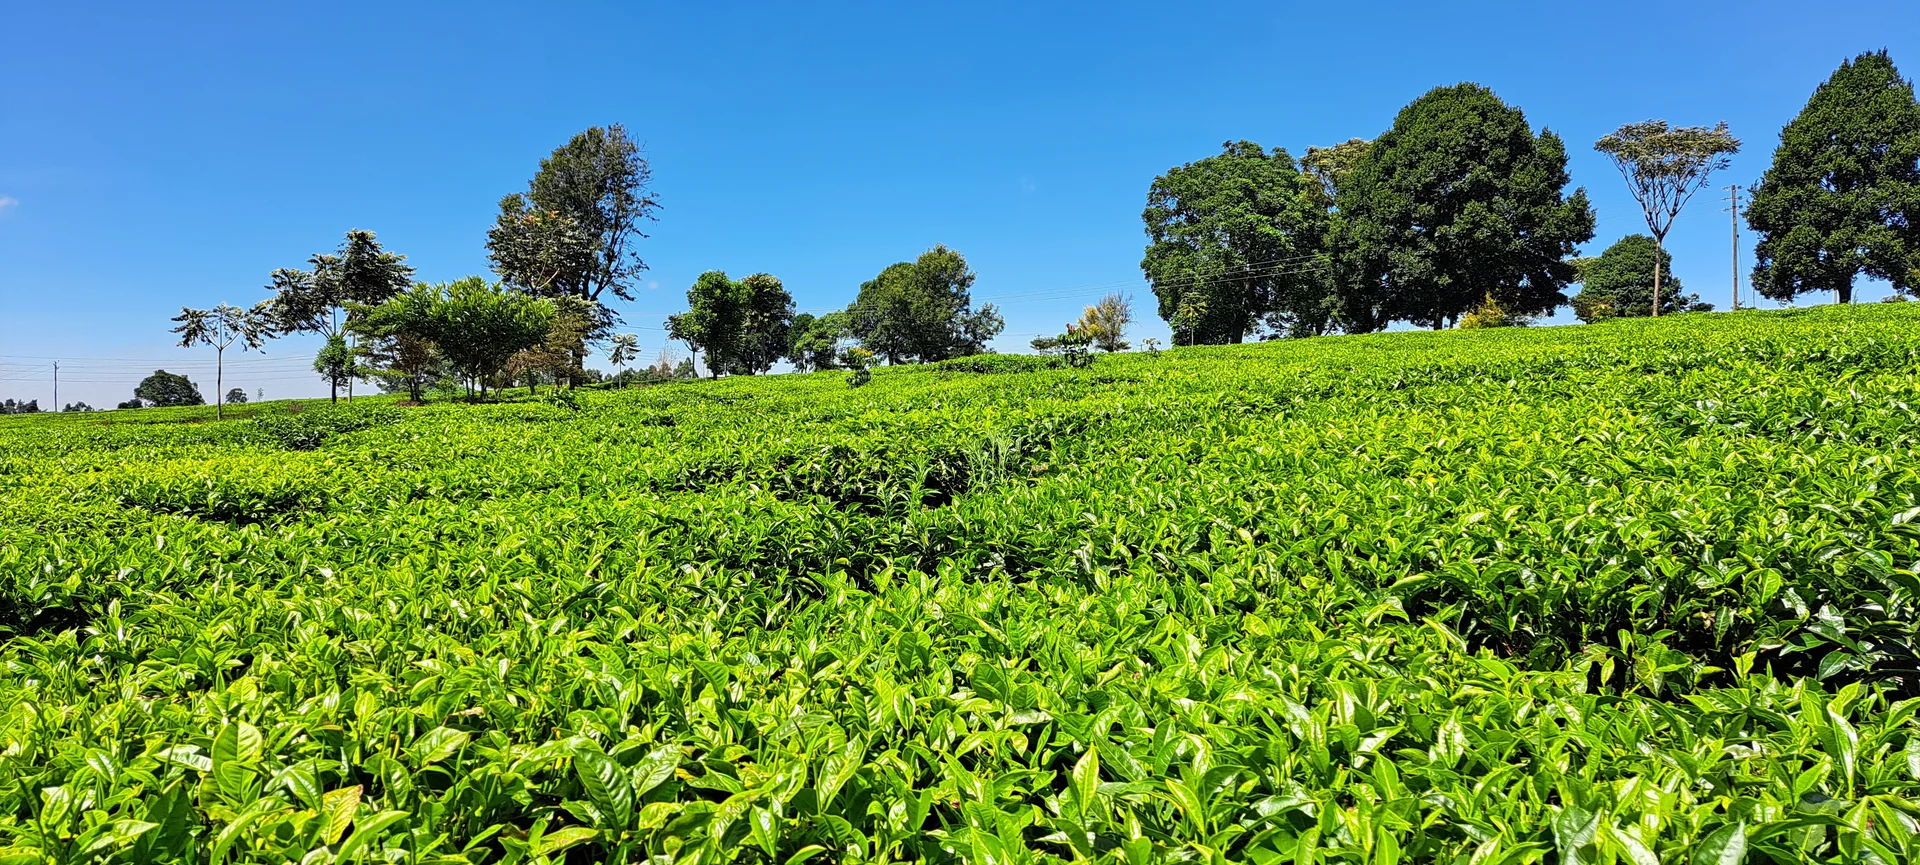
Photo: SeanTwice · CC0
Tea (Camellia sinensis) is an evergreen highland bush you grow not for one harvest but as a living plucking table — a flat-topped hedge, kept pruned to about waist height, that pushes out soft new shoots again and again for a whole generation. What you pick is the tender tip: a bud with the two young leaves just below it ('two-leaves-and-a-bud'). New fields come from cuttings of chosen mother bushes, never from seed, so every bush is a known type. Above everything else, tea lives on sour (acid) soil — about pH 4.5–5.5 — and must never be limed. Keep it moist, keep it mulched, feed it steady nitrogen, and pluck it light and often, and one bush earns for you year after year.

Bernard Gagnon · CC BY-SA 4.0 
Rogerirakoze · CC BY-SA 4.0
- Row spacing
- 120 cm
- Plant spacing in the row
- 60 cm
These are general figures for the crop, compiled from published agronomic references including FAO and CABI. The right choice for your field depends on your soil, rainfall and the yield you are aiming for.
Will tea actually do well on your field? Check your own field against every crop in the catalogue — no signup. Run the crop check →
Also known as
- Afrikaans
- tee
- Chichewa
- tiyi
- French
- thé
- Kinyarwanda
- icyayi
- Ndebele
- itiye
- Portuguese
- chá
- Swahili
- chai
- Xhosa
- itiye
- Zulu
- itiye
Working in buckets, bags or paces? The farming glossary turns the measures growers actually use into kilograms and hectares — what a 20 litre bucket of each crop really weighs, and how to size a field by walking it — alongside the Shona, Swahili, Ndebele and Yoruba words used in the field. Open the glossary →
Growing tea, stage by stage
Your tea year on an established bush: keep the soil sour and mulched, pluck the soft two-leaves-and-a-bud every 1–2 weeks, feed nitrogen back after the rounds, prune every 3–4 years to reset the table, and rush every pluck to the factory fresh the same day.
Season start — clean, mulch and feed the table
As the season opens, what you do now decides how strongly the table flushes all year. Clear the weeds that steal water and nitrogen from the shallow feeding roots, lay a thick mulch to lock in moisture and smother regrowth, and open the year's nitrogen feed. One rule stands above all the rest: never lime tea, and never spread wood ash on it. Tea only thrives on sour (acid) soil, so keep lime, ash and any 'sweetener' well away from the bushes.
Weed and mulch Recommended
Weeds under the bushes drink the water and eat the nitrogen your tea needs to flush, and bare soil bakes hard and burns the shallow feeding roots that sit just under the surface. A clean, thickly-mulched strip locks in moisture, smothers the next weeds, keeps the soil cool and sour, and feeds it as the mulch rots — giving the whole table a strong, even start to the season.
In the first weeks of the season, clear the weeds from the strip under and between the bushes while they are still small. Hand-pull them, or hoe shallowly — tea's feeding roots sit right under the surface, so digging deep near a bush tears them and sets the flush back.
Lay a thick mulch of grass, prunings or leaf litter over the cleared strip — about 20 cm deep, one hand-span of loose material — but keep it a little clear of the main stems so they don't rot. Mulch holds moisture, smothers new weeds, keeps the soil cool, and feeds it as it breaks down.
Never put lime, wood ash or any 'sweetener' on tea. Tea only grows on sour (acid) soil — about pH 4.5–5.5 — and liming slowly un-sours the soil and kills the bush. This is the one mistake you cannot undo.
As you work, check the base of the bushes for termites: thin tubes of dried mud creeping up the stems, and any bush that yellows, wilts and lifts loose when you tug it — a sign termites are eating the collar (where the stem meets the soil) and roots. Keep bushes watered and mulched (termites strike hardest in drought); dig out and burn any bush that is badly eaten.
- Tip:
Liming tea, or spreading wood ash on it — it destroys the sour (acid) soil the bush must have and slowly kills it. Never lime tea, ever.
- Do:
Hoe shallowly near the bushes — tea's feeder roots are right under the surface, so deep digging cuts them and stalls the flush.
- Watch out:
Termites — thin mud tunnels up the stems, and bushes that wilt and pull out easily. They strike hardest in dry spells, so keep the mulch on and the soil moist.
Pluck and feed, round after round
This is the heart of the tea year — where your income comes from. The table flushes soft new shoots again and again, so you go over it every 7–14 days, plucking the tender two-leaves-and-a-bud, and feed nitrogen back between rounds so the bush keeps pushing fresh flush. Keep the soil steadily moist — this is the make-or-break stage for water, and dry stress simply switches the flush off. And walk the field every 3–4 days to catch mites, tea mosquito bug and root rot while they are still small.
Hand-pluck two-leaves-and-a-bud Critical
The soft two-leaves-and-a-bud shoot is your crop and your cash: plucked tender and often it makes top-grade tea and pushes the bush to flush again. Leave it too long and the shoot grows coarse and woody — the grade drops, the factory pays less, and the bush slows down. Going right over the whole table every 7–14 days is what keeps both the quality and the amount up.
Pluck when a new shoot carries a plump bud with two soft young leaves above the older, darker leaves. That tender tip — 'two leaves and a bud' — is exactly what you take, nothing coarser.
Nip or snap off just that soft top with your fingers, level with the flat top of the table. Leave the tougher, darker 'maintenance' leaves below — they are the bush's food factory and drive the next flush; strip them and you starve the next round.
Drop the shoots loosely into an open basket on your back or hip. Never pack them tight or into a plastic bag — squeezed leaf heats up and spoils before it reaches the factory.
Go over the whole table every 7–14 days — quicker in warm, wet flush, a little slower when growth is slow. Miss the window and the tender shoots grow out and stop flushing — coarse, dormant tips the trade calls banjhi (overgrown shoots with no soft bud, that have gone to sleep) — and these make poor, low-grade tea.
If a round does slip and the flush has gone coarse and banjhi, pluck or tip that coarse growth off anyway to bring the table back level — take the low-grade leaf even though it earns little, so the bush is forced to push soft new flush again; don't leave the coarse shoots standing or the whole table stalls.
Keep the top of the table flat and level as you pluck — tip back any shoot that stands up above the surface, so it stays even and easy to pluck next round.
- Do:
Pluck light and often — a soft two-and-a-bud every 7–14 days makes better tea, and more of it, than a heavy coarse pluck now and then.
- Tip:
Plucking coarse old shoots, or stripping off the darker maintenance leaves — coarse leaf is low grade, and stripping the bush starves next round's flush.
- Watch out:
If the shoots stop coming and the leaves go dull, the bush is short of water — dry stress stops the flush dead. Keep the mulch on and the soil moist.
- Watch out:
If a spray is ever needed, use only one whose pre-harvest interval — the safe wait between spraying and plucking — is shorter than your plucking round, or the chemical ends up in the very leaf you pick a few days later.
Top-dress nitrogen after plucking rounds Recommended
Every round you pluck carries nitrogen off the field in the green leaf, so you must feed it back or the flush fades and your pickings fall. Tea is a heavy, steady nitrogen feeder: splitting the year's nitrogen into several small rounds through the flush means less is washed away by rain, and the bush is fed a little, often — exactly how it likes to eat.
Split the year's nitrogen across at least 3–4 feeds (roughly every 2–3 months), timed to the flush. Feed after a plucking round, not before, so the bush spends it on the next flush. Your recommendation gives the amount for your field.
On an established, close-planted hedge the roots have filled the whole row, so broadcast the fertiliser evenly over the soil under the full spread of the bushes — right across the shaded strip where the feeding roots reach — not piled against the main stem and not on top of the plucking table.
Apply onto moist soil — after rain, or into the mulch — so it dissolves down to the roots. On dry soil much of the nitrogen gasses off into the air and is wasted.
Tea fertiliser is usually a compound that carries nitrogen together with some potassium (K) — both are drawn off in the plucked leaf — and often zinc (Zn). Zinc works best fed as a foliar spray (sprayed straight onto the leaves), not through the soil; follow your recommendation.
Never lime and never use wood ash — tea must stay sour. Keep the grains off the wet plucking leaves (they scorch the leaf), well away from streams and children, and wash your hands afterwards.
- Tip:
Dumping the whole year's nitrogen on in one heavy go — one big rain washes it straight past the roots. Feed little and often: 3–4 or more splits a year.
- Tip:
Lime or wood ash on tea — it un-sours the soil the bush lives on and slowly kills it.
- Watch out:
Keep fertiliser grains off the wet plucking table (they scorch the leaf), out of streams and away from children, and wash your hands after handling it.
Scout Recommended
A quick walk every 3–4 days catches the three big tea troubles while they are still small: red spider mite bronzing the leaves in dry spells, helopeltis (the tea mosquito bug) stabbing black spots into the very shoots you pluck, and armillaria root rot killing bushes in a spreading patch. Caught early you can still act; left alone, mite and helopeltis wreck the flush's grade and root rot creeps from bush to bush.
Every 3–4 days, walk a big 'W' across the field so you cover the corners and the middle, and look closely at the young flush, the leaf undersides, and any weak or off-colour bushes.
Red spider mite: in hot, dry, dusty weather, look for mature leaves turning a rusty bronze along the midrib and upper surface, with a fine, dusty look. Tip a leaf to the light and you'll see tiny reddish mites moving. It is worst on dusty roadside rows and drought-stressed bushes.
Helopeltis (tea mosquito bug): on the bud and top two leaves, look for dark brown-black sunken spots and streaks, and shoots that bend, scar and die back. The bug itself is slender and mosquito-like — long legs, and a little pin standing up on its back — and it feeds on exactly the shoot you pluck.
Armillaria root rot: look for bushes that yellow, wilt and die in a spreading patch — often where an old tree stump was left in the ground. Scrape the collar (where the stem meets the soil) of a dying bush: white, fan-shaped fungal sheets under the bark and black, bootlace-like strands on the roots confirm it.
Note what you see and where. Rising mite or helopeltis on the flush means act now — open the matching pest guide. For a spreading patch of dying bushes, dig out and burn the whole bush with its roots and old stump, and trench around the patch to stop it spreading.
- Watch out:
Red spider mite explodes in hot, dry, dusty spells — scout harder in drought, and keep the dust down on rows near paths and roads.
- Do:
Flag any patch of dying bushes (suspected root rot) and dig out the whole stump and root — the fungus lives on dead roots and creeps to the next bush.
- Watch out:
If you decide to spray, respect the pre-harvest interval — the days to wait before plucking — so no chemical reaches the leaf you pick every week or two.
Prune to rejuvenate the bush
Left alone too long, the table climbs out of reach, the shoots grow thin and woody, and the flush weakens. Every 3–4 years you cut the bush back — a hard prune, or a lighter skiff (a light shave of just the top) — to wake up vigorous new growth and reset the flat table to an easy plucking height, about waist high. You give up a little crop now in return for years of stronger flush afterwards.
Prune / skiff (every 3–4 years) Recommended
An unpruned bush grows tall, thin and woody, and the flush drops right off. A hard prune — or a lighter skiff, shaving just the top — every 3–4 years cuts back the old wood so the bush throws fresh, vigorous shoots and the table comes back to an even, comfortable plucking height. It costs you one flush now for years of stronger flush afterwards.
Prune every 3–4 years, in the cool, slow-growth lull — not in peak flush — so the bush has time to recover before the next flushing season.
How far down you cut depends on the job. A hard prune cuts the old wood right back low — down to about 45–60 cm, roughly knee height — to fully rejuvenate a tired bush; you then let it re-grow and build the tall waist-high (0.9–1.2 m) plucking table back up from the fresh shoots, so don't stop the cut at waist height thinking that is the prune. A light skiff only shaves the top few centimetres off to level the table. Your plan says which this bush needs.
Use a clean, sharp blade and make slanting cuts so rain runs straight off. Ragged, torn cuts and blunt blades let dieback and collar rot — rot at the collar, where the stem meets the soil — in through the fresh wood.
Spread the prunings back under the bushes as mulch — they hold moisture and feed the soil while the bush regrows.
Let the bush re-grow and build a fresh table before you pluck it hard again — plucking the tender new shoots too soon starves the recovering bush and undoes the prune.
- Do:
Prune in the slow-growth lull, not mid-flush — the bush recovers faster and you lose less crop.
- Tip:
Cutting with a blunt or dirty blade — torn, crushed stumps invite dieback and collar rot into the fresh cuts.
- Watch out:
A freshly pruned bush is tender — keep the mulch on, don't let it dry out, and don't let weeds overrun it while it re-grows.
Get the green leaf to the factory fresh
Green tea leaf is alive and perishable — the moment you pluck it, it starts to heat up and break down. Getting each round to the factory fresh, within a few hours, is what turns your plucking into money; leaf that sits, heaps and heats is downgraded or thrown out. At the factory the leaf becomes black tea by withering, rolling, oxidising, drying and sorting — but only if it arrives sound.
Deliver green leaf to the factory fresh Recommended
The factory pays for fresh, cool, whole leaf. Plucked leaf that is packed tight or left in the sun heats up, reddens and breaks down within hours — and a whole day's plucking can be rejected at the gate. Delivering fast and handling the leaf gently protects the price of everything you picked.
Keep the plucked leaf loose, cool and shaded from the moment it leaves the bush — an open basket, never a tight sack or plastic bag that traps the heat.
Don't sit on, press down or overfill the leaf — crushed leaf bruises, reddens and heats up.
Get each round to the collection point or factory within a few hours of plucking — the same day, as fast as you can.
If you must wait for transport, spread the leaf thin, in the shade, with air moving through it — never heaped in a warm pile.
- Tip:
Leaving green leaf to sit, heap or bake in the sun before the factory — it heats and reddens, and the quality (and the price) is lost.
- Do:
Carry and hold the leaf loose and shaded in an open basket, so air moves through it and it stays cool right up to the factory.
- Watch out:
A warm, sweet-smelling or reddening pile means the leaf is already breaking down — spread it thin at once and move it fast.
Pests and diseases that attack tea


Grow tea with a plan, not a guess
This guide is the general answer. Divisi works out yours — the week to plant tea on your soil and your rainfall, and each job dated for your field.


When to plant tea, country by country
- When to plant tea in Angola
- When to plant tea in Burundi
- When to plant tea in Cabo Verde
- When to plant tea in Cameroon
- When to plant tea in Comores
- When to plant tea in Egypt
- When to plant tea in Eritrea
- When to plant tea in Eswatini
- When to plant tea in Ethiopia
- When to plant tea in Guinea Ecuatorial
- When to plant tea in Guinée
- When to plant tea in Kenya
- When to plant tea in Libya
- When to plant tea in Madagascar
- When to plant tea in Malawi
- When to plant tea in Mauritius
- When to plant tea in Morocco
- When to plant tea in Moçambique
- When to plant tea in Namibia
- When to plant tea in Nigeria
- When to plant tea in Rwanda
- When to plant tea in République centrafricaine
- When to plant tea in République démocratique du Congo
- When to plant tea in Sao Tome and Principe
- When to plant tea in Somalia
- When to plant tea in South Africa
- When to plant tea in South Sudan
- When to plant tea in Sudan
- When to plant tea in Tunisie
- When to plant tea in Uganda
- When to plant tea in United Republic of Tanzania
- When to plant tea in Zambia
- When to plant tea in Zimbabwe
Where tea scores best
Districts where Divisi's engine currently rates this crop highest, ranked by fit.
-
 Kabarole
 -
 Nyamasheke
 -
 Ukuma
Ukuma -
 Southern
 -
 Buuri
Buuri -
 Burambi
 -
 Idjwi
Idjwi -
 Kartala
 -
 Lalangina
 -
 San Antonio de Palé
 -
 Nyamagabe
 -
 Sironko
Get Insights by email
A short digest of new Divisi articles. No email on quiet weeks.
Frequently asked questions
How do I grow tea?
How to grow tea: 120 cm rows. Also called tee, tiyi, thé, icyayi, itiye, chá, chai.
What is tee in English?
Tee is the Afrikaans name for tea.
What is tiyi in English?
Tiyi is the Chichewa name for tea.
What is thé in English?
Thé is the French name for tea.
What is icyayi in English?
Icyayi is the Kinyarwanda name for tea.
What is itiye in English?
Itiye is the Ndebele, Xhosa and Zulu name for tea.
What is chá in English?
Chá is the Portuguese name for tea.
What is chai in English?
Chai is the Swahili name for tea.
What spacing should I use for tea?
Space tea rows about 120 cm apart, with roughly 60 cm between plants within the row.
What pests and diseases attack tea?
The ones covered in this guide are Algal leaf spot, Armillaria root rot, Bagworms. Each has its own page explaining how to identify, check for and control it.