 Divisi
Black pod
Phytophthora palmivora · Fungal
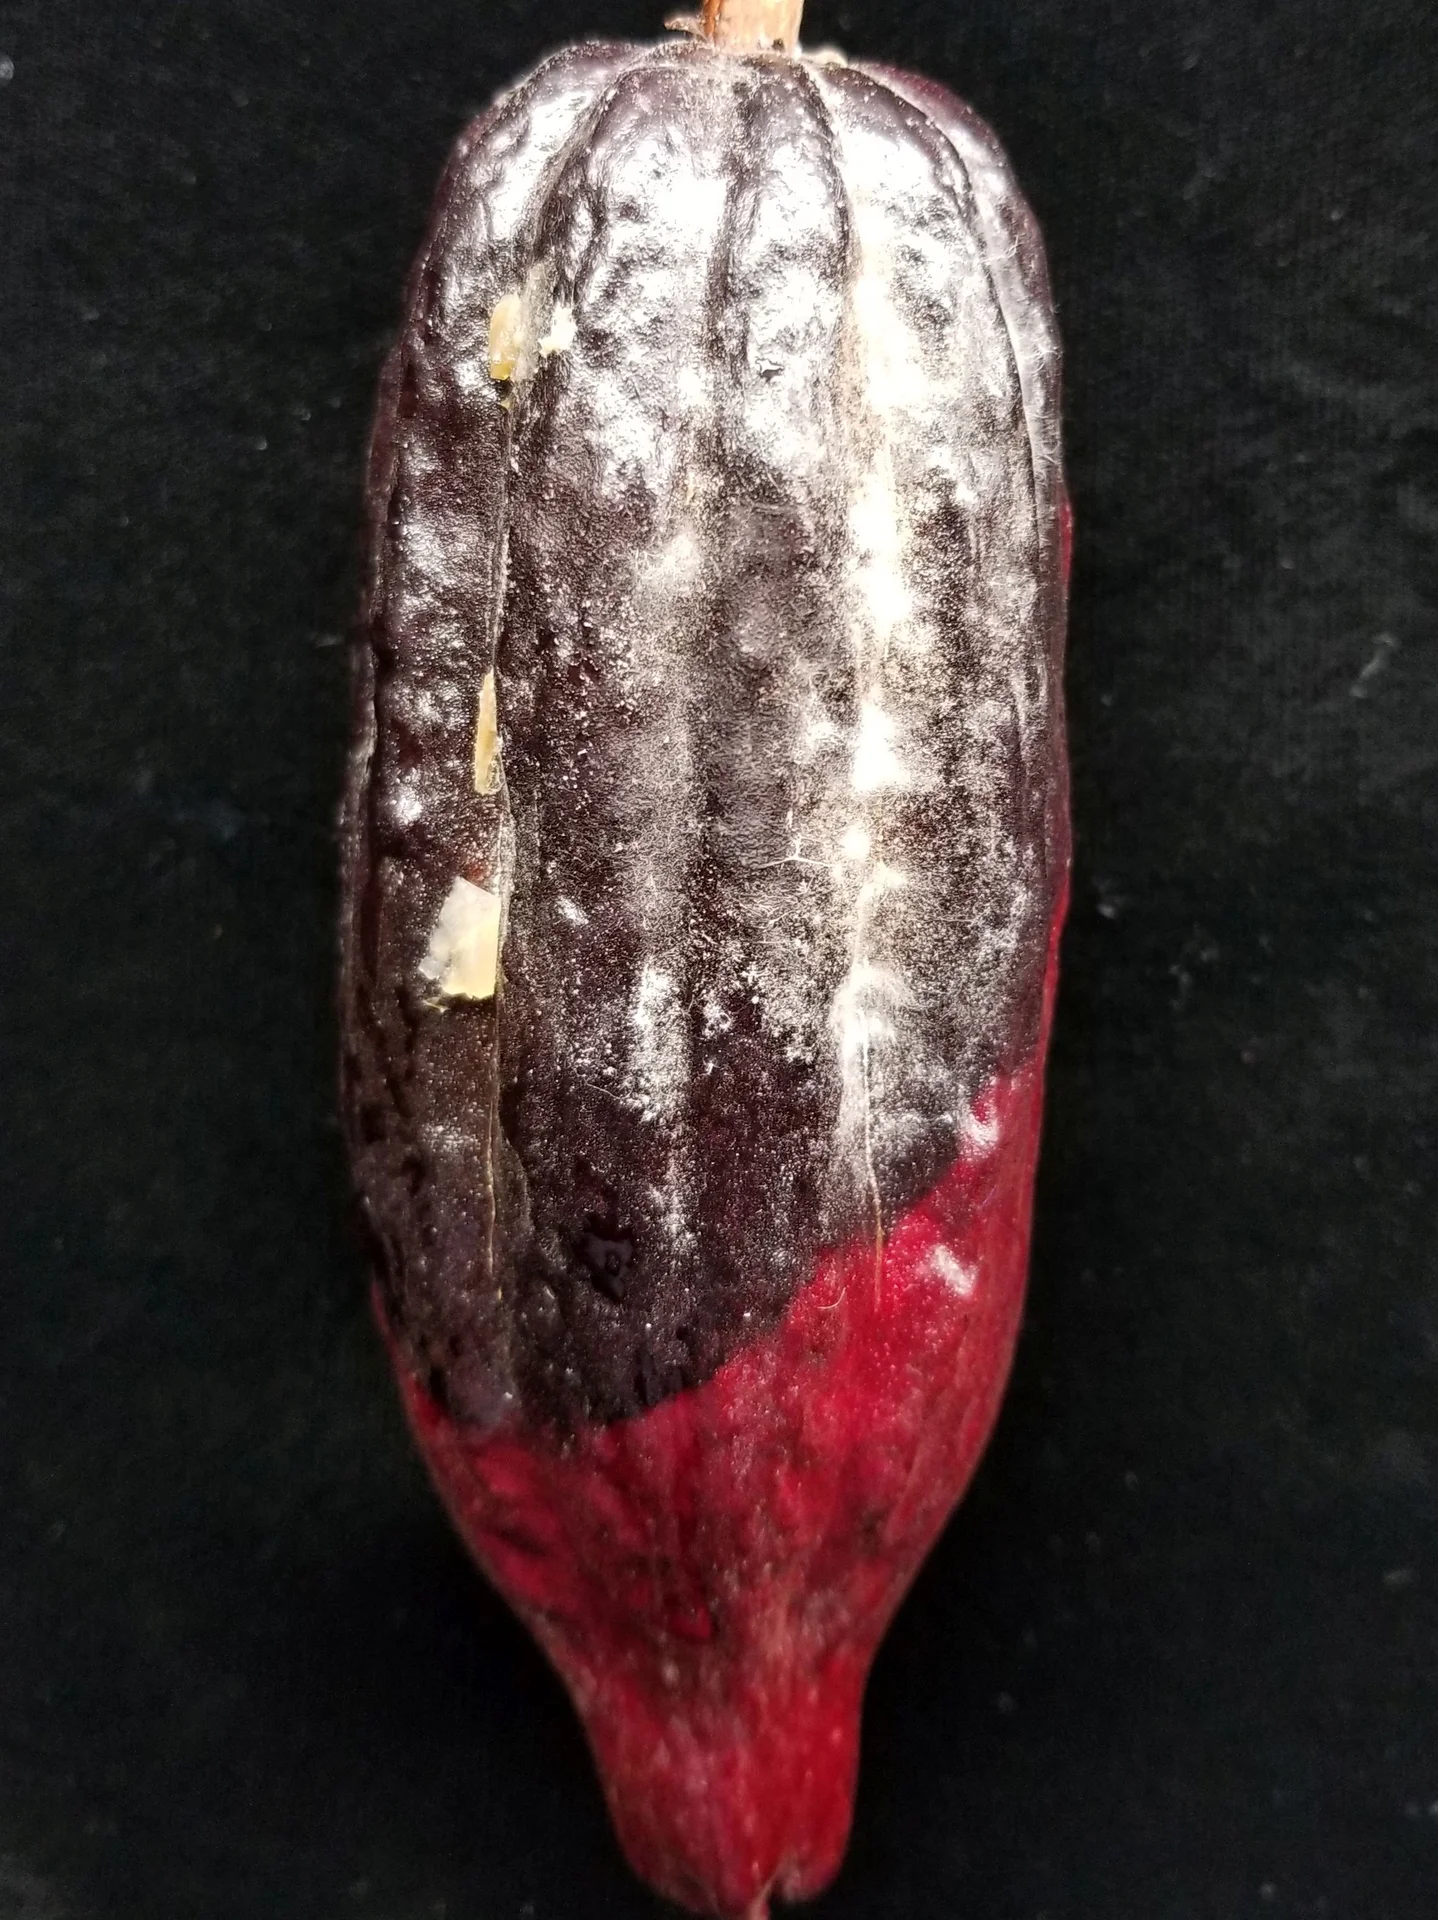
Photo: Scot Nelson · CC0
Black pod is the most damaging disease of cocoa, and it also strikes coconut and oil-palm. It is caused by a water-mould (an oomycete — a fungus-like organism that thrives in standing water and wet air) called Phytophthora palmivora, which rots the pods where your beans grow. It spreads when rain splashes its spores from the soil, fallen litter and already-rotten pods onto healthy ones, and in a wet, shady, poorly-drained plot it can even climb into the trunk and wipe out most of a crop.
Scot Nelson · CC0 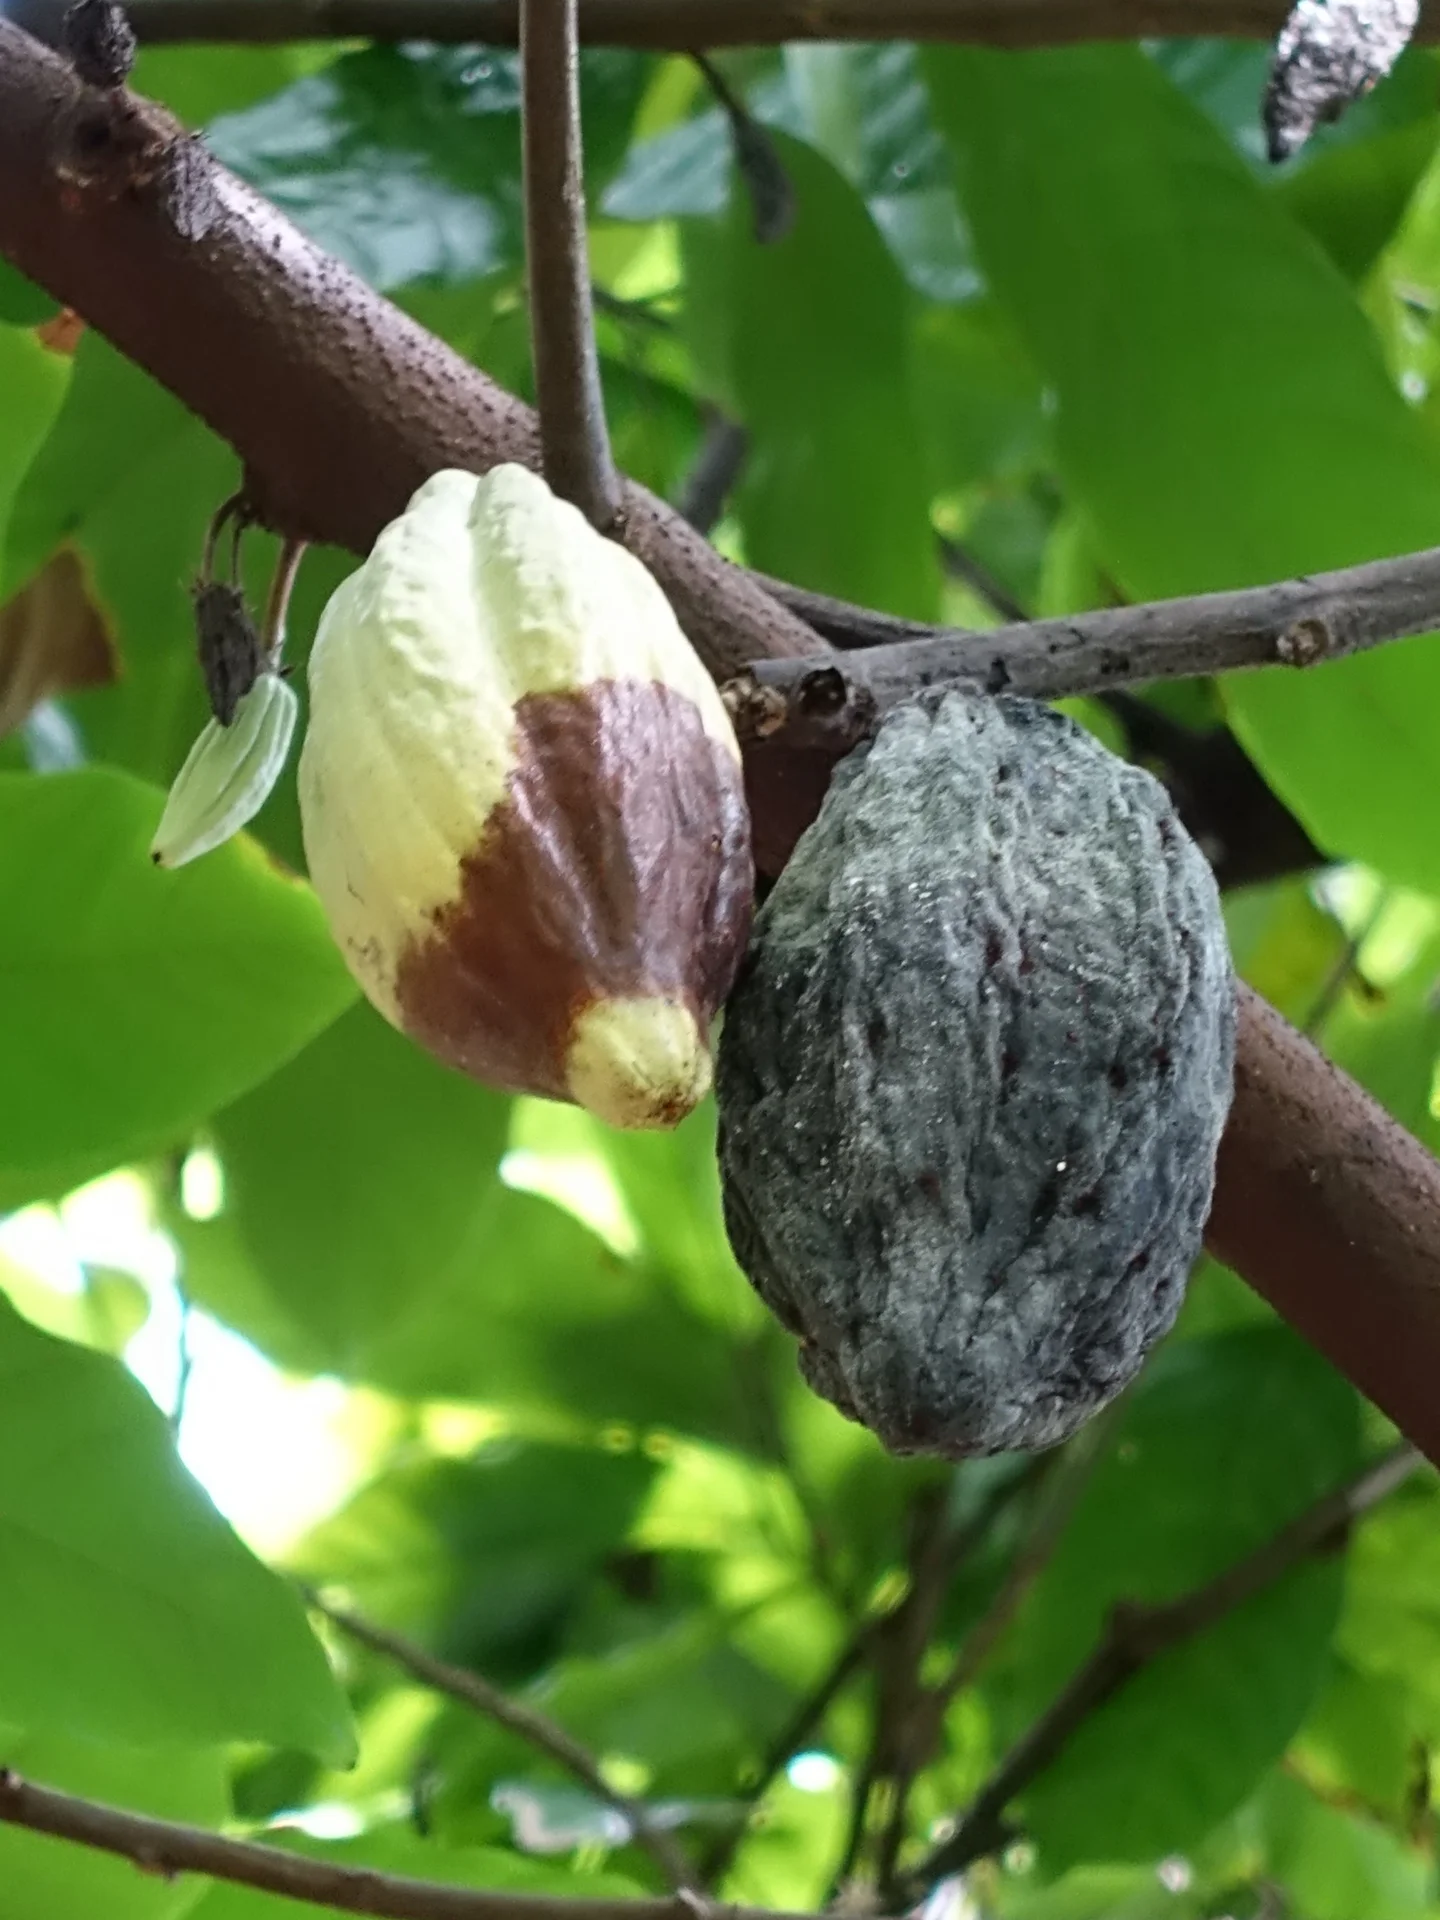
Scot Nelson · CC0
Why it matters
Black pod rots the pods themselves — the very part you harvest and sell. In a wet season it can rot up to 80% of your crop (four pods in every five), and a single rotten pod left hanging showers spores onto every healthy pod around it each time it rains. Once it is established in a wet, shady plot it spreads faster than you can pick, and its spores survive in the soil, fallen litter and old dried-up pods to attack again next year — so the only real cure is to catch it early and keep your plot dry and clean.
When to act
Begin protective sprays and weekly sanitation at the onset of the wet season or when the first pod lesions appear.
This guidance is general, compiled from published agronomic references including FAO and CABI. Thresholds and timing shift with your crop, your variety and the season.
In much of the region a spray is simply called mushonga — medicine. But a chemical group you cannot name is one you cannot rotate, and a product you did not write down has no pre-harvest interval you can observe. Mushonga, and other farming words →
The full Black pod field guide
Identify it
The first sign
a small, hard, water-soaked spot appears on the pod — often near the tip, the stalk, or wherever rainwater collects — and quickly turns a chocolate-brown colour. Unlike a knock or a bruise, this spot does not stay put.
It spreads fast
within a few days the brown patch darkens to black and races outward in a spreading half-moon shape until the whole pod turns black. A pod that looked healthy can be completely black in under a week — this speed is the hallmark of black pod.
The give-away sign
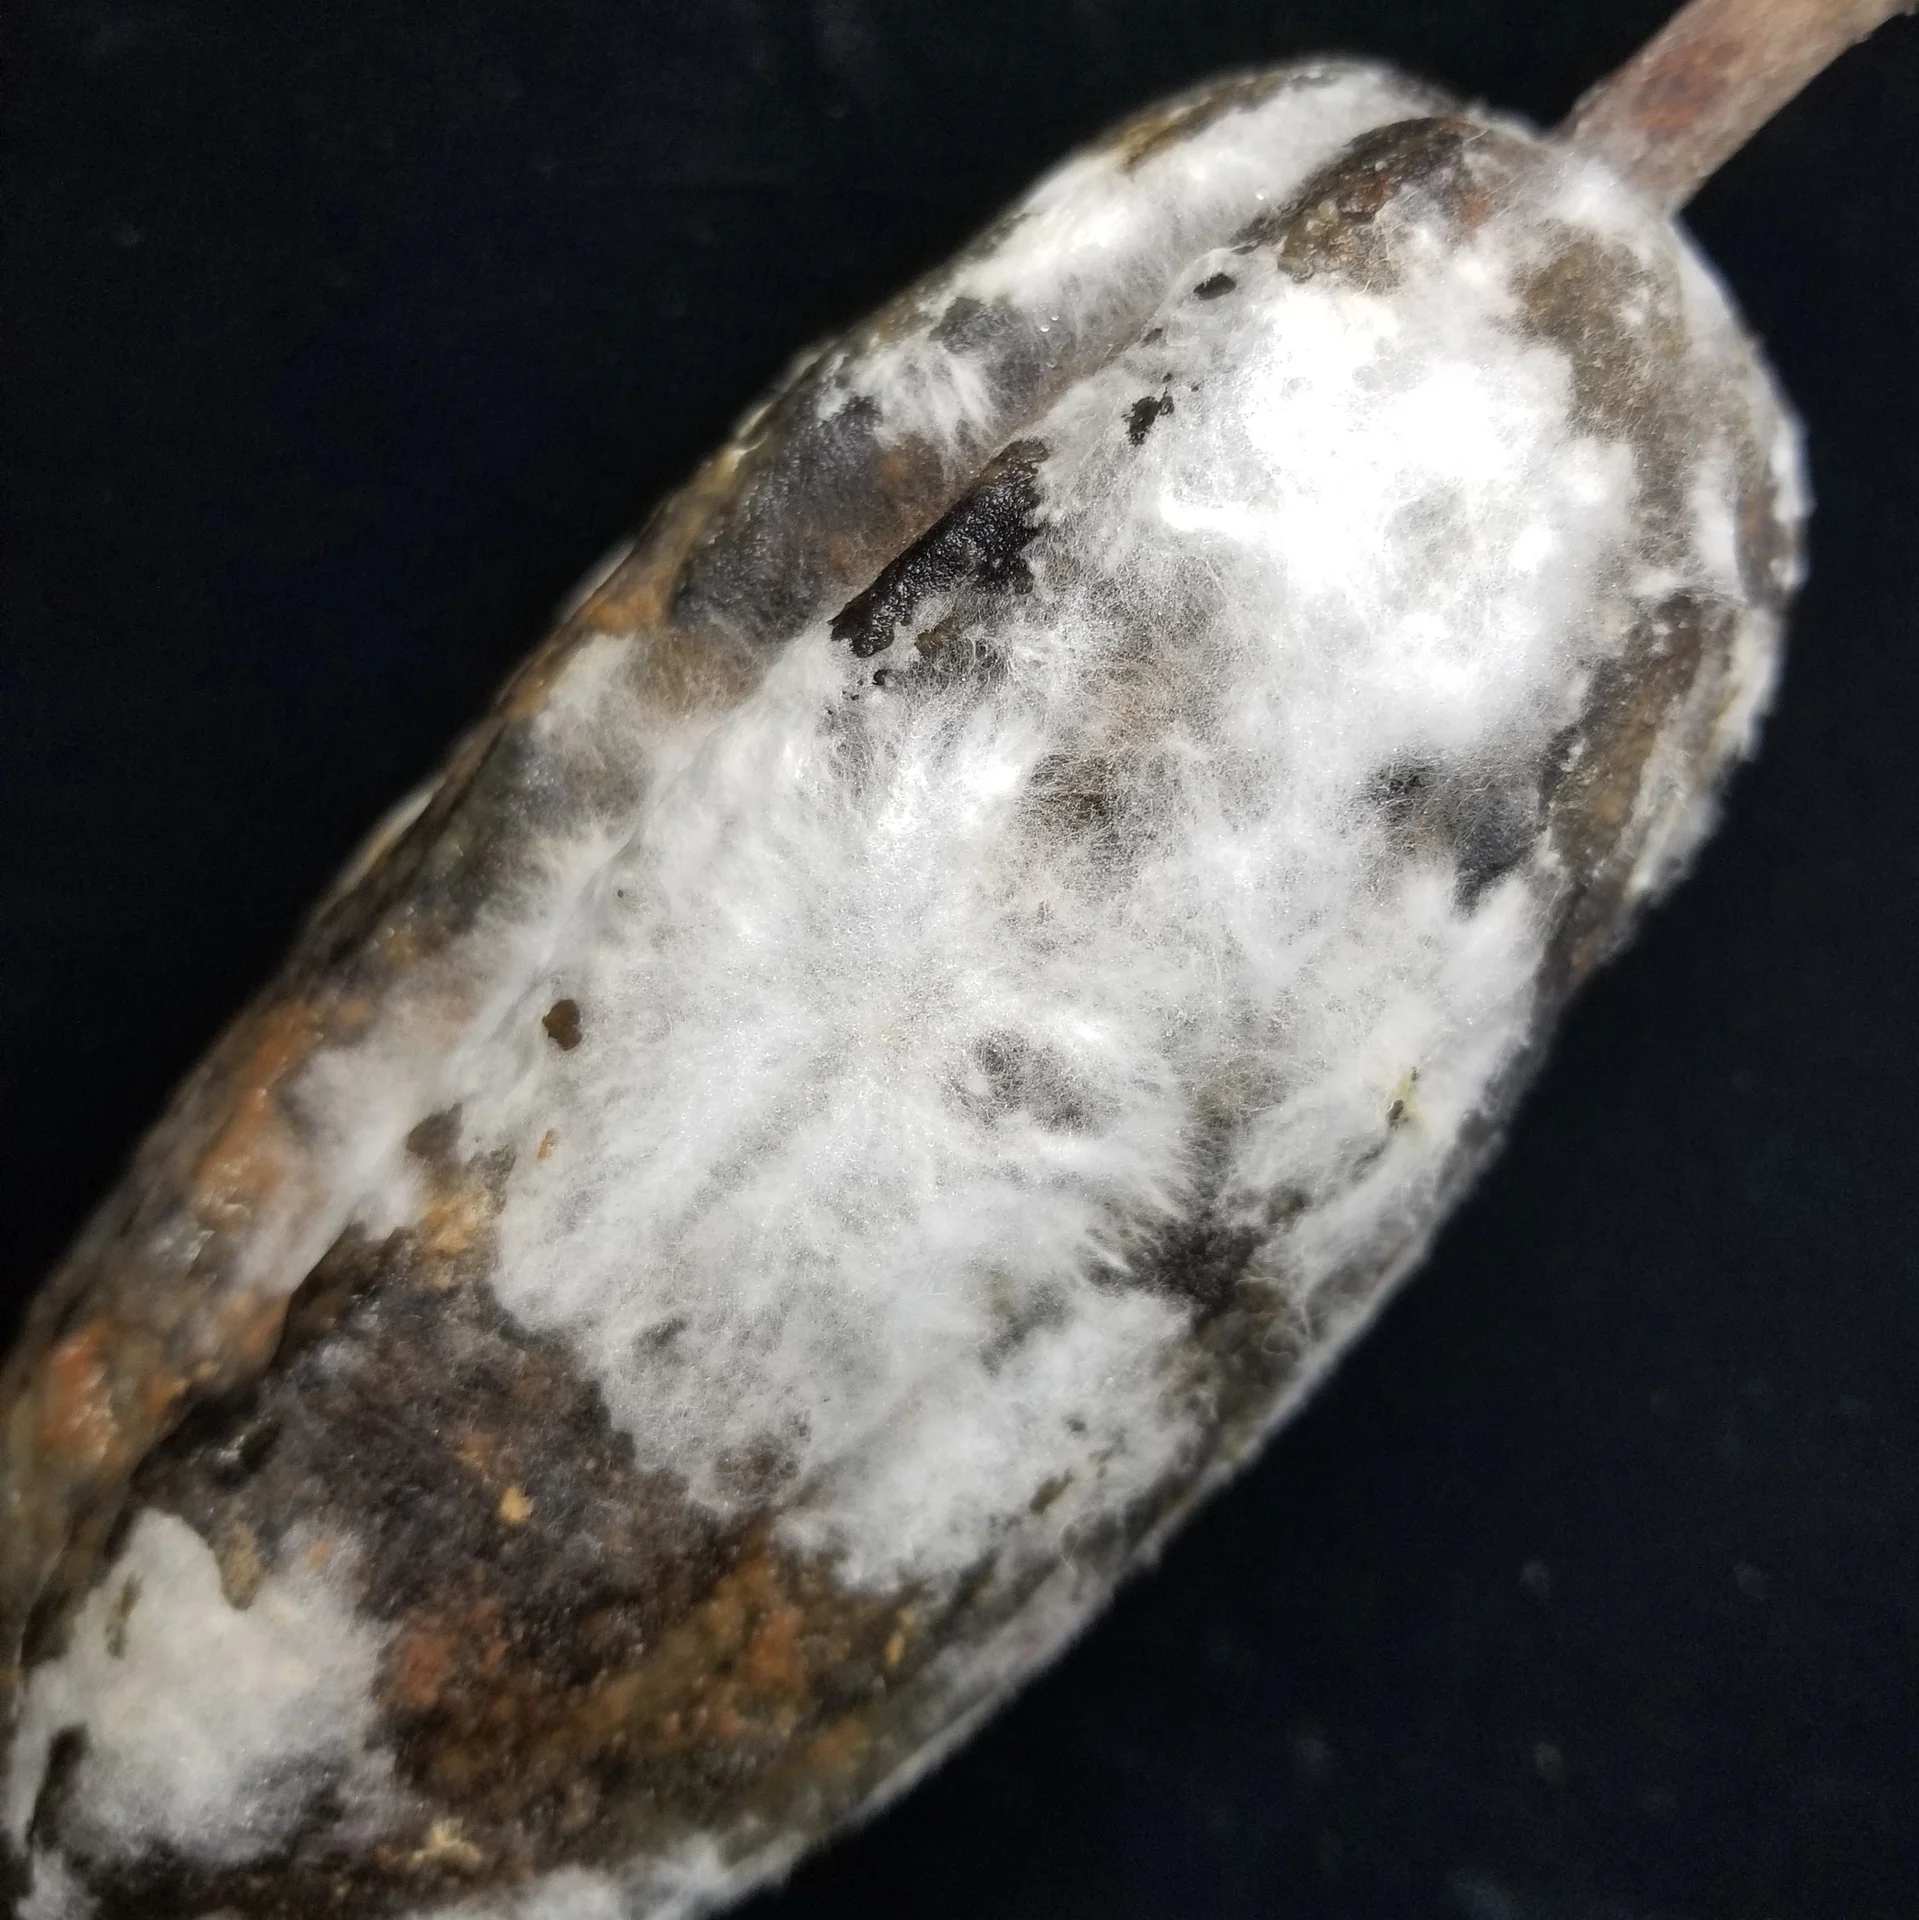
in humid, wet weather a fine white or cream powdery bloom (the mould's spores) dusts the surface of the blackened pod. No other pod problem makes this white dust — it is your surest proof that it really is black pod.
Inside and up the tree
split a black pod open and the beans are rotten — brown, slimy and stuck together — so the whole pod is a loss. The rot can also climb into the cushions and bark of the trunk, leaving dark, wet, sunken patches (called cankers — dead, rotting bark) that may ooze a reddish liquid.
Don't confuse it with cherelle wilt
cherelle wilt is a natural thinning where some small young pods blacken, then shrivel, dry hard and mummify on the tree — but they stay dry, with no white bloom, and the blackening does not spread to neighbouring pods. Black pod is a wet, spreading rot carrying the tell-tale white dust; cherelle wilt is a dry, harmless shrivel of just a few small pods.
Scout for it
When to look
black pod attacks the pods as they develop and ripen through the wet season — so this is when to watch closely. Start walking the plot once a week as soon as the rains set in, and step up your checks after long spells of rain and heavy, humid, still air, which is exactly when the disease races.
How to walk it
take a big W-shaped path across the plot so you pass through all four corners and the middle — not just the trees along the path by your house, where it is easy to keep looking at the same few.
What to check — about 10 stops:
at each stop, look over pods of every size, from the low pods near the wet ground to the ones high on the tree, paying special attention to where two pods touch, where a pod joins the branch, and any pod splashed with soil.
Also check the trunk and the ground
run your eye over the trunk and branch cushions (where the pods hang) for dark, wet, sunken cankers, and glance at the ground and leaf litter for rotten fallen pods — these are the spore stores that start each new round of infection.
One is enough to act
unlike an insect pest, you do not wait for a percentage — a single spreading black pod, or the first white bloom, means spores are already loose in your plot, so remove it the moment you see it. And from the onset of the wet season, run weekly sanitation (picking and burying rotten pods) even before the first spot shows.
Control it
PREVENT
-
keep the plot open and dry (your strongest tool):
black pod thrives in still, damp, shady air, so let the sun and wind in. Prune the canopy and cut back heavy shade trees so pods dry quickly after rain, remove the chupons (the upright suckers that sprout from the trunk and base), keep wide spacing between trees, and clear the drainage so water never sits. Drier air alone defeats most of the disease — this is the method that works best short of spraying.
-
break the spore cycle by hand every week:
through the rains, pick off and carry away every rotten or black pod — from the tree AND from the ground — and bury them (or dump them far from the plot), and harvest ripe pods promptly so none are left to rot. This weekly hand-cleaning (sanitation) is the single most important job, because every rotten pod left hanging is a spore factory raining infection onto the healthy pods below.
-
plant tolerant types:
when you plant new trees or fill gaps, choose tolerant cocoa hybrids where you can get them. They will not stop black pod on their own — they only cut losses part-way — but they lower your starting losses so all your other work goes further.
LAST RESORT — copper spray as a shield, used with care:
where a wet plot is under real pressure, a copper-based protectant fungicide shields the pods. Protectant means it only sits on the outside and blocks spores from landing — so it must go on before infection and be re-sprayed every 3–4 weeks through the wet season and after heavy rain washes it off; for high pressure a metalaxyl-copper mix (part systemic — meaning some of it is taken up inside the pod — for longer cover) can be used. Safety: cover your skin, eyes, nose and mouth; spray in the cool of the day with the wind at your back; keep the spray off food, drinking water, children and bees; respect the pre-harvest interval (the number of days the label tells you to wait between the last spray and picking pods); and wash yourself and your clothes afterwards. Resistance: never lean on the same systemic (metalaxyl) every time — alternate it with plain copper so the disease cannot learn to survive it.
IF IT KEEPS SPREADING → clean harder before you spray more
if pods keep blackening, the leak is almost always missed rotten pods or a canopy still too wet — so walk the plot twice a week, remove every last diseased pod and cut any oozing trunk cankers back to clean, healthy wood, and open the shade further. If a tree is riddled with cankers and losing most of its pods season after season, cut your losses: it has become a spore reservoir feeding the whole plot, so remove or heavily rehabilitate it and replant with a tolerant hybrid so it stops reinfecting your healthy trees.
Catch Black pod before it costs you the harvest
This guide is the general answer. Divisi works out yours — the week to scout your own field for Black pod, and what to do the day you find it.


Crops it affects
Plan the crops it attacks
-
 When to plant Cocoa in Mbini
 -
 When to plant Coconut in Chake Chake
 -
 When to plant Oil palm in Itsandra-Hamanvou
All planting calendars, country by country
Get Insights by email
A short digest of new Divisi articles. No email on quiet weeks.
Frequently asked questions
How do I identify Black pod?
The first sign. a small, hard, water-soaked spot appears on the pod — often near the tip, the stalk, or wherever rainwater collects — and quickly turns a chocolate-brown colour. Unlike a knock or a bruise, this spot does not stay put.
When should I take action against Black pod?
Begin protective sprays and weekly sanitation at the onset of the wet season or when the first pod lesions appear.
How do I control Black pod?
PREVENT — keep the plot open and dry (your strongest tool):. black pod thrives in still, damp, shady air, so let the sun and wind in. Prune the canopy and cut back heavy shade trees so pods dry quickly after rain, remove the chupons (the upright suckers that sprout from the trunk and base), keep wide spacing between trees, and clear the drainage so water never sits. Drier air alone defeats most of the disease — this is the method that works best short of spraying.
Which crops are attacked by Black pod?
Among the crops covered here: Cocoa, Coconut, Oil palm.