 Divisi
How to grow coconut
Cocos nucifera · Arecaceae
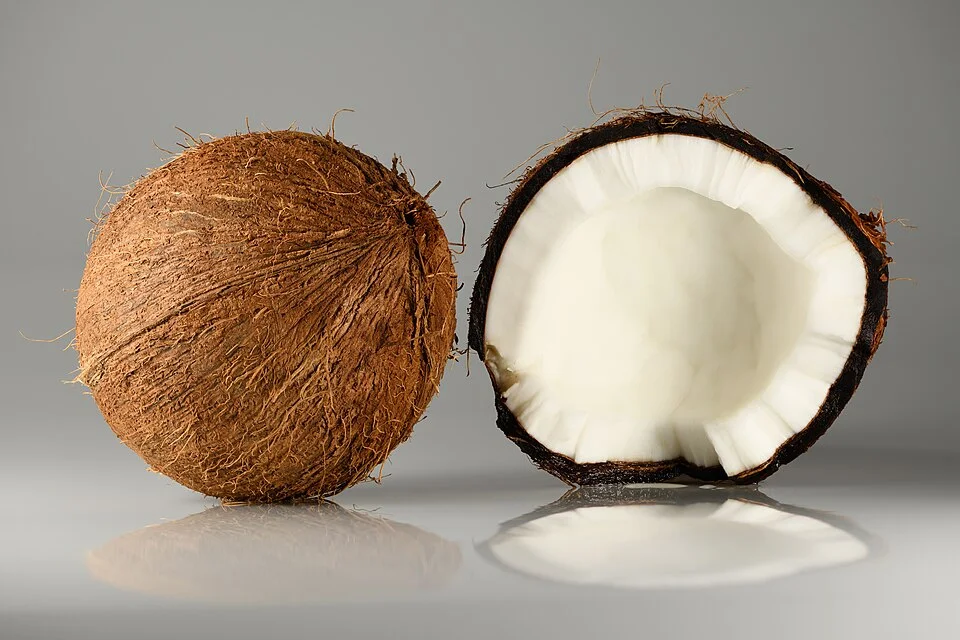
Photo: Ivar Leidus · CC BY-SA 4.0
The coconut is the coast's tree of life — a tall palm you plant once and pick from for 60 to 80 years. One seed is a whole nut, raised in a nursery for the best part of a year before it ever reaches the field. It thrives on sandy soil and salt air where little else will grow, and gives you sweet drinking water, food, cooking oil from the dried kernel (copra), and husks and fronds for a hundred jobs around the home. Tall types are hardy and start bearing in 6–10 years; Dwarf types bear sooner, in 3–5 years; hybrids sit in between. You plant a coconut for your children as much as for yourself — so choose the parent palm and the seedling with care, because a poor palm can never be fixed once it is in the ground.
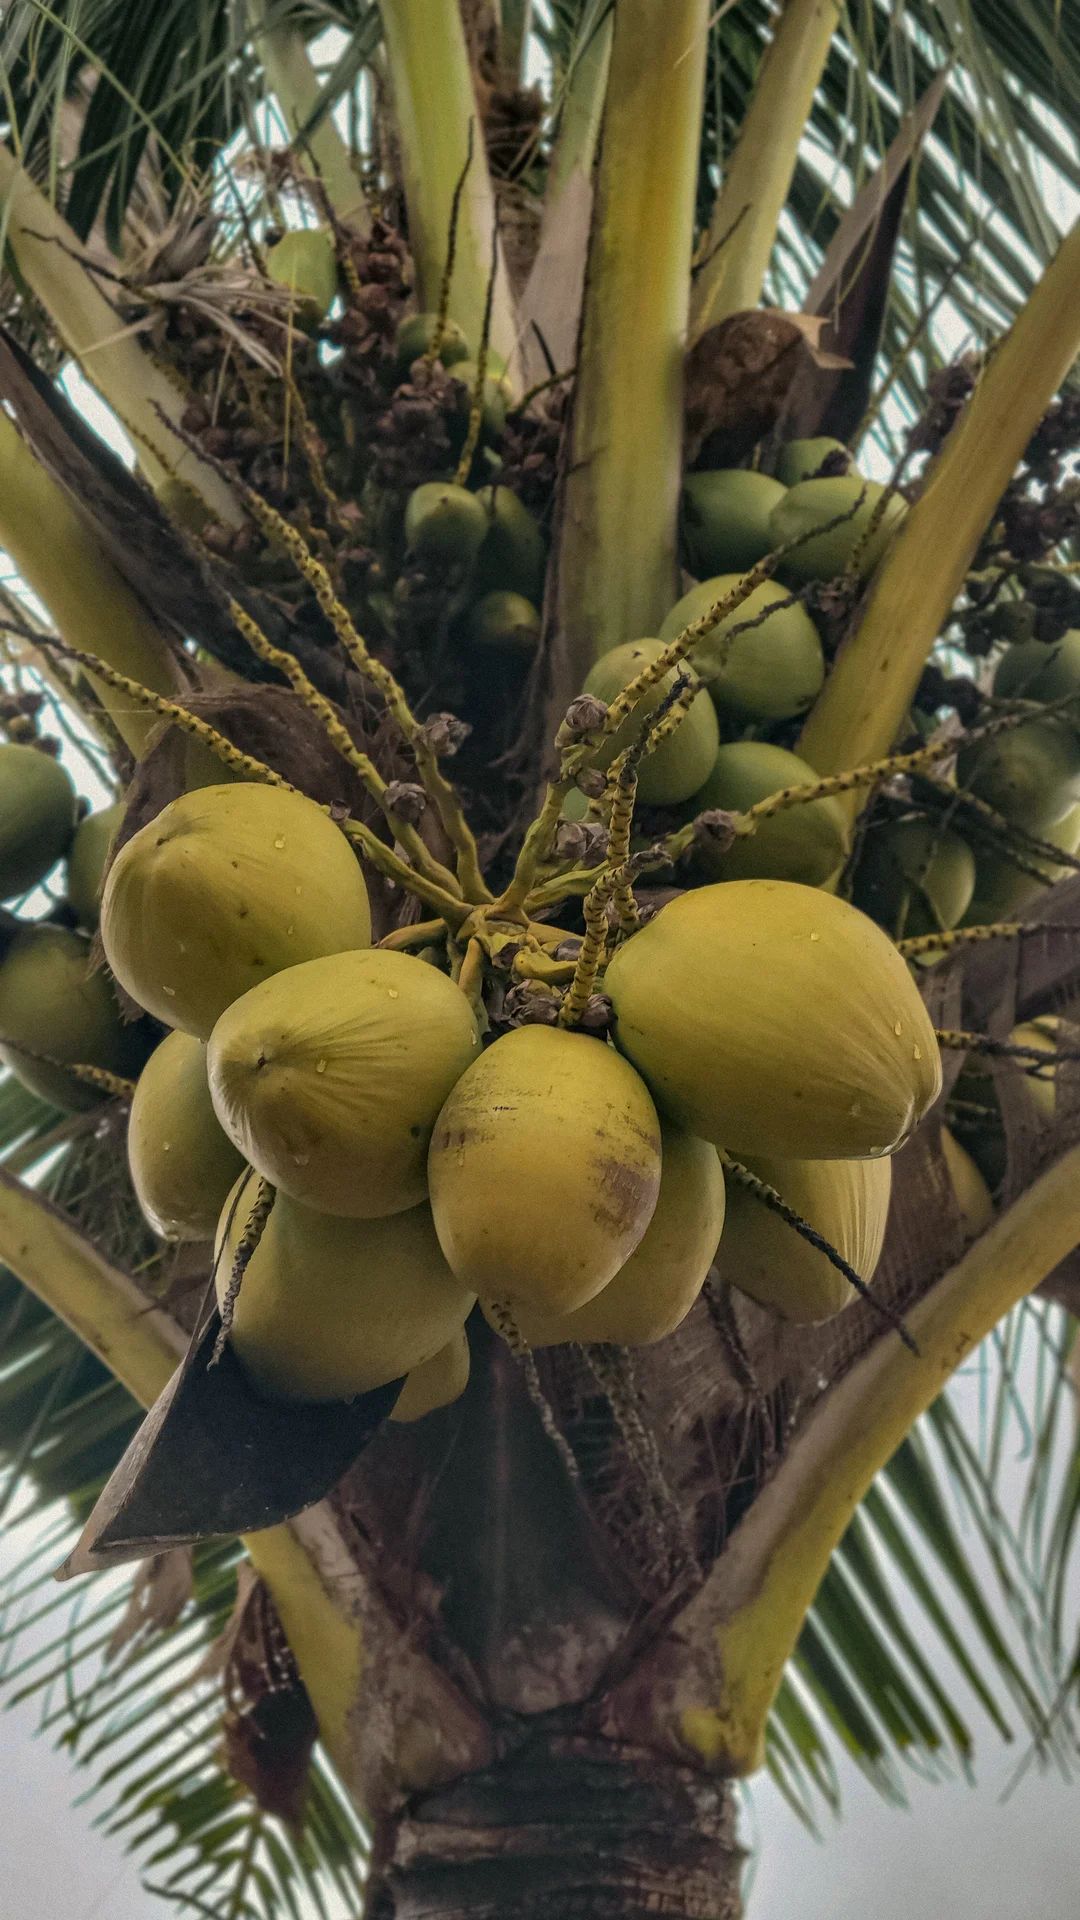
Timiadekola · CC BY-SA 4.0 
Nhrjmhll · CC0
- Days to maturity
- 330–365 days
- Row spacing
- 800 cm
- Plant spacing in the row
- 800 cm
These are general figures for the crop, compiled from published agronomic references including FAO and CABI. The right choice for your field depends on your soil, rainfall and the yield you are aiming for.
Will coconut actually do well on your field? Check your own field against every crop in the catalogue — no signup. Run the crop check →
Also known as
- Afrikaans
- klapper
- French
- cocotier, noix de coco
- Portuguese
- coqueiro, coco
- Swahili
- mnazi, nazi, dafu
Working in buckets, bags or paces? The farming glossary turns the measures growers actually use into kilograms and hectares — what a 20 litre bucket of each crop really weighs, and how to size a field by walking it — alongside the Shona, Swahili, Ndebele and Yoruba words used in the field. Open the glossary →
Growing coconut, stage by stage
Coconut is a lifelong tree, not a one-season crop — this guide takes you from choosing good seednuts and raising strong seedlings, through planting and the long years of care, to a lifetime of picking nuts and drying copra hard.
Choose good seednuts and raise strong seedlings
You plant a coconut once and it stands for 60–80 years, so the seednut and the seedling you pick now decide decades of harvest — and a weak palm can never be fixed later. Take seednuts only from proven, heavy-bearing mother palms, raise them in a shaded, watered nursery for the best part of a year, and keep only the strongest 9–12-month seedlings. Get the site and the planting pits ready before the rains come.
Select seednuts from good mother palms Critical
A coconut palm bears for 60–80 years, and it can only ever be as good as the nut it grew from — a nut from a poor palm gives you a poor palm for a lifetime. Choosing seednuts from proven, heavy-bearing mother palms is the cheapest and most powerful thing you do in this whole guide, and it costs you nothing but care.
Pick your mother palms first. Choose palms that are heavy, regular bearers — a good one carries 60 or more nuts a year — with a dense, round crown and a short, stout trunk, and no sign of disease. Watch a palm across a full season before you trust it.
Take only fully mature seednuts: the husk is dry and brown, and when you shake the nut the water sloshes clearly inside. Green or half-ripe nuts sprout poorly, or not at all.
Choose medium-to-large nuts of the normal shape for that palm. Pass over any that are odd-shaped, very small, cracked, or pierced with pest holes.
Collect them in the dry season, then let them rest (this resting is called curing) in the shade for a few weeks before you sow them in the nursery — it evens out how they sprout.
Handle every nut gently — a nut dropped hard can crack the sprout hidden inside. Never take a seednut from a palm with yellowing fronds or early nut fall; it may be carrying disease.
- Do:
Mark your chosen mother palms with paint or a tag, so you and your family collect from the same proven trees year after year.
- Tip:
Picking up windfall nuts from the ground under unknown palms — you don't know the parent, and many are duds that never sprout.
- Watch out:
A nut that does NOT slosh when shaken is either unripe or dried out — leave it. Only keep nuts you can clearly hear water moving in.
Raise & select the best seedlings Critical
Not every seednut makes a good palm. The nursery is your one chance to throw out the weak ones before they take up a lifetime of space in your grove. The seedlings that sprout fastest and grow stoutest in the nursery are the very ones that will bear earliest and heaviest in the field — so this is where you cull hard.
Sow the cured seednuts in a nursery bed of sandy soil: lay each nut on its side, half-buried, packed close together, and keep the bed shaded and watered.
Keep the bed weeded and moist for the best part of a year. The first sprouts show at about 3–5 months, but they come up unevenly — and that unevenness is exactly what helps you sort the strong from the weak.
By 9–12 months after you sowed the nursery, lift and judge each seedling on three signs: it sprouted early, it has a thick collar (the swollen base where the shoot meets the nut — as thick as your wrist is good), and its leaflets have already begun to split into the feathery shape.
Keep only the best. A good rule is to throw out the slowest quarter to third — thin, late, or spindly seedlings never catch up, no matter how you feed them.
Move the kept seedlings to the field at the start of the rains, lifting each one with its nut and a ball of soil so the roots are not torn.
- Do:
Keep the nursery close to water and shade — a coconut nursery needs steady moisture for nearly a full year.
- Tip:
Keeping a slow or thin seedling just because you are short of plants — one poor palm wastes a good spot for 60 years.
- Watch out:
A fat collar and early leaflet-splitting are the two surest signs of a future heavy bearer — always favour those seedlings over tall, thin ones.
Prepare a well-drained coastal/sandy site Recommended
A coconut's roots reach down about 2 metres and the palm will stand in this spot for decades, so the site you choose and the pits you dig now must serve it for a lifetime. Coconut loves full sun, sandy, well-aired soil, and even a high water table — but it will not sit in a swamp where water stands and rots the roots.
Choose an open, sunny site — coconut needs full sun and stalls in shade. Sandy or sandy-loam coastal soil is ideal; the palm even shrugs off salt spray and a high water table.
Clear the land and mark planting stations about 8 strides (≈8 m) apart each way — roughly 150 palms to a hectare. Wide spacing lets every crown get full light for its whole life.
On low, wet ground, throw up mounds or cut drainage channels so water never stands around the base — the palm takes a high water table but rots in a swamp.
At each station, open a pit at least 45 cm wide and 45 cm deep — about knee-height each way — and bigger, up to a 60 cm cube, in hard or heavy ground. Keep the dark topsoil in one heap and the pale subsoil in another.
Let the pits weather open for a few weeks. You will refill them at planting with topsoil, well-rotted manure and sand.
- Do:
Line the palms up on a straight grid in both directions — tidy rows make weeding, feeding and harvesting far easier for 60 years.
- Tip:
Cramming palms closer than 8 strides to fit more in — crowded crowns shade each other and every palm then bears less.
- Watch out:
Don't plant in a cold frost hollow or in deep shade — coconut is a warm-coast palm and sulks in cold or shade.
Plant well and nurse it through the early years
This is the young palm's start in the field. You plant it once, into a big pit made rich with topsoil, manure and sand and topped with a husk mulch, then nurse it through its first two years with water and a clean ring. Rhino beetle and red palm weevil hunt young palms and can kill the single growing point — so keep the crown and the base clean and check often.
Plant in big pits + husk mulch Critical
The young palm lives off this one pit for its first years. A big pit filled with rich topsoil, manure and sand, topped with a husk mulch that holds water, gives the roots an easy, moist, well-fed start — and a strong start is what carries the palm through its first dry seasons all the way to bearing.
Plant at the start of the rainy season, so the young palm gets months of rain to root down before it ever faces a dry spell. Do it within about two weeks of the first good rains.
Half-fill the pit with a mix of topsoil, well-rotted manure and sand — this is the loose, rich bed the first roots will feed in.
Set the seednut or seedling in the middle so the collar (where the shoot meets the nut) sits level with the ground — not buried deep, not perched high. Keep the nut lying the way it grew, sprout upward.
Fill in around it and firm the soil with your foot so there are no air pockets and the palm stands steady.
Mulch the basin thickly with coconut husks, coir (the loose husk fibre) or dry grass to hold moisture and keep the ring cool. Laying husks hollow-side-up (each husk cupped like a little bowl) in the pit also catches and holds rainwater for the roots.
Water it in well.
- Do:
Plant at the very start of the rains, so the palm has the whole wet season to root down before any dry spell tests it.
- Tip:
Burying the collar deep — a too-deep palm rots at the neck and sulks. Keep the collar right at soil level.
- Watch out:
Keep loose manure and rubbish heaps AWAY from the young palms — those heaps are where rhino beetle grubs breed before they attack the crown.
Scout (rhino beetle, red palm weevil) Recommended
In its first two years the young palm has only a few fronds and one growing point — lose that single bud to a beetle or a weevil and the whole palm dies. There is no second bud and no recovery. A quick look at the crown once a month catches these pests while you can still act.
From about 1 month after planting, look closely at the crown and the spear (the newest, still-folded leaf) of each young palm every 4–5 weeks — the crown is where both pests attack.
Rhinoceros beetle: look for V-shaped notches cut into the fronds as they unfold, and clean bore-holes at the base of the spear. The pest itself is a large black horned beetle that bores into the crown at night.
Red palm weevil: look for a wilting, drooping spear, a sour, fermented smell from the crown or trunk, and oozing holes packed with chewed fibre — the fat grubs tunnel inside where you cannot see them.
Starve the beetle: clear away rotting manure heaps, dead palms and old stumps nearby, because that is where rhino beetle grubs breed.
If you find a beetle, hook it out of its bore-hole with a stiff bent wire. If a young palm's spear pulls out rotten and sour, that palm is likely lost to weevil — cut it and burn it so the grubs don't spread to your other palms.
- Watch out:
A drooping spear that pulls out EASILY with a sour, fermented smell means the growing point is already rotting from weevil — act on that palm at once.
- Do:
Keep the plot tidy — no rotting logs, dung heaps or dead palms — and you starve rhino beetle of the muck it breeds in.
- Tip:
Leaving a dead or dying palm standing; it becomes a beetle-and-weevil nursery that infects your healthy palms.
Water + weed the ring Recommended
A young palm has a small, shallow root system and dies fast if the ring around it dries out, or if grass and weeds steal its water. Watering and keeping a clean, mulched basin through the first dry seasons is the difference between a palm that survives to bear and one that quietly dies in its first year.
Keep a clean, weed-free ring about one stride (≈1 m) across around each young palm — grass right at the base is the palm's worst rival for water.
In the dry season, water each young palm every week or two — a few buckets soaked into the basin, not a light splash that only wets the surface.
Keep the basin mulched with husks or dry grass so the water you carry does not bake straight off in the sun.
Pull weeds by hand, or hoe only shallowly near the palm — the young feeder roots run close to the surface and are easily cut.
As the palm grows, widen the clean ring outward to match its spreading roots.
- Do:
Mulch heavily — a thick husk-and-grass mulch can halve how often you must carry water in the dry season.
- Tip:
Hoeing deep against the trunk — you slice the shallow feeder roots the young palm lives on.
- Watch out:
A young palm whose newest leaves stay tightly folded and turn grey is thirsty — water it before that spear dries out.
The growing-up years — feed it and keep it healthy
These are the growing-up years, from year 2 until the palm first bears (Dwarf ~3–5 years, Tall ~6–10 years). The palm builds trunk and crown but gives you nothing to sell yet. Feed it potassium and magnesium four times a year, keep the ring clean and moist, and above all watch for lethal yellowing and remove any sick palm at once, before it spreads to the whole grove.
Scout (lethal yellowing, weevil) Critical
In these years a killer disease — lethal yellowing — and the red palm weevil can take out whole palms, and one diseased palm left standing infects its neighbours. A monthly walk to spot and remove sick palms early protects the future of your entire grove.
Once a month, from year 2 until the palm bears, look over each palm's crown, fronds and any flower spikes.
Lethal yellowing shows in an order — learn it: first the nuts drop early while still small, then the oldest, lowest fronds yellow and the yellowing climbs up the crown, the flower spikes blacken and die, and finally the crown collapses. Bottom-up yellowing plus early nut fall means real danger.
Red palm weevil: a wilting spear, a sour, fermented smell, and holes on the trunk oozing brown fluid — the grubs are tunnelling inside.
Remove sick palms at once — this is called roguing. A palm with clear lethal-yellowing signs cannot be cured — cut it down and burn or bury it quickly so the insect that carries the disease can't move it to healthy palms.
For the next several months, keep a close eye on the neighbours of any palm you removed.
- Watch out:
Yellowing that starts on the OLDEST, LOWEST fronds and climbs UP is the lethal-yellowing pattern — act on it. A whole crown going pale evenly is more often hunger or drought.
- Do:
Remove and destroy a confirmed lethal-yellowing palm the SAME week — a standing sick palm is a source that keeps infecting the rest.
- Tip:
Waiting to 'see if it recovers' — lethal yellowing has no cure, and every week you wait it spreads further.
Manure (K + chloride/salt + Mg) Critical
Potassium is the nutrient that fills coconuts — it makes the nuts, the water and the oil, and the palm needs more of it than of anything else. With magnesium to keep the older fronds green and a little salt (the palm feeds on the chloride it holds), splitting the feed into about four rounds a year keeps a steady supply that the rain can't wash straight through the sandy soil.
Feed about every 3 months — four small rounds a year — so the palm always has potassium to hand and no single big dose is washed away by the rain.
Spread the feed in a ring around the palm, never against the trunk: for a young palm keep it about one to two hand-spans (20–40 cm) out; widen it to a stride (≈1 m) or more as the palm grows and its feeder roots spread.
Use potassium as the main feed — muriate of potash if you can buy it (it gives potassium and the chloride the palm likes), or wood ash from the fire, which is rich in potash. Your recommendation gives the exact amount for your palms.
Add magnesium (from dolomite, or an Epsom-type magnesium salt) — it keeps the older, outer fronds green; a palm short of magnesium goes orange-yellow on its oldest fronds first.
Work in well-rotted manure with the ring feed, plus a small handful of common salt per grown palm — coconut is a coast palm and does better with a little chloride.
Lightly fork it into the topsoil of the ring and mulch over it, so it feeds down to the roots instead of blowing or washing away.
- Do:
Split the potassium into about four feeds a year — one big dose is mostly washed straight through sandy coastal soil before the palm can use it.
- Watch out:
Oldest fronds turning yellow-orange from the tips = the palm is short of potassium or magnesium; an even, all-over paleness is more often drought — read which before you act.
- Tip:
Piling fertiliser or salt against the trunk — it burns the base; always spread it in the feeding ring. Wash your hands afterwards, and keep fertiliser off food and water and away from children.
Weed the ring Recommended
Grass and weeds crowding the base steal the water and the potassium you just fed the palm, and a weedy, littered base also hides the rats and beetles that attack it. A clean ring sends your inputs into the palm, not into the weeds.
Every month or two, clear weeds and grass from a ring about a stride (≈1 m) across around each palm — widen the ring as the palm grows.
Slash or pull the weeds; hoe only shallowly near the palm so you don't cut the surface feeder roots.
Leave the pulled weeds as a mulch in the ring (kept away from the trunk) to hold moisture — unless they are already carrying seed.
Keep rotting piles and rubbish out of the ring — they shelter rhino beetle grubs and rats.
- Do:
Time your weeding just BEFORE you feed the palm, so the potassium goes to the coconut and not to a fresh flush of weeds.
- Tip:
Deep hoeing at the trunk — the palm's shallow feeder roots run right under the ring surface and are easily cut.
Bearing begins — keep the bunches coming
Once the palm starts bearing it never really stops — a new flower bunch opens about every month, and nuts of every age hang together on the crown. (Talls cross-pollinate; Dwarfs pollinate themselves.) Your job now is steady: keep feeding potassium and magnesium, keep water coming in dry spells — or the palm sheds its young 'button' nuts — and watch for coconut mite and bud rot.
Scout (mite, bud rot) Recommended
Two quiet problems steal nuts here: coconut mite scars and shrinks the young nuts, and bud rot can rot out the growing point and kill an otherwise healthy bearing palm. A monthly look at the young bunches and the crown catches both early, while you can still act.
Once a month, look at the young nuts near the crown and at the spear and heart of the palm.
Coconut mite: on young nuts, look under the cap — the little scales where the nut joins the stalk — for pale triangular patches that turn into rough, brown, corky scars; badly-hit nuts stay small and lopsided. The mites themselves are far too tiny to see.
Bud rot: the spear (the youngest, unopened leaf) wilts, browns and pulls out easily, with a foul, rotten smell, and the heart of the crown turns soft and black. If the bud dies, the palm dies.
If you catch bud rot very early, cut out all the rotten tissue from the crown down to clean flesh and protect the open wound; a palm whose whole bud has already rotted is lost — remove and burn it.
Cut off and destroy heavily mite-scarred bunches to bring the numbers down, and keep the crown open and well-fed, since a strong palm shrugs mites off far better.
- Watch out:
A spear that pulls out with a ROTTEN smell is bud rot (the growing point is dying); a spear cut with V-notches is beetle damage instead — the two call for different action.
- Do:
In wet, humid weather, check the crown MORE often — bud rot spreads fastest through long, warm rains.
- Tip:
Shrugging off corky-scarred young nuts as 'just marks' — coconut mite can shrink nut size and cut yield across the whole palm.
Maintain K/Mg nutrition + moisture Recommended
A bearing palm is making flowers, water and nuts all at once, every month of the year — and that constant work runs on potassium, magnesium and water. Let any of them run short in a dry spell and the palm answers by dropping its young button nuts, and you lose the bunch before it ever fills.
Keep up the four-times-a-year potassium and magnesium feed in the ring, exactly as in the growing-up years — a bearing palm needs it even more.
In dry spells and hot, dry winds, water the palm. A bearing coconut is a heavy drinker — it likes 1000–3000 mm of rain a year — and drought is what makes it shed young nuts.
Keep the basin mulched with husks and old fronds so the water and the feed stay down in the root zone.
Watch the young bunches: lots of button nuts falling is the palm telling you it has gone short of water or food — step both up.
Return the palm's own husks and old fronds to the ring as mulch — they rot down into the very potassium the next bunches need.
- Do:
If you can do only one thing in a dry spell, WATER — moisture stress is the top cause of dropped nuts and empty bunches.
- Watch out:
A sudden shower of falling button nuts (pea- to egg-sized) after a dry, windy stretch means the palm went short — feed and water it.
- Tip:
Letting the feeding lapse once the palm bears — a hungry bearing palm quietly makes fewer, smaller nuts for years on end.
Fill and ripen the nuts
Each bunch takes about 11–12 months to fill and ripen, and because a new bunch opens every month, nuts of every age hang on the palm together. Keep the palm fed and watered, and now also guard the maturing nuts from rats and squirrels, while coconut mite keeps working on the younger ones.
Scout (mite, rats/squirrels) Recommended
As the nuts fill they become a target for rats and squirrels, which gnaw holes and drain the water so nuts fall early, while coconut mite keeps scarring the younger ones. A monthly check plus a few simple guards saves nuts you have already spent a year growing.
Once a month, look over the maturing bunches and the ground under the palm.
Rats and squirrels: look for gnawed holes in green nuts, fresh nut fall with teeth marks, and nuts drained of their water. Chewed fallen nuts under the palm are the giveaway.
Coconut mite: keep checking under the cap of the younger nuts for the pale patches and brown, corky scarring you learned in the bearing stage.
Guard against climbers: fit a smooth metal band (a rat-guard) around the trunk well up out of jumping reach — about 2 m up, above head height — so rats and squirrels can't climb or leap past it; and keep fronds from neighbouring palms, wires or buildings from bridging across into the crown.
Clear fallen nuts and crop trash that shelter rats, and trap or bait persistent ones well away from where children and animals feed.
- Do:
Band the trunks with smooth metal — a rat-guard mounted about 2 m up is the cheapest, surest way to stop climbing rats reaching the nuts.
- Watch out:
A nut falling with a neat GNAWED HOLE (not a clean stalk break) means rats or squirrels took it, not ripeness.
- Tip:
Leaving crossed fronds or wires touching the crown — those are the bridges rats use to get past a trunk guard. If you use rat bait, keep it far from food, children and animals, and wash your hands.
Harvest, round after round
The palm bears all year, so you don't harvest once — you come back every month or so and take whichever nuts are ready. Pick them green at about 6–7 months for sweet drinking nuts, or leave them to 11–12 months for fully ripe nuts for copra and oil.
Harvest mature nuts Critical
A nut only reaches its full weight of kernel, water and oil at the right age — pick it too soon and the copra is thin and rubbery; leave a drinking nut too long and the sweet water dries up. Coming back on a monthly round and taking only the ready nuts is how you get the most from a palm that never stops bearing.
Decide what each nut is for. Drinking nuts (dafu): pick them green at about 6–7 months, when the nut is full-sized and the water is sweet and plentiful — shake one and you hear plenty of water.
Ripe nuts for copra and oil: leave them on the palm to about 11–12 months, until the husk is dry and brown, the kernel is hard, and the water has shrunk so it sloshes in a smaller, hollow space when you shake it.
Harvest a round every month to six weeks (about 30–45 days), taking only the bunches that have reached the age you want and leaving the rest to ripen.
Get the nuts down safely: climb with a rope foot-loop, or cut the bunch with a knife on a long pole from the ground. Warn anyone below before you cut.
Cut the whole ready bunch at its stalk rather than knocking nuts off one by one, and lower it or drop it clear of people, animals and roofs.
If a nut isn't ready — husk still green for copra, or the water already dried in a drinking nut — leave it and take it on the next round. Picking unripe nuts wastes them; an over-ripe drinking nut is only good for copra now.
- Do:
Shake a nut to judge it — a heavy drinking nut sounds FULL of water; a ripe copra nut SLOSHES in a smaller, drier space.
- Watch out:
A long pole-knife or a climbing rope near the crown can knock the spear or the young flower spikes — work carefully so you don't damage next season's bunches.
- Tip:
Standing, or letting children stand, under the palm while nuts come down — a falling coconut can kill.
Dehusk, and dry copra hard
Green drinking nuts are sold fresh, the same day. Ripe nuts are turned into copra — the dried kernel that is pressed for oil or sold on. The whole value here rests on one thing: drying the kernel hard, because copra that stays even a little damp goes mouldy and sells for next to nothing.
Dehusk & make copra Recommended
Copra is only worth good money if it is dried hard and clean. Fresh kernel is about half water; dried down to about 6% it keeps for months and grades well. Under-dried copra grows mould — including a hidden poison called aflatoxin that spoils the whole batch and gets it rejected — so the drying is where a year's work is won or lost.
Dehusk the ripe nut — lever the fibrous husk off against a metal spike set in the ground, or split it off with a strong knife.
Split the shell and prise out the two half-cups of white kernel with a short, blunt knife.
Dry the kernel cut-side up. It starts about half water (≈50%) and must come right down to about 6% — hard, so it rattles loose in the shell-cup when tapped. Sun-dry on raised racks or mats, or use a kiln or solar dryer in wet weather.
Dry on raised racks, clean mats or a tarpaulin — never on bare ground, which pushes damp back in and adds mould, grit and animal dirt. Turn the pieces so they dry evenly, and cover them or bring them in if rain threatens.
Check it is dry enough: good copra is hard, snaps rather than bends, and rattles in the cup. If a piece is bendy, damp, or grey-spotted, it is NOT dry — dry it more before you store it.
Store the finished copra dry and off the ground, or press it for oil. Sell green drinking nuts fresh, the same day.
- Tip:
Under-drying copra — even slightly damp copra moulds, grows the hidden poison (aflatoxin), and grades low or gets rejected outright.
- Do:
Dry on raised racks or mats, never on the ground — ground-drying pushes damp back in and adds mould, grit and animal dirt.
- Watch out:
Grey or greenish mould, or a musty smell, means the batch is spoiling — pull those pieces out and re-dry before they taint the rest.
Pests and diseases that attack coconut
-
 Bagworms
 -
 Black pod
 -
 Butt rot
 -
 Coconut mite
 -
 Ganoderma basal stem rot
 -
 Lethal yellowing
 -
 Nettle caterpillars
 -
 Red palm weevil
 -
 Rhinoceros beetle
Where to sell coconut
Markets that trade this crop — what each one sells it by, when supply peaks there, and the currency used.


Grow coconut with a plan, not a guess
This guide is the general answer. Divisi works out yours — the week to plant coconut on your soil and your rainfall, and each job dated for your field.


When to plant coconut, country by country
- When to plant coconut in Angola
- When to plant coconut in Benin
- When to plant coconut in Burkina Faso
- When to plant coconut in Burundi
- When to plant coconut in Cabo Verde
- When to plant coconut in Cameroon
- When to plant coconut in Comores
- When to plant coconut in Congo
- When to plant coconut in Côte d'Ivoire
- When to plant coconut in Egypt
- When to plant coconut in Eritrea
- When to plant coconut in Ethiopia
- When to plant coconut in Gabon
- When to plant coconut in Gambia
- When to plant coconut in Ghana
- When to plant coconut in Guinea Ecuatorial
- When to plant coconut in Guinea-Bissau
- When to plant coconut in Guinée
- When to plant coconut in Kenya
- When to plant coconut in Liberia
- When to plant coconut in Madagascar
- When to plant coconut in Malawi
- When to plant coconut in Mali
- When to plant coconut in Mauritanie
- When to plant coconut in Mauritius
- When to plant coconut in Moçambique
- When to plant coconut in Namibia
- When to plant coconut in Niger
- When to plant coconut in Nigeria
- When to plant coconut in République centrafricaine
- When to plant coconut in République démocratique du Congo
- When to plant coconut in Sao Tome and Principe
- When to plant coconut in Seychelles
- When to plant coconut in Sierra Leone
- When to plant coconut in Somalia
- When to plant coconut in South Sudan
- When to plant coconut in Sudan
- When to plant coconut in Sénégal
- When to plant coconut in Togo
- When to plant coconut in Uganda
- When to plant coconut in United Republic of Tanzania
- When to plant coconut in Zambia
- When to plant coconut in Zimbabwe
Where coconut scores best
Districts where Divisi's engine currently rates this crop highest, ranked by fit.
-
 Chake Chake
 -
 Pointe-Noire
 -
 Karluway #1
 -
 Antalaha
 -
 Songololo
 -
 Mongo
Mongo -
 Tabou
Tabou -
 Bata
Bata -
 West Mahe
 -
 Buco Zau
 -
 Moroni-Bambao
 -
 Tarkwa Nsuaem
Get Insights by email
A short digest of new Divisi articles. No email on quiet weeks.
Frequently asked questions
How do I grow coconut?
How to grow coconut: 330–365 days to maturity, 800 cm rows. Also called klapper, cocotier, coqueiro, mnazi.
What is klapper in English?
Klapper is the Afrikaans name for coconut.
What is cocotier in English?
Cocotier (also noix de coco) is the French name for coconut.
What is coqueiro in English?
Coqueiro (also coco) is the Portuguese name for coconut.
What is mnazi in English?
Mnazi (also nazi and dafu) is the Swahili name for coconut.
How long does coconut take to grow?
Coconut takes about 330–365 days from sowing to maturity, though the exact length varies with variety, temperature and how the season runs.
What spacing should I use for coconut?
Space coconut rows about 800 cm apart, with roughly 800 cm between plants within the row.
What pests and diseases attack coconut?
The ones covered in this guide are Bagworms, Black pod, Butt rot. Each has its own page explaining how to identify, check for and control it.