 Divisi
How to grow oil palm
Elaeis guineensis · Arecaceae
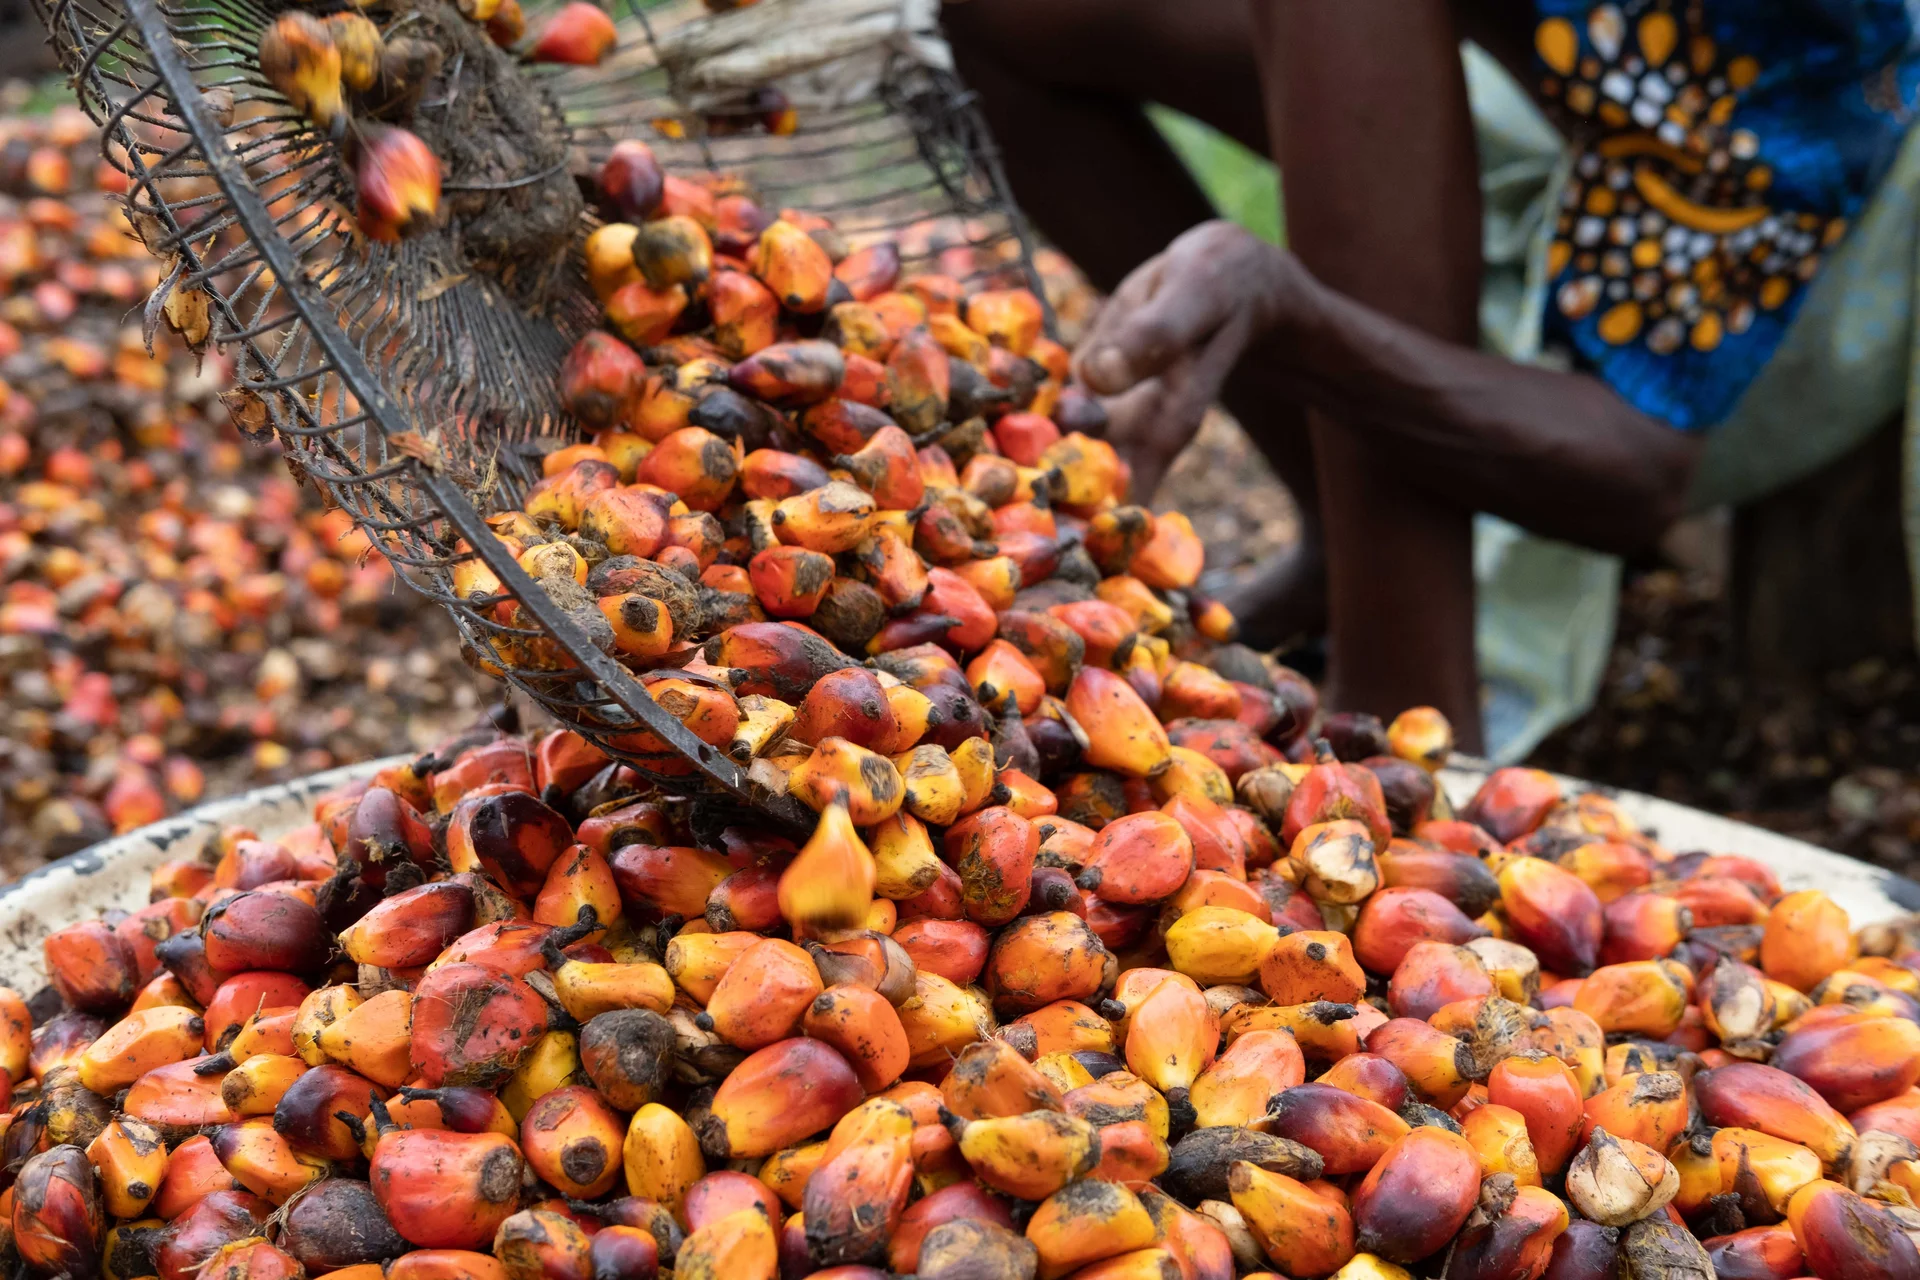
Photo: Ei'eke · CC BY-SA 4.0
Oil palm (Elaeis guineensis) is a single-stemmed palm from the forests of West and Central Africa, and the highest-yielding oil crop in the world. One palm carries separate male and female flower bunches at different times, and a small weevil — not the wind — carries the pollen between them. You grow it from tenera seedlings (a special cross that gives thin-shelled fruit packed with oil), plant them wide, and one palm then bears fresh fruit bunches every few weeks for decades. The orange-red fruit gives palm oil; the nut inside gives palm-kernel oil.
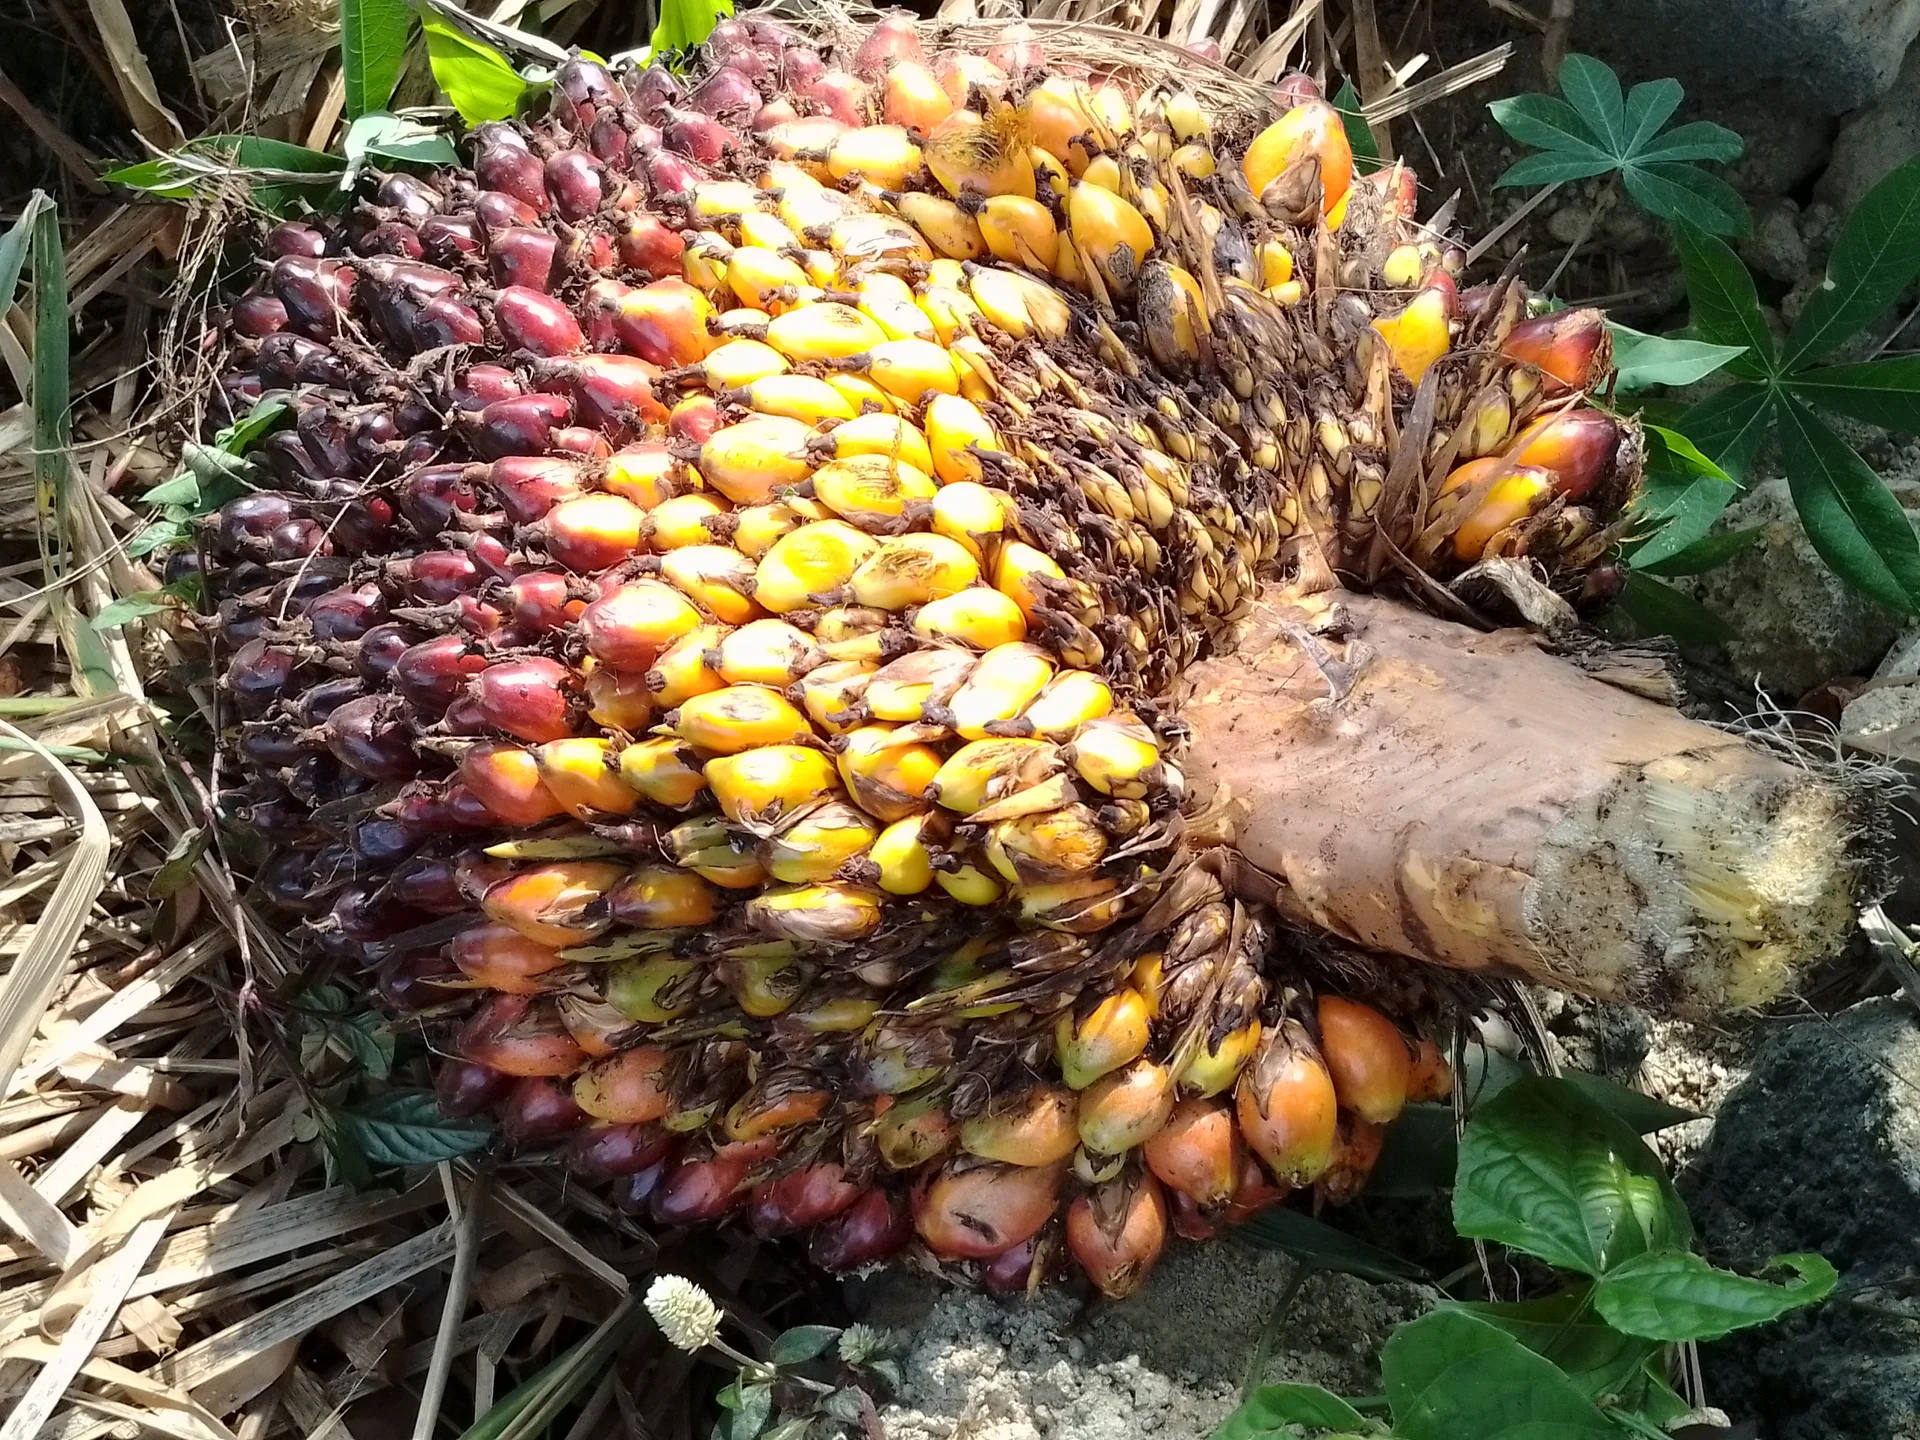
Kuuzy · CC BY-SA 4.0 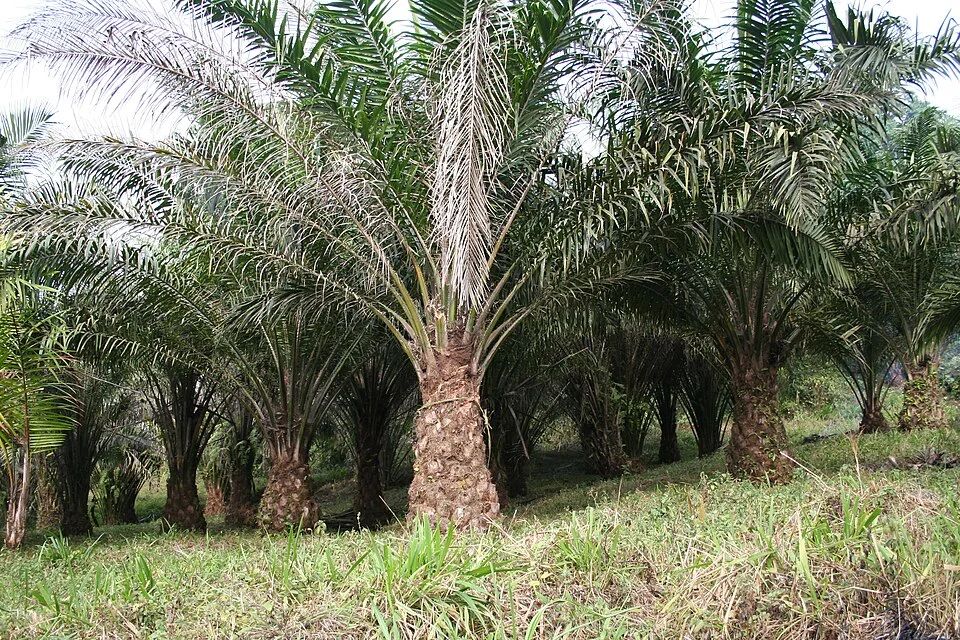
Marco Schmidt [1] · CC BY-SA 2.5
- Row spacing
- 900 cm
- Plant spacing in the row
- 900 cm
These are general figures for the crop, compiled from published agronomic references including FAO and CABI. The right choice for your field depends on your soil, rainfall and the yield you are aiming for.
Will oil palm actually do well on your field? Check your own field against every crop in the catalogue — no signup. Run the crop check →
Also known as
- French
- palmier à huile
- Portuguese
- dendezeiro, palmeira-de-dendê
- Swahili
- mchikichi
- Yoruba
- ope
Working in buckets, bags or paces? The farming glossary turns the measures growers actually use into kilograms and hectares — what a 20 litre bucket of each crop really weighs, and how to size a field by walking it — alongside the Shona, Swahili, Ndebele and Yoruba words used in the field. Open the glossary →
Growing oil palm, stage by stage
Your oil palm from seed to standing crop — a year raising strong tenera seedlings, then planting them nine strides apart with a nitrogen-fixing cover crop, feeding heavy potassium, guarding the pollinating weevil, and rushing every ripe bunch to the mill within a day or two.
Raise strong seedlings and clear the land
About a year before planting, in two steps. Everything the palm will be for decades starts here: raise tenera seedlings (the right cross, giving thin shells and plenty of oil), throw out every weak or odd one, and keep the nursery free of Cercospora leaf spot — it travels with the seedling to the field. At the same time, clear the land properly, because old palm stumps and roots harbour the trunk-rot Ganoderma.
Raise tenera seedlings Critical
The palm you plant lives and bears for decades — a weak or wrong seedling is a mistake you cannot undo for a generation. A full year in a good nursery, and ruthlessly throwing out the runts, is what gives you strong, true-to-type tenera palms that carry heavy, oily bunches.
Buy proper tenera seed or sprouts from a trusted source — a research station or a licensed nursery. Tenera is a special cross (dura x pisifera) that gives a thin shell and lots of oil. Never use seed picked up under your own or a neighbour's palms — those seedlings will not come true, and many bear thick-shelled, near-oilless fruit.
Pre-nursery (first ~3 months): sow each sprouted seed in a small bag of good topsoil, keep it in light shade, and water daily. Keep the bags close together where you can watch and water them easily.
Main nursery (next ~9 months): move each seedling into a large bag (about two hand-spans across) filled with good topsoil, spaced so the leaves just touch. Water well — a nursery seedling drinks a lot — and keep the bags weed-free.
Give a little compound fertiliser as your recommendation directs, and watch for Cercospora leaf spot the whole time (see the spraying task).
Throw out the rejects. Over the year, pull and discard any seedling that is a runt, spindly, flat-topped, grassy, twisted, or much smaller than its mates — expect to throw out a good number. A bad seedling never becomes a good palm; culling now is the cheapest yield you will ever gain.
Plant out only vigorous, dark-green, ~12-month seedlings with several healthy fronds. A few weeks before planting, harden them off — cut back the shade and water a little less — so they toughen up for the open field.
- Do:
Buy tenera seed from a named, trusted source and keep the receipt — the wrong palm is a decades-long mistake.
- Tip:
Planting out the small, weak or oddly-shaped seedlings just to "not waste them" — they never catch up, and they waste good land for years.
- Watch out:
Never let a nursery bag dry out; a seedling that is checked by drought sulks for months.
Clean clearance (remove old stumps/roots) Critical
Old palm stumps and roots left in the ground are where Ganoderma — a rot that kills the base of the trunk — lives and waits. Plant your young palms among them and the rot creeps root-to-root into your new stand, with no cure. Clean clearing now protects the palms for their whole life.
Do this in the last month or two before you plant out (near the end of the nursery year), so the land is clean and ready the moment the rains come.
Clear the bush, then dig out and remove old palm stumps and big roots — don't just cut them off at ground level. Ganoderma feeds on the dead wood you leave behind.
Gather and burn or haul away the stumps, root chunks and any old rotting palm trunks. Don't leave heaps of rotting wood on the field — they also breed rhinoceros beetle.
Line out the planting points at 9 m triangular spacing — about nine long strides between palms, each row set into the gap of the next — which fits about 143 palms per hectare.
On slopes, mark the rows across the slope and cut small planting platforms or terraces, so soil and rain stay put around each young palm.
- Do:
Get the old stumps and roots right out of the ground — a stump left to rot is a Ganoderma factory beside your young palms.
- Tip:
Piling old logs and trunks at the field edge — they breed rhinoceros beetle that then bores into your seedlings.
- Watch out:
Peg the 9 m triangle carefully; the spacing is fixed for the life of the stand — you cannot move a palm later.
Treat Cercospora in the nursery Recommended
Cercospora leaf spot is a fungus that spots and kills the seedling leaves — and it travels with the seedling to the field, so a sick nursery plants a sick stand. Keeping the nursery clean from about 2 months in protects both the seedlings and the field they will grow in.
From about 2 months after sowing, check the seedling leaves each week. Look for small brown or greyish spots, often each ringed by a yellow halo; as they spread, the leaf dries into brown patches.
Prune off and burn the worst-spotted leaves — don't drop them among the bags, where the spores wash onto healthy plants.
Spray a recommended fungicide over the leaves, wetting both sides, and repeat every 2-3 weeks while the disease is active.
Give the seedlings room and air: don't crowd the bags, and water at the base in the morning so leaves dry fast — wet, crowded leaves are what the fungus loves.
Safety: cover your skin, nose and eyes, spray in the cool of the morning or evening with the wind at your back, keep it off any food, and wash well afterwards.
- Do:
Cull and burn badly-spotted seedlings — a spotty seedling carries the disease straight to the field.
- Tip:
Watering overhead in the evening, which leaves the leaves wet all night for the fungus.
- Watch out:
Wash your hands and change out of sprayed clothes before you eat.
Plant out and get the young palms growing
Years 0-1. This is the one planting you get — a palm stands where you put it for decades, so the spacing must be right the first time. Set the palms 9 m apart, sow a nitrogen-fixing legume cover crop between them to feed the soil and smother weeds, and guard the soft young palms from rhinoceros beetle and rats.
Plant tenera + legume cover crop Critical
This is the one planting you get — a palm sits where you put it for decades, so the spacing must be right the first time. Setting the palms 9 m apart and sowing a nitrogen-fixing legume cover crop between them gives every palm full sun, chokes out weeds, and feeds the soil free nitrogen for years — so you buy far less nitrogen fertiliser.
Plant at the start of the rains, into land already cleared of old stumps and roots, so the young palms get a long wet spell to settle in.
Set each ~12-month seedling at 9 m triangular spacing — about nine long strides between palms, every row into the gap of the next — giving about 143 palms per hectare. Dig a hole a bit bigger than the bag.
Slit and remove the bag without breaking the soil ball. Set the seedling so the soil sits at the same level it was in the bag — never deeper, or the buried growing point (spear) rots — and firm the soil around it.
Sow the legume cover crop (Pueraria, Mucuna or Calopogonium — beans-family creepers) in the strips between the palms. Their roots pull nitrogen from the air and feed the soil; their leaves smother weeds and shade the ground.
Manure each palm at planting (see the manure task), keeping the manure in a ring a hand-span (~20 cm) out from the stem, not against it.
Keep the cover crop off the palm itself — hoe a clean weeded circle about a stride (~1 m) wide around each stem so the creepers don't climb up and smother it.
- Do:
Plant at the same depth the seedling grew in the bag — burying the spear rots the growing point and kills the palm.
- Tip:
Squeezing palms closer than 9 m to fit more in — crowded palms grow drawn-up and weak and carry small bunches, for their whole life.
- Watch out:
Handle seedlings by the bag, never by the stem or spear — a snapped spear can kill the palm.
Scout the young palms Critical
In the first year the young palms are soft and easily killed. Rhinoceros beetle bores into the heart and can destroy the growing point in days, and rats gnaw the stems and eat the loose fruit. A walk through every 3-5 weeks catches them while you can still act.
Walk the young palms every 3-5 weeks through the first year, checking the centre spear and the newest fronds of each palm.
Rhinoceros beetle — look for neat V-shaped cuts across the opening fronds and a round bored hole down into the spear. A bored spear can kill a young palm, so act at the first sign — hook the beetle out of the hole with a stiff wire.
Destroy the beetle's breeding sites: rotting logs, old stumps, and heaps of empty bunches or rotting palm waste. Spread them out to dry, or treat them.
Run pheromone traps — about 1 per 2 hectares — to catch the adults, and change the lure about every 6 weeks.
Rats — look for gnawed stem bases, teeth-marks, droppings, and eaten loose fruit. Keep the weeded circle around each palm clean, cut back rank cover, and trap or bait where rats are active.
Treat known beetle breeding heaps with a biological control — the Oryctes virus or the fungus Metarhizium — rather than blanket-spraying the field.
- Do:
Clear away every rotting log and old stump — kill the beetle where it breeds, not just where it feeds.
- Watch out:
A single bored spear can mean the growing point is already gone — check that palm closely and hook the beetle out.
Manure the young palm Recommended
A young palm building its trunk and roots is hungry. Well-rotted manure and compound fertiliser, spot-placed around each palm every 3-4 months, build the strong frame that will carry heavy bunches later. Feed the palm, not the whole field.
Start about a month after planting, then repeat every 3-4 months through the establishment years.
Use well-rotted manure or compost (dark, crumbly, no strong smell) plus the compound fertiliser your recommendation names — your recommendation gives the amount for the palm's age.
Spot-place it in a shallow ring on the weeded circle, about a hand-span (~20 cm) out from the stem — and widen the ring each time as the palm grows and its roots reach further. Keep it off the stem, which it can rot.
Lightly work it into the topsoil, or cover it with a little soil or frond mulch, so it doesn't wash away or gas off.
Safety: keep fertiliser off the young leaves and spear, away from food, water and children, and wash your hands after.
- Do:
Place manure in a ring a hand-span out from the stem, and widen that ring each time as the roots spread.
- Tip:
Piling manure against the stem — it holds damp on the trunk and invites rot.
- Watch out:
Use only well-rotted manure; fresh manure scorches young roots and brings weed seeds.
Build the frame — potassium, pruning, and clean fronds
Year 1 to first bearing (around year 3). The palm builds its trunk and canopy now, which decides how soon and how heavily it bears. Feed it heavy potassium with magnesium and boron, prune lightly to a clear window, and watch the fronds — the palm's food factory — for wilt and leaf-eating pests.
Scout for wilt & defoliators Critical
The fronds are the palm's food factory — pests that strip them, and Fusarium wilt that kills them from the roots, both rob the growth that decides how soon and how heavily the palm bears. A check every 3-5 weeks catches trouble while it is still in a few palms.
Walk the stand every 3-5 weeks, looking over the fronds and the whole crown of each palm.
Fusarium wilt — look for one side of the crown going yellow, then brown, and dying while the other side stays green; older fronds snapping and hanging down in a "skirt". There is no cure — mark badly-hit palms and remove and burn them, and never replant with tenera that isn't wilt-tolerant.
Bagworms — look for small hanging "bags" (cases made of bitten-off leaf bits) dangling under the fronds, and leaflets eaten down to a lacy skeleton.
Leaf miner — look for brown, blister-like blotches inside the leaflets and leaflets drying brown from the tip; in a bad outbreak whole fronds go brown.
Nettle caterpillars — look for flat, green, spiny caterpillars on the underside of the leaflets (they sting — don't touch bare-handed) and eaten leaf edges.
Hand-pick or spot-treat small outbreaks of the caterpillars and bags; only if damage is spreading fast across many palms bring in a recommended treatment. If a palm shows one-sided wilt, remove it — don't waste spray on it, wilt can't be sprayed away.
- Do:
Rogue (remove and burn) wilt-struck palms early — a dying palm left standing seeds the rot into its neighbours.
- Tip:
Touching nettle caterpillars bare-handed — their spines sting badly.
- Watch out:
Fresh, spreading leaf damage across many palms is your signal to treat; a few old chewed leaflets are not.
Frond pruning Recommended
The palm needs its green fronds to feed itself, but dead and drooping ones get in the way and shelter pests and rats. Light pruning every 3-4 months keeps a clear "window" to reach the bunches without ever starving the palm.
Prune lightly every 3-4 months as the canopy builds — a little and often, never a hard strip.
Cut off only the dead, broken or hanging lower fronds, and any that block your view of, or reach to, the forming bunches — leaving a clear "window" to the bunches. Keep every green, upright frond — those feed the palm.
Cut close to the trunk with a sharp chisel or knife, and cut cleanly — ragged wounds let in red palm weevil and rot.
Stack the cut fronds in the strips between the rows (the "frond pile"). As they rot they return potassium and organic matter to the soil — free feeding.
Never leave heaps of cut fronds and trash around the palm base, where rats and rhinoceros beetle shelter.
- Do:
Prune little and often, keeping every green frond the palm can carry.
- Tip:
Over-pruning to a bare "hat-rack" — stripping green fronds starves the palm, cuts yield, and pushes it to make more male (non-fruiting) flowers.
- Watch out:
Cut fronds close and clean; ragged stubs are the doorway for red palm weevil.
K + Mg + B nutrition Critical
Oil palm is a potassium glutton — it pulls more potassium than nitrogen out of the ground, and a hungry palm makes small, few bunches. Feeding heavy potassium (K) with magnesium (Mg) and boron (B) every 3-4 months is the single biggest thing you do for yield after getting the stand right. The legume cover crop already supplies much of the nitrogen.
Feed every 3-4 months. Your recommendation gives the amount of each fertiliser for the palm's age and your soil.
Potassium (K) is the big one — usually muriate of potash. Look for its shortage as "orange spotting": older, lower fronds covered in small orange-yellow spots that run together.
Magnesium (Mg) — usually kieserite. Look for its shortage as "orange frond": older fronds turning bright orange-yellow, worst on the side facing the sun (a frond shaded by another often stays green — a handy clue).
Boron (B) — a little borate goes a long way. Look for its shortage in the youngest leaves: crinkled, hooked, stunted or "fish-bone" fronds that never open properly.
Spot-place the fertiliser in a ring on the weeded circle, out where the feeding roots are (widen the ring as the palm grows), or drop it onto the frond pile. Keep it off the stem and spear.
Safety: keep fertiliser off wet leaves and the spear, away from food, water and children, and wash your hands after. With boron especially — a pinch is medicine, too much is poison, so never exceed the recommended rate.
- Do:
Feed potassium generously and every few months — it is the nutrient oil palm needs most.
- Tip:
Guessing the boron rate — too much boron scorches and kills the palm; follow the recommendation exactly.
- Watch out:
Orange older fronds usually mean potassium or magnesium hunger; hooked, crinkled young fronds mean boron hunger.
Flowering — protect the pollinating weevil
Bearing, from around year 3, in alternating male and female flower cycles. A tiny weevil — not the wind — carries pollen from the male flowers to the female ones, and only a well-pollinated flower fills into a full, heavy bunch. Protect the weevil and clear rotten bunches.
Check pollinating weevils Critical
Oil palm is pollinated by a weevil (Elaeidobius kamerunicus), not by wind or bees. It carries pollen from the male flowers to the female flowers, and only a well-pollinated flower fills into a full, heavy bunch. No weevils means half-empty bunches and bunch rot. So around each flowering, check they are there and working.
Check around flowering — from a few days before the female flowers open through about two weeks after — every 1-2 weeks.
Find an open male flower (a long, spiky, strong-smelling spike shedding yellow pollen) and tap it over your hand or a cloth. Look for small brown weevils crawling and flying out — plenty of them means good pollination.
Check a female bunch a few weeks after its flowers opened: a well-pollinated bunch is full and plump all the way round; a poorly-pollinated one has many small, hard, seedless fruit and gaps.
Keep male flowers on the palms and around the block — they are the weevils' breeding ground. Don't cut them all off, and don't blanket-spray insecticide over flowering palms, or you kill the pollinators.
If fruit set is poor and few weevils are about, leave more male flowers standing, stop any spraying near the flowers, and — only as a last resort in a young or isolated stand — hand-pollinate by dusting collected pollen onto the open female flowers.
- Do:
Protect the male flowers — they are the weevil nursery that fills your bunches.
- Tip:
Spraying insecticide across flowering palms — it kills the pollinating weevils and empties your bunches.
- Watch out:
Lots of small, seedless fruit and gappy bunches is the sign of poor pollination — go count the weevils.
Scout bunch rot Recommended
Bunch rot — a fungus — rots the fruit on the bunch before you can harvest it, and it thrives on poorly-pollinated bunches in a damp, crowded canopy. Clearing rotten and aborted bunches every 3-5 weeks stops it spreading to the good ones.
From flowering, check the young bunches every 3-5 weeks.
Look for white or greyish fungal threads spreading over the bunch, brown rotting fruit, and small aborted bunches going mouldy in the crown.
Cut out and remove rotting and aborted bunches — carry them out of the field or bury them; don't leave them in the crown, where the fungus jumps to the next bunch.
Open the canopy a little by pruning dead fronds so air moves and the bunches dry — the rot loves still, damp air.
Fix the root cause: poor pollination leaves gappy bunches that rot easily, so keep the weevils working (see the weevil check).
- Do:
Sanitise — cut out and carry away every rotting bunch before it seeds the next one.
- Watch out:
A run of rotten, gappy bunches often points back to poor pollination — check the weevils.
Fill the bunches and cull the killers
Each bunch takes about 5-6 months to fill, and bunches overlap so the palm bears all year. Keep the potassium, magnesium and boron coming to fill them, and — most important — find and remove palms struck by Ganoderma stem rot or red palm weevil before they spread.
Scout Ganoderma & red palm weevil Critical
Ganoderma (a rot at the base of the trunk) and red palm weevil (a grub that tunnels the trunk) each kill whole palms and spread to their neighbours. Neither can be cured once deep in a palm, so finding and removing the sick ones every 3-5 weeks is how you save the rest of the stand.
Walk the stand every 3-5 weeks, looking hard at the base of the trunk and the whole crown of each palm.
Ganoderma — look for a hard, brown-and-white bracket (a shelf- or plate-shaped fungus) growing from the trunk base, many fronds yellowing and collapsing into a skirt at once, and unopened spears stacking up in the crown. Tap the base — a hollow, punky sound is a bad sign.
Red palm weevil — look for a wilting, lopsided or toppling crown, tunnels near the frond bases oozing brown liquid that smells sour and fermented, chewed frond bases, and sometimes a crunching sound from grubs inside.
Remove infected palms. Cut down and destroy a Ganoderma-hit palm and dig out its stump and roots (the rot lives on in them) — never leave them to infect neighbours. Burn or bury the debris.
For red palm weevil, cut out and destroy badly-tunnelled palms, and keep pruning wounds small and clean — the weevil enters through fresh cuts, so avoid heavy pruning where it is about.
Leave the gap, or replant only after clearing all the old roots — never drop a fresh seedling straight onto a rotted-out stump.
- Do:
Dig out the stump and roots of a Ganoderma palm — leaving them carries the rot to the next palm.
- Tip:
Heavy or ragged frond-pruning where red palm weevil is about — fresh wounds are its way in.
- Watch out:
A bracket fungus at the trunk base, or a sour-smelling ooze near the fronds, means that palm is lost — remove it before it spreads.
Maintain K/Mg/B nutrition Recommended
A palm carries bunches at every stage all year, and filling them draws heavily on potassium (plus magnesium and boron). Keeping the feed going every 3-4 months fills the bunches you have and sets up the ones coming behind them.
Keep feeding every 3-4 months right through bearing — bunch fill never stops, so neither does the demand. Your recommendation gives the amount.
Potassium stays the headline — a bearing palm sends a lot of K away in every bunch it delivers to the mill. Look for shortage as "orange spotting" on the older fronds.
Keep up magnesium (watch for orange, sun-side older fronds) and boron (watch for hooked, crinkled young fronds) — your recommendation carries these.
Spot-place the fertiliser in a ring where the feeding roots are, or scatter it onto the frond pile in the row middles, which also rots down to return potassium. Keep it off the stem.
Return every empty bunch and pruned frond to the interrow, not off the farm — they carry potassium back to the soil and cut what you must buy.
Safety: keep fertiliser off wet leaves, away from food, water and children, and wash your hands after.
- Do:
Recycle empty bunches and cut fronds back into the field — they are rich in the potassium the palm just used.
- Tip:
Skipping feeds when money is tight — a starved bearing palm cuts its bunch numbers for next year, not just today.
- Watch out:
Orange-spotted older fronds on a bearing palm mean it is running short of potassium.
Cut ripe bunches on time
From about 5-6 months after each flower is pollinated, bunches ripen a few at a time, so you harvest a round every 1-2 weeks, all year. Cutting at exactly the right ripeness — and picking up every loose fruit — is what turns your work into oil.
Cut ripe FFB + collect loose fruit Critical
A bunch cut too early carries little oil; left too late it over-ripens, rots, and sheds loose fruit that is lost. Harvesting each bunch at the right ripeness — and picking up every loose fruit, the oiliest part — is where your whole year's work becomes oil and money. Because bunches ripen a few at a time, you go round every 1-2 weeks.
Go round every 1-2 weeks, from about 5-6 months after the flowers opened, checking which bunches have ripened.
Ripe test: a bunch is ready when its fruit has turned from dark/black to orange-red AND a few loose fruits have detached and fallen to the ground on their own. Loose fruit lying under a bunch is your signal.
Cut ripe bunches only. On short, young palms use a chisel (a sharp blade on a short handle) pushed against the bunch stalk; on tall palms use a curved knife on a long pole (a pole-and-knife) to reach up and cut the stalk.
Cut the bunch stalk short, and take care not to gash the trunk or the frond bases — open wounds let in red palm weevil and rot.
Pick up every loose fruit from the ground and add it to the bunch — it is the ripest and oiliest, and left behind it is lost and breeds pests.
Stack cut bunches and loose fruit in the shade at the collection point, ready to go to the mill the same day (see the mill task).
If a bunch is still dark with no loose fruit yet, leave it and check again next round. If one is over-ripe (much fruit already fallen, some soft), cut it anyway so it doesn't rot on the palm and breed pests — but keep it separate, as stale fruit makes poorer oil.
- Do:
Wait for the loose fruit to start dropping — that, with the orange-red colour, is the true sign of ripeness.
- Tip:
Cutting under-ripe (still-dark, no loose fruit) bunches to harvest sooner — they hold little oil and dock your price.
- Watch out:
Don't wound the trunk with the chisel or pole-knife — fresh gashes are a doorway for red palm weevil and rot.
Rush the bunches to the mill
The clock starts the moment you cut. Bruised, detached fruit begins turning its oil sour within hours, and a bunch that waits days makes low-grade oil the mill discounts or rejects. Deliver within 24-48 hours.
Deliver FFB to the mill Critical
From the moment fruit is cut and bruised, the oil inside starts to break down and go sour — the "free fatty acids" rise and the oil grade (and your price) falls. A bunch milled the same day makes top-grade oil; one left three days makes cheap oil, or none. Speed is money.
Deliver every harvested bunch and all the loose fruit to the mill within 24-48 hours of cutting — the sooner the better, same-day best.
Handle the fruit gently — every bruise and cut speeds the oil going sour. Don't throw, drop or trample the bunches.
Keep the cut bunches in the shade at the collection point, not baking in the sun, while they wait for transport.
Move a full batch at once rather than letting bunches sit for days waiting to fill a load — a waiting bunch is losing value every hour.
At the mill the bunches are steam-sterilised (which stops the souring and loosens the fruit), then the fruit is stripped from the stalk, mashed, and pressed for crude palm oil; the nuts are cracked and pressed separately for palm-kernel oil.
- Do:
Deliver bunches to the mill within 24-48 hours of harvest — same day is best.
- Tip:
Letting cut bunches sit for days to build a full load — the oil sours and the whole batch is downgraded.
- Watch out:
Keep the fruit shaded and handle it gently; heat and bruising both speed the oil going bad.
Pests and diseases that attack oil palm
-
 Bagworms
 -
 Black pod
 -
 Butt rot
 -
 Ganoderma basal stem rot
 -
 Nettle caterpillars
 -
 Oil palm bunch rot
 -
 Oil palm leaf miner
 -
 Red palm weevil
 -
 Rhinoceros beetle
Where to sell oil palm
Markets that trade this crop — what each one sells it by, when supply peaks there, and the currency used.
-
 Onitsha Main Market
-
 Marché Dantokpa
-
 Marché Mboppi
-
 Marché de Bohicon
-
 Bodija Market
-
 Marché de Kisangani
-
 Marché de San-Pédro
-
 Ogbete Main Market
Grow oil palm with a plan, not a guess
This guide is the general answer. Divisi works out yours — the week to plant oil palm on your soil and your rainfall, and each job dated for your field.


When to plant oil palm, country by country
- When to plant oil palm in Angola
- When to plant oil palm in Benin
- When to plant oil palm in Botswana
- When to plant oil palm in Burkina Faso
- When to plant oil palm in Burundi
- When to plant oil palm in Cabo Verde
- When to plant oil palm in Cameroon
- When to plant oil palm in Comores
- When to plant oil palm in Congo
- When to plant oil palm in Côte d'Ivoire
- When to plant oil palm in Egypt
- When to plant oil palm in Eritrea
- When to plant oil palm in Ethiopia
- When to plant oil palm in Gabon
- When to plant oil palm in Gambia
- When to plant oil palm in Ghana
- When to plant oil palm in Guinea Ecuatorial
- When to plant oil palm in Guinea-Bissau
- When to plant oil palm in Guinée
- When to plant oil palm in Kenya
- When to plant oil palm in Liberia
- When to plant oil palm in Madagascar
- When to plant oil palm in Malawi
- When to plant oil palm in Mali
- When to plant oil palm in Mauritanie
- When to plant oil palm in Mauritius
- When to plant oil palm in Moçambique
- When to plant oil palm in Namibia
- When to plant oil palm in Niger
- When to plant oil palm in Nigeria
- When to plant oil palm in Rwanda
- When to plant oil palm in République centrafricaine
- When to plant oil palm in République démocratique du Congo
- When to plant oil palm in Sao Tome and Principe
- When to plant oil palm in Seychelles
- When to plant oil palm in Sierra Leone
- When to plant oil palm in Somalia
- When to plant oil palm in South Sudan
- When to plant oil palm in Sudan
- When to plant oil palm in Sénégal
- When to plant oil palm in Tchad
- When to plant oil palm in Togo
- When to plant oil palm in Uganda
- When to plant oil palm in United Republic of Tanzania
- When to plant oil palm in Zambia
- When to plant oil palm in Zimbabwe
Where oil palm scores best
Districts where Divisi's engine currently rates this crop highest, ranked by fit.
-
 Itsandra-Hamanvou
 -
 La Digue
 -
 Ngabe
Ngabe -
 Etimboue
 -
 Mwene-Ditu
 -
 Butaw
Butaw -
 Mongomeyen
 -
 Buengas
 -
 Mahanoro
 -
 Mkoani
 -
 Libreville
 -
 Central Rivercess
Get Insights by email
A short digest of new Divisi articles. No email on quiet weeks.
Frequently asked questions
How do I grow oil palm?
How to grow oil palm: 900 cm rows. Also called palmier à huile, dendezeiro, mchikichi, ope.
What is palmier à huile in English?
Palmier à huile is the French name for oil palm.
What is dendezeiro in English?
Dendezeiro (also palmeira-de-dendê) is the Portuguese name for oil palm.
What is mchikichi in English?
Mchikichi is the Swahili name for oil palm.
What is ope in English?
Ope is the Yoruba name for oil palm.
What spacing should I use for oil palm?
Space oil palm rows about 900 cm apart, with roughly 900 cm between plants within the row.
What pests and diseases attack oil palm?
The ones covered in this guide are Bagworms, Black pod, Butt rot. Each has its own page explaining how to identify, check for and control it.