 Divisi
How to grow arabica coffee
Coffea arabica · Rubiaceae
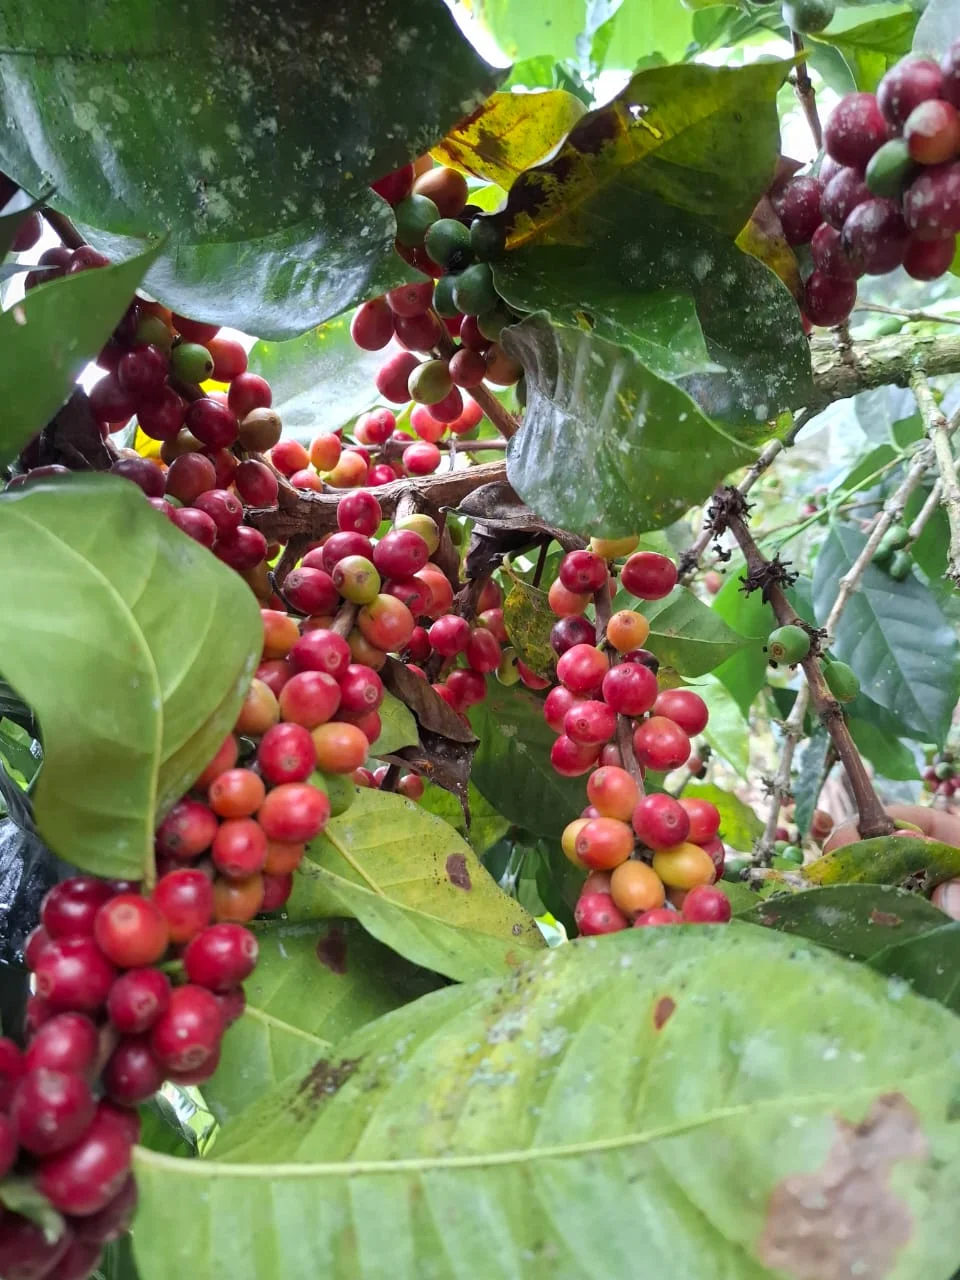
Photo: Kızıldeniz · CC BY-SA 4.0
Arabica is the cool-highland coffee — a small evergreen tree kept pruned to about your own height (1.5–2 m) so you can pick standing on the ground. It belongs in the hills above 1,000 m, in deep, well-drained, slightly sour (acid) soil, under a light roof of shade. Unlike the crops you plant every season, coffee is planted once and, looked after, pays you back with a crop of cherries every year for decades. It flowers when the rains break after a cool, dry rest, and the green cherries then ripen slowly to deep red over about 7–9 months. Its worst enemies in the highlands are leaf rust and coffee berry disease, so airflow, the right shade and timely spraying matter far more here than for the tougher lowland Robusta.
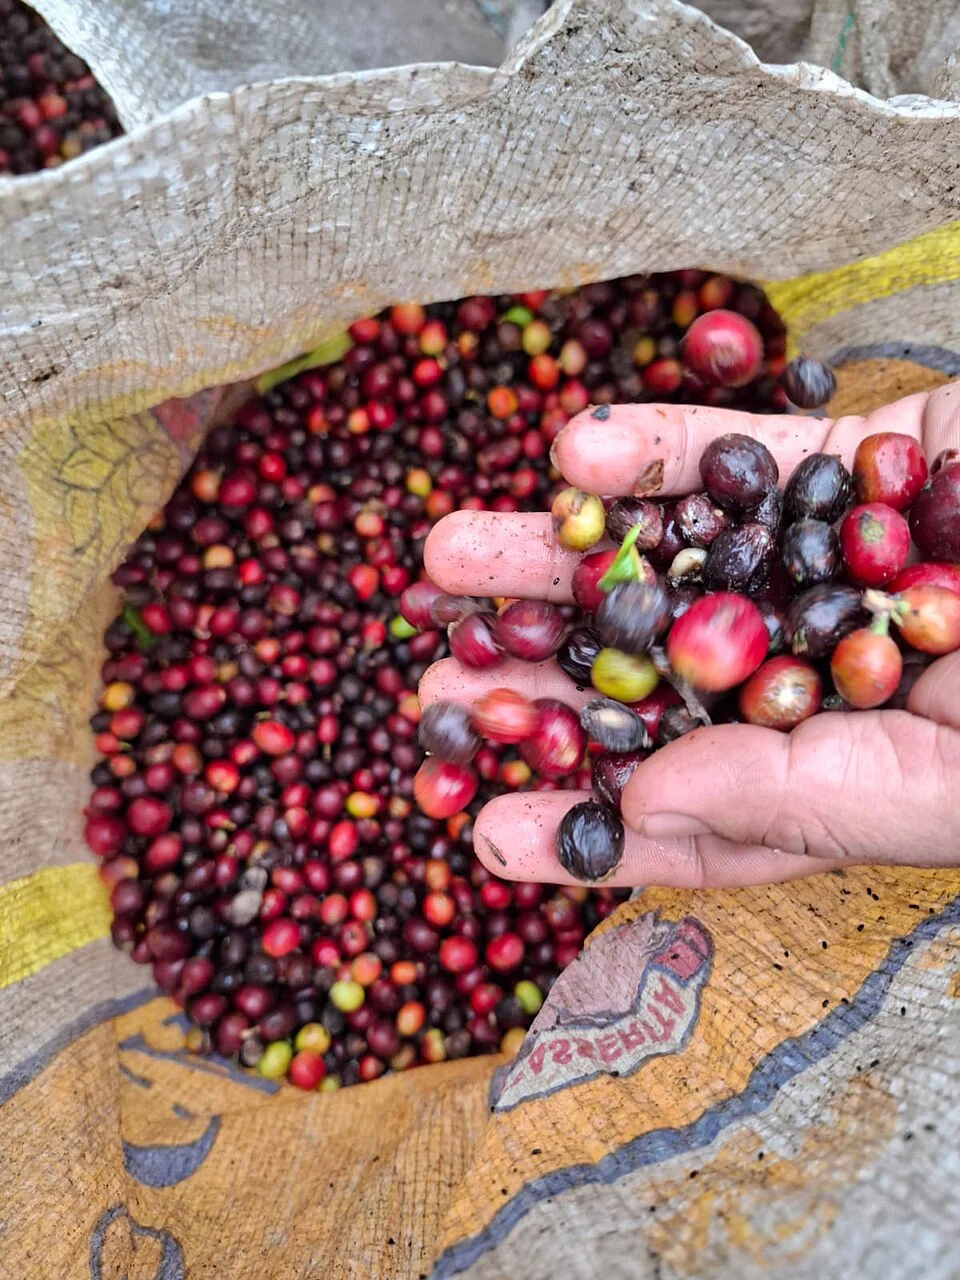
Kızıldeniz · CC BY-SA 4.0 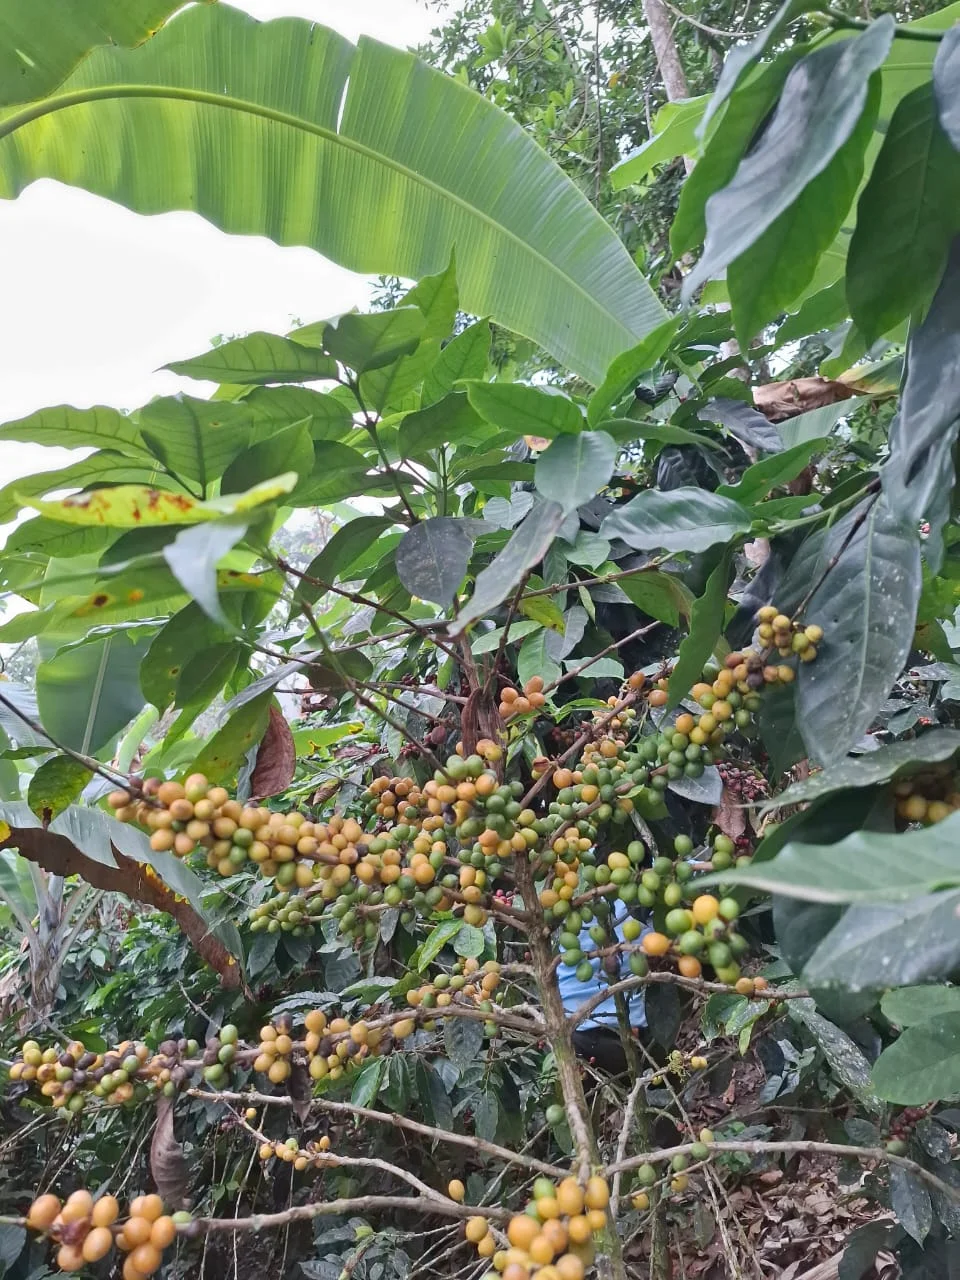
Kızıldeniz · CC BY-SA 4.0
- Days to maturity
- 210–270 days
- Row spacing
- 200 cm
- Plant spacing in the row
- 200 cm
These are general figures for the crop, compiled from published agronomic references including FAO and CABI. The right choice for your field depends on your soil, rainfall and the yield you are aiming for.
Will arabica coffee actually do well on your field? Check your own field against every crop in the catalogue — no signup. Run the crop check →
Also known as
- Afrikaans
- koffie
- Amharic
- buna
- French
- café
- Oromo
- buna
- Portuguese
- café
- Sesotho
- kofi
- Swahili
- kahawa
- Zulu
- ikhofi
Working in buckets, bags or paces? The farming glossary turns the measures growers actually use into kilograms and hectares — what a 20 litre bucket of each crop really weighs, and how to size a field by walking it — alongside the Shona, Swahili, Ndebele and Yoruba words used in the field. Open the glossary →
Growing arabica coffee, stage by stage
Coffee is a tree you plant once and pick from for decades: raise strong seedlings under light shade, prune them into a low, open frame over the first three years — then every year the rains trigger the blossom, the cherries redden over 7–9 months, and you pick only the ripe red ones and dry them hard for storage.
Raise your seedlings and get the site ready
A coffee tree lives in one spot for decades, so the choices you make now — where to plant, and how strong your seedlings are — you live with for the tree's whole life, and you can never move a coffee field later. In the months before planting out, pick a cool highland site, get shade trees growing ahead of time, and raise sturdy, disease-protected seedlings in a nursery.
Choose a highland, acid, drained site Critical
Arabica is a cool-hills tree: in hot, low ground it bakes, catches far more disease and barely yields, and one cold night in a frost pocket can kill it outright. Its roots will also live in this soil for decades and can never be moved, so the ground must be deep, well-drained and slightly sour. Getting the site right is a once-in-a-tree's-life decision — there is no fixing it later.
Choose this site 6 months to 1 month before you plant out, so shade trees and seedlings can be readied on it in good time.
Pick high ground, above 1,000 m. Arabica is a cool-highland tree; down in the hot lowlands it scorches, catches more disease and hardly yields — that warm ground suits Robusta, not Arabica.
Avoid frost pockets. On clear, cold nights cold air slides downhill and settles in valley bottoms and hollows, and a night near 2°C kills coffee. Plant on a slope or mid-hillside where the cold air drains away, never in the dip at the bottom.
Test that it drains. Dig a hole about knee-deep (roughly 45 cm) and fill it with water — it should soak away within a few hours, not stand. Coffee hates wet feet; roots that sit in water rot. Check too that there's no rock or hard pan close under the surface, so roots can go down deep.
Sour soil suits coffee. Coffee likes soil that is slightly sour (acid, about pH 5–6) — pH just means how sour or sweet the soil is, and coffee wants the opposite of most crops. Chalky ground, or land heavily limed for other crops, may be too sweet for it.
Make sure water is within reach (young trees need hand-watering twice a week in dry spells) and that the spot is sheltered from harsh, drying wind.
If the test hole still holds water after a few hours → that spot will rot your roots; choose better-draining, higher or sloping ground instead. You cannot move coffee once it is planted.
- Do:
Walk the site early on a cold, clear morning — if frost or a cold mist settles there, it will settle on your coffee too. Choose higher, sloping ground where the cold air drains off.
- Tip:
Planting in a valley bottom or hollow where cold air and rainwater collect — coffee there is the first to freeze and the first to rot, and you cannot move it later.
- Watch out:
Very sweet (chalky or heavily-limed) ground — coffee wants it slightly sour (pH 5–6); don't lime coffee land the way you would for maize.
Raise seedlings in nursery Critical
A coffee tree is only ever as good as the seedling it grew from. Weak, sickly or bent-rooted seedlings become weak, low-yielding trees you are then stuck with for decades. The nursery is where you protect them from disease and throw out the poor ones cheaply — before they ever go in the ground.
From the day you sow the seed in the nursery, plan on raising the seedlings for the better part of a year (up to about 10 months) before they're ready to plant out — coffee is slow, so start in good time.
Sow fresh coffee seed in a shaded nursery bed, or in deep poly-tubes filled with loose topsoil mixed with well-rotted compost. Coffee is one of the few crops whose seed comes up nearly true to the parent, so seed off a healthy, good local tree is fine. Sow it shallow — only about 1–2 cm, just enough to cover the seed, flat side down — and cover lightly. Buried deeper, coffee (already slow, 6–8 weeks to come up) emerges even later and patchier.
Keep the bed under light shade (a raised grass or shade-net roof) and water gently so it stays moist — never dried out, never waterlogged. Bare-sun seedlings scorch; standing water rots them.
Be patient. The seed pushes up on a stalk in about 6–8 weeks (farmers call this the 'soldier' stage), then opens its first pair of leaves (the 'butterfly'). If the bed is crowded, prick the seedlings out into their own tubes.
Protect against disease. Spray the seedlings with a copper fungicide on a routine schedule against coffee berry disease (a fungus that later rots the berries) and leaf rust. Copper is a protectant — it coats the leaf, so it must go on before the disease arrives, not after. Follow the label rate, and treat it like any agrochemical: cover your skin, nose and eyes, spray in the cool of the day with the wind behind you, keep it off food and children, and wash well afterwards.
Weed the bed by hand and grow the seedlings on until they are sturdy and about knee-high (45 cm) with several pairs of leaves. Then, for the last couple of weeks, cut back the shade and watering to harden them off so they can take the open field.
If a seedling stays weak and spindly, or its taproot has curled at the bottom of the tube → throw it out; don't plant it. One poor seedling means a decade of a poor tree.
- Do:
Raise a few more seedlings than you need, so at planting you keep only the strongest and discard any weak or crooked-rooted ones — you live with these trees for decades.
- Tip:
Letting the taproot curl or kink at the bottom of a short tube (a 'J-root') — that tree never anchors or yields well. Use deep tubes and don't leave seedlings sitting in them too long.
- Watch out:
Copper is an agrochemical — cover up, spray in the cool with the wind at your back, keep it off food and children, and wash your hands and face after.
Establish shade trees Recommended
Young coffee scorches in full highland sun and is battered by frost and dry spells. A light roof of shade — about a quarter — keeps the trees cooler and steadier, cuts their stress, and softens the exhausting 'heavy year, then starved light year' swing (biennial bearing). But shade trees grow slowly, so they must be planted well ahead of the coffee, not alongside it.
Plant your shade trees in the months before you plant the coffee (and no later than planting day), so they're already up and casting shade when the seedlings arrive. Shade planted at the same time as the coffee gives no protection in the early years, when the coffee needs it most.
Aim for light, dappled shade — about a quarter (25%) — the kind where plenty of broken sunlight still reaches the ground, not deep gloom. Too much shade cuts your crop and keeps the canopy damp; too little lets sun and frost through.
Space the shade trees wide and high-crowned so they shade the coffee from above without crowding its roots for water and food. Many leguminous shade trees pull their own nitrogen from the air and quietly feed the soil beneath them as a bonus.
Plan to keep the shade trees pruned and thinned as they grow, so the shade stays around a quarter over the years — that's an ongoing job (see 'Manage shade').
- Do:
Get the shade trees in a full season ahead — coffee planted under bare, just-planted shade poles gets none of the protection it needs.
- Watch out:
Too much shade drops your yield and keeps the canopy damp (more rust and berry disease); too little lets frost and scorching sun through. Aim for light, dappled quarter-shade.
Plant out and settle the young trees
The seedlings go into their permanent home. Because they'll stand here for decades, the spacing you set now is fixed, and a moist, well-mulched start carries the tender young trees through their riskiest weeks. For the first year or two the trees are small and vulnerable — hand-water them, keep frost off, and watch for the pests of young coffee.
Plant + heavy mulch Critical
This is the day each tree takes up its lifelong position, so the spacing you set now is permanent — too close and the trees crowd, shade each other out and trap the damp, still air that breeds disease; too far and you waste land. A heavy mulch and a good watering-in carry the tender seedling through its first weeks, while its roots are still tiny.
Plant at the start of the rains, into ground the rain has already wetted, under the shade trees you grew ahead of time. Push your hand into the soil — it should come out moist right down, not just damp on top. Plant in the cool of the day (early morning or evening), never in hot midday sun.
Space the trees two to two-and-a-half strides apart each way (2×2 to 2.5×2.5 m) — a stride is about 1 m — the same distance between the rows and along the row. This spacing is permanent: closer trees crowd, shade each other out and hold the damp, still air that breeds rust and berry disease. On a slope, run the rows across the slope to hold soil and water.
Dig a planting hole bigger than the seedling's ball of soil, and loosen the bottom. Slip the seedling out of its tube without breaking the soil ball, set it so the old soil line sits level with the ground (never bury the stem), and keep the taproot pointing straight down — a bent root cripples the tree for life.
Firm the soil back gently around the roots and water it in well straight away, so the earth settles snug against the roots with no air pockets.
Mulch heavily. Lay a thick mat of dry grass or leaves around each tree, out to a hand-span (about 20 cm) and wider — but keep it a hand-span back from the stem so the bark doesn't rot. The mulch keeps the roots moist and cool and smothers weeds; in frosty spots the mulch and the shade also take the edge off cold nights.
If the rains haven't truly soaked the soil deep down, don't plant yet — wait for a proper planting rain. A seedling set into hot, dry soil usually just dies.
- Do:
Plant in the cool of the day into moist ground and water in immediately — a seedling put into hot, dry soil at midday often just dies.
- Tip:
Cramming the trees closer than 2 m to fit more in — you can never move them, and a crowded, airless field is a rust-and-berry-disease field with small yields.
- Watch out:
The taproot — set it pointing straight down and don't bury the stem; a bent or buried collar rots or strangles the young tree.
Scout (leaf miner, nematode) Recommended
In the years before the trees carry a crop, your whole job is to keep them growing steadily. A monthly walk lets you catch leaf miner chewing out the leaves, and the stunting of root-knot nematode, early — and spot frost or drought setting a tree back before it's too late to help.
From about a month after planting, once a month for the first few years, walk the young field and look over a good spread of trees — not just the ones by the path.
Leaf miner: on the upper side of the leaves, look for irregular, pale-brown dead blister-patches, as if a patch inside the leaf has dried out — that's a tiny grub mining between the two skins of the leaf. A few patches are normal; widespread browning and leaf-drop is not.
Root-knot nematode: watch for young trees that stay stunted and yellowish and wilt in the heat even though you feed and water them. If you lift a badly-affected tree, its roots carry knots and beady swellings (galls) instead of clean roots — that's a soil worm too small to see. Mark those spots.
Check for frost or sun scorch (browned leaf edges after a cold, clear night, or in gaps where the shade is thin) and for dryness — top up the mulch and watering, and fill in any thin shade.
Note anything that is spreading and act early — for a named pest or disease, open its own guide. If leaf-miner browning or nematode stunting is spreading tree to tree → act now (open the matching guide); don't wait for the next monthly round.
- Watch out:
Root-knot nematode lives in the soil and rides in on infected seedlings and dirty tools — start with clean nursery stock and don't carry soil from a known bad patch into clean ground.
- Do:
Keep the young trees unstressed — well-mulched, watered and lightly shaded — they shrug off leaf miner and nematode far better than a stressed tree does.
Water young trees Recommended
A newly-planted seedling has a tiny root system and dries out in days. Until it roots down — over the first year or two — regular water is the difference between a tree that establishes and one that dies back in the first dry spell.
From planting, water each young tree at least twice a week (every 3–4 days) whenever the rain isn't doing it for you — right through the first year or two, until the tree is well established.
Water deeply and slowly at the base, so it soaks down to the roots — a can or two per tree poured slowly beats a quick daily splash that only wets the surface.
Keep the mulch topped up — it holds the water in and means you water less often. Check under the mulch with a finger and water when the soil below is drying out.
Ease off as the tree establishes and its roots reach down — but never let a young tree wilt hard in a dry spell; coffee is very drought-sensitive while young.
If a young tree wilts and its leaves droop → water it deeply straight away and top up the mulch; don't leave it, or it may die back and never recover.
- Tip:
Letting young trees wilt and drop their leaves in the first dry season — many never recover. Water is the top priority for the first year or two.
- Watch out:
Don't waterlog them either — coffee roots rot in standing water. Keep the soil moist, not swampy, and drain any spot where water sits.
Build the frame and keep the canopy open
Over the next couple of years the tree builds the branch framework that will carry all its future crops. Prune it into a low, open shape — about your own height — that you can pick from the ground and that lets air right through, because a dry, airy canopy starves leaf rust and berry disease. Hold the shade at about a quarter, and stay on top of rust, the highland's worst coffee disease.
Scout (rust, leaf miner) Critical
Leaf rust can strip a tree of all its leaves — and a tree with no leaves grows no cherries, setting your future crop back for years. A monthly check while the canopy is building lets you catch the first rust spots, and leaf miner, before they spread.
From about a year after planting, once a month, walk the field and turn the leaves over on a good spread of trees — the worst trouble hides on the underside.
Coffee leaf rust: on the underside of the leaves, look for orange-yellow powdery spots — they look like rust or turmeric powder rubbed on the leaf — with matching pale-yellow blotches on the upper side. Badly-hit leaves drop, leaving branches bare. This is your number-one disease here.
Leaf miner: on the upper side, look for the pale-brown, dead blister-patches where a grub has mined inside the leaf.
Note where rust is worst — it's usually heaviest where the canopy is crowded, damp and over-shaded. That tells you where to open up the pruning and thin the shade.
If rust is spreading → act now: run the copper/fungicide programme (see the berry-growing stage) and open the canopy. A resistant variety, an open canopy and the right shade are your cheapest defences.
- Do:
Turn the leaves over — rust starts as orange powder on the hidden underside, and is far cheaper to stop early than once whole branches go bare.
- Watch out:
Rust thrives in dark, still, over-shaded canopies. If you're seeing a lot of it, your shade is probably too heavy and your trees too crowded inside — open them up.
Formative/maintenance pruning + de-sucker Recommended
Pruning is how you build a coffee tree that's easy to pick and slow to get sick. A low, open frame — about 1.5–2 m, roughly your own height — lets you pick from the ground and lets air and light through, drying the canopy so rust and berry disease can't take hold. Left unpruned, coffee grows tall, tangled, damp and diseased, and crops in exhausting heavy-then-light swings.
Once a year, in the dry spell after harvest (while the tree is resting), shape the tree with a clean, sharp knife or saw.
Set the height. Keep the tree to about 1.5–2 m — roughly your own height — so you can reach the very top from the ground. In the early years you either cap (cut off) the single main stem at that height to force it to branch out, or train a few main stems; after that, top it back each year to hold that height.
De-sucker. Rub or cut off the unwanted upright shoots — the whippy 'suckers' or 'water-shoots' that spring straight up from the stems — because they eat the tree's strength but carry little crop. Keep only the framework branches you want.
Open the middle. Cut out any branches that are dead, broken, crossing or crowding the centre, so light and air move right through the tree. An open canopy dries fast after rain and gets far less rust and berry disease.
Over the years, take out old, worn-out cropping branches so fresh, productive ones replace them — this keeps each year's crop even, instead of a big year followed by a starved one.
- Do:
Prune in the dry season after picking, with a clean, sharp blade — cutting in the wet drives disease in through the fresh wounds.
- Tip:
Letting the tree grow above head height — you'll end up picking off ladders, and a tall, dense, tangled tree is a rust and berry-disease trap.
- Watch out:
Water-shoots springing straight up from the branches — rub them off early while they're soft; left on, they crowd the tree and sap the crop.
Manage shade Recommended
The shade trees you planted keep growing, and left alone they cast heavier and heavier shade — which cuts your coffee crop and keeps the canopy damp enough to breed rust and berry disease. Every couple of months, tune the shade back to about a quarter so the coffee gets protection without being smothered.
Every couple of months, look up and judge the shade: aim for light, dappled shade — about a quarter (25%) — with plenty of broken sunlight reaching the ground, not deep gloom.
If it's too dark, thin and lift the shade trees — cut out some branches and raise the canopy — to let more light through. Heavy shade means fewer cherries and a damp canopy that rots and rusts.
If it's too open (sun scorching the coffee, or frost getting through on cold nights), let the shade trees fill back in, or plant a few more.
Time the heavier thinning for just before the flowering rains and through berry filling, when the coffee most needs the extra light and drier air to set and fill a good crop.
- Watch out:
A dark, still, over-shaded field is a rust and berry-disease field — if disease is climbing, open up the shade.
- Do:
Re-check the shade every couple of months; shade trees grow fast and quietly smother the coffee if you leave them.
Flowering — the rains bring the blossom
Coffee flowers on cue. After a cool, dry rest of about 1–2 months (under roughly 50 mm of rain) the trees hold their buds; then the first good rain — the 'flowering rain' or blossom shower — throws the whole field into white bloom within days. Every one of those blossoms can become a cherry, so this short window sets the size of the year's crop. Feed the trees zinc and boron just before, and keep the antestia bug off the buds.
Scout (antestia bug) Recommended
The antestia bug (a shield-shaped stink bug) feeds on the flower buds and young berries just as they form. Heavy feeding drops the buds and berries, mis-shapes the beans, and can give the coffee a foul 'rotten-potato' taste that wrecks the price. Flowering, when the bug moves in, is the time to catch it.
From the flowering rain, check the trees every 5–7 days for the first three weeks or so, while the flowers and tiny berries are forming and most at risk.
Know the bug. Antestia is a shield-shaped bug about the size of your smallest fingernail (a few mm), brown-black with bright white, orange and pale-blue markings on its back. It's shy — it scuttles round to the far side of a branch when disturbed.
Check a set number of trees. On each, look over the flower clusters, growing tips and green berries, then give a branch a sharp knock over a cloth or your open hand to dislodge hiding bugs, and count what falls.
Look for its damage too: blackened, aborted flower buds and young berries, and dark feeding spots.
If you find 2 or more antestia bugs on a single tree → that's your signal to act: control them and open the antestia guide. That's the level tied to bean damage and the potato-taste defect; below it, keep monitoring and lean on prevention.
- Watch out:
Antestia hides on the shaded, inside branches of dense, over-shaded trees — thinning the shade and opening the canopy leaves it far fewer places to hide.
- Do:
Knock a branch over a cloth to find them — they hide underneath and on the far side and are easily missed just by looking.
Zinc/boron foliar before flowering Recommended
Coffee sets fruit far better when the tree has enough zinc and boron — two of the nutrients it most often runs short of, and which it especially needs to turn blossom into cherry. Fed through the leaves in the weeks before flowering, they help the tree set a full, even crop instead of shedding its flowers and young berries.
In the few weeks before flowering — about 2 to 6 weeks before you expect the blossom shower — plan a foliar feed (a spray put straight onto the leaves, which the tree takes in through them) of zinc and boron.
Use a proper zinc + boron foliar product and mix it at the label rate — no stronger. Too-strong zinc, and especially boron, scorches the leaves; boron has a narrow safe dose, so measure it, don't guess.
Spray to wet the leaves evenly in a calm, cool part of the day (early morning or late afternoon), not in hot midday sun that would scorch the wet leaves.
As with any spray: cover your skin, nose and eyes, keep the wind at your back, keep it off food and water, and wash yourself and the sprayer well afterwards.
Time it so it lands before the flowers open — feeding after the blossom is too late to help this crop set.
- Tip:
Over-dosing the boron to 'make sure' — boron's safe range is narrow, and too much burns the leaves and hurts the tree. Measure strictly to the label.
- Watch out:
Spray in the cool, calm hours with the wind behind you, off food and water, and wash up after — this is an agrochemical.
Grow the cherries — the long protection stretch
From blossom to ripe cherry takes a long 7–9 months, and this is the stretch where the crop is won or lost. Three enemies go for the berries — coffee berry disease, leaf rust and the coffee berry borer — so you run a preventive spray programme right through the wet season and keep the field clean. The trees are also thirsty and very hungry for potassium now, while filling a heavy load of berries, so don't let them run dry or starve.
Scout (CBD, rust, berry borer) Critical
The whole year's crop is now hanging on the trees for months, right through the wet season when berry disease, rust and the berry borer are all active. Twice a week is what it takes to catch each of them early — once berry disease or borer is widespread, those cherries are already lost.
From the flowering rain, right through berry filling, walk the field twice a week in the wet season and check leaves and berries on a good spread of trees — not just the edge row.
Coffee berry disease (CBD): on the green (unripe) berries — not the ripe red ones, look for dark, sunken, blackish spots (lesions), each pressed in as if with a thumbnail, that spread and rot the berry; badly-hit berries blacken, shrivel and either stick on (mummify) or drop. This fungus loves the cool, wet highlands and is your worst berry disease.
Coffee leaf rust: turn the leaves over and look for orange-yellow powder on the underside — heavy rust strips the very leaves the tree needs to fill its cherries.
Coffee berry borer: look on the cherries for a tiny hole, like a pinprick, usually at the blossom (far) end — a small dark beetle bores in there to lay its eggs in the bean. Cut open a suspect cherry and you may find the grub and its tunnels inside.
Potassium hunger and drought: watch for scorched, browning edges on the older leaves (a sign of potassium shortage under a heavy berry load) and for wilting in dry spells — both stop the cherries filling properly.
Note what's spreading and where. If berry disease, rust or borer is over threshold, act now — run the spray programme and open the matching guide. Once they're widespread the crop is already lost.
- Watch out:
A tiny hole at the tip of a cherry means the borer is already inside the bean, where sprays can't reach — which is why sanitation and traps, done early and every round, matter more than spraying for this one.
- Do:
Turn leaves over and cut open a few suspect cherries — both rust and the borer hide out of plain sight, and catching them early is the only cheap time to act.
CBD + rust fungicide programme Critical
Coffee berry disease and leaf rust are the two diseases that most cut highland Arabica, and both are far cheaper to prevent than to cure. A protectant spray only works if it's already on the plant before the disease strikes, so a timed programme keeps a protective film on the leaves and berries all through the wet season, when the rain is driving infection.
Understand what this spray is: a protectant (a copper or approved fungicide) that coats the leaves and berries and stops the disease getting in. It must go on before, or at the very first spots — it sits on the surface and cannot cure a berry that is already infected.
Start at flowering / early berry set (or the moment you see the first lesions), and repeat every 3–4 weeks while the weather stays wet, through to harvest. Your recommendation and the product label give the exact mix and amount for your field — don't guess the rate.
Spray to cover the leaves evenly — including the undersides, where rust lives — and the berries.
Respect the pre-harvest interval — the shortest wait the label sets between your last spray and picking, so no chemical is left on the cherries you sell or drink. Stop spraying in time, and note the date.
Spray safely: cover your skin, nose and eyes, spray in the cool of the day with the wind at your back, keep it off food and water, and wash yourself and the sprayer well afterwards.
The cheapest controls are still a resistant variety, an open airy canopy and the right shade — the spray only tops these up. If disease keeps spreading despite spraying → open the canopy, thin the shade, and check your spray timing and cover (undersides and berries), then keep to the programme.
- Do:
Get the first spray on before the rains really drive the disease — a protectant put on late, after the spots show, is money half-wasted.
- Tip:
Spraying right up to picking — respect the label's pre-harvest interval so you're never selling or drinking cherries with chemical still on them.
- Watch out:
Re-spray after heavy rain washes the protective film off, and always cover the leaf undersides (rust) and the berries (berry disease).
Berry-borer sanitation Recommended
The coffee berry borer is a tiny beetle that lives inside the bean, where no spray can reach it — so you fight it by denying it homes. Every leftover, dropped or dried cherry, on the tree or the ground, is a nursery breeding next season's beetles, so keeping the field clean and trapping the beetles is your main control.
Strip the tree bare at the end of each harvest round — pick or knock off every leftover cherry, including the dry, shrivelled 'raisin' ones, and gather the drops off the ground. Even a few left cherries breed borers for next season.
Bury or destroy what you strip — bury it deep, or dunk it in hot or soapy water. Don't just pile it at the field edge, or the beetles walk straight back in.
Hang attractant traps — simple bottle traps baited with an alcohol–water mix — among the trees. They catch flying beetles and, just as usefully, tell you when the borer is active, so you time your clean-ups to when they count.
Keep it up every few weeks through the season, and hardest right after picking, when leftover cherries are the borer's main refuge.
- Do:
Be strict about stripping every last cherry after harvest and burying it — a clean field is the single best borer control there is.
- Watch out:
Traps mainly catch and time the beetle — they show you when it's flying; they don't replace stripping and burying the leftover cherries.
Pick only the ripe red cherries
About 7–9 months after flowering the cherries start turning deep red — but never all at once, so harvest isn't one job but several rounds over weeks, each time taking only the ripe red ones. This careful, selective picking is exactly what earns a good price; a rushed strip of green-and-red-together ruins the cup.
Pick only red cherries Critical
Only a fully red, ripe cherry has the sugars that make good coffee and fetch the top price. Green and yellow cherries picked too early are sour and light and poorly paid; over-ripe black ones are already spoiled. So the whole skill of harvest is taking each cherry at exactly the right moment — over several passes.
From about 7–9 months after flowering, wait until a cherry is deep, even red all over (or deep yellow on yellow varieties) — that's ripe. A ripe cherry gives a little when you squeeze it, and the bean slips out easily.
Pick only the ripe red ones, by hand, rolling them off the branch with your fingers. Leave the green and part-coloured ones to ripen for the next round — don't strip the branch.
Come back to the same trees every 10–14 days and take the next lot as they redden. A field usually needs several rounds across the weeks of harvest.
Also take off any black, dried or borer-holed cherries and drop them in a separate container (never in with your good coffee) — this doubles as berry-borer sanitation.
If a tree's cherries aren't red yet, don't pick it — leave it and come back next round. Picking green loses you both weight and quality.
Keep your picked cherries in the shade and get them to processing the same day — cherries left heaped in the sun start to ferment and spoil within hours.
- Tip:
Strip-picking green and red cherries together to save trips — it costs you cup quality and price; pick only the red.
- Do:
Pick in several rounds, taking only the deep-red cherries each time — the patience here is what earns the premium price.
- Watch out:
Get picked cherries into the shade and to processing the same day — a day heaped in the sun and they start to ferment and taint.
Turn the cherries into stored beans
Picking isn't the end — a cherry is mostly wet pulp and, left as it is, rots within a day. You either wash the beans (pulp them, ferment off the sticky layer, wash, and dry the parchment) or process them natural (sun-dry the whole cherry). Both finish the same way: dry down to about 11% moisture and store dry — and both must start the same day you pick.
Process + dry to ~11% Recommended
A picked cherry is mostly sweet, wet pulp that starts to rot within hours, so how you process it and how hard you dry it decide your final quality and price. Beans dried properly to about 11% moisture keep safely for months; beans stored damp go mouldy, taste bad and fetch little.
Process the same day you pick — don't leave cherries heaped overnight, or they ferment and taint. First float the cherries in water and skim off the ones that float (light, unripe or borer-damaged), keeping the heavy, sound ones.
Choose your method. Washed fetches a better price but needs clean water and care. Natural (dry) is simpler and uses little water — you dry the whole cherry.
Washed — pulp: the same day, run the cherries through a pulper (or press them by hand) to squeeze the beans out of the red skin.
Washed — ferment: put the wet beans in a clean tub for about 12–48 hours to break down the mucilage (the slippery, sugary layer stuck to the bean). It's done when the beans feel gritty, not slimy — don't over-ferment, or it taints them.
Washed — wash: rinse the beans in clean water until they feel rough and clean, not slippery. What's left is the bean in its papery parchment (the dry husk around it).
Dry (both methods): spread the beans thinly on a raised table, mat or tarpaulin — never on bare ground — in the sun, and turn them regularly so they dry evenly. Washed coffee dries in its parchment; natural coffee dries as the whole cherry. Cover it at night and whenever rain threatens.
Dry to about 11% moisture: dry enough that a parchment bean, bitten, cracks hard and shatters rather than squashing, and a natural cherry rattles loose in its shell. Then store it dry, off the floor, in clean bags in a cool, dry place.
If the beans still bite soft (bendy, not brittle) → they're too wet; dry them more before you bag them, or the whole bag will mould in store.
- Tip:
Storing damp parchment or cherry — dry to about 11% (bites hard and brittle) first, or it moulds and the whole bag gets downgraded.
- Do:
Process the same day you pick, and dry on a raised table or tarpaulin, never on bare ground — ground-drying pushes damp back in and adds grit, stones and mould.
- Watch out:
Ferment only until the beans feel gritty, not slimy (about 12–48 hours) — over-fermenting in the tub taints the coffee and cuts the price.
Pests and diseases that attack arabica coffee


Where to sell arabica coffee
Markets that trade this crop — what each one sells it by, when supply peaks there, and the currency used.
-
 Marché Central de Bujumbura
-
 Marché de Bafoussam
-
 Mbeya Market
-
 Hawassa Market
-
 Jimma Market
-
 Mbale Central Market
-
 Addis Mercato
-
 Huye Market
Grow arabica coffee with a plan, not a guess
This guide is the general answer. Divisi works out yours — the week to plant arabica coffee on your soil and your rainfall, and each job dated for your field.


When to plant arabica coffee, country by country
- When to plant arabica coffee in Angola
- When to plant arabica coffee in Botswana
- When to plant arabica coffee in Burundi
- When to plant arabica coffee in Cabo Verde
- When to plant arabica coffee in Cameroon
- When to plant arabica coffee in Comores
- When to plant arabica coffee in Congo
- When to plant arabica coffee in Côte d'Ivoire
- When to plant arabica coffee in Egypt
- When to plant arabica coffee in Eritrea
- When to plant arabica coffee in Eswatini
- When to plant arabica coffee in Ethiopia
- When to plant arabica coffee in Gabon
- When to plant arabica coffee in Ghana
- When to plant arabica coffee in Guinea Ecuatorial
- When to plant arabica coffee in Guinée
- When to plant arabica coffee in Kenya
- When to plant arabica coffee in Liberia
- When to plant arabica coffee in Madagascar
- When to plant arabica coffee in Malawi
- When to plant arabica coffee in Mauritanie
- When to plant arabica coffee in Mauritius
- When to plant arabica coffee in Morocco
- When to plant arabica coffee in Moçambique
- When to plant arabica coffee in Namibia
- When to plant arabica coffee in Nigeria
- When to plant arabica coffee in Rwanda
- When to plant arabica coffee in République centrafricaine
- When to plant arabica coffee in République démocratique du Congo
- When to plant arabica coffee in Sao Tome and Principe
- When to plant arabica coffee in Sierra Leone
- When to plant arabica coffee in Somalia
- When to plant arabica coffee in South Africa
- When to plant arabica coffee in South Sudan
- When to plant arabica coffee in Sudan
- When to plant arabica coffee in Sénégal
- When to plant arabica coffee in Togo
- When to plant arabica coffee in Uganda
- When to plant arabica coffee in United Republic of Tanzania
- When to plant arabica coffee in Zambia
- When to plant arabica coffee in Zimbabwe
Where arabica coffee scores best
Districts where Divisi's engine currently rates this crop highest, ranked by fit.
-
 Muramvya
 -
 Borabu
 -
 Gakenke
 -
 Kalemie
 -
 Kampala
 -
 Bicurga
 -
 Moungoundou-Nord
 -
 Rombo
Rombo -
 Lekoni-Lekori
 -
 Cahombo
 -
 Vatomandry
 -
 Muhanga
Get Insights by email
A short digest of new Divisi articles. No email on quiet weeks.
Frequently asked questions
How do I grow arabica coffee?
How to grow arabica coffee: 210–270 days to maturity, 200 cm rows. Also called koffie, buna, café, kofi, kahawa, ikhofi.
What is koffie in English?
Koffie is the Afrikaans name for arabica coffee.
What is buna in English?
Buna is the Amharic and Oromo name for arabica coffee.
What is café in English?
Café is the French and Portuguese name for arabica coffee.
What is kofi in English?
Kofi is the Sesotho name for arabica coffee.
What is kahawa in English?
Kahawa is the Swahili name for arabica coffee.
What is ikhofi in English?
Ikhofi is the Zulu name for arabica coffee.
How long does arabica coffee take to grow?
Arabica coffee takes about 210–270 days from sowing to maturity, though the exact length varies with variety, temperature and how the season runs.
What spacing should I use for arabica coffee?
Space arabica coffee rows about 200 cm apart, with roughly 200 cm between plants within the row.
What pests and diseases attack arabica coffee?
The ones covered in this guide are Antestia bug, Coffee berry borer, Coffee berry disease. Each has its own page explaining how to identify, check for and control it.