 Divisi
How to grow ginger
Zingiber officinale · Zingiberaceae
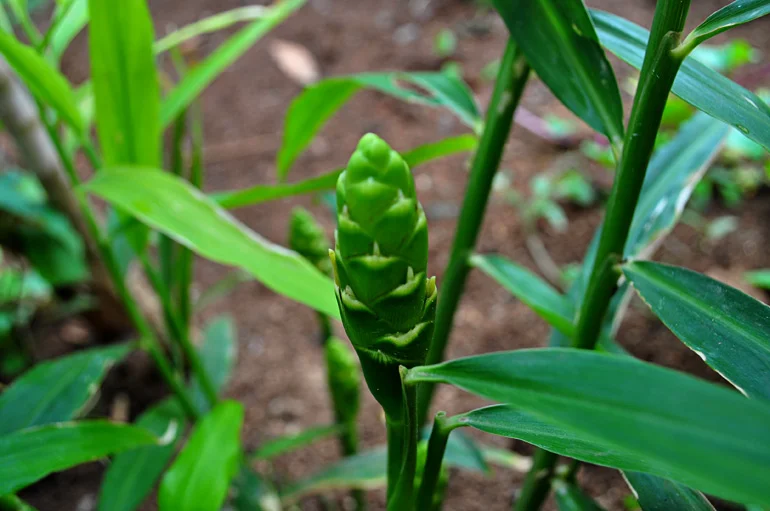
Photo: Venkatx5 · CC BY-SA 3.0
Ginger is a leafy, reed-like plant grown for the knobbly, spicy rhizome — the 'root' — that swells just under the soil and is sold fresh or dried. You do not grow it from true seed. Instead you plant pieces of clean, healthy rhizome called setts (seed-rhizome pieces), and each one grows into a leafy clump. It is a long crop — about 8 to 10 months — that loves warmth, light shade, a thick blanket of mulch and steady, gentle moisture. Its great danger is two diseases that ride in on dirty seed and live for years in the soil — soft rot and bacterial wilt — and neither has any cure once it strikes. So ginger is won or lost before you plant: clean setts, a raised bed that drains fast and is rich in well-rotted manure, and land that has grown no ginger (or its wilt relatives) for at least 3 years.
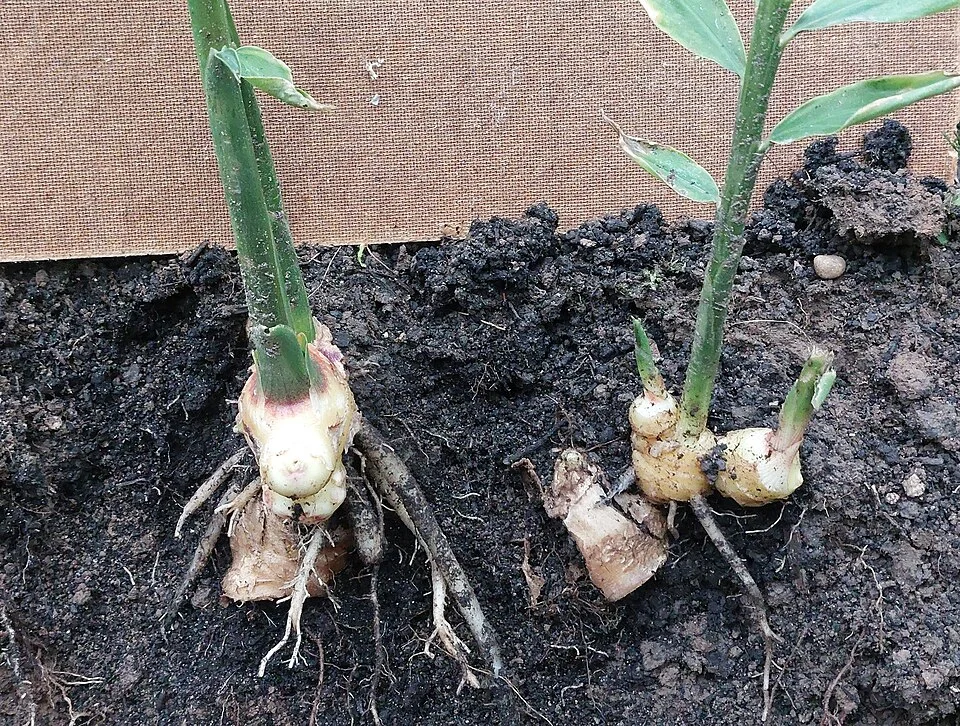
Schlaghecken Josef · CC BY-SA 4.0 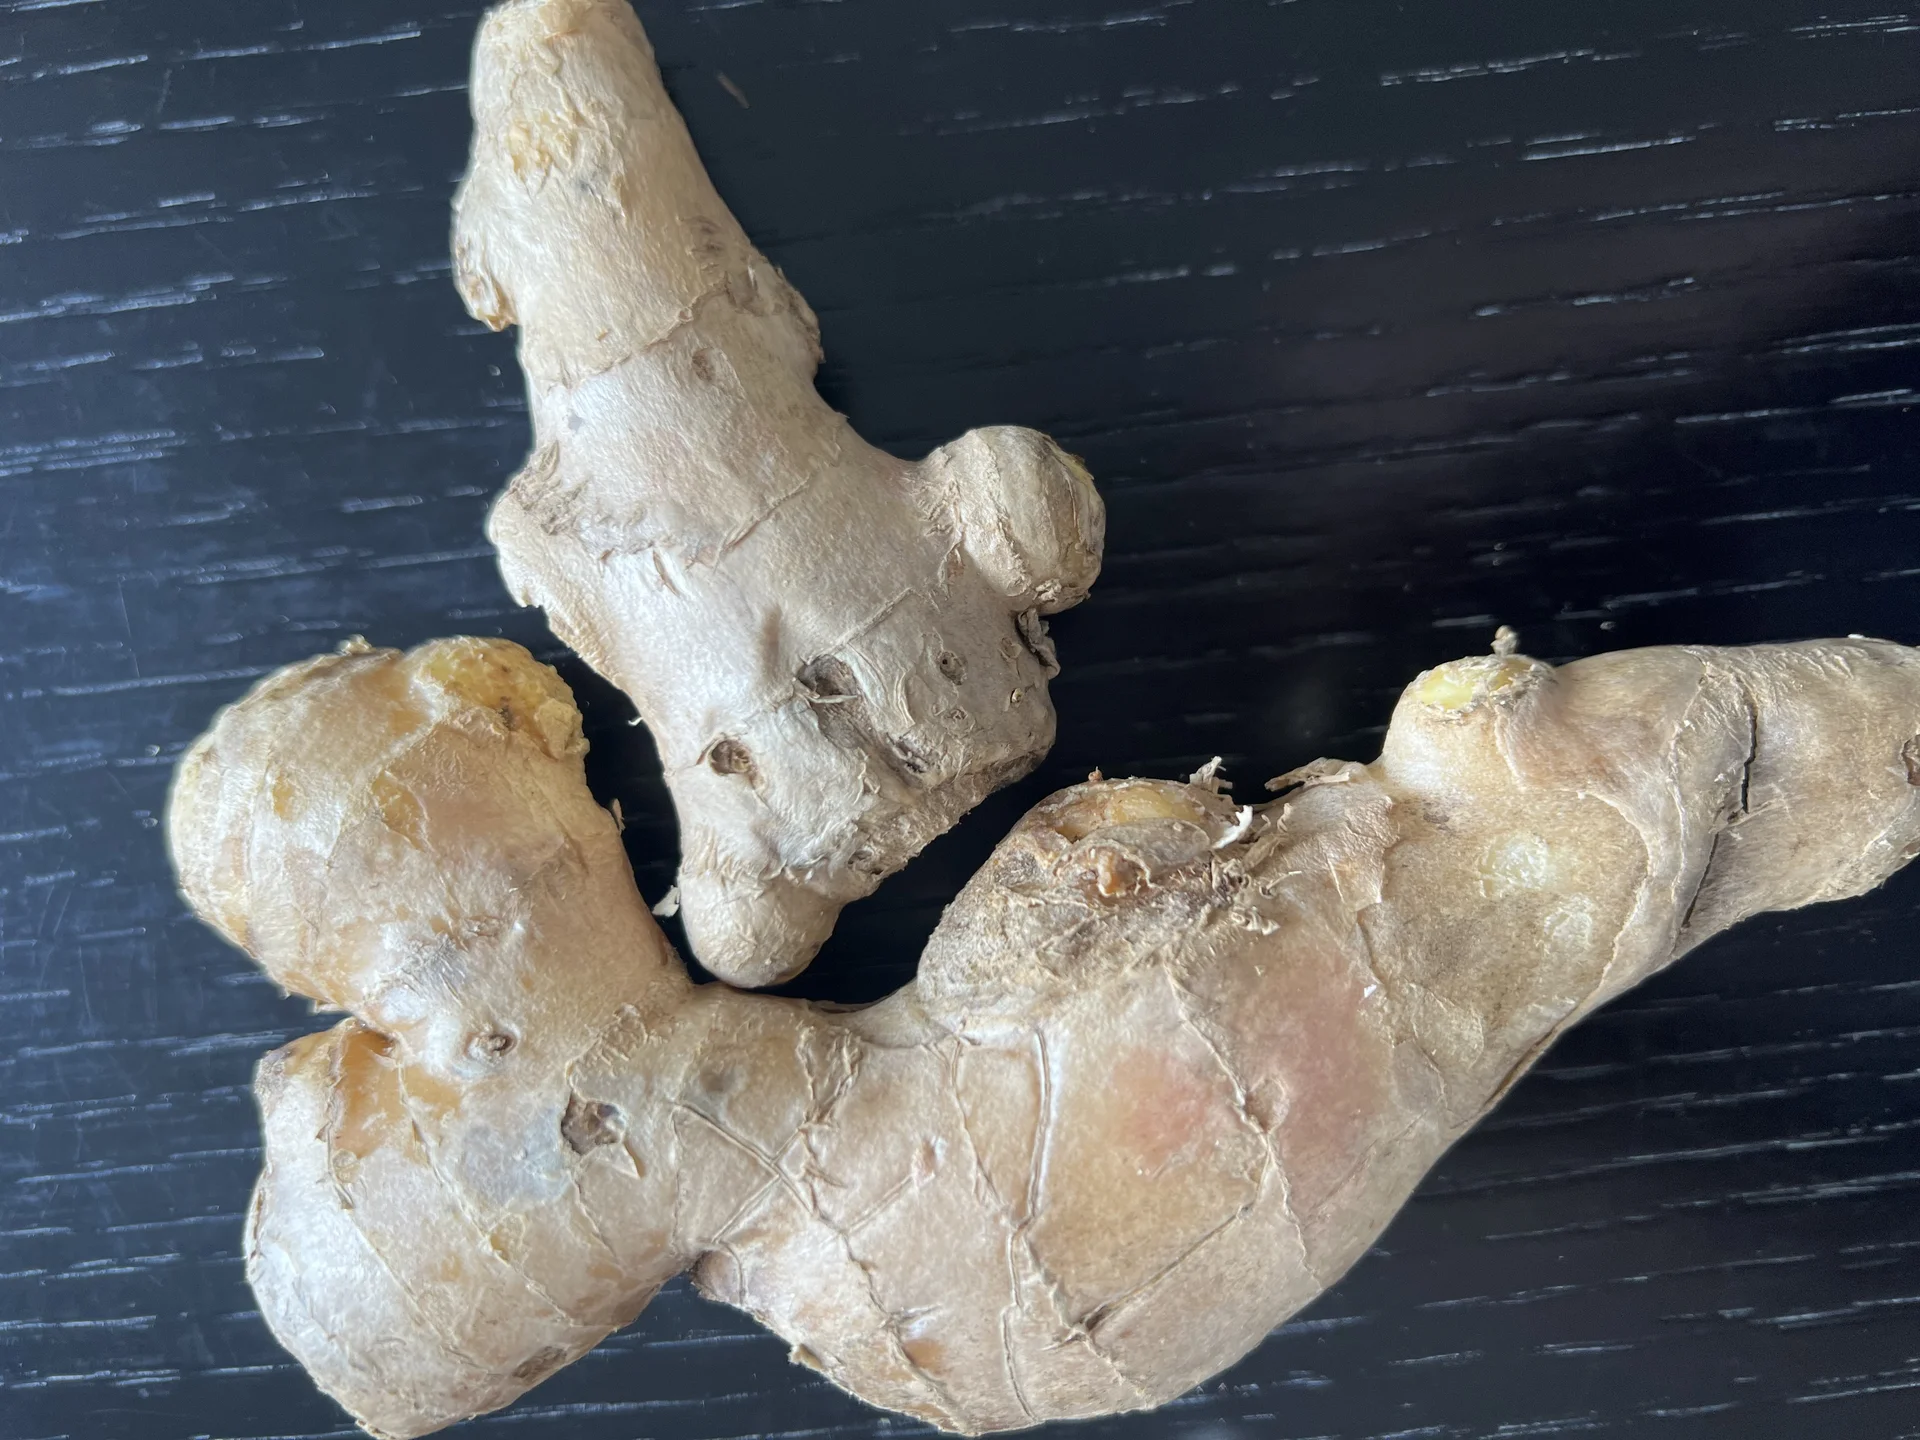
HaJunkiyada · CC BY-SA 4.0
- Days to maturity
- 240–300 days
- Row spacing
- 25 cm
- Plant spacing in the row
- 22 cm
- Sowing depth
- 5 cm
These are general figures for the crop, compiled from published agronomic references including FAO and CABI. The right choice for your field depends on your soil, rainfall and the yield you are aiming for.
Will ginger actually do well on your field? Check your own field against every crop in the catalogue — no signup. Run the crop check →
Also known as
- Afrikaans
- gemmer
- French
- gingembre
- Hausa
- citta, cittar aho
- Portuguese
- gengibre
- Swahili
- tangawizi
- Yoruba
- atalé, jinja
- Zulu
- ujinja
Working in buckets, bags or paces? The farming glossary turns the measures growers actually use into kilograms and hectares — what a 20 litre bucket of each crop really weighs, and how to size a field by walking it — alongside the Shona, Swahili, Ndebele and Yoruba words used in the field. Open the glossary →
Growing ginger, stage by stage
Your ginger season from start to finish — clean seed and a raised, fast-draining bed, then planting, mulching, feeding and careful scouting, through to a well-cured rhizome in store. Ginger is a long 8–10 month crop, and its two worst diseases — soft rot and bacterial wilt — have no cure in the field, so at every step you are working to keep them out. With ginger, prevention beats cure.
Get ready — clean seed, a raised bed, and rotation
Ginger is won or lost before you plant a single sett. Its two killers — soft rot (a wet, slimy rot) and bacterial wilt (a green wilting that oozes) — have no cure in the field, so everything now is about keeping them out. Buy only clean, firm, rot-free setts; build a raised bed that drains fast and is rich in well-rotted manure; and plant only on land that has grown no ginger — and no tomato, potato, pepper, chilli or eggplant — for at least 3 years. Get this stage right and the whole long season runs far easier.
Source disease-free seed rhizomes Critical
Ginger's two killers — soft rot and bacterial wilt — ride in hidden inside infected seed rhizomes, and neither can be cured once it is in your soil. That makes choosing clean, healthy seed the single most important decision of the whole season. Dirty seed loses the crop before it even sprouts, and no amount of care later can undo it.
Get your seed rhizomes a few weeks to a month before you plan to plant, so you have time to sort them well and, later, to heal the cut pieces.
Choose plump, firm, healthy rhizomes with fat buds — the little swollen 'eyes' that sprout. The safest seed of all is saved from a crop you know stayed clean and disease-free.
Reject any piece that is soft, shrivelled, dark inside, weeping, or bad-smelling. That is rot — and one rotten piece can seed disease across a whole bed.
Store the good seed rhizomes in a cool, dry, shaded, airy place until the day you cut and plant them — never in a warm, damp heap where they sweat and rot.
- Do:
Buy only clean, firm, rot-free seed rhizomes — the two killers travel inside infected seed.
- Tip:
Cheap, unknown seed from a crop that had rot — you can't see the disease until it is already in your soil.
- Watch out:
A slimy, foul smell or a weeping cut end means soft rot — throw that piece away, don't plant it.
Confirm rotation Critical
Soft rot and bacterial wilt survive in the soil for years after an infected crop. If you plant ginger where ginger — or a wilt relative like tomato, potato, chilli or eggplant — grew recently, the disease is already lying in the ground waiting for it. Rotation simply starves the disease out, and it costs you nothing.
In the weeks before you commit a plot, think back over everything that has grown there for the last 3 years.
Choose land that has grown no ginger, and no tomato, potato, pepper, chilli or eggplant, for at least 3 years — all of these carry the same rot and wilt that attack ginger.
Pick a spot that is naturally free-draining and never sits wet after rain — low, soggy ground breeds soft rot no matter how clean your seed is.
If your only land has a disease history, plant a different crop there this season and find fresh ground for your ginger.
- Do:
Keep a simple note of what grew where each year, so planning a clean rotation is easy.
- Tip:
Replanting ginger on the same bed year after year — you are feeding its diseases and building them up.
Build raised, drained, organic bed Critical
Ginger rots if its rhizome sits in wet soil, even for a short spell. A raised bed lifts the crop above standing water so rain drains away fast, and well-rotted manure worked in feeds this hungry crop while keeping the soil loose enough for the rhizome to swell. This bed is your main physical defence against soft rot — you can hardly make it too well-drained.
A few weeks before planting, dig the plot deeply and break it down to a loose, crumbly tilth — the rhizome can only swell fat in soft, open soil.
Raise the bed clearly above the paths — about a hand-span (20 cm) or more high — and cut a drainage channel down each side so water runs off and never pools on the bed.
Spread plenty of well-rotted manure or compost over the bed and mix it into the topsoil. Use only dark, crumbly, fully-rotted matter — fresh manure burns the setts and feeds rot.
Your recommendation gives the exact manure and fertiliser amounts for your bed — follow it, and spread everything evenly so the crop grows evenly. Wash your hands after handling manure and keep it away from drinking water.
- Do:
Make the bed high and the side channels deep — you can never make ginger too well-drained.
- Tip:
Flat beds or low, wet ground — water that sits on the bed for even a day starts soft rot.
- Watch out:
Use only well-rotted manure, wash your hands after handling it, and keep it away from drinking water.
Cut & heal (treat) setts Recommended
A sett cut too small has no food reserve to push out a strong shoot, and a piece with no live bud never sprouts at all. Letting the cut faces heal and dry before planting seals each wound, so soil rot cannot climb in through it — a fresh, wet cut face is an open door for soft rot.
One or two days before planting, break or cut healthy rhizomes into pieces about the size of your thumb (20–25 g), each carrying one or two plump buds (the eyes that sprout).
Use a clean knife and wipe it between rhizomes, so you never carry rot from one piece to the next.
As you cut, throw away any piece that is soft, discoloured or foul-smelling inside — the rot is already in it, buds or no buds.
Spread the cut pieces in a shady, airy place for a day or two until the cut faces dry and harden over into a firm, corky skin.
Where soft rot is a known problem, dip the setts in a recommended fungicide or biocontrol (a treatment that kills the rot or crowds it out) and let them dry again. Cover your nose, skin and eyes while handling the treatment, keep it off food and water, and wash well afterwards.
- Do:
Heal the cuts in shade before planting — a dry, corky cut face keeps soil rot out.
- Tip:
Planting tiny slivers or budless pieces — small setts give weak plants, and a piece with no bud gives nothing.
- Watch out:
Never plant a piece that is soft or smells bad, even if the buds look fine — the rot is already inside.
Plant the setts and get them sprouting
Now you plant the healed setts into the raised bed and cover the whole bed with a thick blanket of mulch. Sprouting is slow — 2 to 4 weeks or more — so bare soil in the first weeks is completely normal; be patient. But you must watch for the first rot patch, because soft rot spreads through wet soil and has no cure once it starts. A full, even stand of clumps now sets your yield ceiling high for the whole season.
Plant treated setts, bud-side up Critical
Getting the setts in at the right spacing and depth, buds pointing up, gives every plant room to build a big clump of rhizome. Too deep and the shoot exhausts itself reaching the surface; too shallow and the rhizome pushes out and greens. Spacing is a decision you cannot change once planted, so get it right this one time.
Plant on your prepared raised bed when the soil is warm and moist — ginger simply will not sprout in cold soil.
Open shallow furrows about 25 cm apart — a hand-span — across the bed.
Set the healed setts along each furrow about 22 cm apart (again about a hand-span), with the buds pointing up.
Cover them with fine soil so they sit about 5 cm deep — one finger-joint. Deeper than that in wet soil invites rot; shallower and the rhizome greens at the surface.
Mulch the whole bed heavily straight away (the next task) — never leave the planted bed bare.
- Do:
Plant buds-up and firm the soil gently, so each sett sits snug in moist earth.
- Tip:
Waterlogging the bed — even a short spell of standing water after planting triggers soft rot in the setts.
- Watch out:
Keep the spacing even (a hand-span each way) — crowded setts make small, forked rhizomes.
Mulch heavily Critical
Ginger came from the shady, leaf-littered floor of the forest, and a thick mulch gives it back that home. It keeps the soil cool and evenly moist — just what a sprouting sett needs — smothers weeds before they start, and rots down to feed the crop. A bare bed instead dries out, bakes the setts, and lets weeds take over.
The moment the setts are planted, lay a thick blanket of mulch — straw, dry grass, leaf litter or crop residue — right across the whole bed.
Make it generous: about a hand-span (20 cm) of loose material, which settles down to a solid cover. Ginger thrives under a heavy mulch.
Keep the mulch loose and airy, not a soggy mat — it should hold moisture while still letting rain drain straight through.
Top it up through the season as it rots down, especially before the dry months.
- Do:
Mulch thickly and keep renewing it — it is your free weed control, moisture-keeper and slow feed, all in one.
- Tip:
Skimping on mulch — a thin cover dries out and the setts sprout weakly and unevenly.
Scout emergence & rot patches Critical
The first month decides how many of your setts become healthy clumps. Soft rot has no cure — your only defence is to spot the first slimy patch and cut it out, together with the soil around it, before it spreads through the wet bed to the whole crop.
From about a week after planting, walk the bed every week while you wait for the shoots. Sprouting takes 2–4 weeks or more, so bare soil early on is normal — you are watching the soil, not just the shoots.
Look for setts that fail to sprout while their neighbours do — gently uncover one; if it is soft, slimy or foul-smelling, that is soft rot.
Look for wet, rotten, bad-smelling patches on the bed, and any young shoot that wilts while still green or topples at its base.
At the very first rot patch, dig out the rotted setts plus a spadeful of the soil around them at once, carry it right away from the bed, and open up the drainage there. Never let water run from a sick patch onto healthy plants.
If a rot patch appears → act the same day: rogue it out (dig out and destroy the sick setts and soil) and improve the drainage. A single day's delay can cost you the whole bed.
- Watch out:
A slimy, bad-smelling, water-soaked patch is soft rot — there is no spray for it; cutting it out fast is the only cure.
- Do:
Walk the bed after every heavy rain — soft rot spreads fastest in wet soil.
Irrigate — keep moist, never waterlogged Recommended
The sprouting sett needs the soil steadily moist to push out its shoot and first roots — but ginger drowns easily, so the trick is little and often, never a flood. Dry soil now gives slow, patchy sprouting; waterlogged soil rots the setts before they ever come up.
Keep the bed evenly moist, like a wrung-out cloth — damp all the way through but never soggy.
Water little and often (every few days), more in heat and on sandy soil, less after rain.
Check with a finger: water when the top few centimetres have dried; skip it if the soil is still wet under the mulch.
Never let water pool on the bed — if it does, open the side drainage channels wider.
- Tip:
Heavy flooding of the bed — standing water is the fastest way to rot your setts.
- Do:
Feel the soil before every watering — under a thick mulch it stays wet longer than you think.
Leafy growth — feed, weed and earth up
The setts are up, and the plants now build leafy shoots (tillers — the reed-like stems) and a spreading root system: the leaf factory that will later fill the rhizome. Keep the bed weeded and well-mulched, start feeding potassium and nitrogen in small splits, and earth up to keep the swelling rhizomes covered. This is also when bacterial wilt appears — and like soft rot it has no cure — so the only answer is to rogue it (dig out and destroy whole sick clumps) the moment you see it.
Renew mulch & weed Critical
Weeds steal the water, light and food your ginger paid for, and the mulch you laid at planting is now rotting down. Renewing it keeps the weeds down, holds the steady moisture the crop must have, and covers the rhizomes as they begin to swell close to the surface.
From about 6 weeks after planting, and every 3–4 weeks after, check the bed and pull weeds by hand while they are still small.
Weed by hand close to the plants — a hoe or fork driven in deep wounds the rhizome, and every wound is a door for rot. Hoe only shallowly, between the rows.
Renew the mulch wherever it has thinned or rotted away, keeping a thick, even cover across the whole bed.
As you go, draw a little soil and mulch up over any rhizome that is showing, so it stays buried and does not turn green.
- Do:
Renew the mulch as it breaks down and earth up lightly to keep the swelling rhizomes covered.
- Watch out:
A plant that wilts while its leaves are still green, oozing a milky-white thread when you cut the base and stand it in water, is bacterial wilt — dig out the whole clump and its soil at once; no spray cures it.
- Tip:
Deep hoeing close to the plants — a wounded rhizome rots.
Split-feed N + K Recommended
Ginger is a hungry crop, and it takes up more potassium (K) than anything else — potassium is what packs weight and pungency (the hot, spicy bite) into the rhizome — plus plenty of nitrogen (N) to build the leaves. Feeding in small splits rather than one big dose means the heavy rain and watering can't wash the food away before the crop uses it.
Starting about 6 weeks after planting, give the crop its fertiliser in splits, roughly once a month, using the amount in your recommendation — don't guess, because too much nitrogen gives lush leaf and little rhizome.
Band it — lay it in a line to the side of the row, not on the plants — then cover it with soil or mulch so it doesn't wash or gas away.
Feed onto moist soil — after weeding or a light rain — so the food soaks down to the roots.
Keep fertiliser off wet leaves (it scorches them), keep it away from food, water and children, and wash your hands afterwards.
- Do:
Split the feed into small monthly doses — steady feeding beats one big dose that the rain washes past the roots.
- Tip:
Piling on nitrogen — it gives lush leaves but a small rhizome, and soft growth that rots easily.
- Watch out:
Band fertiliser to the side and cover it — grains left on wet leaves burn them.
Earth up Recommended
The rhizome swells just under the surface and keeps pushing upward as it grows. Earthing up — drawing loose soil and mulch over the clump — keeps the rhizome buried and pale (an exposed rhizome turns green and hard and won't sell), gives it soft soil to expand into, and steadies the leafy shoots so they don't topple.
From about 2 months after planting, once the clumps are growing well, gently draw loose soil and mulch up around the base of each clump, like building a low mound.
Cover any rhizome or pale 'fingers' poking out of the soil — keep them buried and dark.
Work gently, by hand or with a light tool, staying shallow near the plant so you never cut the rhizome.
Top up with fresh mulch after earthing up to keep the mound cool and moist. If rhizomes show again later in the season, simply earth up once more.
- Do:
Earth up whenever rhizome shows — covered rhizome stays tender and pale; exposed rhizome greens and is hard to sell.
- Tip:
Digging in deep and close to the clump — you will wound the rhizome and let rot in.
Scout (wilt, leaf spot, nematode) Critical
This is when bacterial wilt strikes — and like soft rot it has no cure, so catching the first sick clump and rogueing it is the only way to save the rest. Nematodes, leaf spot and the shoot borer also appear now; spotting them early keeps the leaf factory working to fill the rhizome.
Walk the bed every week and look over the leaves, the shoots, and any exposed roots or rhizome.
Bacterial wilt: whole shoots wilt and yellow from the bottom up while the leaves are still green. Cut a wilted base and stand it in clear water — a milky-white thread streaming out confirms it. Dig out the whole clump plus the surrounding soil at once, carry it right off the field, and never compost it.
Root-knot nematode: plants are stunted and yellowish for no clear reason; lift one and look for knots and swellings on the roots. Rogue badly affected clumps and keep that spot out of ginger next time.
Leaf spot: small oval spots with pale grey centres and dark edges on the leaves. Usually minor — pick off badly spotted leaves and don't work the bed while the foliage is wet.
Shoot borer: the central shoot yellows and dries out — a 'dead heart' — with a small bore-hole and sawdust-like droppings low on the stem. Cut out and destroy the bored shoot with the grub inside.
- Watch out:
Green wilting with a milky ooze is bacterial wilt — rogue whole clumps the same day; it spreads in water and soil.
- Do:
Scout after rain, and clean your tools and boots between beds so you don't carry wilt and nematodes on them.
Rhizome bulking — the yield-maker
This is the yield-making stage: the rhizome now swells fast and puts on most of its weight. It is the crop's thirstiest and hungriest time, so keep the soil evenly moist — never dry, never flooded — and give the final potassium feed that fills and firms the rhizome. Bacterial wilt and soft rot still lurk in the warm, wet bed, so keep rogueing any sick clump on sight, right up to the day you dig.
Keep moisture high & even Critical
The rhizome puts on most of its weight now, and that needs steady, even moisture — this is the crop's peak water demand. If the soil swings from bone-dry to flooded, the rhizomes grow in fits and starts, crack or rot, and the harvest shrinks. Even moisture now is the difference between thin fingers and fat, heavy hands of ginger.
From about 5 months after planting, keep the bed evenly moist all the time — like a wrung-out cloth: damp right through, but never waterlogged.
Water every few days in dry weather, and keep the thick mulch topped up to hold the moisture between waterings.
Still never let water pool — the side channels must stay open even now, because soft rot loves a warm, wet bulking bed.
Hold the moisture steady while the rhizome is swelling; you only begin to ease off near harvest (the next stage), not yet.
- Do:
Keep moisture even and high — but drained. This is the highest-water, highest-growth phase of the whole crop.
- Tip:
Letting the soil swing dry then flooded — it cracks and rots the swelling rhizomes and wrecks the yield.
Final K feed Recommended
Potassium (K) is the nutrient that fills the rhizome — it drives the weight, firmness and pungency (spicy bite) you sell. One last potassium feed as bulking gets going pushes size and quality right up. This is the crop's biggest, most important feed of the season.
Around 5 to 6½ months after planting, give the final potassium feed, using the amount in your recommendation.
Band it to the side of the rows and cover it with soil or mulch, onto moist soil, so it reaches the roots and doesn't wash away.
Skip heavy nitrogen now — late nitrogen pushes soft, leafy growth that rots and delays the rhizome firming up for harvest.
Keep fertiliser off wet leaves, away from food, water and children, and wash your hands afterwards.
- Do:
Make potassium the priority now — it is what turns leaf into heavy, pungent rhizome.
- Tip:
A late nitrogen boost — it delays maturity and softens the rhizome so it rots.
Rogue any wilt/rot clumps Critical
Even this late, a single wilt or rot clump left in the bed can seed the warm, wet soil and spread to the fat rhizomes around it — losing weight you have spent eight months growing. Rogueing on sight protects the harvest right up to the day you dig.
Keep walking the bed every week or so through bulking, looking for the same two killers.
Bacterial wilt: a clump that wilts green and yellows from the bottom, with a milky ooze when a cut base is stood in clear water.
Soft rot: a soft, slimy, foul-smelling base and rhizome, with shoots that pull away easily — often around a wet patch in the bed.
The moment you see either, dig out the whole sick clump plus the soil around it, carry it right off the field, and never compost it or let water run from it toward healthy plants.
- Watch out:
One sick clump ignored can rot a whole corner of fat rhizomes — rogue it the day you see it.
- Do:
After rogueing, improve drainage on that spot and keep water from running off it onto healthy clumps.
Maturity and careful lifting
Ginger tells you it is ready by dying back: the leaves yellow and the stems dry and flop over. Fresh (green) ginger can be lifted earlier — from about 6–7 months — while it is mild and thin-skinned; for dried, mature ginger with firm skin, wait for full die-back at about 8–10 months. Either way, dig gently by hand, because bruised or broken rhizomes rot in store — one careless harvest can spoil a whole season's work.
Dig & lift whole rhizomes Critical
You have grown the crop; now you must get it out of the ground whole and unbruised. Ginger's skin bruises and its fingers snap easily, and every cut or bruise is where rot begins in storage. Careful lifting is the difference between a crop that keeps for months and one that spoils in weeks.
Stop watering for a week or two before you dig, so the soil dries a little and the skin firms up — firm-skinned rhizomes bruise less and keep far better.
Read the maturity sign. For dried ginger, wait until the leaves have yellowed and the stems dried and flopped over (lodged), and the skin is firm and does not scrape off with a thumbnail. For fresh/green ginger you can lift earlier (about 6–7 months), while the skin is still thin. If the skin still scrapes off easily → it is not yet mature; wait, unless disease is forcing an early lift.
Loosen the soil well away from the clump with a fork or spade, then lift the whole clump by hand — never lever the rhizomes out or pull them up by the tops.
Gently shake off the soil, snap or cut off the tops and the stringy roots, and lay the rhizomes in the shade. Set aside the best, clean, disease-free clumps for seed (the next task).
- Do:
Stop irrigation a week or two before harvest to firm the skin, then dig carefully — ginger bruises and breaks easily.
- Tip:
Levering rhizomes out with a tool or yanking the tops — you snap fingers and bruise skin, and bruised ginger rots in store.
- Watch out:
Dig in the cool of the day and keep the lifted rhizomes out of the hot sun.
Select clean seed rhizomes Recommended
Next year's crop is only as clean as the seed you keep. Choosing seed rhizomes from your healthiest, disease-free clumps now — while you can still see which plants stayed strong all season — is how you keep soft rot and wilt out of next season, and it saves you buying in dirty seed.
As you lift, mark or set aside the clumps that stayed healthiest all season — good leaf, no wilt, no rot.
From these, keep plump, firm, well-formed rhizomes with plenty of fat buds for seed.
Reject anything from a clump that showed wilt or rot, and any piece that is soft, dark or damaged — one bad seed rhizome can seed disease across next year's crop.
Keep the seed rhizomes separate from your market ginger and store them carefully (see storage).
- Do:
Take seed only from clumps that were healthy all season — clean seed is your cheapest disease control next year.
- Tip:
Keeping seed from anywhere near a wilt or rot patch, however good the rhizome looks.
Clean, cure, dry and store
Now protect what you dug. Fresh-market ginger is washed gently, kept cool, and handled as little as possible. Dried ginger is dried down hard until the pieces snap cleanly (about 10% moisture) so it keeps without mould. And your seed rhizomes go into a cool, dry, airy store to carry the clean crop through to next planting — watching all the while for rhizome scale.
Wash, cure & dry Recommended
How you finish the crop decides whether it reaches the market sound. Bruised, dirty or half-dried ginger goes mouldy and is rejected. Gentle washing and proper drying (or careful cooling for fresh sale) turn your dug rhizomes into a product that stores and sells.
For fresh market: wash the rhizomes gently in clean water to remove the soil, let them surface-dry in the shade, and keep them cool — handle them as little as possible, because every bruise shortens their life.
For dried ginger: wash, then slice or split the thick rhizomes so they dry right through, and spread them in the sun or airy shade on a rack, mat or tarpaulin — never on bare ground, which pushes damp back in and adds mould and dirt.
Turn the pieces regularly so they dry evenly, and cover them if rain or dew threatens.
Snap test: a properly dried piece is hard and brittle and snaps with a clean crack (about 10% moisture — the point where it keeps without mould). If it bends or feels leathery → it is still too wet; dry it longer before you store it, or it will mould.
- Tip:
Rough handling and drying on bare ground — bruised, dirty, half-dried ginger drives nearly all the storage loss.
- Do:
For dried ginger, dry to hard, brittle pieces that snap cleanly (~10% moisture) before storing.
- Watch out:
Keep drying ginger up off the ground and covered from rain and dew — it soaks damp back up overnight.
Store selected seed rhizomes Recommended
Your seed rhizomes must stay alive, firm and disease-free for months until next planting. Stored too warm, damp or airless they rot or dry out; left unchecked, rhizome scale quietly sucks them dry. Good storage is what lets you plant your own clean seed next season instead of buying it in.
Store the selected seed rhizomes in a cool, dry, shaded, airy place — a ventilated basket, box or pit that stays cool and never gets wet.
Spread them out or layer them loosely (some farmers layer them in dry sand or with dry leaves) so air moves around them and they don't sweat and rot.
Check the store every few weeks: remove and discard any rhizome that turns soft, slimy or shrivelled, so one bad piece doesn't spoil the rest.
Look for rhizome scale — tiny greyish-white crusty specks encrusting the skin, with the rhizome shrivelling beneath. Discard heavily-scaled pieces and keep only clean, plump seed.
- Do:
Store cool, dry and airy, and pick out any rotting piece each time you check.
- Watch out:
Greyish-white crusty specks on stored rhizomes are scale — they shrivel the seed; cull affected pieces.
- Tip:
Sealing seed rhizomes in a warm, damp, airless bag — they sweat, rot, and are dead by planting.
Pests and diseases that attack ginger


Where to sell ginger
Markets that trade this crop — what each one sells it by, when supply peaks there, and the currency used.


Grow ginger with a plan, not a guess
This guide is the general answer. Divisi works out yours — the week to plant ginger on your soil and your rainfall, and each job dated for your field.


When to plant ginger, country by country
- When to plant ginger in Angola
- When to plant ginger in Benin
- When to plant ginger in Botswana
- When to plant ginger in Burkina Faso
- When to plant ginger in Burundi
- When to plant ginger in Cabo Verde
- When to plant ginger in Cameroon
- When to plant ginger in Comores
- When to plant ginger in Congo
- When to plant ginger in Côte d'Ivoire
- When to plant ginger in Egypt
- When to plant ginger in Eritrea
- When to plant ginger in Eswatini
- When to plant ginger in Ethiopia
- When to plant ginger in Gabon
- When to plant ginger in Gambia
- When to plant ginger in Ghana
- When to plant ginger in Guinea Ecuatorial
- When to plant ginger in Guinea-Bissau
- When to plant ginger in Guinée
- When to plant ginger in Kenya
- When to plant ginger in Liberia
- When to plant ginger in Libya
- When to plant ginger in Madagascar
- When to plant ginger in Malawi
- When to plant ginger in Mali
- When to plant ginger in Mauritanie
- When to plant ginger in Mauritius
- When to plant ginger in Morocco
- When to plant ginger in Moçambique
- When to plant ginger in Namibia
- When to plant ginger in Niger
- When to plant ginger in Nigeria
- When to plant ginger in Rwanda
- When to plant ginger in République centrafricaine
- When to plant ginger in République démocratique du Congo
- When to plant ginger in Sao Tome and Principe
- When to plant ginger in Seychelles
- When to plant ginger in Sierra Leone
- When to plant ginger in Somalia
- When to plant ginger in South Africa
- When to plant ginger in South Sudan
- When to plant ginger in Sudan
- When to plant ginger in Sénégal
- When to plant ginger in Tchad
- When to plant ginger in Togo
- When to plant ginger in Uganda
- When to plant ginger in United Republic of Tanzania
- When to plant ginger in Zambia
- When to plant ginger in Zimbabwe
Where ginger scores best
Districts where Divisi's engine currently rates this crop highest, ranked by fit.
-
 Kalangala
 -
 Dekese
 -
 Hamahamet-Mboinkou
 -
 Vatomandry
 -
 Chake Chake
 -
 Lomela
 -
 Boende
 -
 Kyela
Kyela -
 Liranga
 -
 Bouanila
 -
 Belleh
 -
 Soyo
Soyo
Get Insights by email
A short digest of new Divisi articles. No email on quiet weeks.
Frequently asked questions
How do I grow ginger?
How to grow ginger: 240–300 days to maturity, 25 cm rows, 5 cm deep. Also called gemmer, gingembre, citta, gengibre, tangawizi, atalé, ujinja.
What is gemmer in English?
Gemmer is the Afrikaans name for ginger.
What is gingembre in English?
Gingembre is the French name for ginger.
What is citta in English?
Citta (also cittar aho) is the Hausa name for ginger.
What is gengibre in English?
Gengibre is the Portuguese name for ginger.
What is tangawizi in English?
Tangawizi is the Swahili name for ginger.
What is atalé in English?
Atalé (also jinja) is the Yoruba name for ginger.
What is ujinja in English?
Ujinja is the Zulu name for ginger.
How long does ginger take to grow?
Ginger takes about 240–300 days from sowing to maturity, though the exact length varies with variety, temperature and how the season runs.
What spacing should I use for ginger?
Space ginger rows about 25 cm apart, with roughly 22 cm between plants within the row.
How deep should ginger be planted?
Sow ginger at about 5 cm deep. Shallower risks drying out; deeper wastes seed energy before the shoot reaches light.
What pests and diseases attack ginger?
The ones covered in this guide are Leaf spot, Rhizome rot, Rhizome scale. Each has its own page explaining how to identify, check for and control it.