 Divisi
How to grow sesame
Sesamum indicum · Pedaliaceae
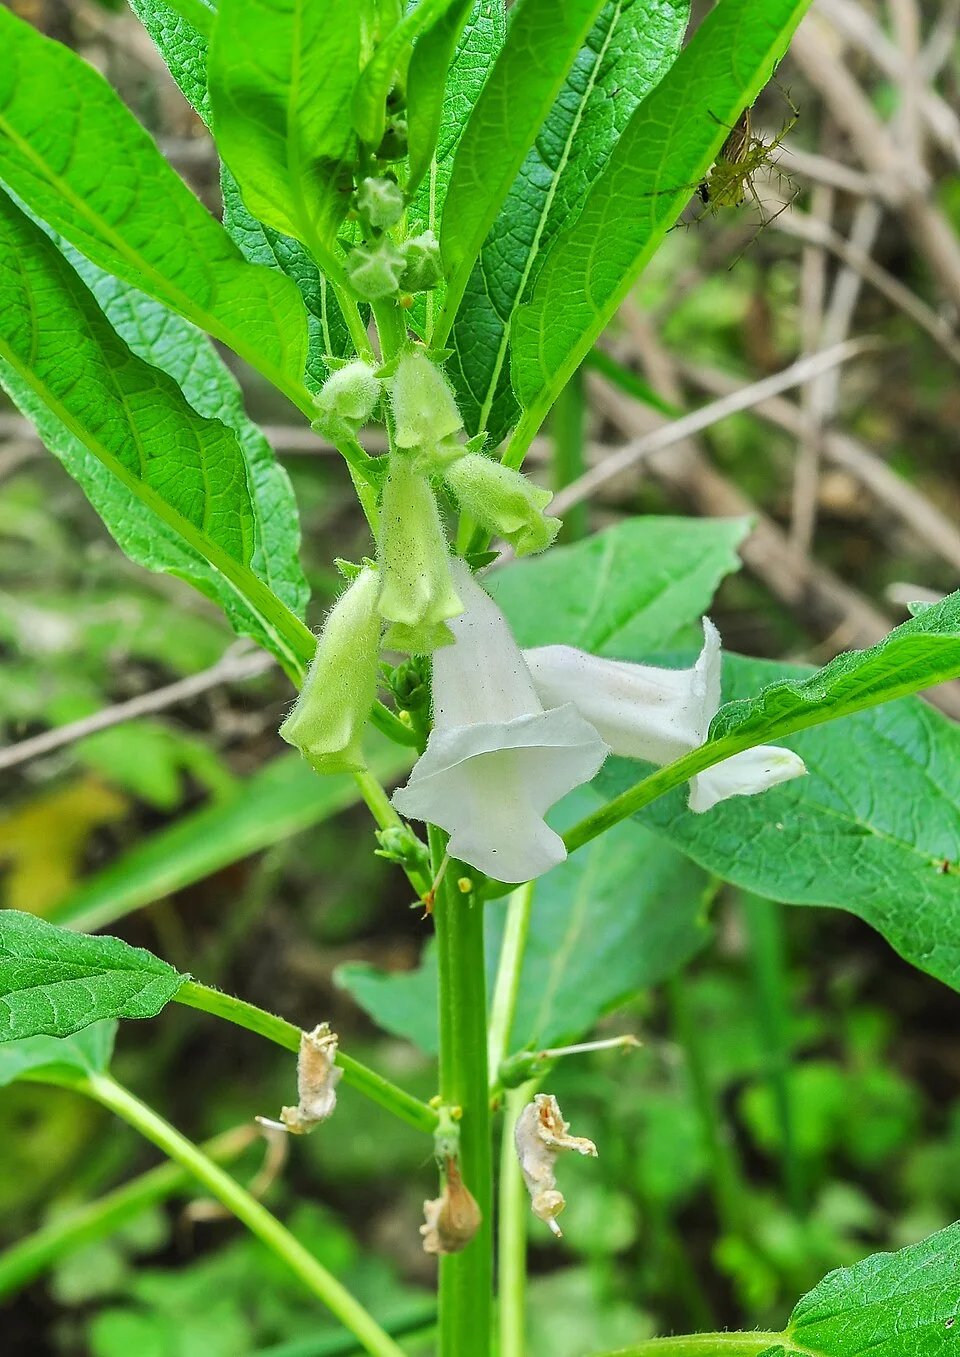
Photo: Joydeep · CC BY-SA 3.0
Sesame — also called simsim or benniseed — is a tough, upright oilseed that grows from knee to shoulder height and gives a seed that is about half oil. It is a survivor: it takes the heat and the dry spells that ruin softer crops, and it feeds lightly, so it earns money on poorer, sandier land where other crops struggle. But two habits rule everything you do. First, the seed is tiny — about a thousand seeds weigh only 3 grams — so it can only climb out of a fine, firm, shallow seedbed. Second, when the seed-pods (called capsules) ripen, they split open and spill the seed on their own. So the whole season comes down to two things: an even stand at the start, and cutting at exactly the right moment at the end. Get those two right and sesame pays you where tougher crops fail.
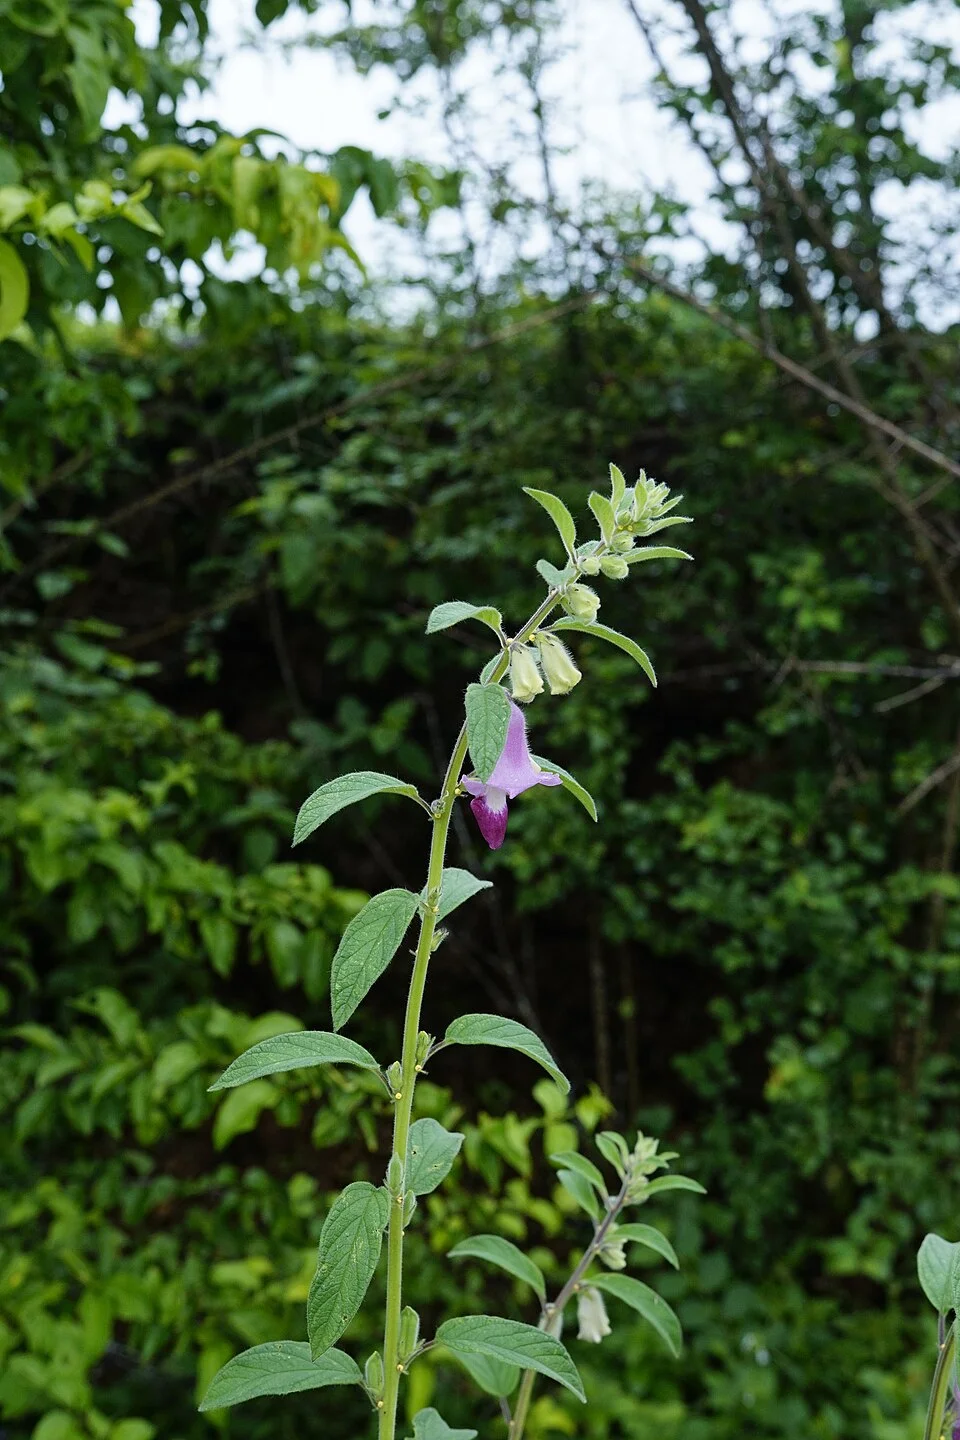
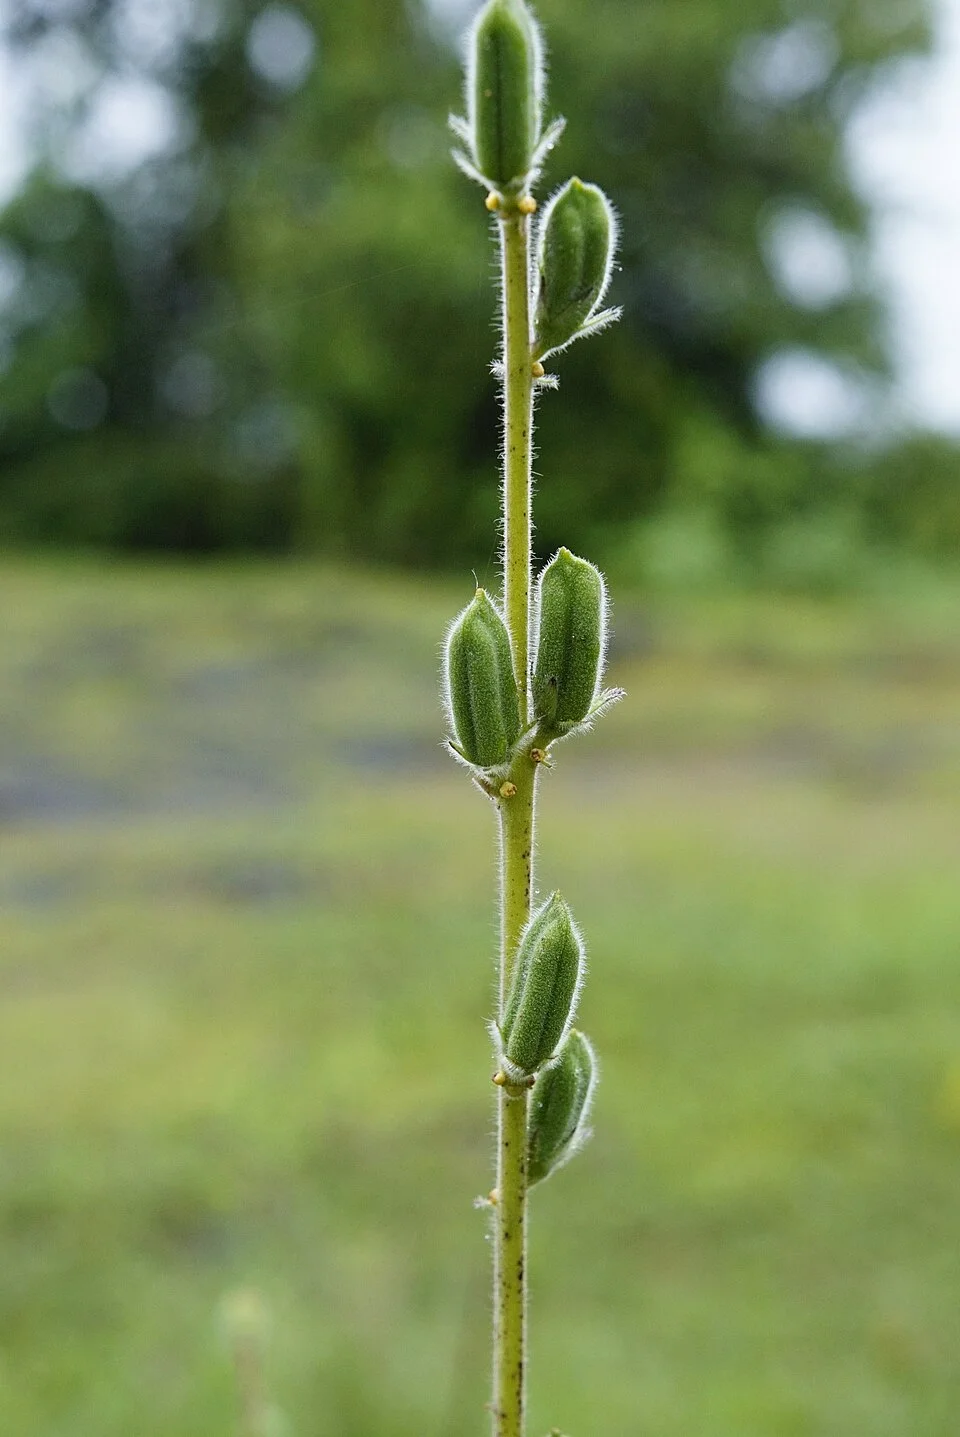
- Days to maturity
- 90–130 days
- Row spacing
- 37 cm
- Plant spacing in the row
- 7 cm
- Sowing depth
- 1.5–3 cm
These are general figures for the crop, compiled from published agronomic references including FAO and CABI. The right choice for your field depends on your soil, rainfall and the yield you are aiming for.
Will sesame actually do well on your field? Check your own field against every crop in the catalogue — no signup. Run the crop check →
Also known as
Sesame is also called simsim and benniseed.
- English
- simsim, benniseed
- Afrikaans
- sesam, sesamsaad
- Amharic
- selit
- French
- sésame
- Hausa
- ridi
- Portuguese
- gergelim
- Shona
- runinga, uninga
- Swahili
- ufuta
- Yoruba
- eeku, isasa
Working in buckets, bags or paces? The farming glossary turns the measures growers actually use into kilograms and hectares — what a 20 litre bucket of each crop really weighs, and how to size a field by walking it — alongside the Shona, Swahili, Ndebele and Yoruba words used in the field. Open the glossary →
Growing sesame, stage by stage
Your sesame season, step by step — from a fine, firm seedbed and an even stand of dust-fine seed, through timely weeding, feeding and pulling out sick plants, to cutting and curing the crop before the capsules shatter and spill your seed.
Choose your land and make a fine seedbed
Sesame is won or lost before you sow. Its dust-fine seed can only push up through a fine, firm, level seedbed, and the plant dies in a day or two of standing water. So the field you choose and the bed you make now decide your stand more than anything you do later. In the weeks before planting, get your seed, your starter fertiliser and a well-drained field ready — so you can sow the moment the soil is warm and moist.
Choose well-drained land Critical
Sesame cannot stand wet feet — even a day or two of standing water rots the roots and kills the plants outright. The single most important choice of the whole season is the field itself. Pick well-drained, gently sloping land and you sidestep the one thing that most often wipes out a sesame crop.
Pick a field that drains freely — gently sloping, with sandy-loam or loam soil where water never sits. Sesame actually does well on lighter, poorer land that heavier crops find too weak, so save your best bottomland for something else.
Never choose a low spot, a vlei or dambo, or anywhere water pools after heavy rain. If you can, remember the field after a storm last season — if puddles stood there even a day, sesame will drown there too.
Avoid heavy clay or a hard pan just under the surface that traps water. If your only land is flat, plan now to make ridges or raised beds so the plants sit above any wet.
Think about last season's crop. Sesame after a cereal like maize or sorghum is good. Do not grow sesame after sesame on the same land year after year — it builds up wilts and rots in the soil that attack the roots and stems.
- Tip:
Planting in a low, water-collecting spot — a day or two of standing water is enough to kill sesame outright.
- Do:
On flat land that puddles, ridge or bed it up first so the roots always sit above any standing water.
Buy seed + basal fertiliser Critical
Good seed of a variety suited to your area, bought in good time, gives the even, vigorous stand that sets your whole season — and having the right basal (starter) fertiliser in hand means you can act the day you sow. Sesame seed is cheap and tiny, but old or poor seed comes up thin and patchy, and a gap in the row can never be filled later.
Buy fresh, clean seed of a recommended variety from a trusted dealer. Where you can, choose a shatter-resistant (non-splitting) type — its capsules hold the seed longer and give you a wider, calmer harvest window.
Match the seed colour to your market: white seed usually fetches the best price for food and export, while brown and black types are hardier. Ask your buyer what they want before you choose.
Get the seed rate your recommendation gives for your field size — sesame needs only a little seed because it is so tiny — plus some dry sand or wood ash to mix it with at sowing.
Buy the basal (starter) fertiliser your recommendation lists — usually a compound carrying phosphorus plus part of the nitrogen. Sesame is a light feeder: do not buy or apply more than you are advised.
Store seed and fertiliser dry, off the floor, and away from food, water and children. Keep the receipt and label in case the seed comes up poorly.
- Do:
Ask for a shatter-resistant variety if one is sold near you — it turns the tense, few-day harvest into a calmer, wider one.
- Tip:
Buying more nitrogen fertiliser than advised — too much makes sesame run to leaf, fall over, and set fewer capsules.
- Watch out:
Keep fertiliser bone dry — once it soaks up any damp it sets hard as a rock and will not spread.
Prepare a very fine, firm seedbed Critical
A sesame seed is barely bigger than a grain of dust — it has almost no strength to push through clods or a hard crust. Only a fine, firm, level seedbed lets the whole stand come up together. A rough, cloddy bed is the commonest cause of a thin, gappy sesame crop.
Plough or dig, then break the soil down fine — work the top until it is crumbly like flour or fine sand, with no clod bigger than a pea. Rake off any trash, roots and stones.
Level the surface smooth and even. Bumps and hollows bury some seed too deep and leave the rest lying on top.
Firm the bed lightly — walk it, roll it, or pat it down with the back of a hoe. A loose, fluffy bed swallows the tiny seed too deep to climb out; the seed wants firm, moist soil pressed around it.
If your land is flat or holds water, make raised ridges or beds now, while the soil works easily, so the young plants sit above any standing water.
- Do:
Aim for a bed so fine and level you would happily sow tiny vegetable seed on it — that is exactly what sesame needs.
- Tip:
Leaving clods or a rough, lumpy surface — the dust-fine seed cannot climb out and you get a patchy stand.
- Watch out:
Do not over-loosen into a deep, fluffy tilth; a soft bed swallows the seed too deep to come up.
Apply basal (½N + P) Recommended
Sesame is a light feeder, but a small starter dose of phosphorus with a little nitrogen worked into the seedbed gives the young roots a push on poor, sandy land. Phosphorus barely moves once it is in the soil, so it must go down where the roots will be — not sprinkled on top, where it does almost nothing.
Use the basal fertiliser and the amount your recommendation gives — usually a compound carrying phosphorus plus half of the season's nitrogen (the other half is fed later, once the crop is growing fast).
Work it in just before or as you sow — band it along the rows or mix it through the top of the bed. Keep it below and to the side of where the seed will sit, never touching the seed, or the tiny sprout burns.
Sesame also answers to a little boron — the trace nutrient that helps flowers set into capsules. If your recommendation includes boron, apply it now with the basal. Never add extra on a guess: too much boron poisons the crop.
Keep the dose modest. Too much fertiliser — especially nitrogen — makes sesame grow tall and leafy, fall over (lodge), and set fewer capsules. A light feeder wants a light hand.
- Watch out:
Wash your hands after handling fertiliser, and keep it off food and water and out of children's reach.
- Tip:
Piling fertiliser in the seed line — concentrated fertiliser against the tiny seed burns it. Place it below and to the side.
Sow and get an even stand
Getting an even stand from dust-fine seed is the hardest and most important job of the whole season — you cannot add plants back later. Mix the seed with sand or ash so you can spread it evenly, sow shallow into warm, moist soil, keep the surface just damp until it is up, then thin to leave one strong plant every few centimetres.
Sow (seed mixed with sand/ash) Critical
Everything rests on this day. Sesame seed is so tiny that, sown carelessly, it goes down in clumps and bare patches — or too deep to ever come up. Mixing it with sand and sowing shallow is the difference between a full, even stand and a thin, gappy one you can never repair.
Sow only into warm soil. Sesame will not come up in cold ground — wait until the soil is warm to the touch and there is moisture in the seedbed.
Mix the seed with a carrier so you can spread it thinly: about 1 handful of seed to 5–10 handfuls of dry sand or wood ash. Mix it well in a tin or bucket — the sand carries the tiny seed evenly and lets you see where it has fallen.
Open shallow furrows 30–45 cm apart — about two hand-spans between rows (a hand-span is your spread hand, roughly 20 cm). Trickle the seed-and-sand mix thinly along each furrow.
Cover only lightly — just 1.5–3 cm, less than one finger-joint deep. A thin blanket of fine soil is all it needs; you should almost still see the line of the row. Deep sowing is the number-one killer of a sesame stand — the seed runs out of strength before it reaches the light.
Firm the row lightly with your foot, a light roller, or the back of a hoe, so the soil presses around the seed and holds the moisture in.
- Do:
Sow on a still day — the seed is light enough for a breeze to blow away. A little damp sand in the mix helps it stay put.
- Tip:
Sowing deep to chase moisture — the tiny seed dies trying to climb out. Sow shallow and keep the surface damp instead.
- Watch out:
If a hard crust forms after a heavy shower before the seedlings are through, break it very gently so they can push out.
Scout (webber, gaps) Recommended
The first two weeks decide your stand. Gaps you catch now can be re-sown; caught later they are simply lost seed. And the sesame webber caterpillar goes for the tender shoot tips of young plants — spotting it early keeps your stand whole.
From a few days after sowing, walk the rows every 3–4 days and look closely — the seedlings are thread-thin at first and easy to miss.
Check the stand: are the rows filling evenly, or are there bare stretches? Note the big gaps and re-sow them while the soil is still moist and the crop is only days old.
Look for the webber (a leaf-rolling caterpillar): the young sesame webber spins fine silk over the top leaves and growing tip and feeds hidden inside, so the shoot tip looks stuck together, folded, or wilted. Open a webbed tip and you may find a small greenish caterpillar — this same pest bores into the capsules later, so knock it back now.
Look for toppling seedlings (damping-off): seedlings that flop over with a thin, dark, water-soaked pinch right at the soil line, usually in the damp patches. It is the soil telling you it is too wet.
Note where the trouble is. If the webber is spreading, open its guide and act. If seedlings are damping off, ease off the water and open up the drainage.
- Do:
Re-sow big gaps within the first few days, while the rest is only just up — a late fill never catches the crop.
- Watch out:
Damping-off follows wet soil. If seedlings are collapsing at the base, cut back the water and improve drainage.
Thin to stand Recommended
Sown from a sand mix, sesame always comes up too thick in places. Crowded seedlings starve each other into thin, weak plants that carry few capsules. Thinning to one strong plant every few centimetres lets each one branch out and fill with pods.
Thin when the seedlings are 5–10 cm tall (roughly 10–14 days after sowing), while the extras still pull out easily.
Leave one strong seedling every 5–10 cm along the row — about two finger-joints apart (a finger-joint is one section of your finger, 3–5 cm). Keep the sturdiest and remove the rest.
Pull or pinch out the extra seedlings gently, holding the soil down around the one you keep so you do not lift its roots too. Thinning is easiest when the soil is slightly moist.
Fill any bare gap by moving a thinned seedling with a ball of soil into it and watering it in — or leave the gap if the crop is already too old for a fill to catch up.
- Do:
Thin on time — a crowded stand left too long makes spindly plants that never recover.
- Tip:
Yanking hard and lifting the keeper's roots along with its neighbour — steady the plant you want as you pull the extra.
Light irrigation for emergence Recommended
The seed sits in the top 1–3 cm of soil, which dries out fastest. If that shallow zone dries before the seedlings are up, the stand fails. If you can water, keeping just the surface moist gives an even, full emergence — without ever soaking the soil, which sesame hates.
Only if you can irrigate. From sowing until the seedlings are well up, keep the top of the seedbed just damp — light, frequent watering, never a heavy soaking.
Water gently — a fine spray or a careful can, never a hard flow that washes the tiny seed into heaps or beats the surface into a crust.
Water little and often — about every 3–4 days, more in heat and on sandy soil. Push a finger in; wet the surface again when the top centimetre is drying.
Never let water stand. Sesame drowns in waterlogged soil — if puddles form or the ground stays soggy, stop and let it drain.
- Tip:
Heavy flooding to 'save time' — it crusts the surface, drowns the seedlings, and brings on damping-off.
- Watch out:
A hard crust after watering or rain can trap the seedlings underneath. Break it gently if the crop cannot get through.
Weed early and feed the crop
Now the plant builds its frame and its branches — and this is where sesame is most often lost to weeds. Young sesame is a weak, slow starter that weeds easily smother, so weeding on time here is worth more than almost anything else you do. Weed twice before the crop closes over, and feed the rest of the nitrogen while the plant is growing fast.
1st + 2nd weeding Critical
Young sesame grows slowly and cannot fight weeds — a weedy field in the first weeks simply swallows the crop, costing 10–30% of your yield or more. Two timely weedings, before the leaves close over, are the cheapest big gain in the whole season.
Do the first weeding early — about 2 weeks after sowing (around 15 days) — as soon as you can tell the crop rows from the weeds. Do not wait; sesame loses ground fastest while it is small.
Do the second weeding about 2 weeks later (around 30 days after sowing), before the plants close over and shade the ground themselves.
Hoe shallowly between and along the rows — sesame's roots run near the surface, and deep hoeing close to the plants cuts them. Weed by hand right next to the stems.
Take care not to uproot or bury the young sesame — the seedlings snap and smother easily while they are small.
- Do:
Weed while the weeds are still small — once they overtake young sesame, the crop can never catch up.
- Watch out:
Keep the hoe shallow near the plants; sesame's surface roots are easily cut.
N top-dress Recommended
Sesame took half its nitrogen at planting; feeding the other half now, while it is growing fast and branching, builds the frame that will carry the capsules. Splitting the nitrogen this way means the rains wash less of it away, so more of it actually reaches the crop.
Around 4 weeks after sowing (about 30 days), top-dress (feed the growing crop) with the rest of the nitrogen your recommendation gives — the second half of the split.
Band it in a thin line about a hand's width (10 cm) out to the side of the rows, not on top of the plants, and keep the fertiliser off the leaves.
Apply onto moist soil — just after a weeding or a light rain — and lightly cover it or water it in, so it feeds the roots instead of gassing off into the air.
Keep the dose to what is recommended. Too much nitrogen makes sesame grow tall and leafy, fall over (lodge), and delay its capsules — feed it with a light hand.
- Tip:
Overdoing the nitrogen — extra N gives you leaf and lodging (plants falling over), not more seed.
- Watch out:
Keep fertiliser off wet leaves (it scorches them), and wash your hands after handling it.
Scout (leaf webber, leaf spot) Recommended
As the crop bushes out, the webber caterpillar webs and eats the growing tips and leaves, and leaf-spot disease can start stripping the leaves. The leaves are the crop's food factory — catching these early keeps the plant building capsules instead of fighting damage.
Walk the field every 3–4 days, checking plants right across it — not just along the edge by the path.
Sesame webber (the young stage of the capsule borer): look for top leaves and shoot tips webbed together with fine silk, folded or stuck, with a small caterpillar feeding inside and dark specks of droppings. It webs the tips now and will bore into the flowers and capsules later, so hit it now.
Leaf spot: look for small brown or dark spots on the leaves, sometimes with a paler centre or a ring; badly spotted leaves yellow and drop. It spreads fastest in warm, wet, crowded stands.
Note how widespread it is. If the webber or leaf spot is spreading, open the matching guide and act — and pull off and destroy any badly diseased leaves or plants.
- Watch out:
The same webber caterpillar that folds the shoot tips now becomes the capsule borer at flowering — dealing with it early saves you seed later.
- Do:
Give sesame room and airflow with good thinning and weeding — crowded, damp crops get far more leaf spot.
Flowering — scout, rogue and water
Bell-shaped flowers open low on the stem and climb upward, leaving a capsule of seed behind each one — and this is the crop's most water-hungry, most vulnerable stage. Two diseases strike now: phyllody, which turns flowers into useless leafy tufts, and the gall midge, which swells buds into empty galls. Scout hard, pull out sick plants at once, and keep the water coming — without ever waterlogging.
Scout (phyllody, gall midge, capsule borer) Critical
Flowering is when the crop is made or lost to pests and disease. Phyllody can cost you more than half your yield if it spreads unchecked, while the gall midge and capsule borer quietly destroy the flowers and pods that were to become your seed. Checking every 2–3 days lets you pull sick plants before they infect the rest.
From the first flowers (about 35 days after sowing), scout every 2–3 days — the tightest watch of the whole season. Look over plants right across the field.
Phyllody: look for plants whose flowers have turned into little green leafy tufts instead of normal bell flowers, with the top growth bunched, leafy and bushy — a 'witch's-broom' look. These plants are sterile: they will never set seed, and they pass the disease on to others.
Sesame gall midge: look for flower buds and young capsules that are swollen, deformed, and never open properly — hard little galls where a normal capsule should be forming.
Capsule borer: look for flowers and green capsules with small bore-holes and sawdust-like droppings, and flower clusters webbed together. This is the grown-up stage of the webber you watched for earlier.
Mark or note the affected plants. Pull out the phyllody plants at once (see the next task); if the midge or borer is spreading, open the matching guide and act.
- Watch out:
Phyllody is carried plant-to-plant by tiny leafhoppers — the longer a sick plant stands, the more of your field it infects.
- Do:
Hold this scout to a tight 2–3 day rhythm through flowering — it is the highest-value walk of the whole season.
Rogue phyllody plants Critical
A phyllody plant is a dead loss that infects its neighbours — left standing, phyllody can cost you more than half the field (up to about 54%). Pulling and destroying sick plants the moment you see them is the only way to stop it, and it costs you nothing but a few minutes.
As you scout (from about 35 days after sowing), whenever you find a plant with leafy green tufts where its flowers should be, or a bushy witch's-broom top setting no capsules, act on it straight away.
Pull the whole plant out, roots and all. Do not just cut the top — the disease is in the whole plant.
Carry it right out of the field and burn or bury it. Left lying in the rows it still feeds the leafhoppers that carry phyllody onto your healthy plants.
Keep doing this every 3–4 days through flowering — new sick plants keep appearing as the disease spreads.
- Do:
Rogue (pull out) the instant you spot it — every day a sick plant stands, the leafhoppers move the disease onto more of your crop.
- Tip:
Tossing pulled plants on the field edge — they must leave the field and be destroyed, or they keep spreading phyllody.
Irrigate (water-critical) Critical
Flowering and early pod-set is the thirstiest stage of the whole crop — sesame that dries out now drops its flowers and sets far fewer capsules, costing 10–30% of your yield. If you can water at only one stage, water now. But sesame still drowns in standing water, so keep it moist, never soaked.
Only if you can irrigate. From the first flowers (about 35 days after sowing) through pod-set, keep the soil evenly moist — this is the most important watering of the season.
Water every 5–7 days, more often in heat and on sandy soil. Do not let the crop wilt while it is flowering.
Give it a good soak that drains away — never a flood that stands. Even a day or two of standing water at flowering can rot the roots and undo everything.
Water in the cool of the morning or evening, so less is lost to the sun.
- Watch out:
Wilting at flowering is a direct loss of capsules — check the crop daily in hot, dry spells.
- Tip:
Flooding the field. Sesame needs moist soil at flowering but dies in waterlogging — give it a drink, not a bath.
Fill the pods and watch for harvest
The capsules now fill with oil-rich seed from the bottom of the plant upward, so the crop ripens unevenly — the lowest pods are ready long before the top ones. Ease off the water as the plant dries down, guard the ripening seed from birds, and watch the lowest capsules closely, because they give the signal to harvest before the pods shatter and spill.
Scout (leaf spot, birds, lowest capsules yellowing) Recommended
In the last stretch, the seed you have already grown is at risk from birds, late leaf disease, and charcoal rot — and you must catch the harvest signal in the lowest capsules before the pods shatter. A weekly look protects the finished crop and times your harvest right.
Walk the field once a week through pod-fill, looking over the whole crop.
Watch the lowest capsules: when the bottom pods start turning from green to yellow-brown, maturity is coming and harvest is near. This is your main signal — check it every visit.
Birds: look for flocks feeding on the crop and for split, emptied capsules near the field edges as the seed ripens. Ripe sesame spills easily and birds learn fast — scare them off or plan to harvest promptly.
Charcoal rot: look for scattered plants that wilt and die early, with a greyish, shredded lower stem that shows tiny black specks like soot when you scrape the skin. It strikes hot, dry, stressed crops — pull and remove badly affected plants.
Late leaf spot: dark spots and yellowing on the leaves. It is not worth chasing this late, but note it for next season's rotation.
- Watch out:
The lowest capsules are your harvest clock — once they yellow and the first ones split, the shatter countdown has begun.
- Do:
If birds are hitting the ripening crop hard, bring the harvest forward rather than feed the flock.
Taper irrigation toward maturity Recommended
Early pod-fill still needs some water to plump the seed, but as the crop ripens it must dry down — watering late keeps it green, delays maturity, and invites rot. Easing off at the right time gives full, oil-rich seed and a clean, timely finish.
Only if you can irrigate. Through early pod-fill, keep giving a moderate drink every 7–10 days while the plant and leaves are still green, so the seed fills out.
As the lower leaves yellow and the bottom capsules turn, cut back the water.
Stop watering once the crop starts to dry down and the lowest pods are browning — from here it needs to dry, not drink.
Never waterlog at any point; a soggy finish brings on the stem and root rots that ruin a standing crop.
- Do:
Let the crop dry down naturally as it ripens — dryness is exactly what you want now.
- Tip:
Watering late to 'keep it going' — it only delays maturity and feeds rot.
Cut and stook before it shatters
This is the moment the whole season has built toward. Sesame capsules split open and spill their seed the instant they are fully ripe, so you harvest at the first sign of maturity — not a week later. Because the crop ripens from the bottom up, you cut while the top is still a little green, trusting the lowest capsules to tell you it is time. Cut the whole plants, tie them into small bundles, and stand them in little shocks (stooks) so the seed dries in the pod, not on the ground.
Cut whole plants & stand in stooks Critical
Cut at the right moment and you keep almost all your seed; cut a few days too late and the pods shatter and pour your harvest onto the ground. The lowest capsules — not the whole plant — tell you when it is time, so you cut while the top still looks a little green.
Judge maturity by the lowest capsules: harvest as soon as the bottom pods turn from green to yellow-brown and the very first ones just begin to split, most leaves have yellowed and dropped, and roughly three-quarters (about 75–85%) of the capsules are browning. Do not wait for the whole plant to dry — by then it is already shattering.
Cut in the cool of the early morning, when the pods are least brittle and there is a little dew, so they shatter and spill less as you handle them.
Cut the whole plants near the ground with a sickle or knife — or pull them up if the soil is loose.
Tie them into small bundles — about an armful each — and stand the bundles upright in little shocks (stooks), tops leaning together so air moves through, in the field or on a clean drying floor or tarpaulin.
Handle gently and as little as possible — every rough knock spills seed from the pods that have already split.
- Tip:
Waiting for the whole crop to dry on the stem — the lowest pods shatter and spill while you wait for the top to ripen.
- Do:
Cut and carry in the cool, dewy early morning — midday-dry pods shatter at a touch.
- Watch out:
If the pods are already splitting and spilling, harvest this morning — do not lose another day. If the lowest pods are still fully green, wait and check every 2–3 days; cutting too early gives shrivelled, immature seed.
Cure, thresh and store
The crop is cut, but the seed is not yet safe. Cure the stooks in the sun until the capsules are fully dry and split open, then thresh gently by turning the bundles over and shaking so the seed falls out — a little at a time, over several days, as more pods keep splitting. Winnow it clean and dry it hard before bagging, because sesame's high oil turns rancid (spoils) if it is stored even a little damp.
Cure the stooks (7–14 days) Recommended
Curing lets the capsules finish drying and split open on their own, so the seed threshes out easily and comes off dry. Rush it and the pods stay shut and the seed goes into store damp — where sesame's rich oil quickly turns rancid (spoils) and moulds.
Leave the stooks standing to cure in the sun for about 7–14 days, until the capsules are fully dry, brittle, and splitting open.
Stand them on a clean, dry surface — a tarpaulin, mat, or swept threshing floor, never bare soil — and keep them off wet ground.
Cover the stooks or move them under shelter if rain threatens, then set them back in the sun. One soaking undoes days of curing and starts mould.
The seed that spills from the first pods to split can be caught on the sheet beneath — so cure the stooks over the cloth you will thresh onto, and lose nothing.
- Tip:
Curing or drying on bare ground — the seed picks up damp, soil, stones and mould, and sesame's oil goes rancid fast when stored damp.
- Watch out:
Watch the sky — one downpour undoes days of curing. Keep a cover close by.
Thresh (invert & shake) & winnow Critical
This is how the seed comes free of the pods without being crushed or lost. Because the crop ripens unevenly, the seed does not all fall at once — gentle threshing over several days, as more pods split, saves every seed, while rough beating shatters and wastes it.
Once the capsules are dry and splitting (after curing), turn the bundles upside-down over a clean cloth or tarpaulin and shake or tap them gently — the ripe seed rains out. Beat lightly only if you must; hard threshing breaks the seed.
Repeat over several days. Sesame ripens from the bottom up, so more pods split each day — shake the bundles again and again until they give no more seed.
Winnow the seed clean: on a breezy day, pour it slowly from one container into another (or use a winnowing basket) so the wind carries off the chaff, bits of pod and dust. Clean seed keeps far better.
Check it is dry enough to store: bite or press a seed — it should be hard, with no give. If it dents or feels soft, spread it thin in the sun and dry it more before bagging — do not store it yet.
Store the clean, hard-dry seed in sealed bags or clean, dry containers, off the floor, in a cool dry place. Sesame's high oil turns rancid if it is stored damp or warm — dry and sealed is what keeps it good.
- Do:
Thresh gently and often — several soft shakings over a few days save far more whole seed than one hard beating.
- Tip:
Bagging seed that is not bone-dry — sesame's oil goes rancid and mouldy in store. If a bitten seed dents instead of cracking, dry it longer.
- Watch out:
Store off the floor and away from the walls in sealed containers, and check now and then for damp or pests.
Pests and diseases that attack sesame


Where to sell sesame
Markets that trade this crop — what each one sells it by, when supply peaks there, and the currency used.
-
 Dawanau International Grains Market
-
 Marché Katako
-
 Marché de Maradi
-
 Rood Woko
-
 Grand Marché de Bobo-Dioulasso
-
 Gulu Main Market
-
 Marché de Pouytenga
-
 Mercado Central de Nampula
Grow sesame with a plan, not a guess
This guide is the general answer. Divisi works out yours — the week to plant sesame on your soil and your rainfall, and each job dated for your field.


When to plant sesame, country by country
- When to plant sesame in Algeria
- When to plant sesame in Angola
- When to plant sesame in Benin
- When to plant sesame in Botswana
- When to plant sesame in Burkina Faso
- When to plant sesame in Burundi
- When to plant sesame in Cabo Verde
- When to plant sesame in Cameroon
- When to plant sesame in Comores
- When to plant sesame in Congo
- When to plant sesame in Côte d'Ivoire
- When to plant sesame in Egypt
- When to plant sesame in Eritrea
- When to plant sesame in Eswatini
- When to plant sesame in Ethiopia
- When to plant sesame in Gabon
- When to plant sesame in Gambia
- When to plant sesame in Ghana
- When to plant sesame in Guinea Ecuatorial
- When to plant sesame in Guinea-Bissau
- When to plant sesame in Guinée
- When to plant sesame in Kenya
- When to plant sesame in Lesotho
- When to plant sesame in Liberia
- When to plant sesame in Libya
- When to plant sesame in Madagascar
- When to plant sesame in Malawi
- When to plant sesame in Mali
- When to plant sesame in Mauritanie
- When to plant sesame in Mauritius
- When to plant sesame in Morocco
- When to plant sesame in Moçambique
- When to plant sesame in Namibia
- When to plant sesame in Niger
- When to plant sesame in Nigeria
- When to plant sesame in Rwanda
- When to plant sesame in République centrafricaine
- When to plant sesame in République démocratique du Congo
- When to plant sesame in Sao Tome and Principe
- When to plant sesame in Seychelles
- When to plant sesame in Sierra Leone
- When to plant sesame in Somalia
- When to plant sesame in South Africa
- When to plant sesame in South Sudan
- When to plant sesame in Sudan
- When to plant sesame in Sénégal
- When to plant sesame in Tchad
- When to plant sesame in Togo
- When to plant sesame in Tunisie
- When to plant sesame in Uganda
- When to plant sesame in United Republic of Tanzania
- When to plant sesame in Zambia
- When to plant sesame in Zimbabwe
Where sesame scores best
Districts where Divisi's engine currently rates this crop highest, ranked by fit.
-
 Demba
Demba -
 Nyanza-Lac
 -
 Korogwe
 -
 Kakata
 -
 Corisco
 -
 Xá-Muteba
 -
 Magarini
 -
 Kimba
Kimba -
 Ogooue et Lacs
 -
 Vangaindrano
 -
 Kalangala
 -
 Mweka
Mweka
Get Insights by email
A short digest of new Divisi articles. No email on quiet weeks.
Frequently asked questions
How do I grow sesame?
How to grow sesame: 90–130 days to maturity, 37 cm rows, 1.5–3 cm deep. Also called simsim, sesam, selit, sésame, ridi, gergelim, runinga, ufuta, eeku.
What is sesam in English?
Sesam (also sesamsaad) is the Afrikaans name for sesame.
What is selit in English?
Selit is the Amharic name for sesame.
What is sésame in English?
Sésame is the French name for sesame.
What is ridi in English?
Ridi is the Hausa name for sesame.
What is gergelim in English?
Gergelim is the Portuguese name for sesame.
What is runinga in English?
Runinga (also uninga) is the Shona name for sesame.
What is ufuta in English?
Ufuta is the Swahili name for sesame.
What is eeku in English?
Eeku (also isasa) is the Yoruba name for sesame.
How long does sesame take to grow?
Sesame takes about 90–130 days from sowing to maturity, though the exact length varies with variety, temperature and how the season runs.
What spacing should I use for sesame?
Space sesame rows about 37 cm apart, with roughly 7 cm between plants within the row.
How deep should sesame be planted?
Sow sesame at about 1.5–3 cm deep. Shallower risks drying out; deeper wastes seed energy before the shoot reaches light.
What pests and diseases attack sesame?
The ones covered in this guide are Charcoal rot, Leaf spot, Phyllody. Each has its own page explaining how to identify, check for and control it.