 Divisi
How to grow turmeric
Curcuma longa · Zingiberaceae
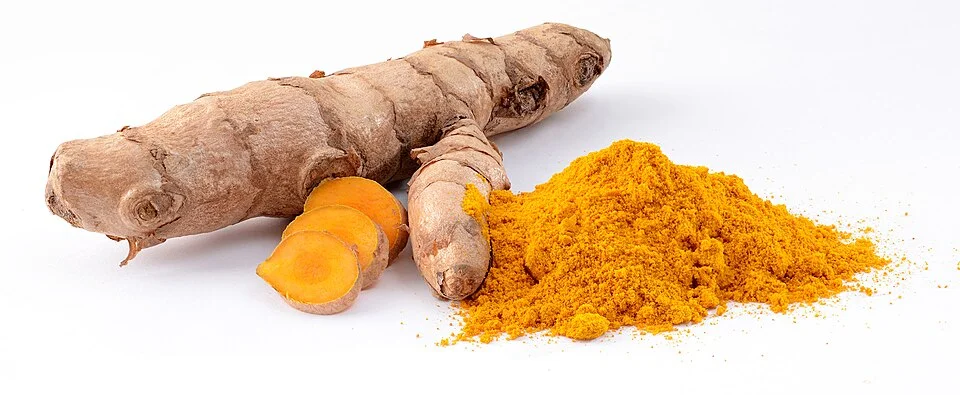
Photo: Simon A. Eugster · CC BY-SA 3.0
Turmeric is a leafy, ginger-like plant grown for the bright orange, aromatic rhizome (underground stem) hidden beneath it — the source of the yellow spice, the dye, and its own next-season seed. There is no true seed to buy: every crop is grown from pieces of last year's rhizome, called setts. It is a long, patient crop — 8 to 10 months of warm, damp weather and heavy feeding — and it lives or dies by drainage. Rhizomes left sitting in water rot in the ground, and that rot cannot be cured. Get the drainage, clean seed and feeding right, and you dig bright, firm fingers that boil, dry and polish into a spice that stores and sells.
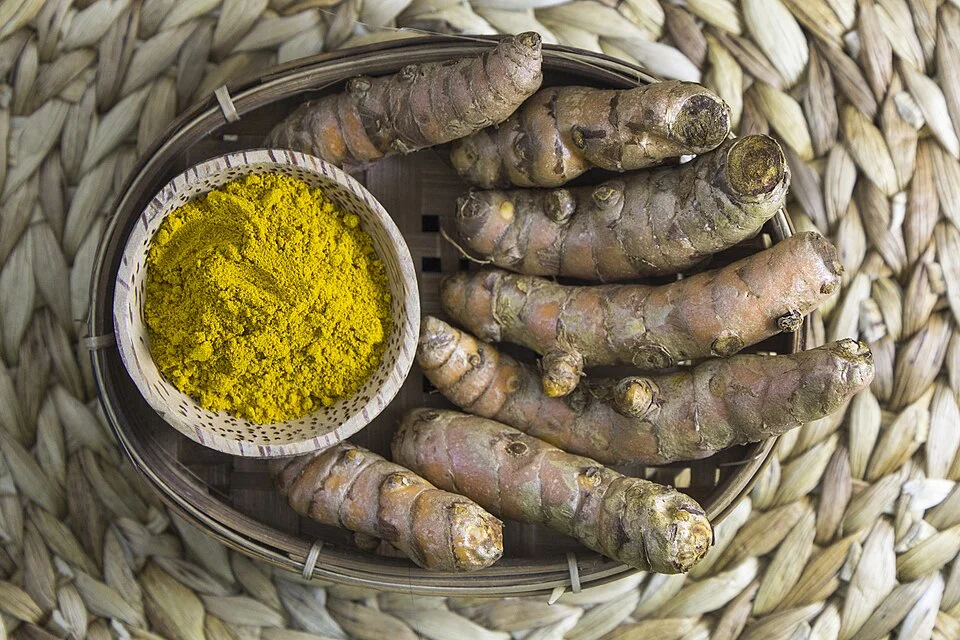
Herusutimbul · CC BY-SA 4.0 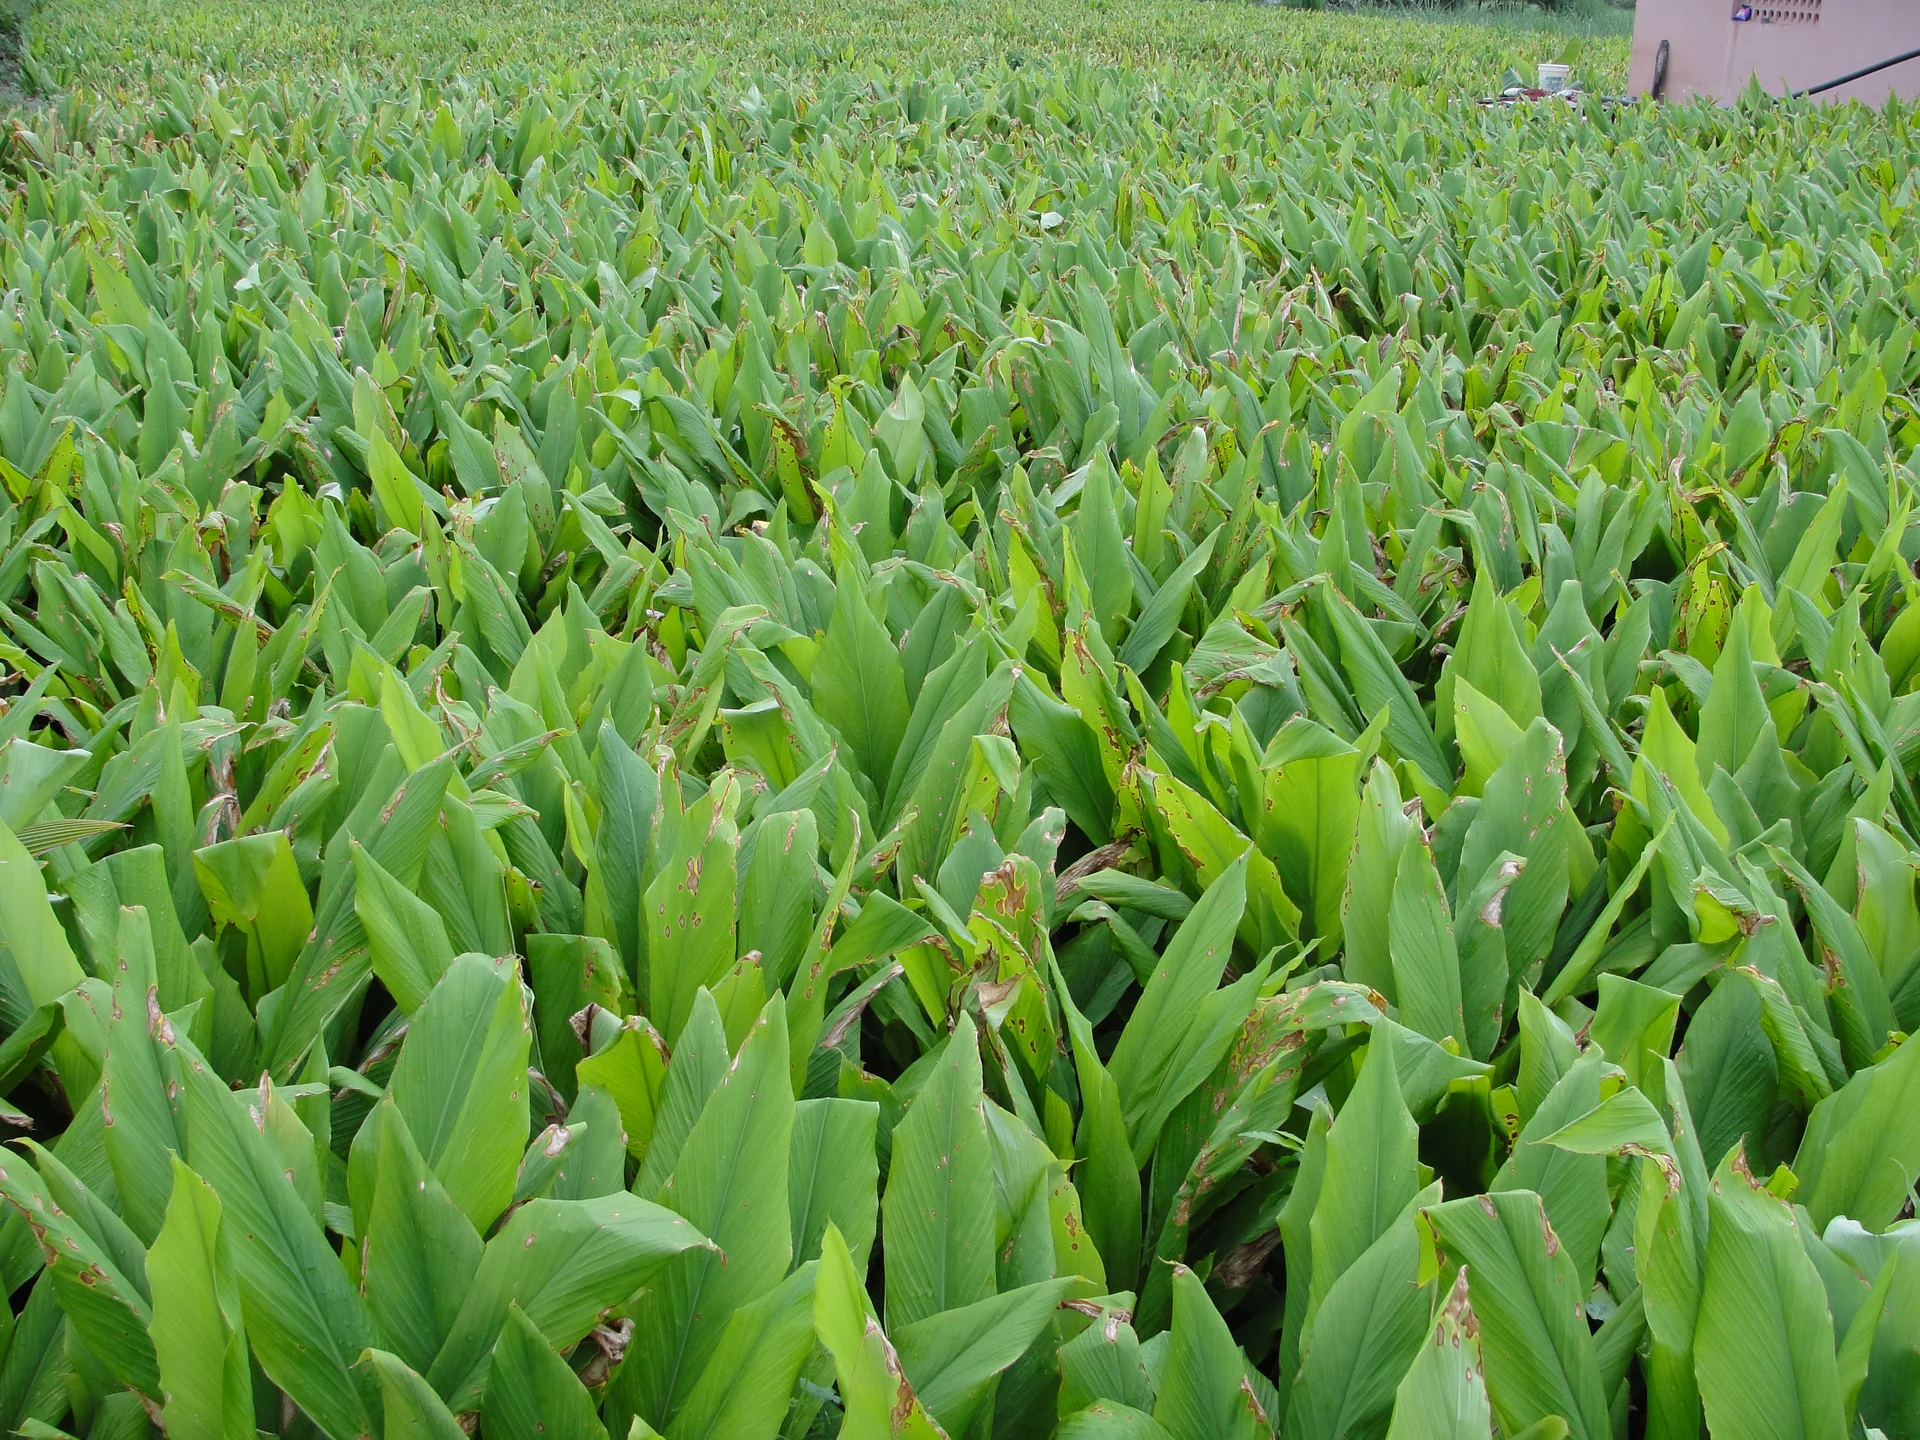
Thamizhpparithi Maari · CC BY-SA 3.0
- Days to maturity
- 210–300 days
- Row spacing
- 50 cm
- Plant spacing in the row
- 25 cm
These are general figures for the crop, compiled from published agronomic references including FAO and CABI. The right choice for your field depends on your soil, rainfall and the yield you are aiming for.
Will turmeric actually do well on your field? Check your own field against every crop in the catalogue — no signup. Run the crop check →
Also known as
- Afrikaans
- borrie
- Amharic
- ird
- French
- curcuma, safran des Indes
- Portuguese
- açafrão-da-índia, cúrcuma
- Swahili
- manjano, binzari manjano
Working in buckets, bags or paces? The farming glossary turns the measures growers actually use into kilograms and hectares — what a 20 litre bucket of each crop really weighs, and how to size a field by walking it — alongside the Shona, Swahili, Ndebele and Yoruba words used in the field. Open the glossary →
Growing turmeric, stage by stage
Your turmeric season, step by step — from building free-draining beds and planting clean rhizome setts, through heavy mulching and feeding, to boiling, drying and polishing the fingers into market-ready spice.
Get the land and seed rhizomes ready
Turmeric is won or lost before you plant. It has no cure for root rot, so your whole crop rests on three things you set up now: land that drains fast so rhizomes never sit in water, clean disease-free seed rhizomes, and a plot that has rested from turmeric, ginger and their relatives. Do this in the weeks before planting.
Build raised, free-draining beds Critical
Turmeric rhizomes swell just under the surface, and if they sit in wet, airless soil they rot in the ground — and rot cannot be cured. Raised beds let heavy rain drain away fast. This one job is the single biggest thing that decides whether you harvest a crop at all.
Pick your best-draining land — where water never stands after a storm. Avoid low spots, heavy clay, and anywhere puddles linger.
Form raised beds about a hand-span high (15–20 cm) with a clear channel between each one, or make ridges and furrows. That height is what carries water away from the rhizomes.
Make each bed about one stride across (≈1 m) so you can weed and harvest from the path without treading on the bed and packing the soil hard.
Open the drainage channels so they run to a lower outlet and actually carry water off the plot — a channel that dead-ends just holds water where you don't want it.
Loosen the soil in the bed deeply and break up the clods, so the swelling rhizomes can push through easily and roots go down.
- Do:
Plant only on raised, free-draining beds — for turmeric, drainage is the single most decisive thing you control.
- Watch out:
After the first heavy storm, walk the plot and look for any bed where water sits. Fix that channel before you plant, not after.
Confirm rotation Critical
The rot and wilt germs that kill turmeric live on in the soil after a turmeric, ginger or tomato-family crop. Planting turmeric back into that soil is planting it straight into a waiting disease. A break of a few years starves those germs out before your setts go in.
Choose a plot that has not grown turmeric or ginger for at least 3 years — they share the very same soil rots.
Also avoid land that recently grew tomato-family crops (tomato, potato, pepper, eggplant/brinjal, tobacco) — they carry the same bacterial wilt that collapses turmeric.
Good crops to follow are cereals or legumes (maize, sorghum, beans, groundnut): they do not host turmeric's diseases and help clean the soil.
If your only land grew turmeric or ginger recently, rest it or plant a cereal on it for a season first — do not gamble your setts on sick soil.
- Do:
Keep a simple note of what grew on each plot each year, so you can plan a clean rotation instead of guessing.
- Tip:
Following tomato, potato, pepper or eggplant with turmeric — they hand it bacterial wilt.
Select + treat disease-free setts Critical
Every plant comes from a piece of rhizome — a sett — because there is no seed to buy. A sett with hidden rot carries the killer disease straight into your clean beds, and a weak sett makes a weak clump. Ten minutes sorting good from bad now protects the whole plot.
Choose seed rhizomes from a healthy, high-yielding crop you trust — plump, firm, and a bright orange inside when you snap one.
Cut them into setts about the size of your thumb (25–50 g), each carrying 1–2 buds (the 'eyes' where new shoots come from).
Inspect every sett. Throw out any that are soft, shrivelled, dark, water-soaked or bad-smelling — those are already rotting inside and will spread it.
Treat the good setts before planting: dip them in a recommended fungicide, in a Trichoderma solution (a helpful bio-fungus that fights rot), or in hot water, to kill germs on the skin. Let them dry in the shade.
If most of your setts are soft, dark or rotten → do not plant them. Get clean, certified seed rhizome from a trusted source instead.
- Do:
Sort and cut setts on a clean surface, not on the bare ground where they pick up soil germs.
- Tip:
Planting any sett you are unsure about — one rotten sett can seed a rot patch that spreads to its neighbours.
- Watch out:
Wash your hands after the fungicide dip, keep it off your skin, eyes and food, and follow the label.
Incorporate FYM/compost Recommended
Turmeric is a hungry, long-season crop that feeds for the better part of a year. Well-rotted manure or compost feeds it slowly the whole time, helps the bed hold moisture, and keeps the soil open so rhizomes swell and drain freely. But fresh manure burns the young sprouts and brings weed seeds, so it must be well rotted first.
Use only well-rotted manure or compost — dark, crumbly, no strong smell. Fresh, strawy dung needs more months to rot down first.
Spread a heavy, even layer over the whole bed — turmeric wants 20–40 tonnes per hectare, several times what a grain crop needs. Cover every part; a light dusting is not enough for a crop this hungry.
Fork or hoe it into the topsoil of the bed in the last week or two before planting, so it settles in with the soil the setts will sit in.
- Tip:
Fresh/raw manure at planting — it scorches the young sprouts, robs the soil of nitrogen as it rots, and carries weed seeds.
- Watch out:
Wash your hands after handling manure or compost.
Plant the setts and mulch heavily
Now you plant the treated setts into the raised beds and cover them at once with a thick blanket of mulch — for turmeric the mulch is not optional; it holds the moisture and smothers the weeds through the long wait for shoots. Turmeric is slow: shoots can take up to a month to break the surface, so keep the beds damp but never waterlogged, and be patient.
Plant setts + mulch heavily Critical
The number of healthy clumps you set now is the ceiling on your harvest — you cannot add plants later. Right spacing, shallow planting and an immediate heavy mulch give you an even stand and save weeks of watering and weeding through the slow sprouting.
Plant on your prepared raised beds when the soil is warm and moist — at the start of the rains, or under irrigation.
Space the setts about two hand-spans between rows (45–60 cm) and one hand-span along the row (25 cm).
Set each sett with its buds facing up or sideways and cover it with only a finger-joint of soil (3–5 cm) — plant shallow, not deep.
Straight away, lay a thick blanket of green-leaf mulch (12–15 tonnes per hectare) over the whole bed — pile it so you cannot see the soil through it. The mulch holds moisture and smothers weeds while the setts sprout.
Water in if the soil is dry, and keep the bed damp but never waterlogged. Be patient — sprouts can take up to 30 days to show.
- Do:
Mulch the same day you plant — bare turmeric beds dry out and grow weeds fast during the long sprouting wait.
- Tip:
Planting deep — buried setts sprout slowly and unevenly and rot more easily in wet soil.
- Watch out:
Keep the bed moist, but check it drains after every storm; setts sitting in water rot before they ever sprout.
Keep moist, never waterlogged Critical
Setts need steady moisture to wake up and sprout, but turmeric's killer — rhizome rot — comes straight from waterlogging. Your job for the first month is to walk the tightrope: keep the beds damp so setts sprout, and keep them draining so they never drown.
Check the beds every 5–7 days (more often in heat or on sandy soil), and again after every heavy rain.
Keep the top of the bed damp — push a finger in and water when the top few centimetres are dry. The mulch will hold moisture for you between waterings.
After rain, walk the drainage channels. If water is standing anywhere on the beds, open the channel so it drains away at once.
In a wet spell, stop watering and let the beds drain — damp is good, waterlogged is deadly.
- Tip:
Letting water stand on the beds even for a day or two — that is exactly the condition that starts rhizome rot.
- Watch out:
A soft, sinking, sour-smelling patch of bed after wet weather is the first sign of rot — mark it and watch it closely.
Scout emergence & rot patches Recommended
The first month is a nervous wait — sprouts are slow, and this is exactly when rhizome rot can take hold underground unseen. A weekly walk tells you whether your stand is coming, and catches any rot patch before it spreads to healthy setts.
Once a week, walk the whole plot — every bed, not just the edge nearest the path.
Watch for sprouts. Turmeric is slow: shoots trickle up over as long as 30 days, so patchy emergence early on is normal — note which stretches are coming and which are still blank.
Look for rot patches: setts that never sprout, or early shoots that yellow, wilt and flop over, often with a soft, water-soaked, foul-smelling base. That is rhizome rot.
If you find a rot patch, dig out the rotten sett with the soil around it, carry it right off the plot, and improve the drainage there. Never replant a rotten spot with a fresh sett.
Keep checking drainage after rain — most first-month losses trace back to a bed that held water.
- Watch out:
Rot spreads outward from a wet spot — the sooner you lift the first rotten clump and its soil, the fewer neighbours it takes with it.
- Do:
Handle any suspect-rot setts last and wash your hands after, so you don't carry the germ back to healthy beds.
Leafy growth — feed, weed, earth up
The shoots are up and the plant now builds its leaves and shoots (tillers) — the green factory that will later fill the rhizomes. Give it its first feed, keep it weed-free, mound soil up over the swelling rhizomes (earthing-up), and renew the mulch. Turmeric doesn't mind light shade, so it grows happily between taller crops. This is also when leaf and shoot pests first arrive, so start scouting in earnest.
First fertiliser split + weed + earth up Recommended
Around 6–7 weeks after planting the plant is growing leaves fast and hungry for nitrogen (N) to build them. Feeding now — and mounding soil up over the rhizomes at the same time — gives the swelling fingers food, room and cover right as they start to form.
Time it for about 6–7 weeks after planting (~45–55 days), when the clumps are leafing up. First pull any weeds so the feed goes to the crop, not the weeds.
Apply the first fertiliser split — a compound (N-P-K) feed; your recommendation gives the amount for your field. Band it along the row, a little to the side of the clumps, not on top of them.
Earth up: draw loose soil from the path up over the base of the clumps and the rhizomes, covering the fertiliser as you go. This gives the swelling fingers room and keeps them out of the light.
Do it when the soil is moist (after rain or watering) so the feed dissolves in, then renew the mulch over the top.
- Do:
Weed just before you feed and earth up — one pass then does three jobs and none of your fertiliser is wasted on weeds.
- Watch out:
Keep fertiliser off the wet leaves and out of the crown (it scorches them), away from food, water and children — and wash your hands afterwards.
- Tip:
Digging deep close to the clumps when you earth up — the rhizomes sit shallow and a hoe cuts them easily.
Renew mulch (~day 50) Recommended
The first mulch has rotted down into the soil by now — which is good, it is feeding the crop — but bare soil dries out, grows weeds, and lets rain splash rot germs up onto the plants. A fresh mulch layer keeps the moisture even and the bed clean through the long middle of the season.
Around 7 weeks after planting (~day 50), right after weeding, earthing-up and feeding, lay a fresh layer of green leaves or dry grass over the beds.
Make it thick enough that you cannot see the soil — the same heavy blanket you laid at planting.
Keep the mulch pulled back a little from the crown (base of the shoots), so the stems don't stay wet and rot.
- Do:
Renew the mulch whenever the old layer thins out — turmeric is a mulch-loving crop and rewards a bed that is never left bare.
Scout leaf spot, shoot borer, wilt Recommended
This long stretch is when turmeric's pests and diseases arrive — shoot borer hollowing the stems, leaf spot and leaf blotch eating the leaf factory, and wilts that collapse whole clumps. Catching them while only a few plants are hit is the difference between a quick save and a spreading loss.
Once a week, walk the whole plot and look closely at about 10 clumps spread across the beds — the leaves, the central shoots, and the base of the stems.
Shoot borer: look for a central shoot that yellows, wilts and dries while the outer leaves stay green (a 'dead heart'), and a bore-hole oozing wet, sawdust-like droppings on the stem. A caterpillar is tunnelling down inside it.
Leaf spot: look for small oval brown spots with pale grey centres, sometimes ringed with yellow, scattered on the leaves; they grow, join up, and the leaf dries.
Leaf blotch: look for many small dirty-yellow to reddish-brown blotches on both sides of the leaves, giving the plant a dirty, rusty look; badly hit leaves dry from the edges.
Bacterial wilt: look for a clump that wilts suddenly while still green, then yellows and collapses. Cut a wilted shoot low down and stand it in clear water — a milky thread oozing from the cut means bacterial wilt.
Rhizome rot (still the killer): watch for clumps that yellow, wilt and pull out easily, with a soft, rotten, smelly base. Note where each problem is and how many clumps are hit.
If a pest or disease is spreading, act — open the matching guide. For any wilt or rot, rogue (pull out and remove) the affected clump with its soil and carry it off the plot.
- Watch out:
Wet, fresh droppings at a bore-hole mean the borer is still inside and worth acting on; old dry droppings with no fresh hole are a past attack.
- Do:
Rogue wilt and rot clumps the day you find them — these diseases have no cure, so removal is the only control that works.
- Tip:
Moving from a sick clump to healthy ones without washing your hands and tools — you carry the germ with you.
Rhizome bulking — the make-or-break months
Now the underground fingers multiply and swell — this is where your yield is actually made, and it is the thirstiest, most yield-sensitive part of the whole season. Keep the moisture high and even (but still draining), give a potassium (K)-rich feed with a second earthing-up, and pull out any rot or wilt clumps the moment they show. Water stress or waterlogging now costs you more than at any other time.
Keep moisture high & even (never waterlogged) Critical
The swelling rhizomes are mostly water, and this is turmeric's most moisture-sensitive stage — a dry spell now can cut your yield by 15–40%, more than at any other time. Even, steady moisture keeps the fingers filling. But the same waterlogging that kills all season still kills now, so keep it moist and draining.
From about 4 months after planting through bulking, water every 7–10 days, more often in heat and on sandy beds.
Aim for soil that is evenly moist to a finger's depth — never bone-dry, never swampy. Steady beats a flood-then-drought pattern.
Never let the crop wilt in the heat during these months — a wilted turmeric is a shrinking rhizome.
Keep watching the drainage: after big rains, make sure no bed holds water, even while you keep the plot moist.
- Watch out:
If you can only water well at one stage of the whole season, water NOW — bulking is when water turns straight into yield.
- Tip:
Swinging between soaked and parched — uneven watering splits and mis-shapes the rhizomes.
Second earth up + K top-dress Recommended
As the fingers bulk, the plant's biggest hunger switches to potassium (K) — the nutrient that drives rhizome size and filling. A K-rich top-dress around 3–4 months, with a second earthing-up to cover the growing rhizomes, feeds the bulking directly.
Time it for about 3–4 months after planting (~90–120 days), as the rhizomes start to bulk. Weed first.
Apply the potassium (K)-rich feed — your recommendation gives the amount and type. Band it a little to the side of the clumps, on moist soil, not on top of the plants.
Earth up again: draw fresh soil up over the rhizomes and the fertiliser — the fingers spread as they swell and must stay covered and out of the light.
Renew the mulch over the top so the bed stays covered and the moisture stays even.
- Do:
Cover the fertiliser as you earth up — a top-dress left bare on the surface gasses off and washes away.
- Watch out:
Keep fertiliser off the leaves and crown, away from food, water and children, and wash your hands afterwards.
Rogue any rot/wilt clumps Recommended
Rhizome rot and bacterial wilt cannot be cured — once a clump has it, it is lost, and left in the ground it spreads to the healthy rhizomes right next to it. Removing sick clumps fast is the only way to save the rest of the bed.
Every 10–14 days, walk the beds looking for clumps that are yellowing, wilting or collapsing out of step with the healthy plants around them.
Check the base: a soft, water-soaked, foul-smelling base on a clump that lifts out easily is rhizome rot; a clump that wilted suddenly while still green and oozes a milky thread from a cut stem is bacterial wilt.
Dig out the whole sick clump together with the soil around and under it — the germ is in that soil — and carry it right off the plot. Do not drop it on the bed edge or the compost.
Improve the drainage at that spot, and do not replant it this season.
Wash your hands and tools before moving back to the healthy clumps.
- Do:
Act the same day you spot it — every day a rotten clump stays in the bed, it feeds the rot into its neighbours.
- Tip:
Composting rogued clumps or leaving them on the field edge — the disease survives there and comes back next season.
- Watch out:
Standing water is where rot starts — check the wettest, lowest beds first.
Maturity and digging
After 7–10 months the leaves yellow and dry down across the plot — the plant's own sign that the rhizomes are full and firm. Ease off the water to firm them up, then dig carefully and lift whole clumps. Set aside the soundest rhizomes, uncooked, as next season's seed before the rest goes to processing.
Check maturity Recommended
Digging too early gives soft, pale rhizomes that yield and cure poorly; digging too late, long past die-back, risks rot in the ground and sprouting. The plant tells you when it is ready — reading that sign gets you the fullest, brightest rhizomes.
From about 7 months after planting (~210 days), watch the leaves: maturity is when they turn yellow and dry down across the whole plot, not just a few plants.
Dig up one clump as a test. A mature rhizome breaks with a firm snap and shows a bright orange interior; a soft rhizome with a pale, watery inside is not ready.
Withhold water as die-back begins, to firm the rhizomes for digging and curing.
When most of the plot has dried down and the test rhizome snaps firm and orange, it is ready to harvest.
If the leaves are still green and the test rhizome is soft and pale → wait and check again in a week or two. It is simply not mature yet.
- Do:
Judge maturity by the whole plot drying down, not the first plant to yellow — one early yellow clump can just be disease.
- Watch out:
Once dried down, don't leave rhizomes long in wet ground — mature rhizomes sitting in damp soil start to rot or resprout.
Dig at leaf die-back Critical
This is the crop you have grown for ten months — and a careless dig bruises and cuts the rhizomes, which then rot in storage and lose their market value. Lifting whole clumps gently, and keeping your best rhizomes back for seed, protects both this harvest and next season's.
Harvest at full leaf die-back (from ~210 days). If the soil has baked hard, water lightly a day before so the clumps lift without breaking.
Dig around each clump and lift it whole with a fork or hoe, working well clear of the rhizomes — don't stab straight down into them. Bruised and cut rhizomes rot in store.
Shake off the soil and separate the fingers from the mother rhizomes. Wash them clean and trim off the roots and any leftover stem.
Set aside the soundest, disease-free rhizomes as next season's seed — keep them UNCOOKED (curing kills their buds) and store them cool and dry.
Send the rest on to boiling and curing quickly — fresh rhizomes don't keep long.
- Do:
Lift whole clumps gently — every cut and bruise is a doorway for storage rot.
- Tip:
Curing (boiling) the rhizomes you want for seed — boiled rhizome is dead and will never sprout.
- Watch out:
Keep your seed rhizomes in a separate basket from the eating/selling crop, so they don't get boiled by mistake.
Boil, dry and polish into market spice
Fresh turmeric is not yet a spice. Three steps make it market-ready and storable: boil (cure) the rhizomes until they soften and the aroma releases, sun-dry them until hard and brittle, then polish off the rough skin to bring out the colour. Skip or rush any step and you get mould, dull colour and a crop that won't sell.
Boil / cure the rhizomes Critical
Boiling (curing) is what turns raw rhizome into turmeric: it carries the colour evenly right through, speeds and evens the drying, kills the buds so it can't sprout in store, and gives the uniform bright finish buyers pay for. Skip it or rush it and you get blotchy, mouldy, low-value turmeric.
As soon as you can after harvest, boil the fresh eating/selling rhizomes in water for about 45–60 minutes — until froth rises, the turmeric smell releases, and a piece pushes through easily with a finger or a stick.
Don't over-boil (the colour and aroma bleed out into the water) and don't under-boil (the centres stay raw and dry unevenly). Cook even-sized rhizomes together so they cure evenly.
Lift them out and let the water drain — they are now ready to dry.
Remember: only the eating/selling crop is boiled. Your seed rhizomes stay raw and uncooked so their buds live for next season.
- Tip:
Skipping or shortening the boil — under-cured turmeric dries blotchy, moulds, and fetches a poor price.
- Watch out:
The boiling water, steam and hot pot burn badly — keep children well back and lift the baskets with care.
- Do:
Boil big and small rhizomes in separate batches — mixed sizes cure unevenly and some come out raw in the middle.
Dry then polish Critical
Drying takes the boiled rhizomes down to a hard, brittle, storable spice — under-dried turmeric moulds in the bag. Polishing then rubs off the wrinkled skin and dull look to reveal the smooth, bright surface that grades well and sells for more.
Spread the boiled rhizomes one layer deep on a mat, rack or tarpaulin — never on bare ground — in full sun for about 6–15 days, covering them or bringing them in at night and whenever rain threatens.
Turn them daily so they dry evenly. They are dry enough when a rhizome breaks with a sharp, metallic 'clink' and cannot be dented with your thumbnail.
Polish the dried rhizomes: rub or tumble them — in a sack, a drum, or by hand against a rough surface — to knock off the rough skin, root scars and soil and bring the colour up.
For a brighter, more even colour, some farmers tumble them with a little turmeric powder while polishing — optional, just for market appearance.
If a rhizome still bends, dents under your nail, or feels leathery → it is not dry enough. Dry it more before storing, or it will mould in the bag.
- Tip:
Drying on bare ground — it pushes damp back in and adds soil, stones and mould. Always use a mat, rack or tarpaulin.
- Do:
Store the finished turmeric — and your uncooked seed rhizomes — cool, dry and off the floor in clean bags.
- Watch out:
Bag turmeric only once it clinks and won't dent — sealing it even a little damp invites mould and ruins the whole batch.
Pests and diseases that attack turmeric


Where to sell turmeric
Markets that trade this crop — what each one sells it by, when supply peaks there, and the currency used.


Grow turmeric with a plan, not a guess
This guide is the general answer. Divisi works out yours — the week to plant turmeric on your soil and your rainfall, and each job dated for your field.


When to plant turmeric, country by country
- When to plant turmeric in Algeria
- When to plant turmeric in Angola
- When to plant turmeric in Benin
- When to plant turmeric in Botswana
- When to plant turmeric in Burkina Faso
- When to plant turmeric in Burundi
- When to plant turmeric in Cabo Verde
- When to plant turmeric in Cameroon
- When to plant turmeric in Comores
- When to plant turmeric in Congo
- When to plant turmeric in Côte d'Ivoire
- When to plant turmeric in Egypt
- When to plant turmeric in Eritrea
- When to plant turmeric in Eswatini
- When to plant turmeric in Ethiopia
- When to plant turmeric in Gabon
- When to plant turmeric in Gambia
- When to plant turmeric in Ghana
- When to plant turmeric in Guinea Ecuatorial
- When to plant turmeric in Guinea-Bissau
- When to plant turmeric in Guinée
- When to plant turmeric in Kenya
- When to plant turmeric in Liberia
- When to plant turmeric in Libya
- When to plant turmeric in Madagascar
- When to plant turmeric in Malawi
- When to plant turmeric in Mali
- When to plant turmeric in Mauritanie
- When to plant turmeric in Mauritius
- When to plant turmeric in Morocco
- When to plant turmeric in Moçambique
- When to plant turmeric in Namibia
- When to plant turmeric in Niger
- When to plant turmeric in Nigeria
- When to plant turmeric in Rwanda
- When to plant turmeric in République centrafricaine
- When to plant turmeric in République démocratique du Congo
- When to plant turmeric in Sao Tome and Principe
- When to plant turmeric in Seychelles
- When to plant turmeric in Sierra Leone
- When to plant turmeric in Somalia
- When to plant turmeric in South Africa
- When to plant turmeric in South Sudan
- When to plant turmeric in Sudan
- When to plant turmeric in Sénégal
- When to plant turmeric in Tchad
- When to plant turmeric in Togo
- When to plant turmeric in Tunisie
- When to plant turmeric in Uganda
- When to plant turmeric in United Republic of Tanzania
- When to plant turmeric in Zambia
- When to plant turmeric in Zimbabwe
Where turmeric scores best
Districts where Divisi's engine currently rates this crop highest, ranked by fit.


Get Insights by email
A short digest of new Divisi articles. No email on quiet weeks.
Frequently asked questions
How do I grow turmeric?
How to grow turmeric: 210–300 days to maturity, 50 cm rows. Also called borrie, ird, curcuma, açafrão-da-índia, manjano.
What is borrie in English?
Borrie is the Afrikaans name for turmeric.
What is ird in English?
Ird is the Amharic name for turmeric.
What is curcuma in English?
Curcuma (also safran des Indes) is the French name for turmeric.
What is açafrão-da-índia in English?
Açafrão-da-índia (also cúrcuma) is the Portuguese name for turmeric.
What is manjano in English?
Manjano (also binzari manjano) is the Swahili name for turmeric.
How long does turmeric take to grow?
Turmeric takes about 210–300 days from sowing to maturity, though the exact length varies with variety, temperature and how the season runs.
What spacing should I use for turmeric?
Space turmeric rows about 50 cm apart, with roughly 25 cm between plants within the row.
What pests and diseases attack turmeric?
The ones covered in this guide are Rhizome rot, Rhizome scale, Shoot borer. Each has its own page explaining how to identify, check for and control it.