 Divisi
How to grow yam
Dioscorea rotundata · Dioscoreaceae
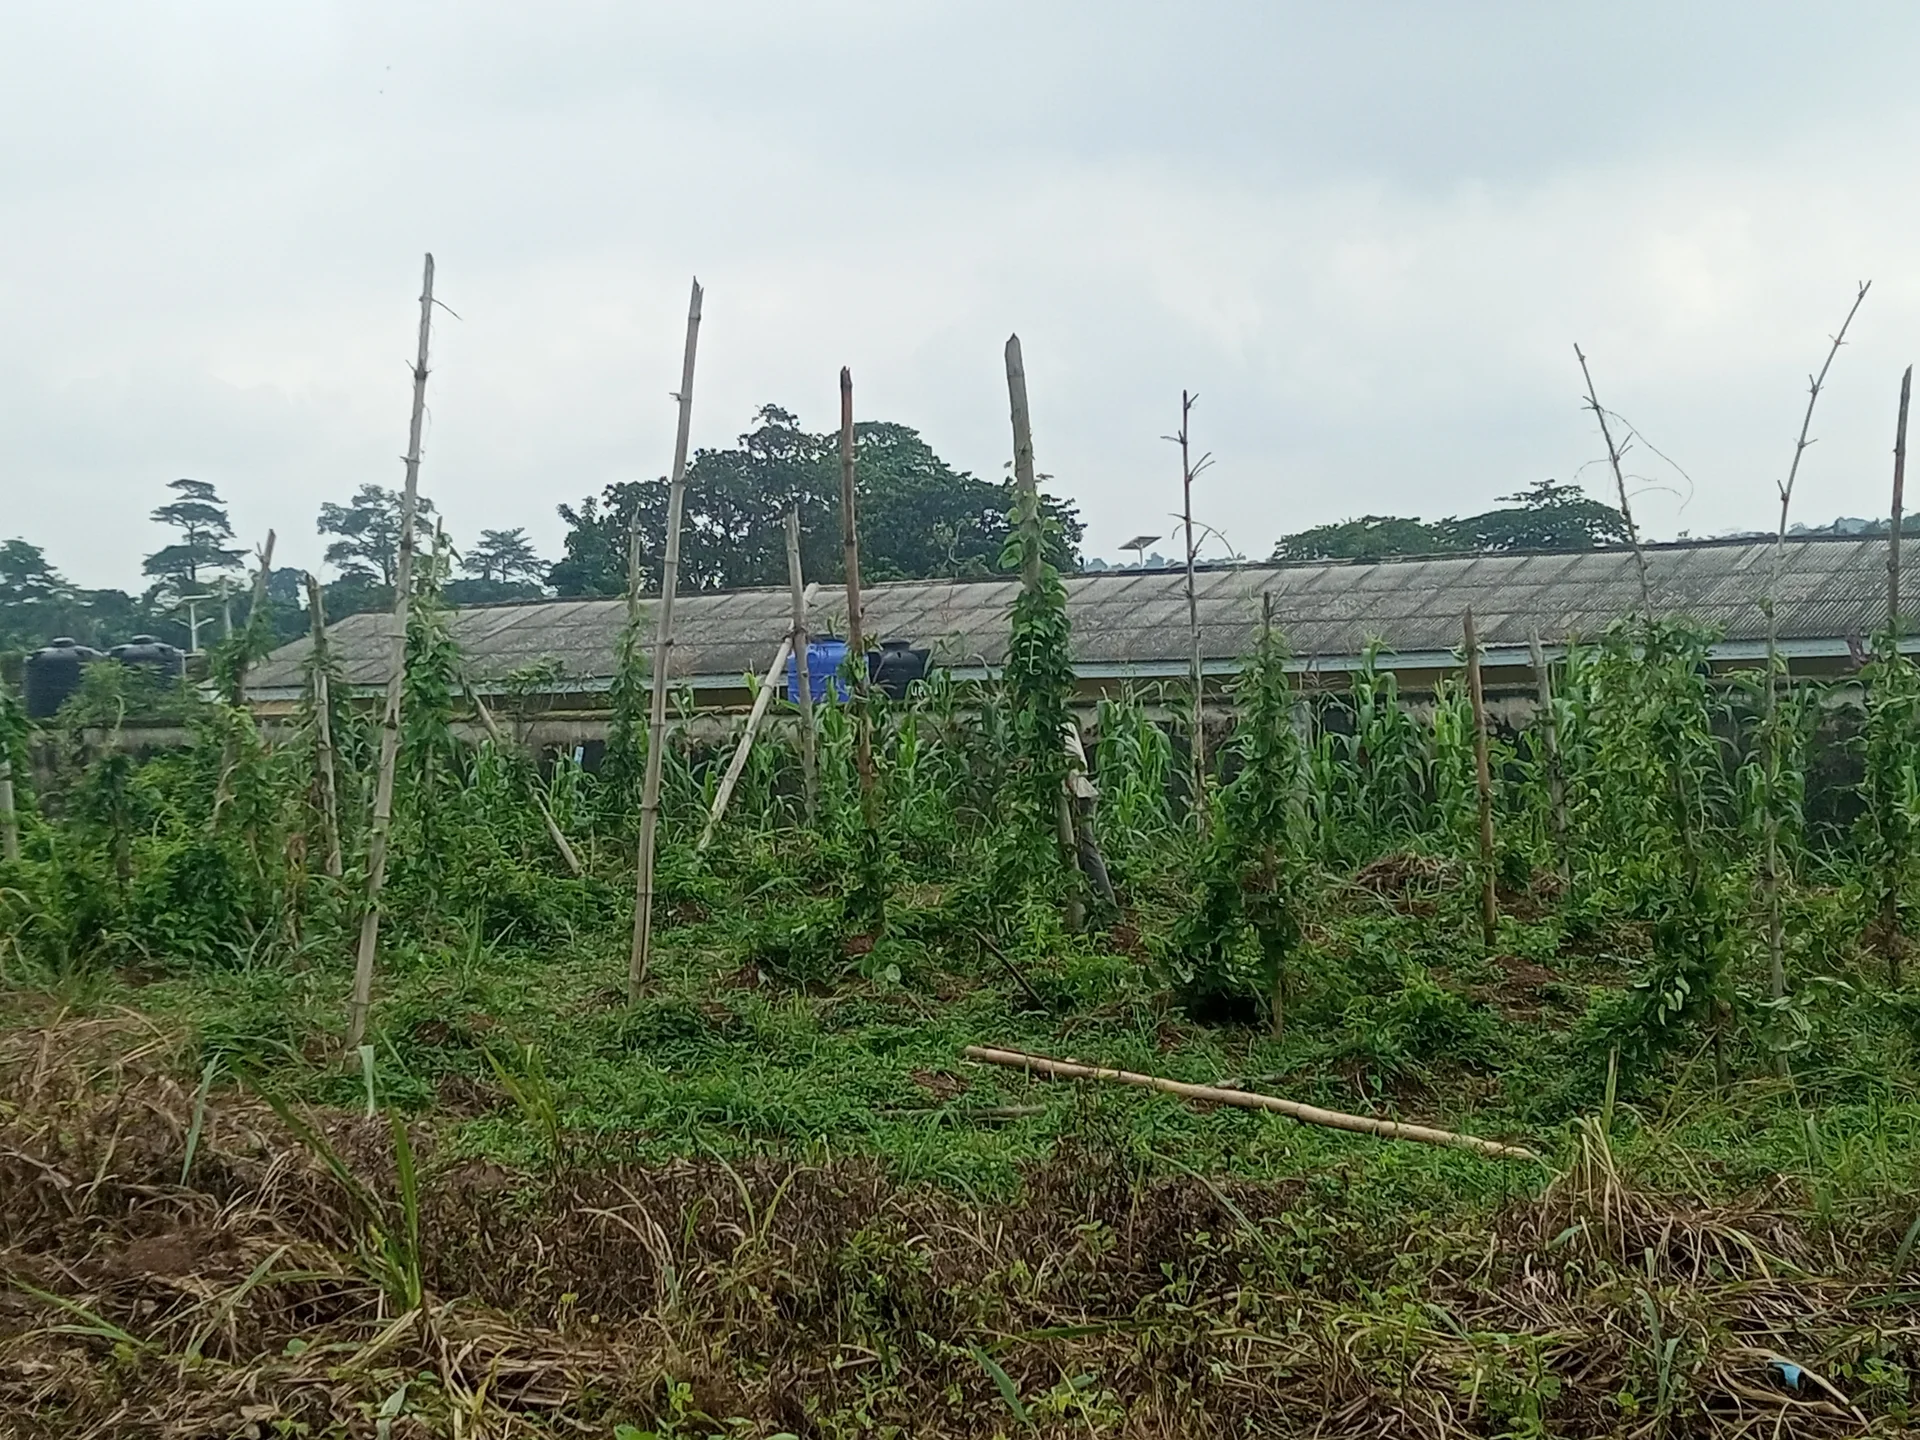
Photo: Starheroine · CC BY-SA 4.0
Yam is a climbing vine that grows one big food tuber underground over a long 7-11 month season. You don't plant a seed from a packet: you plant a piece of a yam tuber (a 'sett'), which sprouts a vine that must climb a tall stake to feed the new tuber below. It is a hungry crop that rewards deep, rich, well-drained soil, clean planting material, and patient hands. Grown right, the tubers you dig will keep in a barn and feed your family right through the dry season. This guide covers white Guinea yam, water yam and yellow yam together; where they differ (water yam needs staking less), it says so.
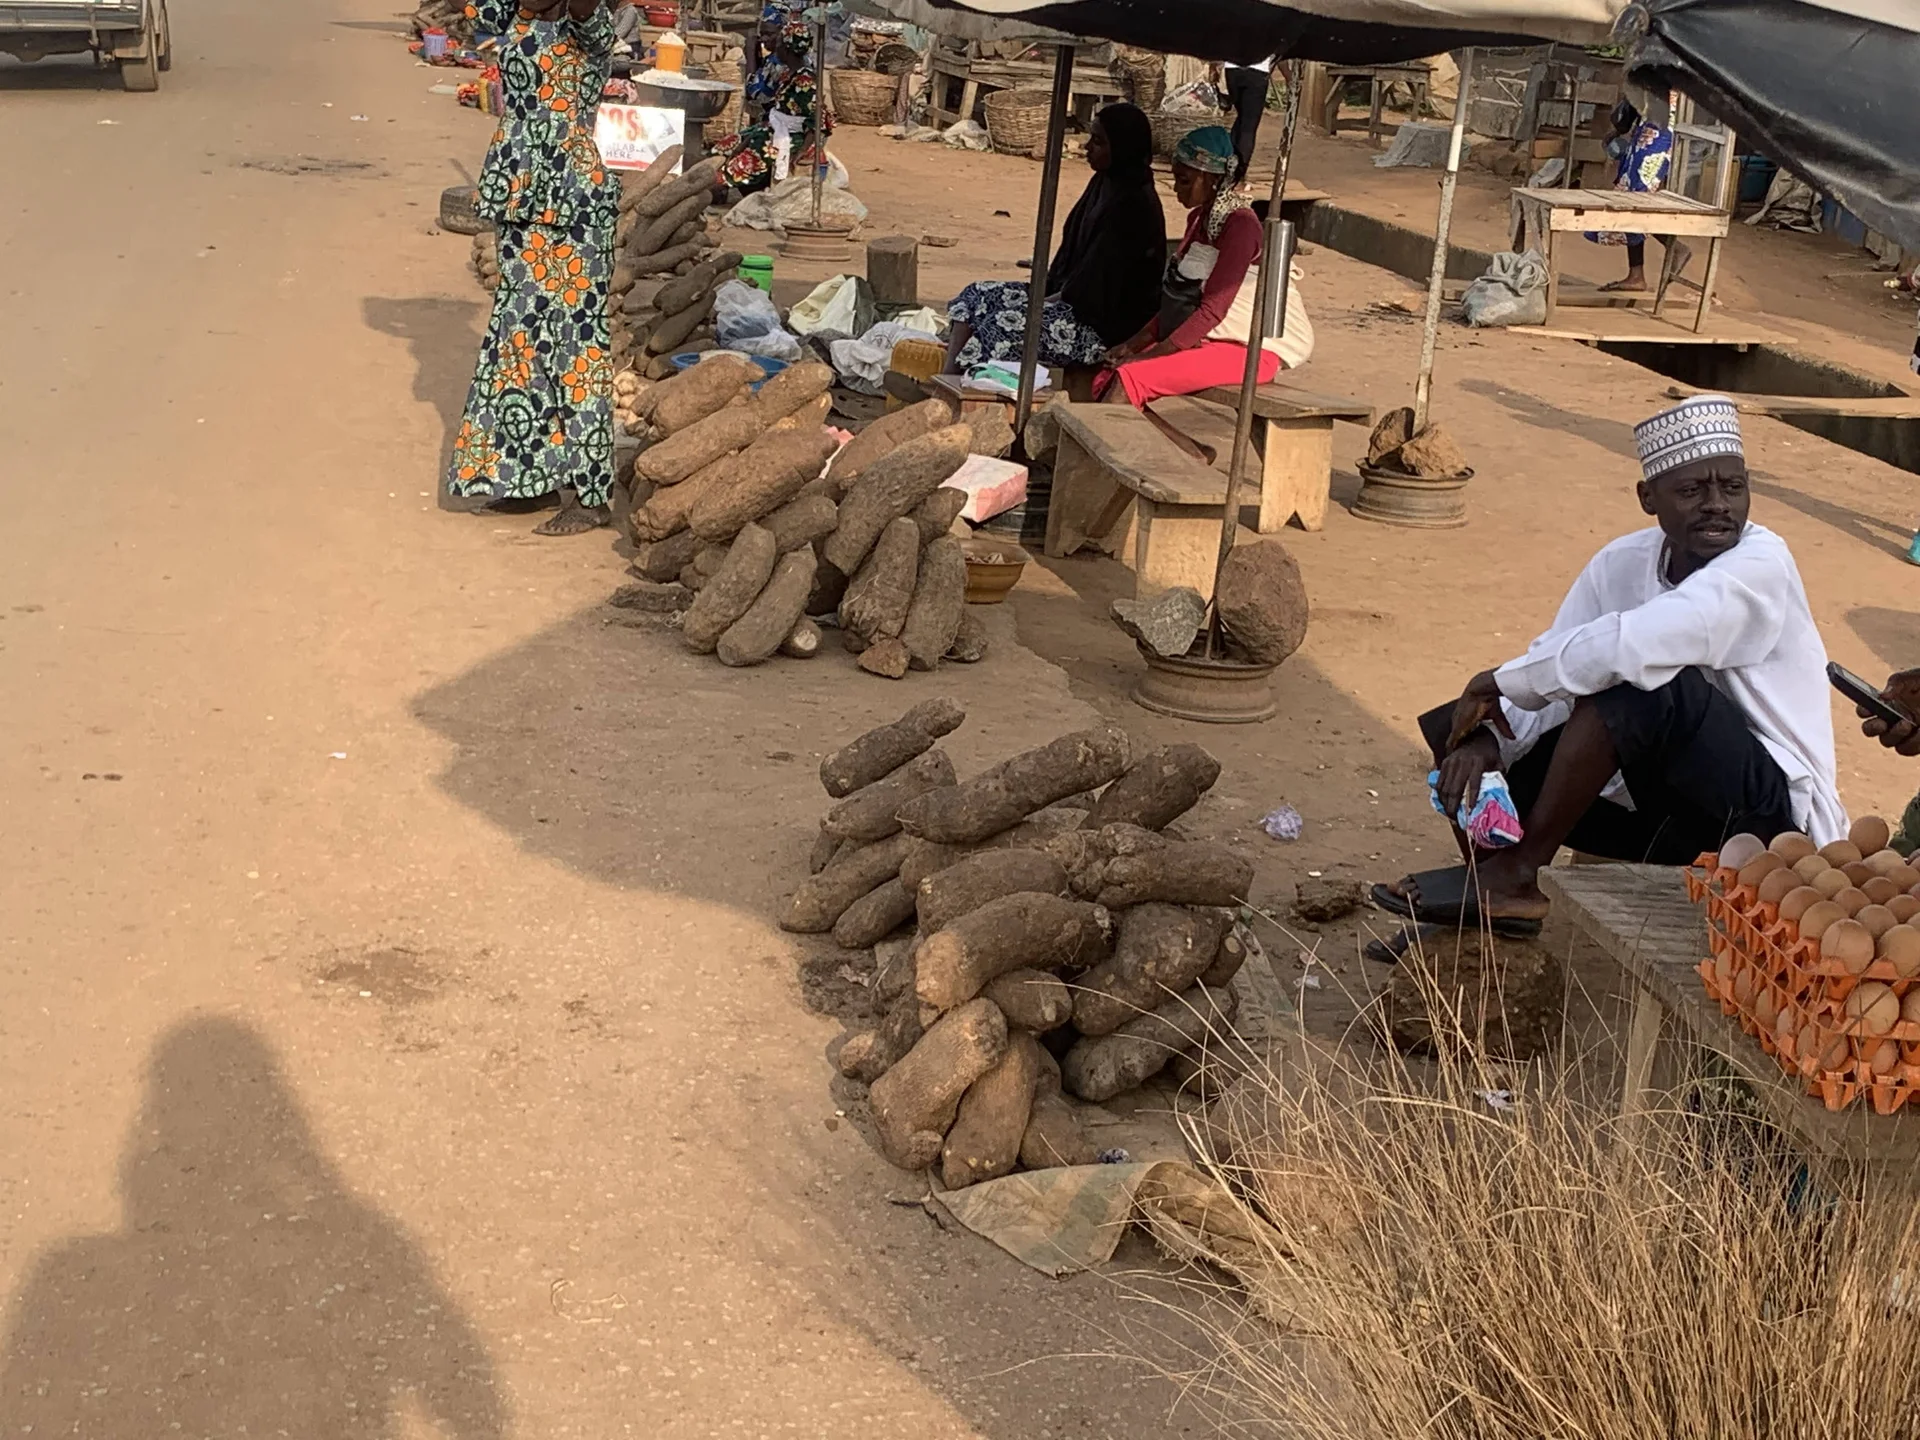
Isaacayodele32 · CC BY-SA 4.0 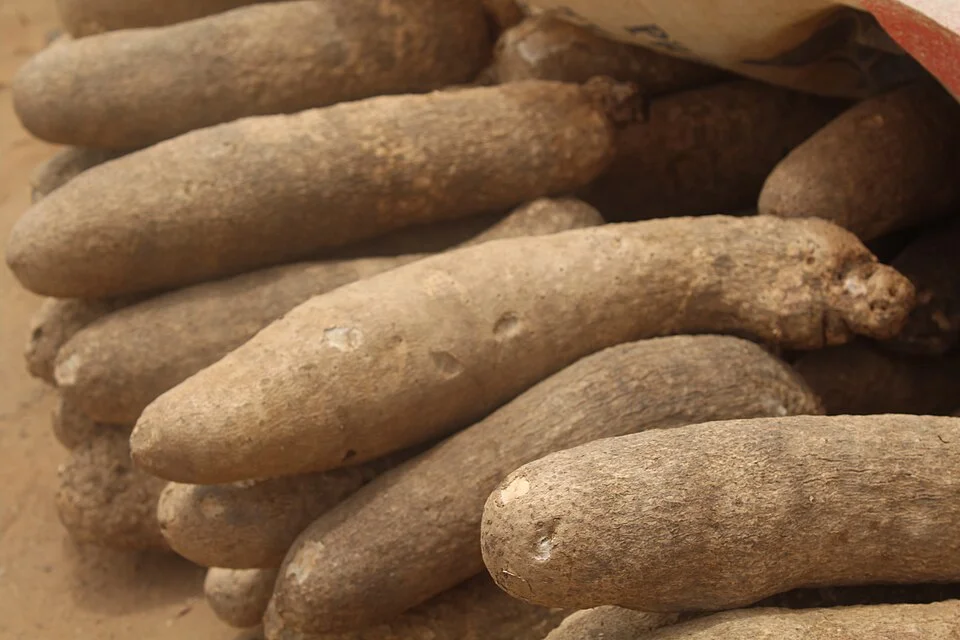
Dorcas Atule · CC BY-SA 4.0
- Days to maturity
- 180–330 days
- Row spacing
- 100 cm
- Plant spacing in the row
- 100 cm
- Sowing depth
- 10–15 cm
These are general figures for the crop, compiled from published agronomic references including FAO and CABI. The right choice for your field depends on your soil, rainfall and the yield you are aiming for.
Will yam actually do well on your field? Check your own field against every crop in the catalogue — no signup. Run the crop check →
Also known as
Yam is also called white yam and water yam.
- English
- white yam, water yam
- Akan
- bayerɛ
- French
- igname
- Hausa
- doya
- Igbo
- ji
- Portuguese
- inhame
- Swahili
- kiazi kikuu
- Yoruba
- isu
Working in buckets, bags or paces? The farming glossary turns the measures growers actually use into kilograms and hectares — what a 20 litre bucket of each crop really weighs, and how to size a field by walking it — alongside the Shona, Swahili, Ndebele and Yoruba words used in the field. Open the glossary →
Growing yam, stage by stage
Your yam season from mound to barn: plant clean tuber pieces on big soft mounds, stake the climbing vines high, weed and feed them through the long climb, then dig the tubers gently and cure and store them so they keep through the dry season.
Get your land, setts and mounds ready
With yam the season is won or lost before you plant. The single biggest lever is your planting material - clean, healthy tuber pieces, free of rot and virus. Add deep, loose, well-drained land (fresh or rested ground is best, because yam is a hungry feeder) and big, soft mounds, and your vines get the strong start they need for the long climb ahead.
Choose deep, loose, well-drained land Recommended
Yam pushes its tuber down deep and hates wet feet. Deep, loose, well-drained soil lets the tuber swell big and clean; shallow, hard or waterlogged ground gives small, forked, rotten tubers. Choosing the right field costs you nothing and pays all season.
Pick deep, loose, fertile soil that drains well - a sandy loam or loam you can push a stick into easily. Yam roots reach down about 1 m, so avoid thin soil sitting over rock or a hard pan.
Choose fresh or rested (fallow) land if you can, and put yam first in your rotation, before other crops take the richness. Yam is a heavy feeder and gives its best on new ground.
Avoid low, wet spots where water sits after rain - yam tubers rot in waterlogged ground. If the land is flat, plan to plant on high mounds or ridges to lift the tuber above the wet.
Clear the bush and weeds early, in the 2 months before planting, so the ground is ready and the cut trash has time to rot down.
- Do:
Choose gently sloping or raised ground that sheds water - it beats a flat, low field where rain pools and rots the tubers.
- Tip:
Heavy clay or a hard pan under the topsoil - the tuber cannot push down and comes out small and twisted.
Select + treat clean setts / minisetts Critical
The sett is the whole plant in your hand - and its hidden faults travel straight into your field. A sett carrying rot, dry-rot worms, or mosaic virus grows a weak, sick plant that never makes a good tuber, and the virus spreads to the rest. Clean, treated setts are the surest yield you will ever buy.
Take your planting pieces only from healthy plants and sound tubers - no soft spots, no dark dry cracks under the skin, no shrivelling. A yam grown from a sick tuber stays sick.
A 'sett' is a cut piece of yam tuber used for planting. Cut setts of about 100-300 g each - from a large egg up to your fist. To stretch scarce seed, cut 'minisetts' of 25-50 g - about a matchbox each - with a bit of skin on every piece.
Let the cut faces dry in a shady, airy place for a day or two until they skin over - a wet, raw cut face invites rot.
Treat the setts against dry-rot worms (nematodes - tiny soil worms that cause dry, cracked rot) and anthracnose (a fungus that blackens leaves and vine tips). Choose one: roll the cut faces in wood ash or lime; or dip them in a fungicide (follow the label); or dip them a few minutes in hot - not boiling - water at about 50-53 C. With no thermometer, mix 1 part boiling water to 2 parts cold - steaming, not bubbling.
Use virus-free material to keep yam mosaic virus (YMV) out: never cut setts from any plant whose leaves showed a yellow-and-green mottled pattern last season.
Sort as you go: throw out any piece that is soft, smelly, or shows dark dry rot under the skin. Better to plant fewer good setts than to carry disease into the field.
If too many of your setts are rotten, mottled, or worm-damaged to plant a full field, don't risk them - buy clean, certified seed-yam or minisetts from a trusted source instead.
- Do:
Treat and dry the setts before planting - a few minutes' work stops the two worst tuber diseases at the door.
- Tip:
Cutting setts from the market-food heap, or from any plant that looked mottled or stunted - you plant its disease with it.
- Watch out:
Hot-water dip: keep it hot to the touch, NOT boiling - water too hot cooks the sett and it won't sprout. If you use a fungicide, wear gloves, keep it off food and skin, and wash your hands after.
Build mounds/ridges Recommended
Yam makes its tuber in the loose soil you pile up for it. A big, soft, well-drained mound lets the tuber swell large, smooth and easy to lift; flat or hard ground gives small, forked tubers that break when you dig them.
Build mounds or ridges 30-45 cm high - up to knee height - spaced 1 m apart every way - one stride. That gives about 10,000 mounds per hectare, one plant each.
Break and loosen the soil well as you heap it - the softer and deeper the mound, the bigger and cleaner the tuber.
Work a generous handful or two of well-rotted manure or compost into each mound as you build it, mixed right through the soil. Use only rotted manure - fresh manure burns the sett and brings weed seeds.
On flat or wetter land, make the mounds taller so the tuber sits high and dry; on slopes, run ridges across the slope to hold the rain and soil.
- Do:
Build the mounds in the last few weeks before planting, while the soil works easily, so they're ready the day your setts are treated.
- Tip:
Small, low mounds on wet ground - the tuber sits in damp soil and rots before harvest.
Plant the setts and get them sprouting
Now the treated sett goes into the mound and begins its slow, uneven wake-up - sprouting can take 40 days or more. Because the ground is bare and the sett is defenceless for so long, this stage is about setting the sett in at the right depth, keeping the mound moist and intact, and guarding the slow-starting plants from termites.
Plant treated setts Critical
Depth and care at planting decide whether the sett sprouts strong and even. Too shallow and it dries out or cooks in the sun; too deep and it rots or struggles up; bruised and it never comes at all. One careful planting sets the whole long season.
Plant your treated setts into the ready mounds, one sett per mound.
Set each sett about 10-15 cm deep - three finger-joints - on top of the mound, cut-face down or sideways, and cover it firmly with loose soil.
Keep to 1 m between mounds every way - one stride. Don't crowd them; a yam vine needs room and light to fill its tuber.
Plant when the soil is moist but not waterlogged - into a mound that will stay damp, not into dust and not into a puddle.
Firm the soil over the sett so it sits snug in moist earth, and keep the mound shape intact.
- Do:
Handle the treated setts gently and plant them the same day - knocking off the ash coat or leaving them baking in the sun undoes your treatment.
- Tip:
Planting into a low, wet hollow - the sett rots before it sprouts. Plant on the raised mound.
- Watch out:
Yam wakes slowly - don't panic if nothing shows for weeks, and don't dig up a sett to check; you'll snap the young sprout.
Scout sprouting, termites Recommended
The sett lies alone in the mound for weeks, and termites can hollow it out or eat the young sprout before it ever climbs - a mound that never comes up is a plant lost, with no time to replace it. A weekly look lets you catch trouble and fill gaps while you still can.
From about a week after planting until the vines are well up (roughly the first 6 weeks), walk the mounds once a week.
Check which mounds have sprouted and mark the ones that haven't - yam is slow and uneven, so give late ones time, but keep note.
Termites: look for mud tunnels and soil sheeting climbing the mound or the stake, and setts eaten hollow. Scratch open a non-sprouting mound or two - a tunnelled, hollow sett means termites are working.
Look for rotten or foul-smelling setts (wet rot, or the dry, cracked rot of nematode worms) in mounds that fail to sprout.
Where termites are active, break up any nests nearby and keep the mounds clear of dry trash, and replant failed mounds with a fresh treated sett early, while there is still season to catch up.
- Watch out:
Fresh mud tunnels on the mound and stake mean termites are active right now - act before they reach more setts.
- Do:
Replant a dead mound in the first few weeks - a sett planted late never catches the rest of the field.
Keep moist; maintain mounds Recommended
The sett has no roots yet and lives on the moisture in the mound. If the mound dries out or washes down flat, the sett stalls, cooks, or sits exposed - and your slow crop falls even further behind.
Through the first 6 weeks after planting, keep the mound moist but never waterlogged - damp like a wrung-out cloth, not muddy.
After heavy rain, rebuild any mounds that have slumped or washed down, and re-cover any sett left exposed.
In a dry spell, a light mulch of grass or leaves over the mound holds the moisture in and keeps the soil cool - but keep mulch clear of any active termite ground.
Don't let water pool around the base - open a small channel to drain low spots so the sett doesn't rot.
- Do:
Mulch the mounds in dry weather to hold moisture through the long, slow sprouting.
- Tip:
Letting rain flatten the mounds - a washed-down mound leaves the sett shallow and exposed to sun and pests.
Vines climb - weed and feed
The vine is up and now races to build the leaf canopy that will fill the tuber. Two jobs make or break this stage: stake the vines high so their leaves catch the sun, and keep the mounds weed-free - because yam's slow start lets weeds run away with the field, and choking weeds can cost you almost the whole crop. Feed the growing plant, and watch for leaf disease and beetles.
Stake + train vines Critical
A yam vine on the ground is a yam wasted. Lifted up a stake into the sun, its leaves make far more food and pour it into the tuber - staking is worth about 30-40% more yield. Left sprawling, the leaves shade each other, catch disease, and the tuber stays small.
As soon as the vines appear (about 6-10 weeks after planting), set a stake by every mound - a strong pole 2-3 m tall, well taller than you. Push it in firmly, 20 cm (a hand-span) from the sett so you don't spear the tuber.
Wind the young vine gently onto the stake in the direction it naturally twines, and tie it loosely if it won't hold on its own.
Walk the field again a few days later and re-train or re-stake any vines that have fallen or missed their pole.
Where poles are scarce, lead several vines up one tall stake as a tripod, or train them onto a live tree or trellis - the whole point is to get the leaves up into the light.
- Do:
Stake the moment the vines run - a vine left on the ground even a couple of weeks loses growth you can't get back.
- Tip:
Driving the stake right against the sett - you can pierce the young tuber. Set it 20 cm (a hand-span) out.
- Watch out:
Water yam (the greater yam) needs staking less than white yam, but even it yields more off the ground than sprawling.
Weeding (critical, weeks 8–16) Critical
Yam starts so slowly that weeds get a long head start - and in this window weeds steal the water, light and food the vine needs, and can cut your crop by as much as 90%. Keeping the mounds clean through weeks 8-16 protects almost the entire harvest.
Weed 3-4 times through the critical window - weeks 8 to 16 after planting - going over the field every 2-3 weeks.
Keep the mound and the base of each vine clean; pull or hoe weeds while they are small and easy.
Hoe shallowly near the mound - the tuber is swelling just under the surface, and deep hoeing cuts or bruises it.
Lay the pulled weeds between the mounds as a mulch to hold moisture and slow the next flush (keep them off the vine base).
- Do:
Weed early and often through weeks 8-16 - a clean field now is the cheapest big yield you will ever gain.
- Tip:
Deep, hard hoeing close to the mound - you wound the tuber, and the wound turns to rot in store later.
- Watch out:
Don't let weeds climb the stake with the vine - pull them off before they smother the leaves.
Top-dress fertiliser Recommended
Once the vine is climbing hard it needs feeding to build the canopy and, above all, to fill the tuber. Yam is a heavy feeder of potash (K) as much as nitrogen (N) - potassium is what packs starch into the tuber and firms it for storage. A well-timed top-dressing lifts both the size and the keeping quality of your crop.
Top-dress about 8-12 weeks after planting, once the vines are climbing and the field is freshly weeded (feed the yam, not the weeds).
Use a compound fertiliser supplying both nitrogen (N) and potash (K) - your recommendation gives the type and amount for your field.
Spread it in a ring around each plant, about 20 cm (a hand-span) out from the stem - never against the vine base or over the tuber.
Apply onto moist soil (after weeding or a light rain) and cover it lightly or let rain wash it in, so it doesn't blow off or gas away.
- Do:
Weed first, then feed - so the fertiliser goes into the yam and not the weeds.
- Tip:
Piling fertiliser against the stem or onto wet leaves - it scorches them. Keep a hand-span clear.
- Watch out:
Handle fertiliser with care: keep it off food, water and children, and wash your hands after.
Scout anthracnose, YMV, yam beetle Recommended
This is when leaf disease and virus take hold and when beetles come for the young tubers. Anthracnose can blacken and kill the vines, mosaic virus quietly shrinks every tuber, and yam beetles bore holes that let in rot. A weekly look lets you pull out sick plants and act before it spreads.
From about 6 weeks to 4 months after planting, walk the field once a week and look closely at the leaves, vines and mound bases.
Anthracnose (a fungus, also called dieback): look for dark brown-to-black spots on the leaves, and blackened, dying vine tips and shoots - worst on water yam in wet weather. Cut out and carry off badly hit vines.
Yam mosaic virus (YMV): look for a yellow-and-green mottled or streaky pattern on the leaves, with crinkling and stunting. There is no cure - uproot and remove badly mottled plants, and never save setts from them.
Yam beetle: look for round bore-holes and tunnels in exposed tubers and at the mound base; the brown beetles feed at night and come in from nearby fallow or swampy ground. Firm, clean mounds and clearing crop trash keep them down.
Note where you see each problem and remove diseased vines and plants promptly - clean-up is your main tool here, as this plan uses no spray.
- Watch out:
A mottled, mosaic-patterned leaf means virus - mark that plant and never cut next season's setts from it.
- Do:
Carry badly diseased vines right out of the field rather than dropping them between the rows, so the disease doesn't spread.
Fill the tuber (bulking)
As the days grow shorter later in the season, the plant switches to pumping starch down into the tuber - this is where your yield is actually made. This swelling and filling is called 'bulking'. Two things drive it: steady moisture and potassium. Keep the staked canopy green and healthy, keep the mounds clean, and never let the crop go thirsty now, or you dig small tubers.
Scout anthracnose, YMV Recommended
The canopy has to stay green and working right through bulking to fill the tuber. Anthracnose stripping the leaves now steals the crop at the very moment it is being made - a sick canopy means small, half-filled tubers.
From about 4 to 8 months after planting, check the field every 2 weeks, looking over the whole canopy.
Anthracnose: watch for spreading dark leaf spots and blackened, dying vine tips, especially in wet spells and on water yam. Cut out and carry off badly hit vines to slow it.
Keep watching too for mosaic-mottled leaves (YMV - the yellow-and-green patterning) and pull out any badly affected plants.
Keep the canopy up on its stakes and in the light - a green, healthy leaf is what fills the tuber.
- Watch out:
A canopy going brown and dying back early - before the natural end-of-season yellowing - is anthracnose robbing your tuber. Act on it.
- Do:
Re-stake any vines that have slipped down, so their leaves keep working right through bulking.
Spot-weed Recommended
The big weeding is done, but stray weeds on the mound still steal water and food from the filling tuber and hide pests. Keeping the mound clean through bulking protects the yield you've already built.
From about 4 to 8 months, walk the field every 3-4 weeks and pull any weeds off the mounds and vine bases.
Weed by hand, or hoe very shallowly - the tuber is swelling just below and is easily cut.
Leave the pulled weeds between the mounds as mulch to hold moisture through the dry-season bulking.
- Tip:
Hoeing deep or hard against the mound now - a nick in the swelling tuber becomes a rot in the barn.
Irrigate in dry spells during bulking Recommended
Bulking is the thirstiest, most important moment of the whole season - the one stage yam cannot afford to go dry. Drought now gives small, poorly-filled tubers; steady water through bulking is worth 15-40% more yield.
If you can water, keep the soil steadily moist through bulking - roughly months 4 to 8 - watering every 7-10 days in dry spells.
Water deeply enough to wet the tuber zone (down a hand-span and more), then let the top just start to dry before the next watering - yam still hates standing water.
Never let the crop wilt during bulking - a thirsty vine stops filling the tuber, and you can't get that growth back.
Ease off only near the very end, as the leaves begin to yellow and the tuber matures for storage.
- Watch out:
If you can water at only one stage of the whole season, water NOW, through bulking - it is where the tubers are made.
- Tip:
Waterlogging the mounds - soaking, standing water rots the tuber even while it needs moisture. Keep it moist, not flooded.
The tuber matures
The long climb is over. The vines and leaves yellow and die back on their own, and the tuber's skin sets firm - the plant's own signal that the tuber is full and ready. A dry spell now matures the tuber and eases it into its resting sleep, so it will store. Don't rush it, and don't dig while the crop is still green.
Check maturity Recommended
Digging decides how well your yam stores, and the plant itself tells you when it's ready. Lift it too early and the tuber is unfilled and won't keep; read the signs right and you dig a full, firm, storable tuber.
From about 8 months after planting, watch for the plant to finish on its own.
The tuber is mature when the vines and leaves turn yellow and die back, and the skin on the tuber has set firm and no longer rubs off when you scratch a little soil away from the top.
Scrape gently to feel the shoulder of a tuber - a firm, tight skin means ready; a thin skin that scuffs off means it's still filling.
If the vines are still green and the skin still rubs off, it isn't ready - wait and check again in a couple of weeks. An unfilled, thin-skinned tuber will not store.
- Do:
Let the crop yellow and die back naturally before you dig - that's the tuber telling you it's full and ready to keep.
- Watch out:
For early white-yam types you plan to 'milk', you can lift a first tuber earlier, at about 5-6 months - see the harvest step.
Dig the tubers carefully
Yam harvest is slow, skilled work done by hand in the dry season, about 7-11 months after planting. The whole aim is to lift each tuber out whole and unbruised - because every cut and bruise becomes a rot in the barn. This is where careful hands turn a good crop into a stored one.
Dig carefully by hand Critical
A yam only stores if it comes out of the ground whole. A cut, speared or bruised tuber rots within weeks in the barn - so a rushed harvest can spoil a crop you spent 10 months growing. Slow, careful digging is what lets the yam keep and feed you through the dry season.
Harvest at leaf-yellowing, in the dry season (about 7-11 months after planting). Choose a dry day - damp tubers store worse.
Dig a wide ring around the mound first, well out from the tuber, and loosen the soil down the side - never chop straight down onto the tuber.
Work slowly by hand, easing the whole tuber out sideways and lifting it whole and unbruised. Support its weight so it doesn't snap.
To 'milk' early white-yam types: at about 5-6 months, cut the first tuber off below its head and set the head (with the vine) back in the mound to grow a second tuber for a later harvest.
Lay the dug tubers gently in the shade - never toss or drop them - and keep them out of the sun while you finish.
- Do:
Dig slow and wide - the extra care lifting whole tubers pays back many times over in the barn.
- Tip:
Levering the tuber out on a spade point or hoe - one gouge and that tuber rots in store.
- Watch out:
Handle every tuber like an egg from field to barn; a bruise you can't even see turns into rot.
Cure and store in the barn
The crop is dug - now keep it. Yam stores for months if you do two things: cure it first so its cuts heal and its skin hardens, then store it cool, dry, shaded and airy in a traditional yam barn. Done right, the tuber's natural resting sleep (dormancy) carries it right through the dry season; done wrong, the tubers rot or sprout away.
Cure the tubers (2–4 days) Recommended
Fresh-dug tubers are covered in tiny wounds and thin skin that let rot straight in. Curing - holding the tubers warm and damp for a few days - heals those wounds and toughens the skin, sealing the tuber against the rots that would otherwise eat your harvest in the barn.
Right after harvest, cure the tubers for 2-4 days before they go into store.
Hold them warm and humid - about 32-40 C and very damp air - in a shaded, airy spot: heap them under a shelter and cover the heap loosely with grass or leaves to trap the warmth and moisture.
This lets the cuts and grazes skin over and the outer skin harden, so rot cannot get in.
Handle gently even now - a fresh bruise during curing is a fresh doorway for rot.
- Tip:
A hot, poorly-ventilated store - it rots the tubers. Keep the barn clean, shaded and airy.
- Do:
Cover the curing heap with grass or leaves to keep it warm and damp - that damp warmth is what heals the skins.
Barn-store through the dry season Recommended
A cured tuber can sleep for months - but only in the right store. Cool, dry, shaded, airy storage lets the tuber ride out the dry season; a hot, damp, closed store rots it, and light and warmth wake it into sprouting that eats up the food inside.
Cure the tubers first (see the curing step), then move only sound, unbruised tubers into store - set aside any cut or soft ones to eat first.
Store in a traditional yam barn: a shaded, well-ventilated frame where you rack or tie the tubers so air moves all around them - out of the sun, rain and reach of rodents.
The tuber's natural resting sleep (dormancy) lasts roughly 2-7 months and carries it through the dry season with no special treatment.
Check the barn regularly. Once the sleep breaks and tubers start to sprout, rub off the new sprouts by hand every week - sprouting drains the food and shrivels the tuber.
Pull out and use any tuber that turns soft, mouldy, foul-smelling, or shows dry, cracked rot under the skin before it spreads to its neighbours.
- Do:
Rack the tubers with space around each one - free-moving air is what keeps them sound.
- Tip:
Storing bruised or already-rotting tubers among the good ones - one soft yam spreads rot down the whole rack.
- Watch out:
Look over the barn every week for soft spots, mould, or small bore-holes, and take out any bad tuber at once.
Pests and diseases that attack yam


Where to sell yam
Markets that trade this crop — what each one sells it by, when supply peaks there, and the currency used.
-
 Mile 12 Market
-
 Grand Marché de Bamako
-
 Konkomba Yam Market
-
 Marché Gouro d'Adjamé
-
 Marché Mokolo
-
 Onitsha Main Market
-
 Kalerwe Market
-
 Kejetia Market
Grow yam with a plan, not a guess
This guide is the general answer. Divisi works out yours — the week to plant yam on your soil and your rainfall, and each job dated for your field.


When to plant yam, country by country
- When to plant yam in Algeria
- When to plant yam in Angola
- When to plant yam in Benin
- When to plant yam in Botswana
- When to plant yam in Burkina Faso
- When to plant yam in Burundi
- When to plant yam in Cabo Verde
- When to plant yam in Cameroon
- When to plant yam in Comores
- When to plant yam in Congo
- When to plant yam in Côte d'Ivoire
- When to plant yam in Egypt
- When to plant yam in Eritrea
- When to plant yam in Eswatini
- When to plant yam in Ethiopia
- When to plant yam in Gabon
- When to plant yam in Gambia
- When to plant yam in Ghana
- When to plant yam in Guinea Ecuatorial
- When to plant yam in Guinea-Bissau
- When to plant yam in Guinée
- When to plant yam in Kenya
- When to plant yam in Liberia
- When to plant yam in Libya
- When to plant yam in Madagascar
- When to plant yam in Malawi
- When to plant yam in Mali
- When to plant yam in Mauritanie
- When to plant yam in Mauritius
- When to plant yam in Morocco
- When to plant yam in Moçambique
- When to plant yam in Namibia
- When to plant yam in Niger
- When to plant yam in Nigeria
- When to plant yam in Rwanda
- When to plant yam in République centrafricaine
- When to plant yam in République démocratique du Congo
- When to plant yam in Sao Tome and Principe
- When to plant yam in Seychelles
- When to plant yam in Sierra Leone
- When to plant yam in Somalia
- When to plant yam in South Africa
- When to plant yam in South Sudan
- When to plant yam in Sudan
- When to plant yam in Sénégal
- When to plant yam in Tchad
- When to plant yam in Togo
- When to plant yam in Tunisie
- When to plant yam in Uganda
- When to plant yam in United Republic of Tanzania
- When to plant yam in Zambia
- When to plant yam in Zimbabwe
Where yam scores best
Districts where Divisi's engine currently rates this crop highest, ranked by fit.


Get Insights by email
A short digest of new Divisi articles. No email on quiet weeks.
Frequently asked questions
How do I grow yam?
How to grow yam: 180–330 days to maturity, 100 cm rows, 10–15 cm deep. Also called white yam, bayerɛ, igname, doya, ji, inhame, kiazi kikuu, isu.
What is bayerɛ in English?
Bayerɛ is the Akan name for yam.
What is igname in English?
Igname is the French name for yam.
What is doya in English?
Doya is the Hausa name for yam.
What is ji in English?
Ji is the Igbo name for yam.
What is inhame in English?
Inhame is the Portuguese name for yam.
What is kiazi kikuu in English?
Kiazi kikuu is the Swahili name for yam.
What is isu in English?
Isu is the Yoruba name for yam.
How long does yam take to grow?
Yam takes about 180–330 days from sowing to maturity, though the exact length varies with variety, temperature and how the season runs.
What spacing should I use for yam?
Space yam rows about 100 cm apart, with roughly 100 cm between plants within the row.
How deep should yam be planted?
Sow yam at about 10–15 cm deep. Shallower risks drying out; deeper wastes seed energy before the shoot reaches light.
What pests and diseases attack yam?
The ones covered in this guide are Tuber rots, Yam anthracnose, Yam beetle. Each has its own page explaining how to identify, check for and control it.