 Divisi
How to grow garlic
Allium sativum · Amaryllidaceae
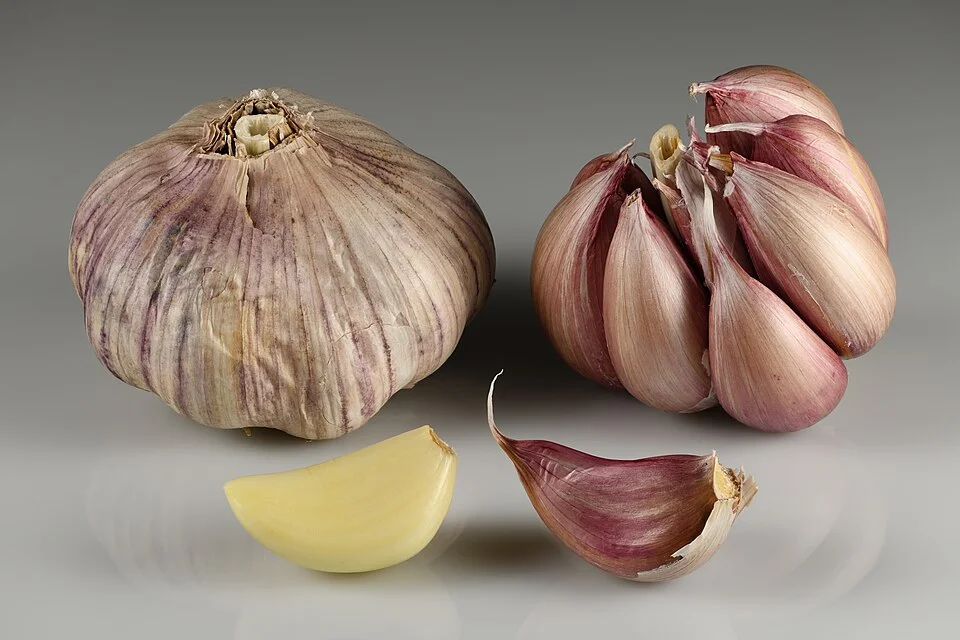
Photo: Ivar Leidus · CC BY-SA 4.0
Garlic (Allium sativum) is grown for its compound bulb — the head that splits into the cloves you cook with. Unlike most crops you don't grow it from seed: you plant the cloves themselves (called 'seed cloves'), and each big, healthy clove grows into a whole new bulb, so clove size is the biggest thing you control. Garlic is a cool-season crop with two special needs built in: the cloves must first feel a spell of cold before they will split into a proper multi-clove bulb (this cold requirement is called vernalization), and the bulb only swells once the days grow longer through the season. That is why garlic does best in the cool highlands or planted for the cool season; in warm, low areas you must chill the cloves first, or use a local warm-country variety. Garlic also feeds heavily on sulphur — the nutrient behind both yield and the sharp garlic taste. And its season ends differently from a grain crop: you must take it off water and dry (cure) the bulbs before they will store.
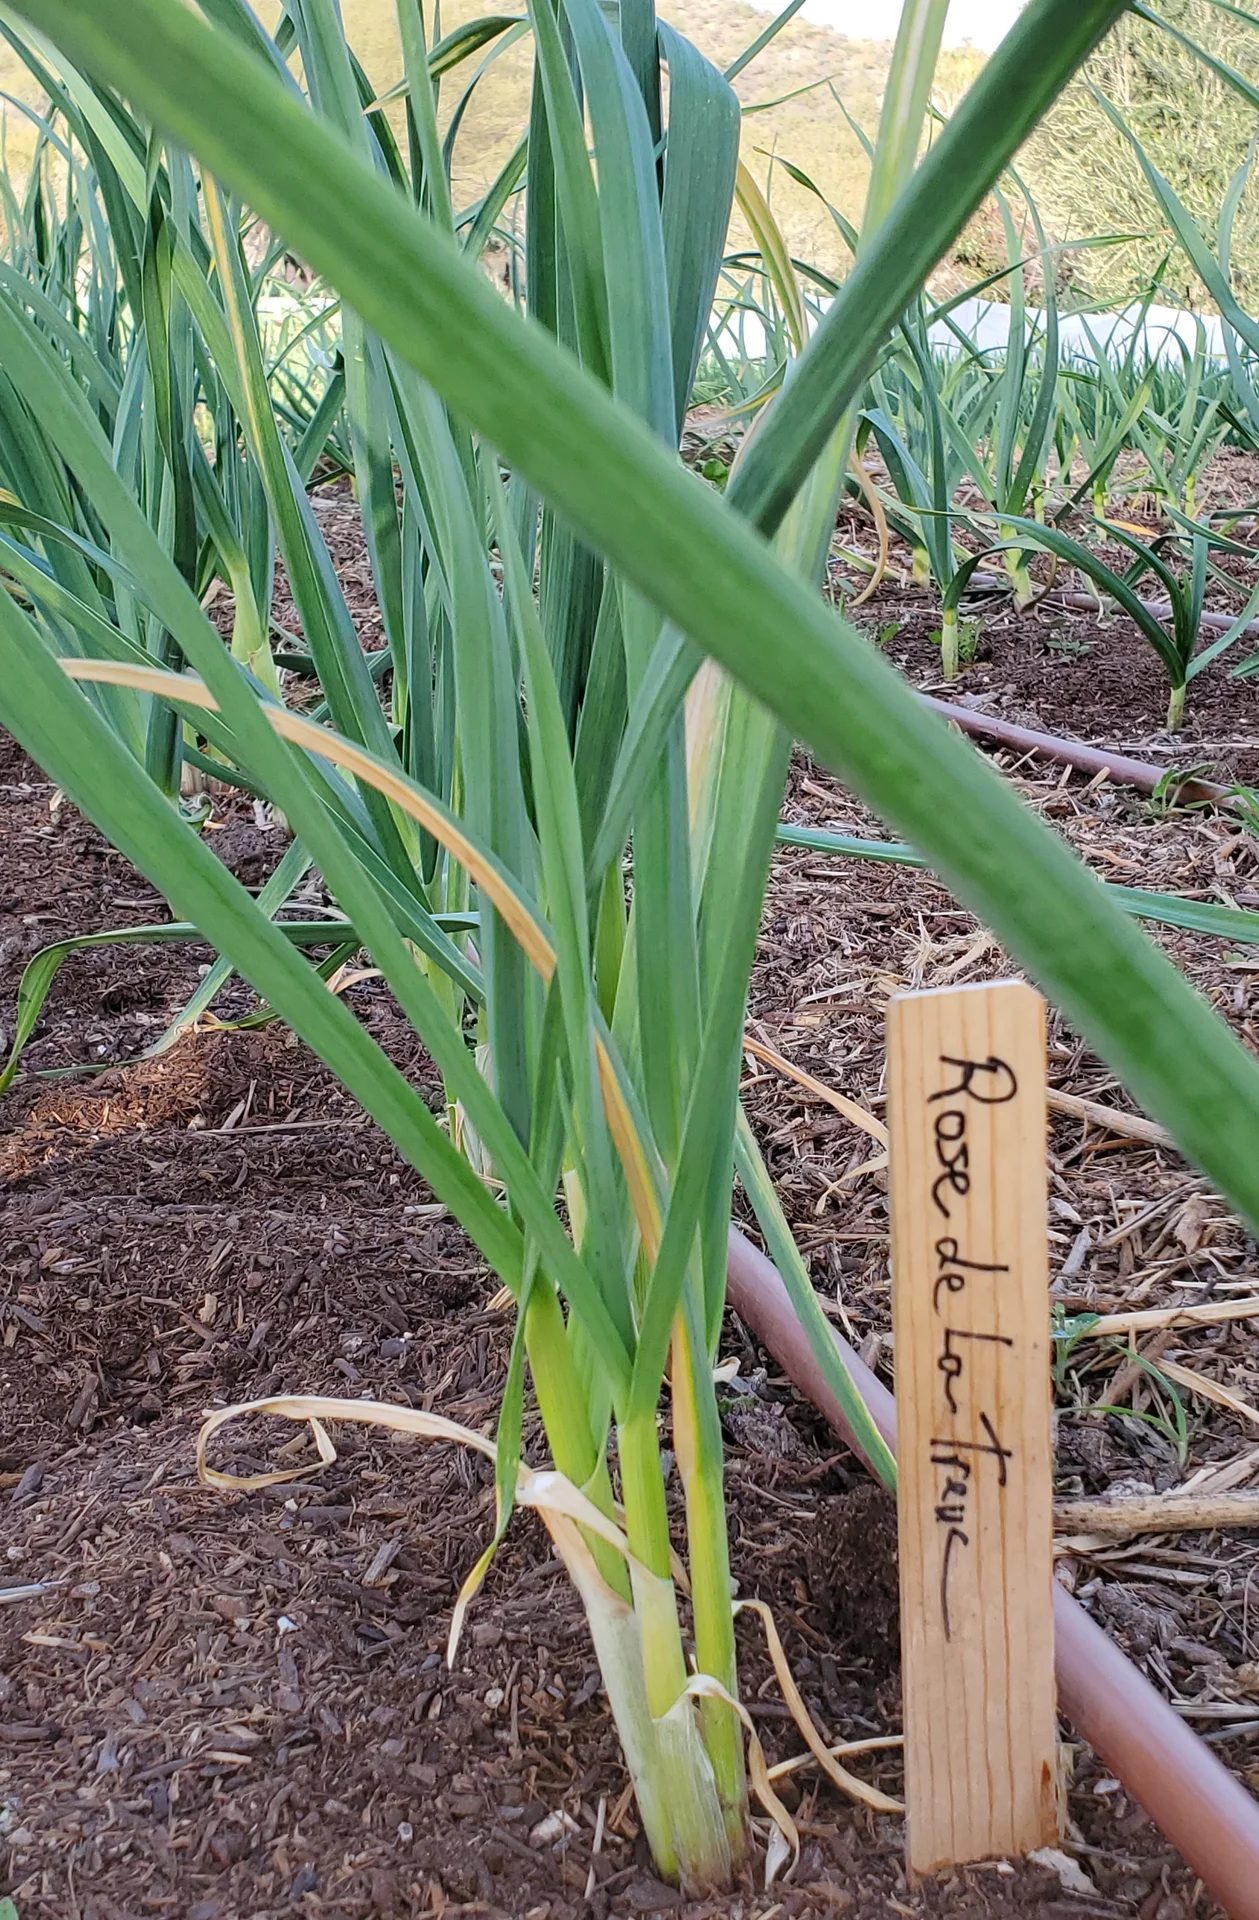
Cecilemckee · CC BY-SA 4.0 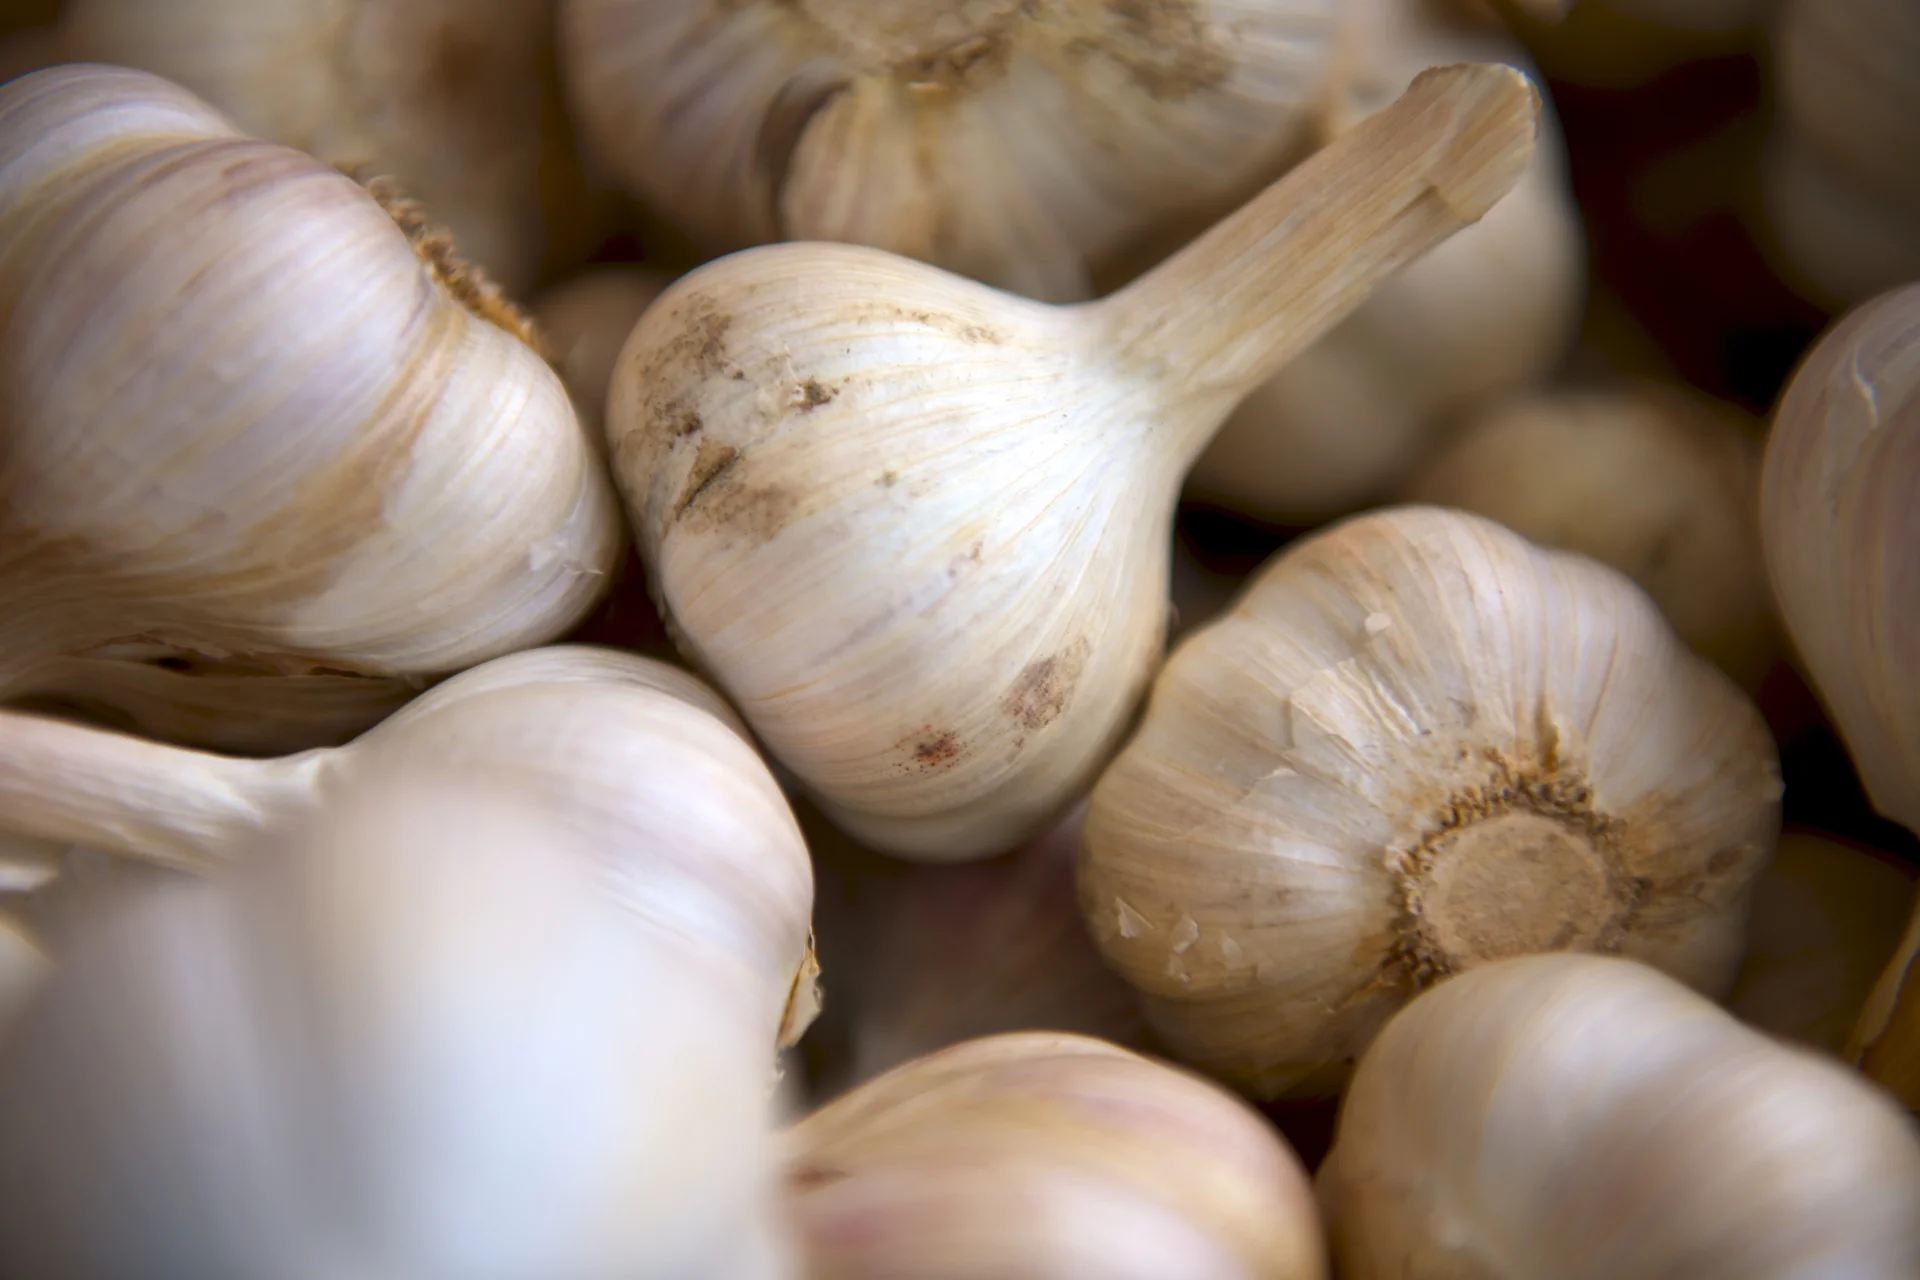
Matthew Pilachowski · CC0
- Days to maturity
- 120–210 days
- Row spacing
- 30 cm
- Plant spacing in the row
- 10 cm
- Sowing depth
- 3–5 cm
These are general figures for the crop, compiled from published agronomic references including FAO and CABI. The right choice for your field depends on your soil, rainfall and the yield you are aiming for.
Will garlic actually do well on your field? Check your own field against every crop in the catalogue — no signup. Run the crop check →
Also known as
- Afrikaans
- knoffel
- Amharic
- nech shinkurt
- French
- ail
- Hausa
- tafarnuwa
- Portuguese
- alho
- Swahili
- kitunguu saumu, kitunguu thomu
- Yoruba
- àyù
Working in buckets, bags or paces? The farming glossary turns the measures growers actually use into kilograms and hectares — what a 20 litre bucket of each crop really weighs, and how to size a field by walking it — alongside the Shona, Swahili, Ndebele and Yoruba words used in the field. Open the glossary →
Growing garlic, stage by stage
Your garlic season from clove to cured bulb — pick and prepare big, clean seed cloves, plant them tip-up into a rich, well-drained bed, feed and weed the young leaves while beating back thrips, keep the water steady while the bulbs swell, then dry the crop off, lift gently and cure the bulbs so they keep for months.
Get your cloves and bed ready
Garlic is only as good as the clove you plant and the bed you plant it into — and both are decided before planting day. Big, healthy cloves make big bulbs; small or diseased ones can never catch up. In warm areas the cloves also need a spell of cold first, or they grow into a single undivided ball instead of splitting into cloves. Use these weeks to pick clean seed cloves, chill them if your area is warm, and build a rich, well-drained bed on land that has been off garlic and onions for 3–4 years.
Crack + select large clean cloves Critical
The clove you plant becomes the bulb you harvest — big, healthy cloves grow big bulbs, and small or sick ones stay small. Sorting out the soft, mouldy and damaged cloves now also stops the two worst garlic troubles — white rot and stem-and-bulb nematode — from riding into your clean bed on infected planting material.
Wait until 1–2 weeks before planting to split (crack) the bulbs into single cloves — cracked too early, the cloves dry out and lose their strength.
Split each bulb by hand and keep only the big, plump outer cloves. Clove size decides bulb size, so the biggest cloves are your best seed; set the small inner cloves aside for the kitchen.
Throw out any clove that is soft, shrivelled, mouldy, or has brown sunken spots or a rotten base. Look for grey-white fluffy mould or tiny black specks at the base plate (the flat root-plate at the bottom of the clove) — a sign of white rot, a soil fungus that rots the roots and base — and any oddly soft, spongy clove, a sign of stem-and-bulb nematode, a tiny worm that bloats and twists the plant.
Keep the picked seed cloves in a cool, dry, airy place and plant them within a few days — don't leave them peeled or lying in the sun, where they dry out and weaken.
- Do:
Plant only your largest, cleanest outer cloves — every bit of extra clove size shows up as bulb size at harvest.
- Tip:
Planting garlic (or onions) on land that grew garlic or onions in the last 3–4 years — white rot and nematode live on in that soil for years and will hit your crop.
- Watch out:
Cracking the bulbs too many days ahead — split them close to planting so the cloves stay firm and fresh.
Cold-condition cloves (warm zones) Recommended
Garlic will only split into a proper multi-clove bulb after the cloves have felt a spell of cold — the requirement called vernalization. In cool highlands the weather does this for you, but in warm, low areas cloves that never feel cold grow into a single undivided ball (a 'round') instead of a bulb of separate cloves. A few weeks of chilling before planting fixes this.
Do this only if you farm in a warm or low area (or are planting outside the cool season). In the cool highlands you can skip it — the field is already cold enough to do the job.
Starting about 6–8 weeks before planting, keep your selected seed cloves cold — around 0–10 °C — for several weeks. A cool store, a clay pot in the coolest room, or the lower part of a fridge all work.
Keep them dry and airy while they chill — never wet or sealed in plastic, or they rot before they reach the soil.
Take them out and plant them at your normal planting time; the cold spell has already told them to make a proper divided bulb.
- Do:
Match the trick to your area — chill the cloves in the warm lowlands, skip it in the cold highlands.
- Tip:
Chilling cloves in a damp, closed bag — trapped moisture rots them before they ever reach the soil.
- Watch out:
A clove that never felt cold grows into a single round ball, not a bulb of cloves — if your area is warm, don't skip this step.
Prepare a drained, fertile bed + manure + sulphur Critical
Garlic has shallow roots and cannot chase food or push through hard, wet soil, so it repays a soft, rich, well-drained bed. Standing water rots the bulbs, so drainage matters most; and because garlic feeds heavily on sulphur — the nutrient behind both yield and the sharp garlic taste — working manure and sulphur in now sets the crop up before a single clove goes in.
Choose a well-drained spot that has not grown garlic or onions for 3–4 years — this breaks the build-up of white rot and nematode that gather in soil under Allium (the onion-and-garlic family).
In the 2–3 weeks before planting, dig the bed over about a spade's depth and break the clods to a fine, crumbly tilth (loose, soft soil) so the shallow roots spread easily. Sandy loam or ordinary loam is best; heavy soil must be loosened well and raised so water drains away.
Work in plenty of well-rotted manure or compost — dark, crumbly, no strong smell — spread as an even dressing and forked in, not left in lumps or piles. Fresh manure burns the roots and brings weed seeds, so it must be fully rotted first.
Mix in the sulphur and base fertiliser your recommendation gives, spread evenly through the topsoil. Sulphur is garlic's signature nutrient — it drives both the yield and the sharp taste, so don't leave it out.
On flat or heavy ground, raise the bed or make ridges so rain drains off — garlic sitting in water rots at the base.
- Do:
Raise or ridge the bed wherever water might sit — good drainage is the cheapest disease control garlic has.
- Tip:
Fresh, raw manure — it scorches the shallow roots and carries weed seed; use only well-rotted manure or compost.
- Watch out:
Wash your hands after handling manure and fertiliser, and keep both away from food, drinking water and children.
Plant your cloves and get them rooting
Now you set the crop in the ground — and how many big, evenly-spaced, well-rooted plants you get here is the ceiling on your harvest. Plant each clove the right way up at the right depth and spacing, keep the bed evenly moist so the shallow roots take hold, and knock out the first weeds early, because garlic's few thin leaves are poor at fighting weeds. Too little cold before now gives undivided 'rounds'; cloves set upside-down or too deep give small, twisted bulbs.
Plant cloves (3–5 cm, tip up) Critical
This one moment fixes spacing, depth and the right-way-up — and you cannot change any of them later. Cloves set tip-up at the right depth and spacing root fast and grow into big, round, well-wrapped bulbs; cloves planted upside-down, too deep or too crowded make small, twisted, forked bulbs.
Plant into a moist bed — damp enough that a squeezed handful of soil holds together but isn't muddy. If it is dry, water the day before.
Set each clove tip (pointed end) up, flat root-plate down — the shoot grows from the tip, so an upside-down clove wastes its strength curving around and makes a bent bulb.
Push each clove in one finger-joint deep (3–5 cm), the tip just covered — a little deeper in sandy soil, shallower in heavy soil.
Space the cloves about one and a half hand-spans between rows (30 cm) and half a hand-span along the row (10 cm) — a hand-span being the stretch from thumb to little finger, about 20 cm.
Place the base fertiliser — phosphorus, sulphur and a little starter nitrogen, the amount your recommendation gives — worked into the bed or banded just below the cloves, not touching them.
Firm the soil over each clove so it sits snugly in moist earth, and keep the bed evenly moist, since the roots are shallow and dry out fast.
- Do:
Set every clove tip-up and firm the soil around it — good soil contact means fast, even rooting.
- Tip:
Planting cloves upside-down or too deep — both give small, mis-shapen, late bulbs you can't fix later.
- Watch out:
Keep the starter fertiliser off the cloves themselves — fertiliser salt touching the clove burns the young roots.
Keep evenly moist Critical
Garlic roots are shallow and short, so the topsoil is all they can reach — and it dries out fast. Steady moisture in the first 3 weeks wakes the cloves and roots them evenly; let the bed dry out and rooting stalls, giving a gappy, uneven stand.
From planting through the first 3 weeks, keep the topsoil evenly moist — damp, never soggy.
Water little and often: every 4–6 days, and more often on sandy soil or in heat that dries the surface quickly.
Check with a finger — water once the top few centimetres feel dry, before the surface bakes into a hard crust.
Don't flood the bed. Garlic rots in standing water, so drain any spot where water pools.
- Tip:
Letting the bed dry out and crust over in the first weeks — the shallow roots stall and the stand comes up patchy.
- Watch out:
Waterlogging — garlic bulbs rot fast in soil that stays wet; keep it damp, not drowned.
Early weeding Recommended
Garlic's few thin, upright leaves cast almost no shade, so it is a poor competitor — weeds steal its light, water and food right from the start. Clearing weeds as soon as the shoots are up keeps that early theft off your crop, when it hurts most.
As soon as the young green shoots break through (about 1–2 weeks after planting), start weeding — don't wait for the weeds to get ahead.
Pull weeds by hand or hoe very shallowly between the plants; garlic roots sit just under the surface and are easily cut.
Take special care right next to each plant — loosen weeds gently by hand rather than chopping in deep.
In dry areas, leave the pulled weeds lying between the rows as a light mulch to hold moisture.
- Do:
Weed early and often — a clean bed in the first weeks is worth far more than a big rescue clean-up later.
- Watch out:
Hoe shallow near the plants — a deep hoe slices the shallow garlic roots and checks growth.
Grow the leaves — feed, weed and beat the thrips
Every leaf the plant grows now becomes a wrapper layer around a future clove, so this leaf-building stage sets how big the bulb can get. Feed nitrogen and sulphur in small splits so the rain doesn't wash them away, keep weeding shallow and often, and above all scout for thrips — the tiny insects that are garlic's number-one pest and open the door to leaf disease.
Split-N top-dress (with sulphur) Recommended
Growing leaves eat a lot of nitrogen (N) for green growth and sulphur (S) for yield and pungency — but nitrogen washes away in the rain if you dump it all at once. Splitting it into two smaller feeds during leaf growth keeps more in the soil where the shallow roots can reach it, building the big canopy that fills the bulb.
Give the first feed about 3 weeks after planting, once the leaves are actively growing, and the second about 3 weeks after that (by around 6–8 weeks after planting) — never all in one go.
Use the nitrogen-with-sulphur amount from your recommendation. A sulphur-containing fertiliser feeds both needs at once and sharpens the garlic taste.
Band it in a shallow line to the side of the row, not on top of the plants, then cover it or water it in so it doesn't gas off into the air or scorch the leaves.
Feed onto moist soil, after a weeding or a light rain, so it moves down to the roots.
Watch the leaves for hunger: pale, yellowing young leaves point to a shortage of sulphur; pale older, lower leaves point to a shortage of nitrogen — either one is your cue that the crop needs its feed.
- Do:
Feed little and often, and keep weeding shallow — garlic's shallow roots need the food close by and the weeds gone.
- Tip:
Putting all the nitrogen on at once — one heavy rain washes it past the roots and wastes your money.
- Watch out:
Keep fertiliser off wet leaves and wash your hands afterwards; keep it away from food, water and children.
Careful shallow weeding Recommended
Garlic never shades the ground, so weeds keep coming all season and keep stealing the water, light and fertiliser you paid for. Regular weeding through leaf growth protects that food for the crop — but the roots are shallow, so how you weed matters as much as whether you weed.
Weed every 10–14 days from about 3 weeks after planting — little and often beats one big rescue.
Hoe or pull shallowly. Garlic roots sit just below the surface; deep hoeing cuts them and stunts the plant.
Be gentlest right beside each plant — flick out those weeds by hand rather than driving a hoe in close.
In dry weather, lay the pulled weeds between the rows as a mulch to keep the soil moist.
- Do:
Keep the bed clean the whole way through — garlic's thin leaves never out-shade weeds on their own.
- Watch out:
Shallow strokes only near the plants; a deep hoe near garlic does more harm than the weeds it removes.
Scout thrips Critical
Onion thrips are garlic's worst pest. They are tiny slivers that scrape open the leaves and suck the sap, silvering the leaves and shrinking the bulb — and the wounds they leave let purple blotch disease in. They breed fastest in warm, dry spells, so catching them early, before they build up, is the whole game.
Walk the crop twice a week (every 3–4 days), starting from about 3 weeks after planting. Don't only check the row nearest the path — walk right across the bed and stop at several spots, so a patch building up in the middle doesn't hide from you.
At each spot, part the leaves on a few plants and look for the thrips: tiny pale-yellow to brown slivers, smaller than a rice grain, that slide into cover when disturbed. They shelter in the leaf folds and where the leaf wraps around the stem — check those hidden spots first.
Look for their damage too: silvery-white streaks and blotches on the leaves where they have scraped the surface away. The silvering stays even after the thrips move on, so it's the live thrips you count — treat when you are finding about 1–3 thrips on most leaves you check.
While you are down there, also look for dark, sunken purple-brown blotches ringed with yellow on the leaves (purple blotch, a leaf fungus that spreads in warm, humid, dewy weather) and small orange-brown powdery spots (rust, another leaf fungus).
And look for any plant that is oddly soft, stunted, yellowing or twisted — pull one and check below ground: a bloated, spongy base or a rotten root-plate points to nematode (a tiny worm) or base rot.
If thrips are over the treat level, spray a recommended product in the cool of the day, and rotate to a different chemical group each time you spray so the thrips don't become immune (resistant) to it. If you scout and stay under the level → don't spray; just keep watching.
- Watch out:
Thrips explode in hot, dry weather — scout more often through dry spells, when a light infestation can blow up in days.
- Do:
Rotate spray groups between sprays; thrips build up resistance fast if you hit them with the same chemical over and over.
- Watch out:
When you spray, cover your skin, nose and eyes, spray in the cool with the wind at your back and away from food, and wash well after. Respect the pre-harvest interval — the days the label says to wait between spraying and eating the crop.
Bulbing — the make-or-break window
As the days lengthen and the cold requirement is met, the plant stops making leaves and the cloves begin to divide and swell into the bulb — the stage of highest water and food demand and garlic's most moisture-sensitive moment. Keep the water steady, ease off the nitrogen so the bulbs firm up for storage, and keep hammering the thrips, which now peak. A dry spell or a nitrogen overdose here is where a good crop is lost.
Keep water non-limiting Critical
Bulbing is garlic's thirstiest, most water-sensitive stage — this is when the bulb actually fills out. Let the soil dry now and the bulbs stay small and split into loose segments; this single stage decides the size of everything you lift.
From about 10 weeks after planting until roughly 20 weeks, keep the soil steadily moist right through bulb swelling — never let the crop wilt.
Water every 5–7 days, and more often in heat or on sandy soil that dries fast.
Check with a finger and water before the plants show any thirst; a dry check at bulbing costs you bulb size you can't get back.
Keep it evenly moist — big swings from bone-dry to flooded make the bulbs split and crack.
- Tip:
Heavy nitrogen now — a late nitrogen push gives soft, thick-necked bulbs that store badly and ripen late.
- Watch out:
Uneven watering — dry-then-drenched cycles crack the bulbs; steady moisture is what you want.
Stop heavy N Recommended
Once the bulbs start swelling, more nitrogen works against you — it pushes soft, leafy growth and thick necks instead of firm bulbs, delays ripening, and gives bulbs that rot in store. Stopping the heavy feeding now is what makes the crop keep.
By about 10–11 weeks after planting, once bulbing has begun, stop the heavy nitrogen feeds.
Any remaining need is for sulphur (S) and potassium (K) — the finishing nutrients that firm the bulb and sharpen the taste — not more nitrogen.
Let the plant now put its strength into swelling and firming the bulb rather than growing more leaf.
- Tip:
A late nitrogen top-up to 'green it up' — it trades storable bulbs for soft, thick-necked ones that spoil in the store.
Continue thrips scouting Critical
Thrips pressure is now at its peak, and a bulbing plant robbed of leaf by thrips fills a smaller bulb — the damage lands straight on your yield. Keep scouting twice a week so no outbreak runs away with the crop at its most important stage.
Keep walking the crop twice a week (every 3–4 days) right through bulbing, stopping at several spots across the whole bed, not just the edge nearest the path.
Look for the tiny pale slivers in the leaf folds and stem joints, and the silvery streaking on the leaves they have rasped — treat at about 1–3 thrips per leaf.
Keep looking for the dark purple-brown blotches ringed with yellow of purple blotch, which thrips wounds make worse in warm, humid weather — the more thrips damage, the more blotch.
When you spray, rotate to a different chemical group each time, cover your skin, nose and eyes, spray in the cool with the wind behind you and away from food, respect the label's pre-harvest interval (the wait-days before eating the crop), and wash well after.
- Watch out:
Peak thrips in a dry spell can strip the leaves in days — at the exact stage that fills the bulb, so don't miss a scouting round now.
- Do:
Keep rotating spray groups so late-season thrips don't shrug off your chemicals.
Ripen, stop water and lift
The crop is now finishing — the leaves start to yellow and topple, and the job switches from growing to firming the bulbs and getting them out cleanly. Take the crop off water a couple of weeks before lifting so the skins tighten and the bulbs cure well, then lift gently when most tops have fallen. Leave it too long and the bulbs split and their protective skins rot; harvest too rough and they bruise.
Stop irrigation ~2–3 weeks pre-lift Critical
Cutting off the water before harvest tells the bulb to stop swelling and start firming, tightens the papery wrapper skins (the dry outer layers that protect the bulb), and starts the drying (curing) the bulb needs to store. Bulbs lifted straight out of wet soil are soft, stain easily and rot in the store.
About 2–3 weeks before you expect to lift (roughly 20–23 weeks after planting), once the lower leaves are yellowing, stop watering.
Let the soil dry down so the bulbs firm up and their outer skins tighten into a dry, papery wrapper.
Watch the tops: when about a third to a half of the leaves have yellowed and flopped over, and the necks have gone soft, the crop is nearly ready to lift.
If your area gets late rain, drain the bed well — you want the soil drying, not soaking, into harvest.
- Do:
Harvest before all the leaves die off — the wrapper skins that protect the bulb form from the green leaves, and an over-ripe bulb splits and stores badly.
- Watch out:
Keep the drying bed from flooding in late rain — wet soil at ripening undoes the firming and invites base rot.
Lift gently Critical
Garlic bulbs bruise and cut easily, and every knock is a doorway for rot in store. Lifting gently at the right moment — most tops down, skins tight — is what carries the crop whole into curing and sale.
Lift when most of the tops have yellowed and fallen and the necks are soft — around 21–26 weeks after planting. First dig one test bulb: it is ready when the cloves are well-divided and the outer wrapper skins are tight and papery.
If the test bulb's cloves are still not divided, or the skins are thin and soft → it is not ready. Wait a few more days and test another bulb before you lift the whole crop.
When it is ready, loosen the soil with a fork a little way from the row, then ease each bulb out by hand — don't yank the tops, or you tear the bulb or snap the neck.
Handle them like eggs: don't drop, throw or bang the bulbs together — every bruise turns into rot later.
Set aside any bulb that is soft or rotten at the base plate (a sign of fusarium basal rot, a fungus that rots the root-plate) — don't cure or store it, and keep it away from the healthy ones.
Don't wash the bulbs; brush off the loose soil gently, leave the tops and roots on for now, and move them out of the hot sun to a shady, airy place to cure — never leave them baking in the field.
- Do:
Lift on a dry day and keep the bulbs shaded — sun-scald spoils the skins, and full sun on freshly-lifted bulbs cooks them.
- Tip:
Pulling bulbs up by the tops or knocking the soil off hard — both bruise and split the bulb and shorten its storage life.
- Watch out:
Leaving the crop in too long — over-mature bulbs burst their skins, split into loose cloves and store poorly.
Cure, clean and store
The crop is grown — now don't lose it in the store. Almost all garlic that spoils went in soft or not properly dried. Curing — drying the whole plant in a shady, airy place for a few weeks until the necks and skins are bone-dry — is what lets garlic keep for months. Cure it hard, clean and grade it, store it cool and dry, and save your best bulbs as next season's seed cloves.
Cure, clean, grade & store Critical
Curing is what makes garlic store. Bulbs put away before the necks and skins are fully dry sweat, mould and rot within weeks; properly cured bulbs keep for months. This last step protects everything the whole season put into the ground.
Right after lifting, cure the whole plants — tops, bulbs and roots still on — for 2–4 weeks in a dry, shady, airy place. Hang them in bunches or lay them in a single layer on racks; never cure in direct sun (it scalds) or in a damp, closed room (it rots).
Good airflow is everything — spread them out so air moves around every bulb, and turn them now and then if they are in a pile.
The cure is done when the necks and outer skins are fully dry — the neck is tight and papery, not soft or juicy, and the outer wrappers rustle like paper (usually after 2–4 weeks).
If the necks are still soft or the skins are damp after that → the bulbs are not ready. Keep curing in a drier, airier spot and do not bag them up yet — storing them wet is the fastest way to lose the crop.
Once fully dry, trim the roots and cut the tops (or plait them), rub off the loose outer skins and any soil, and grade the bulbs by size — but leave enough tight wrapper skins on to protect each bulb.
Store the cured bulbs cool, dry and airy — in nets, plaits or open baskets off the floor — never in sealed plastic, which traps damp and rots them.
Set aside your biggest, healthiest bulbs as next season's seed cloves, and store them separately so they don't get eaten or sold.
- Do:
Keep back your best, largest bulbs for seed — good seed cloves are the cheapest way to a good crop next year.
- Tip:
Storing garlic in sealed plastic or a damp room — trapped moisture brings mould and neck rot (a grey mould that softens the neck in store).
- Watch out:
Pull out at once any bulb going soft, grey-mouldy at the neck, or rotten at the base plate in store — one bad bulb spreads rot to the rest.
Pests and diseases that attack garlic


Where to sell garlic
Markets that trade this crop — what each one sells it by, when supply peaks there, and the currency used.


Grow garlic with a plan, not a guess
This guide is the general answer. Divisi works out yours — the week to plant garlic on your soil and your rainfall, and each job dated for your field.


When to plant garlic, country by country
- When to plant garlic in Algeria
- When to plant garlic in Angola
- When to plant garlic in Botswana
- When to plant garlic in Burundi
- When to plant garlic in Cabo Verde
- When to plant garlic in Cameroon
- When to plant garlic in Comores
- When to plant garlic in Egypt
- When to plant garlic in Eritrea
- When to plant garlic in Eswatini
- When to plant garlic in Ethiopia
- When to plant garlic in Guinea Ecuatorial
- When to plant garlic in Kenya
- When to plant garlic in Lesotho
- When to plant garlic in Libya
- When to plant garlic in Madagascar
- When to plant garlic in Malawi
- When to plant garlic in Mali
- When to plant garlic in Mauritanie
- When to plant garlic in Mauritius
- When to plant garlic in Morocco
- When to plant garlic in Moçambique
- When to plant garlic in Namibia
- When to plant garlic in Niger
- When to plant garlic in Nigeria
- When to plant garlic in Rwanda
- When to plant garlic in République démocratique du Congo
- When to plant garlic in Somalia
- When to plant garlic in South Africa
- When to plant garlic in South Sudan
- When to plant garlic in Sudan
- When to plant garlic in Tchad
- When to plant garlic in Tunisie
- When to plant garlic in Uganda
- When to plant garlic in United Republic of Tanzania
- When to plant garlic in Zambia
- When to plant garlic in Zimbabwe
Where garlic scores best
Districts where Divisi's engine currently rates this crop highest, ranked by fit.


Get Insights by email
A short digest of new Divisi articles. No email on quiet weeks.
Frequently asked questions
How do I grow garlic?
How to grow garlic: 120–210 days to maturity, 30 cm rows, 3–5 cm deep. Also called knoffel, nech shinkurt, ail, tafarnuwa, alho, kitunguu saumu, àyù.
What is knoffel in English?
Knoffel is the Afrikaans name for garlic.
What is nech shinkurt in English?
Nech shinkurt is the Amharic name for garlic.
What is ail in English?
Ail is the French name for garlic.
What is tafarnuwa in English?
Tafarnuwa is the Hausa name for garlic.
What is alho in English?
Alho is the Portuguese name for garlic.
What is kitunguu saumu in English?
Kitunguu saumu (also kitunguu thomu) is the Swahili name for garlic.
What is àyù in English?
Àyù is the Yoruba name for garlic.
How long does garlic take to grow?
Garlic takes about 120–210 days from sowing to maturity, though the exact length varies with variety, temperature and how the season runs.
What spacing should I use for garlic?
Space garlic rows about 30 cm apart, with roughly 10 cm between plants within the row.
How deep should garlic be planted?
Sow garlic at about 3–5 cm deep. Shallower risks drying out; deeper wastes seed energy before the shoot reaches light.
What pests and diseases attack garlic?
The ones covered in this guide are Botrytis neck rot, Fusarium basal rot, Purple blotch. Each has its own page explaining how to identify, check for and control it.