 Divisi
How to grow hot pepper
Capsicum annuum · Solanaceae
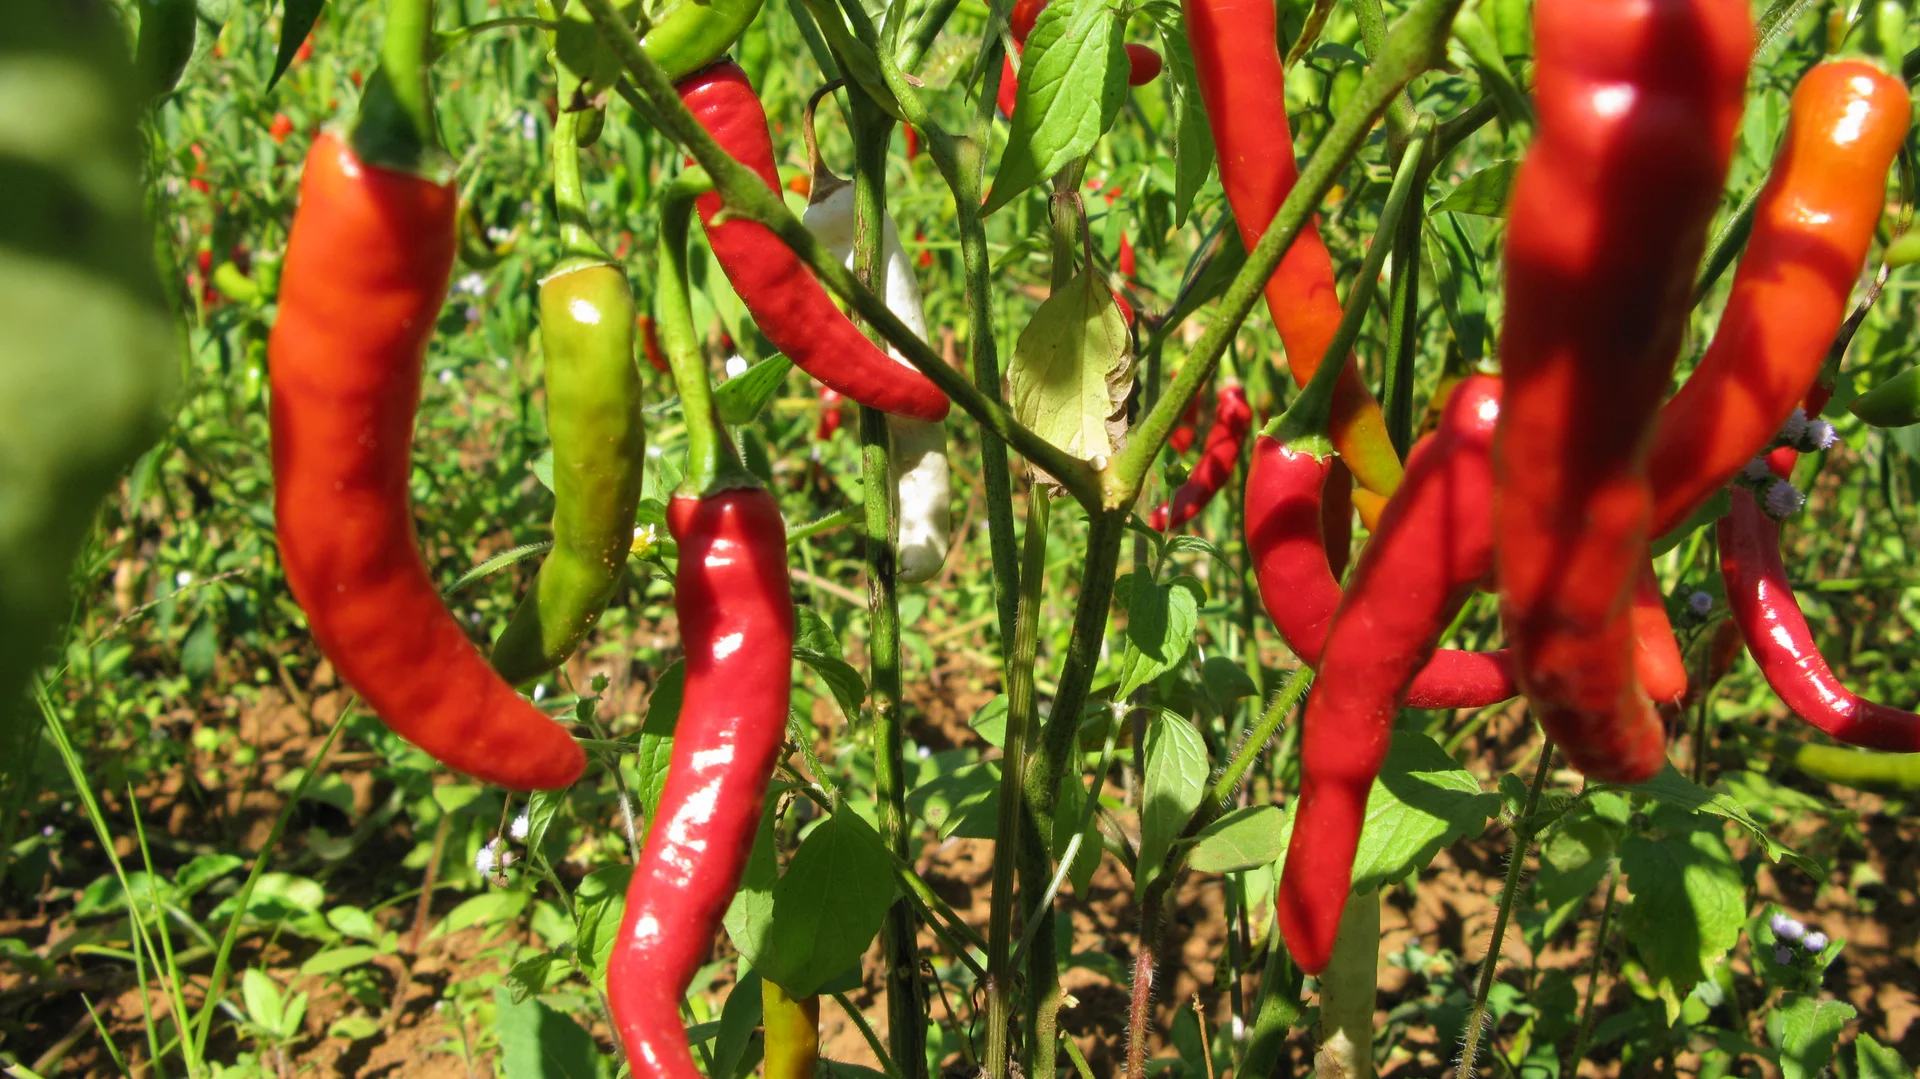
Photo: Vyacheslav Argenberg · CC BY 4.0
Hot pepper — chilli, mhiripiri, pilipili kali, barkono, ata eiye — is the small, fiery Capsicum grown for the burn in its fruit. That burn comes from capsaicin, the substance that makes chilli hot; it builds as the fruit ripens and is strongest when the pod turns fully red. Chilli loves warmth but hates wet feet: its soft roots rot in soggy ground. You do not sow it straight into the field — you raise the tiny, slow seed in a small protected nursery, move the young plants onto well-drained beds, then pick the pods again and again over two to three months, fresh or dried. It rewards care but it is fussy: it drowns in waterlogged soil, it is crippled by the tiny insects (thrips, mites, whitefly) that curl and stunt its leaves, and dry chilli must be dried fast and clean to be safe to eat and sell. The hotter kinds — bird's-eye, piri-piri, habanero — can be cut back and kept for a second or third year.
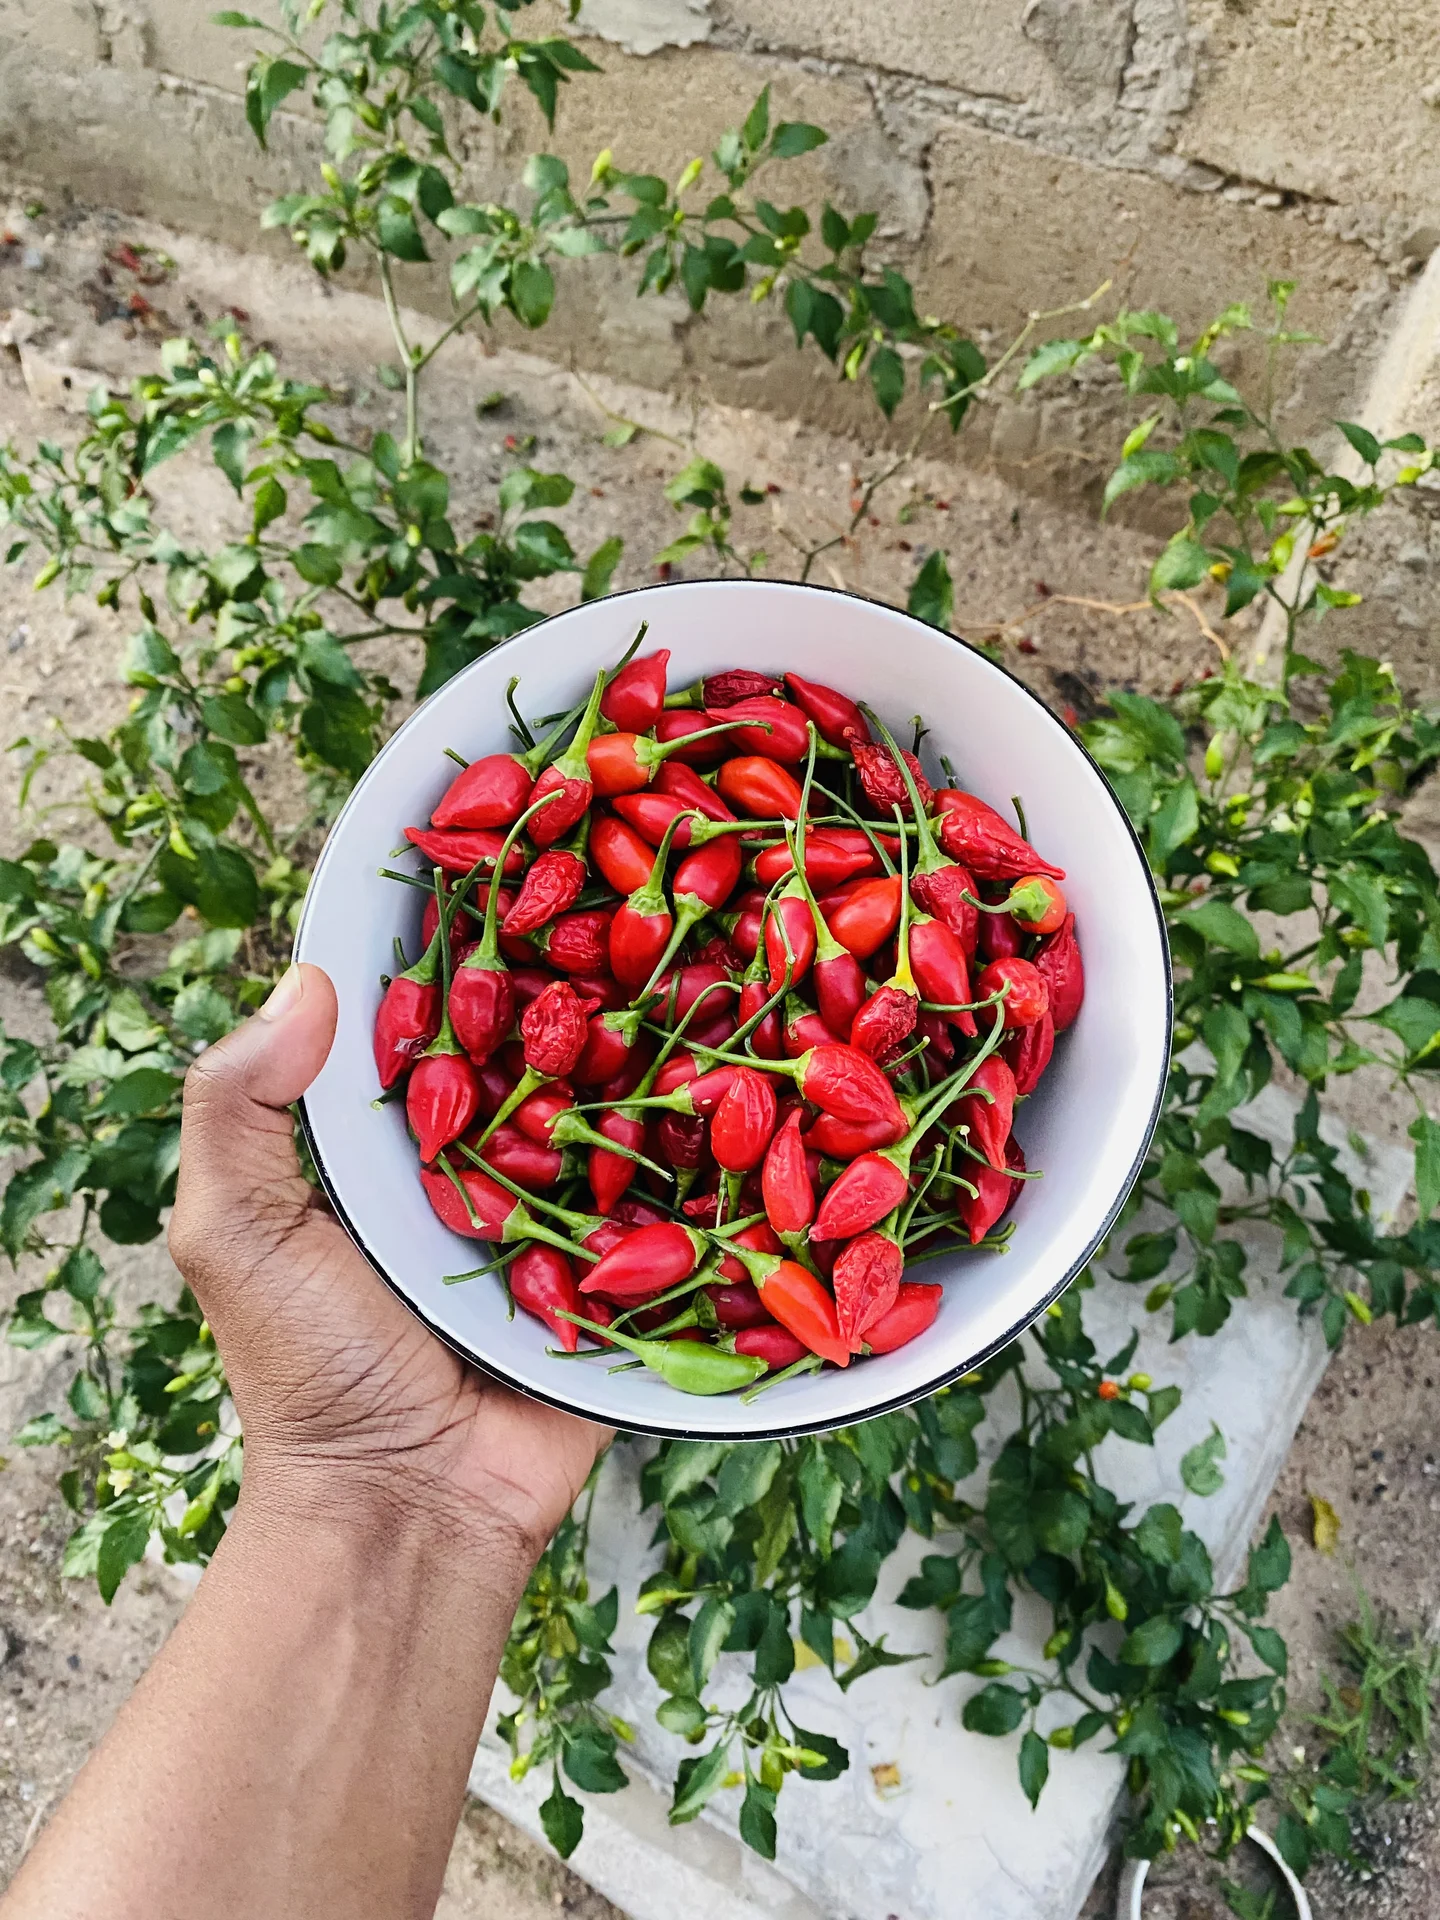
Mwewannie D · CC BY-SA 4.0 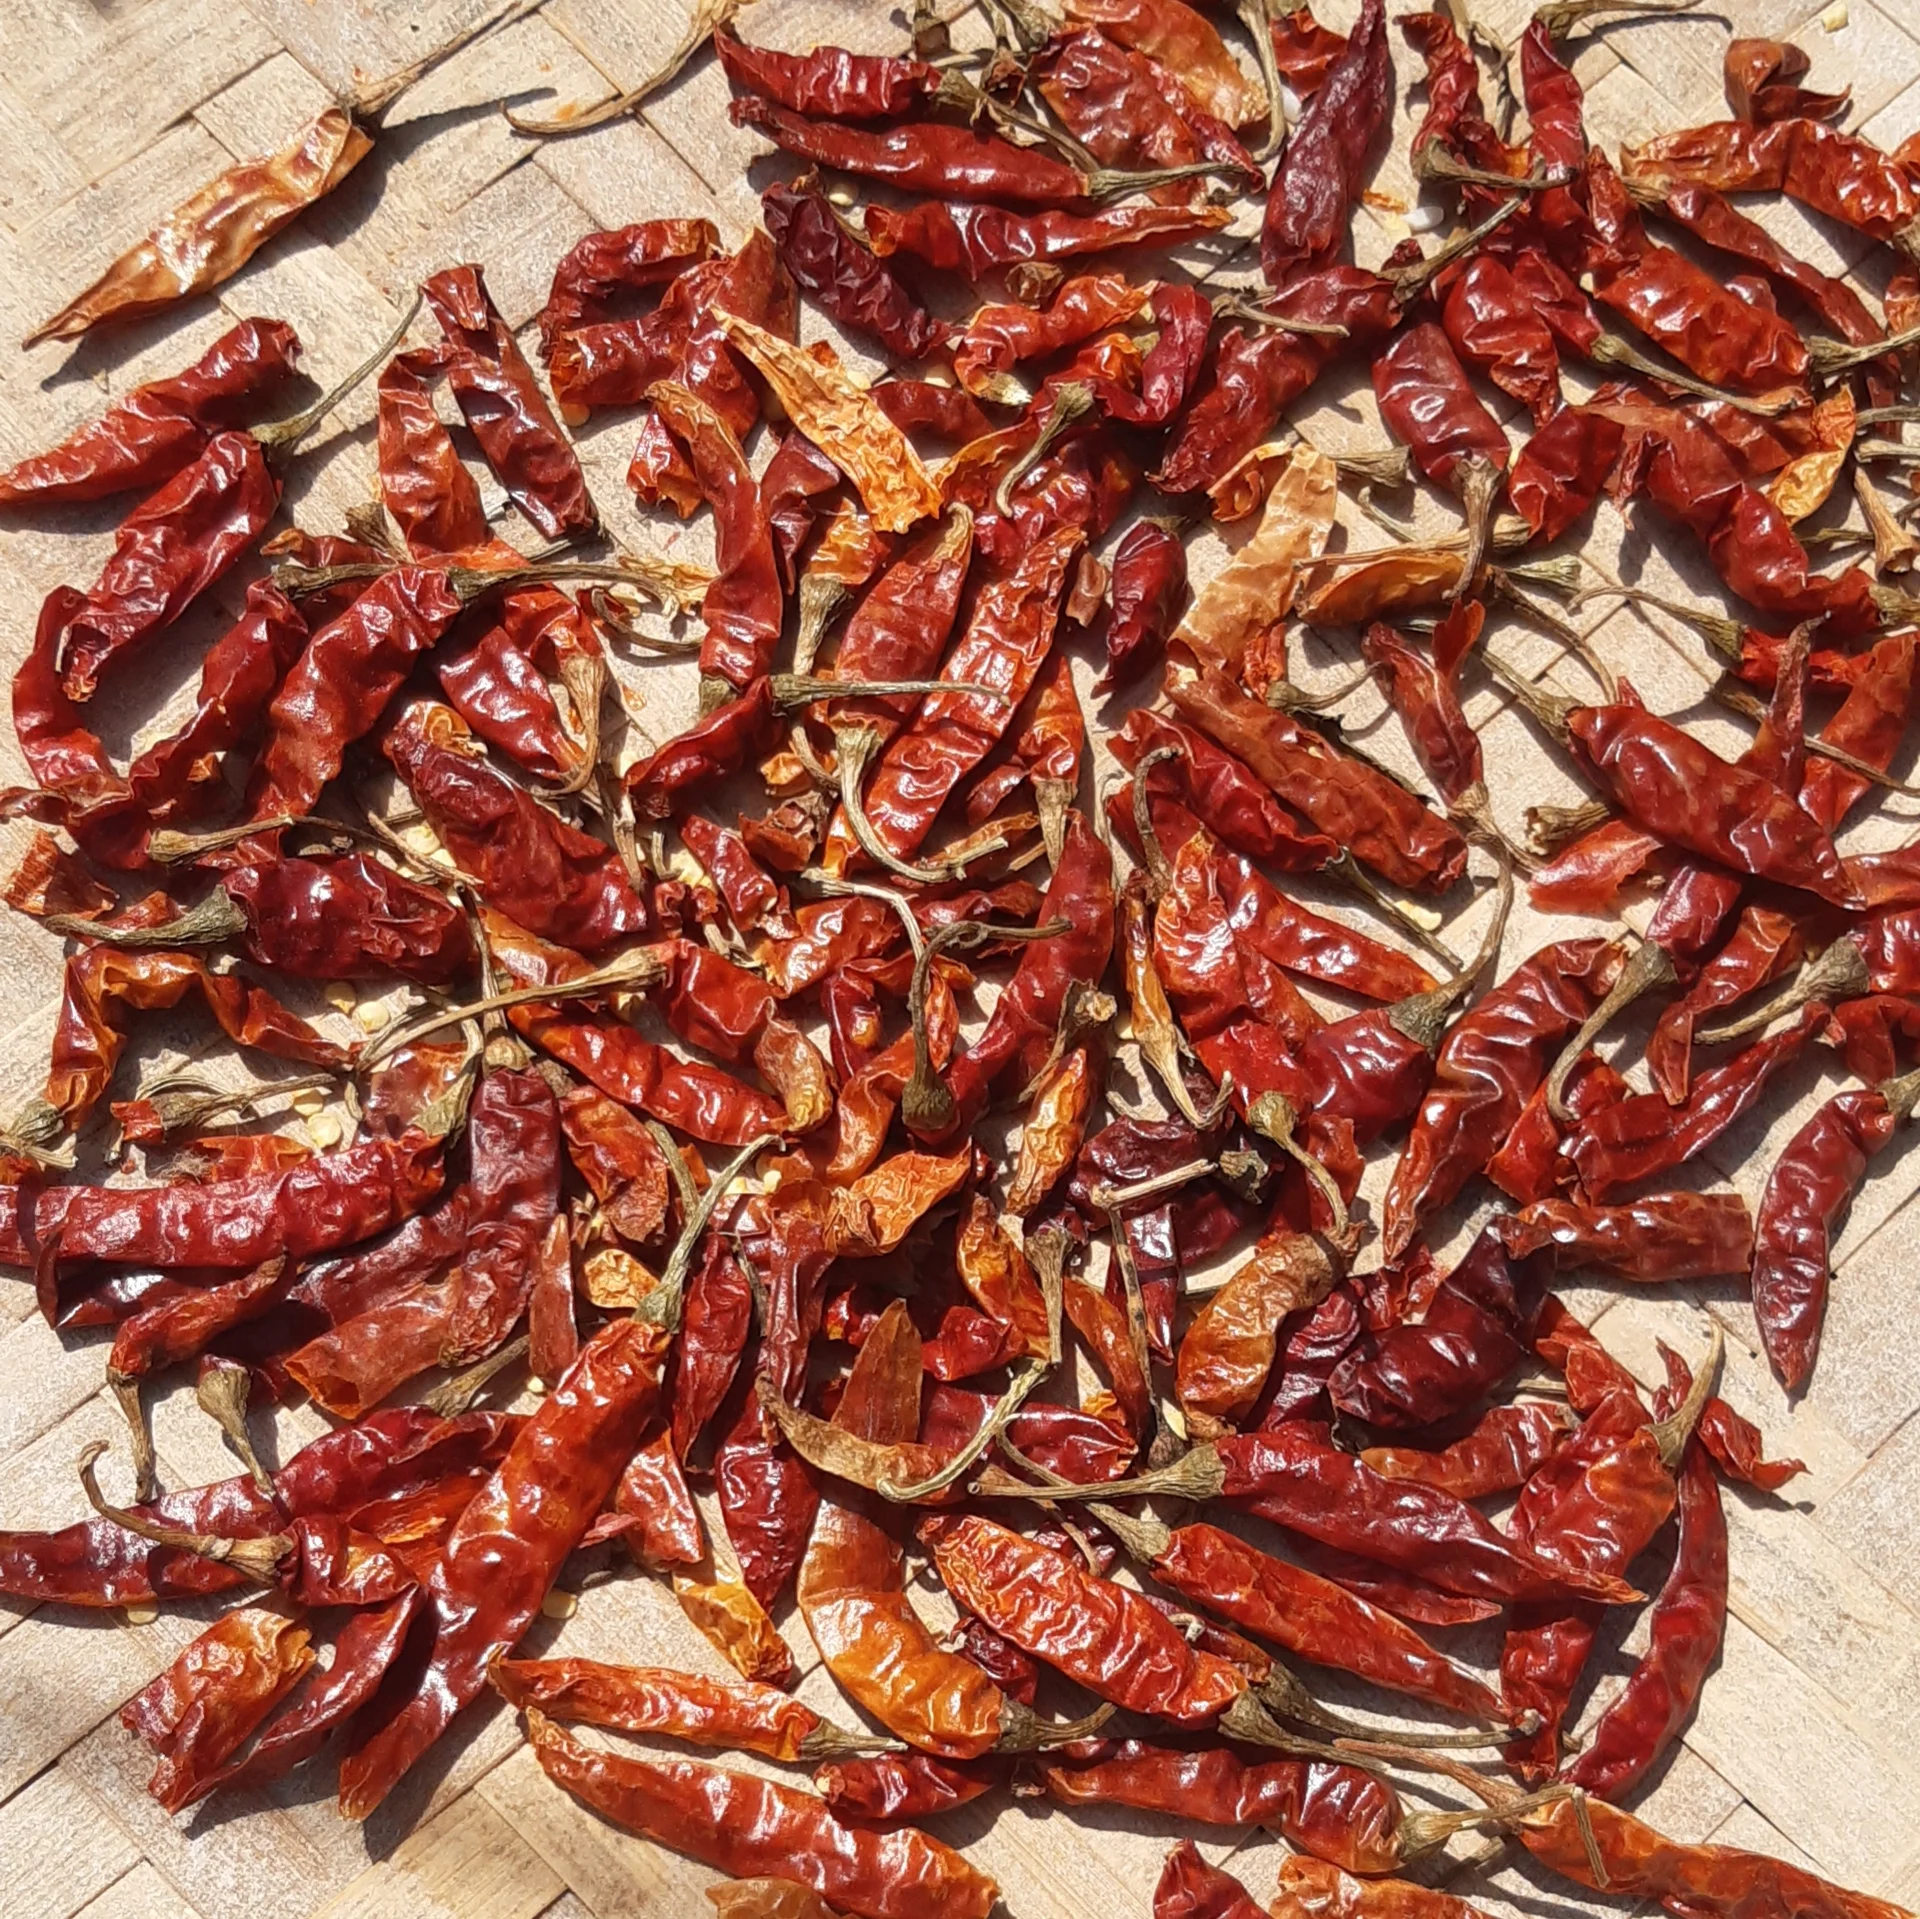
Sabina Bajracharya · CC BY-SA 4.0
- Days to maturity
- 150–210 days
- Row spacing
- 75 cm
- Plant spacing in the row
- 45 cm
These are general figures for the crop, compiled from published agronomic references including FAO and CABI. The right choice for your field depends on your soil, rainfall and the yield you are aiming for.
Will hot pepper actually do well on your field? Check your own field against every crop in the catalogue — no signup. Run the crop check →
Also known as
Hot pepper is also called chilli, bird's-eye pepper and African bird pepper.
- English
- chilli, bird's-eye pepper, African bird pepper
- Afrikaans
- rissie
- Amharic
- qariya
- Chichewa
- tsabola
- French
- piment
- Hausa
- barkono, atarugu
- Portuguese
- pimenta, piri-piri, malagueta
- Shona
- mhiripiri
- Swahili
- pilipili kali, pilipili
- Yoruba
- ata, ata eiye, ata rodo
Working in buckets, bags or paces? The farming glossary turns the measures growers actually use into kilograms and hectares — what a 20 litre bucket of each crop really weighs, and how to size a field by walking it — alongside the Shona, Swahili, Ndebele and Yoruba words used in the field. Open the glossary →
Growing hot pepper, stage by stage
Your chilli season, step by step — raise sturdy seedlings in a netted nursery, move them onto well-drained raised beds, feed and guard them against the tiny leaf-curling pests, then pick the fruit again and again for two to three months and dry it fast and clean.
Raise strong seedlings in a nursery
Chilli seed is tiny and slow, so you don't sow it into the field — you raise it in a small, protected nursery for about 4–6 weeks first. A clean, free-draining seedbed under a fine insect-proof net gives you sturdy, disease-free seedlings and keeps out the tiny insects (thrips, whitefly) that carry the viruses which cripple chilli. Get the nursery right and the whole season starts strong.
Prepare & sterilise the seedbed Recommended
Chilli seedlings are delicate. A dirty, wet, badly-drained seedbed rots them off at the base — a disease called damping-off — before they ever reach the field, and an open nursery lets in the thrips and whitefly that carry viruses onto your young plants. A clean, netted, free-draining bed is the cheapest insurance you can buy.
Do this in the 2–3 days before you sow. Pick a spot with good drainage and morning sun, well away from any tomato, potato, pepper or eggplant plot — those crops leave behind the same wilt and root pests that attack chilli.
Build a raised seedbed about a hand-span high (≈20 cm) so water drains away fast. Seedlings sitting in cold, wet soil rot off at the stem.
Clean the bed — take out old roots, stones and weeds. If you can, sterilise the topsoil: drench it with boiling water, or cover the damp soil with clear plastic in the hot sun for a few weeks. This kills the rot fungi and weed seeds.
Cover the bed with a fine insect-proof net on a low frame. This is the single most important step — it keeps out the thrips and whitefly that bring the viruses that curl and stunt chilli.
- Do:
Raise the nursery under fine insect-proof net — keeping the virus-carrying thrips and whitefly off the seedlings is worth more than any spray later.
- Tip:
Siting the nursery where tomato, potato, pepper or eggplant just grew — they hand bacterial wilt and root nematodes (tiny soil worms that attack roots) straight to your chilli.
- Watch out:
Cool, soggy, over-watered soil is what triggers damping-off — keep the bed raised and never waterlogged.
Sow clean/hot-water-treated seed Critical
This is the start of every plant you will grow. Clean seed sown thinly on a warm, moist bed gives even, sturdy seedlings. Dirty saved seed can carry anthracnose — a fruit-rotting fungus — into the crop, and seed sown thickly, cold or soggy rots or grows thin and leggy (tall, weak and floppy).
Use certified clean seed if you can. If you must use your own saved seed, treat it first against seed-borne anthracnose: soak it in hot — not boiling — water, about 50 °C (hot to the hand but you can still hold a finger in it), for roughly half an hour, then dry it in the shade.
Sow the seed thinly — scatter it, or drop it in shallow lines, so seeds sit about a finger-width apart and never touch. Crowded seedlings grow thin, leggy and rot more easily.
Barely cover the seed — no deeper than a fingernail (a few mm) of fine soil. Chilli seed is tiny; sown too deep it never comes up.
Keep the bed warm and evenly moist — chilli sprouts best at 20–24 °C. Water gently in the morning with a fine rose (a sprinkler head) so you don't wash the seed out, and never leave it waterlogged.
Seedlings take 1–3 weeks to appear. Keep them netted and weeded, and thin out any crowded, weak ones so the rest grow short and stocky.
- Do:
Water in the morning so the bed isn't wet and cold overnight — that is when damping-off strikes.
- Tip:
Sowing thickly and deep — it gives you weak, leggy, disease-prone seedlings.
- Watch out:
Seedlings that suddenly flop over with a thin, water-soaked, pinched stem right at the soil line are damping-off — cut back watering at once and remove the fallen ones with the soil around them.
Harden off Recommended
A pampered seedling moved straight from a soft, shaded nursery into the open field gets a shock — it wilts, stalls or dies. Hardening off — toughening the seedlings for a week or two before the move — means they take root and grow away instead of sulking.
Start about 1–2 weeks before you transplant — roughly 4–6 weeks after you sowed the nursery.
Cut back the watering — water less often, letting the seedlings feel slightly dry between waterings so their stems toughen.
Open the net and give them more sun each day, a little longer at a time, so they get used to full sunlight and wind.
They are ready when they are sturdy and stocky with 4–5 true leaves (the real leaves that come after the first two rounded seed-leaves), about as tall as your hand is long (15–20 cm) — transplant them then.
- Do:
Water the seedlings well the evening before you lift them, so the roots come out in a ball of moist soil and don't tear.
- Tip:
Letting seedlings grow tall, soft and leggy — short, stocky transplants establish far better.
Prepare the beds and get your seedlings
While the nursery grows, get the field ready. Chilli lives or dies on drainage — its roots rot in wet soil — so the whole job here is well-drained raised beds, worked-in compost and the first (basal) fertiliser, on land rested from tomato-family crops. If you're not raising your own seedlings, buy strong, clean ones now.
Prepare raised beds + basal Critical
Chilli's worst soil diseases — bacterial wilt and root rots — all thrive in wet ground, and once bacterial wilt is inside a plant there is no cure. Raised beds that shed water, on land rested from tomato-family crops, are your main defence. The basal fertiliser (the first feed, worked in before planting) builds the strong early root the crop needs.
Do this in the 2 weeks before transplanting. Choose land that did not grow tomato, potato, pepper, eggplant or okra last season — better still, one rested under a cereal (maize, sorghum) for 2–3 seasons. Those crops share chilli's wilt and nematode enemies and leave them in the soil.
Make raised beds about a hand-span high (≈20 cm) so rain drains away — wet feet kill chilli. Keep each bed narrow enough to reach the middle from the path without stepping on it — about one metre wide.
Work in well-rotted compost or manure — dark and crumbly with no strong smell — to feed the soil and help the bed hold steady moisture. Use only well-rotted material; fresh manure burns young roots.
If your soil is sour (acid) — past crops stayed yellow and stunted, or a test reads below pH 5.5 — work in lime now. Lime also adds calcium, which chilli needs to avoid blossom-end rot (a rot at the bottom tip of the fruit) later.
Work the basal fertiliser into the bed just before transplanting — your recommendation gives the exact amount and type. This phosphorus-rich feed is what drives early rooting.
- Do:
Build the beds high and free-draining — good drainage is the best protection you have against bacterial wilt and root rot.
- Tip:
Following tomato, potato, pepper or eggplant — bacterial wilt and nematodes carry straight over into your chilli.
- Watch out:
Wash your hands after handling lime and fertiliser, keep them off food, water and children, and out of your eyes.
Source healthy seedlings Critical
If you're not raising your own, the seedlings you buy are your crop — a sick or leggy transplant never fully recovers, and a single virus-infected seedling can seed the whole field. Buy strong, clean plants from a trusted nursery in the week before you transplant.
Buy stocky, dark-green seedlings with 4–5 true leaves and a thick stem — not tall, thin, yellow or pot-bound (roots coiled tight in the pot) ones.
Check each one: no curled, crinkled or mottled (blotchy light-and-dark) leaves — a sign of virus — no wilting, no spots. Reject the whole batch if many look sick.
Buy from a nursery that raises its seedlings under net — those carry the fewest thrips, whitefly and viruses.
Transplant them within a day or two of buying, and keep them shaded and watered until you do.
- Do:
Pick short, stocky, deep-green seedlings — they root fast and catch up quickly.
- Tip:
Buying cheap, leggy or yellowing seedlings, or any with curled leaves — you're buying a poor crop and maybe a virus.
Transplant and get them growing
Moving day. Set the seedlings onto the raised beds at the right spacing, water them in, and give the first feed to the side. The next two weeks are about getting every plant to take root — and catching the tiny insects (thrips, whitefly) and any wilt early, because the insects bring viruses and the wilt has no cure.
Transplant + water in Critical
How you set the seedling decides whether it roots fast or stalls. Right spacing, planted to the root-ball on a well-drained bed and watered in — that's a plant that grows away. Too deep, too dry, or crowded, and it sulks, rots or fights its neighbours all season — and the spacing you set now you can never change.
Transplant in the cool of late afternoon, on transplant day, so the seedlings don't wilt in the midday heat while they settle in.
Set plants about 45 cm apart along the row (a forearm — elbow to fingertip), in rows about 75 cm apart (a full arm's length). Wider rows let air move through and make picking easier.
Plant each seedling to the top of its root-ball — the same depth it grew in the nursery, no deeper. A buried stem rots.
Firm the soil gently around each root-ball so there are no air pockets, then water each plant in straight away to settle the soil around the roots.
Place the basal fertiliser to the side of the plant, not touching the stem or roots — your recommendation gives the amount. Fertiliser against the roots burns them.
- Do:
Transplant late in the day and water in at once — evening transplants settle overnight instead of frying in the sun.
- Tip:
Planting deeper than the seedling grew in the nursery — a buried stem rots.
- Watch out:
Silvery flecks on the leaves, or clouds of tiny white flies rising when you brush the plants, mean thrips or whitefly — deal with them early, because they carry the viruses that curl and stunt chilli.
Scout (thrips, broad mite, wilt) Critical
The first two weeks decide how many plants survive and take root. Bacterial wilt has no cure — one wilting plant left in the ground infects its neighbours through the soil — and thrips and whitefly bring viruses that cannot be undone. Ten minutes twice a week now protects the whole crop.
Starting a few days after transplanting, walk the whole crop twice a week through the first two weeks, looking closely at plants all over the field, not just the edge by the path.
Wilt: look for plants that suddenly wilt while still green and do not perk up overnight. Cut such a stem and stand it in a clear glass of clean water — a milky-white thread streaming out of the cut confirms bacterial wilt.
If you find wilt: pull out the whole plant with the soil around its roots and destroy it (don't compost it). No spray cures it — pulling out and destroying the sick plants is the only control. If wilt keeps spreading, that bed is infected — don't replant chilli or its relatives there.
Thrips: on the youngest leaves, look for silvery streaks and flecking with tiny black specks of frass (droppings) and upward-curling leaf tips.
Whitefly: brush the plants — if clouds of tiny white flies rise from the leaf undersides they're there; turn a leaf over to see the scale-like young stuck underneath.
Note where the problems are so you can act. Where thrips or whitefly are building, treat early and change to a different chemical group each time (the group number is on the label) — these pests grow resistant fast.
- Do:
Pull out and destroy wilting plants the moment you see them, soil and all — every day you leave one, it feeds the soil bacteria that infect the next plant.
- Watch out:
Reflective (silver) mulch and clean, weed-free field margins cut down the thrips and whitefly that fly in.
Gap-fill Recommended
Every seedling that fails to take is an empty space making no fruit. Filling gaps in the first week — while replacements can still catch up — keeps your plant stand, and your harvest, full.
About a week after transplanting, walk the beds and find the seedlings that died or never took root.
Replace them with your spare seedlings — always hold some back in the nursery for this — planted at the same 45 cm spacing and watered in.
Do it in the cool of the evening and water the new plants well, so they settle without wilting.
Fill gaps early — a plant put in two weeks late never catches the rest and makes little.
- Do:
Hold back a few nursery seedlings just for gap-filling — being the same age, they catch up with the rest.
Irrigate — keep moist, well-drained Recommended
Freshly-moved seedlings have small, shocked roots that dry out fast. Steady moisture — never bone-dry, never waterlogged — is what gets them rooting and growing away evenly.
Keep the topsoil evenly moist while the seedlings root — water every 2–3 days through the first two weeks after transplanting, more often in heat and on sandy soil.
Check with your finger: water when the soil is dry a finger-joint deep (3–5 cm).
Water at the base of the plants, in the cool of morning or evening — wetting the leaves in the heat spreads disease.
Never let the beds waterlog — standing water rots chilli roots and wakes up bacterial wilt. If water pools, open the drains between the beds.
- Tip:
Waterlogging — chilli roots rot in standing water and it wakes up bacterial wilt. Keep the beds raised and draining.
Build the bush and beat the leaf-curl
Now the plant builds its bush before it flowers. Two jobs matter most: give it a modest nitrogen feed (too much delays flowering and pulls in pests), and watch the growing tips like a hawk — this is when thrips and broad mite cause the leaf-curl farmers call murda, and when whitefly spread the leaf-curl virus that stunts the plant and wrecks the harvest.
Scout (thrips, broad mite → leaf curl) Critical
This is the leaf-curl danger window. Thrips, broad mite and the whitefly-borne leaf-curl virus all twist and shrink the growing tips, and a plant crippled now sets few or deformed fruit. You cannot un-curl a leaf — you can only catch the cause early and stop it spreading.
From about 2 to 6 weeks after transplanting, walk the crop twice a week, checking the youngest leaves and growing tips closely — that's where all three troubles show first.
Thrips: silvery flecking with tiny black frass (droppings), and leaves curling upward.
Broad mite: the mites are far too small to see, so read the leaves — young leaves curl downward with a shiny, bronzed (coppery) underside, and the tips go hard, brittle and distorted.
Leaf-curl virus (murda): leaves curl upward, crinkle and pucker, the plant goes bushy and stunted with short joints, and it sets few, small or twisted fruit. It's spread by whitefly and there is no cure — pull out and destroy badly-infected plants.
Aphids: clusters of soft green or black insects on the tips and leaf undersides, with sticky honeydew (their sugary droppings) and a black sooty mould growing on it.
Where a pest is over the top, treat early and change chemical group each time (the group number is on the label) so thrips and mites don't become resistant.
- Tip:
Piling on nitrogen — soft, lush growth delays flowering and pulls in thrips, aphids and virus. Chilli wants a modest, steady feed, not a big N push.
- Do:
Lay reflective (silver) mulch, or keep the beds clean and weed-free — it repels the thrips, aphids and whitefly that fly in with viruses.
- Watch out:
Tell the three curls apart: thrips curl up with silvering, broad mite curls down with a bronze sheen, virus curls up with crinkling and stunting. The virus plant must come out; the pests can be sprayed.
N side-dress Recommended
A modest nitrogen feed as the bush builds keeps it green and growing. But chilli is not maize — too much nitrogen delays the flowers, softens the plant and feeds the pests. Give the recommended amount, no more, and place it well so rain doesn't wash it away.
Feed about 4 weeks after transplanting, as the plant is building its frame before flowering.
Give the recommended nitrogen top-up — your recommendation gives the amount — and do not overshoot.
Band it in a line about a hand-span (≈20 cm) to the side of the row, never against the stems — fertiliser on the stem burns it.
Apply onto moist soil (after watering or light rain) and cover it or water it in, so it soaks to the roots instead of gassing off into the air.
Keep the fertiliser off wet leaves — the grains stick and scorch them — and wash your hands afterwards.
- Tip:
Over-feeding nitrogen — with chilli it means lots of leaf, late flowers and more thrips and virus. More is not better here.
- Watch out:
Keep fertiliser off food, water and children, and off the leaves; wash your hands after handling it.
Weed + reflective mulch Recommended
Weeds steal the water and food your chilli needs and shelter the very insects that spread its viruses. A clean bed — better still, a reflective mulch — starves the weeds and confuses the flying pests.
Keep the beds weed-free from about 2 to 6 weeks after transplanting, while the plants are small and easily robbed.
Weed shallowly by hand or hoe — chilli roots run near the surface and deep hoeing cuts them.
Lay a reflective (silver) mulch along the beds (or a light straw mulch). Reflective mulch bounces light that confuses and repels thrips, aphids and whitefly, cutting virus spread, and it holds soil moisture steady.
Pull weeds from the field margins too — they harbour thrips, whitefly and the viruses between crops.
- Do:
Mulch the beds — it deters the virus-carrying insects and keeps the soil evenly moist, which also guards against blossom-end rot later.
- Tip:
Deep hoeing close to the plants — it tears the shallow roots.
Irrigate — even moisture Recommended
Steady water builds the leafy frame that will carry the fruit. Swings between bone-dry and soaked stress the plant and set up problems (like blossom-end rot) later.
From about 2 to 6 weeks after transplanting, water every 4–6 days, keeping the soil evenly moist but never waterlogged — deeper and less often than in the nursery, to draw the roots down.
Check with a finger: water when it's dry a finger-joint deep (3–5 cm).
Water at the base in the cool of the day, keeping the leaves dry to slow disease.
Keep the beds draining — open the furrows between beds if water ever pools.
- Tip:
Letting the crop swing from bone-dry to soaked — uneven water now sets up blossom-end rot on the fruit later.
Flowering and fruit set — the make-or-break window
This is where your yield is made. The plant flowers and sets its first fruit, and it's now most sensitive to water stress and heat. Keep the water even (for fruit set and for calcium), start preventive anthracnose sprays the moment flowers open, and watch for the fruit borer. Heat above ~32 °C or cold nights drop the flowers — and a dropped flower is a fruit you'll never get.
Scout (fruit borer, anthracnose start, thrips) Critical
Flowering is when the fruit borer starts drilling into pods and anthracnose starts rotting fruit — both hit the harvest directly — and every flower lost to heat or stress is lost yield. Catching the borer and starting anthracnose cover early is the difference between clean fruit and a rotten crop.
From about 6 to 10 weeks after transplanting, walk the crop twice a week, now checking flowers and young fruit as well as the tips.
Fruit borer: look for small holes bored into pods and young fruit with sawdust-like droppings (frass) at the hole, and flowers or tiny fruit dropping off. Hang pheromone traps — baited lures that catch the moths — about 5 per hectare to warn you when the moths are active.
Anthracnose: look on fruit and stems for dark, sunken spots, sometimes in rings, with pink-to-orange spore masses in the centre. Start the preventive spray now (next task) — don't wait for lots of it.
Thrips and mites: keep checking the tips for silvering and bronzed, curled growth as before.
Note what you find and act early, changing spray groups each time so the pests and the fungus don't grow resistant.
- Do:
Start the preventive anthracnose spray at first flowering and set fruit-borer traps (about 5 per hectare) — prevention beats trying to save spotted fruit later.
- Watch out:
Flowers drop when days climb above ~32 °C or nights go above ~24 °C or below ~15 °C. You can't bring back a dropped flower — keep the plant well-watered and unstressed so it holds what it can through hot spells.
Preventive anthracnose spray Recommended
Anthracnose is the disease that turns your fruit into sunken, rotten, spore-covered spots — often only showing as the fruit ripens, when it's too late. A protectant fungicide (one that coats the fruit like a shield to stop the fungus getting in) only works if it's on the fruit before the fungus lands — so you spray to prevent, from first flowering, not to cure.
Start spraying when the first flowers open, and repeat about every 2 weeks, especially through wet, humid weather when anthracnose spreads by rain splash.
Use a recommended protectant fungicide (such as a mancozeb type) — a shield that must be on the fruit before infection. Change to a different chemical group each time (the group is on the label) so the fungus doesn't become resistant.
Cover the fruit and leaves well, undersides included — the fungus lands where the spray doesn't reach.
Spray safely: cover your skin, eyes and nose; spray in the cool of the day with the wind behind you; keep it off food; and wash yourself and your clothes afterwards.
Respect the pre-harvest interval — the number of days on the label you must wait between spraying and picking. Pick too soon and the chemical is still on the fruit you sell and eat.
- Do:
Spray to prevent — start at flowering and keep the cover going in wet weather. Once the fruit is spotted, no spray brings it back.
- Tip:
Using the same fungicide every time — the anthracnose fungus soon shrugs it off. Rotate to a different group.
- Watch out:
Wear cover, spray downwind in the cool, keep it off food, and obey the days-to-harvest wait printed on the label.
Even irrigation + calcium Critical
This is the thirstiest, most water-sensitive stage — the plant is setting fruit. Uneven water both drops flowers and causes blossom-end rot — a dark, sunken, leathery rot at the bottom tip of the fruit — because the plant can only carry calcium into the fruit on a steady stream of water. Even watering is the make-or-break job now.
From about 6 to 10 weeks after transplanting, keep the soil evenly moist right through flowering and fruit set — water every 4–6 days, more often in heat, and never let the plant wilt at this stage.
Water little and often rather than a big flood then nothing — it's the swings that drop flowers and cause blossom-end rot.
Blossom-end rot is mostly a watering fault: steady water lets the plant move calcium into the fruit. Make sure the bed has enough calcium (from lime or gypsum worked in earlier), then keep the water even.
Keep the beds draining — even now, waterlogging rots roots and feeds bacterial wilt.
- Watch out:
If you can water at only one stage of the whole season, water now — dry soil or heat at flowering costs you the most fruit.
- Do:
Water steadily and evenly to stop both flower-drop and blossom-end rot — the fruit-tip rot is a watering problem, not a spray problem.
Fill and ripen the fruit
The fruit is now swelling and colouring. Feed potassium — it drives the fruit's size, quality and pungency (the heat) — keep up anthracnose cover in wet weather, and strip out any rotten fruit each time you pass, because one spotted pod seeds the next.
Scout (anthracnose, borer, mites) Recommended
As the fruit ripens, anthracnose, fruit borer and mites all go for the crop you've already grown. Removing infected fruit each pass and keeping potassium up protects both the weight and the quality — and the heat — you sell on.
From about 10 to 13 weeks after transplanting, walk the crop twice a week, checking the ripening fruit closely.
Anthracnose: dark, sunken, sometimes ringed spots with pink-orange spore masses. Pick off and destroy every spotted fruit each pass — a rotten fruit left on the plant seeds the whole bush.
Fruit borer: bored holes with sawdust-like frass; remove and destroy any holed fruit.
Powdery mildew: white, powdery patches on the leaves (worst on the lower, shaded ones), which then yellow and dry — it can spread in warm weather even without rain.
Mites and thrips: keep checking the growing tips for bronzed, curled or silvered growth.
- Do:
Keep potassium up and remove infected fruit on every pass — the fruit you strip out is fruit that won't infect the rest.
- Watch out:
Don't toss spotted or holed fruit onto the ground or the compost — burn or bury it away from the field, or the spores and grubs come straight back.
K feed through fill Recommended
Potassium (K) is the nutrient chilli responds to most through fruit fill — it builds the fruit's size, firmness, colour and pungency (the heat) that dry chilli is paid for. A K feed as the first fruit fills lifts both your yield and your grade.
Feed potassium as the first fruit is filling, about 10 weeks after transplanting.
Use the recommended amount and type (a potassium fertiliser such as muriate or sulphate of potash) — your recommendation gives it — banded to the side of the plants, not on the stems.
Apply onto moist soil and water it in so it reaches the roots.
Keep it off the leaves and fruit, off food and water, and wash your hands after.
- Do:
Feed potassium through fruit fill — it's what puts size, colour and heat into the pods.
- Watch out:
Keep fertiliser off food, water and children; wash your hands after handling it.
Anthracnose spray in wet weather Recommended
In wet weather anthracnose keeps splashing onto the ripening fruit right through to harvest. Keeping the protectant cover going in the rains is what stops a clean crop rotting in the last weeks.
In rain-fed, wet weather, from about 10 to 13 weeks after transplanting, keep spraying the protectant fungicide about every 2 weeks through fruit fill and ripening.
Change chemical group each time so the fungus doesn't grow resistant, and cover the fruit well, undersides included.
Spray safely: cover skin, eyes and nose; spray in the cool with the wind behind you; keep it off food; wash after.
Obey the pre-harvest interval on the label — the wait between spraying and picking — because you're now picking fruit regularly. If a spray day and a picking day clash, pick first, then spray.
- Do:
Time sprays around your picking so you always keep the label's days-to-harvest wait — never sell or eat fruit sprayed inside that window.
- Tip:
Spraying the same group every time — rotate, or the anthracnose stops being killed by it.
Pick, and pick again (with a ratoon option)
Chilli doesn't ripen all at once — you pick the same plants again and again over 2–3 months, and frequent picking makes the plant set more fruit. Pick green-mature or red-ripe to suit your market (red is the hottest and best for drying). At the very end, the hotter kinds can be cut back to grow again next year.
Hand-pick (weekly passes) Critical
This is the payoff — but chilli comes in waves, so how and how often you pick decides the total. Frequent, careful picking of fruit at the right stage keeps the plant setting new fruit and gets clean pods to market. Leaving ripe fruit on the bush tells the plant to stop.
Make the first pick about 10 weeks after transplanting, then go over the plants every week.
Pick to your market: green-mature fruit is full-sized, firm and glossy; red-ripe fruit is fully coloured and hottest — the heat (capsaicin) peaks when it's fully red, so red is best for drying.
Cut each fruit off with a short piece of stalk using a knife or scissors — don't pull or twist, which tears the branch and can strip off next week's flowers.
Wear gloves and keep your hands from your eyes and face — the capsaicin that makes chilli hot burns skin and eyes. Wash your hands well with soap afterwards.
Pick often — going over the plants weekly keeps them flowering and fruiting; ripe fruit left on the bush slows new set.
If a fruit is still soft or pale it isn't ready — leave it: for green chilli wait until it's full-sized, firm and glossy; for the hottest dry chilli, wait until it turns fully red.
- Do:
Cut with a short stalk and pick weekly — gentle, frequent picking stimulates more fruit.
- Watch out:
Capsaicin burns — wear gloves, keep your hands from your eyes and face, and wash well after picking or handling hot chilli.
Ratoon cut-back (frutescens/chinense) Optional
The hotter chilli species (bird's-eye/piri-piri, habanero) are really short-lived perennials — instead of pulling them out and starting a fresh nursery, you can ratoon them: cut the plant hard back so it regrows and fruits again next year, saving a whole season's nursery and transplanting.
This is optional, and only worth it for the hotter perennial kinds (frutescens, chinense) on healthy, disease-free plants — never ratoon a plant that had wilt or bad virus.
At the end of the season (after the last picks, about 5–7 months after transplanting), cut each plant back to about 10 cm of woody stem (a hand-span or less) with 1–2 buds (nodes) left to sprout from.
Re-fertilise and water the cut-back stumps to push strong new growth for a second — even third — year.
Keep scouting the regrowth for thrips, mites and virus just as you would a new crop.
- Do:
Only ratoon strong, disease-free plants — a wilt- or virus-carrying stump just carries the trouble into next year.
- Tip:
Ratooning tired, diseased plants — it's cheaper in the long run to start clean seedlings.
Dry and store (dry chilli) or handle fresh
The fruit is grown — now don't lose its value. Fresh chilli keeps only a couple of weeks and bruises easily; dry chilli must be dried fast and clean to about one-tenth moisture, because slow, damp drying grows a mould whose hidden poison (aflatoxin) ruins the chilli and gets it rejected. A simple solar dryer is the key tool.
Dry chilli fast (solar dryer) Critical
Dry chilli is mostly water when fresh and worth little wet. Dried fast, it keeps its red colour and heat and sells well; dried slowly in the damp, it grows a mould (Aspergillus) and aflatoxin — a hidden poison that harms your family and gets your chilli refused at market. Fast, clean drying is the whole job.
Dry each batch of red fruit as you pick it (from about 13 weeks after transplanting onward). Dry only clean, sound, fully-red fruit — sort out any bruised, rotten or anthracnose-spotted pods first, so they don't mould the whole batch.
Use a solar dryer (a raised rack under clear plastic) rather than the open ground — it dries about twice as fast, keeps the red colour and heat, and denies the mould the slow damp it needs to make aflatoxin.
Never dry on bare ground — it pushes damp back up into the fruit and adds mould, stones, dust and animal dirt. Spread the fruit thinly and turn it so it dries evenly.
Dry until the chilli is brittle and snaps cleanly when you bend it (about one-tenth moisture) — that's the sign it's safe to store.
Store the dry chilli in clean, moisture-proof bags, kept cool, dry and off the floor. Check now and then for any damp or mould.
If a pod bends instead of snapping it isn't dry enough — keep drying before you bag it, or mould and aflatoxin will grow in the bag.
- Do:
A solar dryer beats open sun every time — faster drying means better colour, more heat, and no aflatoxin.
- Tip:
Slow drying in the damp, and drying on bare ground — both grow the Aspergillus mould that makes aflatoxin. Don't chill fresh fruit below ~7 °C either, or it spoils.
- Watch out:
Bendy, leathery pods are still too wet — snap-dry them before storing, and keep the bags cool and dry so they don't pick damp back up.
Pests and diseases that attack hot pepper


Where to sell hot pepper
Markets that trade this crop — what each one sells it by, when supply peaks there, and the currency used.
-
 Mile 12 Market
-
 Atkilt Tera
-
 Grand Marché de Kinshasa
-
 Marché Gouro d'Adjamé
-
 Marché Mokolo
-
 Marché de Foumbot
-
 Mercado Treinta
-
 Onitsha Main Market
Grow hot pepper with a plan, not a guess
This guide is the general answer. Divisi works out yours — the week to plant hot pepper on your soil and your rainfall, and each job dated for your field.


When to plant hot pepper, country by country
- When to plant hot pepper in Algeria
- When to plant hot pepper in Angola
- When to plant hot pepper in Benin
- When to plant hot pepper in Botswana
- When to plant hot pepper in Burkina Faso
- When to plant hot pepper in Burundi
- When to plant hot pepper in Cabo Verde
- When to plant hot pepper in Cameroon
- When to plant hot pepper in Comores
- When to plant hot pepper in Congo
- When to plant hot pepper in Côte d'Ivoire
- When to plant hot pepper in Egypt
- When to plant hot pepper in Eritrea
- When to plant hot pepper in Eswatini
- When to plant hot pepper in Ethiopia
- When to plant hot pepper in Gabon
- When to plant hot pepper in Gambia
- When to plant hot pepper in Ghana
- When to plant hot pepper in Guinea Ecuatorial
- When to plant hot pepper in Guinea-Bissau
- When to plant hot pepper in Guinée
- When to plant hot pepper in Kenya
- When to plant hot pepper in Lesotho
- When to plant hot pepper in Liberia
- When to plant hot pepper in Libya
- When to plant hot pepper in Madagascar
- When to plant hot pepper in Malawi
- When to plant hot pepper in Mali
- When to plant hot pepper in Mauritanie
- When to plant hot pepper in Mauritius
- When to plant hot pepper in Morocco
- When to plant hot pepper in Moçambique
- When to plant hot pepper in Namibia
- When to plant hot pepper in Niger
- When to plant hot pepper in Nigeria
- When to plant hot pepper in Rwanda
- When to plant hot pepper in République centrafricaine
- When to plant hot pepper in République démocratique du Congo
- When to plant hot pepper in Sao Tome and Principe
- When to plant hot pepper in Seychelles
- When to plant hot pepper in Sierra Leone
- When to plant hot pepper in Somalia
- When to plant hot pepper in South Africa
- When to plant hot pepper in South Sudan
- When to plant hot pepper in Sudan
- When to plant hot pepper in Sénégal
- When to plant hot pepper in Tchad
- When to plant hot pepper in Togo
- When to plant hot pepper in Tunisie
- When to plant hot pepper in Uganda
- When to plant hot pepper in United Republic of Tanzania
- When to plant hot pepper in Zambia
- When to plant hot pepper in Zimbabwe
Where hot pepper scores best
Districts where Divisi's engine currently rates this crop highest, ranked by fit.
-
 Dekese
 -
 Rumonge
 -
 Cubal
Cubal -
 Emurua Dikirr
 -
 Ukerewe
 -
 Rutsiro
 -
 Kitagwenda
 -
 Vatomandry
 -
 Ikela
Ikela -
 Londuimbale
 -
 Mishiha
 -
 Geita
Geita
Get Insights by email
A short digest of new Divisi articles. No email on quiet weeks.
Frequently asked questions
How do I grow hot pepper?
How to grow hot pepper: 150–210 days to maturity, 75 cm rows. Also called chilli, rissie, qariya, tsabola, piment, barkono, pimenta, mhiripiri.
What is rissie in English?
Rissie is the Afrikaans name for hot pepper.
What is qariya in English?
Qariya is the Amharic name for hot pepper.
What is tsabola in English?
Tsabola is the Chichewa name for hot pepper.
What is piment in English?
Piment is the French name for hot pepper.
What is barkono in English?
Barkono (also atarugu) is the Hausa name for hot pepper.
What is pimenta in English?
Pimenta (also piri-piri and malagueta) is the Portuguese name for hot pepper.
What is mhiripiri in English?
Mhiripiri is the Shona name for hot pepper.
What is pilipili kali in English?
Pilipili kali (also pilipili) is the Swahili name for hot pepper.
What is ata in English?
Ata (also ata eiye and ata rodo) is the Yoruba name for hot pepper.
How long does hot pepper take to grow?
Hot pepper takes about 150–210 days from sowing to maturity, though the exact length varies with variety, temperature and how the season runs.
What spacing should I use for hot pepper?
Space hot pepper rows about 75 cm apart, with roughly 45 cm between plants within the row.
What pests and diseases attack hot pepper?
The ones covered in this guide are Bollworm complex, Broad mite, Chilli leaf curl virus. Each has its own page explaining how to identify, check for and control it.