 Divisi
How to grow Irish potato
Solanum tuberosum · Solanaceae
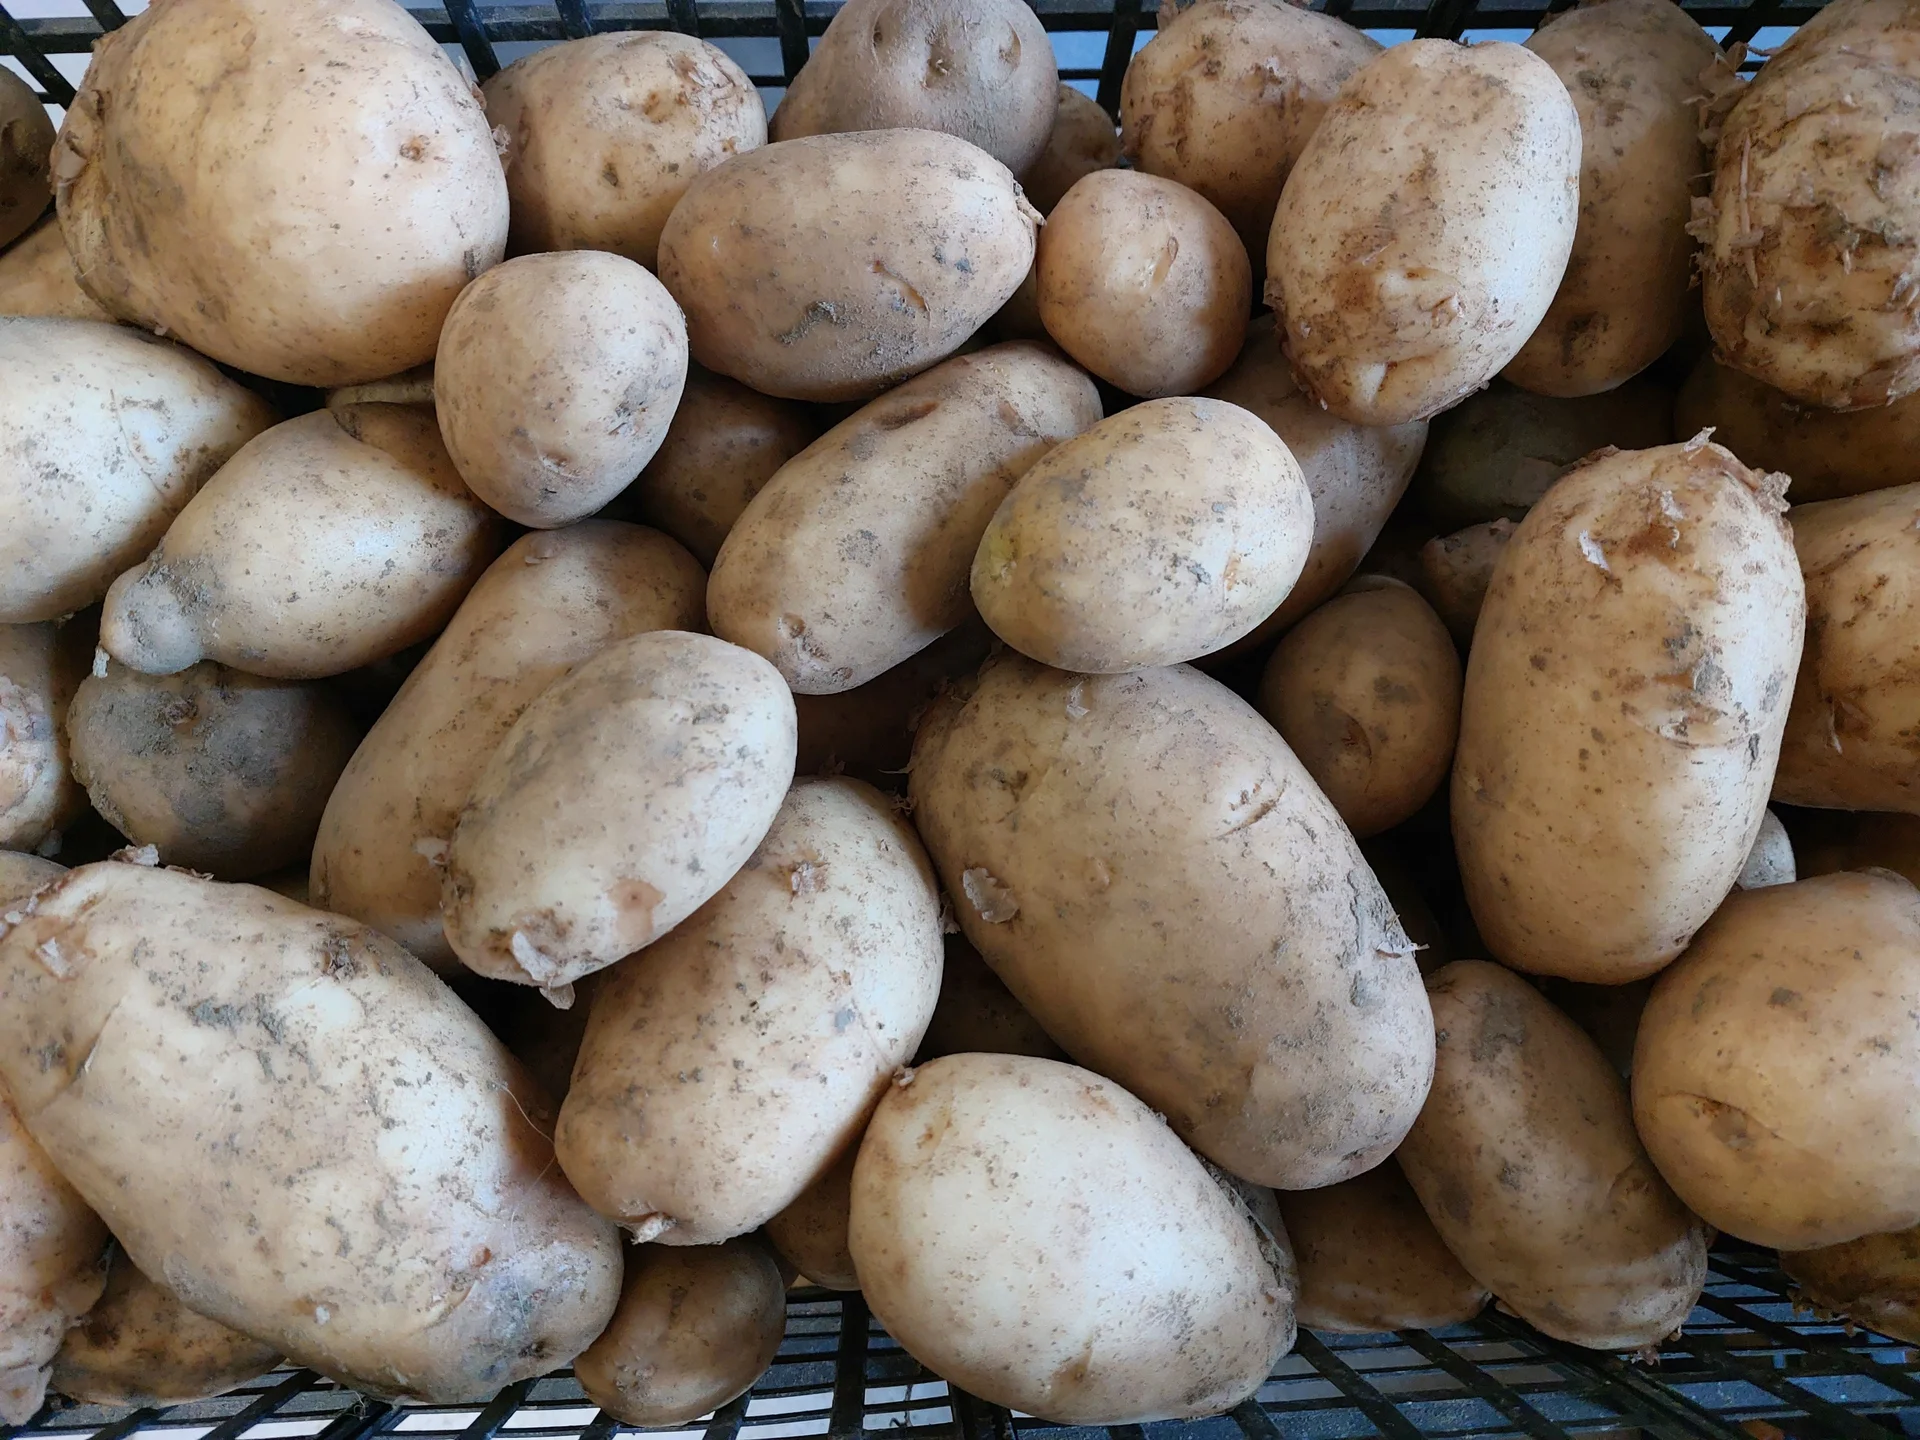
Photo: PROPOLI87 · CC BY-SA 4.0
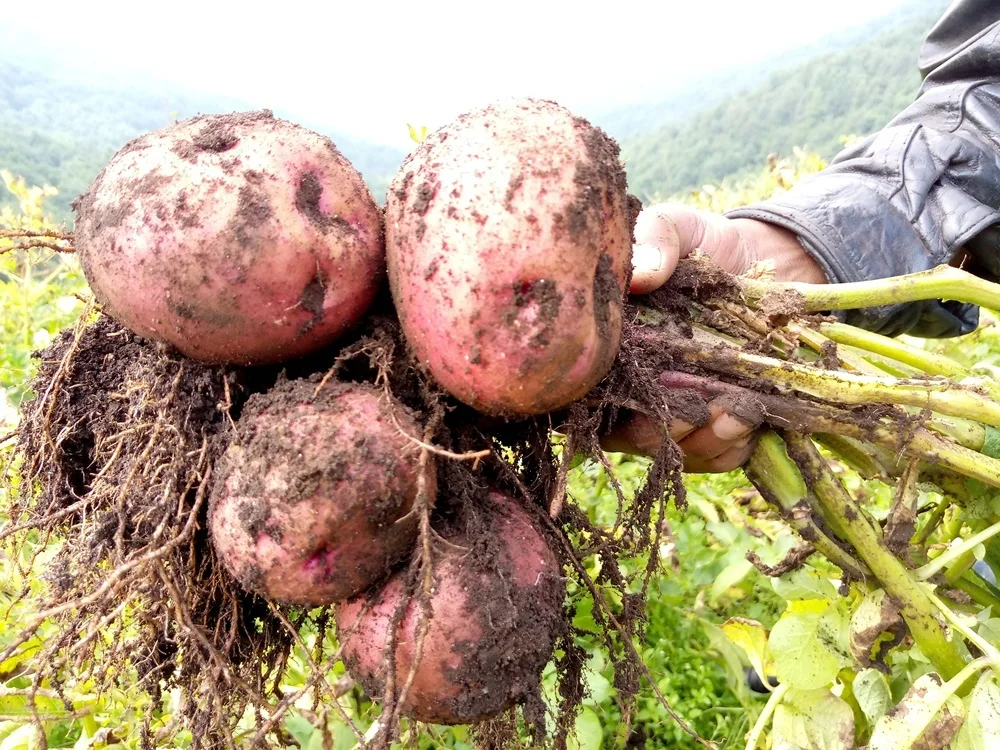
The Irish potato (mbatatisi, ikirayi, viazi mviringo) is a cool-weather crop grown for the tubers that swell underground — it is not a grain, and it is not the same plant as sweet potato. You do not plant it from true seed: you plant small whole potatoes, called seed tubers, and each one grows into a plant that makes a nest of new potatoes below the soil. Potato loves the cool — cool highlands and cool seasons — because in real heat it grows leafy tops but stops making tubers. It pays back generously, but it is a demanding crop: it lives or dies on three things — clean certified seed, staying ahead of late blight, and plenty of potassium.
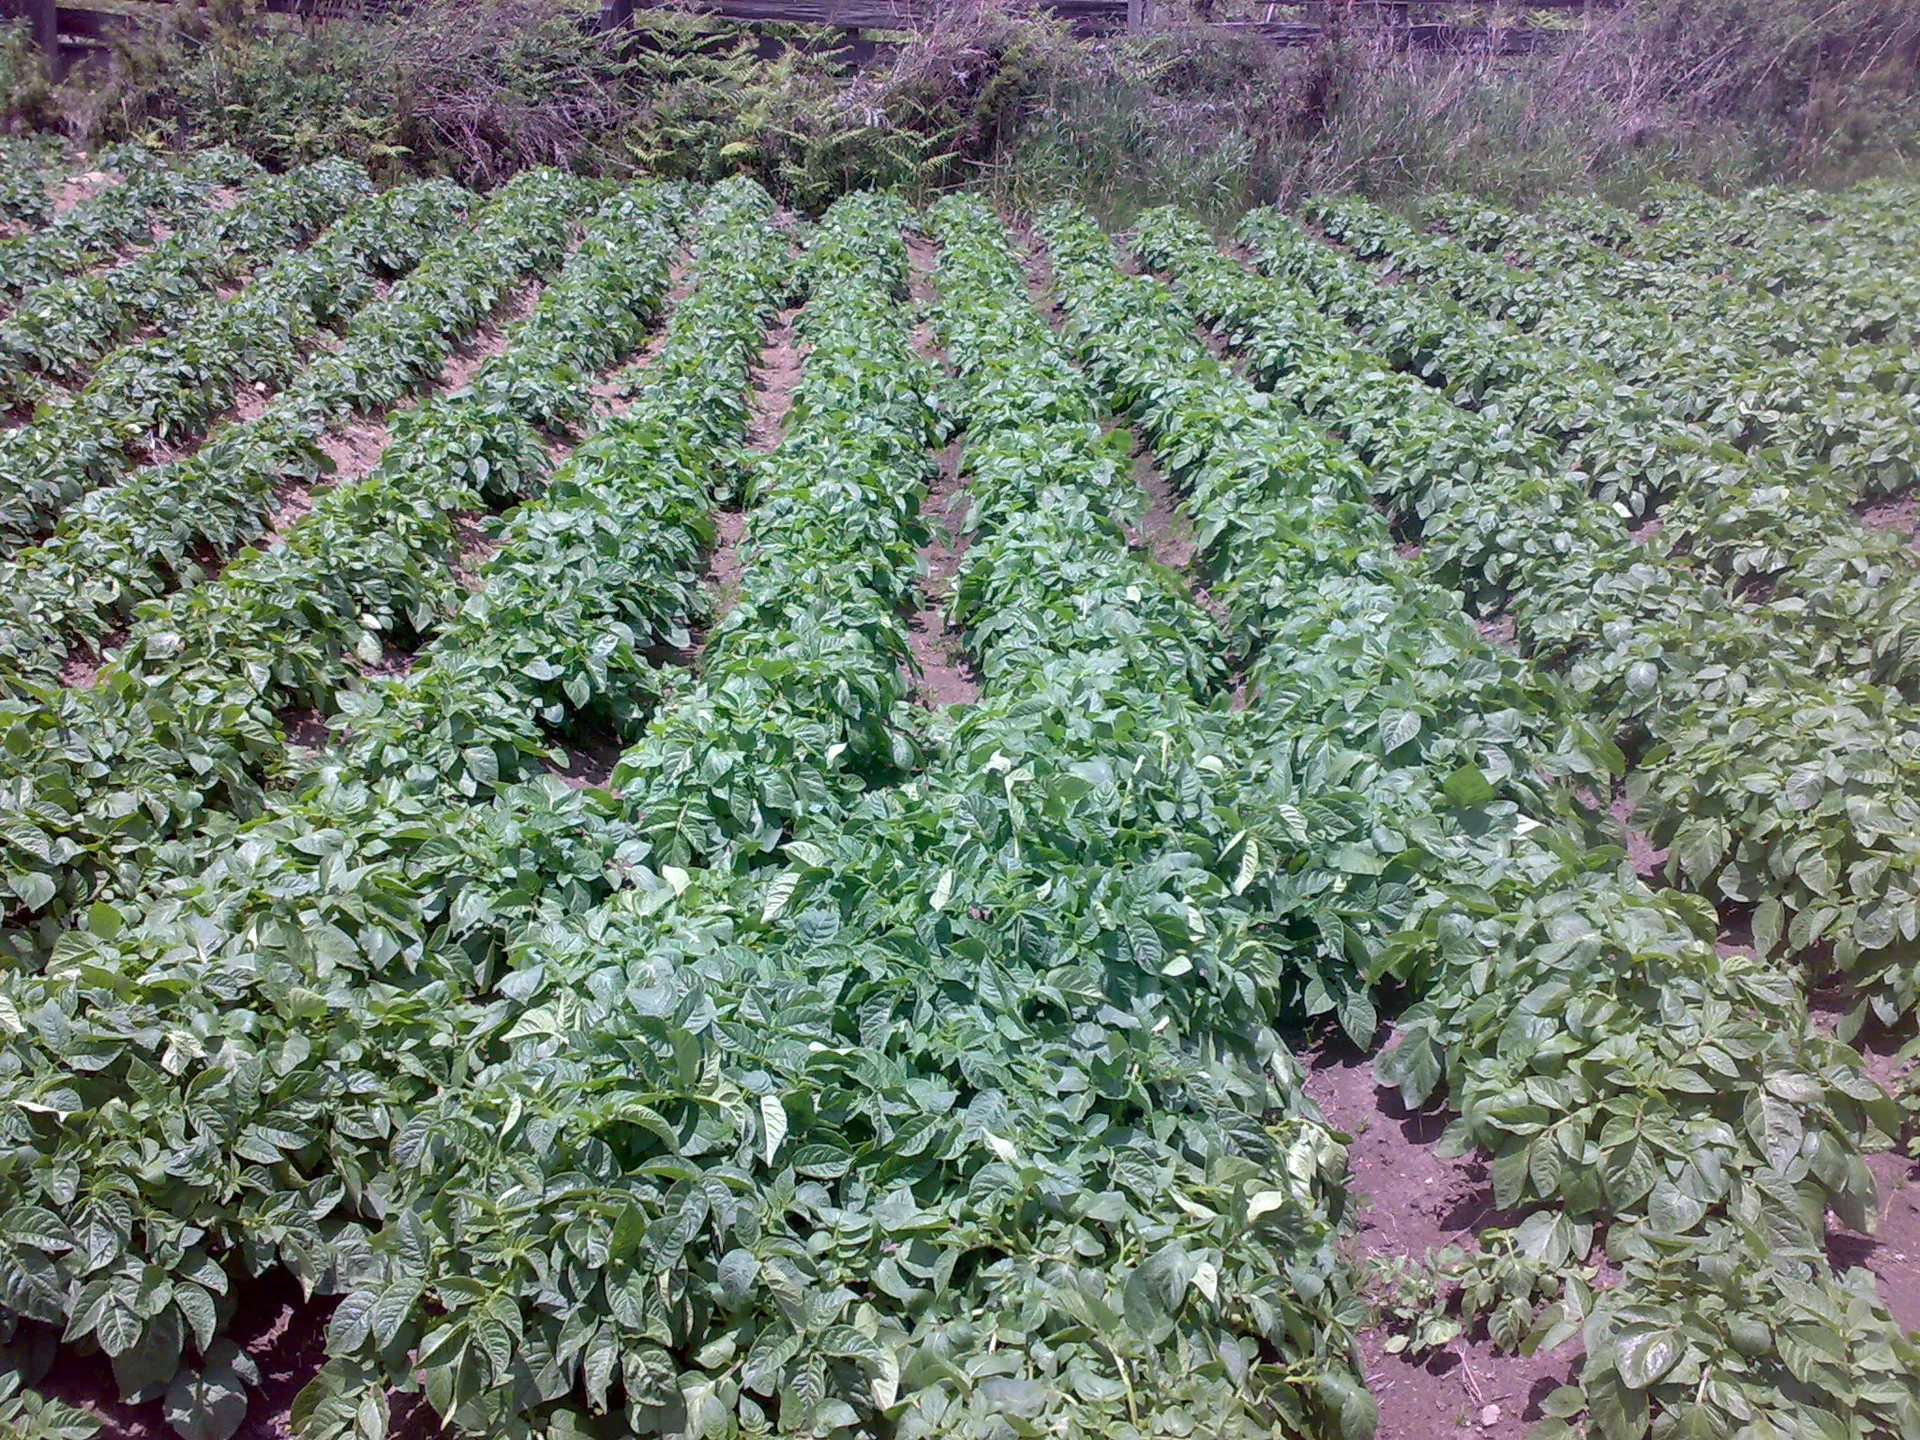
- Days to maturity
- 70–130 days
- Row spacing
- 75 cm
- Plant spacing in the row
- 28 cm
- Sowing depth
- 10 cm
These are general figures for the crop, compiled from published agronomic references including FAO and CABI. The right choice for your field depends on your soil, rainfall and the yield you are aiming for.
Will Irish potato actually do well on your field? Check your own field against every crop in the catalogue — no signup. Run the crop check →
Also known as
- Afrikaans
- aartappel
- Amharic
- dinich
- Chichewa
- mbatata
- French
- pomme de terre
- Kinyarwanda
- ikirayi
- Ndebele
- igwili
- Portuguese
- batata
- Sesotho
- tapole, ditapole
- Setswana
- ditapole
- Shona
- mbatatisi
- Swahili
- viazi mviringo, kiazi
- Xhosa
- izambane
- Zulu
- izambane
Working in buckets, bags or paces? The farming glossary turns the measures growers actually use into kilograms and hectares — what a 20 litre bucket of each crop really weighs, and how to size a field by walking it — alongside the Shona, Swahili, Ndebele and Yoruba words used in the field. Open the glossary →
Growing Irish potato, stage by stage
Your potato season, step by step — from choosing clean seed and ridging the land, through planting, earthing-up and keeping blight at bay, to lifting and storing tubers that keep for months.
Get your land, seed and inputs ready
Almost the whole potato crop is decided before you plant. The single biggest thing you control is your seed — clean, certified seed tubers carry no blight, wilt or virus into your field. In the weeks before planting, buy that seed and sprout it, choose land that has had a 3–4-year break from potato and tomato, and build deep, loose, well-drained ridges for the tubers to swell in.
Plan the field / rotation Critical
Potato's worst soil diseases — bacterial wilt above all — build up in land that grows potato or tomato too often, and bacterial wilt has no cure and no spray. Once your soil carries it, plants wilt and die while still green, with the tubers rotting inside. Choosing land that has had a 3–4-year break from potato and tomato costs you nothing, and it is the surest way to keep wilt out of your crop.
Pick a field that has not grown potato, tomato, pepper, eggplant or tobacco for 3–4 years — these are all one family and share the same soil diseases.
Avoid any land where potatoes wilted and died green before — bacterial wilt stays in that soil for years. If you must use it, never save seed from it.
Choose a well-drained spot that does not flood — waterlogged soil rots seed and tubers and helps wilt spread.
Good crops to grow before potato are cereals (maize, wheat) or a grass fallow — they starve the potato diseases out of the soil.
Put it in your plan now to buy certified seed and start sprouting (chitting) it 2–4 weeks before you plant.
- Do:
Buy certified seed and sprout (chit) it 2–4 weeks ahead for a faster, more even stand.
- Tip:
Short rotations — bacterial wilt has no cure and builds up in the soil with every potato or tomato crop.
- Watch out:
Pull out and destroy any 'volunteer' potatoes that sprout on their own from last season — they carry blight and virus into the new crop.
Buy certified seed tubers (35–55 mm) + fertiliser Critical
Your seed is the single biggest thing that decides this crop. Certified seed tubers are grown under inspection to be free of blight, bacterial wilt and virus, and true to variety — so they come up evenly and yield well. Cheap market or home-saved tubers almost always carry hidden disease that no spray can undo, and one bad batch can cost you the whole field. Potato also needs a lot of seed and a high-potassium fertiliser, so buy both early and in the right amount.
Buy certified seed tubers from a registered dealer or seed scheme — with a label, the variety name and this season's grade. Certified means grown to be free of blight, wilt and virus.
Choose egg-sized tubers, about 35–55 mm — between a large marble and a small hen's egg. That size is plenty; you do not need big ones.
Buy enough — potato is planted thickly, about 2–2.5 tonnes for a hectare (far more by weight than a grain crop). Your recommendation gives the amount for your field.
Buy a high-potassium basal (planting) fertiliser (a compound rich in K) — potato eats more potassium than any other nutrient. Get the amount in your recommendation.
Store seed tubers cool, light and airy (light keeps sprouts short and green); store fertiliser dry, off the floor, and away from food, water and children.
- Do:
In a cool, wet area, choose a variety with some blight resistance — it cuts down your spraying.
- Tip:
Planting ware potatoes from the market or last year's harvest as seed — they hide blight, wilt and virus and yield poorly.
- Watch out:
Reject any batch with soft, rotten or brown-ringed tubers. Cut one across; a brown ring that oozes when squeezed is bacterial wilt — send it back.
Sprout (chit) the seed Recommended
Sprouting (chitting) the seed before planting wakes the tubers up, so they push out of the ground days sooner and all together. A quick, even stand gets ahead of blight and gives the tubers a longer time to swell into your yield. It is also your last chance to throw out any rotten seed before it goes into the ground.
Start 2–4 weeks before planting. Spread the seed tubers in a single layer — a shallow box, tray or old egg-crates work well — so light reaches every one.
Keep them somewhere cool, airy and light — out of direct sun, but not dark and not hot. A dark place gives long, weak, white sprouts that snap off.
Set each tuber with the eye-end up — the end with the most little eyes — because that is where the strongest sprouts come from.
Wait until each tuber has short, sturdy, green or purple sprouts about a finger-joint long. Short and stubby is what you want; long and pale is too weak.
As you handle them, throw out any tuber that is soft, rotting, shrivelled or leaking — plant only firm, healthy seed.
- Do:
Chit in a cool, light place — light makes short, tough sprouts that survive planting.
- Tip:
Chitting in a warm, dark store — you get long, pale, brittle sprouts that break off as you plant, wasting the head start.
- Watch out:
Rub off all but the 3–4 strongest sprouts per tuber if you want fewer, bigger potatoes; leave them all for more, smaller ones.
Apply lime (if very acid) + basal Recommended
In sour (acid) soil, potato roots cannot take up the fertiliser you paid for. But potato is different from most crops — it actually copes with slightly sour soil, and too much lime brings common scab, which pits and roughens the skins and spoils the look of your crop. So lime only if your soil is very sour, keep it modest, and put it on well before planting so it has time to work.
Only lime if a soil test — or past crops that stayed yellow and stunted even with fertiliser — shows your soil is very sour. Potato handles mild acidity better than most crops.
Where scab has pitted your skins before, keep the soil on the sour side and go easy on lime — heavy liming makes scab worse.
If you do lime, spread it evenly over the field like sprinkling flour, then work it into the topsoil with a hoe — lime left lying on top does almost nothing.
Lime weeks before planting (it acts slowly), and keep it separate from manure — do not apply lime and manure on the same day.
Work in your basal fertiliser as the ridges go up, so the young plants find food straight away — your recommendation gives the type and amount.
- Tip:
Heavy liming just before potato — it triggers scabby, pitted skins. If scab is your problem, do not lime at all.
- Do:
Spread lime and manure a few weeks apart, giving each time to settle into the soil.
- Watch out:
Wash your hands after handling lime and fertiliser, keep the dust out of your eyes, and keep it off your food and water.
Form ridges + incorporate manure Recommended
Potatoes swell in loose, soft soil, so the ridge you build now is the room your tubers grow into. Deep, loose, well-drained ridges let the tubers expand, keep them covered from the greening light, and carry rain away so the seed does not rot. Well-rotted manure worked in feeds the crop slowly and helps the ridge hold moisture — but fresh, raw manure burns the seed and can bring scab.
Dig or plough the land deep and loose — about 20–30 cm (a spade's depth or more). Potatoes cannot swell in hard, cloddy soil.
Break up the clods until the soil is crumbly — loose soil grows smooth, well-shaped tubers.
Work in well-rotted manure or compost (dark, crumbly, no strong smell) — about a wheelbarrow every few strides. Never use fresh, raw manure.
Draw the soil up into ridges about a stride apart (≈75 cm), tall and loose — each ridge is one planting row.
Make sure water can drain off between the ridges; potato hates sitting in wet soil.
- Do:
Build the ridges loose and deep — the softer the ridge, the bigger and smoother the tubers.
- Tip:
Fresh manure in the ridge — it burns the seed, feeds scab and brings weed seeds. Use only well-rotted manure.
- Watch out:
On a slope, run the ridges across the slope, not up-and-down, so they hold the rain instead of washing away.
Plant and get an even stand
The stand you set now is the ceiling on your harvest — you cannot add plants later. Plant your sprouted seed about a hand-width deep on the ridges, a hand-span plus a thumb apart, with the sprouts pointing up and the basal fertiliser banded to the side. Keep the ridge just moist, and watch for cutworms slicing off young shoots and for the first signs of bacterial wilt.
Plant sprouted seed + basal Critical
A full, even stand is the biggest thing you control once you have clean seed. Get the spacing, depth and fertiliser placement right and every plant makes a good nest of tubers; get them wrong and you lose plants to rot, to fertiliser burn, or to gaps you can never fill. This one job sets the whole season.
Plant when the soil is moist but not wet, and only once the frost is past — potato shoots are killed by frost.
Set each sprouted seed tuber on the ridge with the sprouts pointing up, about a hand-width deep (≈10 cm).
Space the seed a hand-span plus a thumb apart (≈28 cm) down the row — that is a full hand-span and then a thumb's width more — with rows a stride apart (≈75 cm). This gives roughly the plant population your yield needs.
If you must cut big seed, leave each piece (sett) with 1–2 eyes and let the cut faces dry and heal for a day or two before planting, or they rot in the soil.
Band the basal fertiliser to the side of the seed, a hand's width away and a little below — never touching the tuber, or it burns the sprouts.
Cover and firm the ridge over seed and fertiliser so the tuber sits snug in moist soil and comes up strongly.
- Watch out:
A plant that wilts and dies while still green (leaves do not yellow first) is bacterial wilt — cut a stem and stand it in clean water; milky threads oozing out confirm it. Pull those plants with the soil around them, carry them out of the field, and do not replant the spot. There is no cure.
- Do:
Plant sprouts-up and shallow enough to come up fast — speed out of the ground beats blight; you earth up deeper later.
- Tip:
Planting seed straight after cutting it — unhealed cut faces rot in the soil. Let them skin over for a day or two first.
Scout (emergence, cutworms) Critical
The first few weeks decide your stand. Cutworms can slice young shoots off at ground level overnight, and the first bacterial wilt plants show now — if you spot and remove them early, before they spread, you protect the rest of the field. Ten minutes twice a week is the cheapest insurance you have.
Walk the crop twice a week (more in warm weather) from the day the first shoots break ground, looking down each ridge.
Cutworms: look for young shoots cut clean off at ground level, worst in the morning. Scratch the soil near a cut plant to find the fat, grey, curled caterpillar and squash it.
Bacterial wilt: look for a plant that wilts in the heat of the day but stays green (not yellowing). Cut a stem and stand it in clear water — milky threads streaming out mean wilt.
Rogue any wilt plant at once: dig it out with the soil around it, carry it out of the field, and do not plant that spot again this season.
Count the gaps (stations with no plant) as they come up, so you know how even your stand is.
If you find wilt → rogue it out and wash your hands and tools before touching healthy plants, so you do not carry it down the row.
- Watch out:
Never let soil or tool-washings from a wilt spot run into your irrigation or a stream — the bacteria travel in water to healthy plants.
- Do:
Handle any suspect wilt plant last, after touching the healthy ones, and wash hands and hoe afterward.
Irrigate — keep the ridge moist, not waterlogged Recommended
Young sprouts and shallow roots need steady moisture to push up evenly — but a waterlogged ridge rots the seed and spreads wilt. Getting an even, healthy stand now means keeping the ridge just moist, never soggy.
Keep the ridge moist like a wrung-out cloth, not wet — water about every 6–8 days (more often in heat or on sandy ridges), pushing a finger in and watering when the top few centimetres are dry.
Water little and often rather than flooding — soggy ridges rot the seed tubers before they sprout.
Water in the cool of the morning or evening so less is lost to the sun.
Make sure water drains away between the ridges after rain; do not let it pond around the plants.
- Tip:
Flooding the furrows deep at this stage — standing water rots the seed and carries bacterial wilt from plant to plant.
- Watch out:
Sandy ridges dry out fast — check them more often in heat.
Grow the tops and earth up
Now the leafy tops grow fast and, hidden under the ridge, the stolons (underground shoots) that will carry the tubers begin to form. Three jobs matter most: earth up into a firm ridge to give the tubers room and cover, put on the main potassium-and-nitrogen feed, and — as the leaves close over the rows — start spraying against blight before you ever see it.
Scout (late blight, aphids) Critical
As the canopy closes in cool, damp weather, late blight can appear — and once it starts it can flatten the whole crop in a week. Aphids also arrive now and spread leaf-roll and mosaic virus. Spotting the first blight spot, and keeping aphids down, is the difference between a full harvest and a ruined one.
Walk the crop twice a week — more in cool, wet, misty weather, which is exactly when blight strikes.
Late blight: look on leaves for dark, water-soaked patches, often at the tips and edges, with a white furry mould underneath in the morning damp. It spreads fast.
Early blight: look on the older, lower leaves for brown spots with rings inside them, like a target.
Aphids: turn leaves over and look for clusters of tiny green or black soft insects, and sticky, sooty leaves.
Virus: mark any plant with crinkled, mottled or rolled leaves and stunted growth, and rogue it out so aphids cannot spread it further.
Act at the very first blight lesion — tighten your spray and cut out badly-hit tops; do not wait for it to spread.
- Do:
Earth up into a firm ridge — it gives tubers room, stops them greening, and blocks the tuber moth from reaching them.
- Do:
Start the preventive blight programme as the canopy closes, before any blight shows — protection only works ahead of the disease.
- Watch out:
A run of cool, wet, cloudy days is blight weather — scout every day and make sure your spray is fresh.
Weed + earth up Critical
Two jobs in one. Early weeds steal the water, food and light the young crop needs. And earthing-up — drawing loose soil up around the stems — is one of potato's make-or-break jobs: it gives the tubers room to swell, buries them away from the greening light, and blocks the tuber moth from reaching them to lay its eggs.
Weed early, while the weeds are small and before the canopy closes — hoe shallowly so you do not cut the potato's shallow roots.
When the plants are about knee-high, draw loose soil up around the stems from both sides into a firm, high ridge.
Build the ridge up enough that the tubers forming below are well covered — at least a hand-width of soil over them.
Re-cover any tuber you see poking out, and close any cracks in the ridge — cracks let in the tuber moth and the greening light.
Time the earthing-up to bury your top-dressing at the same time, so the fertiliser feeds the crop and not the weeds.
- Do:
Earth up before the rows close over — once the canopy meets, you cannot get down the rows without breaking stems.
- Tip:
Deep hoeing right next to the plants — you slice the roots and the young tubers. Keep the blade shallow near the stems.
- Watch out:
Green shoulders on tubers mean light is getting in — pull more soil over them at once; green parts are bitter and mildly poisonous.
Main N + K top-dress Recommended
This is potato's big feed, and it is mostly about potassium — the nutrient potato eats more of than any other. Potassium fills and firms the tubers and drives the bulking to come; the nitrogen builds the leafy canopy that feeds them. Put it on now, banded and buried, so it is there just as the tubers start to set.
Apply as the plants reach about knee-high, when the canopy is building and the tubers are about to set.
Use a high-potassium compound (your recommendation gives the type and amount) — potato needs far more K than N or P. Potato also answers to magnesium (Mg): on sandy soils, or where you kept lime low to dodge scab, choose a compound that carries Mg too, or add a little magnesium sulphate (Epsom salts).
Band it along the row a hand's width to the side of the plants, not on top of them.
Cover it with the earthing-up soil in the same job, so rain does not wash it away and it reaches the roots.
Apply onto moist soil (after a weeding or light rain), and keep the grains off wet leaves — they stick and scorch.
- Tip:
Piling on extra nitrogen to force bigger tops — too much N grows leaf at the expense of tubers and invites blight.
- Do:
Cover the fertiliser as you earth up — banded-and-buried potassium reaches the tubers; scattered on top it is half wasted.
- Watch out:
Keep fertiliser off wet leaves and out of your eyes, wash your hands afterwards, and keep it away from food, water and children.
Begin preventive blight fungicide Critical
Late blight is the crop's number-one killer — in cool, wet weather it can turn a green field black in a week. The catch is that protectant spray only works before the disease lands — it shields healthy leaves, it does not cure sick ones. So you start spraying as the canopy closes, on a fixed calendar, before blight ever appears, and keep it up. This is one of potato's three non-negotiables.
Start a protectant fungicide (such as mancozeb) as the canopy closes — before you see any blight.
Spray on a calendar every 7–10 days, and tighten to every 5–7 days in cool, wet, blight weather.
Wet the whole plant — the tops and the undersides of the leaves — until just before it drips; blight starts on the parts you miss.
Re-spray if rain falls within a few hours — the protection washes off.
At the first lesion, switch to a systemic blight product — one that is taken up inside the leaf and can knock back blight that has already started (such as metalaxyl, usually sold mixed with mancozeb), where a protectant only guards the clean surface it lands on. Tighten the interval, and cut out and carry away badly-hit tops.
Spray safely: cover your skin, nose and eyes, spray in the cool with the wind at your back, keep it off food, and wash well afterwards. Respect the days-to-harvest (the pre-harvest interval) on the label — the least number of days you must wait between your last spray and lifting or eating the tubers.
- Do:
Spray before blight, not after — a protectant on clean leaves is worth ten sprays on a sick crop.
- Tip:
Skipping a spray because the crop looks clean — clean is exactly when the calendar spray is doing its job.
- Watch out:
Alternate or mix products so blight cannot get used to one — resistance builds fast against a single spray.
Irrigate — keep steady moisture Recommended
Steady water now grows the leafy canopy that will feed the tubers — the bigger and greener the tops, the more the crop can pour into the potatoes later. Swings between bone-dry and soaked stress the plants and shrink that leaf factory.
Keep the soil evenly moist down to where the roots and stolons are — water every 6–8 days, more often in heat.
Check with a finger: water when the top few centimetres are dry, before the plants wilt.
Water in the cool of the day and let the leaves dry before nightfall, to give blight less chance.
Keep the ridges draining — do not let water stand around the stems.
- Tip:
Wetting the leaves late in the day and leaving them damp overnight — that is perfect blight weather. Water early.
- Do:
Aim for steady moisture, not feast-and-famine — even water now builds the tops that will fill the tubers.
Bulk the tubers — the make-or-break window
This is where your harvest is made — the tubers set and swell fast under the ridge, and almost all your yield is laid down here. Two things drive it: steady, even moisture (this is potato's thirstiest, most water-sensitive stage) and potassium. Keep the blight spray going without a gap — late blight can still wipe the crop out even now — and keep every tuber covered from the moth and the light.
Scout (late blight, tuber moth) Critical
The tubers are swelling now, so every problem hits your actual harvest. Late blight is still deadly and can spread down to the tubers themselves. The potato tuber moth starts laying on any tuber the soil leaves bare. And scorched or yellowing older leaves warn of potassium or magnesium shortage just when the crop needs them most. Catch each one early and you protect the yield you have already grown.
Walk the crop twice a week, more in cool wet weather, right through bulking.
Late blight: keep checking leaves for dark water-soaked patches with white mould underneath; now also look at any tuber you uncover for firm brown dents — blight in the tuber rots it in store.
Tuber moth: look for exposed or cracked tubers and shoot-tips with tunnels — the moth lays on any tuber the soil does not cover. Earth them over at once.
Potassium or magnesium shortage: on the older, lower leaves, scorched, browning margins (with undersized tubers) mean potassium is short, while yellowing between the veins with the veins still green means magnesium — make sure the K feed went on, and add a magnesium source if you see the vein-yellowing.
Feel the soil moisture as you walk — even moisture here prevents the cracked, knobbly tubers that come from wet-then-dry swings.
- Do:
Keep soil moisture even through bulking — swings between dry and wet crack the tubers and grow knobbly, second-growth potatoes.
- Watch out:
Scorched leaf margins and small tubers mean potassium shortage — check your K went on and top-dress if you can.
- Watch out:
Any tuber showing its shoulder above the soil will green and draw the tuber moth — earth it over the moment you see it.
Maintain blight fungicide Critical
Do not drop your guard now. A single missed spray in cool, wet weather during bulking can still lose the whole crop, and blight washing off the leaves runs down to rot the tubers you have grown. New leaves keep unfurling with no protection until you coat them, so keep the calendar unbroken right through bulking.
Keep spraying on the same 7–10-day calendar (tighter, 5–7 days, in cool wet weather) with no gaps through bulking.
Always coat the new growth — the youngest leaves are unprotected until you spray them.
At the first lesion, switch to a systemic product — one taken up inside the leaf that can knock back blight already started (such as metalaxyl; a protectant only shields the surface it lands on) — shorten the interval, and remove and carry away badly-hit tops so spores do not wash down to the tubers.
Re-spray after rain washes the cover off, and rotate products so blight cannot get used to one.
Spray safely: cover skin, nose and eyes; spray in the cool with the wind behind you; keep it off food; wash well after; and count the days-to-harvest on the label so the tubers are safe to eat.
- Watch out:
Blight on the leaves washes down to the tubers — kill and clear badly-hit tops so the spores never reach what you are growing.
- Do:
Keep a strict calendar through bulking — the last weeks of green leaf are still feeding the tubers and worth protecting.
- Tip:
Stopping sprays early just because harvest is near — respect the days-to-harvest interval instead, and keep protecting until the tops die down.
Re-earth any exposed tubers Recommended
As the tubers swell they push up and the ridge cracks, and any tuber that catches the light turns green — bitter, mildly poisonous and unsellable. Worse, exposed tubers and cracks are the tuber moth's doorway to lay its eggs. A few minutes covering them protects both the eating quality and the crop from the moth.
Every week or two, walk the rows and look for green shoulders poking out of the ridge and for cracks in the soil.
Draw fresh soil over any exposed tuber straight away — a good covering, a hand-width or more.
Close the cracks in the ridge with soil — cracks let in both the greening light and the egg-laying moth.
Keep the ridge shoulders full right to the end — a well-covered ridge is your best tuber-moth control without any spray.
- Do:
Keep the ridge full to the very end — covering soil is free tuber-moth protection.
- Tip:
Leaving green or exposed tubers 'to deal with at harvest' — the moth is already laying on them, and the damage carries into store.
Irrigate — keep even moisture Critical
This is the most important watering of the whole season. The tubers are swelling fast and they need steady, even moisture: get it right and you fill a full crop of smooth tubers; let it swing dry-then-wet and they crack, grow knobbly or sprout second growths, while a real dry spell simply stops the bulking and shrinks your yield. If you can water at only one stage, water now.
Keep the soil evenly moist all through bulking — water every 5–7 days, more often in heat or on sandy soil.
Never let the crop dry right out and then flood it — that sudden swing is what cracks tubers and grows knobbly, second-growth potatoes.
Check with a finger before the plants show any stress — water before they wilt, not after.
Water in the cool and let the leaves dry by night, to keep blight down.
Keep the water even and gentle — do not wash the ridges down or expose the tubers.
- Do:
Steady, even water beats big occasional soakings — even moisture is what fills smooth, unblemished tubers.
- Tip:
A dry spell followed by heavy watering or rain — the tubers crack and grow knobbly. Keep it even.
- Watch out:
Do not waterlog either — soaked soil late in bulking rots the tubers and washes blight down to them.
Ripen and set the skins
The tops now yellow and die back and the tuber skins toughen (set) so they can be lifted and stored without scuffing. For eating (ware) potatoes, let the skins set fully; for seed potatoes, kill the tops a little earlier to fix the tuber size and stop late virus. Easing off the water and removing the tops firm the skins and stop late blight washing down to the tubers. The crop is ready when the tops have died back and the skin does not rub off when you press and twist it with your thumb.
Stop irrigation and let the skin set Recommended
Stopping the water tells the crop to stop swelling and toughen its skins. A set skin — one that does not rub off — survives lifting and storage without scuffing, so it keeps for months. Soft, thin skins scuff on the way out of the ground and let in rot and the tuber moth. This simple pause is what turns a heap of potatoes into a store that lasts.
Stop watering as the tops begin to yellow and die back — the crop is finishing and no longer needs it.
Let the plants die down (or kill the tops — see the next job) so the skins can harden.
Test the skin after a couple of weeks: press a thumb on a tuber and twist — if the skin stays put and does not rub off, it is set and ready to lift.
If the skin still rubs off → wait longer and leave the tubers in the ground a while more before lifting.
- Do:
Remove or kill the tops about 2 weeks before lifting — it firms the skins and stops blight spores reaching the tubers.
- Watch out:
For seed potatoes, kill the tops earlier — this fixes them at a good seed size and cuts off late virus coming in on aphids.
- Tip:
Lifting while the skin still rubs off — those tubers scuff, rot in store and will not keep.
Remove/kill the haulm ~2 weeks before lifting Recommended
Cutting off the tops (the haulm) about two weeks before you lift does two things: it firms the skins ready for storage, and it removes the leaves where late blight lives, so the spores cannot wash down and rot your tubers in the ground or in store. For seed potatoes it also shuts out late virus.
About two weeks before lifting, cut or pull the tops off at the base, or slash them down.
Carry the cut tops right out of the field — especially any with blight — do not leave them lying on the ridges over the tubers.
Leave the tubers in the ground those two weeks so the skins finish setting.
If blight is in the tops, remove them promptly so the last spores die off before you dig.
- Do:
Take the haulm out of the field, do not leave it on the ridge — blighted tops lying over the soil wash spores straight onto the tubers.
- Tip:
Digging the day you cut the tops — give the skins about two weeks to set first, or they will scuff and rot.
Lift and sort
Lift about two weeks after the tops have died back, choosing a dry day and dry soil. Dig carefully so you do not cut or bruise the tubers — every wound is a doorway for rot in store. Let them dry on the surface for an hour or two, out of strong sun, then sort out the cut, green and diseased ones. Careful lifting and honest sorting decide how much of your crop actually reaches the plate or the market.
Lift carefully & sort Critical
Everything you have grown is now in the ground — the whole job here is to get it out without wounding it. A cut, bruised or speared tuber rots in store and spreads the rot to its neighbours. Lifting gently in dry soil and sorting out every damaged or diseased tuber is what decides whether your harvest keeps for months or is lost in weeks.
Lift on a dry day when the soil is dry and crumbly — wet soil clings, bruises the tubers and spreads rot.
Dig well to the side of the row with a fork or plough and lift from underneath — driving the fork through the ridge spears the tubers.
Handle them gently — set them into baskets, do not throw or tip them from a height; bruises you cannot see rot later.
Let the lifted tubers dry on the surface for an hour or two, in the shade or gentle sun — never strong midday sun, which greens and cooks them.
Sort as you collect: put aside every tuber that is cut, bruised, green, rotten or diseased, and keep only clean, sound tubers for storage.
Use the damaged and green ones first (they will not keep), and keep any seed-grade tubers separate.
- Tip:
Leaving lifted tubers in strong sun or out in the field overnight — they green, and the tuber moth finds them and lays on them.
- Do:
Dig one test plant first to see where the tubers sit, then set your fork wide enough to lift under them without stabbing them.
- Watch out:
Any tuber with a brown ooze or ring inside is bacterial wilt — throw it far from the store and never keep it for seed.
Cure, then store cool and dark
The crop is in — now keep it. First cure the tubers for 1–2 weeks in a cool, dark, airy place so the skins toughen and small wounds heal over. Then store them cool, dark and airy: darkness stops them greening, and cool, airy storage slows sprouting and starves the tuber moth. Keep eating (ware) and seed potatoes apart, check the store often, and eat the damaged ones first.
Cure, then store cool and dark Recommended
Curing lets the skins toughen and the small wounds heal, so the tubers shrug off rot in store. After that the whole battle is cool, dark and dry: light turns them green (bitter and mildly poisonous), warmth makes them sprout and feeds the tuber moth, and damp brings rot. Store them well and you can eat and sell over many months instead of dumping the whole crop at the low harvest price.
First cure for 1–2 weeks: spread the sound tubers in a single layer in a cool, dark, airy place so the skins harden and cuts heal.
Then move them to a cool, dry, airy store — a dark room, a pit, or a ventilated shed.
Keep them in the dark — cover windows or use a dark store; even a little light over weeks turns eating potatoes green.
Keep the store airy so the tubers do not sweat and rot — do not seal them in a solid heap or a closed sack.
Keep eating (ware) and seed potatoes separate and clearly apart, so you do not eat your seed or plant your food.
Eat the damaged and green ones first — they will not keep — and check the store often for rot, sprouts or tuber-moth holes; pull out any bad tuber before it spreads.
- Tip:
Storing in a warm, light place — the tubers sprout, green and get riddled by the tuber moth. Never eat the green parts; they are bitter and mildly poisonous.
- Do:
Cure 1–2 weeks in a cool, dark, airy place to toughen skins and heal wounds, then store cool, dark and ventilated.
- Watch out:
Seed tubers keep best in soft, diffused light (a little greening keeps sprouts short and the moth away) — but keep eating potatoes in full dark, because green eating-potatoes are bitter and mildly poisonous.
Pests and diseases that attack Irish potato


Where to sell Irish potato
Markets that trade this crop — what each one sells it by, when supply peaks there, and the currency used.
-
 Joburg Market
-
 Mbare Musika
-
 Wakulima Market
-
 Atkilt Tera
-
 Kimironko Market
-
 Kongowea Market
-
 Marché de Foumbot
-
 Marché de Thiaroye
Grow Irish potato with a plan, not a guess
This guide is the general answer. Divisi works out yours — the week to plant Irish potato on your soil and your rainfall, and each job dated for your field.


When to plant Irish potato, country by country
- When to plant Irish potato in Algeria
- When to plant Irish potato in Angola
- When to plant Irish potato in Benin
- When to plant Irish potato in Botswana
- When to plant Irish potato in Burundi
- When to plant Irish potato in Cabo Verde
- When to plant Irish potato in Cameroon
- When to plant Irish potato in Comores
- When to plant Irish potato in Congo
- When to plant Irish potato in Côte d'Ivoire
- When to plant Irish potato in Egypt
- When to plant Irish potato in Eritrea
- When to plant Irish potato in Eswatini
- When to plant Irish potato in Ethiopia
- When to plant Irish potato in Gabon
- When to plant Irish potato in Ghana
- When to plant Irish potato in Guinea Ecuatorial
- When to plant Irish potato in Guinea-Bissau
- When to plant Irish potato in Guinée
- When to plant Irish potato in Kenya
- When to plant Irish potato in Lesotho
- When to plant Irish potato in Liberia
- When to plant Irish potato in Libya
- When to plant Irish potato in Madagascar
- When to plant Irish potato in Malawi
- When to plant Irish potato in Mali
- When to plant Irish potato in Mauritanie
- When to plant Irish potato in Mauritius
- When to plant Irish potato in Morocco
- When to plant Irish potato in Moçambique
- When to plant Irish potato in Namibia
- When to plant Irish potato in Niger
- When to plant Irish potato in Nigeria
- When to plant Irish potato in Rwanda
- When to plant Irish potato in République centrafricaine
- When to plant Irish potato in République démocratique du Congo
- When to plant Irish potato in Sao Tome and Principe
- When to plant Irish potato in Sierra Leone
- When to plant Irish potato in Somalia
- When to plant Irish potato in South Africa
- When to plant Irish potato in South Sudan
- When to plant Irish potato in Sudan
- When to plant Irish potato in Sénégal
- When to plant Irish potato in Tchad
- When to plant Irish potato in Togo
- When to plant Irish potato in Tunisie
- When to plant Irish potato in Uganda
- When to plant Irish potato in United Republic of Tanzania
- When to plant Irish potato in Zambia
- When to plant Irish potato in Zimbabwe
Where Irish potato scores best
Districts where Divisi's engine currently rates this crop highest, ranked by fit.


Get Insights by email
A short digest of new Divisi articles. No email on quiet weeks.
Frequently asked questions
How do I grow Irish potato?
How to grow Irish potato: 70–130 days to maturity, 75 cm rows, 10 cm deep. Also called aartappel, dinich, mbatata, pomme de terre, ikirayi, igwili, batata.
What is aartappel in English?
Aartappel is the Afrikaans name for Irish potato.
What is dinich in English?
Dinich is the Amharic name for Irish potato.
What is mbatata in English?
Mbatata is the Chichewa name for Irish potato.
What is pomme de terre in English?
Pomme de terre is the French name for Irish potato.
What is ikirayi in English?
Ikirayi is the Kinyarwanda name for Irish potato.
What is igwili in English?
Igwili is the Ndebele name for Irish potato.
What is batata in English?
Batata is the Portuguese name for Irish potato.
What is tapole in English?
Tapole (also ditapole) is the Sesotho name for Irish potato.
What is ditapole in English?
Ditapole is the Setswana name for Irish potato.
What is mbatatisi in English?
Mbatatisi is the Shona name for Irish potato.
What is viazi mviringo in English?
Viazi mviringo (also kiazi) is the Swahili name for Irish potato.
What is izambane in English?
Izambane is the Xhosa and Zulu name for Irish potato.
How long does Irish potato take to grow?
Irish potato takes about 70–130 days from sowing to maturity, though the exact length varies with variety, temperature and how the season runs.
What spacing should I use for Irish potato?
Space Irish potato rows about 75 cm apart, with roughly 28 cm between plants within the row.
How deep should Irish potato be planted?
Sow Irish potato at about 10 cm deep. Shallower risks drying out; deeper wastes seed energy before the shoot reaches light.
What pests and diseases attack Irish potato?
The ones covered in this guide are Early blight, Late blight, Potato tuber moth. Each has its own page explaining how to identify, check for and control it.