 Divisi
How to grow lime
Citrus aurantiifolia · Rutaceae
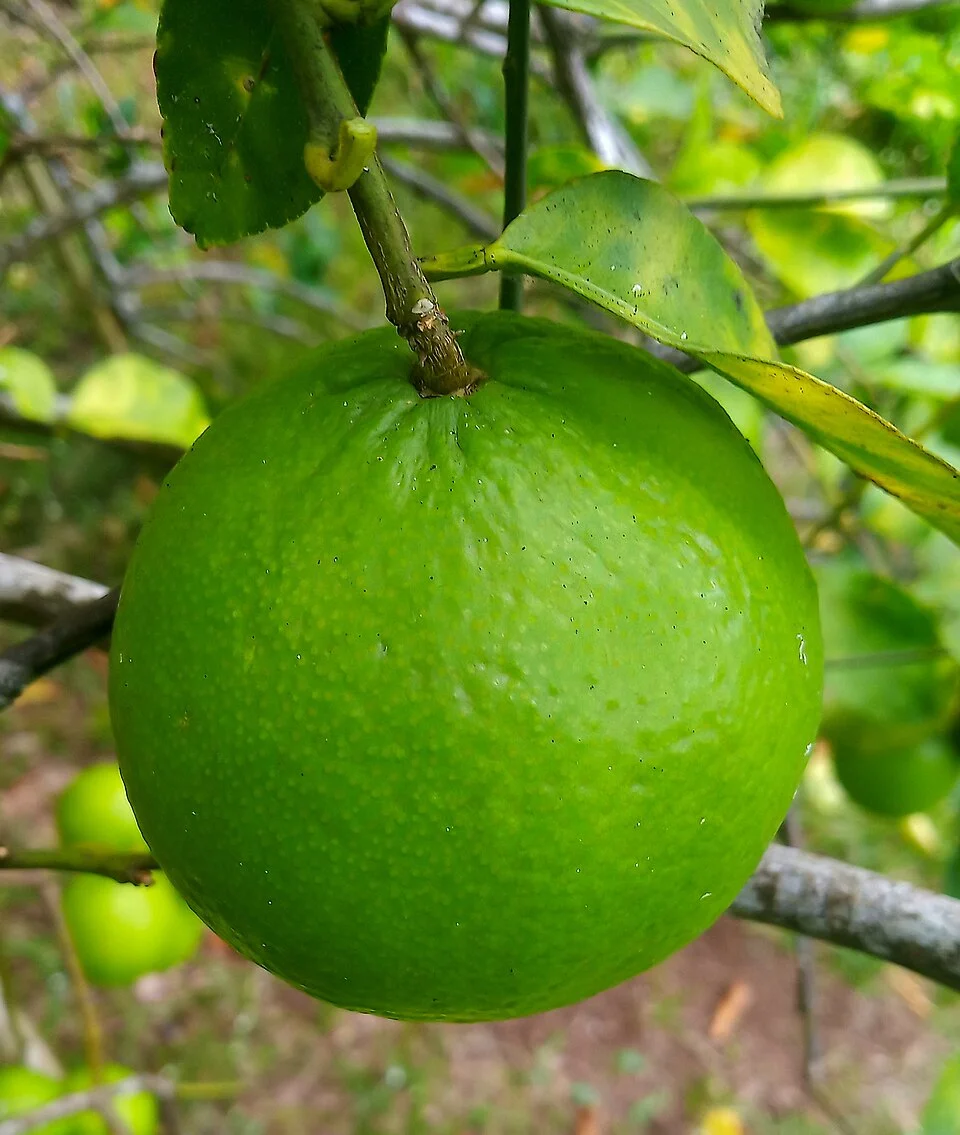
Photo: Filo gèn' · CC BY-SA 4.0
The lime is a small, thorny, evergreen citrus tree — the most heat-loving and least cold-hardy of the whole citrus family. In warm, frost-free lowlands it never really rests: it flushes new leaves, flowers and sets fruit a little all year round. You plant a grafted tree (a chosen fruiting variety joined onto a tough root variety), give it a warm, well-drained, sunny spot, and it rewards you for many years with small, sharp green fruit — picked green for juice and cooking.
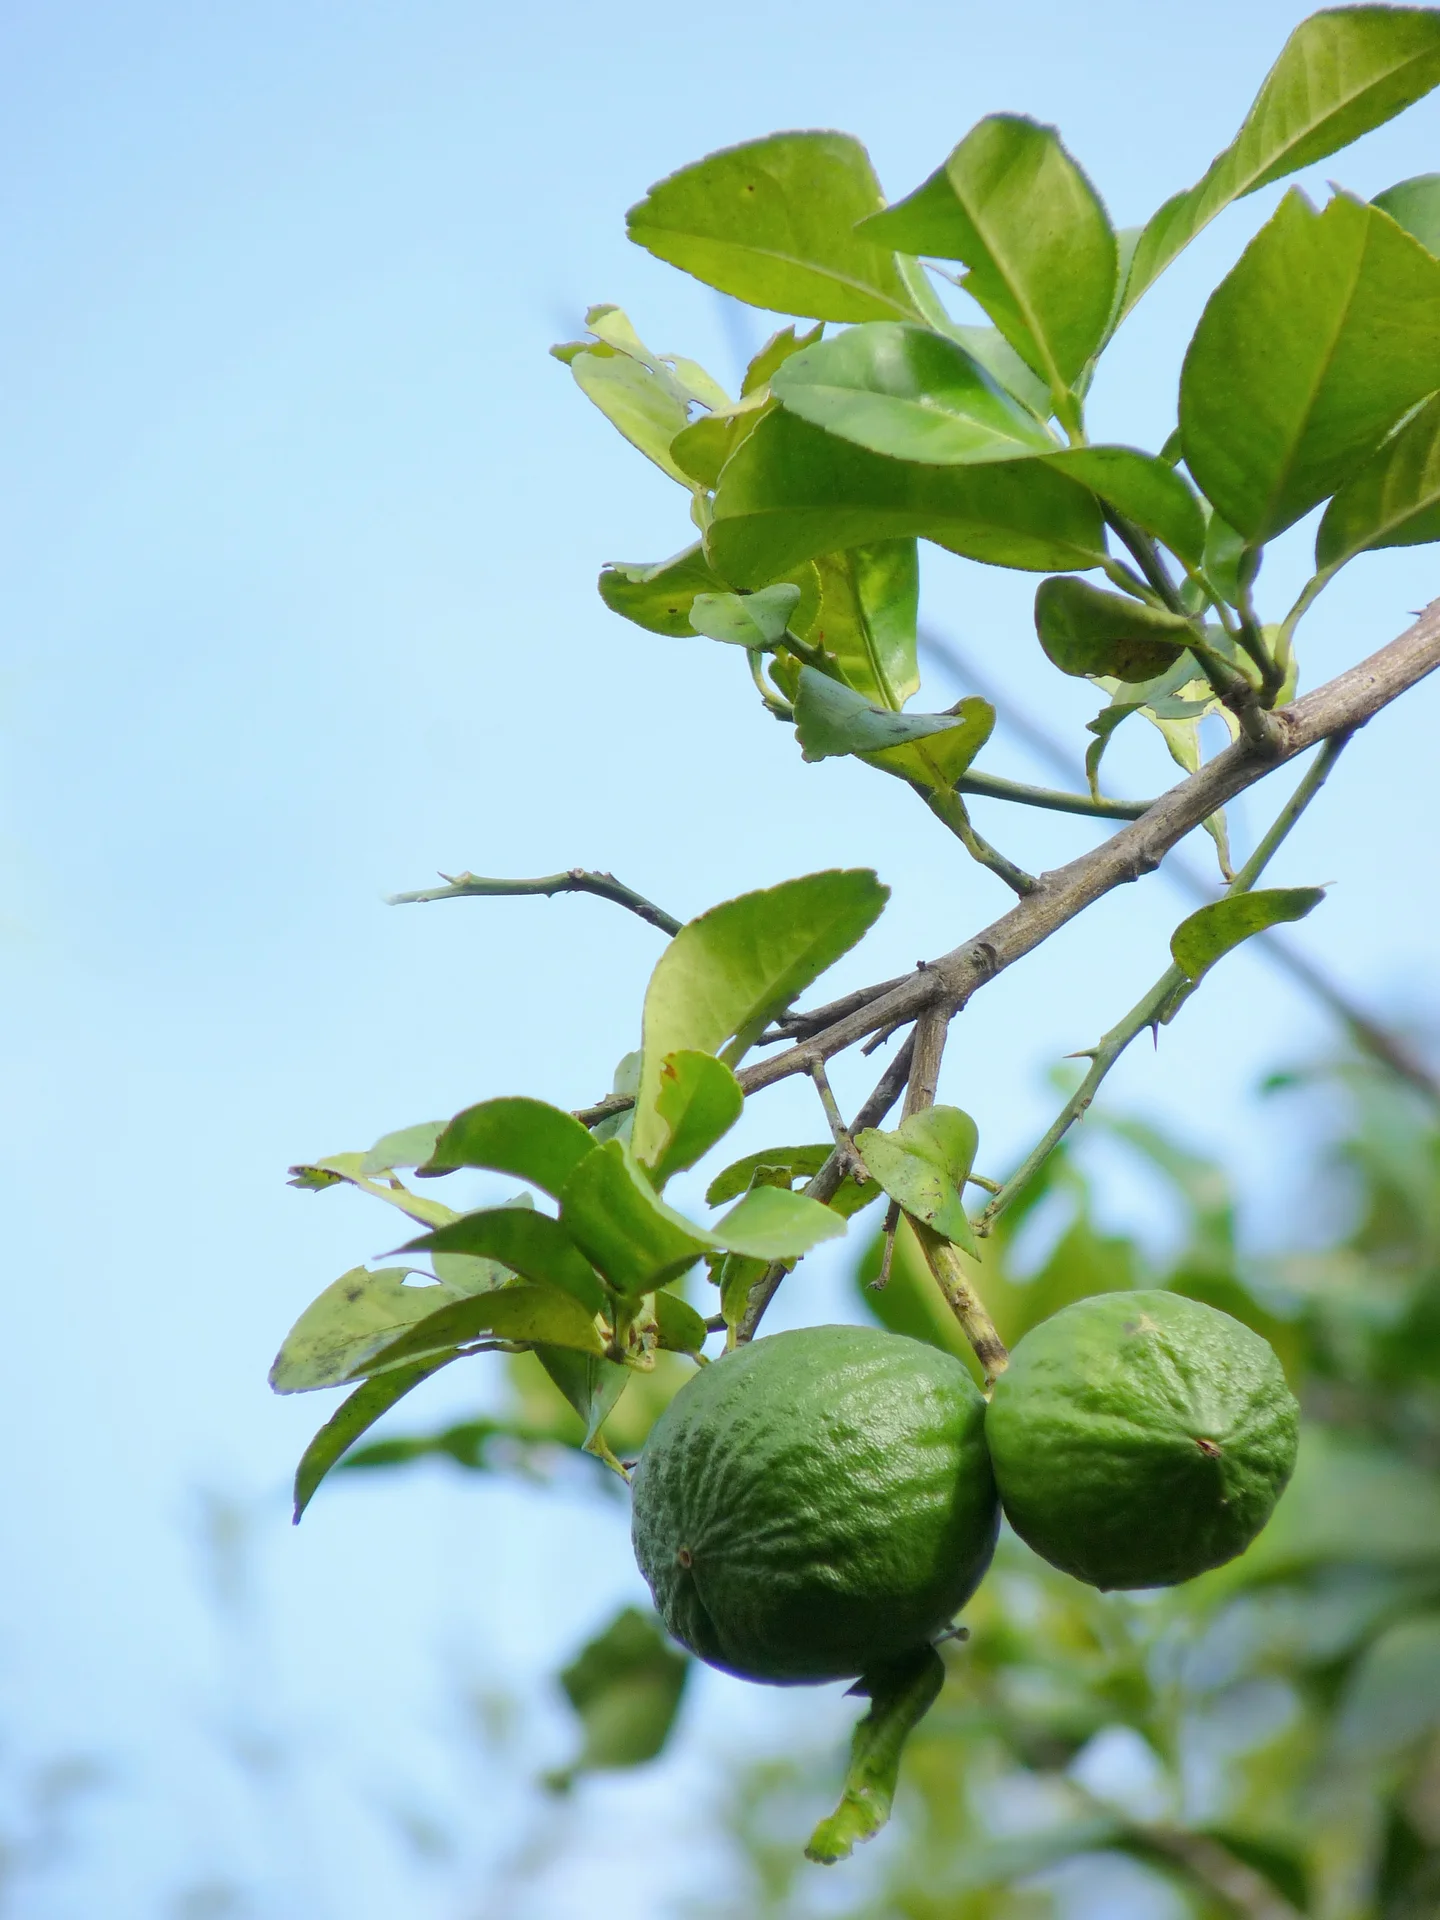
Jeevan Jose, Kerala, India · CC BY-SA 4.0 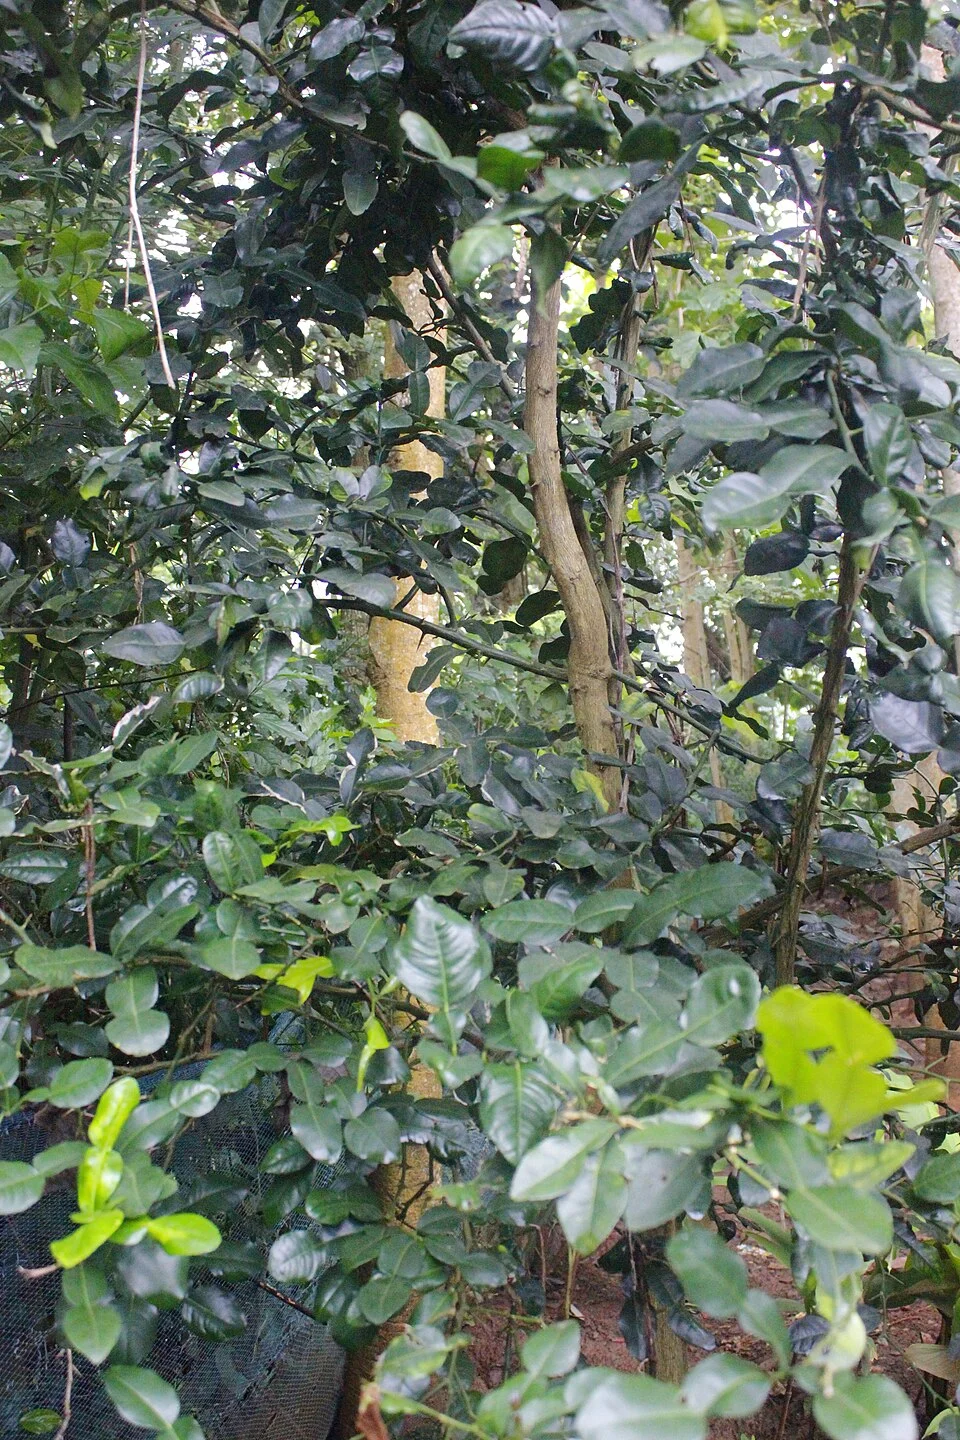
Boesenbergia · CC BY-SA 4.0
- Row spacing
- 550 cm
- Plant spacing in the row
- 550 cm
These are general figures for the crop, compiled from published agronomic references including FAO and CABI. The right choice for your field depends on your soil, rainfall and the yield you are aiming for.
Will lime actually do well on your field? Check your own field against every crop in the catalogue — no signup. Run the crop check →
Also known as
Lime is also called key lime.
- English
- key lime
- Afrikaans
- lemmetjie
- French
- lime, citron vert
- Portuguese
- lima
- Swahili
- ndimu
Working in buckets, bags or paces? The farming glossary turns the measures growers actually use into kilograms and hectares — what a 20 litre bucket of each crop really weighs, and how to size a field by walking it — alongside the Shona, Swahili, Ndebele and Yoruba words used in the field. Open the glossary →
Growing lime, stage by stage
Your lime is a small tree you plant once and pick from for years — this plan takes you from choosing a warm, frost-free spot and planting a grafted tree, through the early years that build its frame, into the flower-and-fruit cycle it repeats all year, while you keep fruit flies and greening disease from stealing the crop.
Pick the right spot and plant your tree
Almost everything about a lime tree's long life is decided before and at planting — a warm, frost-free spot, a healthy grafted tree on the right root, deep well-drained soil, and a good start. You plant only once and the tree then stands for many years, so get the site, the spacing and the planting depth right. This stage also covers the first shaping cuts of the young tree's early years.
Choose a warm, frost-free lowland site Critical
Lime is the most cold-tender of all citrus — even a light frost (around -1 °C) can kill it outright. Where you plant is a decision you live with for the tree's whole life, so choose the warmest, most frost-free spot you have. A cold hollow will cost you the tree; a warm, sunny, sheltered site will feed you for years.
Choose a warm, low, frost-free site in full sun. Limes belong in hot lowlands — if frost ever settles in a spot, don't plant a lime there.
Avoid cold hollows and valley bottoms where cold air pools on clear nights. Higher ground or a gentle slope that lets cold air drain away is safer.
Pick deep, well-drained soil. Dig a test hole and fill it with water — if it stays a pond for hours, the roots will rot there; choose a better-draining spot or plant on a raised mound.
Give the trees room. Limes are planted far apart (about five to six strides apart every way), so make sure the site is big enough for the number of trees you want.
Look for some shelter from strong wind (a hedge or wall on the windy side) — but not shade. The tree still needs full sun all day.
- Tip:
Planting where frost or cold ever occurs — lime is the most tender citrus and cold will kill it.
- Watch out:
Low, still hollows are frost traps on clear cold nights — cold air flows downhill like water and settles in dips. Plant higher up.
- Do:
Choose deep, free-draining soil. Lime roots drown and rot in ground that stays wet.
Choose a grafted tree on a suitable rootstock Critical
A lime tree is really two plants in one: a chosen fruiting top joined onto a tough rootstock (the root part it grows on). Buying a healthy grafted tree — not a seedling — on the right rootstock gives you fruit years sooner and a root that resists disease. The wrong rootstock can doom the tree to a slow decline you cannot reverse.
Buy a grafted tree from a trusted nursery — one where a chosen lime variety has been joined (grafted) onto a separate root variety. You will see the graft union: a knobbly join low on the stem.
Ask the nursery for a rootstock suited to your area and its diseases. Tell them if tristeza (a citrus virus, see below) has been a problem locally.
Avoid a sour-orange rootstock where tristeza virus is around. Sour orange catches it badly — trees on it decline and collapse. Ask the nursery which rootstock they used.
Check the young tree is healthy: green, unblemished leaves with no blotchy yellow mottle, no sticky pests, a straight stem, and a clean, well-healed graft.
Buy from a nursery that sells certified, disease-free citrus stock. A cheap, infected tree can spread disease to every tree you own.
- Tip:
Sour-orange rootstock where citrus tristeza virus ('CTV', a citrus virus) is present — it makes the tree decline and die.
- Tip:
Growing your own tree from a lime pip (seed) — it takes far longer to fruit and misses the disease-resistant root a grafted tree gives you.
- Watch out:
Reject any nursery tree with blotchy, one-sided yellow leaf mottle or sticky, curled new leaves — it may already carry disease or pests.
Ensure drainage, plant, stake & water in Critical
How you plant sets the tree up for its whole life. Two mistakes here are almost impossible to undo: burying the graft join (it invites rot and throws away the rootstock's protection) and planting into wet ground (the roots rot). Plant on well-drained soil, keep the join above the ground, stake against wind, and water it in.
First, mark out your tree positions about 5.5 m apart — roughly five to six strides — every way, in both directions (about 340 trees fill a hectare). This wide spacing is permanent, so pace it out carefully before you dig.
Dig a generous hole, wider and deeper than the tree's root ball, on deep, well-drained soil. Mix some well-rotted compost or manure into the soil you will put back.
Set the tree so the graft union — the knobbly join low on the stem — stays a hand-span (about 20 cm) ABOVE the soil line. Never bury it. Planting too deep lets rot in and lets the fruiting top take root and lose the rootstock's protection.
Fill back and firm the soil gently around the roots so there are no air pockets.
Build a low ring of soil (a basin) around the tree, a little wider than its canopy, to catch and hold water — then water it in well.
Stake the young tree to a strong pole so wind cannot rock it and tear the new roots. Tie it loosely with soft material, never wire that cuts into the bark.
Keep a weed-free ring around the trunk, wider than the branches reach, so weeds do not steal its water — but keep mulch and soil from piling against the stem.
- Tip:
Burying the graft union — plant with that join clearly above the soil, or the tree rots and loses its rootstock.
- Tip:
Planting into a wet, poorly-drained hole. If water ponds in your test hole, mound the soil up and plant on the raised mound.
- Do:
Stake the young tree and water it in on planting day — a rocked, dried-out young tree struggles for months.
Formative pruning to an open frame Recommended
In its first few years the tree is not fruiting — it is building its frame. A few shaping cuts now give you a strong, open, well-branched tree that will carry fruit for decades. Skip them and you get a tangled, crowded tree that is hard to pick and quick to catch disease.
In the first year or two, choose three or four strong, well-spaced main branches to keep as the tree's frame, and shorten or remove the rest.
Remove any shoots growing from BELOW the graft join (rootstock 'suckers'). These are the wild root variety — they bear no good fruit and will take over the tree if left.
Cut out dead, crossing and inward-growing shoots, and thin the centre so light and air reach right through — an open middle dries fast after rain and fights off disease.
Remove water shoots — the fast, upright, whippy shoots that shade the middle and carry no fruit.
Do this every five to six months through the early years — about twice a year. Use clean, sharp tools and mind the thorns — lime is very spiny.
- Do:
In the first year or two, pinch off the few early flowers and fruit so the young tree puts its strength into building a strong frame, not a handful of limes.
- Watch out:
Rootstock suckers below the graft grow fast and wild — rub or cut them off while small, before they take over the tree.
- Tip:
Topping the tree hard or cutting big holes in the canopy — use light shaping cuts, not heavy chopping.
Grow the young tree strong (the first years)
For its first one to three years the young tree is not fruiting yet — it is growing roots and a frame. Your job is steady water, small frequent feeds, a clean weed-free ring, and protecting it from cold and from the pests and diseases that hit citrus hardest while it is small. A strong young tree becomes a heavy-bearing one.
Scout the young tree Critical
The young tree is at its most vulnerable now. Greening disease (HLB) — spread by a tiny insect — has no cure and can doom the tree, and root rot, leafminer and scale all set it back. Ten minutes every few weeks lets you catch trouble while you can still act.
Roughly every month (every 3–5 weeks), walk to each young tree and look closely — new leaves, older leaves, the twigs, and the base of the trunk.
Greening disease (HLB, huanglongbing): look for blotchy, one-sided yellow mottle on leaves (the yellow does NOT match across the mid-vein), yellow shoots, and small, lop-sided fruit. There is no cure — this is why you watch for the psyllid insect that spreads it.
Root rot (phytophthora): check the trunk base for dark, wet, oozing or gummy patches and bark that is dying. It comes from soil staying too wet — keep water and mulch off the trunk.
Leafminer: look for silvery, wiggly (snake-like) tunnels just under the skin of new leaves, and curled, distorted leaf edges.
Scale insects: look for tiny brown or white bumps stuck on twigs and leaf undersides that do not brush off, plus sticky leaves and black sooty mould growing on the stickiness.
If a tree shows clear greening mottle → remove and burn it so it cannot infect the rest. For pests → open the matching pest guide and act early.
- Watch out:
Greening's yellow mottle is blotchy and one-sided — it does not match on both sides of the leaf's mid-line. Yellowing that DOES match is usually just hunger, not greening.
- Do:
Check the trunk base every visit — a little dark ooze there is early root rot, and drying the soil around the trunk can still save the tree.
Water & feed the young tree Recommended
A young tree has shallow roots that dry out fast but also rot fast in standing water. Steady moisture and small, frequent feeds build the frame that will carry fruit for years — while overwatering against the trunk invites the root rot that kills young citrus.
Water every 1–2 weeks — more often in heat and on sandy soil that dries fast, less in cool or wet weather. Keep the soil moist, never waterlogged.
Water into the basin around the tree, wetting the whole root area out to the canopy edge — but keep water off the trunk itself, which rots if it stays wet.
Feed little and often: small amounts spread in a ring under the outer edge of the leaves (never piled against the trunk), as your recommendation advises. Young roots burn easily, so many small feeds beat one big one.
Lime needs nitrogen, potassium and the micronutrients magnesium and zinc — a compound feed plus magnesium and zinc, per your recommendation.
Keep a mulch ring to hold moisture and smother weeds, but keep the mulch from touching the trunk.
Keep fertiliser off the leaves and away from food, water and children, and wash your hands afterwards.
- Tip:
Letting water pool against the trunk — wet bark rots. Water the root zone out at the canopy edge, not the stem.
- Do:
Feed small amounts often rather than one heavy dose — young citrus roots scorch easily.
- Watch out:
In a cold snap, protect the young tree (cover it, or bank soil and mulch around the base) — a single frost can kill it.
Feed the tree and keep the canopy open
Once it starts bearing, a lime flushes new leaves and flowers all year round in the warm lowlands. Two jobs keep it productive: feed it steadily (including the magnesium and zinc citrus often lacks) and keep the canopy open with light pruning, so light and air get in and disease stays out.
Scout the canopy Critical
The bearing tree's leaves are its food factory. Anthracnose (wither-tip) kills twig tips in wet weather, leafminer disfigures the flush, and aphids can carry tristeza virus — catching them early keeps the canopy healthy and feeding the fruit.
Roughly every month (every 3–5 weeks), walk the trees and look over the leaves, the new flush, and the twig tips.
Anthracnose / wither-tip: look for twig tips dying back from the tip downward and dark, sunken spots on leaves and small fruit — worst in wet, humid spells. Prune the dead tips out (see light pruning).
Leafminer: look again for silvery, wiggly tunnels and curled edges on the soft new leaves.
Tristeza virus / aphids: look for colonies of soft aphids on the new flush (they spread the virus), and, on a tree with a susceptible root, general decline and yellowing. Squash aphid colonies early.
Note what you see. If disease or pests are spreading, act — open the matching guide and prune out affected wood.
- Watch out:
Wither-tip (anthracnose) spreads fastest in wet, still, crowded canopies — every open pruning cut you make is also disease control.
- Do:
Cut dying twig tips back into healthy wood as you find them, and carry the prunings out of the orchard.
Light pruning Recommended
A bearing lime keeps throwing new growth, so it crowds itself. Light, regular pruning keeps the middle open — light reaches the fruit and the canopy dries fast after rain, which is your best defence against anthracnose (wither-tip).
Every 3–5 months, take out dead, diseased and crossing wood and any wither-tip (dead twig tips), cutting back into healthy wood.
Thin the centre so light and air pass right through — an open tree dries quickly and catches far less disease than a dense one.
Remove water shoots (fast, upright, whippy shoots) and any suckers from below the graft join.
Use clean, sharp tools and mind the thorns. Carry prunings out and burn diseased wood — do not leave it lying under the tree.
- Do:
Prune in dry weather and wipe your blade between diseased cuts, so you don't carry disease from tree to tree.
- Tip:
Hard-pruning a bearing tree all at once — it throws lots of soft water shoots and little fruit. Little and often is better.
- Watch out:
Mind the thorns — lime is very spiny. Wear thick sleeves and gloves.
N + K + micronutrient feeding Recommended
A bearing lime flowers and fruits all year, so it is always feeding. Steady nitrogen and potassium keep it flushing and filling fruit, and citrus very commonly runs short of magnesium and zinc, which show up as tell-tale yellowing on the leaves. Little-and-often feeding keeps it fed without burning roots or washing away in the rain.
Feed every 2–3 months, year-round. Your recommendation gives the amount for your tree's size.
Spread it in a ring under the outer edge of the leaves (the 'drip line', where rain drips off) — kept clear of the trunk — on moist soil, then rake or water it in.
Split the year's feed into small, frequent doses rather than one big one — less is washed away by rain and there is no root burn.
Give nitrogen, potassium and the micronutrients magnesium and zinc (a compound plus magnesium and zinc), as your recommendation sets out.
Watch the leaves for hunger: magnesium short = yellowing between the veins on older leaves; zinc short = small, narrow, mottled new leaves ('little-leaf'). Correct these with a foliar spray (sprayed straight onto the leaves) of magnesium/zinc — it acts fast.
Keep fertiliser off the trunk and off wet leaves, away from food, water and children, and wash your hands afterwards.
- Do:
Feed on moist soil and water it in — dry soil plus a heavy dose can scorch the roots.
- Tip:
Piling fertiliser against the trunk — it burns the bark and feeds the wrong place. Spread it out at the leaf edge where the feeding roots are.
- Watch out:
Yellowing between the veins of older leaves is usually magnesium hunger, not a disease — fix it with a magnesium feed or foliar spray.
Flowering — help it set fruit
Limes flush and flower again and again through the warm year — a short dry spell followed by watering can pull a stronger flush together. Two things pay off now: keep the psyllid insect off the soft new flush (it spreads greening disease), and give a zinc-and-boron foliar spray just before flowering to help the flowers set into fruit.
Scout psyllids at the flush Critical
The citrus psyllid is a tiny sap-sucking insect that swarms the soft new flush — and it spreads greening disease (HLB), the incurable disease that slowly kills citrus. One psyllid can carry it, so you act on the first one you see, not when there are many.
From just before flowering, check the new flush about every 7–10 days — the psyllid only breeds on soft new growth.
Look for tiny insects (about aphid-sized) sitting tail-up at a slant (about 45°) on the youngest shoots — this tail-up pose is the giveaway.
Look for their white, waxy, curly threads and for twisted, notched new leaves where they have fed.
While you are there, check for greening itself: blotchy, one-sided yellow mottle on leaves and yellow shoots.
Act on the first psyllids you see — wash them off or spot-treat the flush, and open the psyllid guide. Do not wait for numbers to build.
- Watch out:
The psyllid feeds tail-up at a slant — no other small citrus pest sits like that. That pose is how you tell it apart.
- Do:
Remove and burn any tree showing clear greening mottle. Greening has no cure, so keeping the psyllid out and pulling infected trees is the only real defence.
Zinc/boron foliar Recommended
A little zinc and boron at flowering helps the flowers set into fruit instead of dropping. Sprayed straight onto the leaves (a foliar spray) just before the flowers open, it reaches the tree fast, right when it is forming fruit.
Time it for just before a flowering flush — when the flower buds are swelling but not yet open.
Mix zinc and boron at the rate on your recommendation or the product label. Do not overdo the boron — a little helps, but too much harms the tree.
Spray to wet the new leaves and buds. Spray in the cool of early morning or evening, with the wind behind you.
Cover your skin, eyes and nose, keep the spray off food, and wash yourself and your kit afterwards.
If you miss the window (flowers already open and dropping) → skip it and catch the next flush. Limes flower again and again.
- Tip:
Mixing the boron too strong — over-strong boron scorches the tree. Follow the rate exactly.
- Do:
Spray in the cool, calm part of the day so the spray isn't blown about and doesn't burn in hot sun.
Grow the fruit and beat the fruit fly
The little fruit now fill out over about five to six months. This is a thirsty stage — steady water gives full, juicy limes and stops young fruit dropping. It is also when fruit flies attack: staying on top of traps, bait and picking up fallen fruit is what saves the crop.
Scout fruit fly & anthracnose Critical
Fruit flies sting the fruit and their maggots rot it from the inside, so it drops before you can pick it — you lose fruit you have already grown. Anthracnose spots the fruit in wet weather. Frequent checking lets you start control the moment they appear.
From a couple of weeks after flowering, once tiny fruit have set, check the fruit every 3–4 days — fruit flies move fast.
Hang a trap or two in the tree and check the catch each visit — a rise in catches is your early warning.
Look on the fruit for sting marks (tiny punctures or dimples), soft rotting patches, and fruit dropping early. Cut open a dropped fruit — small maggots inside means fruit fly.
Anthracnose: look for dark, sunken spots on the fruit and dying twig tips (wither-tip), worst in wet spells.
Collect and bury (deep) all fallen fruit twice a week so the maggots inside cannot finish their life cycle and breed the next wave.
On the first stings, or the first rise in trap catches, start the fruit-fly programme now (see the next task).
- Do:
Pick up and bury fallen fruit twice a week without fail — a dirty orchard floor breeds the next generation of flies.
- Watch out:
A sudden jump in your trap catch is the signal to start baiting — don't wait for stung fruit to pile up.
Steady irrigation through set & fill Recommended
Fruit set and fill is a critical water stage. Steady moisture makes full, heavy, juicy limes and stops young fruit dropping — while a dry spell followed by a soaking makes the fruit split and fall. Even watering now turns directly into fruit in the basket.
Water every 7–10 days right through fruit set and fill — more often in heat and on sandy soil.
Keep the soil evenly moist. Do not let it go bone-dry and then flood it — that sudden swing splits and drops the fruit.
Wet the whole root zone out to the canopy edge, not just the trunk — that is where the feeding roots are.
Keep water off the trunk base (wet bark rots), and keep a mulch ring to hold the moisture in.
- Tip:
Letting the tree dry hard and then drenching it — the swing splits the fruit skins and drops young fruit.
- Do:
Mulch under the tree to even out the moisture between waterings, especially in the heat.
Fruit-fly management Recommended
Once the fruit are big enough to sting, fruit flies can ruin a large share of the crop. A programme of traps + spot protein-bait + picking up fallen fruit knocks them down without blanket-spraying the whole tree (which would kill the helpful insects and the bees on your flowers).
Start on the first stung or dropping fruit, or the first rise in trap catches — not before, and not too late.
Use a protein bait (a sweet, protein lure mixed with a little insecticide that the flies come to feed on) as small spots on the trunk or a few leaves — not a full-tree cover spray. The flies come to the bait and die.
Refresh the bait after rain and about weekly, and keep your traps hung and topped up.
Keep collecting and burying fallen fruit twice a week — sanitation is half the battle; bait alone won't win if the ground is full of maggoty fruit.
Respect the pre-harvest interval — the number of days on the product label you must wait between the last spray and picking. Do not pick before that time is up.
Safety: cover your skin, eyes and nose; apply in the cool with the wind behind you; keep it off food and off fruit you'll eat soon; and wash your hands, kit and clothes afterwards.
- Tip:
Cover-spraying the whole tree with strong insecticide — it kills the helpful insects and the bees pollinating your flowers. Spot-bait instead.
- Do:
Combine all three — traps, bait spots, and burying fallen fruit. Any one alone leaves a gap the flies slip through.
- Watch out:
Note your last spray date and the label's pre-harvest interval, so you never pick and sell fruit too soon after spraying.
Pick your limes
Limes are picked green, at full size and juiciness — they do not ripen or sweeten after picking, and left too long they turn yellow and lose their sharp, fresh quality. Because the tree bears a little all the time, you pick over it again and again rather than all at once.
Hand-clip mature green fruit Critical
Pick at the right moment: full-size, deep-green, juicy fruit. Limes do not ripen after picking, so a fruit picked too early stays hard and poor, and one left too long turns yellow and loses its fresh sharp acid — and its value. Clip, don't pull — a torn rind rots in the basket.
Pick when fruit are full-sized, deep green, and feel heavy for their size — a light squeeze gives just slightly, meaning it is full of juice.
Clip the stalk with scissors or secateurs, close to the fruit. Never pull — pulling tears the rind and the fruit rots.
Pick over the tree every 1–3 weeks, taking the ready fruit each time — an ever-bearing lime ripens a few at a time, not all at once.
Handle gently into a padded basket and keep the picked fruit out of the sun.
Try not to pick wet fruit — surface water spreads anthracnose in the basket.
- Do:
Hand-clip the stalk — pulling tears the rind and opens the fruit to rot.
- Watch out:
Fruit turning yellow are over-mature — pick those first, and pick a little earlier next round to keep the sharp green quality.
- Tip:
Reaching into the thorns bare-armed — lime spines puncture both your hands and the fruit. Wear thick sleeves.
Handle, cool and sell
The fruit is grown — now don't lose it in handling. Green limes are perishable, and — unusually — they suffer cold damage if stored too cold: below about 9–10 °C the skin pits and spoils. Keep them cool but not cold, cull the damaged ones, and sell fresh and fast.
Handle gently, cool (not cold) & market Recommended
Careful handling turns grown fruit into sold fruit. Limes bruise and rot easily and — unlike most crops — they get cold injury if kept too cold: below about 9–10 °C the skin pits and spoils (this is called chilling injury). Keep them cool but not cold, and move them fast — green limes don't keep long.
Keep picked fruit in the shade, out of the sun and heat, from the moment it is picked.
Sort out the damaged fruit first — any stung, cut, bruised or spotted limes. One rotting fruit spreads rot through the whole crate.
Pack gently into clean, ventilated crates. Do not overfill or stack so heavy that the bottom fruit are crushed.
Store cool but NOT cold — a shaded, airy place. Do not store below about 9–10 °C: too-cold storage pits and spoils the skin.
Market green-picked fruit fresh and fast — limes are perishable and lose quality quickly.
- Tip:
Storing limes in a very cold fridge or cold-room — below about 9–10 °C the skin pits and the fruit spoils. Cool and shaded, not cold.
- Watch out:
One rotting or stung fruit infects its neighbours — cull the damaged ones before they sit together in the crate.
- Do:
Move fruit to market quickly — green limes don't hold their quality for long.
Pests and diseases that attack lime


Grow lime with a plan, not a guess
This guide is the general answer. Divisi works out yours — the week to plant lime on your soil and your rainfall, and each job dated for your field.


When to plant lime, country by country
- When to plant lime in Algeria
- When to plant lime in Angola
- When to plant lime in Benin
- When to plant lime in Botswana
- When to plant lime in Burkina Faso
- When to plant lime in Burundi
- When to plant lime in Cabo Verde
- When to plant lime in Cameroon
- When to plant lime in Comores
- When to plant lime in Congo
- When to plant lime in Côte d'Ivoire
- When to plant lime in Egypt
- When to plant lime in Eritrea
- When to plant lime in Eswatini
- When to plant lime in Ethiopia
- When to plant lime in Gabon
- When to plant lime in Gambia
- When to plant lime in Ghana
- When to plant lime in Guinea Ecuatorial
- When to plant lime in Guinea-Bissau
- When to plant lime in Guinée
- When to plant lime in Kenya
- When to plant lime in Liberia
- When to plant lime in Libya
- When to plant lime in Madagascar
- When to plant lime in Malawi
- When to plant lime in Mali
- When to plant lime in Mauritanie
- When to plant lime in Mauritius
- When to plant lime in Morocco
- When to plant lime in Moçambique
- When to plant lime in Namibia
- When to plant lime in Niger
- When to plant lime in Nigeria
- When to plant lime in Rwanda
- When to plant lime in République centrafricaine
- When to plant lime in République démocratique du Congo
- When to plant lime in Sao Tome and Principe
- When to plant lime in Seychelles
- When to plant lime in Sierra Leone
- When to plant lime in Somalia
- When to plant lime in South Africa
- When to plant lime in South Sudan
- When to plant lime in Sudan
- When to plant lime in Sénégal
- When to plant lime in Tchad
- When to plant lime in Togo
- When to plant lime in Tunisie
- When to plant lime in Uganda
- When to plant lime in United Republic of Tanzania
- When to plant lime in Zambia
- When to plant lime in Zimbabwe
Where lime scores best
Districts where Divisi's engine currently rates this crop highest, ranked by fit.


Get Insights by email
A short digest of new Divisi articles. No email on quiet weeks.
Frequently asked questions
How do I grow lime?
How to grow lime: 550 cm rows. Also called key lime, lemmetjie, citron vert, lima, ndimu.
What is lemmetjie in English?
Lemmetjie is the Afrikaans name for lime.
What is lime in English?
Lime (also citron vert) is the French name for lime.
What is lima in English?
Lima is the Portuguese name for lime.
What is ndimu in English?
Ndimu is the Swahili name for lime.
What spacing should I use for lime?
Space lime rows about 550 cm apart, with roughly 550 cm between plants within the row.
What pests and diseases attack lime?
The ones covered in this guide are Citrus black spot, Citrus leafminer, Citrus mites. Each has its own page explaining how to identify, check for and control it.