 Divisi
How to grow rape, covo and kale
Brassica oleracea var. acephala · Brassicaceae
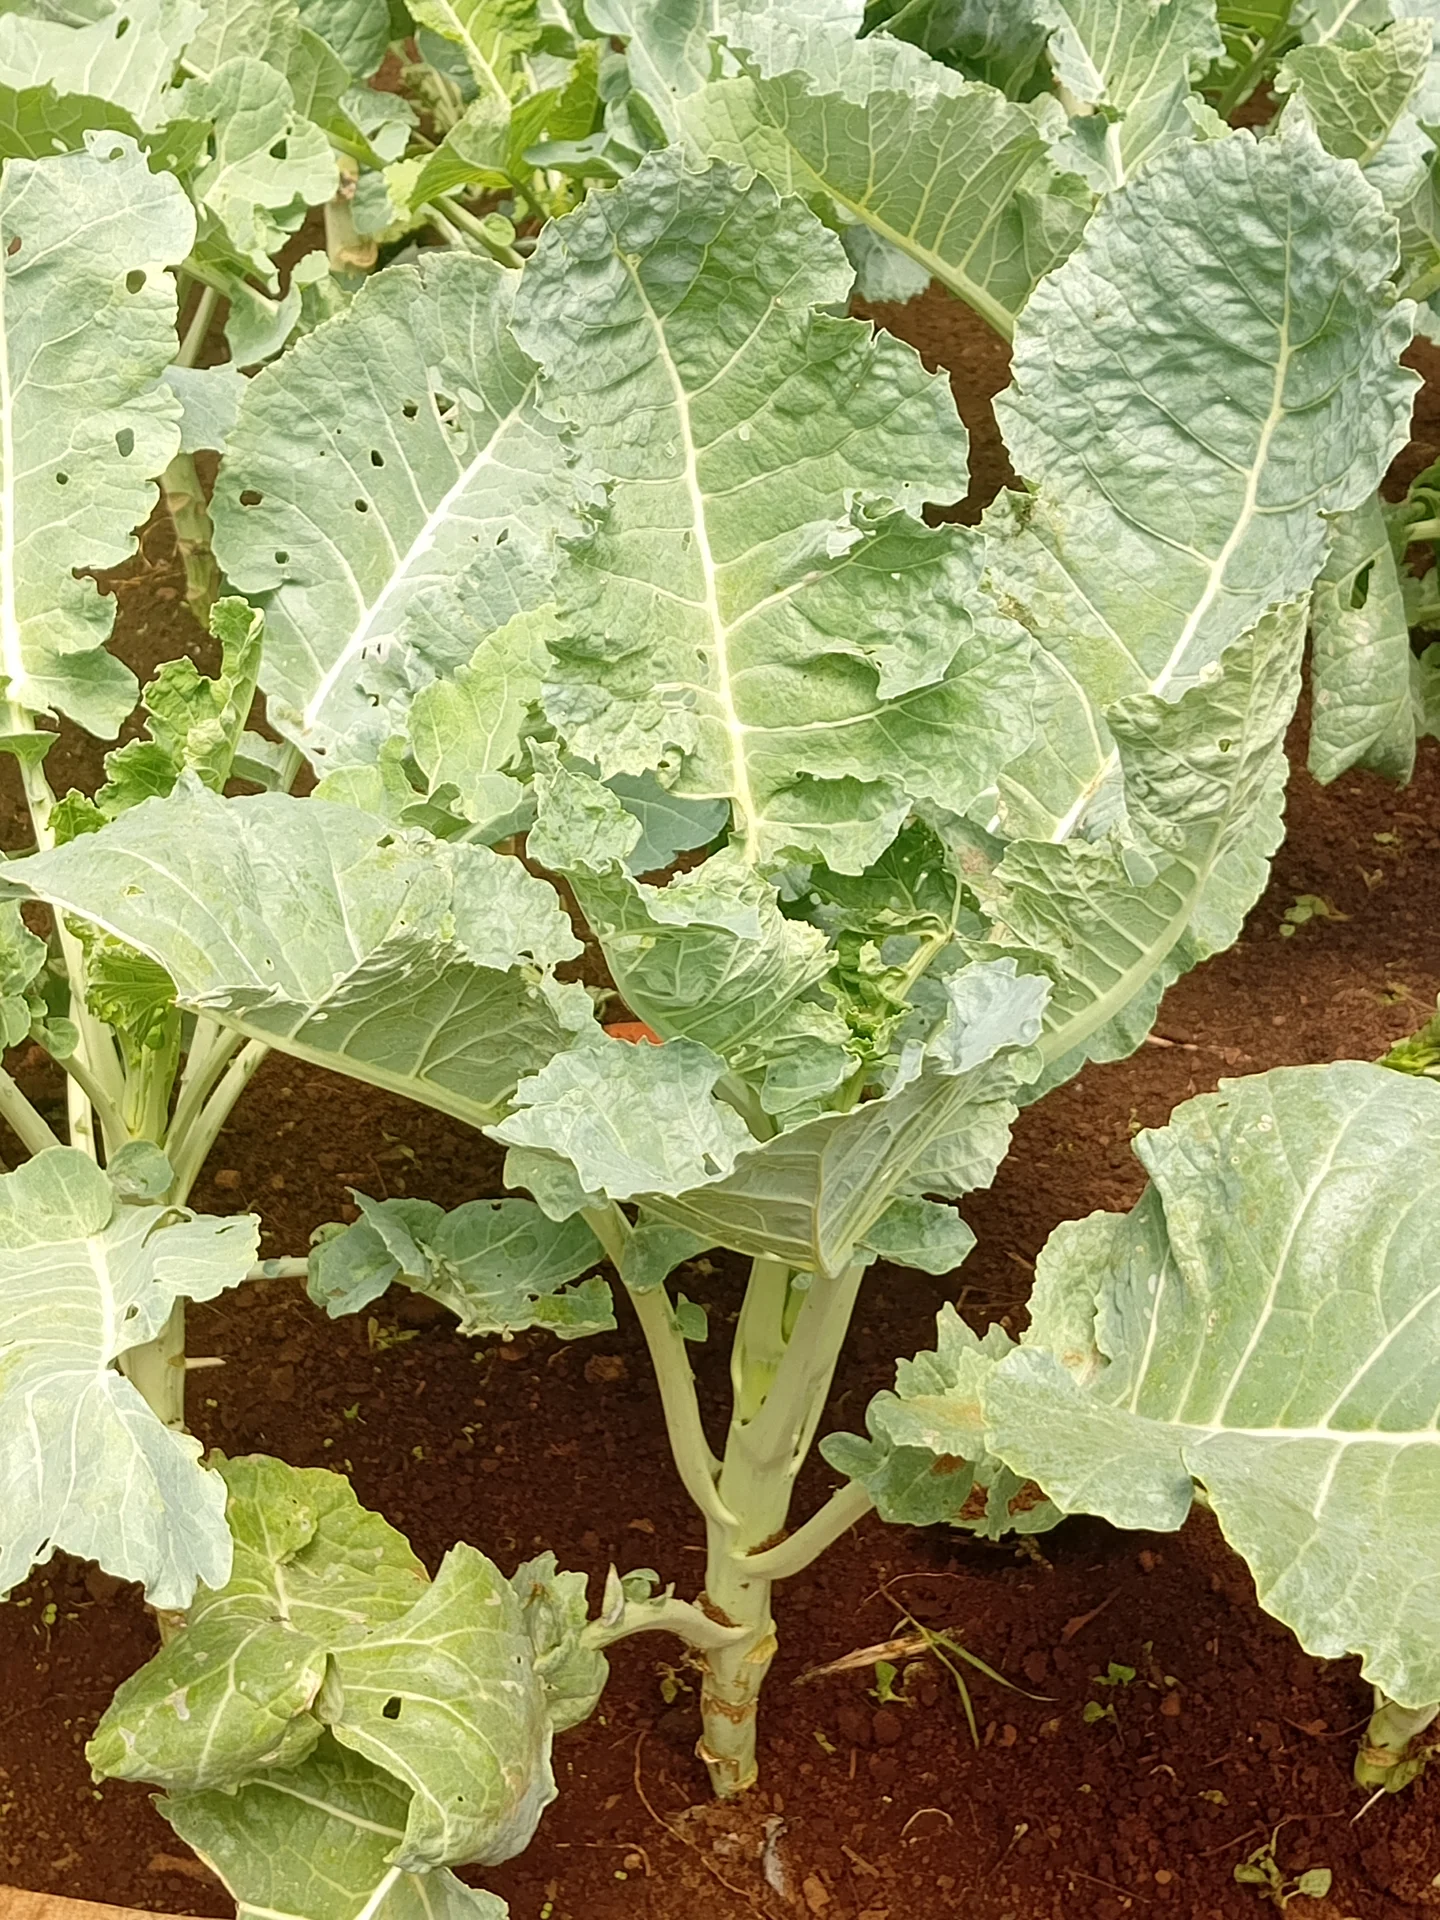
Photo: Coolbrizzy · CC BY-SA 4.0
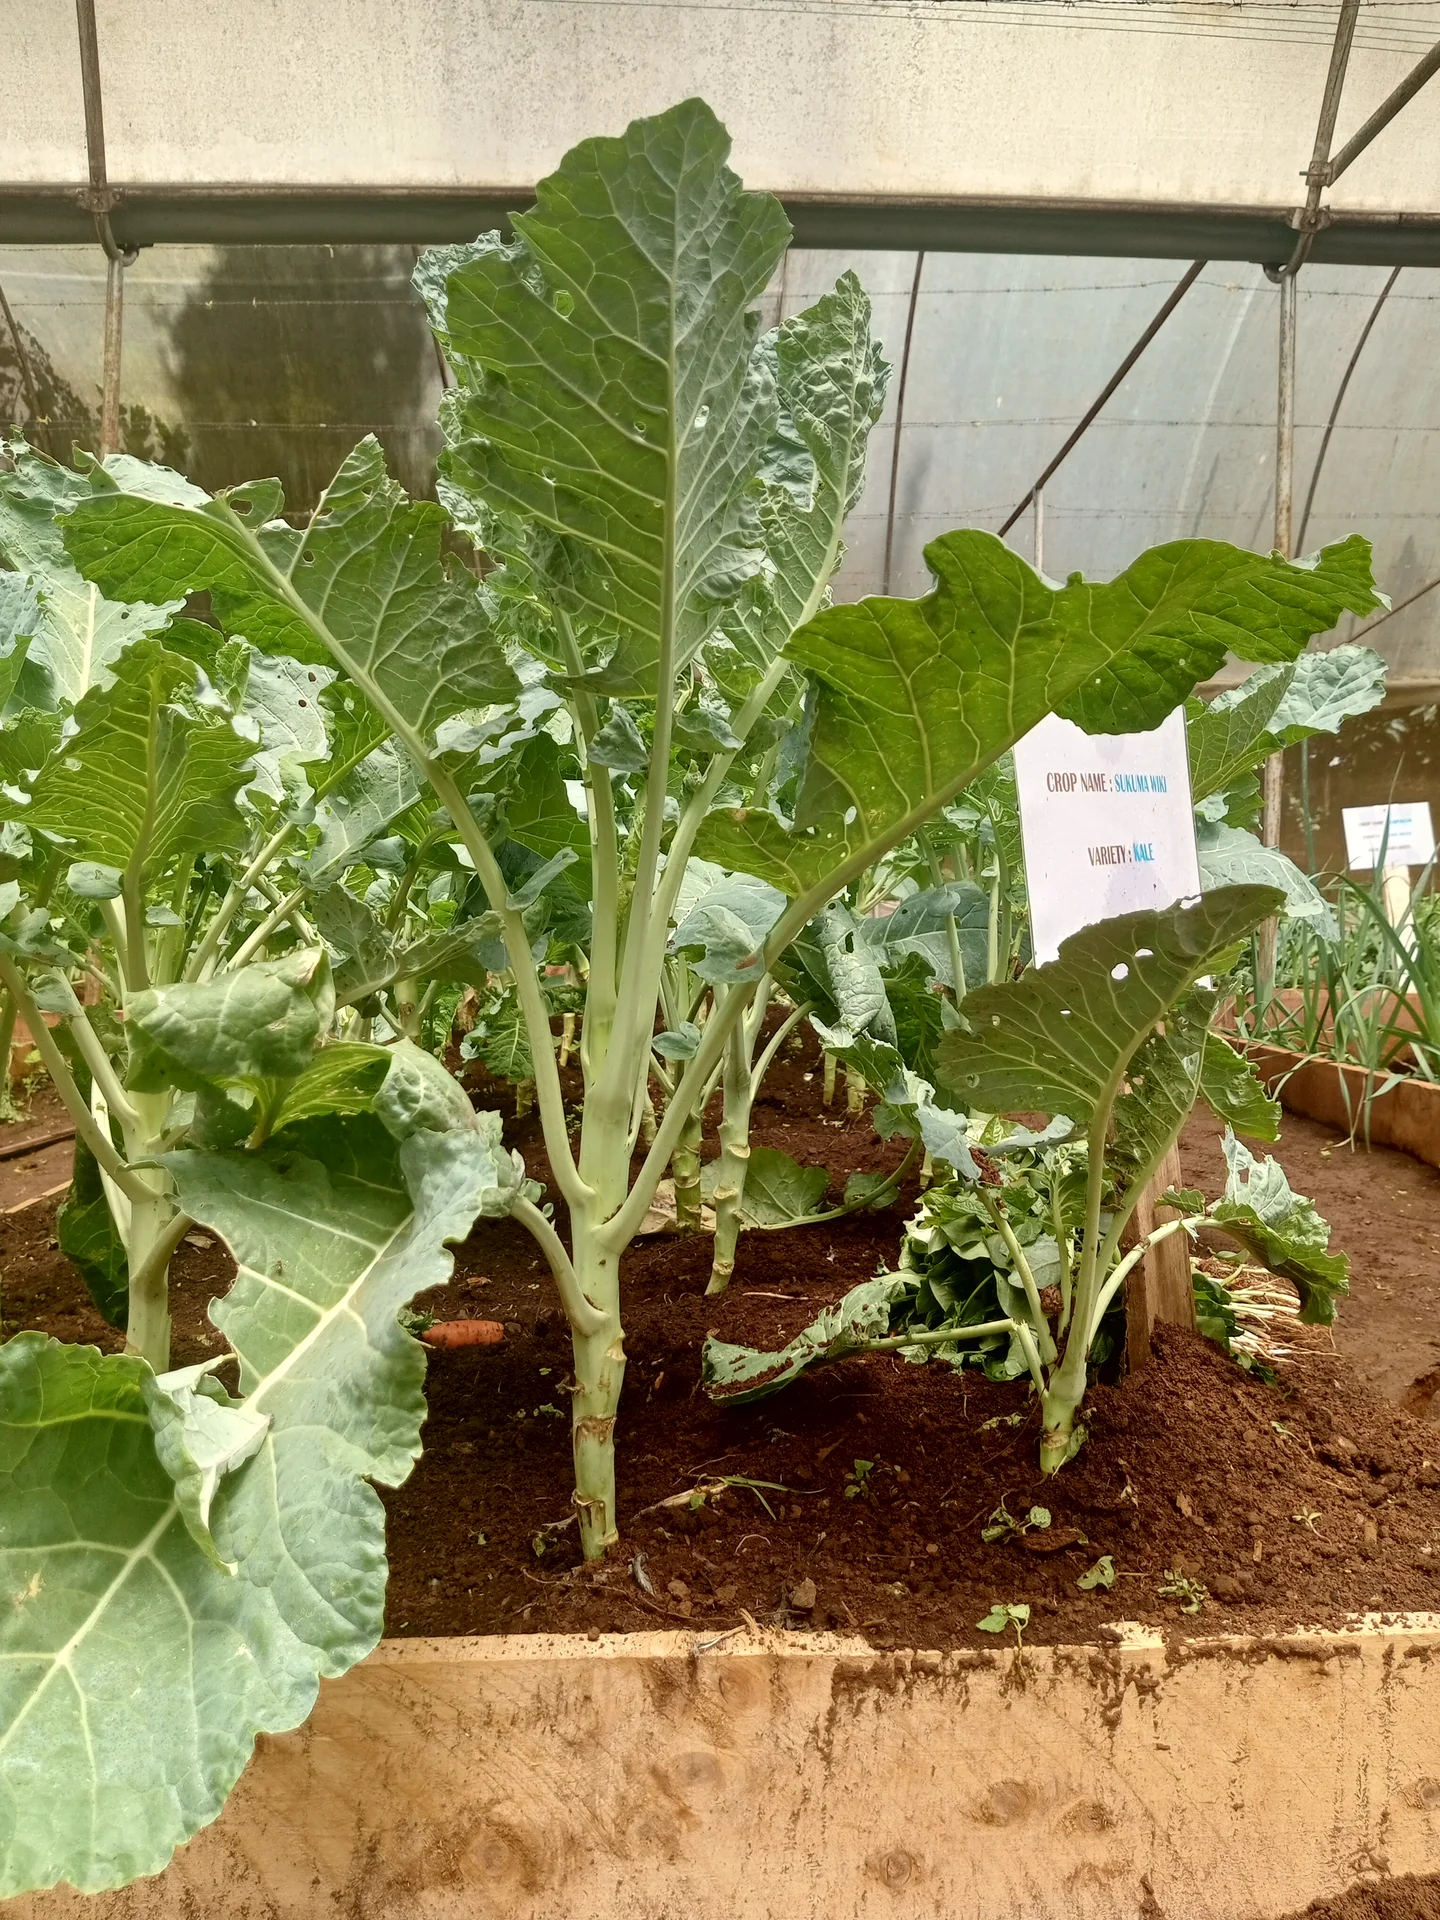
Rape, covo and kale are the everyday leafy greens of the African plot — the relish in the pot most nights. They are all the same loose-leaf cabbage: unlike a real cabbage, they never ball up into a hard head. Instead each plant grows an open crown of leaves that you pick a few at a time, leaving the plant standing to grow more. From one good planting you can pick for the pot and the market for four to six months, until the plants age — and a cold spell, or a run of heat and thirst — finally pushes them to flower (bolt) and the leaves turn tough. They are hungry, thirsty plants that reward sweet, rich soil, a steady drink of water, and a small feed after every pick — and they ask you to stand firm against their two great enemies, the diamondback-moth caterpillar and the cabbage aphid.
Coolbrizzy · CC BY-SA 4.0
- Days to maturity
- 120–180 days
- Row spacing
- 45 cm
- Plant spacing in the row
- 45 cm
- Sowing depth
- 1–2 cm
These are general figures for the crop, compiled from published agronomic references including FAO and CABI. The right choice for your field depends on your soil, rainfall and the yield you are aiming for.
Will rape, covo and kale actually do well on your field? Check your own field against every crop in the catalogue — no signup. Run the crop check →
Also known as
Rape, covo and kale is also called collards and leaf rape.
- English
- collards, leaf rape
- Afrikaans
- boerkool
- Amharic
- gomen
- Chichewa
- mpiru
- Ndebele
- umbhida
- Shona
- covo, rape, tsunga
- Swahili
- sukuma wiki
- Zulu
- umbhida
Working in buckets, bags or paces? The farming glossary turns the measures growers actually use into kilograms and hectares — what a 20 litre bucket of each crop really weighs, and how to size a field by walking it — alongside the Shona, Swahili, Ndebele and Yoruba words used in the field. Open the glossary →
Growing rape, covo and kale, stage by stage
Raise strong seedlings in a nursery, plant them out into sweet, rich, well-fed soil, then pick the outer leaves and feed and water the plants every week or two for months — staying a step ahead of caterpillars, aphids and black rot the whole way.
Raise strong seedlings and ready the soil
Everything the crop will become starts here: strong, even seedlings and soil made sweet and rich enough to feed months of picking. The seed is as fine as dust, so you raise it in a small, cared-for nursery bed and move only the best seedlings to the field at 3–5 true leaves. Lime early — it works slowly — and dig in plenty of well-rotted manure before you transplant, because these shallow-rooted greens are hungry and thirsty from the very first day.
Sow the nursery Critical
The seed of rape and covo is tiny — like grains of dust — and out in the open field it can't fight weeds or dry soil. A small, sheltered nursery bed lets you raise strong, even seedlings and pick only the best to plant out. Sow about 4 weeks before you plan to transplant, so the seedlings are the right size when the field is ready.
Make a small, fine seedbed in a sheltered, well-drained spot with light shade. Rake the soil to a fine crumb, like flour, so the dust-fine seed sits snug against it, and mix in a little well-rotted compost.
Draw shallow drills (little furrows) across the bed, 10–15 cm apart — a bit under a hand-span (a hand-span, thumb-tip to little-finger, is about 20 cm).
Sow the seed thinly along each drill — a pinch trickled slowly, not a heavy line — then barely cover it, only 1–2 cm deep, about half a finger-joint. The seed is dust-fine; sown deep it rots in the ground before it can reach the light.
Water gently with a fine rose, or a leafy branch dipped in water, so you don't wash the seed out of the drills. Keep the bed moist but never soaked, watering in the morning; the seedlings should show in about a week.
If barely any seedlings are up after 10 days, sow a fresh bed at once rather than wait on a bad one — you still have time before transplant.
Once the seedlings open their first proper leaves, thin any crowded patches so each stands about a finger-width apart. Crowded seedlings grow thin, tall and weak.
Aim to transplant at 3–5 true leaves (the proper leaves that come after the first pair), up to a hand-span (about 20 cm) tall — roughly 4 weeks from sowing.
- Do:
Sow a few more seedlings than you need. At transplant you can then plant only the strongest and throw out the weak, leggy ones — and keep a few spare to fill gaps later.
- Watch out:
Damping-off — seedlings that suddenly keel over with a pinched, rotten, thread-thin base — comes from a wet, crowded bed. Sow thinly, water in the morning, and never overwater.
- Tip:
Sowing the seed deep. It is as fine as dust; 1–2 cm is plenty. Deep seed rots in the ground before it can break the surface.
Hot-water-treat seed (black-rot areas) Recommended
Black rot is the worst disease of these greens, and it usually rides in on the seed itself — you plant the disease without knowing. A careful hot-water bath kills the germ on and in the seed before it ever reaches your bed. It is only worth doing where black rot is known, and only on plain, untreated seed.
First run a germination test so you don't cook weak seed: sprout 50–100 seeds on a damp cloth for about a week and count how many grow. Do this the week before you mean to treat and sow.
Only treat seed that sprouts well. If few of them grow, the seed is weak → buy fresh seed rather than treat it, because hot water sets weak seed back even further.
Warm clean water to exactly 50 °C — hot to the hand but not scalding. You need a thermometer: hotter than 50 °C cooks the seed dead; cooler doesn't kill the germ. Keep a kettle nearby to top up and hold the heat.
Tie the seed loosely in a thin cloth and hold it in the water for 20–30 minutes, swirling it now and then so every seed stays evenly warm.
Lift it out, spread the seed to dry in the shade, then sow within a day or two.
Never treat seed that came already coated or coloured (that means it is treated) from the shop — you'd wash off the protection, and the seed can be harmed.
- Watch out:
Temperature is everything — a few degrees too hot and you kill the whole batch. If you can't hold a steady 50 °C, don't guess → buy certified disease-free seed instead.
- Do:
Only bother where black rot has hurt past crops here — the sign is yellow, V-shaped patches biting in from the leaf edge, with the veins inside them turning black.
Harden off seedlings Recommended
Seedlings raised soft in a cosy nursery wilt badly and stall when they're suddenly thrown into the open field. Toughening them up in their last week — called hardening off — means they take to the field fast and keep growing without a check.
In the last week before you lift them, cut back on watering — water less often, and let the bed dry a little between waterings.
Open up any shade and let the seedlings feel more sun and wind, so their leaves toughen and darken.
Keep this up for about a week. Hardened seedlings look sturdier and a little darker, not soft and pale.
Water the bed well the evening before you lift, so the roots come up in a ball of moist soil and hardly feel the move.
- Do:
Lift and transplant in the cool of evening, or on an overcast day — never in hot midday sun, when moved seedlings wilt hardest.
- Tip:
Starving them bone-dry. Hardening off means less water, not none — bone-dry seedlings are set back too far to recover quickly.
Sweeten and feed the field
While the nursery grows, get the field ready. These hungry, shallow-rooted greens need the ground sweetened where it's sour and built up rich with well-rotted manure, because this one bed will feed you for four to six months of picking. If you're not raising your own seedlings, buy strong, clean ones now.
Lime at land prep Recommended
In sour (acid) soil, these greens can't drink up the food you give them — they grow slowly and go yellow — and the root disease clubroot runs wild. Lime sweetens sour soil, but it works slowly, so it must go on weeks to two months before you transplant to help this crop.
Only lime if your soil is sour. A soil test tells you for sure; so does a memory of past crops that stayed yellow and stunted even when you fed them. Your recommendation gives the amount for your field.
Spread it evenly over the nursery bed and the field, like sprinkling flour by hand — patches of lime give you patches of good and bad plants.
Work it into the topsoil with a hoe. Lime only sweetens the soil it is mixed into; left lying on top it does almost nothing.
Do it as early as you can — weeks to two months before transplanting — because lime is slow to act. Where clubroot is a known problem, lime harder, to a sweeter soil, and your recommendation will say so.
- Do:
Spread lime and manure a couple of weeks apart, not on the same day — give each time to work into the soil.
- Watch out:
Wash your hands after handling lime, keep the dust out of your eyes and nose, and keep it off any food and water.
Incorporate manure Critical
Leafy greens are hungry and thirsty, and their roots sit shallow, so the ground must be rich and hold water well. Plenty of well-rotted manure feeds them slowly all season and keeps the soil moist for tender leaves. But fresh manure burns young roots and carries weed seeds, so it must be well rotted first.
Use only well-rotted manure or compost — dark, crumbly, and without a strong smell. Fresh, strawy manure still needs time to rot down.
Spread it thickly and evenly over the beds — far more than a grain crop needs. Aim for about 2–4 kg over every square metre (one pace each way — a pace is about one metre). As a picture, one loaded wheelbarrow (about 50 kg of rotted manure) covers roughly a 4-pace by 4-pace patch.
Work it into the topsoil in the 1–2 weeks before you transplant, so it settles in and is ready when the roots arrive.
On heavy or wet soils, make raised beds as you dig it in — these greens rot in soggy ground.
- Tip:
Fresh, raw manure at planting — it scorches the young roots, robs them of nitrogen as it rots, and sows weeds right through your bed.
- Watch out:
Wash your hands well after handling manure.
Source healthy seedlings Critical
If you're not raising your own, the seedlings you buy are the whole crop you'll pick from for months — a sick or leggy transplant never fully recovers, and one carrying black rot can seed it through the whole bed. Buy strong, clean plants from a trusted nursery in the week before you transplant.
Buy stocky, dark-green seedlings at 3–5 true leaves, up to a hand-span tall — not tall, thin or pale ones.
Check each one: no yellow, V-shaped patches with blackened veins (black rot), no webbed-over growing centres, and no wilting. Reject the whole batch if many look sick.
Buy from a nursery raising seedlings on clean, fresh media, away from any old cabbage-family patch — that's how black rot and clubroot travel.
Transplant them within a day or two of buying, keeping them shaded and watered until you do.
- Do:
Pick short, stocky, dark-green seedlings — they root fast and start picking sooner.
- Tip:
Buying cheap, leggy or yellowing seedlings, or any with black-veined leaf spots — you're buying a poor stand and maybe a disease.
Transplant and settle them in
The stand you set now is the frame that feeds you for months — and its spacing can't be changed later. Move the seedlings in the cool of evening at the right spacing, give each the basal (its first feeding, placed in the planting hole) with boron, and water them in well. The first two weeks are when cutworms, cabbage webworm and flea beetles hit young plants hardest, so watch closely and keep the soil moist while the roots take hold.
Transplant + basal + water in Critical
This is planting day — the day the crop's frame is set. Seedlings settled at the right spacing, fed a basal (the first feeding, placed in the planting station) with boron, and watered in well will romp away. Get the spacing right now, because you cannot change it later.
Transplant in the cool of evening, when the seedlings have 3–5 true leaves. Water the nursery first, then lift each seedling with a ball of soil so the roots barely break.
Set the plants about 45 cm apart each way — just over two hand-spans (a hand-span is about 20 cm). Go as close as 30 cm for more but smaller leaves, or up to 60 cm between rows for bigger plants. Plant to the same depth they grew in the nursery, firm the soil around each, and never bury the growing centre.
Place the basal compound fertiliser plus boron in each station as your recommendation directs, mixed into the soil just below and to the side of the roots — not touching them, or it burns. The compound gives the young plant phosphorus, potassium and sulfur; boron is a trace food (needed in tiny amounts) these greens must have, or their stems turn hollow and brown inside.
Water in well right after planting, so the soil closes around the roots and each seedling stands up firm.
On sour (acid) soils, spray a molybdenum feed over the leaves about a week after transplanting — molybdenum is another trace food, the one that lets the plant use its nitrogen. Your recommendation will tell you if you need it.
- Do:
Transplant in the evening or on a dull, cool day and water in at once — this single step does more than anything else to stop the seedlings wilting.
- Tip:
Dropping the fertiliser into the hole against the roots — keep it a little to the side and below, or it scorches them.
- Watch out:
Firm the soil so no air pocket is left at the roots, but never pack soil into the growing centre in the middle of the plant — that's where all the new leaves come from.
Scout (cutworms, webworm, flea beetles, DBM) Critical
The first two weeks after transplant decide your stand. Cabbage webworm can bore into and kill the growing centre of a young plant, cutworms slice seedlings off at the ground overnight, and flea beetles riddle the leaves — and a young plant has no leaves to spare. Ten minutes, twice a week, saves the stand.
Twice a week, walk a large 'W' across the field so you cover the corners and the middle, not just the edge by the path. Stop often and look closely at the young plants.
Cabbage webworm (the worst one here): look for the tiny growing centre webbed over with silk, with small caterpillars boring into the heart. A hit plant stops growing or dies. Squash them; on a bad run, spray as your control guide directs.
Cutworms: look for seedlings cut clean off at ground level (worst first thing in the morning). Scratch the soil around the cut stump to find the fat, grey, curled-up caterpillar, and kill it.
Flea beetles: look for many tiny round 'shot-holes' peppering the leaves, and little dark beetles that jump away when you touch the plant — worst in hot, dry spells on young seedlings.
Start turning over a few leaf undersides for the caterpillar you'll fight all season — small green diamondback-moth grubs (no longer than a fingernail) that wriggle and drop on a silk thread when disturbed. Much more on these once the leaf frame builds.
If you find gaps or dead seedlings, fill them in the first week or two from your spare nursery seedlings, while replacements can still catch up. → Found a gap later than that? Leave it: a late seedling only shades and stunts, so save that space for your next planting.
- Watch out:
Fresh damage means the pest is still there — a webbed, tunnelled growing centre found today needs acting on today, not next week.
- Do:
Keep a few spare seedlings growing on in the nursery, ready to fill the gaps these establishment pests leave.
Irrigate for establishment Recommended
Fresh transplants have shallow, disturbed roots that dry out fast. Steady moisture in the first two weeks is what gets them to 'take' and start growing — let them wilt now and many never recover.
Keep the topsoil moist but not waterlogged — water every 2–3 days, and more often in heat or on sandy soil that dries fast.
Water in the cool of morning or evening, so less is lost to the sun and the leaves dry off before night.
Check with a finger: water when the top few centimetres are dry. These shallow-rooted greens can't reach down for deep water.
- Tip:
Waterlogging — soggy soil rots the young roots and invites clubroot and damping-off. Drain any low spots.
- Watch out:
New transplants wilting in the afternoon heat for a day or two is normal. Wilting that hasn't recovered by morning means they need more water, or some light shade.
Build the leaf frame
Before your first pick, the plant is building the frame of leaves and roots that every future harvest will grow from. Feed the first nitrogen, weed shallowly and mulch, and keep the water steady — and now begin the twice-weekly hunt for the diamondback moth and cabbage aphid you'll face all season. On a leaf crop every leaf is money, so act early, at the smallest sign.
1st N top-dress Recommended
These greens are heavy nitrogen feeders — nitrogen is what makes big, dark, tender leaves. The first feed goes on 2–3 weeks after transplant, once the plants have taken hold, to push the leaf frame along before your first pick.
Feed 2–3 weeks after transplanting, once the plants are established and growing away.
Use the recommended nitrogen — CAN or AN (calcium ammonium nitrate or ammonium nitrate). If you use CAN, it also brings calcium, which these greens like; plain AN does not. Your recommendation gives the amount.
Top-dress it — that means sprinkle a band of the fertiliser a hand-span (about 20 cm) to the side of the plants, not on top of them — on moist soil, after a weeding or a light rain.
Cover it or water it in so it doesn't gas off into the air and go to waste, and keep the grains off wet leaves, where they stick and scorch little holes.
- Do:
Feed on moist soil and water it in — on dry soil the nitrogen just sits there, out of reach of the roots.
- Tip:
Throwing fertiliser onto wet leaves — it burns little holes. Brush any grains off the leaves and down onto the soil.
- Watch out:
Wash your hands after handling fertiliser, and keep it off food and water and away from children.
Weed (shallow) + mulch Recommended
Young greens can't fight weeds, which steal the water, food and light you're paying for. Weeding 2–4 weeks after transplant, then laying a mulch, keeps the bed clean and keeps the shallow roots cool and moist between waterings.
Weed 2–4 weeks after transplanting, before the weeds grow bigger than the crop.
Hoe shallowly. These greens root shallow, and deep hoeing near the plants cuts the feeder roots the leaves live on.
Pull the weeds close to the stems by hand, so you don't wound the plants.
Lay a mulch — dry grass, leaves, or the pulled weeds — between the plants. It holds moisture, keeps the soil cool for the shallow roots, and slows the next flush of weeds.
- Do:
Weed while the weeds are still small — a clean bed early is the cheapest yield you'll ever gain.
- Tip:
Deep hoeing near the plants — you'll tear the shallow feeder roots the leaves depend on.
Scout (DBM, aphids, black rot) Critical
Now the two enemies you'll fight all season arrive: the diamondback-moth caterpillar (DBM) and the cabbage aphid. On a leaf crop every leaf is for sale, so you act at the first small sign, not when the damage is bad. Catching them early — and rotating your sprays — is the difference between clean greens and a ruined pick.
Twice a week, walk the 'W' and turn the leaves over — most pests hide on the underside.
Diamondback moth (DBM): look for small green caterpillars no longer than a fingernail that wriggle and drop on a silk thread when you touch them, and pale 'windows' — patches where they've eaten the underside of the leaf but left the top skin, so light shines through. On a leaf crop, act at the first few — about one grub on every two or three plants.
Cabbage aphid: look for grey-green, powdery (waxy) clusters packed on the growing centre and leaf undersides, with sticky honeydew (the sugar they excrete) and black sooty mould growing on it. Rub out small colonies by hand.
Black rot (a bacterial disease): look for yellow, V-shaped patches biting in from the leaf edge, with the veins inside turning black. Pull out and remove any hit plant, and never work the crop while the leaves are wet — wet hands and tools carry it from plant to plant.
To spray DBM, use Bt (short for Bacillus thuringiensis, a natural germ that sickens only caterpillars and is safe on food you'll eat), sprayed in the late afternoon — strong sun breaks Bt down, and the caterpillars feed at dusk. Wet the leaf undersides, where they hide.
Rotate — change the spray family — every generation. DBM builds resistance fast, so the same spray twice running soon stops working. When you spray, cover your skin, nose and eyes, spray in the cool with the wind behind you, keep it off food, and wash well after.
- Watch out:
Because you'll soon be picking this crop every week, mind the pre-harvest interval (PHI) — the number of days you must wait between spraying and picking, printed on the label. Bt's is very short; chemical sprays can be a week or more. Never pick and eat leaves you've just sprayed.
- Tip:
Spraying the same insecticide again and again — DBM resists it fast. Rotate to a different family each generation.
- Do:
Spray Bt in the late afternoon and wet the leaf undersides, where the caterpillars shelter.
Irrigate (steady moisture) Recommended
Steady water now builds a big, tender leaf frame. Let these greens dry out and the leaves turn small, tough and bitter — and thirst can even push them to flower (bolt) early and end the crop before it's begun.
Keep the soil evenly moist — water every 3–4 days, and more often in heat or on sandy soil.
Water in the cool of morning or evening, at the base of the plants.
Check with a finger and water when the top few centimetres are dry — the shallow roots can't wait for deep water.
- Do:
Keep the water steady and even. Swings from bone-dry to soaked make tough leaves and split stems.
- Tip:
Overhead watering late in the day that leaves the leaves wet all night — wet leaves spread black rot and mildew.
Start picking and keep feeding
About 4 weeks after transplant the long harvest begins — and it never stops for one big cut. You pick the outer leaves and the plant grows more, month after month. The trick is feed-back: nitrogen after every pick to drive fresh regrowth, steady water for tender leaves, and relentless caterpillar and aphid control with rotated sprays. Now that you're eating the crop, keep every spray inside its safe waiting time.
Pick lower/outer leaves Critical
This is the harvest that pays you for months. Pick the lower, outer, full-sized leaves and always leave the growing centre and the young leaves, and the plant keeps making more — like a little palm tree that never stops. Strip it bare, or take the centre, and it's finished.
Start picking when the lower leaves reach full size — about 4 weeks after transplanting — then come back every 1–2 weeks.
Take the oldest, outer, full-size leaves first, snapping or cutting them off cleanly at the base of the stalk.
Always leave the growing centre and the top few young leaves — at least 4–6 leaves on each plant — so it can regrow. A picked plant should look like a little palm tree: a tuft of leaves on top of a bare lower stem.
Pick in the cool of the morning, when the leaves are crisp and full of water, and get them out of the sun straight away.
Feed nitrogen after each pick (the next task) — that's what powers the regrowth for your next harvest.
Take off any yellow, tough or pest-eaten lower leaves at the same time, to keep each plant clean and tidy.
- Tip:
Picking or damaging the growing centre — that kills the regrowth and ends the plant.
- Do:
Feed nitrogen after every pick — a plant starved between picks grows back slow and small.
- Watch out:
Mind the pre-harvest interval on any spray — never pick leaves within the label's waiting days of spraying them.
N top-dress after each pick Critical
Every leaf you pick carries food away with it. A small nitrogen feed after each pick replaces it and drives the fast, tender regrowth that fills your next harvest. This steady feed-back is what keeps a plant producing for months instead of fading after a cut or two.
Feed straight after each pick, every 1–2 weeks, using the recommended CAN or AN nitrogen — if you use CAN it also brings the calcium these greens like, while plain AN does not. Your recommendation gives the amount.
Top-dress it — a band of grains a hand-span (about 20 cm) to the side of the plants, never on the growing centre.
Apply on moist soil and water it in, so it reaches the roots instead of gassing off into the air.
Keep the grains off wet leaves (they scorch), and don't overdo it — too much nitrogen at once makes soft leaves that pests and rot love.
- Do:
Little and often — a small feed after every pick beats one big dose that a heavy rain washes straight past the roots.
- Tip:
Fertiliser in the growing centre or on wet leaves — it burns the very part you need for regrowth.
- Watch out:
Wash your hands after feeding, and keep fertiliser off the leaves you'll pick and eat.
Scout & spray (DBM, aphids) Critical
Now you're picking and eating the crop, so pests must be beaten and your sprays kept safe. DBM and aphids press hardest at first harvest, and cool, damp weather brings downy mildew. Scout twice a week, spray at the first sign, and always respect the waiting time before you pick.
Twice a week, walk the 'W' and turn the leaves — check the undersides and the growing centre.
DBM: small green caterpillars that drop on a silk thread, plus pale 'window' patches on the leaves. Under pressure, spray Bt (the caterpillar-only germ) every 5–7 days, in the late afternoon — sun destroys Bt, and the grubs feed at dusk.
Cabbage aphid: grey, waxy clusters on the tips and undersides. Wash or rub off small lots; spray if they build up.
Downy mildew: look for pale-yellow patches on top of the leaf with a greyish-purple furry mould underneath, in cool, damp weather. Open the plants up for airflow, avoid wetting the leaves late in the day, and remove the worst-hit leaves.
Rotate your spray family every generation — never the same one twice running, or DBM stops feeling it.
When you spray any chemical: cover skin, nose and eyes, spray in the cool with the wind behind you, keep it off food, and wash well after.
- Watch out:
Pre-harvest interval — the label's wait between spraying and picking. On a crop you pick weekly, prefer Bt (very short wait), and never pick within the waiting days of a chemical spray.
- Tip:
One spray used over and over — rotate families each generation, or DBM beats it.
- Do:
Spray Bt late in the afternoon and hit the leaf undersides, where the caterpillars shelter.
Irrigate (steady water = tender leaves) Recommended
Steady water is what makes the leaves tender and sweet and keeps them growing back fast after each pick. Let the crop go thirsty and the new leaves come tough, bitter and small — and the plants may bolt (run to flower) and finish early.
Keep the soil evenly moist — water every 3–4 days, and more often in heat.
Water at the base of the plants in the cool of the day, not overhead in the evening.
Never let the crop wilt hard between picks — thirst makes tough leaves and can trigger bolting (running to flower).
- Do:
Water soon after each pick and feed — moisture plus nitrogen together is what drives tender regrowth.
- Tip:
Wetting the leaves late in the day — leaves left wet overnight spread downy mildew and black rot.
Keep the harvest going
Keep the cycle turning for as long as the plants will give: pick every 1–2 weeks, feed after each big pick, water steadily, and keep rotating your sprays. On sour soils, watch for clubroot and lime if needed. In the end, as the plants age — pushed on by a cold snap, or by heat and thirst — they bolt (run to flower); their leaves then turn tough and bitter, and that ends the crop.
Scout & spray (DBM, aphids, mildew) Critical
The pests never quit while the crop stands, and now a soil disease — clubroot — and bolting can end it. Keeping up the twice-weekly watch and the rotated sprays protects every leaf you're still selling, right to the finish.
Twice a week, keep walking the 'W', turning leaves for DBM (small green grubs that drop on a silk thread; pale 'window' patches) and cabbage aphids (grey, waxy clusters). Spray Bt in the late afternoon, rotating the spray family each generation.
Clubroot: if plants wilt in the heat, then yellow and stunt for no clear reason, pull one up. Swollen, distorted roots like clubs or knobbly fingers mean clubroot, a soil disease worst in sour, wet ground. Remove the hit plants and don't spread their soil around the field.
Bolting: watch for a stalk shooting up from the centre with flower buds — after this the leaves turn tough and bitter. This ends the plant, so clear it and use the space.
Keep respecting the pre-harvest interval on every spray — you're still picking and eating these leaves.
- Watch out:
Bolting (a rising flower stalk, tough bitter leaves) finishes the crop — clear those plants out and plan your next planting.
- Do:
On sour, clubroot-prone soil, keep it limed sweet and well drained, and rotate away from all cabbage-family crops for a few seasons.
- Tip:
Carrying soil or seedlings from a clubroot patch onto clean ground — the disease lives in the soil for years.
Lime on acid/clubroot soils Optional
On sour (acid) soils, keeping the ground sweet with lime steadies growth and, above all, holds down clubroot — the root disease that swells roots into useless clubs and can't be cured once it's bad. Where clubroot is known, lime harder than usual, to a sweeter soil.
Lime only if your soil is sour, or clubroot is a known problem — a soil test, or stunted, wilting, club-rooted plants, tells you.
Spread it evenly and work it into the topsoil around the crop. Where clubroot is the reason, lime harder, to a sweeter soil (your recommendation gives the amount).
Keep the ground well drained — clubroot thrives in wet, sour soil, so raised beds and good drainage help as much as the lime does.
- Do:
Pair liming with a long rotation away from the cabbage family — lime slows clubroot, but rotation is what starves it out.
- Watch out:
Wash your hands after handling lime, and keep the dust off the leaves you'll pick, out of your eyes, and off food.
Keep the leaves fresh to market
These leaves are very perishable — they wilt and yellow within hours in the sun. What you do in the first minutes after picking decides what reaches the pot or the market. Get them out of the heat, keep them cool and damp, bunch and pack them loose, and keep them well away from ripening fruit.
Cool & pack fresh leaves Recommended
A picked leaf is alive and losing water fast — left in the sun it wilts, yellows and is worth little within hours. Cooling and packing it gently right after the pick is what keeps it fresh and sellable for up to 10–14 days.
Get the leaves out of the sun the moment you pick — into shade, a cool room, or under a damp cloth. Picking in the cool of morning helps most of all.
Cool them down as much as you can — a dip in clean cool water, or a cool, shaded, damp store. Cold, damp air keeps them crisp; warmth yellows them fast.
If the leaves are soiled, wash them in clean water and let the surface dry a little before packing.
Bunch 8–12 leaves together and pack them loose in crates or baskets — do not press them down, because bruised, crushed leaves are the first to rot.
Keep the bunches away from ripening fruit like bananas and tomatoes — the ripening gas (ethylene) they give off yellows the leaves.
- Tip:
Leaving picked leaves standing warm in the sun — cool them straight after every pick.
- Tip:
Packing the leaves tight or in deep piles — squashed leaves heat up and rot. Pack loose and shallow.
- Do:
Pick in the cool morning and take the greens to market the same day for the best price.
Pests and diseases that attack rape, covo and kale


Where to sell rape, covo and kale
Markets that trade this crop — what each one sells it by, when supply peaks there, and the currency used.


Grow rape, covo and kale with a plan, not a guess
This guide is the general answer. Divisi works out yours — the week to plant rape, covo and kale on your soil and your rainfall, and each job dated for your field.


When to plant rape, covo and kale, country by country
- When to plant rape, covo and kale in Algeria
- When to plant rape, covo and kale in Angola
- When to plant rape, covo and kale in Benin
- When to plant rape, covo and kale in Botswana
- When to plant rape, covo and kale in Burkina Faso
- When to plant rape, covo and kale in Burundi
- When to plant rape, covo and kale in Cabo Verde
- When to plant rape, covo and kale in Cameroon
- When to plant rape, covo and kale in Comores
- When to plant rape, covo and kale in Congo
- When to plant rape, covo and kale in Côte d'Ivoire
- When to plant rape, covo and kale in Egypt
- When to plant rape, covo and kale in Eritrea
- When to plant rape, covo and kale in Eswatini
- When to plant rape, covo and kale in Ethiopia
- When to plant rape, covo and kale in Gabon
- When to plant rape, covo and kale in Gambia
- When to plant rape, covo and kale in Ghana
- When to plant rape, covo and kale in Guinea Ecuatorial
- When to plant rape, covo and kale in Guinea-Bissau
- When to plant rape, covo and kale in Guinée
- When to plant rape, covo and kale in Kenya
- When to plant rape, covo and kale in Lesotho
- When to plant rape, covo and kale in Liberia
- When to plant rape, covo and kale in Libya
- When to plant rape, covo and kale in Madagascar
- When to plant rape, covo and kale in Malawi
- When to plant rape, covo and kale in Mali
- When to plant rape, covo and kale in Mauritanie
- When to plant rape, covo and kale in Mauritius
- When to plant rape, covo and kale in Morocco
- When to plant rape, covo and kale in Moçambique
- When to plant rape, covo and kale in Namibia
- When to plant rape, covo and kale in Niger
- When to plant rape, covo and kale in Nigeria
- When to plant rape, covo and kale in Rwanda
- When to plant rape, covo and kale in République centrafricaine
- When to plant rape, covo and kale in République démocratique du Congo
- When to plant rape, covo and kale in Sao Tome and Principe
- When to plant rape, covo and kale in Seychelles
- When to plant rape, covo and kale in Sierra Leone
- When to plant rape, covo and kale in Somalia
- When to plant rape, covo and kale in South Africa
- When to plant rape, covo and kale in South Sudan
- When to plant rape, covo and kale in Sudan
- When to plant rape, covo and kale in Sénégal
- When to plant rape, covo and kale in Tchad
- When to plant rape, covo and kale in Togo
- When to plant rape, covo and kale in Tunisie
- When to plant rape, covo and kale in Uganda
- When to plant rape, covo and kale in United Republic of Tanzania
- When to plant rape, covo and kale in Zambia
- When to plant rape, covo and kale in Zimbabwe
Where rape, covo and kale scores best
Districts where Divisi's engine currently rates this crop highest, ranked by fit.


Get Insights by email
A short digest of new Divisi articles. No email on quiet weeks.
Frequently asked questions
How do I grow rape, covo and kale?
How to grow rape, covo and kale: 120–180 days to maturity, 45 cm rows, 1–2 cm deep. Also called collards, boerkool, gomen, mpiru, umbhida, tsunga.
What is boerkool in English?
Boerkool is the Afrikaans name for rape, covo and kale.
What is gomen in English?
Gomen is the Amharic name for rape, covo and kale.
What is mpiru in English?
Mpiru is the Chichewa name for rape, covo and kale.
What is umbhida in English?
Umbhida is the Ndebele and Zulu name for rape, covo and kale.
What is covo in English?
Covo (also rape and tsunga) is the Shona name for rape, covo and kale.
What is sukuma wiki in English?
Sukuma wiki is the Swahili name for rape, covo and kale.
How long does rape, covo and kale take to grow?
Rape, covo and kale takes about 120–180 days from sowing to maturity, though the exact length varies with variety, temperature and how the season runs.
What spacing should I use for rape, covo and kale?
Space rape, covo and kale rows about 45 cm apart, with roughly 45 cm between plants within the row.
How deep should rape, covo and kale be planted?
Sow rape, covo and kale at about 1–2 cm deep. Shallower risks drying out; deeper wastes seed energy before the shoot reaches light.
What pests and diseases attack rape, covo and kale?
The ones covered in this guide are Black rot, Cabbage aphid, Cabbage webworm. Each has its own page explaining how to identify, check for and control it.