 Divisi
How to grow sweet orange
Citrus sinensis · Rutaceae
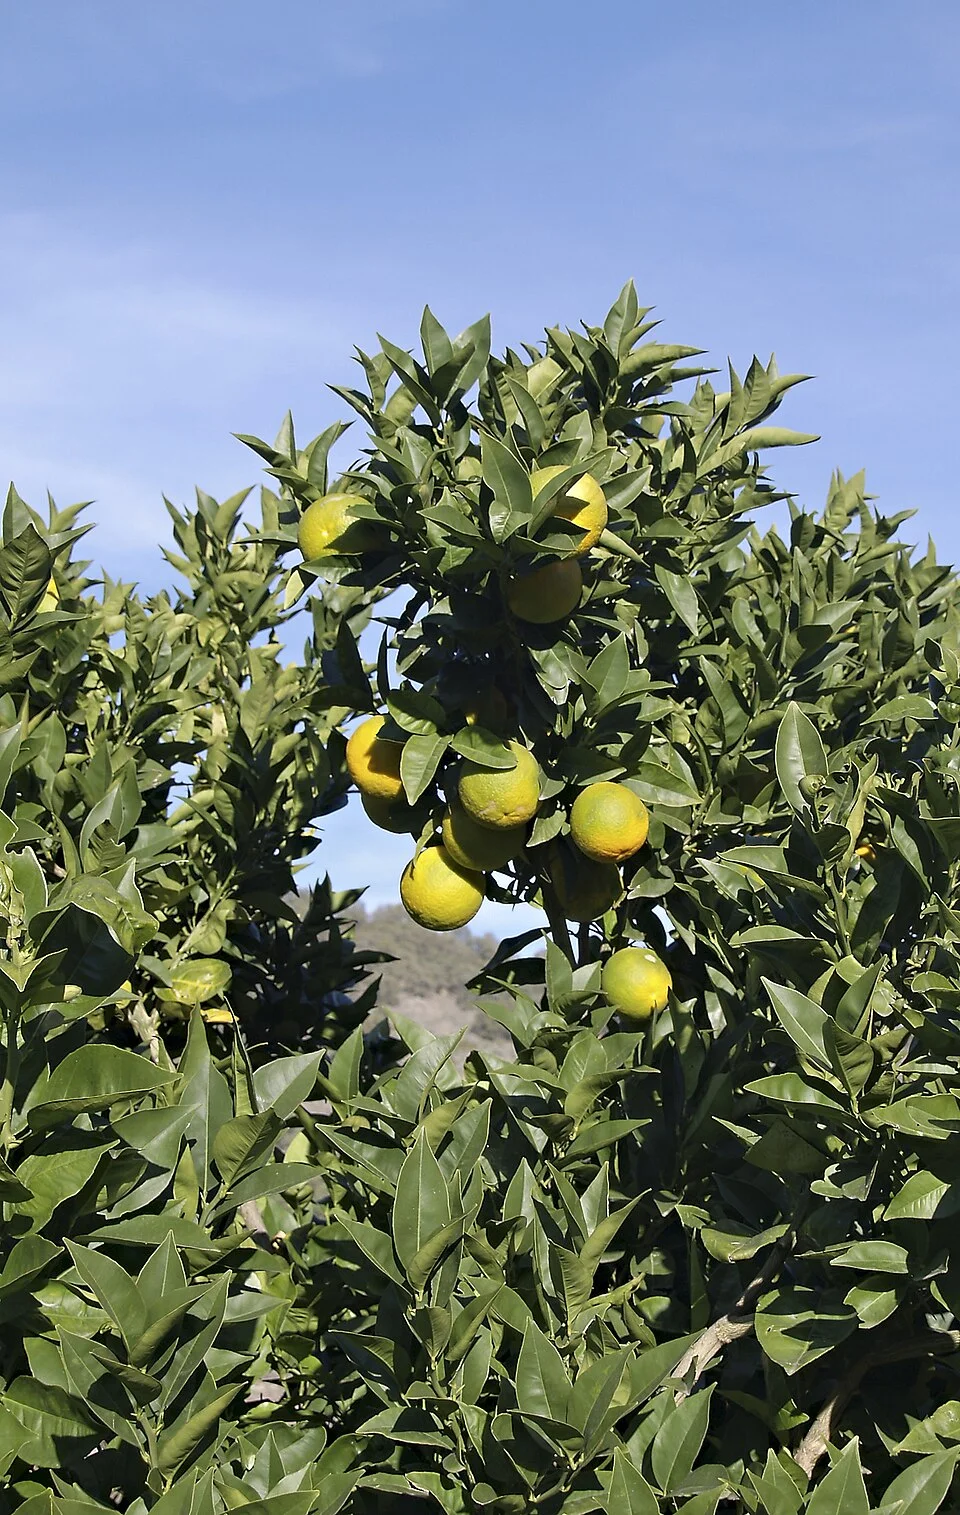
Photo: Luis Fernández García · CC BY-SA 2.5 es
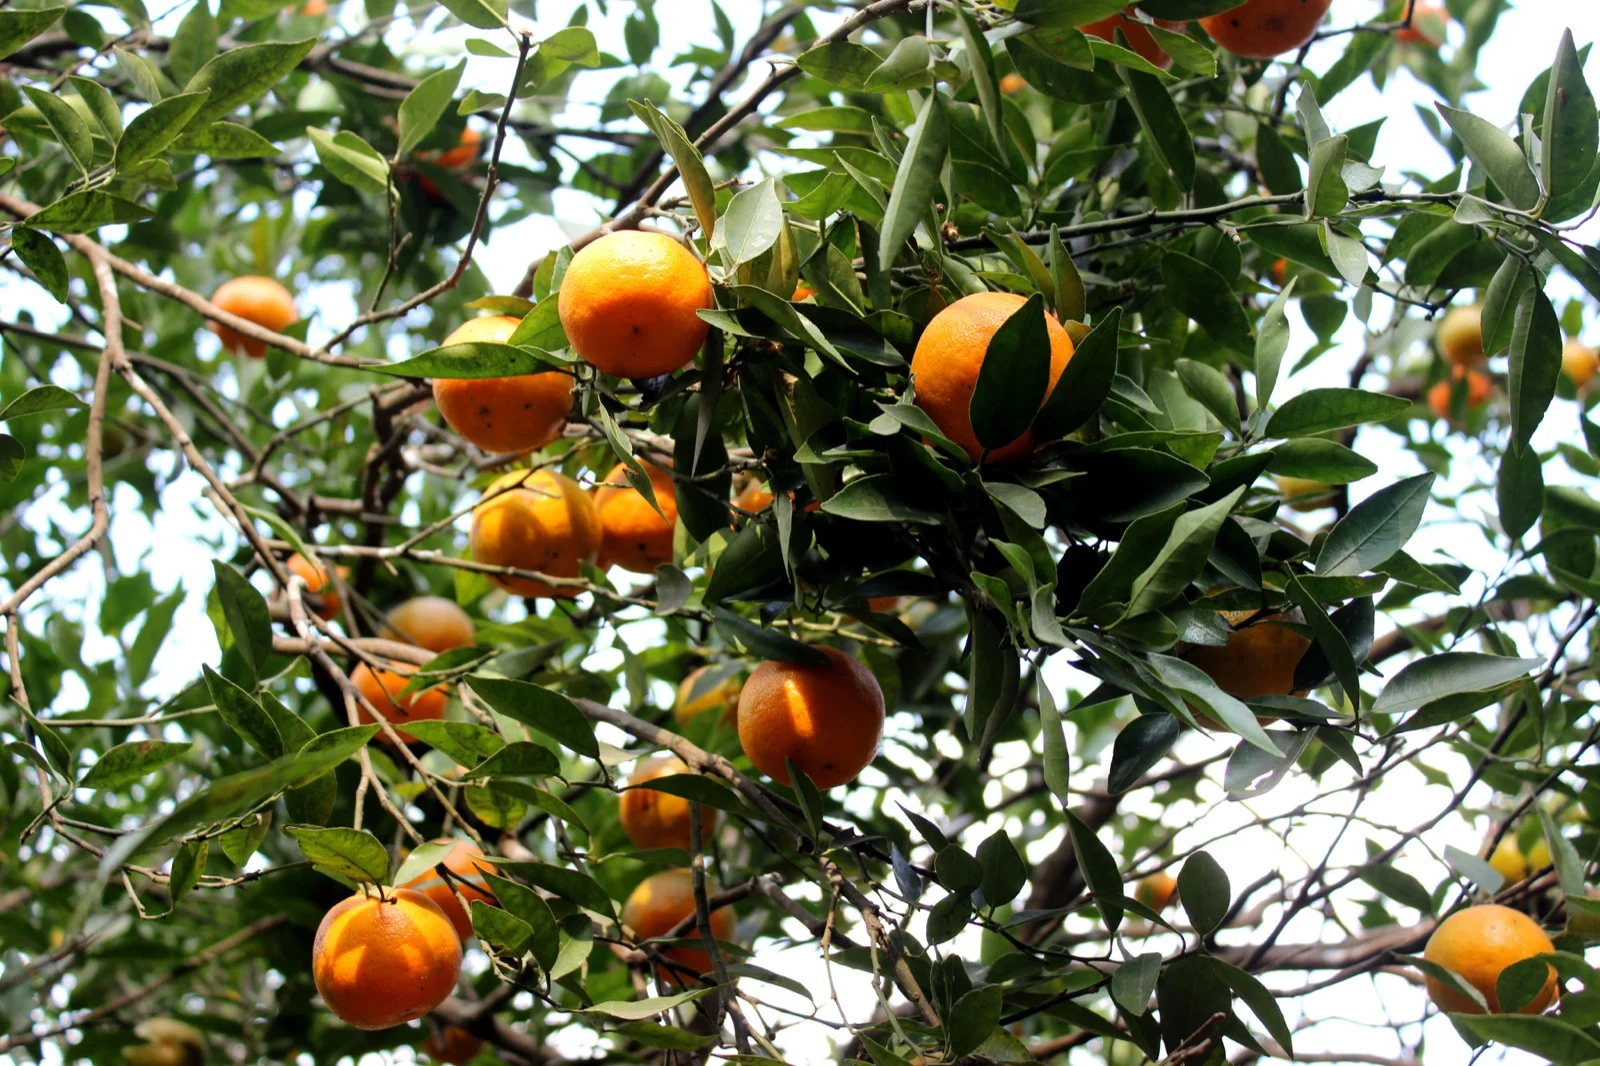
The sweet orange is an evergreen fruit tree — plant it once and, cared for well, it feeds your family and earns money for 20–30 years. The tree you buy is really two plants joined into one: a tough rootstock (the bottom — the roots and lower stem, chosen to beat root disease and suit your soil) carrying a scion on top (which holds your chosen orange variety and its fruit). Where the two join is the graft union — a knobbly bump low on the stem — and it must always stay above the soil. Most sweet oranges set fruit on their own, so even a single tree will bear, and many types are seedless. An orange takes most of a year to grow from flower to ripe fruit, and — unlike a banana or a tomato — it does not ripen or sweeten once you pick it. So the whole craft is leaving each fruit on the tree until it is truly ready, then clipping it off cleanly without tearing the rind.
Auli Raha · CC BY-SA 4.0 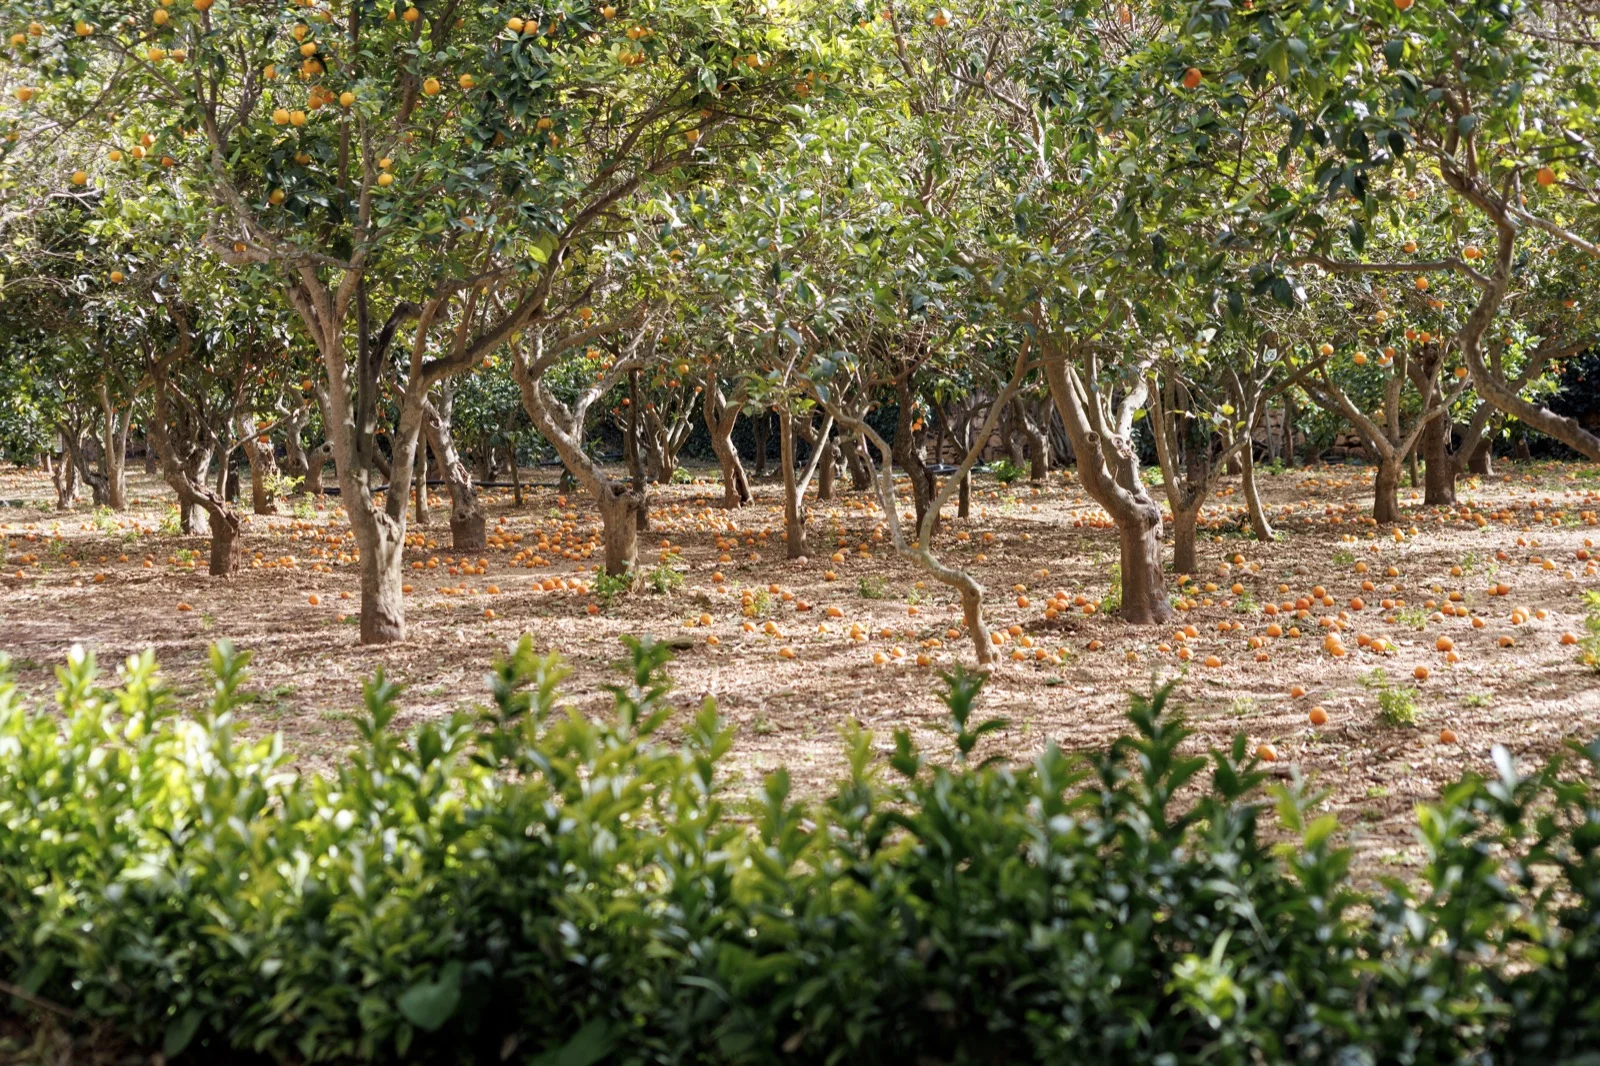
Godwin Borg · CC BY-SA 4.0
- Days to maturity
- 210–360 days
- Row spacing
- 600 cm
- Plant spacing in the row
- 600 cm
These are general figures for the crop, compiled from published agronomic references including FAO and CABI. The right choice for your field depends on your soil, rainfall and the yield you are aiming for.
Will sweet orange actually do well on your field? Check your own field against every crop in the catalogue — no signup. Run the crop check →
Also known as
- Afrikaans
- lemoen
- Chichewa
- lalanje
- French
- orange, orange douce
- Portuguese
- laranja
- Sesotho
- lamunu
- Setswana
- namune
- Swahili
- chungwa, machungwa
- Zulu
- iwolintshi
Working in buckets, bags or paces? The farming glossary turns the measures growers actually use into kilograms and hectares — what a 20 litre bucket of each crop really weighs, and how to size a field by walking it — alongside the Shona, Swahili, Ndebele and Yoruba words used in the field. Open the glossary →
Growing sweet orange, stage by stage
Your orange tree, year by year — choose and plant the right grafted tree, then keep up the yearly round: prune it open, feed it steadily, bring on the flowers, guard the fruit from pests, and pick each orange only when it is truly ripe (remember, it will never sweeten once picked).
Choose the right tree and plant it well
Almost everything about your tree's long life is decided right now, before and as you plant. A grafted tree on the right rootstock, deep well-drained soil, the graft union kept above the ground, a stake and a good watering-in give you a tree that shrugs off root rot and bears for decades. Get this wrong and no amount of later care can put it right — so take your time here.
Choose grafted tree on a suitable rootstock Critical
The tree you plant is a 20–30 year decision — you can never change its roots later. A grafted tree from a clean, certified nursery is your one real defence against the two diseases that kill citrus and have no cure: citrus greening (also called HLB) and tristeza. The right rootstock also beats root rot and copes with your soil. The tree you pick today decides whether you are still picking oranges in 25 years.
Line up your tree in the weeks before planting — a month or two ahead of the rains — so you have time to find a good grafted tree at a certified nursery rather than grabbing whatever is nearest on planting day.
Buy a grafted tree, not a seedling grown from a pip (a pip is an orange seed). A grafted tree is two joined plants: a tough rootstock — the bottom part, the roots and lower stem, chosen for strong, disease-beating roots — and a scion on top, which carries your orange variety and its fruit. You can see where they join: a knobbly bump low on the stem, the graft union.
Buy only from a certified, clean nursery. Certified stock is raised under cover to be free of citrus greening (HLB) and tristeza — two virus-like diseases that have no cure and slowly kill the tree. A cheap roadside seedling can carry them from its very first day.
Ask for a rootstock that suits your soil and your pests: one that stands up to root rot (a soil disease, Phytophthora, that rots the roots and collar on wet ground) and resists tristeza. Where tristeza is about, do not accept a tree grown on sour-orange rootstock — the tree collapses fast on that root.
Pick a healthy tree: dark green leaves with no blotchy yellow mottling, one straight stem, and a graft union that has healed cleanly. Leave behind any tree with yellow, mottled or twisted leaves — it may already be sick.
- Do:
Keep the receipt and the variety label. Certified clean stock is the cheapest insurance you will ever buy against greening and tristeza.
- Tip:
A pip-grown or roadside seedling — it is not even the same variety as its parent, takes far longer to bear, and may already carry disease.
- Watch out:
The graft union must be a clear bump above the roots. If you cannot find it, the tree may be an ungrafted seedling — don't buy it.
Ensure drainage; plant + stake + water Critical
A citrus tree planted too deep or in soggy ground rots at the collar and dies young — root rot is the commonest killer of young citrus. Planting at the right depth in well-drained soil, with the graft union kept well above the ground, a stake to steady it and a good watering-in, gives the roots the air and the fast start they need to anchor for decades.
Plant at the start of the rains, so the young tree has months of steady moisture to settle in before any dry spell.
Choose deep, well-drained soil. Test it: fill a hole with water — if water still stands in it hours later, the spot is too wet. On wet ground, plant on a raised mound about a stride (1 m) across so the roots sit up out of the wet.
Dig a hole about 60 cm each way — roughly knee-deep — and mix the loosened topsoil with well-rotted manure or compost. Planting more than one tree? Leave about six strides (6 m) between trees each way, so every tree gets full sun and air.
Set the tree at the same depth it grew in the nursery bag — no deeper. The graft union (the knobbly join) must stand a hand-span (about 20 cm) clear of the soil. Bury that join and the scion roots into the ground, you lose the rootstock's protection, and rot sets in.
Firm the soil, drive a stake in beside the trunk and tie it loosely so wind can't rock the roots loose, then water it in well to settle the soil around the roots.
Keep a weed-free ring about a stride (1 m) across around the trunk and mulch it — but hold the mulch a hand-span (20 cm) clear of the bark so the trunk stays dry.
- Do:
Plant on a mound wherever water might sit — a dry collar is the single best guard against root rot.
- Tip:
Piling soil, mulch or manure against the trunk, or planting deep — a buried graft union and a wet trunk invite collar rot.
- Watch out:
After the first heavy rain, check the water drains away within a few hours. If it pools around the trunk, the tree is in danger — improve the drainage or build the mound up higher.
Formative pruning (open centre) Recommended
The shape you build in the first three to four years is the frame the tree keeps for life. An open, airy centre lets sunlight and air into the middle, which means more fruit and far less disease. A tree left to grow into one dense bush is dark and damp inside — just what black spot and rot want.
In the first year, choose 3–4 strong branches spread evenly around the trunk to become the tree's main arms, starting a little above knee height. Rub or cut off the rest while they are still small and soft.
Cut out any shoots growing from below the graft union (these come from the rootstock) the moment you see them — they are the wrong variety and steal the tree's strength. They often have different leaves or thorns, so they are easy to spot.
Aim for an open centre, like a cup or a hand held open: keep the middle clear so light reaches right inside, instead of one crowded ball of leaves.
Do this shaping little and often over the first few years, in the weeks after each season starts. Once the frame is built, the tree needs only a light yearly tidy.
- Do:
Remove rootstock suckers (shoots from below the join) as soon as you spot them — they rub off easily while still soft.
- Tip:
Hard, heavy pruning of a young tree — its leaves are its food factory; strip too many and it grows slowly and the bark sunburns.
Keep the tree fed, open and disease-free
Every year the tree must rebuild the leaves that will feed next season's fruit. Through the growing year your job is to feed it steadily (nitrogen and potassium in the soil, plus a zinc-and-magnesium spray on the leaves when they show hunger), keep the centre open with one light prune, and watch the soft new leaves for psyllids — the tiny insect that carries incurable citrus greening.
Scout (HLB/psyllid, black spot, leafminer, CTV/aphids) Critical
Citrus greening and tristeza have no cure — once a tree is badly infected it is lost, and it becomes a source that infects your others. A ten-minute walk once a month is how you catch trouble while you can still act: spray the psyllid (the tiny insect that carries greening), cut out one sick branch, or pull out one tree before it infects the whole row.
Once a month, walk to each tree and look closely at the new leaves, the fruit and the trunk. Carry a bag for anything you cut off, so you don't drop diseased bits under the tree.
Citrus psyllid (the greening carrier): on the soft new leaves, look for a tiny brownish, aphid-like insect about the size of a rice grain that perches tail-up at an angle and jumps or flies off the moment you tap the shoot. Its surest sign is on the young leaves themselves — little cup- or crater-shaped bumps (pit galls) that make the flush look blistered and goose-bumped. It carries incurable greening, so even one is a warning to act.
Citrus greening (HLB): look for a blotchy yellow mottle that is NOT the same on both sides of the leaf's midrib (the midrib is the leaf's central vein). An even yellowing, matching on both sides, is usually just hunger — not greening. Also watch for odd yellow shoots standing out in the green canopy, and small, lopsided fruit that stay green at the bottom and taste bitter.
Root and collar rot (Phytophthora): at the base of the trunk, look for dark, wet, gummy patches oozing where the bark is dying, with the canopy above thinning and going pale. Keep soil and mulch pulled back off the trunk.
Black spot: on the rind of the fruit, look for small dark, sunken spots with pale grey centres, sometimes set in a ring — they blemish the fruit and make it drop early.
Leafminer: look for silvery, wiggly snail-trail tunnels just under the skin of young leaves, which then curl and twist. It rarely troubles a big tree, but the wounds open the door to worse disease.
Tristeza / aphids: look for clusters of soft black or brown aphids (small sap-sucking insects) on the new shoots, and whole trees that yellow and slowly go downhill for no clear reason.
As you go, rake up and carry away fallen leaves and fruit from under the tree — black spot survives in that litter and re-infects next year's fruit.
- Watch out:
A psyllid — that tiny, rice-grain-sized insect that jumps off the new flush — is the real danger, because it carries greening. Spray on the first sighting, and if a tree clearly shows greening, rogue it — pull it out and burn it — before it infects the rest.
- Do:
Learn to tell the one-sided, blotchy mottle of greening from the even, both-sides yellowing of simple hunger — it is the single most useful thing to know about your trees.
Light annual pruning Recommended
One light prune a year keeps the tree's centre open to sun and air. That ripens the fruit evenly and dries the leaves fast after rain, so black spot and rot get no damp foothold. Dead and crossing wood left inside the tree is exactly where disease starts.
Once a year, around the start of the season, cut out any dead, broken or crossing branches, and the strong upright water shoots (fast, leafy shoots that spear straight up through the middle and carry no fruit).
Open the centre until you could almost toss a hat through it — sun and air must reach the inside of the tree.
Cut off any low branches dragging on the ground (fruit down there gets fungus and pests) and any suckers from below the graft union.
Use a clean, sharp saw or secateurs. Cut close to the branch without tearing the bark, then rake up and carry away the prunings and leaf litter.
- Do:
Prune in dry weather so the cuts dry and heal fast and clean.
- Tip:
Cutting off big limbs and stripping the tree bare — light and yearly beats hard and rare. Heavy cuts sunburn the bark and cost you a crop.
N + K + micronutrient feeding Recommended
A bearing orange tree is hungry — it carries leaves, wood and a heavy crop all at once. Feeding through the year, split into several small rounds instead of one big dump, keeps the leaves dark green and the fruit filling. One big feed is mostly washed past the roots by the rain — money down the drain.
Feed in several rounds across the growing year. Your recommendation gives the amount for your tree's age and size — a young tree needs far less than a big bearing one. Split it small and often so the rain can't carry it away.
Spread it in a ring under the outer edge of the leaves — the 'drip line', where rain drips off the canopy — because that is where the feeding roots are. Keep it a hand-span (20 cm) clear of the trunk; piled against the bark it burns the collar and invites rot.
Feed when the soil is moist (after rain or watering) and, if you can, lightly scratch it in or water it, so it soaks down to the roots instead of gassing off into the air.
Watch the leaves for hunger and fix it with a spray on the leaves (a 'foliar' spray): small, narrow leaves with yellow blotches between green veins mean the tree is short of zinc; older leaves yellowing from the base and edges, leaving a green V at the base, mean it is short of magnesium. A foliar zinc-and-magnesium spray on the fresh leaves fixes both.
- Do:
Feed little and often — several small rounds beat one big one the rain simply carries away.
- Tip:
Heaping fertiliser against the trunk. Keep it a hand-span out, off the bark, or you burn the collar.
- Watch out:
Store fertiliser dry, off the floor, away from food, water and children, keep it off wet leaves, and wash your hands after handling it.
Flowering — set the crop
This short window makes your crop: the flowers that open now become the oranges you pick months from now. In cool, higher areas the winter cold itself brings the bloom; in the warm lowlands you trigger it — hold back water for a spell, then water hard. A zinc-and-boron spray just before flowering helps the flowers set into fruit, and psyllids on the fresh new leaves must be stopped before they spread greening.
Time flowering (dry stress then water) Recommended
A strong, even bloom all at once means a bigger crop that ripens together and is easier to pick and protect. A tree that dribbles out a few flowers here and there over months gives a small, scattered crop. In the warm lowlands you can trigger a good bloom on purpose.
In cool, higher areas the winter cold brings the bloom on its own — you need only be ready for it.
In the warm lowlands, hold back water for a few weeks until the leaves just begin to curl and look slightly stressed — but do not let the tree collapse. This short dry rest sets up the flower buds.
Then water heavily — or time it so the first rains arrive. The sudden moisture flushes out a strong, even bloom a few weeks later.
Give the zinc-and-boron spray before the flowers open (see the next task) to help the blossom set into fruit.
- Do:
Line up the dry rest so the water (or the rains) hits when you want the bloom — that is how you get one big crop instead of a trickle.
- Watch out:
A short, gentle stress is the goal. A long, harsh drought that drops the leaves weakens the tree and costs you the crop.
Zinc/boron foliar Recommended
Boron and zinc feed the flower itself, helping the pollen work and the tiny fruit hold on instead of dropping. A cheap spray on the leaves in the two weeks before the flowers open turns more blossoms into oranges you can sell.
Mix a foliar zinc-and-boron spray (a foliar spray is one you spray straight onto the leaves). Your recommendation gives the product and the dose. Spray it in the two weeks before flowering, while the flower buds are still forming.
Spray to lightly wet the leaves and buds — do not overdose the boron. A little boron helps the fruit set; too much burns the leaves and fruit. Follow the label exactly and measure it.
Spray in the cool of early morning or late evening, with the wind at your back so the mist blows away from your face — never in hot midday sun.
Cover your skin, eyes, nose and mouth, keep the spray off food and drinking water, and wash yourself and the sprayer well when you finish.
- Do:
Time this just before the buds open — sprayed too late, after full bloom, it does little for set.
- Tip:
Guessing the boron rate or doubling it 'to be sure'. Too much boron scorches the tree — measure it exactly.
- Watch out:
Never spray in hot midday sun or in wind — the spray burns hot leaves and drifts back onto you.
Scout (psyllids, mites at flush) Critical
The citrus psyllid is a tiny insect that carries citrus greening — the incurable disease that kills citrus — from tree to tree. It breeds on the soft new leaves (the 'flush') that come with flowering, so this is exactly when it strikes. Act on the first one you see and you protect the whole orchard; miss it and greening spreads.
Every week while the tree is pushing soft new leaves, check the flush (the tender new shoots) on several branches around each tree, turning the young leaves over to look underneath.
Psyllids: look for a tiny brownish, aphid-like insect about the size of a rice grain that perches tail-up at an angle to the leaf and jumps or flies off the moment you tap the shoot, like a miniature cicada. Its surest sign is on the young leaves: little cup- or crater-shaped bumps (pit galls) that make the flush look blistered and goose-bumped, with the leaves curling, puckering and yellowing. Turn a leaf over for yellow eggs standing on end along the leaf edge and flat, scale-like young ones sitting still in the pits, sometimes trailing fine white waxy threads; sticky honeydew (sugary droppings) may coat the leaves.
Mites: look for a fine bronzing or silvery dulling of the leaves and young fruit, worst in hot, dry, dusty spells. Tap a leaf over a sheet of white paper and you may see the tiny specks crawl.
Act on the first psyllids — spray them straight away (your recommendation gives the product). Even a few matter, because it is the disease they carry, not their feeding, that does the real damage.
When you spray, cover your skin, eyes and nose, spray in the cool with the wind behind you, keep it off any fruit you'll eat soon, and respect the pre-harvest interval — the number of days the label says to wait after spraying before the fruit is safe to pick. Wash afterwards.
- Watch out:
Psyllids love the soft flush, and every new flush is a fresh chance for greening to get in — check it every single week.
- Do:
Rogue (pull out and burn) any tree that clearly shows greening. One sick tree left standing infects all the rest.
Grow the fruit — steady water, clean ground
The tiny fruit have set; now they must swell for months without splitting, dropping or being spoiled. Steady, even moisture is everything — a hard dry spell then a flood makes the fruit split and fall. Meanwhile fruit flies and black spot go after the fruit itself, so scouting and clearing every fallen fruit protect the crop you have grown.
Check fruit set Recommended
Not every flower becomes an orange — some natural drop is normal. But checking how many young fruit are holding tells you early whether a crop is coming, or whether something (poor pollination, moisture stress, pests) has robbed the set and needs fixing before next bloom.
About one to two months after flowering, once the petals have dropped and pea-sized green fruit show, pick out several typical shoots on different sides of the tree.
On each shoot, count the little fruit that are holding on and swelling, against the flowers that came to nothing. Some drop soon after bloom — a natural 'fruit drop' — so don't expect every flower to hold.
If a good number are holding and growing, you have a crop set — carry on with steady water and your pest watch.
If it fails — almost none are holding (a heavy drop, a poor set): keep the moisture steady from here on (jumpy watering causes drop), and next season give the zinc-and-boron spray before bloom and check for psyllids, greening and drought stress — those are the usual causes of a poor set.
- Watch out:
A little drop soon after bloom is normal — don't panic. A near-total drop is the warning sign to act on.
Scout (fruit fly, black spot) Critical
Fruit flies sting the fruit to lay their eggs, and the maggots rot it from the inside — you often don't see the damage until you cut open a spoiled orange. Black spot blemishes the rind and drops fruit. Both build up fast in the fallen fruit under the tree, so scouting and sanitation (clearing that fallen fruit) is your main defence.
Twice a week from fruit set right through to harvest, check the hanging fruit and the ground under the tree.
Fruit fly: look for tiny sting marks or soft, sunken rotten patches on the fruit, and fruit dropping early. Cut open a suspect fruit — small white maggots inside confirm it. Hang a bait or trap to catch the flies early.
False codling moth: look for a small hole with sawdust-like frass (grub droppings) on the fruit, and fruit that colours and drops too early with a grub inside.
Black spot: look again for the dark, sunken spots with pale grey centres on the rind.
Collect and bury or burn all fallen and stung fruit, twice a week — bury it deep enough that the maggots can't crawl back out. This starves the next generation and is the single most powerful thing you can do.
If fruit fly is building up, start protein-bait spots (your recommendation gives the bait). When you spray, cover up, spray in the cool with the wind behind you, keep it off fruit you'll eat soon, respect the pre-harvest interval (the wait after spraying before the fruit is safe to pick), and wash afterwards.
- Do:
Bury or burn every fallen fruit, twice a week, all season. Sanitation breaks the fruit-fly cycle better than any spray.
- Watch out:
One rotting fruit left on the ground breeds dozens of flies. Never leave windfalls lying.
Steady irrigation through set & fill Recommended
Oranges swell over months and need even moisture the whole time. A tree that dries out hard and then gets a sudden flood makes its fruit split and drop — the crop you grew, burst open on the tree. Steady water through set and fill is how you keep it whole.
From fruit set through fruit fill, water every 1–2 weeks — more often in heat and on sandy soil that dries fast, less in cool or rainy spells.
Aim for even, steady moisture: never let the tree dry out hard and then flood it, because that swing is what splits the rind.
Water the ground out to the drip line (under the outer edge of the leaves, where the feeding roots are), not just at the trunk.
Check by pushing a finger or a stick into the soil under the canopy: water when it is dry a hand-span (20 cm) down, but never leave the roots standing in water.
- Tip:
Long dry spells followed by heavy watering — that swing splits the fruit. Keep it steady.
- Watch out:
Fruit that starts splitting at the navel (bottom) end is telling you the watering is too on-and-off.
Fruit-thin in the 'on' year Optional
Orange trees tend to alternate: a huge crop one year (an 'on' year) exhausts the tree, so it barely bears the next (an 'off' year). Thinning some fruit in a heavy year trades a few small oranges now for bigger fruit this year and a proper crop next year — evening out the swing.
Only in a heavy 'on' year, about 6–12 weeks after flowering once you can see the fruit load, judge whether the tree is carrying far more than it can size up.
Pick off the smallest, damaged and tightly-bunched fruit, leaving the healthy fruit spread out along the branches with room to grow.
Take off enough that the branches aren't bending under a solid mass of tiny fruit — you are swapping many small oranges for fewer large, sellable ones.
- Do:
Thin a very heavy crop — bigger fruit this year plus a crop next year beats a mass of tiny oranges and a bare 'off' year.
- Watch out:
In a normal or light year, don't thin — you'd only throw away crop.
Pick ripe — oranges never sweeten off the tree
Here is the one rule that decides your quality: an orange does not ripen or sweeten after you pick it. So you must taste and pick only truly ripe fruit, over several passes as different fruit ripen. Clip each fruit off — never pull — because a torn rind rots. The good news: fruit holds well on the tree, so there is no rush to strip it all at once.
Check maturity (taste + colour break) Critical
Because oranges never sweeten after picking, the whole quality of your crop rests on this one judgement. Pick too early and you sell sour fruit and lose your customers. The tree is a safe store, so it pays to taste-test and wait until the fruit is genuinely sweet and juicy.
From about 8 months after flowering, start checking. Don't go by rind colour alone — in warm areas an orange can be fully ripe and sweet inside while its rind is still greenish.
Pick one sample fruit and taste it. It is ready when it is sweet and juicy with just a pleasant tang — the right balance of sugar to sourness. Still sharp and sour means not yet.
Look also for the 'colour break' — the rind just starting to turn from green toward orange — and for fruit that feels heavy and full for its size.
If it fails — still sour: leave the fruit on the tree and taste again in 2–3 weeks. It keeps sweetening on the tree, but remember it will not sweeten one bit once picked, so never pick early to 'ripen at home'.
If the inside tastes ripe but the rind is still green (common in the warm lowlands): it is ready — pick it, and the rind can be de-greened (brought to colour) after picking.
- Do:
Taste before you pick, every time. The tree is the best store there is — fruit held on it keeps getting better.
- Tip:
Picking early to ripen at home — oranges don't ripen after picking, so you just get sour fruit that won't improve.
Hand-clip mature fruit (several passes) Critical
How you pick decides whether the fruit keeps or rots. A fruit pulled off tears its rind at the stalk, and that wound lets in rot within days. Clipping it clean, and picking over several rounds as the fruit ripens, gives you sound fruit that stores and sells.
Clip, don't pull. Cut each fruit off with shears or a sharp knife, leaving a very short stalk flush with the fruit. Pull it and you tear out a plug of rind — and the fruit rots from that wound.
Pick over several passes, every 2–3 weeks, taking only the fruit that taste ripe each time — the rest keep ripening on the tree.
Handle gently — don't drop or throw the fruit into hard containers. Every knock is a bruise that becomes a rot spot in store.
Pick into a soft-lined basket or padded crate, and get the fruit out of the hot sun and into the shade straight away.
- Do:
Keep the shears sharp and every stalk short and flush — a long stalk left on one fruit punctures the next one in the crate.
- Tip:
Pulling or twisting fruit off by hand — the torn plug of rind is an open door for rot.
- Watch out:
Long fingernails and rough handling bruise the rind. Cut your nails short at harvest.
Handle gently, colour and store
The fruit is grown and picked — now don't lose it to bruising and rot. Gentle handling and quick cooling keep it sound; where the inside is ripe but the rind is still green it can be de-greened for market colour; and cool, careful storage holds the quality until you sell.
Grade, cure & cold-store Recommended
Most loss after harvest is simply bruised fruit rotting in the crate. Sorting out the damaged fruit, handling the rest gently, and cooling it promptly is the difference between fruit that reaches the market sound and fruit that spoils on the way.
Sort (grade) the fruit as you pack: set aside any that are cut, stung, bruised or already rotting — one rotting orange spreads mould to the whole crate.
Handle gently and get the fruit into the cool and shade quickly — heat and knocks are what turn sound fruit rotten in store.
Where fruit is ripe inside but the rind is still green, it can be de-greened — held in a warm, airy place (or with ethylene gas where that is available) to bring out the orange colour for market. This changes only the skin colour, not the ripeness inside.
Store and move the graded fruit cool, dry and out of direct sun in clean crates, and sell the bruised or blemished fruit first — it won't keep.
- Do:
Cool the fruit fast and keep it cool — every hour in the hot sun after picking shortens how long it will keep.
- Tip:
Tipping fruit from container to container — each transfer bruises the rind and starts rot.
- Watch out:
Pull out any rotting fruit the moment you see it in store — mould jumps quickly from one orange to its neighbours.
Pests and diseases that attack sweet orange


Where to sell sweet orange
Markets that trade this crop — what each one sells it by, when supply peaks there, and the currency used.


Grow sweet orange with a plan, not a guess
This guide is the general answer. Divisi works out yours — the week to plant sweet orange on your soil and your rainfall, and each job dated for your field.


When to plant sweet orange, country by country
- When to plant sweet orange in Algeria
- When to plant sweet orange in Angola
- When to plant sweet orange in Benin
- When to plant sweet orange in Botswana
- When to plant sweet orange in Burkina Faso
- When to plant sweet orange in Burundi
- When to plant sweet orange in Cabo Verde
- When to plant sweet orange in Cameroon
- When to plant sweet orange in Comores
- When to plant sweet orange in Congo
- When to plant sweet orange in Côte d'Ivoire
- When to plant sweet orange in Egypt
- When to plant sweet orange in Eritrea
- When to plant sweet orange in Eswatini
- When to plant sweet orange in Ethiopia
- When to plant sweet orange in Gabon
- When to plant sweet orange in Gambia
- When to plant sweet orange in Ghana
- When to plant sweet orange in Guinea Ecuatorial
- When to plant sweet orange in Guinea-Bissau
- When to plant sweet orange in Guinée
- When to plant sweet orange in Kenya
- When to plant sweet orange in Liberia
- When to plant sweet orange in Libya
- When to plant sweet orange in Madagascar
- When to plant sweet orange in Malawi
- When to plant sweet orange in Mali
- When to plant sweet orange in Mauritanie
- When to plant sweet orange in Mauritius
- When to plant sweet orange in Morocco
- When to plant sweet orange in Moçambique
- When to plant sweet orange in Namibia
- When to plant sweet orange in Niger
- When to plant sweet orange in Nigeria
- When to plant sweet orange in Rwanda
- When to plant sweet orange in République centrafricaine
- When to plant sweet orange in République démocratique du Congo
- When to plant sweet orange in Sao Tome and Principe
- When to plant sweet orange in Seychelles
- When to plant sweet orange in Sierra Leone
- When to plant sweet orange in Somalia
- When to plant sweet orange in South Africa
- When to plant sweet orange in South Sudan
- When to plant sweet orange in Sudan
- When to plant sweet orange in Sénégal
- When to plant sweet orange in Tchad
- When to plant sweet orange in Togo
- When to plant sweet orange in Tunisie
- When to plant sweet orange in Uganda
- When to plant sweet orange in United Republic of Tanzania
- When to plant sweet orange in Zambia
- When to plant sweet orange in Zimbabwe
Where sweet orange scores best
Districts where Divisi's engine currently rates this crop highest, ranked by fit.


Get Insights by email
A short digest of new Divisi articles. No email on quiet weeks.
Frequently asked questions
How do I grow sweet orange?
How to grow sweet orange: 210–360 days to maturity, 600 cm rows. Also called lemoen, lalanje, orange, laranja, lamunu, namune, chungwa, iwolintshi.
What is lemoen in English?
Lemoen is the Afrikaans name for sweet orange.
What is lalanje in English?
Lalanje is the Chichewa name for sweet orange.
What is orange in English?
Orange (also orange douce) is the French name for sweet orange.
What is laranja in English?
Laranja is the Portuguese name for sweet orange.
What is lamunu in English?
Lamunu is the Sesotho name for sweet orange.
What is namune in English?
Namune is the Setswana name for sweet orange.
What is chungwa in English?
Chungwa (also machungwa) is the Swahili name for sweet orange.
What is iwolintshi in English?
Iwolintshi is the Zulu name for sweet orange.
How long does sweet orange take to grow?
Sweet orange takes about 210–360 days from sowing to maturity, though the exact length varies with variety, temperature and how the season runs.
What spacing should I use for sweet orange?
Space sweet orange rows about 600 cm apart, with roughly 600 cm between plants within the row.
What pests and diseases attack sweet orange?
The ones covered in this guide are Citrus mites, False codling moth, Foot rot. Each has its own page explaining how to identify, check for and control it.