 Divisi
How to grow sweet pepper
Capsicum annuum · Solanaceae
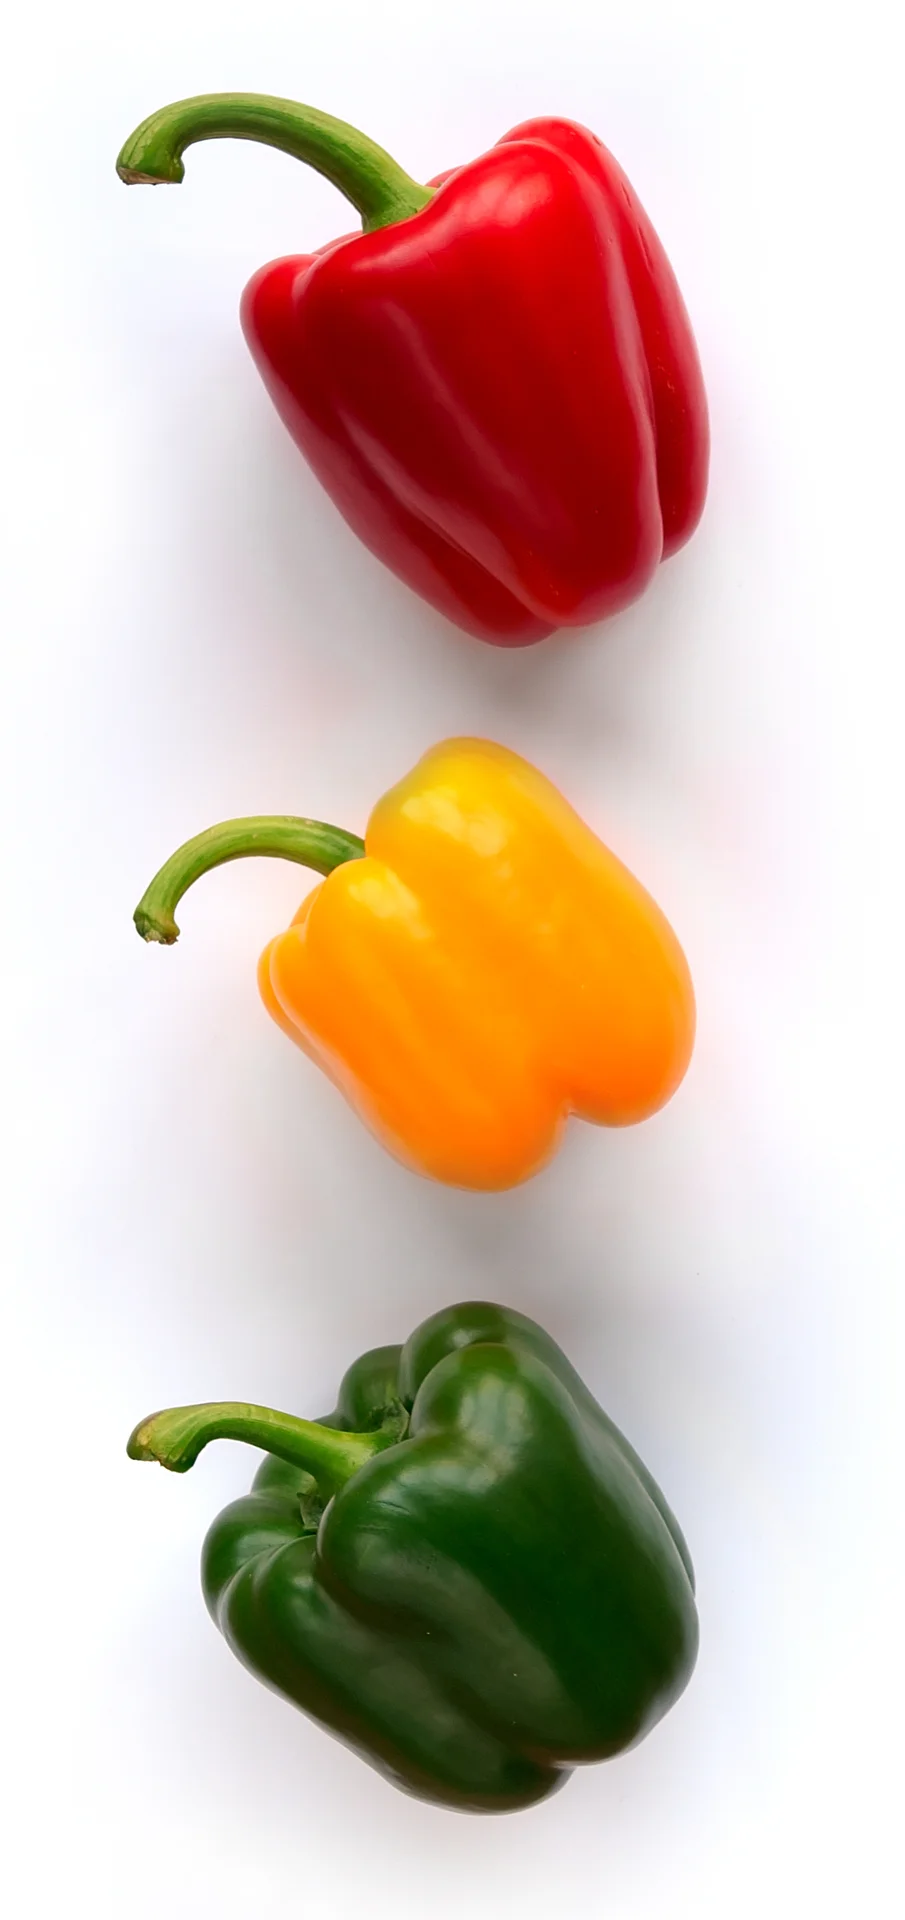
Photo: Luc Viatour · CC BY-SA 3.0
Sweet pepper (bell pepper, capsicum) is a warm-season vegetable grown for its thick-walled, mild, juicy fruit — the kind you slice into relish, stew and salad. It is not a hot chilli; that is a different crop. Green, yellow and red peppers are the same fruit at different stages of ripeness, not different types — a green pepper left on the plant turns yellow, then red, growing sweeter as it colours. You grow it in two steps: first raise seedlings in a small nursery, then transplant the strongest young plants into a well-prepared field. Above all, sweet pepper lives on steady, even water and good drainage — it hates dry-then-wet swings (which rot the fruit tip) and it hates wet feet (which rot the roots).
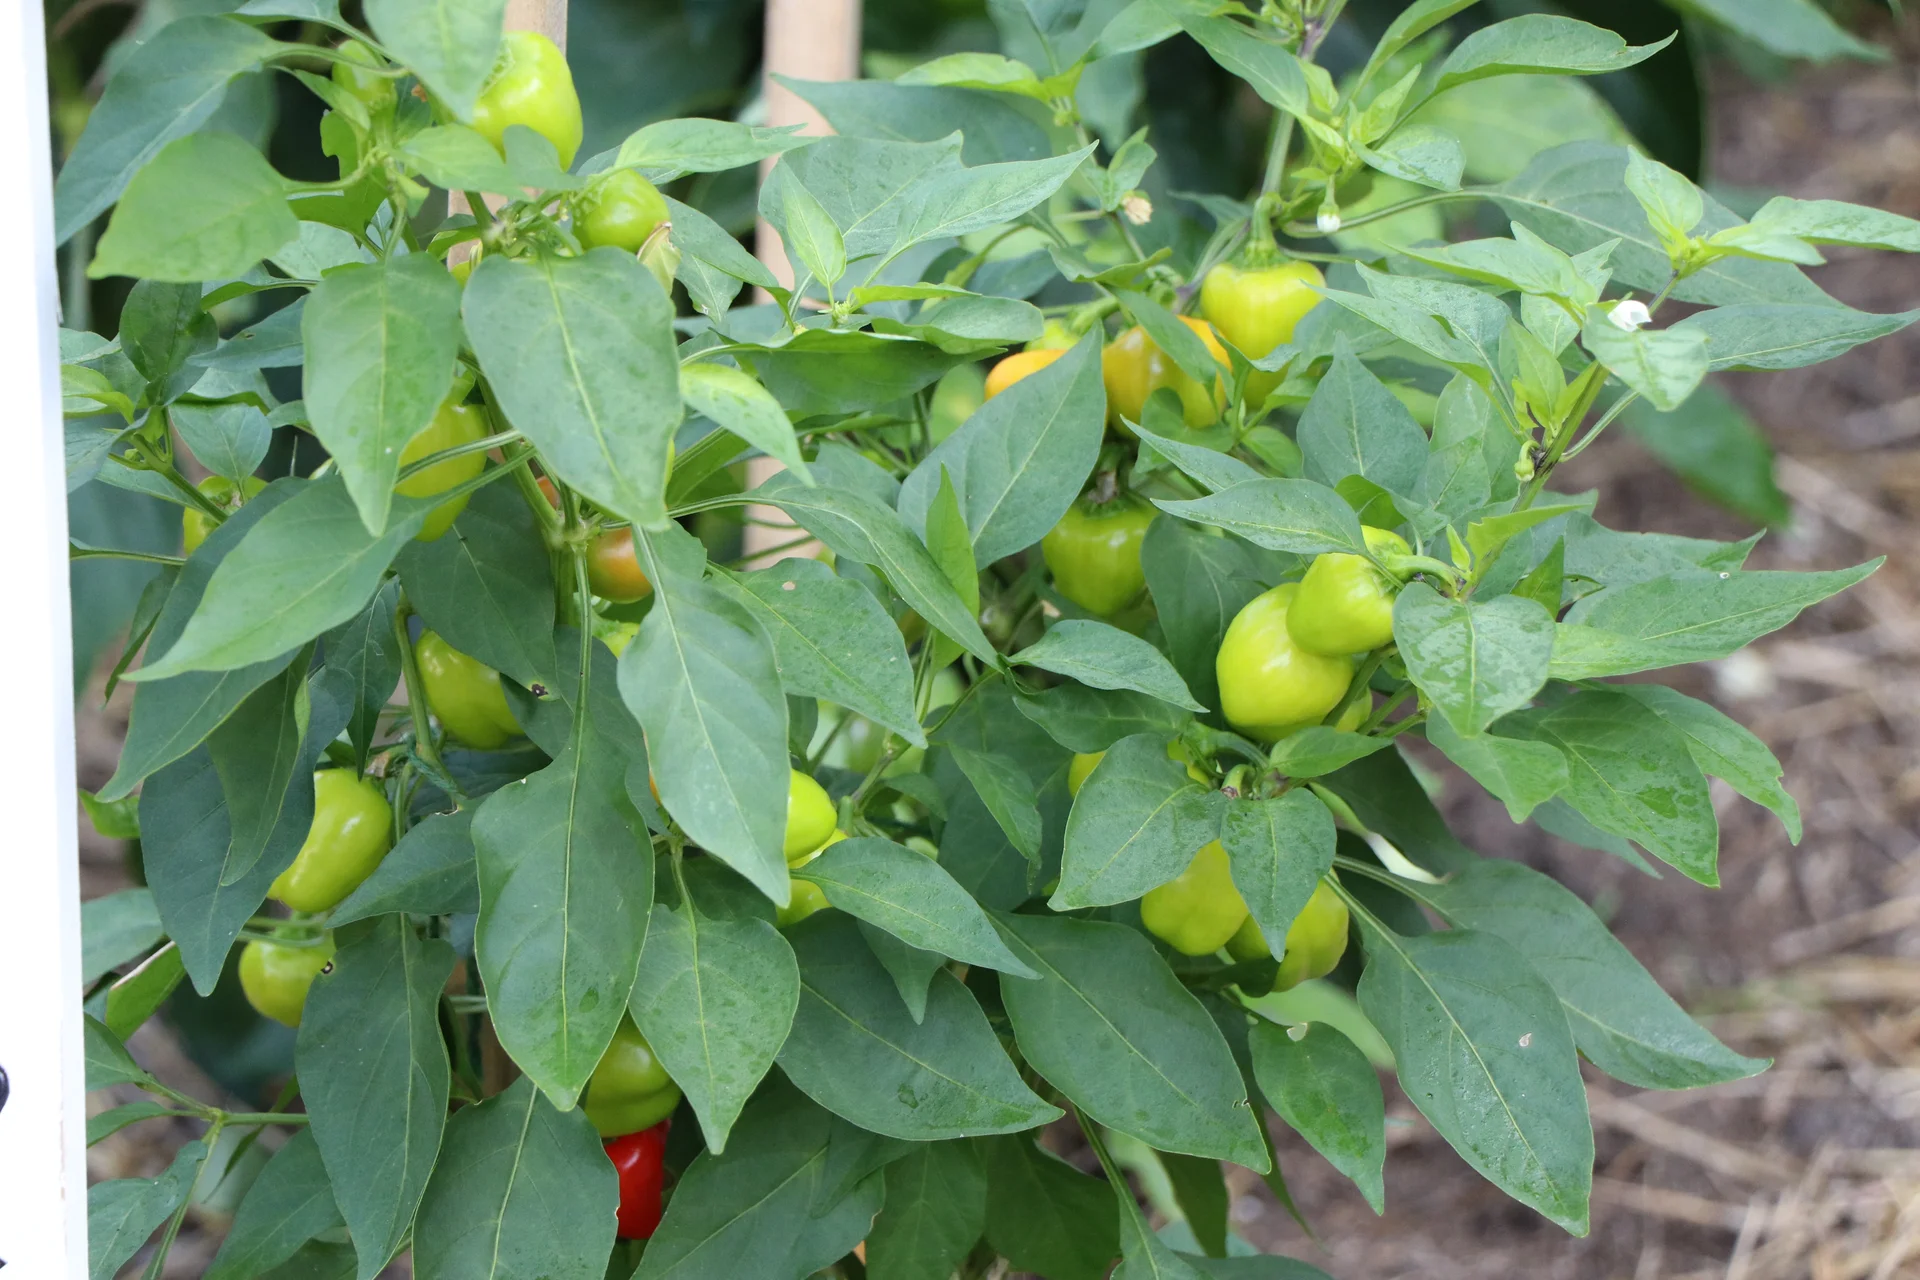
NPS · Public domain 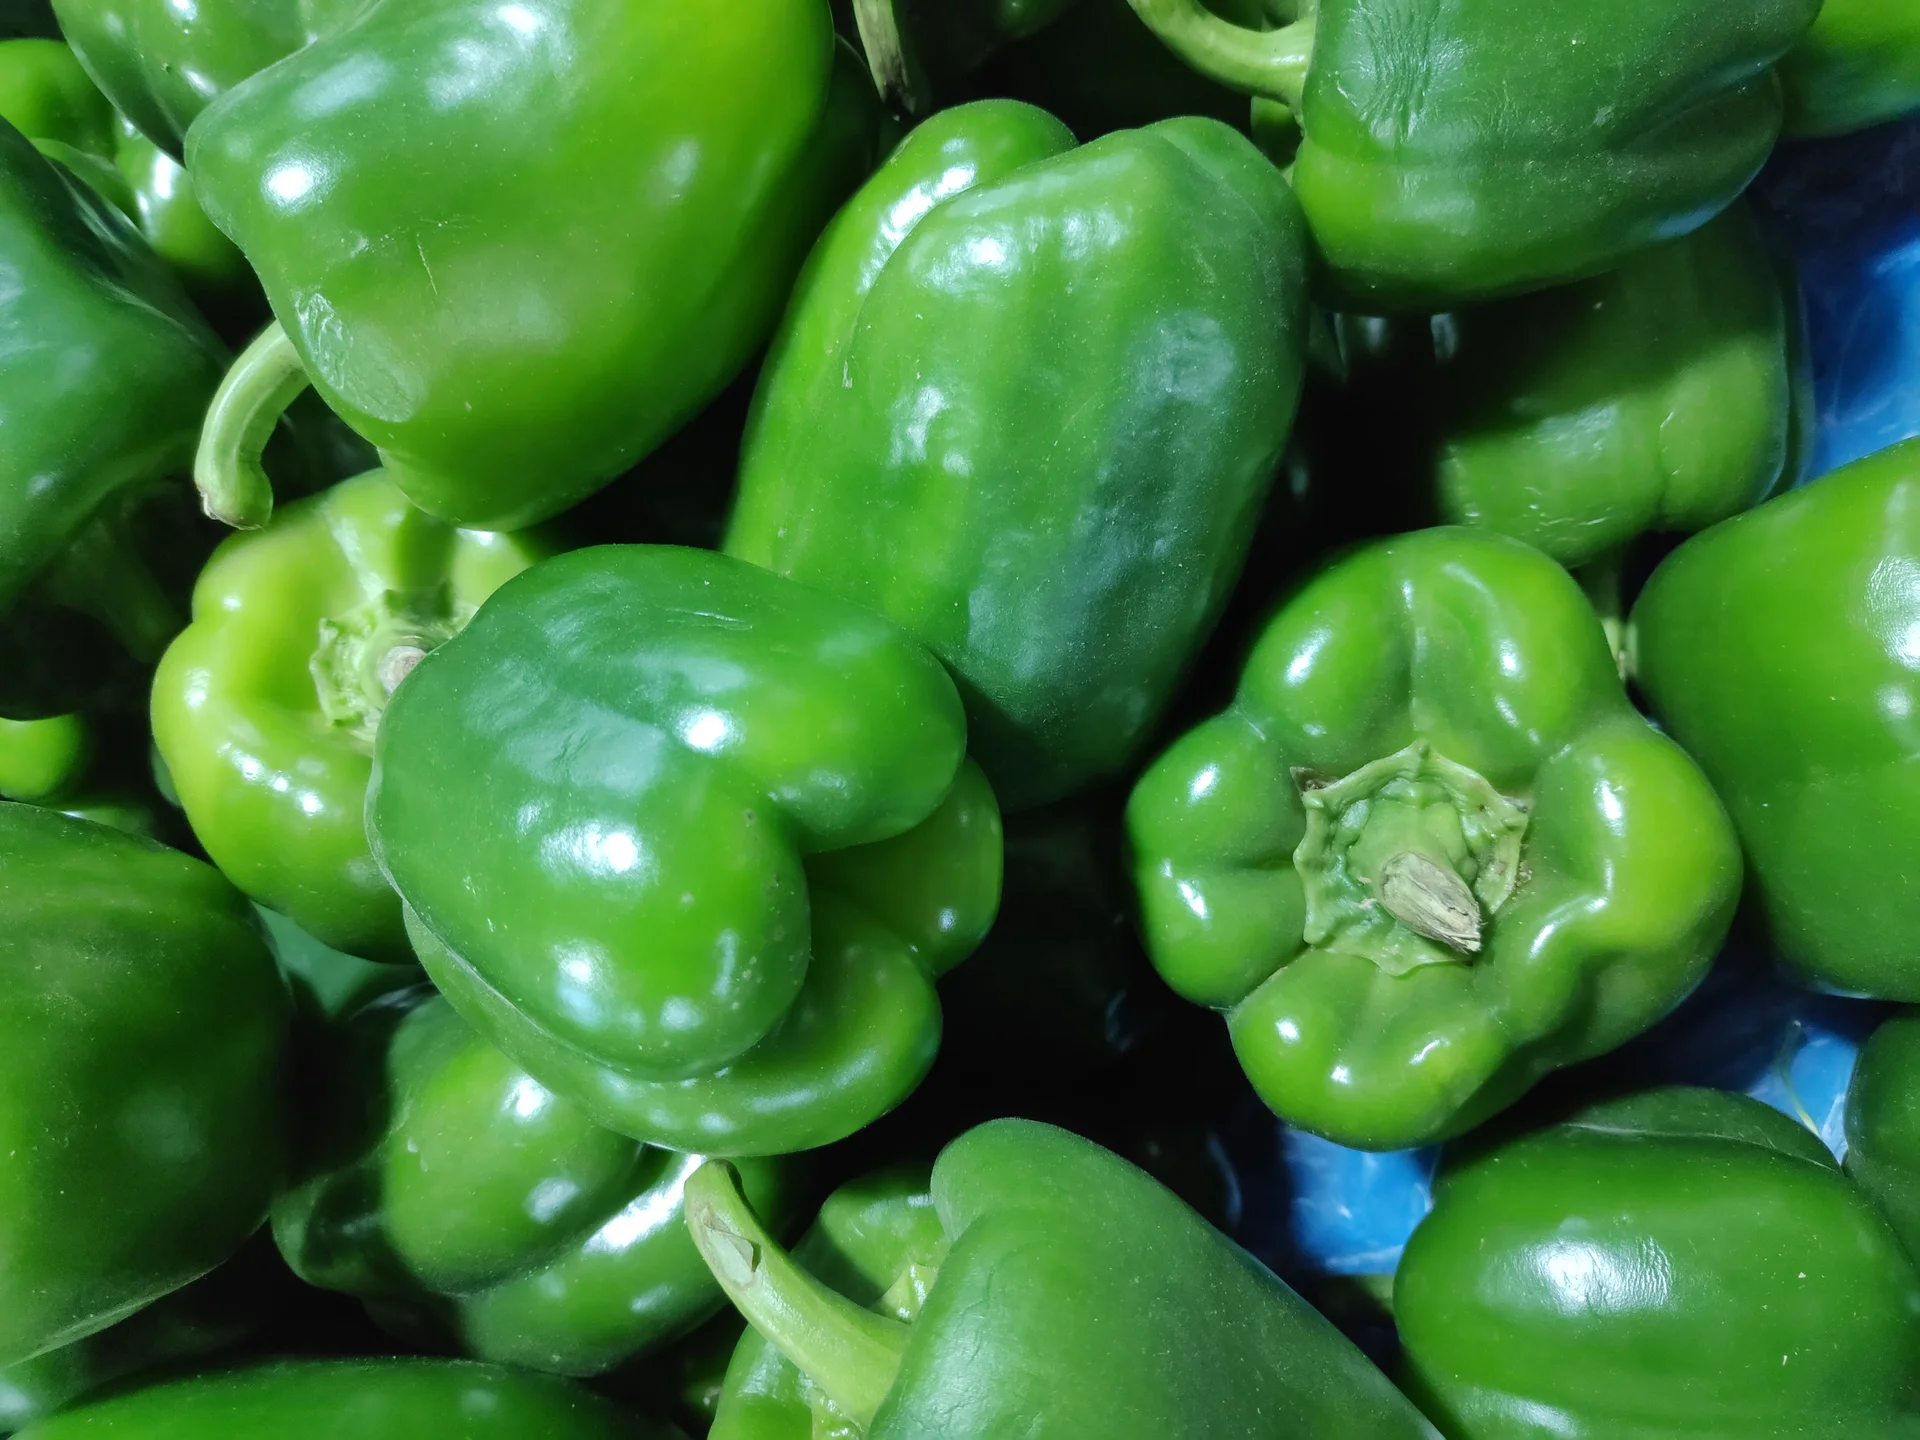
Gaurav Dhwaj Khadka · CC BY-SA 4.0
- Days to maturity
- 120–180 days
- Row spacing
- 60 cm
- Plant spacing in the row
- 40 cm
- Sowing depth
- 0.5–1 cm
These are general figures for the crop, compiled from published agronomic references including FAO and CABI. The right choice for your field depends on your soil, rainfall and the yield you are aiming for.
Will sweet pepper actually do well on your field? Check your own field against every crop in the catalogue — no signup. Run the crop check →
Also known as
Sweet pepper is also called bell pepper and capsicum.
- English
- bell pepper, capsicum
- Afrikaans
- soetrissie
- Amharic
- karya
- French
- poivron
- Hausa
- tattasai, tatashe
- Portuguese
- pimentão
- Shona
- mhiripiri
- Swahili
- pilipili hoho
Working in buckets, bags or paces? The farming glossary turns the measures growers actually use into kilograms and hectares — what a 20 litre bucket of each crop really weighs, and how to size a field by walking it — alongside the Shona, Swahili, Ndebele and Yoruba words used in the field. Open the glossary →
Growing sweet pepper, stage by stage
Your sweet pepper season, step by step — from raising strong seedlings in a nursery, through transplanting, steady watering and careful feeding, to picking the fruit over many weeks and getting it to market unbruised.
Raise strong seedlings in a nursery
You don't sow sweet pepper straight into the field — you first raise the tiny seedlings in a small, protected nursery bed, then move the strongest ones out. This first month sets how strong your crop starts, so give it clean seed, a clean well-drained bed, and toughen the seedlings before they go out. A seedling is ready to transplant at about 5–6 weeks old, one hand-span tall (15–18 cm), with 5–6 true leaves.
Prepare & sterilise the seedbed Critical
Sweet pepper seed is tiny and the seedlings are delicate — a dirty, badly-drained bed loses them to damping-off (a soil fungus that topples young seedlings overnight) and to soil pests. A clean, raised, sterilised bed is the cheapest insurance you have, because once a bed is full of disease you cannot cure it.
Pick a spot that drains well and gets morning sun, on land that has not grown pepper, tomato, potato or eggplant recently — these share a soil disease (bacterial wilt) that has no cure.
Make a raised bed — lift it about a hand-span (15–20 cm) above the ground so water runs off and never sits. Peppers hate wet feet from day one.
Sterilise the bed to kill damping-off fungi and soil pests: burn a layer of dry grass or maize stalks over the surface (quick), or — if you plan ahead — cover the wetted bed with clear plastic in the hot sun for a few weeks (this is called solarising — the trapped heat cooks the germs).
Work in well-rotted compost, not fresh manure — fresh manure burns the tiny roots and carries disease. Then rake the surface fine and level so the small seed sits evenly.
- Tip:
Following tomato, potato, pepper or eggplant on this land — they share bacterial wilt, a soil disease with no cure.
- Do:
Water the finished bed and let it settle a day before sowing, so the surface doesn't wash the tiny seeds into piles.
- Watch out:
Keep the bed away from animal traffic and runoff — dirty splash carries disease straight to the seedlings.
Sow clean seed Critical
Everything downstream rides on this handful of tiny seeds. Clean, fresh seed sown at the right shallow depth comes up evenly and disease-free; buried too deep, the small seed runs out of strength before it reaches the light, and dirty seed carries disease into your bed.
Use clean, certified seed. If you saved your own, treat it first in warm water at 50 °C for 30 minutes (hot to the hand but not scalding — like a very warm bath) to kill seed-borne disease, then dry it.
Make shallow furrows across the bed about a hand's width apart (10 cm) and sow the tiny seed thinly along them.
Cover the seed only a fingernail deep (about 0.5 cm) — barely covered. Small seed buried deep never makes it up.
Water gently with a fine rose or a soft sprinkle so you don't wash the seed away, and keep the bed warm and evenly moist. Sweet pepper sprouts best in warm soil (25–28 °C) and can take 1–2 weeks to show — slower than maize, so be patient.
Once up, thin crowded seedlings so each has room and air — crowded, wet seedlings are exactly what damping-off attacks.
- Do:
Sow a few more seedlings than you need, so you have spares to fill gaps at transplanting.
- Tip:
Sowing deep or watering hard — the seed is tiny and easily buried or washed into clumps.
- Watch out:
Seedlings that suddenly flop with a thin, dark, water-soaked pinch at the soil line are damping-off — remove them, ease off watering, and give more air and sun.
Harden off Recommended
A pampered seedling moved straight from a soft nursery into the open field gets a shock — it wilts, stalls, or dies. Hardening off in the last week toughens it, so it keeps growing the day it is transplanted instead of sulking for two weeks.
Start about 4–6 weeks after sowing, in the last week or so before transplanting, when the seedlings are a hand-span tall (15–18 cm) with 5–6 true leaves.
Slowly cut back the watering and give the seedlings more direct sun each day, so they toughen up and thicken their stems.
Don't starve them completely — the aim is to toughen the plant, not to check its growth hard.
Water the bed well the evening before you lift them. Moist seedlings lift with a ball of soil on the roots and settle in far better than dry, bare-rooted ones.
- Do:
Take only the strongest, stockiest seedlings to the field; leave weak, spindly ones behind.
- Watch out:
A ready seedling is stocky and dark green, about a hand-span tall with 5–6 true leaves — not tall, pale and floppy.
Prepare the field and get your seedlings
While the nursery grows, get the field ready. Sweet pepper is a hungry crop that feeds for months and hates wet feet, so the whole job here is well-drained raised beds, worked-in compost and the first (basal) fertiliser, on land rested from tomato-family crops. If you're not raising your own seedlings, buy strong, clean ones now.
Prepare field + basal (part N + P + K) Critical
Sweet pepper is a hungry crop that feeds for months, so it needs a well-fed, well-drained bed waiting for it. A basal dressing — the fertiliser worked into the soil before planting, feeding the roots as they spread — put into raised beds gives the young plants both food and dry feet from the first day.
Choose land that has not grown pepper, tomato, potato or eggplant for a few seasons — rotating away from them starves out bacterial wilt and other shared diseases.
Make raised beds so water drains away fast — sweet pepper roots rot in wet ground. Never plant it in a spot where water pools.
Work in well-rotted compost or manure to feed the soil and help it hold steady moisture.
Mix the basal fertiliser (a compound carrying N, P and K) into the bed before transplanting — your recommendation gives the amount for your field. Work it in; don't leave it lying on top.
- Tip:
Planting where pepper, tomato, potato or eggplant grew last season — bacterial wilt waits in that soil with no cure. Rotate to a fresh field.
- Do:
Keep fertiliser off food, water and children, and wash your hands after handling it.
- Watch out:
If your land floods or holds water, raise the beds higher or pick another field — waterlogging is a top killer of peppers.
Source healthy seedlings Critical
If you're not raising your own, the seedlings you buy are your crop — a sick or leggy transplant never fully recovers, and a single virus-infected seedling can seed the whole field. Buy strong, clean plants from a trusted nursery in the week before you transplant.
Buy stocky, dark-green seedlings about a hand-span tall (15-18 cm) with 5-6 true leaves and a thick stem — not tall, thin, pale or pot-bound (roots coiled tight in the pot) ones.
Check each one: no mottled, puckered or strappy distorted leaves — a sign of virus — and no wilting or spots. Reject the whole batch if many look sick.
Buy from a nursery that raises its seedlings under net or screen — those carry the fewest thrips, aphids and whitefly, and the least virus.
Transplant them within a day or two of buying, and keep them shaded and watered until you do.
- Do:
Pick short, stocky, dark-green seedlings — they root fast and catch up quickly.
- Tip:
Buying cheap, leggy or pale seedlings, or any with mottled or distorted leaves — you're buying a poor crop and maybe a virus.
Transplant and settle them in
Moving the seedlings from the soft nursery into the open field is a shock — do it gently and they carry on growing; do it roughly and they stall for weeks. Transplant in the cool of late afternoon or on a cloudy day, set each seedling only to the depth of its root-ball, water it in at once, and keep the young plants evenly moist. The number of plants you settle in well now is the number that will carry fruit.
Transplant + water in Critical
This is the moment the crop is most fragile. Moved gently in the cool and watered in at once, the seedlings barely notice the change; done in the heat of the day or set too deep, they wilt hard, stall, or rot at the stem. The spacing you set here is fixed for the season — too close and the plants shade each other and hold disease; too far and you waste land.
Transplant in the late afternoon or on a cloudy day, never in hot midday sun — the seedlings need the cool night to settle before facing the sun.
Space the plants two hand-spans apart (about 40 cm) along the bed, with three hand-spans (about 60 cm) between rows. Even spacing gives each plant light and air.
Set each seedling only as deep as its root-ball — the soil line stays where it was in the nursery. Do NOT bury the stem, because peppers do not root along a buried stem; it simply rots.
Firm the soil gently around the roots and water each plant in straight away, so the roots meet moist soil with no air gaps.
Mulch around the plants with dry grass or leaves to hold steady moisture and stop the soil drying and cracking.
- Do:
Lift and carry seedlings with a ball of soil on the roots and plant them the same evening — bare, dried-out roots set the crop back badly.
- Tip:
Transplanting in hot midday sun — the seedlings wilt before they can root.
- Watch out:
Keep the young plants evenly moist for the first two weeks; a dry-out now stunts them for good.
Scout (cutworms, aphids/whitefly, wilt) Critical
The first two weeks after transplanting is when you lose plants fastest — cutworms fell them overnight, aphids and whitefly move in and start spreading viruses, and bacterial wilt shows up. Ten minutes twice a week lets you replace or treat while there is still time; a week later the gap can't be filled.
Twice a week through the first two weeks after transplanting, walk the whole field — not just the edge by the path — and look closely at a sample of plants all over it.
Cutworms: look for young plants cut clean off at the soil line, lying toppled beside the hole (worst overnight). Scratch the soil nearby to find the fat, greasy, grey caterpillar curled into a C.
Aphids and whitefly: turn over the young leaves and shoot tips. Aphids are tiny soft green or black insects in clusters; whitefly are tiny white insects that fly up in a cloud when you shake the plant. Both leave a sticky shine and spread viruses.
Bacterial wilt: watch for a plant that wilts in the heat of the day while its leaves stay green, and doesn't recover overnight. Cut the base of the stem and stand it in clear water — a milky-white thread oozing out confirms it. There is no cure: pull and remove that plant and don't replant pepper in that spot.
If you must spray a pest, measure the dose with the cap, mix it into a full knapsack (15–20 L), cover your skin, eyes and nose, and spray in the cool with the wind behind you, off any food. Wash well afterwards.
- Do:
Carry a tin as you scout and drop caterpillars, wilted plants and heavily infested leaves into it — take them right out of the field.
- Watch out:
Aphids and whitefly spread viruses you cannot cure — knock their numbers down early rather than waiting.
- Tip:
Handling healthy plants right after touching a wilted or virus-sick one — you carry the disease on your hands.
Gap-fill Recommended
Every seedling that died leaves an empty station — a plant's worth of fruit gone. Filled in the first week or so from your spare seedlings, the replacement catches up; left longer, it never does, so even the stand out while the crop is still young.
About a week after transplanting, walk the rows and note every station where the seedling died or failed to settle.
Fill each gap with a strong spare seedling from the nursery, planted the same way — to the root-ball, in the cool of evening, watered in at once.
Do it early, while the crop is only a week old, so the replacements grow up level with the rest of the field.
- Do:
Keep a few nursery seedlings in reserve for exactly this — spares are what make gap-filling possible.
- Watch out:
If a plant died of wilt (collapsed but green), don't just drop a new plant in — remove the sick plant and the soil around it first, or the replacement catches the same disease.
Irrigate — steady from the start Critical
Fresh transplants have shallow, disturbed roots that dry out fast. Steady water from day one is what lets them root out and settle — and starting even watering now, before flowering, is how you head off blossom-end rot later, which begins as a watering habit long before it ever shows on the fruit.
Water every 2–3 days from transplanting, keeping the topsoil evenly moist — never bone-dry, never waterlogged.
Water more often in heat and on sandy soils that dry fast; check by pushing a finger in and water when the top few centimetres are dry.
Drain fast after watering or rain. Sweet pepper roots rot in standing water — the moisture should be steady, not soggy.
Aim for an even rhythm. Big swings from dry to soaked are what set up fruit problems weeks down the line.
- Tip:
Letting the bed swing from bone-dry to soaked — even watering now is what prevents blossom-end rot at fruiting.
- Watch out:
Water pooling around the stems means poor drainage — open the beds up or the roots rot.
Grow the frame and feed it
Now the plant builds the leafy frame and branches that will carry the fruit. Your job is to keep it fed, weed-free and evenly watered — and to go easy on nitrogen. Too much nitrogen now grows a big bushy plant that is slow to set fruit and more prone to blossom-end rot, so feed it in small splits, never one big dose.
Scout (aphids, thrips, broad mite, early blight/spot) Critical
As the plant bushes out, sap-suckers hide in it — aphids and thrips spreading virus, and broad mite curling the new leaves — and bacterial spot starts on the foliage. These are easiest to stop while the plant is small and open; once it's a dense bush they are hard to reach.
Twice a week, from about 2 weeks after transplanting, check the undersides of leaves and the shoot tips — where these pests live — across a sample of plants all over the field.
Aphids and thrips: aphids cluster as soft green or black dots; thrips are like tiny moving splinters in the growing tips, leaving silvery, scratchy streaks with tiny black specks of dung. Both spread viruses.
Broad mite: far too small to see, but the new leaves at the shoot tips curl downward, harden, and go bronze and shiny, and the growing point looks distorted, almost corky. It looks like a virus but it is mites.
Bacterial spot: look for small dark, greasy, water-soaked spots on the leaves that turn brown with a yellow edge and may drop out as shot-holes; it is worse in warm, wet weather.
Remember virus prevention is clean plants and pulling out sick ones — not spraying. If you must spray a pest, measure the dose with the cap, cover skin, eyes and nose, spray in the cool with the wind behind you, off food, and wait the label's days before picking — the pre-harvest interval, the number of days between spraying and safe harvest.
- Tip:
Over-feeding nitrogen to push growth — it delays fruit set and worsens blossom-end rot.
- Watch out:
Curled, bronzed shoot tips are usually broad mite, not disease — don't waste money spraying it as a fungus.
- Do:
Pull and remove any plant with mottled, puckered, distorted leaves — that is virus, and it spreads to the rest.
N side-dress (splits) Recommended
The growing plant eats most of its nitrogen now, but nitrogen washes away in rain if you dump it all at once. Feeding it in small splits — a portion every couple of weeks — keeps a steady supply going into the crop with less waste. Just don't overshoot: too much nitrogen delays fruit set and brings on blossom-end rot.
Start about 2 weeks after transplanting, then repeat every 2 weeks through early growth.
Band each dose — lay it in a line a hand's width (about 10 cm) to the side of the plants, not on top of them — following the amount your recommendation gives. Split it; never put the season's nitrogen on in one go.
Apply onto moist soil (after watering or light rain) and cover it or water it in, so it feeds the roots instead of gassing off into the air.
Keep the fertiliser off wet leaves (it scorches them) and away from food, water and children. Wash your hands afterwards.
- Tip:
Putting all the nitrogen on at once — a heavy rain washes it past the roots, and a nitrogen surge delays fruiting.
- Watch out:
A big, dark-green, leafy plant with few flowers is a sign of too much nitrogen — ease off.
Weed + mulch Recommended
Young peppers are small and slow, and weeds steal the water, food and light you are paying for. Clearing them early — and laying a mulch — keeps the crop ahead and, just as important, holds the soil moisture steady, which is your main defence against blossom-end rot.
Weed from about 2 weeks after transplanting, while the weeds are still small and you can walk the rows easily.
Hoe shallowly — pepper roots run near the surface, so deep hoeing close to the plants cuts them.
After weeding, lay a mulch of dry grass or leaves around the plants. Mulch smothers new weeds and, above all, keeps the soil evenly moist so the fruit tips get steady calcium.
Keep the mulch a finger-joint's width back from the stems (a few centimetres) — piled against the stem it holds damp and invites rot.
- Do:
Weed just before you side-dress nitrogen, so the feed goes to the peppers and not the weeds.
- Watch out:
Surface roots are easy to injure — hoe lightly near the plants and let the mulch do the rest.
Irrigate Critical
Steady water keeps the leaves growing and builds the frame that will carry the fruit. Just as vital, an even watering rhythm now trains the crop for flowering — the wet-dry swings that cause blossom-end rot begin as a habit at this stage.
Water every 3–5 days, keeping the soil moist to root depth without ever waterlogging it.
Aim for a comfortable middle — let the soil use up to about half its water, then refill. Not dust-dry, not soggy, and never a swing from bone-dry to flooded.
Water more often in heat and on sandy soil; check with a finger and water when the top few centimetres are dry.
Keep the beds draining freely — steady moisture, dry feet.
- Tip:
Letting the crop dry right out then soaking it — that swing is exactly what causes blossom-end rot and cracked fruit later.
- Watch out:
Wilting in the cool of morning (not just hot midday) means real water stress — water now.
Flowering and fruit set — the water-sensitive window
This is the make-or-break stage. The plant flowers and sets its first fruit, and it is now thirstier and more sensitive than at any other time — a dry spell or a wild wet-dry swing here costs you fruit you can never get back. Keep the water dead steady, start the calcium-and-water program against blossom-end rot, and watch that heat or cold isn't knocking the flowers off.
Scout (thrips, fruit borer, blossom drop) Critical
At flowering the stakes jump. Thrips swarm the flowers and spread pepper viruses; fruit borers (bollworm) drill into the young fruit; and flowers drop if it turns too hot or too cold. Catching these now protects the fruit the whole season depends on.
Twice a week, from about 6 weeks after transplanting, check the flowers, shoot tips and young fruit across the field.
Thrips: tap a flower over your open palm — if tiny pale slivers scurry across your hand, that's thrips. On leaves they leave silvery scarring with black specks; they spread viruses, so keep their numbers down.
Fruit borer (bollworm): look for a neat round hole bored into the fruit near the stalk, with droppings at the hole and rot inside. Pick and destroy holed fruit and any caterpillars you find in the flowers.
Pepper viruses: watch for mottled light-and-dark green leaves, puckered or strappy distorted growth, and stunted plants. There is no cure — pull and remove sick plants so aphids and thrips don't carry it on.
Blossom drop: if flowers turn yellow and fall without setting fruit, the cause is usually the weather, not a pest (see the note below). If you must spray a pest, cover skin, eyes and nose, spray in the cool with the wind behind you, off food, and respect the days-to-harvest on the label.
- Watch out:
Flowers drop on very hot days (over 32–35 °C) or cold nights (below 15 °C) — this is a timing problem you prevent, not one you can reverse. Keep water steady and the plant will flower again when the weather eases.
- Do:
In still, humid air a gentle tap of the plant in the warm morning helps the self-pollinating flowers set.
- Tip:
Spraying insecticide onto open flowers in the heat of the day — you knock off flowers and harm the bees that help set fruit.
Check fruit set Recommended
Flowers are only a promise; fruit that has set and is holding is the real crop. Checking now tells you whether pollination and the weather are working for you, or whether heat, cold or thrips are knocking the flowers off before they set — while there is still time to fix the cause.
About 6–8 weeks after transplanting, once the plants have been flowering for a couple of weeks, walk the field and pick a sample of plants to check.
On each, count the young fruit that have set and are holding — small firm peppers, past the flower stage, staying on the plant.
A good crop is carrying several holding fruit per plant, with more flowers still coming.
If it fails — few or no fruit have set → the flowers are dropping. Fix the cause: keep the water dead steady, wait out any heat or cold spell (the plant will re-flower when it eases), scout hard for thrips, and ease off any excess nitrogen. Then re-check in a week or two.
- Watch out:
Plenty of flowers but little fruit means blossom drop — look first at heat, then cold, then water swings, then too much nitrogen, in that order.
Even irrigation through set Critical
This is the single most water-sensitive moment of the whole season. The flowers and setting fruit cannot take a swing — let the soil dry out and then soak it, and flowers drop and fruit tips rot. Even water now is the difference between a heavy set and a thin one.
Water little and often — every 2–4 days — so the soil stays evenly moist and never swings wet to dry.
Keep the crop on the moist side of comfortable: water again before even a quarter of the soil's moisture is used up.
Keep the mulch topped up to hold that moisture steady between waterings.
Still drain freely — even, steady moisture, never standing water.
- Tip:
Skipping a watering in this window — one dry spell at flowering drops fruit you can't get back.
- Watch out:
If you can only water well at one stage of the whole season, water now.
Calcium + steady water Critical
Blossom-end rot — the sunken, leathery brown-black patch on the fruit tip — is the classic sweet-pepper heartbreak: fruit that looked fine rots at the bottom and can't be sold. It is calcium failing to reach the fruit tip, driven mostly by uneven water. The fix is soil calcium plus dead-steady moisture — not spraying calcium on the leaves, which barely helps.
First learn to recognise it: a sunken, leathery, brown-to-black patch at the blossom end (the tip) of the fruit — not a pest, and not curable once it is on a fruit.
Run the program from about 6–7 weeks after transplanting, right through fruiting.
The real fix is steady water — calcium only moves to the fruit when moisture is even, so never let the soil swing wet–dry and keep the mulch in place.
Keep calcium in the soil and the pH around 6.0–6.5 so the roots can take it up — apply soil calcium (such as agricultural lime or gypsum) at the amount your recommendation gives, worked into moist soil.
Don't rely on spraying calcium onto the leaves — foliar calcium barely reaches the fruit; even water plus soil calcium is what works.
- Do:
Treat this as a watering job first and a fertiliser job second — steady moisture does most of the work.
- Tip:
Big nitrogen doses now — they pull calcium away from the fruit and make blossom-end rot worse.
- Watch out:
The first affected fruit are often the earliest, biggest ones during a dry spell — tighten your watering the moment you see a soft tip.
Fill the fruit and keep it even
The fruit is now sizing up and filling out its thick walls — and potassium is what drives that quality. Keep the water even (a wet-dry swing now causes blossom-end rot and splits the fruit; over-watering rots the roots), feed potassium, hold off on nitrogen, and support heavy plants before the fruit load snaps the brittle stems.
Scout (broad/spider mite, powdery mildew, anthracnose) Critical
As the fruit fills, new problems attack it directly: red spider mite in hot dry weather, powdery mildew stripping the leaves, and worst of all anthracnose, which rots the ripening fruit. Spotting them early is your last chance to save the fruit you have grown all season.
Twice a week, from about 9 weeks after transplanting, check leaves (both sides), shoot tips and the ripening fruit across the field.
Red spider mite: in hot dry spells look for fine pale speckling on leaves that then go bronze and dry, with fine webbing on the undersides — hold a leaf to the light to see the tiny moving specks.
Powdery mildew: on pepper it shows mostly as white or grey powdery patches on the underside of leaves, with yellow blotches on top; badly hit leaves drop and expose the fruit to sunburn.
Anthracnose: the fruit killer — sunken, dark, circular spots on ripening fruit, often in rings, with a pinkish or black centre. Pick and remove affected fruit; it spreads fast in warm, wet weather.
If you must spray, cover skin, eyes and nose, spray in the cool with the wind behind you, off food, rotate chemical groups, and wait the label's pre-harvest interval (the days between spraying and safe picking) before you harvest.
- Watch out:
Anthracnose jumps from a few rotting fruit to many — take holed and rotting fruit out of the field as you scout, don't leave them lying.
- Do:
Pick ripe fruit promptly and keep the canopy open — dense, damp bushes are where mildew and anthracnose thrive.
K feed through fill Recommended
Potassium is the nutrient that fills the fruit and builds those thick, heavy, glossy walls buyers pay for — sweet pepper takes up more potassium than any other nutrient. Feeding it steadily through fill carries the fruit; a surge of nitrogen now, by contrast, grows leaves at the fruit's expense.
From about 9–13 weeks after transplanting, feed potassium every 10–14 days through the fruit-fill stage, at the amount your recommendation gives.
Band it in a line a hand's width (about 10 cm) to the side of the plants, on moist soil, and water or cover it in.
Do not surge nitrogen now — late nitrogen grows soft leaf, delays ripening, and worsens blossom-end rot.
Keep fertiliser off wet leaves, off food and water, and away from children — wash your hands afterwards.
- Tip:
Adding extra nitrogen late to 'push' the plant — it costs you fruit quality and slows ripening.
- Do:
Pair every feed with steady watering — potassium and even moisture together give firm, well-filled fruit.
Even irrigation + mulch Critical
Even water through fill decides whether the fruit comes in smooth and whole or rotten and split. A dry-then-soak swing both rots the fruit tip (blossom-end rot) and cracks the swelling fruit; over-watering, on the other hand, invites root and fruit rot. Steady is everything.
Water every 2–4 days to keep the soil evenly moist through the whole fruit-fill stage — the same steady rhythm as at flowering.
Keep a mulch over the beds to buffer the moisture and stop the surface drying and cracking between waterings.
Never let it swing from dry to soaked — that swing is what splits the fruit and rots the tips.
At the same time, never waterlog — soggy ground in warm weather brings on Phytophthora, a rot that wilts and kills whole plants. Steady moisture, free drainage.
- Tip:
A heavy watering or a flood after a dry spell — the fruit skins can't stretch that fast and they split.
- Watch out:
Plants suddenly wilting and dying with a dark rot at the stem base in wet soil is Phytophthora — improve drainage and never overwater.
Pick over many passes
Sweet pepper doesn't ripen all at once — you pick it over and over, roughly once a week for weeks. Decide early whether you are selling green-mature fruit (picked firm and full-sized, which gives more pickings and less risk) or coloured fruit (left to turn yellow or red for a premium, but tying up the plant longer). Cut clean, pick in the cool, and handle only dry fruit.
Harvest passes (weekly) Critical
Picking is not a one-day job — the fruit ripens a few at a time, so you harvest weekly for weeks. Going over the plants regularly and at the right stage keeps them setting new fruit and gets each pepper off before rot, sunburn or overripeness cost you the sale.
Start picking from about 10 weeks after transplanting, then go over the plants once a week for the rest of the season.
For green-mature fruit: pick when the pepper is full-sized, firm, glossy and thick-walled but still green. This gives you more pickings and less risk of loss.
For coloured fruit (yellow or red): leave it on the plant until it colours fully for a higher price — but know it ties up the plant longer and risks more sun and rot in the wait.
Cut each fruit with a short stalk using a clean, sharp knife or secateurs — don't pull, or you tear the brittle branch. (Remember: green, yellow and red are just ripeness stages of the same fruit.)
Pick in the cool of morning or evening, handle only dry fruit (wet fruit rots in the crate), and lay them gently in a shallow container — never tip or drop them.
- Do:
Keep your knife and hands clean between plants — a pepper virus (tobamovirus, a virus carried on hands and tools) spreads plant-to-plant as you pick.
- Tip:
Pulling fruit off by hand — it snaps the brittle branches and tears the stalk, opening the fruit to rot.
- Watch out:
Pick before fruit overripens or sunburns on the plant — regular picking also pushes the plant to set more.
Cool it and handle gently
Sweet pepper is perishable and bruises easily, and — unlike grain — it is harmed by too much cold. Get the field heat out of it fast in the shade, keep it cool and humid, pack it in shallow crates so it isn't crushed, and grade it — but never chill it hard, or it pits and rots.
Cool, grade & pack Recommended
The sale price is made or lost in the hours after picking. Fruit left to sweat in the sun wilts and softens; fruit thrown into deep sacks bruises; fruit chilled too hard pits and rots. Cooling gently and packing shallow is how the quality you grew actually reaches the buyer.
Get the field heat out fast: move picked fruit into the shade immediately — never let it sit in the sun.
Keep it cool and humid. Peppers hold best at around 7–8 °C in high humidity, staying good for up to 3–5 weeks — but this is a cool store, not a cold one.
Do not chill below about 7 °C — sweet pepper is cold-sensitive, and hard chilling causes pitting (small sunken marks) and decay. This is the opposite of grain: colder is not safer here.
Grade the fruit by size, colour and defects — set aside anything soft, cracked, rotting or sunburned so it doesn't spoil the rest.
Pack in shallow crates, not deep sacks — peppers bruise and puncture easily, and weight from above crushes the fruit below.
- Tip:
Chilling fruit below about 7 °C — it causes pitting and decay. Cool, not cold.
- Do:
Sell or move the fruit quickly — even well-cooled, it is perishable and worth most fresh.
- Watch out:
Wet fruit and deep packing both bring rot in the crate — pack dry fruit in shallow layers.
Pests and diseases that attack sweet pepper


Where to sell sweet pepper
Markets that trade this crop — what each one sells it by, when supply peaks there, and the currency used.
-
 Marché de Foumbot
-
 Mercado Grossista do Zimpeto
-
 Windhoek Fresh Produce Market
-
 Letsema Horticulture Market
-
 Sabon Gari Market
Grow sweet pepper with a plan, not a guess
This guide is the general answer. Divisi works out yours — the week to plant sweet pepper on your soil and your rainfall, and each job dated for your field.


When to plant sweet pepper, country by country
- When to plant sweet pepper in Algeria
- When to plant sweet pepper in Angola
- When to plant sweet pepper in Botswana
- When to plant sweet pepper in Burundi
- When to plant sweet pepper in Cabo Verde
- When to plant sweet pepper in Cameroon
- When to plant sweet pepper in Comores
- When to plant sweet pepper in Congo
- When to plant sweet pepper in Côte d'Ivoire
- When to plant sweet pepper in Egypt
- When to plant sweet pepper in Eritrea
- When to plant sweet pepper in Eswatini
- When to plant sweet pepper in Ethiopia
- When to plant sweet pepper in Gabon
- When to plant sweet pepper in Ghana
- When to plant sweet pepper in Guinea Ecuatorial
- When to plant sweet pepper in Guinée
- When to plant sweet pepper in Kenya
- When to plant sweet pepper in Lesotho
- When to plant sweet pepper in Liberia
- When to plant sweet pepper in Libya
- When to plant sweet pepper in Madagascar
- When to plant sweet pepper in Malawi
- When to plant sweet pepper in Mali
- When to plant sweet pepper in Mauritanie
- When to plant sweet pepper in Mauritius
- When to plant sweet pepper in Morocco
- When to plant sweet pepper in Moçambique
- When to plant sweet pepper in Namibia
- When to plant sweet pepper in Niger
- When to plant sweet pepper in Nigeria
- When to plant sweet pepper in Rwanda
- When to plant sweet pepper in République centrafricaine
- When to plant sweet pepper in République démocratique du Congo
- When to plant sweet pepper in Sao Tome and Principe
- When to plant sweet pepper in Sierra Leone
- When to plant sweet pepper in Somalia
- When to plant sweet pepper in South Africa
- When to plant sweet pepper in South Sudan
- When to plant sweet pepper in Sudan
- When to plant sweet pepper in Sénégal
- When to plant sweet pepper in Tchad
- When to plant sweet pepper in Togo
- When to plant sweet pepper in Tunisie
- When to plant sweet pepper in Uganda
- When to plant sweet pepper in United Republic of Tanzania
- When to plant sweet pepper in Zambia
- When to plant sweet pepper in Zimbabwe
Where sweet pepper scores best
Districts where Divisi's engine currently rates this crop highest, ranked by fit.
-
 Manono
 -
 Kilimani
 -
 Kasese
 -
 Huambo
 -
 Gasorwe
 -
 Rubavu
 -
 Bukoba
 -
 Igembe North
 -
 Mityana
 -
 Quibala
 -
 Mwene-Ditu
 -
 Kicukiro
Get Insights by email
A short digest of new Divisi articles. No email on quiet weeks.
Frequently asked questions
How do I grow sweet pepper?
How to grow sweet pepper: 120–180 days to maturity, 60 cm rows, 0.5–1 cm deep. Also called bell pepper, soetrissie, karya, poivron, tattasai, pimentão.
What is soetrissie in English?
Soetrissie is the Afrikaans name for sweet pepper.
What is karya in English?
Karya is the Amharic name for sweet pepper.
What is poivron in English?
Poivron is the French name for sweet pepper.
What is tattasai in English?
Tattasai (also tatashe) is the Hausa name for sweet pepper.
What is pimentão in English?
Pimentão is the Portuguese name for sweet pepper.
What is mhiripiri in English?
Mhiripiri is the Shona name for sweet pepper.
What is pilipili hoho in English?
Pilipili hoho is the Swahili name for sweet pepper.
How long does sweet pepper take to grow?
Sweet pepper takes about 120–180 days from sowing to maturity, though the exact length varies with variety, temperature and how the season runs.
What spacing should I use for sweet pepper?
Space sweet pepper rows about 60 cm apart, with roughly 40 cm between plants within the row.
How deep should sweet pepper be planted?
Sow sweet pepper at about 0.5–1 cm deep. Shallower risks drying out; deeper wastes seed energy before the shoot reaches light.
What pests and diseases attack sweet pepper?
The ones covered in this guide are Bacterial spot, Bollworm complex, Broad mite. Each has its own page explaining how to identify, check for and control it.