 Divisi
How to grow teff
Eragrostis tef · Poaceae
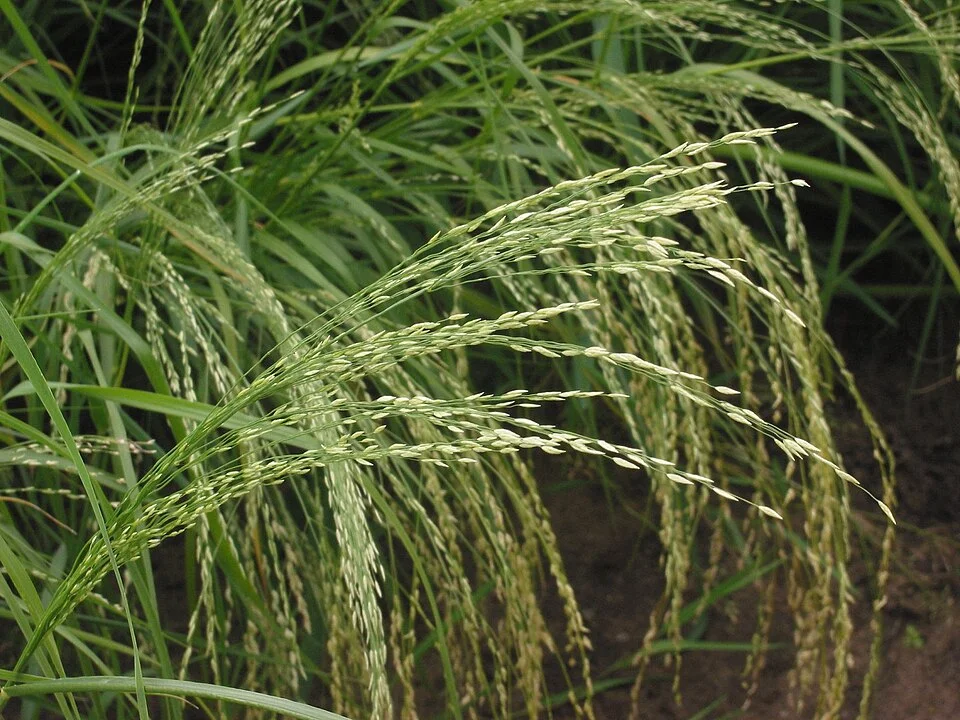
Photo: No machine-readable author provided. Rasbak assumed (based on copyright claims). · CC BY-SA 3.0
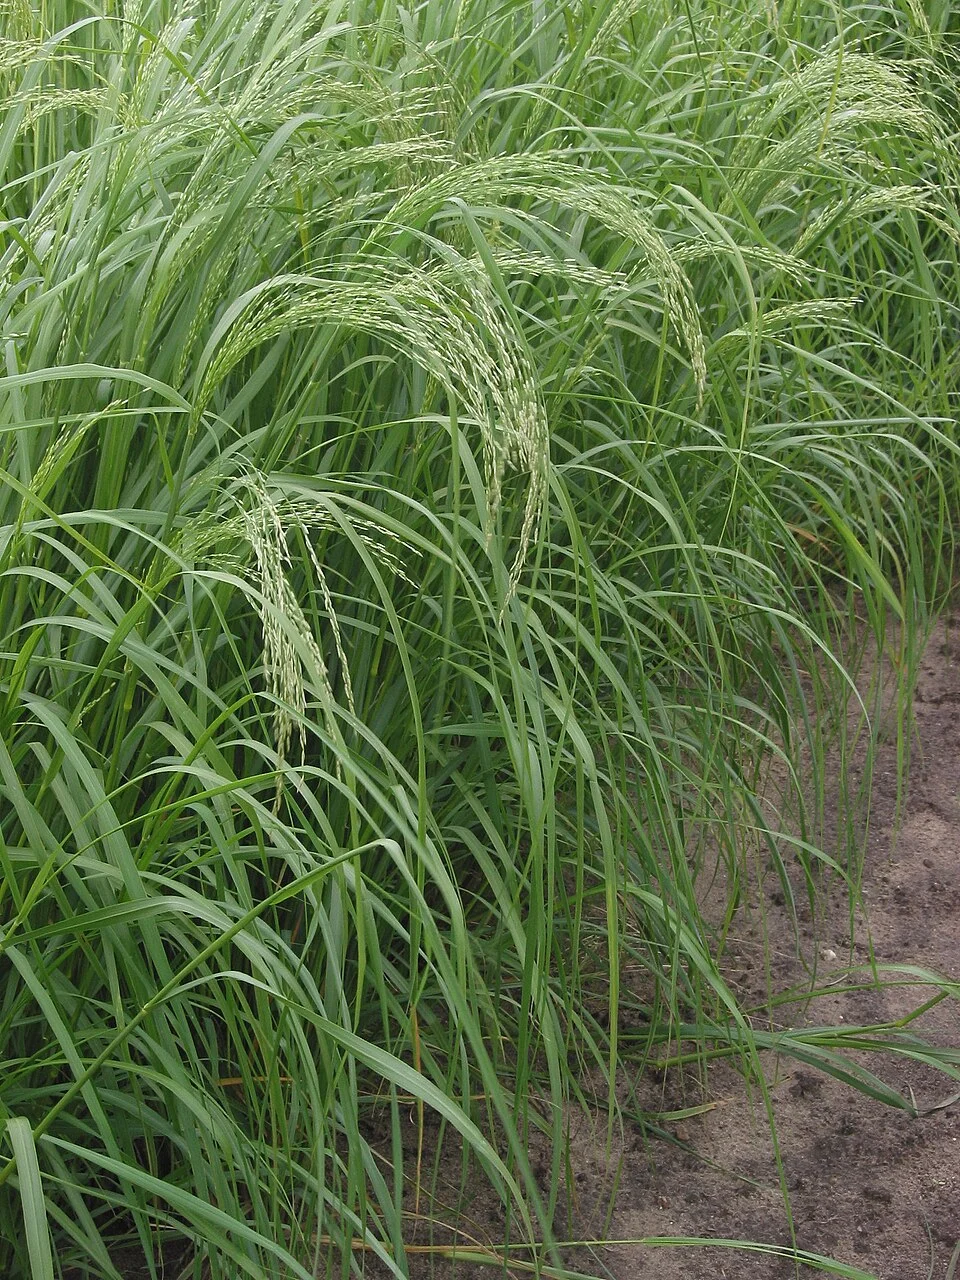
Teff (Eragrostis tef) is a fine, tufted grass that carries the smallest grain of any cereal in the world — seed almost as fine as dust. It is the crop behind injera, the everyday flatbread of Ethiopia and Eritrea, and its grain is naturally gluten-free. Two things set teff apart. It will grow on heavy black clay that stays wet and would drown maize or sorghum; and its thin, whippy stems fall over easily — a problem farmers call lodging, and teff's single biggest headache. The grain comes white or brown/red: white usually sells for more, while brown types are hardier and good for home food. Teff asks little of the soil and wants only modest feeding, but it demands one thing above all — a very fine, firm seedbed — because a seed this small has almost no strength to climb up through clods.

- Days to maturity
- 60–120 days
- Sowing depth
- 0.5–1 cm
These are general figures for the crop, compiled from published agronomic references including FAO and CABI. The right choice for your field depends on your soil, rainfall and the yield you are aiming for.
Will teff actually do well on your field? Check your own field against every crop in the catalogue — no signup. Run the crop check →
Also known as
- Amharic
- ጤፍ (tef)
- French
- teff
- Oromo
- xaafii, tafi
- Portuguese
- tef
- Tigrinya
- taf
Working in buckets, bags or paces? The farming glossary turns the measures growers actually use into kilograms and hectares — what a 20 litre bucket of each crop really weighs, and how to size a field by walking it — alongside the Shona, Swahili, Ndebele and Yoruba words used in the field. Open the glossary →
Growing teff, stage by stage
Your teff season, step by step — build a very fine, firm seedbed, scatter the dust-fine seed evenly and barely cover it, feed it lightly so it stands up straight, protect the moisture at flowering, then cut and thresh carefully so none of the tiny grain is lost.
Get your field and seed ready — the fine, firm seedbed
For teff, the seedbed is the biggest job of the whole season. The seed is almost as fine as dust and carries almost no food inside to push a shoot up through clods — so it needs a fine, firm, level, moist bed, not lumps and loose fluff, or it buries and never comes up. In the weeks before the rains, break and level the soil until it is fine, plan drains on heavy black clay, and line up a short, stand-up-straight (semi-dwarf) variety with only modest fertiliser. Get everything ready before the rains so you can sow the moment the soil is right.
Prepare a very fine, firm, level seedbed Critical
Teff seed is about the size of dust, with almost no food inside to push a shoot up through clods or loose soil. It must sit on a fine, firm, level bed with soil pressed snug around it. A rough, cloddy or fluffy seedbed is the number-one reason teff comes up thin and patchy — and it is the one mistake you cannot undo once the seed is down. This is the most important job of the whole season, and you get only one chance at it.
In the month before sowing, plough or dig the plot, then break it down and level it. Work it over several times across those weeks — teff needs a finer bed than any other cereal you grow.
Loosen the topsoil about 10-15 cm deep — a bit less than a hand-span (a hand-span is about 20 cm). No need to dig deeper: teff roots are shallow, and what matters here is fine and level, not deep.
Crush every clod to a fine, crumbly tilth (a soft, crumbly surface) and rake out stones, roots and old stalks. Aim for a surface as fine as a nursery seedbed — if big clods remain, the dust-fine seed falls into the gaps and comes up in patches.
Firm the bed: roll a log or a drum over it, or tramp it down, so it is level and firm underfoot. Teff must have firm soil under the seed — a loose, fluffy bed dries out and swallows it.
On heavy black clay that holds water (the sticky kind that gets waterlogged), open shallow drainage furrows a few strides apart (a stride is about 1 m) across the plot so heavy rain runs off. Teff stands wet feet better than other cereals, but a drowned, crusted seedbed still gives a poor stand.
Save the final fine raking for just before sowing, while the soil is still moist — a firm, moist, fine bed is exactly what the seed needs on sowing day.
- Do:
Work the bed finer than you think you need. For teff, 'too fine' is about right; 'a bit cloddy' gives you a thin, gappy stand.
- Tip:
A loose, fluffy or cloddy bed, and any hollows where water pools — the seed buries, dries out or drowns.
- Tip:
Piling on nitrogen or heavy fresh manure to 'boost' the soil — lush, soft growth makes teff fall over (lodge) later. Keep feeding modest.
Buy seed & fertiliser Critical
The variety you choose decides whether your crop stands up or falls flat. Teff's biggest problem is lodging — when the thin stems bend over and the whole crop lies flat on the ground, where it is hard to cut and the grain rots and gets eaten. A short, stiff-strawed (semi-dwarf) variety stands far better. Buy it — and your modest fertiliser — 2-3 weeks before you sow, before the good seed sells out.
Buy a short, lodging-resistant (semi-dwarf) variety if you can get one — short, stiff straw is the best defence against the crop falling flat. Ask the dealer or check your recommendation for a named variety that suits your area.
Choose your grain colour for your market: white teff usually fetches the best price; brown/red types are hardier and fine for home food. Both grow in exactly the same way.
Buy only a little seed — teff is dust-fine, so a handful sows a big plot and a small bag goes a long way. Get clean, certified seed from a trusted dealer, not grain scooped from an old store, which carries weed seed and disease.
Buy the modest fertiliser your recommendation gives — mainly phosphorus (P) to feed the young roots, with only a small amount of nitrogen (N). Teff needs far less feeding than maize, and too much nitrogen makes it fall over.
Store seed and fertiliser dry, off the floor, and away from food, water and children. Keep the label and the receipt in case the seed turns out poor.
- Do:
Pick the shortest, stiffest-strawed variety you can get — with teff, standing straight matters more than almost anything else.
- Tip:
Buying extra nitrogen 'to be safe' — on teff, extra nitrogen mostly buys you a lodged, hard-to-harvest crop.
- Watch out:
Keep fertiliser dry — if it sets hard like a rock, it won't spread evenly.
Apply basal P + modest N Recommended
Phosphorus (P) feeds young teff roots so the crop gets away fast with a strong root system — teff answers well to a little P. A small amount of nitrogen (N) helps it start too, but only a small amount: too much nitrogen makes teff shoot up soft and fall over (lodge). This first, worked-in feed is the basal dressing — the fertiliser mixed into the bed at sowing.
Use the fertiliser and the amount your recommendation gives — mostly phosphorus (P), with only a modest helping of nitrogen (N). Don't add extra 'for luck'.
Spread it evenly over the whole plot, like sprinkling flour by hand — patchy fertiliser gives patchy, uneven growth.
Work it into the topsoil as you make the final fine tilth, in the last three days before you sow, right up to sowing day, so it is mixed in and ready for the roots.
Keep nitrogen small for the rest of the season — do not plan a big nitrogen top-dressing later, or the crop will lodge.
- Tip:
A heavy hand with nitrogen — on teff it drives lodging more than it drives yield.
- Watch out:
Wash your hands after handling fertiliser, and keep it off food, out of streams and wells, and away from children.
Sow the dust-fine seed and get an even stand
Getting an even carpet of seedlings from the tiniest seed of any cereal is the season's hardest trick. You scatter (broadcast) the seed — teff is not planted in rows — mixed with sand so your hand can spread it evenly, then barely cover it and keep the surface just moist. It comes up in 3-5 days. The number of little plants you set now is the crop you will harvest, so aim for an even, dense cover.
Broadcast seed (mix with sand) + barely cover Critical
Teff seed is almost as fine as dust — a handful sows a big plot — so spreading it evenly and shallow is everything. Scattered in clumps or buried even a little, it comes up thick-and-thin with bare patches you cannot fix later. An even, dense carpet of seedlings is the whole basis of your yield, and it all starts here.
Sow onto a fine, firm, moist bed on a calm, still day — wind blows the dust-fine seed into drifts. Moist soil helps the seed stick and come up fast.
Mix the seed with dry sand or fine dry soil — about three or four parts sand to one part seed. This bulks up the tiny seed so your hand spreads it evenly, and so you can see where it has already fallen.
Scatter it by hand (broadcast) as you walk the plot, swinging an even arc. Broadcast simply means spreading the seed over the surface — not dropping it in holes or rows.
Walk the plot a second time, crossing your first path (criss-cross), so any strip you missed gets covered. An even spread beats a heavy-here, bare-there stand every time.
Barely cover the seed: drag a light branch or a leafy brush over the surface, or lightly tramp or roll it, so the seed is pressed onto the soil with no more than a fingernail's depth of cover (a few millimetres). Never bury it — buried teff seed has no strength to reach the light and simply dies.
Keep the surface just moist (not flooded) until the seed is up in 3-5 days. A hard crust or a dry-out now costs you the stand.
- Do:
Mix seed with sand and spread in a criss-cross — it is the single best way to get an even teff stand by hand.
- Tip:
Burying the seed, or sowing on a loose, fluffy bed — teff must sit almost on the surface, on firm soil.
- Watch out:
Sow on a still day; a breeze piles the dust-fine seed into streaks and leaves bare patches.
Scout Recommended
The first two weeks decide your stand, and two things can thin it fast: teff shoot fly, whose maggot kills the central shoot of young seedlings, and damping-off, a soil rot that makes seedlings topple in wet patches. Both spread while you are not looking, so a quick walk every few days lets you catch trouble while you can still re-sow the bare ground.
From about 3 days after sowing, when the seedlings first show, walk the plot every 3-4 days. Cross it corner-to-corner so you see the middle, not just the edge by the path.
Watch the young stand come up evenly, and note any bare or thin patches early — while there is still time in the season to re-sow them.
Teff shoot fly — look for 'deadheart': the central leaf of a young seedling turns yellow, dries, and pulls out easily while the outer leaves stay green; plants look stunted and throw out weak side-shoots. Worst on late, thin, slow-growing patches. ('Deadheart' just means the killed central shoot.)
Damping-off — look for: seedlings that suddenly flop over with a thin, dark, water-soaked pinch right at the soil line, and bare patches that spread in the wettest, most crowded spots.
If shoot fly or damping-off is building, open its guide. For damping-off, ease off any watering and improve the drainage on the wet patches straight away — a just-moist (not soggy), not-too-thick bed is the best prevention.
- Watch out:
Damping-off rides on too much water and a crowded, soggy bed — if patches are collapsing, dry them out and drain them first.
- Do:
Mark thin patches as you find them, so you know exactly where to re-broadcast if the stand check comes up short.
Check the stand Critical
A thin or gappy stand caps your whole harvest — and with teff you can only fix it by re-sowing early, while there is still season left. About a week after sowing, the seedlings show as a fine green haze; that is your moment to judge whether the stand is good enough or needs patching.
About a week after sowing (once seedlings are clearly up), walk the whole plot and look down at the green haze of young teff.
Judge how evenly it covers the ground. A good stand is an even carpet with few bare gaps; a poor one is thick in some spots and bare in others.
Ask yourself: has about 7 in every 10 of the plot come up in an even cover (70%)? Look hardest at the low, wet spots and any hard-crusted patches.
An even, roughly 7-in-10-or-better cover → good. Carry on.
If it fails — much less than 7 in 10, with big bare patches — the bed was likely too loose, too dry, crusted, or the seed was buried. Re-broadcast the bare patches (or the whole plot) onto a freshly firmed, moist surface while there is still season left — and this time firm the bed and barely cover the seed.
- Do:
Judge the stand by even cover, not by counting single plants — teff is far too fine and dense to count.
- Watch out:
Bare patches in the wet, low spots usually mean damping-off or a crust — firm, drain and re-sow those spots.
Tillering — weed early while the crop is small
The young plants now send up side-shoots from the base (tillering) and build the tuft that will carry the seed heads. Teff seedlings are tiny and compete poorly with weeds at first, so early weeding is the big job — later, the dense stand shades the ground and smothers weeds by itself. Keep feeding modest so the crop stays short and stands up straight.
Weeding (critical) Critical
In its first few weeks teff is small and slow, and weeds rob the water, light and food just when the crop cannot fight back — this alone can cost you 10-30% of your harvest. Weed early, from about 2 weeks after sowing, and the crop then closes over and keeps itself clean. Leave it late and the weeds take the very ground your yield comes from.
Start weeding from about 2-3 weeks after sowing, while the weeds are still small and the crop is short.
Hand-weed — pull them, or hoe very shallowly. Teff has fine, shallow roots right near the surface, so deep or rough hoeing tears them up; in a broadcast (scattered) stand, careful hand-pulling is often safest.
Get the weeds out roots and all where you can — chopping only the tops lets many grow straight back.
Weed a second time a couple of weeks later if weeds return, before the crop closes over. Once the dense stand shades the ground, it smothers most new weeds for you.
- Do:
Weed early and gently — an even, closed teff stand is your best weed control later, so protect it now.
- Tip:
Deep or rough hoeing that lifts the shallow teff roots, and walking heavily through the soft young stand.
- Tip:
Adding extra nitrogen to 'push' the crop — it makes teff tall and soft, and it falls over (lodges).
Scout Recommended
As the crop bulks up, three pests move in: the red teff worm and grasshoppers, which chew and strip the leaves, and teff rust, a leaf disease that eats into the crop's power to feed the grain. Catching them while still few keeps the leaf factory (the green leaves that feed the plant) working, and stops a small problem becoming a cleared patch.
Walk the crop every 3-4 days, crossing it corner-to-corner. Look over the leaves, and part the stand to check down at the plant bases and in the soil cracks.
Red teff worm — look for: reddish-brown caterpillars hiding at the plant bases or in soil cracks by day, with cut seedlings, ragged stripped leaves, and thinned patches. The damage shows most in the morning, after their night feeding.
Grasshoppers — look for: ragged, chewed leaf edges and holes, worst on the field edge nearest grassland, and hoppers that jump up as you walk through the crop.
Teff rust — look for: small orange to reddish-brown powdery spots (pustules) scattered on the leaves that rub off as rusty powder on your fingers, with yellowing around them. It likes cool, dewy, humid weather and lush, over-fed stands.
Note what you see and where. If any is building past a light scattering, open its guide. Rust is worse on lush, high-nitrogen crops — one more reason to keep feeding modest.
- Watch out:
Rust thrives on lush, over-fed, dewy stands — modest nitrogen and an even (not over-thick) stand keep it down.
- Do:
Check at the plant base and in soil cracks for the red teff worm — it hides low by day and feeds at night.
Heading and flowering — the make-or-break moisture window
The fine, feathery seed head — the panicle — pushes out of the top leaf and flowers. This is teff's most moisture-sensitive stage: dry weather now hits your yield harder than at any other time. It is also where lodging (the crop bending over and lying flat) begins to threaten. Protect the moisture, keep off the nitrogen, and start watching the crop lean.
Irrigate at flowering Recommended
When the seed heads push out and flower — from about 6 weeks after sowing — the plant is deciding how many grains it will set. Dry soil now can cut your harvest by anywhere from 15% up to half (50%), because heads that dry out at flowering never fill. If you can water at only one time in the whole season, water now.
(Only if you can irrigate.) From about 6 weeks after sowing, as the seed heads emerge and flower, do not let the crop go short of water.
Water every 7-10 days, more often in heat and on light soils that dry fast; keep the soil moist but not flooded.
Check with a finger: water when the top finger-joint of soil (about 3-5 cm) is dry. Don't wait for the crop to wilt at flowering — by then the grains are already lost.
Water gently — a hard flood on a tall, heading crop can knock it flat (lodge it). Let the water soak in rather than rush through and lay the crop over.
- Watch out:
Heat or dry soil at heading and flowering is the single biggest yield-killer of the teff season — this watering beats every other.
- Tip:
Any late nitrogen now — a feed at this stage mostly makes the tall crop lush and heavy, and it lodges.
- Tip:
Heavy flooding that lays the crop over — water gently and let it soak in.
Scout for rust and lodging onset Recommended
At heading, teff rust can flare on the upper leaves just when the crop needs them to fill the grain, and lodging — the crop leaning and starting to lie flat — begins now. Spotting either early is your last cheap chance to protect the grain before it fills.
Walk the crop every 3-4 days through heading and flowering, looking over the top leaves and at the standing crop as a whole.
Teff rust — look for: orange to reddish-brown powdery pustules spreading onto the upper leaves, with yellowing and early drying. Heavy rust on the top leaves starves the filling grain — if it is spreading on a susceptible crop in cool, dewy weather, open the rust guide.
Lodging — look for: patches where the crop is leaning over or beginning to lie flat, especially after wind, rain or a heavy watering. Lodging means the stems bend or fall so the heads end up near or on the ground.
Note which patches lean first — over-fed, over-lush, over-thick or wind-exposed spots go first. There is no fixing a lodged crop, so from here hold off nitrogen, water gently, and be ready to harvest promptly once it ripens.
- Watch out:
Once teff starts to lodge it only gets worse — leaning at flowering is your signal to stop feeding, water gently, and plan a prompt harvest.
- Do:
Watch the cool, dewy mornings — that is when rust takes off on the upper leaves.
Grain fill and ripening — beat lodging, shattering and birds
The grain fills and the crop yellows toward ripe. Lodging risk peaks now — a leaning, fallen crop is hard to cut and loses grain on the ground. Two more losses bite at the finish: shattering (ripe seed dropping off the head on its own) and birds eating the tiny grain. The red teff worm can also feed on the soft, milky grain. The whole job now is to watch closely and harvest promptly the moment it is ripe.
Scout for lodging, shattering and birds Recommended
Everything that threatens teff now attacks the grain you have already grown: the crop lodging (falling flat), the ripe seed shattering (dropping off the head), birds stripping the heads, and — on the soft, milky grain — the red teff worm and head smudge. Spot them and you can harvest promptly and save the crop instead of losing it in the field.
Check the crop about once a week from 10 weeks after sowing, and more often as it nears ripe and after any wind or storm.
Lodging — look for: patches leaning or lying flat. A lodged crop dries unevenly, is hard to cut, and loses grain — if big patches go down and the grain is nearly ripe, cut those patches early rather than lose them.
Shattering — look for: ripe seed falling off the head when you brush it, and loose grain on the ground under the heads. Shattering means the ripe seed drops on its own — the riper it gets, the more you lose, so it is a signal to harvest.
Birds — look for: flocks working the heads and empty, stripped panicles, worst at the field edges and in the morning and evening. Scare them off and bring the harvest forward if they are hitting hard.
Red teff worm — look for: reddish-brown caterpillars and chewed heads as the grain goes soft and milky. Head smudge — look for: dark, sooty, smudgy discolouration on the ripening heads and grain, worst in warm, humid weather and where harvest is delayed.
The answer to almost all of these is the same: harvest at first full yellowing, promptly — don't leave a ripe teff crop standing.
- Do:
Harvest at first full yellowing, before lodging, shattering and birds get worse — a ripe teff crop left standing only loses grain.
- Watch out:
After any wind or storm, check straight away for fresh lodging — it can flatten a patch overnight.
Check maturity Recommended
Cutting at the right ripeness gives you the most grain that also keeps well. Too green and the grain is soft and shrivels; too late and it shatters and lodges away onto the ground. The plant tells you when it is ready — the whole crop turns straw-yellow and the grain goes hard. This is your go-signal for harvest.
From about 13 weeks after sowing, check the crop's colour every few days.
Ripe teff looks like this: the whole plant and seed head turn yellow / straw-coloured, and the grain in the head is hard (not soft or milky) when you press it between your nails.
When most of the crop has reached full straw-yellow with hard grain, it is at physiological maturity — the grain has finished filling and stopped adding weight. Harvest now (see the cutting task).
If it fails — still green, or patchy-yellow with soft grain — it is not ready. Wait a few days and check again. Do not cut green teff: the grain shrivels and you lose both weight and quality.
But if the crop is already lodging badly, shattering, or under heavy bird attack before it is fully ripe, cut it anyway — saving the grain beats waiting for a perfect colour.
- Do:
Let the colour and the hard grain decide — full straw-yellow, hard grain, then cut.
- Watch out:
Don't wait for the 'last' green heads — chasing them lets the ripe ones shatter and the birds move in.
Harvest — cut low at first full yellowing
At first full yellowing — the whole crop straw-coloured and the grain hard — cut without delay. Teff is cut low, at the soil surface, and the whole plant is carried, heads and all, to a clean threshing floor. Cutting promptly beats the lodging, shattering and birds that are all rising now.
Cut at first full yellowing Critical
Teff ripens all at once and then starts losing itself — leaning, shattering, and feeding the birds. Cutting promptly, at first full yellowing, is how you get the grain you grew into your hands instead of onto the ground. And because the grain is so tiny and shaken loose so easily, how you cut and carry it matters as much as when.
Harvest at first full yellowing — the whole plant and heads straw-coloured, the grain hard — for most varieties around 3½ months (about 100 days) after sowing. Don't wait for the very last green head.
Cut the plants low, at the soil surface, with a sickle — teff is harvested whole, straw and all, not just the head.
Cut in the cool of the morning if you can, while a little dew still holds the grain on the heads — this loses less to shattering than cutting in the dry heat of midday.
Handle the cut crop gently and lay it down carefully — every rough shake drops tiny grain on the ground.
Carry it promptly to a clean threshing floor — a swept, smoothed floor or a tarpaulin — where it can dry a few days ready to thresh. Don't leave cut teff lying in the field to be rained on, shattered, or eaten.
- Do:
Cut promptly and low at first full yellowing, and carry gently — teff loses grain to every delay and every rough shake.
- Tip:
Leaving the ripe crop standing, or cut and lying in the field — lodging, shattering and birds eat into it fast.
- Watch out:
Cutting in the cool morning with a touch of dew shatters far less than cutting in the midday heat.
Thresh, winnow, dry and store
The grain is grown — now don't lose the tiny seed. Thresh on a clean, sealed surface, never bare ground, or the dust-fine grain falls through cracks and picks up soil and stones. Winnow it clean in a breeze, dry it hard, and store it. Well-dried teff keeps for years out of the sun and shrugs off most storage pests.
Thresh on a clean surface + winnow Critical
Teff grain is so fine that threshing on bare ground loses it through every crack and mixes it with soil and stones you can never clean out. Thresh on a clean, sealed surface and you keep the whole harvest; store it well-dried and it lasts for years. This last careful step protects everything the season's work has earned.
Thresh on a clean, sealed surface — a tarpaulin, plastic sheet, or a swept and smoothed floor — so the dust-fine grain cannot fall through cracks or pick up soil, stones and animal dirt. Never thresh teff on bare, cracked ground.
Thresh by beating the heads with a stick, or by having animals tread the crop, on that clean surface — light beating shakes the tiny grain free.
Winnow the grain: on a breezy day, pour it from a height so the wind carries off the light chaff and dust while the clean, heavier grain falls in a heap. Repeat until it is clean.
Dry the grain hard in the sun on the mat or tarpaulin (never bare ground), turning it so it dries evenly.
Bite test: bite a few grains — dry-enough grain cracks; grain that squashes is still too wet. Only clean, well-dried grain (it cracks when bitten) is safe to store.
If it fails the bite test (the grain squashes instead of cracking) → spread it back out and dry it more before storing, or it will heat, mould and spoil in the store.
Store the dry, clean grain in clean, dry bags or a sealed container, off the floor and out of the sun. Kept dry, teff holds for years and resists most storage pests.
- Tip:
Threshing on bare ground — the tiny seed is lost through cracks and picks up stones and soil you can't remove.
- Do:
Winnow on a breezy day and dry the grain hard before storing — dry teff keeps for years.
- Watch out:
If grain squashes instead of cracking when bitten, it is too wet — dry it more, or it will mould in store.
Pests and diseases that attack teff


Where to sell teff
Markets that trade this crop — what each one sells it by, when supply peaks there, and the currency used.


Grow teff with a plan, not a guess
This guide is the general answer. Divisi works out yours — the week to plant teff on your soil and your rainfall, and each job dated for your field.


When to plant teff, country by country
- When to plant teff in Algeria
- When to plant teff in Angola
- When to plant teff in Botswana
- When to plant teff in Burundi
- When to plant teff in Cabo Verde
- When to plant teff in Cameroon
- When to plant teff in Comores
- When to plant teff in Egypt
- When to plant teff in Eritrea
- When to plant teff in Eswatini
- When to plant teff in Ethiopia
- When to plant teff in Guinea Ecuatorial
- When to plant teff in Kenya
- When to plant teff in Lesotho
- When to plant teff in Libya
- When to plant teff in Madagascar
- When to plant teff in Malawi
- When to plant teff in Mali
- When to plant teff in Mauritanie
- When to plant teff in Mauritius
- When to plant teff in Morocco
- When to plant teff in Moçambique
- When to plant teff in Namibia
- When to plant teff in Niger
- When to plant teff in Nigeria
- When to plant teff in Rwanda
- When to plant teff in République démocratique du Congo
- When to plant teff in Somalia
- When to plant teff in South Africa
- When to plant teff in South Sudan
- When to plant teff in Sudan
- When to plant teff in Tchad
- When to plant teff in Tunisie
- When to plant teff in Uganda
- When to plant teff in United Republic of Tanzania
- When to plant teff in Zambia
- When to plant teff in Zimbabwe
Where teff scores best
Districts where Divisi's engine currently rates this crop highest, ranked by fit.
-
 Kefa
Kefa -
 Collo
Collo -
 Burera
 -
 Kabare
 -
 Laikipia North
 -
 Bisoro
 -
 Mhlambanyatsi
 -
 Baney
Baney -
 Zombo
Zombo -
 Buffalo City
 -
 Berrihane
 -
 Rubavu
Get Insights by email
A short digest of new Divisi articles. No email on quiet weeks.
Frequently asked questions
How do I grow teff?
How to grow teff: 60–120 days to maturity, 0.5–1 cm deep. Also called ጤፍ (tef), xaafii, tef, taf.
What is ጤፍ (tef) in English?
ጤፍ (tef) is the Amharic name for teff.
What is teff in English?
Teff is the French name for teff.
What is xaafii in English?
Xaafii (also tafi) is the Oromo name for teff.
What is tef in English?
Tef is the Portuguese name for teff.
What is taf in English?
Taf is the Tigrinya name for teff.
How long does teff take to grow?
Teff takes about 60–120 days from sowing to maturity, though the exact length varies with variety, temperature and how the season runs.
How deep should teff be planted?
Sow teff at about 0.5–1 cm deep. Shallower risks drying out; deeper wastes seed energy before the shoot reaches light.
What pests and diseases attack teff?
The ones covered in this guide are Grasshoppers, Red teff worm, Sorghum head smudge. Each has its own page explaining how to identify, check for and control it.