 Divisi
How to grow watermelon
Citrullus lanatus · Cucurbitaceae
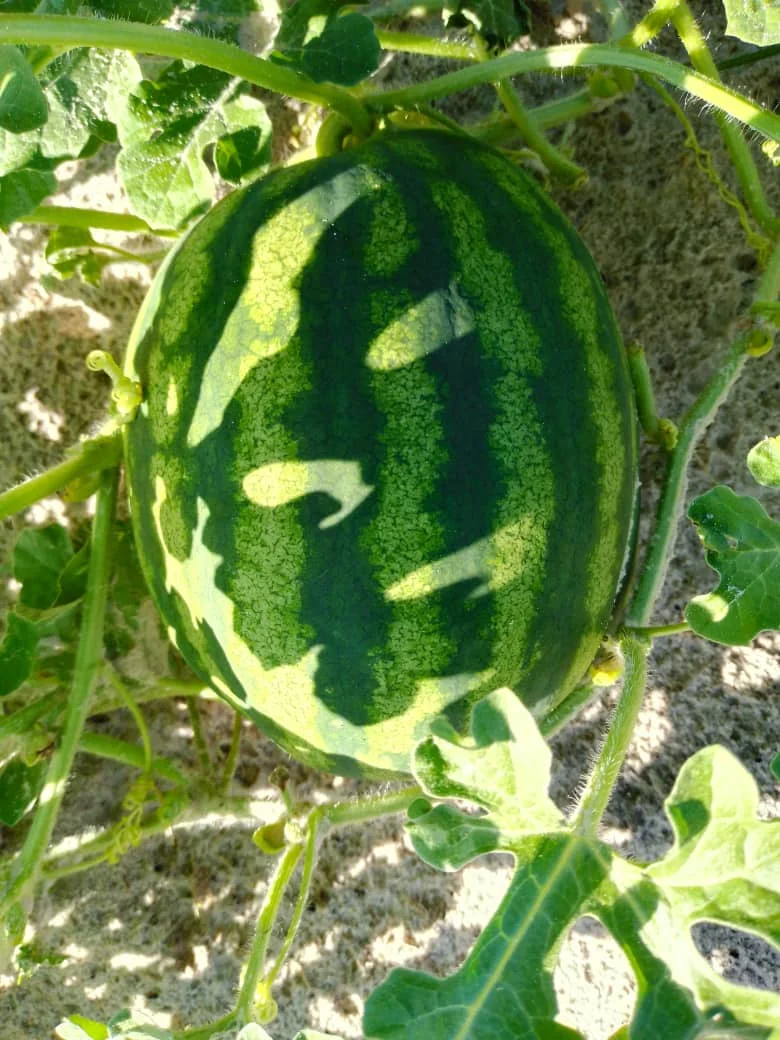
Photo: Lituleni · CC BY-SA 4.0
Watermelon is a warm-season trailing vine, grown flat along the ground for its big, sweet, thirst-quenching fruit — a cousin of pumpkin, cucumber and melon. Three things make or break your crop: warm soil to wake the seed, bees to carry the heavy, sticky pollen from the male flowers to the female ones so fruit can set, and easing off the water as the fruit ripens so the flesh turns sweet instead of watery. The vines sprawl far, so give every plant plenty of room. You grow it straight from seed in warm, well-drained sandy ground — there is no nursery — and feed it only a light touch of nitrogen, because too much nitrogen grows leaf instead of fruit.
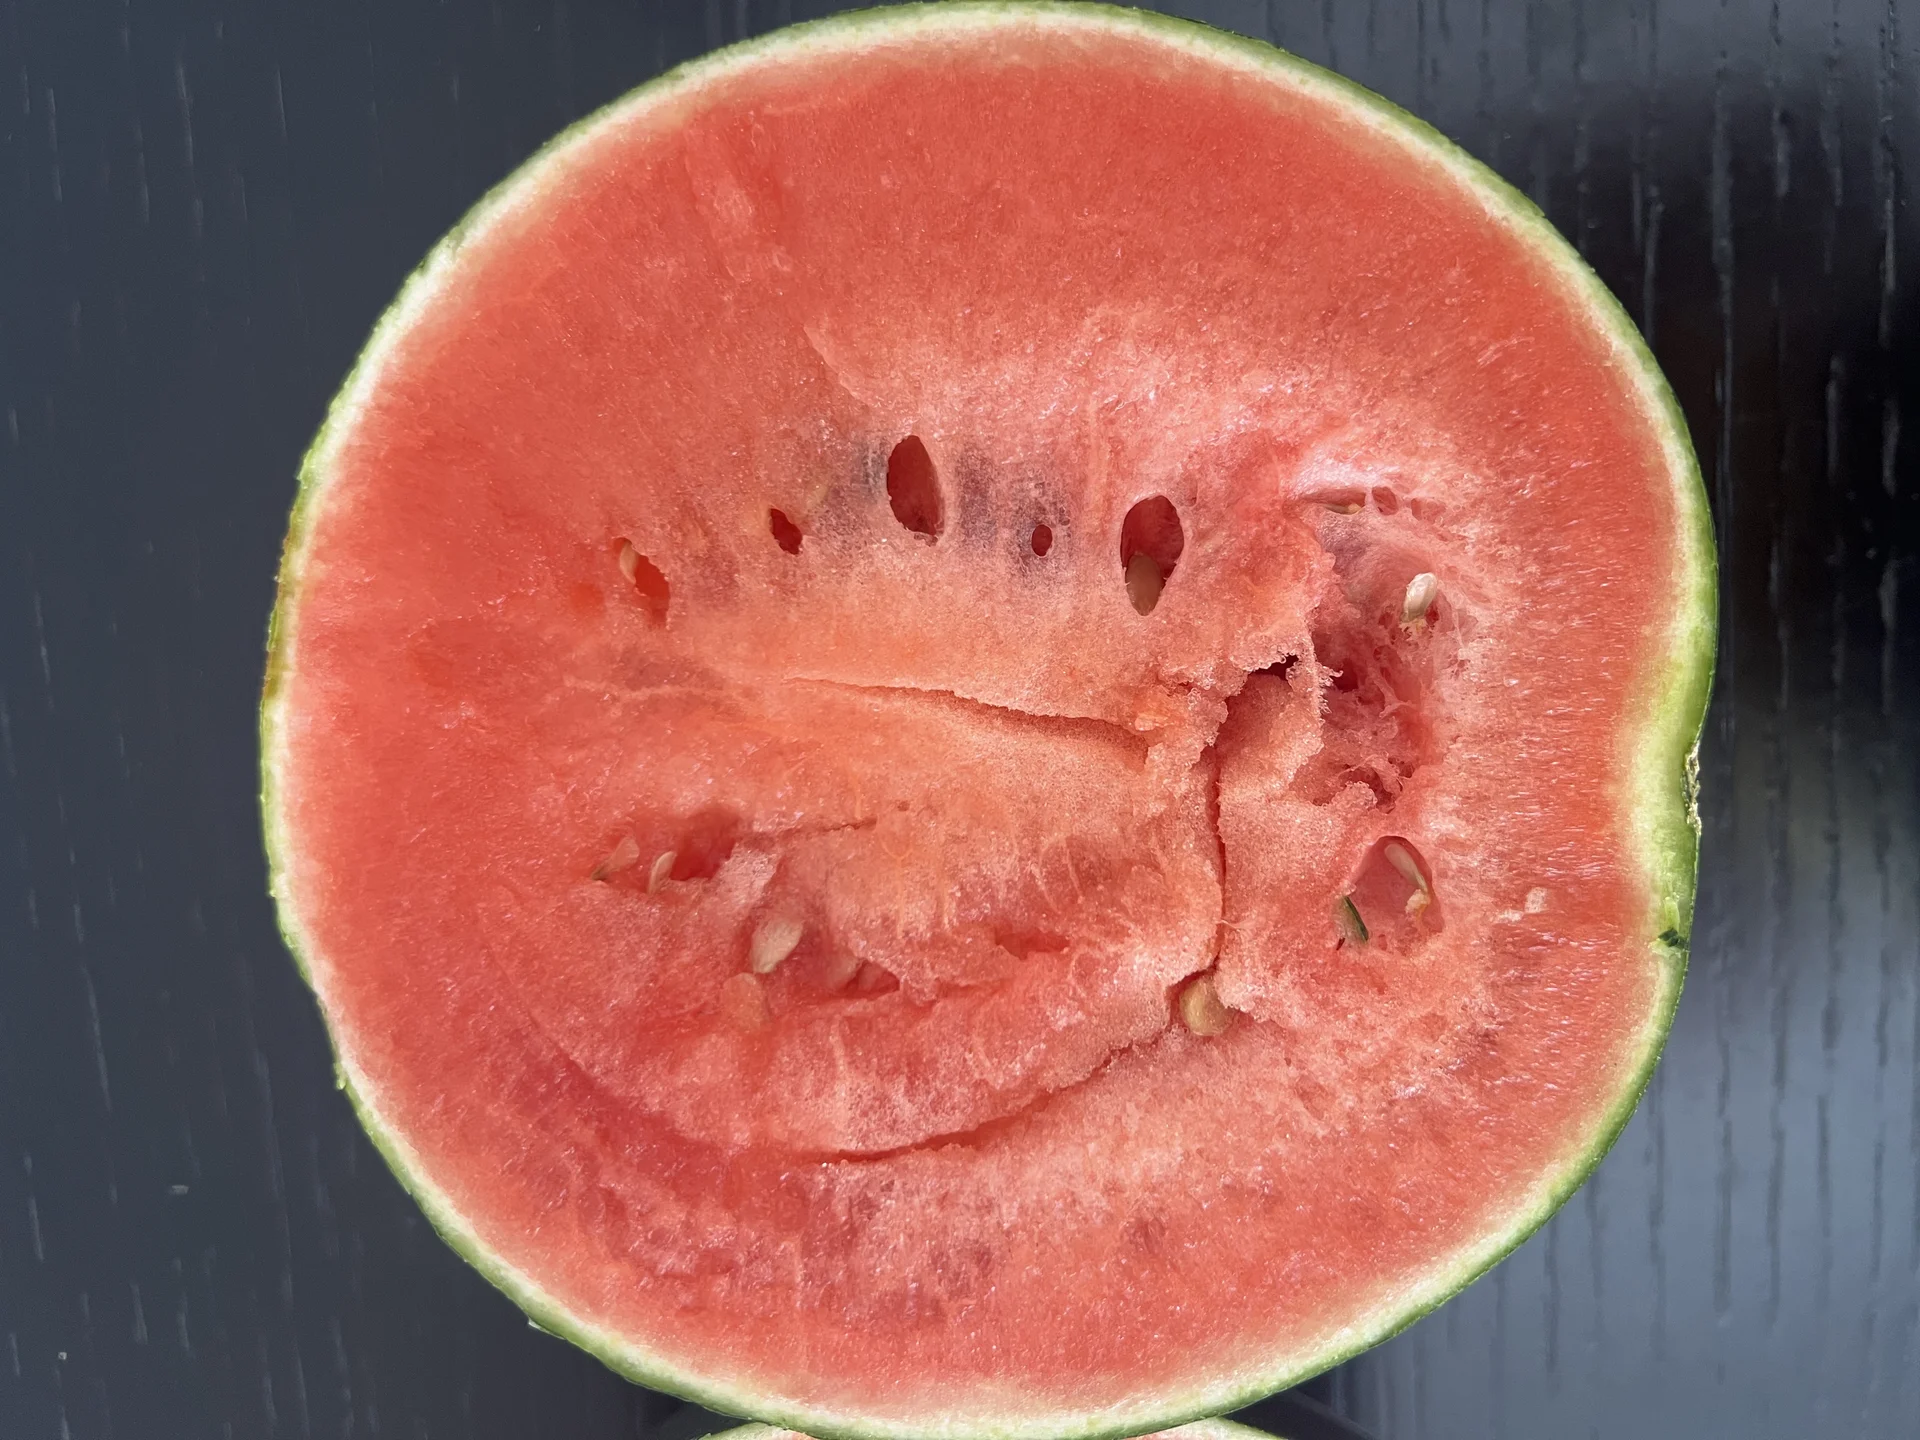
HaJunkiyada · CC BY-SA 4.0 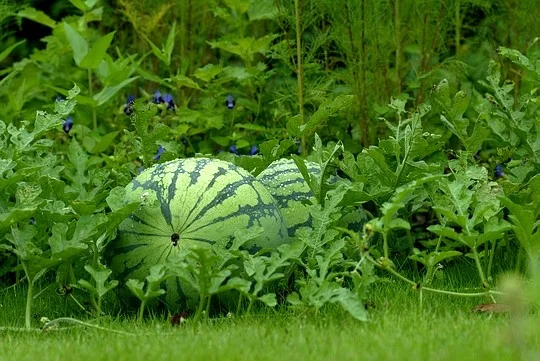
Kumon · CC BY 2.0
- Days to maturity
- 80–110 days
- Row spacing
- 240 cm
- Plant spacing in the row
- 140 cm
- Sowing depth
- 1.3–2.5 cm
These are general figures for the crop, compiled from published agronomic references including FAO and CABI. The right choice for your field depends on your soil, rainfall and the yield you are aiming for.
Will watermelon actually do well on your field? Check your own field against every crop in the catalogue — no signup. Run the crop check →
Also known as
- Afrikaans
- waatlemoen
- Amharic
- ሐብሐብ (habhab)
- French
- pastèque, melon d'eau
- Hausa
- kankana
- Ndebele
- ikhabe
- Portuguese
- melancia
- Sesotho
- lehapu
- Setswana
- legapu
- Swahili
- tikiti maji
- Xhosa
- ivatala
- Zulu
- ikhabe
Working in buckets, bags or paces? The farming glossary turns the measures growers actually use into kilograms and hectares — what a 20 litre bucket of each crop really weighs, and how to size a field by walking it — alongside the Shona, Swahili, Ndebele and Yoruba words used in the field. Open the glossary →
Growing watermelon, stage by stage
Your watermelon season, step by step — from planting into warm soil, through the bees that set your fruit, to picking each melon dead-ripe and sweet.
Get your field and inputs ready
Watermelon rewards warm, open, free-draining ground and punishes crowded, wet or worn-out land — and most of that is decided before any seed goes in. Now is the time to choose a field that has had a long break from the melon family, build warm well-drained mounds with manure and basal fertiliser worked in, and buy your seed early. Get it ready in the weeks before the warm season so you can sow the moment the soil is truly warm.
Plan the field / rotation Recommended
A soil fungus called Fusarium wilt builds up wherever watermelon and its cousins grow year after year. Once it is in the soil you cannot wash it out, and it can wilt and kill your vines just as they should be carrying fruit. Choosing land that has had a long break from these crops is your cheapest, strongest protection — free, and worth more than any spray.
Pick a field that has not grown watermelon, melon, cucumber, pumpkin, squash or gourd for at least 5 years — they are all in the melon family (called cucurbits) and all feed the same wilt.
Good crops to have grown there in between are cereals (maize, sorghum) or legumes (beans, groundnuts) — these do not host the wilt, so they clean the land while you rest it.
Choose warm, open ground that drains freely — a gentle slope or a sandy loam. Avoid low, wet hollows and heavy clay where water sits; soggy roots rot, and the wilt strikes harder there.
Keep well away from any old melon-family patch nearby, and never carry soil or tools across from a field where vines wilted and died last year — that is how the wilt travels.
- Watch out:
A field where pumpkins or cucumbers wilted and collapsed last season is the worst place to plant — the wilt is already waiting in that soil.
- Do:
Give it full sun all day. Shade grows leafy vines but few, small, late fruit.
Buy seed (+ pollenizer if seedless) + basal Critical
Fresh, good seed and the right basal (planting) fertiliser give the strong, even start your whole season stands on. Buy early — good varieties sell out — and if you grow a seedless type you must ALSO buy a seeded 'pollenizer' variety to plant beside it, or the seedless plants set almost no fruit and you lose the crop.
Buy certified seed in a sealed, labelled bag from a known dealer — not loose seed scooped from a sack. Check this season's packing date on the label.
Pick a variety that suits your market and your season: watermelon needs about 80–110 warm days from sowing to harvest. Ask the dealer or check your recommendation.
Seedless (triploid) types only: 'triploid' just means the plant makes no good pollen of its own. So also buy a seeded variety as a pollenizer and plan to plant one pollenizer for every 2–3 seedless plants — without it the bees have no pollen to carry and no fruit sets.
Buy the basal fertiliser your recommendation gives — watermelon wants steady phosphorus and potassium far more than heaps of nitrogen. Buy any boron or calcium your recommendation calls for at the same time (they help the fruit set and fill).
Store seed and fertiliser dry, off the floor, away from food, water and children. Keep the label and receipt in case the seed comes up poor.
- Do:
Buy seed in a sealed, labelled bag — loose 'seed' is often old grain that comes up weak and uneven.
- Tip:
Saving seed out of a bought hybrid or seedless melon — the next crop comes up weak, uneven, or not at all.
- Watch out:
Keep fertiliser dry — damp fertiliser sets hard like a rock and won't spread.
Prepare warm, well-drained mounds/stations Recommended
Watermelon roots hate cold, wet feet. Raised mounds warm up faster, drain quickly after rain, and give the long roots loose soil to dive into. Working well-rotted manure and the basal into each mound now puts food right where the young plant will reach for it, and helps sandy soil hold moisture.
Mark out a wide grid: rows about two-and-a-half strides apart (2.4 m) and stations about a stride and a half apart (1.4 m) along the row. The vines sprawl far — give them the room; you cannot squeeze in more plants without losing fruit.
At each station, loosen the soil deep (watermelon roots go down over a metre) and pull it up into a low, flat-topped mound about two hand-spans across (½ m), raised a little above where rainwater would stand.
Work a few handfuls of well-rotted manure (dark, crumbly, no strong smell) and the basal fertiliser your recommendation gives into each mound — mixed into the soil, not left sitting on top.
Build the mounds in the weeks before sowing so they settle and warm through, and where they catch sun all day.
- Tip:
Fresh, raw manure — it burns young roots and brings weed seeds. Use only well-rotted manure or compost.
- Watch out:
Wash your hands after handling manure and fertiliser.
- Do:
On heavy or wet ground make the mounds higher; on light sand keep them low and flat so they don't dry out too fast.
Sow and get a full stand
The plants you get up now are the most fruit you can ever harvest — you cannot add vines later. Sow ONLY into warm soil (over about 18 °C); cold soil rots the seed. Sow shallow on the warm mounds, keep them evenly moist, and watch for beetles chewing the first tender leaves.
Sow + basal Critical
This is your one shot at a plant stand. Sowing into warm, moist soil at the right shallow depth gives quick, even emergence; sowing into cold or dry soil rots or stalls the seed and thins your field before the season even starts.
Only sow once the soil is truly warm — over about 18 °C. Feel it at dawn: it should be warm, not cold, to your hand. Watermelon seed rots in cold soil, so wait for settled warm weather even if it means sowing a week later.
On each prepared mound, drop 2–3 seeds spread a little apart (not in one clump), 1.3–2.5 cm deep — no deeper than the top joint of your finger (fingertip to the first knuckle, about 2 cm). Go a little deeper in dry sand, shallower in heavier soil. Point each seed's narrow, pointed end downward if you can.
The basal should already be worked into the mound. If you add a little at sowing, keep it a hand-span (20 cm) out from the seed and never touching it, or it burns the sprout.
Cover and firm the soil gently so each seed sits snug in warm, moist earth.
Seedless types: sow your pollenizer seed to the same plan — one pollenizer for every 2–3 seedless stations — and mark the pollenizer plants (a stick or a ribbon) so you know them at flowering.
Once the seedlings are up with their first true leaves, keep the strongest one or two per station and pinch the rest off at ground level so the keepers aren't crowded.
- Do:
Sow into warm, moist mounds — warmth is everything for watermelon. If in doubt, wait; a late warm start beats a cold rot.
- Tip:
Sowing deep — small watermelon seed buried too deep uses up its strength before it reaches the light and never comes up.
- Watch out:
Keep any fertiliser off the seed, and wash your hands after handling it.
Scout cucumber beetles, aphids, gaps Recommended
In the first two weeks, tender seedlings are easy meat. Cucumber beetles can strip the first leaves and spread a wilt, aphids start viruses, damping-off rots seedlings at the ground, and every empty station is a plant you can still replace now but not later. Ten minutes every few days saves the stand.
From about 5 days after sowing, walk all the mounds every 3–4 days — don't just check the row by the path.
Cucumber beetles: look for small yellow-and-black or reddish beetles feeding on the leaves and stems, and the ragged holes they chew. They also spread a wilt, so knock their numbers down early by hand-picking into a tin of soapy water.
Aphids: look under the leaves for clusters of tiny soft green or black insects, sticky shiny leaves, and ants running up the plants — aphids carry viruses.
Damping-off: look for seedlings that suddenly flop over with a thin, dark, pinched, water-soaked stem at the soil line. It spreads in cold, wet, crowded mounds — so don't over-water, and thin any crowded stations.
Note any gaps (stations where nothing came up) so you can decide whether to re-sow while the soil is still warm.
Do not spray insecticide if the crop is anywhere near flowering later — hand-pick pests instead; the bees you will soon need are worth far more than the beetles you'd kill.
- Watch out:
A few beetles on tiny seedlings do far more harm than the same few on a big vine — act while the plants are small.
Check emergence Recommended
A thin, patchy stand caps your whole harvest, and you can only fix it in the first days while the soil is still warm enough to re-sow. Counting now tells you whether to fill in or carry on.
About a week after sowing, walk the mounds and count how many stations have at least one healthy seedling against the number you sowed.
Work out the share that came up — for example, 8 stations with plants out of every 10 sown = 80%.
80% or more (8 in 10) → a good stand, carry on.
Fewer than 80% → re-sow the empty stations now, while the soil is still warm, so the fill-ins can catch up.
If it fails — the gaps are widespread, or a re-sow still doesn't come up — re-sow the whole patch rather than nurse a half-empty field all season.
- Do:
Re-sow quickly — a seedling that starts a week late still beats an empty station, but one that starts a month late never catches up.
Irrigate — keep moist until established Recommended
The seed and its shallow young roots must stay evenly moist to sprout and get going. Let a mound dry out now and you lose that seedling; keep it soaked and the seed rots. Little and often is the balance.
Keep the mound moist but never waterlogged — damp like a wrung-out cloth, not muddy.
Water every 3–5 days, more often in heat and on sandy mounds that dry fast. Check by pushing a finger in — water when the top few centimetres are dry.
Water at the base in the cool of the morning, and try to keep the leaves dry to slow off disease.
- Tip:
Flooding the mounds — watermelon seed and seedlings rot in standing water. Drain any low spots.
Vines run — weed early, feed lightly
Now the vines build the leafy engine that will fill your fruit. Two jobs matter most: weed while you can still walk between the plants (once the vines run across the ground you can't get in), and give one light feed of nitrogen — just enough for strong vines, not so much that you grow all leaf and no fruit. Keep watching for wilt and leaf diseases.
Weed (before vines run) Critical
Young watermelon can't fight weeds that steal its water, light and food — and once the vines run out across the ground you can no longer get in to weed without treading on the crop. This early, clean window is the biggest slice of yield weeding will ever gain you.
Weed by about 2–4 weeks after sowing, before the vines start to run and while you can still step between the mounds.
Hoe shallowly around the plants — watermelon has wide, near-surface feeder roots, so deep hoeing near the stem cuts them.
Pull weeds close to the stem by hand, roots and all — chopping only the tops lets them spring back.
Leave the pulled weeds or some straw as a mulch between the mounds — it holds moisture, smothers the next flush, and later gives the fruit a clean, dry bed to lie on.
- Do:
Get this weeding done before the vines run — after that, walking the rows means trampling your own crop.
- Watch out:
Hoe shallow near the plants; watermelon's surface feeder roots are easily cut.
- Tip:
Reaching for an insecticide while you are in there if any flowers have opened — it kills the bees the crop will soon depend on.
1st N side-dress Recommended
A little nitrogen now pushes strong, healthy vines. But watermelon is only a medium feeder, and too much nitrogen grows a jungle of leaf and vine with few, late, poor fruit — so this is a moderate, one-time side feed, not a heavy dose.
About 2–3 weeks after sowing, as the vines start to run, side-dress the nitrogen amount your recommendation gives — no more.
Band it in a line about a hand-span (20 cm) out from the stem along the row — never against the stem or on the leaves.
Apply onto moist soil (after watering or light rain) and cover or water it in, so it feeds the plant instead of gassing off into the air.
Save the plant's big potassium feed for fruit-sizing later — potassium is what makes fruit and sweetness, not nitrogen.
- Tip:
Piling on nitrogen to 'push' the crop — you'll grow huge vines and few melons. Moderate N only.
- Watch out:
Keep fertiliser off wet leaves (it scorches them) and wash your hands afterwards.
Scout aphids, whitefly, mildews Recommended
This is when sap-sucking aphids and whitefly spread viruses, and mildews and Fusarium wilt first show. Catching them early keeps the leaves — the plant's food factory — working to fill your fruit.
Every 3–4 days, walk the crop and turn over leaves at several plants across the field.
Aphids / whitefly: look under the leaves for clusters of tiny green or black aphids, or tiny white flies that puff up in a little cloud when you brush the vine — both leave leaves sticky and shiny and spread virus.
Cucurbit virus: look for leaves mottled light-and-dark green (a 'mosaic' pattern), crinkled or puckered, and vines that stay stunted. There is no cure — pull and destroy badly affected plants so they don't seed the rest.
Powdery mildew: look for white powdery patches, like a dusting of flour, on the leaves. Downy mildew: look for angular yellow blotches on the top of the leaf (boxed in by the veins) with grey-purple fuzz underneath in wet weather.
Fusarium wilt: look for a runner or whole plant that wilts in the heat of the day and does NOT recover overnight, then yellows and dies; a split stem shows brown streaks inside. Pull affected plants — and remember this land now owes its long rotation break.
Note what you see and where. If a disease is spreading, act — open the matching guide.
- Watch out:
Wilt that stays wilted after a cool night is Fusarium, not just thirst — watering more won't fix it.
- Tip:
Working through the vines while the leaves are wet — you carry mildew and wilt from plant to plant.
Irrigate — keep evenly moist Recommended
Steady, even moisture now builds the big, healthy vine that will carry and fill your fruit. Swinging between bone-dry and soaked stresses the plant and invites disease.
Water every 5–7 days, enough to wet the soil deep where the long roots are — water well but less often, rather than a daily sprinkle.
Keep it even — don't let the vines wilt and then flood them; steady moisture avoids stress.
Water at the base in the morning and keep the leaves as dry as you can to slow mildew.
- Do:
Water deeply and less often to pull the roots down — deep roots ride out dry spells far better.
Flowering and pollination — the make-or-break window
This is where your fruit is set or lost. Each female flower opens for one morning only and needs many bee visits to be fully pollinated — a poorly-visited flower makes a small, lopsided melon or none at all. So protect the bees above all (no insecticide during bloom), hand-pollinate if bees are few, and keep the water even and steady.
Protect pollinators Critical
Watermelon pollen is heavy and sticky — wind can't move it, so bees do all the work of setting your fruit. A single insecticide spray during flowering can wipe out the bees and turn a good field into small, misshapen melons. Protecting bees now is the highest-value thing you do all season.
Do not spray any insecticide while the crop is flowering — not even for beetles or aphids. If a pest is truly serious, hand-pick it, or wait until the day's flowers have closed.
Give bees a reason to visit: leave some flowering weeds or hedge plants near the field, and don't clear every flowering plant from the edges.
If you keep bees or know a beekeeper, hives set near the field during bloom greatly lift fruit set.
Watch each morning: busy bee traffic on the yellow flowers means fruit is setting. Few or no bees → plan to hand-pollinate (next task).
- Tip:
Any insecticide during bloom — it is the fastest way to ruin the crop by killing your pollinators.
- Do:
If you truly must treat a pest, do it in the late evening after the flowers have closed and bees have stopped flying — but at peak bloom, don't spray at all.
Hand-pollinate if bees scarce Recommended
If bees are scarce, you can be the bee. Moving pollen by hand on the one morning each female flower is open can lift your fruit set — and your yield — by 15–50%, turning near-empty vines into a real harvest.
Go out in mid-morning (about 9–11 am), when the flowers are freshly open and the pollen is ready.
Tell the flowers apart: a male flower sits on a plain thin stalk; a female flower has a tiny marble-sized melon just behind its petals. You move pollen from male to female.
Pick a fresh open male flower, peel its petals back to bare the yellow centre, and dab that yellow pollen onto the centre of each open female flower. One male can serve several females; take a fresh male when the pollen runs low.
For seedless crops, take the pollen from your pollenizer (seeded) plants — that is the whole reason they are in the field.
Do this every morning through flowering while bees are few — each female flower is open one morning only, so a missed morning is a missed melon.
- Watch out:
The female flowers with a little fruit behind them are your future melons — check every morning so none opens and closes unvisited.
- Do:
Work early; by afternoon the flower has closed and that chance is gone for good.
Irrigate — flowering & set are water-critical Critical
Flowering and fruit-set are the thirstiest, most water-critical days of the whole season — the one stage the plant cannot bounce back from. Dry stress now drops flowers and young fruit; uneven watering causes a black rot on the fruit end. Keep it steadily, evenly moist.
Keep the soil evenly moist right through flowering and fruit-set — water every 3–5 days, more often in heat. Never let the vines wilt now, even for a day.
Water evenly. A big drink after a dry spell causes blossom-end rot — a sunken, brown-black leathery patch on the flower end of the young fruit — because calcium can't reach the fruit when the watering swings.
If your recommendation includes calcium or boron, this is the stage they help the fruit set well and fill evenly — apply as directed.
Water at the base and keep the leaves dry to hold off mildew.
- Watch out:
A sunken dark leathery patch on the blossom end of young fruit is blossom-end rot — the fix is steady, even watering, not simply more water.
- Do:
If you can water at only one stage all season, water NOW — flowering and set are worth up to half your yield.
Fruit sizing and ripening
The fruit swells fast now and lays down its sugar. Feed potassium and keep moisture even through sizing, slip straw under each melon and turn it so the skin stays clean, and watch for melon fly. Then, from about a week before harvest, ease off the water — too much late water gives bland, watery fruit that splits.
Scout melon fly, mildews Recommended
As the fruit swells it becomes a target. Melon fly stings young fruit and its maggots rot it from the inside — often the first sign is a good-looking melon that suddenly collapses. Catching the fly and the mildews early saves the fruit you've worked all season to grow.
Every 3–4 days, check the young fruit and the leaves.
Melon fly: look for tiny needle-prick scars that weep a drop of sap on young fruit, soft sunken patches, and fruit that rots or drops early. Cut a spoiled one open and you'll find white maggots inside.
Pick up and destroy (bury deep or burn) every stung or rotten fruit — don't leave them lying, or the maggots crawl into the soil and the next generation is worse.
Mildews: keep checking leaves for the white flour-like patches (powdery) or angular yellow blotches with fuzzy undersides (downy), especially in damp weather.
If melon fly is active, hang simple bait traps and consider covering the youngest fruit. Time any spray for the evening — and if you do spray, cover your skin, nose and eyes, keep the wind at your back and away from food, respect the pre-harvest interval (the set number of days you must wait between spraying and picking so the poison clears the fruit), and wash well afterwards.
- Watch out:
A firm young melon that suddenly goes soft and rots is almost always melon-fly maggots inside — remove it before they spread.
- Do:
Clear fallen and stung fruit every few days — this sanitation is your best melon-fly control without spraying at bloom.
Straw under fruit + turn Recommended
A melon lying on bare, damp soil rots on its underside and stains its skin — costing you both fruit and market price. A dry bed and a gentle turn keep the skin clean and sound so it fetches a good price.
Once fruit are about fist-sized, slip a pad of dry straw, grass or leaves (or a tile or board) under each melon to lift it off the damp soil.
Gently turn each fruit a little every week or two so all sides get sun and colour evenly and no side sits wet — but turn carefully, without twisting or kinking the stalk.
Keep the bedding dry; replace it if it rots down.
- Tip:
Rolling or lifting fruit roughly — a snapped or kinked stalk stops the melon filling and lets in rot.
- Do:
Bed the fruit while it is still small, so you're not shoving a heavy melon around later.
K feed through sizing Recommended
Potassium is the nutrient that builds sugar and firm flesh — it is what turns a big watermelon into a sweet one. Watermelon pulls more potassium than any other nutrient while the fruit sizes, so feed it now, right through the swelling stage.
As the fruit begins to size (about 7–10 weeks after sowing), side-dress the potassium amount your recommendation gives.
Band it about a hand-span (20 cm) out from the stem on moist soil, and water it in so it reaches the roots.
Keep moisture even through sizing — steady water plus potassium gives big, sweet, firm fruit; feast-and-famine watering gives splits and dull flesh.
This is the fruit-and-sugar feed: unlike nitrogen, potassium builds fruit, not leaf, so don't skip it.
- Watch out:
Keep fertiliser off the leaves and fruit, and wash your hands afterwards.
- Do:
Pair the potassium feed with even watering — the two together are what make the sweetness.
Reduce irrigation ~1 week before harvest Critical
The last stretch decides whether your melons are sweet or watery. Too much water in the final days dilutes the sugar and swells the fruit until it splits — ruining it right at the finish. Easing off concentrates the sugar and firms the flesh.
From about a week before harvest (roughly day 80 onward, as the fruit reach full size and start to ripen), cut watering right back — give only enough to keep the vines from collapsing.
Never follow a dry spell with a big soaking now — that sudden drink is exactly what splits ripe fruit. If you must water, water only a little.
Let the fruit finish on the drier side — this is what pulls the flesh sweet instead of bland and watery.
- Tip:
A heavy late watering, or letting a storm follow a drought at ripening — that is when melons split open and spoil. If rain threatens ripe fruit, pick the ripe ones ahead of the storm.
- Watch out:
Dull skin and the ripening signs mean it's time to hold water back, not push more on.
Harvest and handling
Pick each melon dead ripe — watermelon does NOT sweeten after picking. Read the three ripeness signs together, cut (never pull) with a short stalk, and handle the fruit gently. You'll make one main pick and a few more passes over about two weeks, taking roughly 2–3 melons per plant.
Pick ripe fruit Critical
Watermelon does not ripen any further once it leaves the vine — pick it too early and it stays hard and bland forever; leave it too long and it goes mealy or splits. Reading the signs right, and handling the fruit gently, is the difference between top-price melons and rejects.
Start checking from about 35 days after the fruit set (roughly day 80 from sowing). Judge ripeness by three signs together, never just one:
Tendril: the little curly 'pig-tail' tendril on the vine nearest the fruit has dried and turned brown.
Ground spot: the patch where the melon sits on the ground has turned from white to a creamy, buttery yellow (a white ground spot means it's not ready).
Skin and sound: the skin has gone dull, not shiny, and the melon gives a deep, hollow thump (like knocking on your chest) when you tap it — a high, tight ring means unripe.
When the signs agree, cut the stalk with a knife (don't pull or twist), leaving a short stub of stalk on the fruit. Handle it gently — watermelons bruise and crack if dropped or thrown.
Make a main pick, then pass again every 5–7 days for the fruit that ripen later — about 2–3 melons per plant over roughly two weeks.
If the signs don't agree — green tendril, white ground spot, or a tight ringing sound — leave the melon and check again in a few days. It will not sweeten after picking, so never pick on hope.
- Do:
Store the picked melons cool, at about 10–15 °C (best ~13 °C), out of the sun, and keep them away from ripening fruit like bananas (the ripening gas softens them). Sell within a couple of weeks — watermelon does not keep long.
- Tip:
Chilling melons below about 7–10 °C — that cold causes chilling injury (pitted skin, watery off flesh). Keep them cool, not cold.
- Watch out:
Cut with a short stalk and handle gently — dropped or pulled melons bruise, crack, and rot at the stalk scar and won't store.
Pests and diseases that attack watermelon


Where to sell watermelon
Markets that trade this crop — what each one sells it by, when supply peaks there, and the currency used.
-
 Marché de Thiaroye
-
 Windhoek Fresh Produce Market
-
 Letsema Horticulture Market
-
 Marché Ocass
-
 Ongwediva Fresh Produce Business Hub
-
 Rundu Fresh Produce Business Hub
Grow watermelon with a plan, not a guess
This guide is the general answer. Divisi works out yours — the week to plant watermelon on your soil and your rainfall, and each job dated for your field.


When to plant watermelon, country by country
- When to plant watermelon in Algeria
- When to plant watermelon in Angola
- When to plant watermelon in Benin
- When to plant watermelon in Botswana
- When to plant watermelon in Burkina Faso
- When to plant watermelon in Burundi
- When to plant watermelon in Cabo Verde
- When to plant watermelon in Cameroon
- When to plant watermelon in Comores
- When to plant watermelon in Congo
- When to plant watermelon in Côte d'Ivoire
- When to plant watermelon in Egypt
- When to plant watermelon in Eritrea
- When to plant watermelon in Eswatini
- When to plant watermelon in Ethiopia
- When to plant watermelon in Gabon
- When to plant watermelon in Gambia
- When to plant watermelon in Ghana
- When to plant watermelon in Guinea Ecuatorial
- When to plant watermelon in Guinea-Bissau
- When to plant watermelon in Guinée
- When to plant watermelon in Kenya
- When to plant watermelon in Lesotho
- When to plant watermelon in Liberia
- When to plant watermelon in Libya
- When to plant watermelon in Madagascar
- When to plant watermelon in Malawi
- When to plant watermelon in Mali
- When to plant watermelon in Mauritanie
- When to plant watermelon in Mauritius
- When to plant watermelon in Morocco
- When to plant watermelon in Moçambique
- When to plant watermelon in Namibia
- When to plant watermelon in Niger
- When to plant watermelon in Nigeria
- When to plant watermelon in Rwanda
- When to plant watermelon in République centrafricaine
- When to plant watermelon in République démocratique du Congo
- When to plant watermelon in Sao Tome and Principe
- When to plant watermelon in Seychelles
- When to plant watermelon in Sierra Leone
- When to plant watermelon in Somalia
- When to plant watermelon in South Africa
- When to plant watermelon in South Sudan
- When to plant watermelon in Sudan
- When to plant watermelon in Sénégal
- When to plant watermelon in Tchad
- When to plant watermelon in Togo
- When to plant watermelon in Tunisie
- When to plant watermelon in Uganda
- When to plant watermelon in United Republic of Tanzania
- When to plant watermelon in Zambia
- When to plant watermelon in Zimbabwe
Where watermelon scores best
Districts where Divisi's engine currently rates this crop highest, ranked by fit.
-
 Dékoa
Dékoa -
 North Imenti
 -
 Saakow
 -
 Gwelekpoken
 -
 Katsina-Ala
 -
 Banga
Banga -
 Caravela
 -
 Luiza
Luiza -
 Okano
Okano -
 Ignie
Ignie -
 Kwadaso Municipal
 -
 Mbini
Mbini
Get Insights by email
A short digest of new Divisi articles. No email on quiet weeks.
Frequently asked questions
How do I grow watermelon?
How to grow watermelon: 80–110 days to maturity, 240 cm rows, 1.3–2.5 cm deep. Also called waatlemoen, ሐብሐብ (habhab), pastèque, kankana, ikhabe, melancia.
What is waatlemoen in English?
Waatlemoen is the Afrikaans name for watermelon.
What is ሐብሐብ (habhab) in English?
ሐብሐብ (habhab) is the Amharic name for watermelon.
What is pastèque in English?
Pastèque (also melon d'eau) is the French name for watermelon.
What is kankana in English?
Kankana is the Hausa name for watermelon.
What is ikhabe in English?
Ikhabe is the Ndebele and Zulu name for watermelon.
What is melancia in English?
Melancia is the Portuguese name for watermelon.
What is lehapu in English?
Lehapu is the Sesotho name for watermelon.
What is legapu in English?
Legapu is the Setswana name for watermelon.
What is tikiti maji in English?
Tikiti maji is the Swahili name for watermelon.
What is ivatala in English?
Ivatala is the Xhosa name for watermelon.
How long does watermelon take to grow?
Watermelon takes about 80–110 days from sowing to maturity, though the exact length varies with variety, temperature and how the season runs.
What spacing should I use for watermelon?
Space watermelon rows about 240 cm apart, with roughly 140 cm between plants within the row.
How deep should watermelon be planted?
Sow watermelon at about 1.3–2.5 cm deep. Shallower risks drying out; deeper wastes seed energy before the shoot reaches light.
What pests and diseases attack watermelon?
The ones covered in this guide are Cucumber beetles, Cucurbit mosaic virus, Cucurbit virus complex. Each has its own page explaining how to identify, check for and control it.