 Divisi
How to grow banana and plantain
Musa spp. · Musaceae
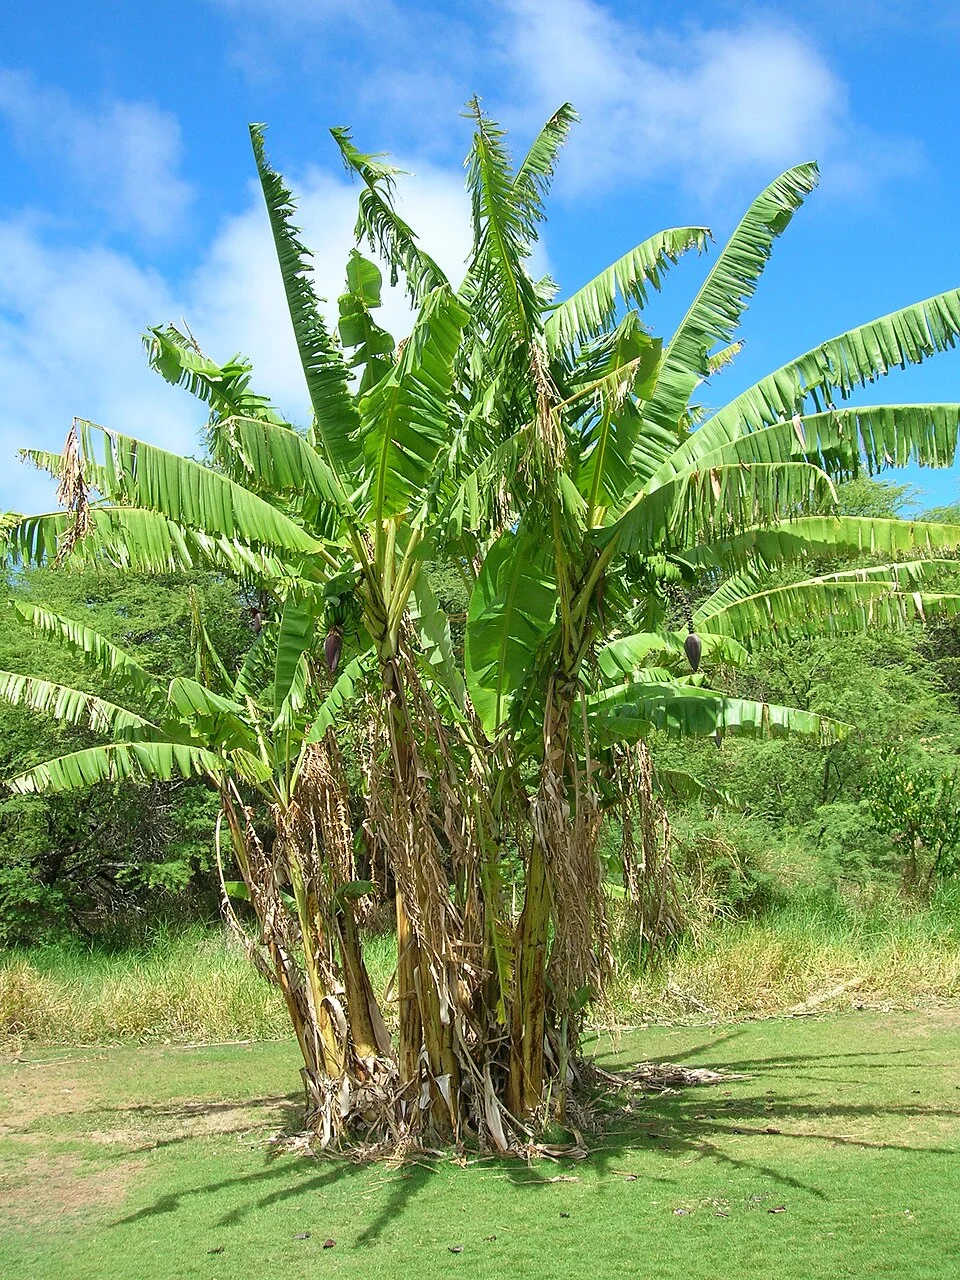
Photo: Forest & Kim Starr · CC BY 3.0
Banana and plantain are one giant perennial herb (Musa), not a tree — the tall 'trunk' is really rolled leaf-sheaths growing from an underground corm. It grows as a mat (stool): a mother plant surrounded by suckers of different ages, so as one stem fruits and dies, the next is already coming up behind it. There is no seed — you plant a sucker, corm piece, or clean tissue-culture plantlet, and one mat then gives you a bunch about every 9–15 months for years. This guide covers the whole family together — sweet dessert banana, cooking banana / matoke, and plantain — because they share the same mat biology and the same pests and diseases. Match the type to your land: plantain and dessert banana like the hot, humid lowlands, while cooking banana / matoke does best in the cooler highlands and struggles high up on cold mountains.
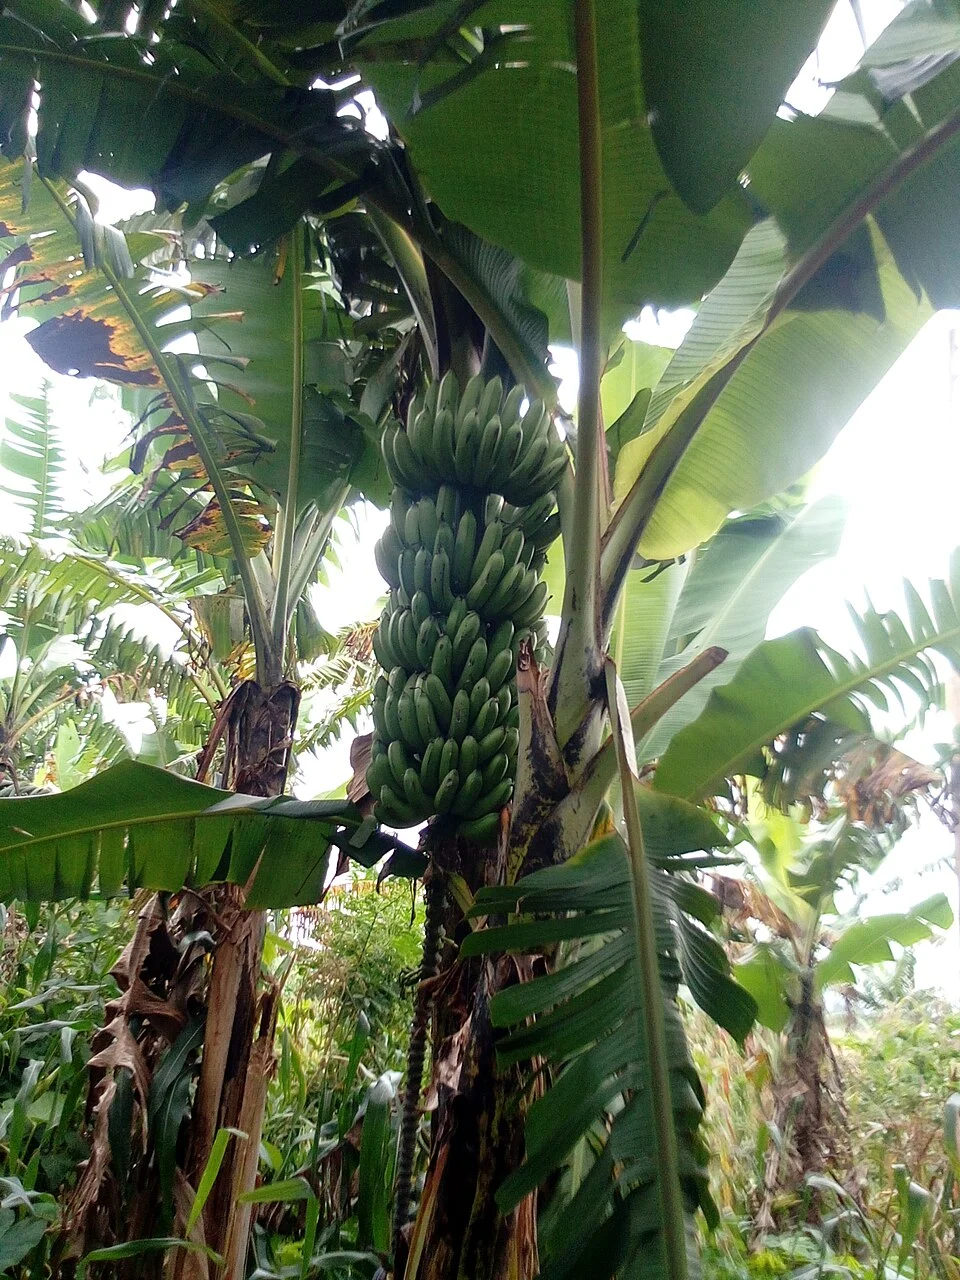
Frankyta · CC BY-SA 4.0 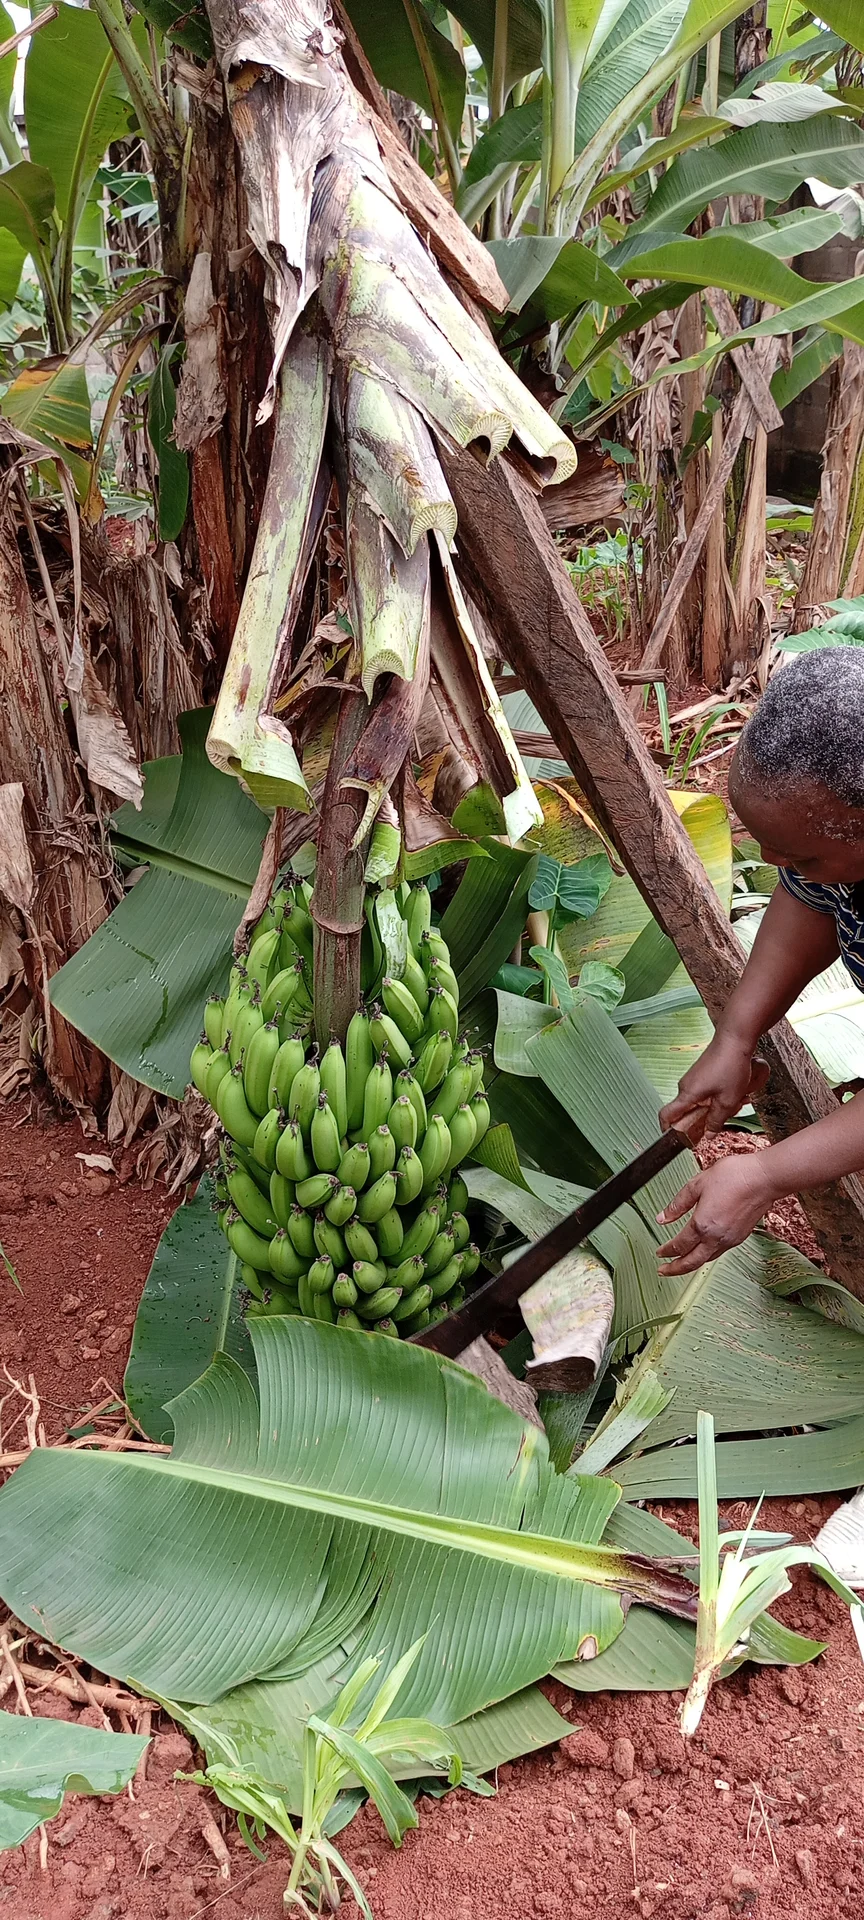
Lexy Tchuileu · CC BY-SA 4.0
- Row spacing
- 250 cm
- Plant spacing in the row
- 250 cm
These are general figures for the crop, compiled from published agronomic references including FAO and CABI. The right choice for your field depends on your soil, rainfall and the yield you are aiming for.
Will banana and plantain actually do well on your field? Check your own field against every crop in the catalogue — no signup. Run the crop check →
Also known as
- Afrikaans
- piesang
- Akan
- kwadu
- Chichewa
- nthochi
- French
- banane, banane plantain
- Luganda
- matooke, matoke
- Ndebele
- ibhanana
- Portuguese
- banana
- Swahili
- ndizi
- Xhosa
- ibhanana
- Yoruba
- ọ̀gẹ̀dẹ̀
- Zulu
- ubhanana
Working in buckets, bags or paces? The farming glossary turns the measures growers actually use into kilograms and hectares — what a 20 litre bucket of each crop really weighs, and how to size a field by walking it — alongside the Shona, Swahili, Ndebele and Yoruba words used in the field. Open the glossary →
Growing banana and plantain, stage by stage
Set up the banana mat once with clean planting material and heavy mulch, then it feeds your family for years — each stem giving one bunch about every 9–15 months as long as you keep the water and potassium up, thin the suckers, and cut out disease the day you see it.
Pick a good spot and get clean planting material
Banana is a perennial — the mat you plant now stays in the same place giving bunches for years, so getting the start right matters more than with any yearly crop. The single biggest thing you control is clean planting material: dirty suckers plant weevil, nematodes (tiny root-eating worms) and the incurable banana Xanthomonas wilt (BXW) — a bacterial disease with no cure — into your soil for good. Choose deep, rich, well-drained land that is not too sour, with no past banana wilt, get clean suckers or tissue-culture plantlets, and dig big holes filled with topsoil and manure before the rains.
Choose disease-free, well-drained land Critical
Banana roots are shallow and weak, and the plant sits in one place for years — so a wet, shallow, or disease-sick spot holds it back every season, not just once. Water sitting around the corm rots it, and a field where banana wilt (BXW) or Panama disease has struck before will infect your new plants too. Choose right once and the whole plantation benefits for years.
Pick deep, rich soil that drains well — a deep loam is ideal. After heavy rain the water should soak away, never sit in pools; banana rots in waterlogged ground.
Banana likes soil that is only slightly sour to neutral, not strongly acid. Only worry about sourness if a soil test — or past crops that stayed yellow and stunted even when you fed them — says the soil is very sour. If it is, spread and work in the recommended lime a few months before planting to sweeten it, the way you would for maize; lime is slow, so late liming won't help.
On a slope, plant on the gentle lower and middle slopes where the soil is deep and moist but water still drains; avoid the very bottom, where water and cold air collect.
Ask about the field's history. Do not plant where banana wilt (BXW) or Panama disease has killed plants before — both diseases survive in the soil and old corms for years and will strike your new mat. Learn what they look like so you can judge a plot: BXW makes plants wilt fast, ripen a few fingers yellow too early, and ooze a yellow slime from a cut stem; Panama disease (also called Fusarium wilt) makes the older, lower leaves turn yellow and collapse until they hang down around the trunk like a dead skirt, and the inside of a cut stem base is streaked reddish-brown.
Match your type to your altitude: plantain and dessert banana like the hot, humid lowlands; cooking banana / matoke does best in the cooler highlands and struggles high up on cold mountains.
If you can, choose a spot near your home or a path — you will walk it often to scout, cut suckers, and carry heavy bunches out.
- Tip:
Infected or unknown suckers dug from a sick or unknown field — they carry weevil, nematode and BXW straight into your soil, where they stay for years.
- Tip:
Low, waterlogged bottoms and thin, stony soil — banana's shallow roots cannot cope with either.
- Watch out:
A field where banana died of wilt before is a trap: the disease lives on in the soil and old corms. Give it a long break or plant elsewhere.
- Watch out:
If you lime a sour field, spread it evenly, work it into the topsoil, wash your hands afterwards, and keep the dust out of your eyes.
Source clean planting material Critical
This is the single biggest decision in the whole plantation. Clean planting material gives you a healthy mat for years; one dirty sucker plants weevil, nematode and incurable wilt in your soil from day one — and you can never take them back out. Care here saves you from problems no spray can fix later.
Best of all: use tissue-culture plantlets from a trusted nursery — they are grown clean and carry no weevil, nematode or virus. If you can get them, they are worth it.
If you use suckers, take sword suckers — young ones with a narrow, spear-shaped leaf and a fat corm — from a healthy, high-yielding mat you know. Avoid broad-leaved water suckers, and never take suckers from a field with wilting, stunting, or a bunched-up top.
Pare the corm: with a clean knife, shave off the outer skin until it is white and clean. Brown or black tunnels you uncover are weevil damage; dark, rotten root bases are nematode. Cut them out — if the corm is riddled, throw that sucker away.
Hot-water dip (if you can): after paring, dip the corms in water at about 50 °C for ~20 minutes — hot enough that you cannot keep your hand in it and it steams, but not boiling. This kills nematodes and weevil grubs hiding inside. Then plant soon after.
Keep pared, treated material in the shade and plant it quickly. Never mix it back in with untreated suckers.
- Do:
If you can only afford a few clean tissue-culture plants, grow your own clean sucker block from them and expand from that — not from random village mats.
- Tip:
Suckers from a mat showing yellowing, wilting, oozing cuts, or narrow bunched-up top leaves — those are BXW or bunchy-top, and there is no cure.
- Watch out:
Hot water and a sharp knife both hurt — lift corms with a stick, cut away from your body, and keep children well away from the hot drum.
Dig big holes + manure Recommended
Big holes filled with good soil and manure give the shallow roots a rich, soft, moist bed to spread into, so the young plant powers away from the start. Cramped holes in poor soil give a slow, weak mat that never fills a proper bunch.
Mark your planting spots about 2.5 m apart each way — that is roughly two to three normal strides between plants, the same distance in both directions. Wide spacing lets air move (less leaf disease) and light in.
At each spot dig a big hole — about knee-deep and as wide as a large basin (30–60 cm across). Banana likes room.
Keep the dark topsoil in one pile and the poorer subsoil in another.
Mix the topsoil with one or two basins of well-rotted manure or compost (and a handful of wood ash for potassium if you have it), and put that rich mix back in first, where the roots will sit.
Do this before the rains, so the holes are ready and you can plant the moment the ground is properly wet.
- Do:
Use well-rotted manure — dark and crumbly, no strong smell. Fresh dung burns the young roots.
- Tip:
Digging tiny holes in hard ground — the roots stay balled up and the plant sulks all season.
- Watch out:
Wash your hands after handling manure, and keep it off any food or drinking water.
Plant the mat and keep it wet
The number of healthy mats you set now is the ceiling on the whole plantation — spacing you can't change later. Banana's roots are shallow and never recover well from a dry spell, so the job here is to plant into a rich hole, mulch heavily the same day, and keep the soil continuously moist for the first three months while the young plant roots down. Watch for weevil and toppling from the very start.
Plant + mulch heavily Critical
How well the plant establishes now decides how fast it reaches its first bunch and how big that bunch is. Plant it at the right spacing in a rich, moist hole and mulch it heavily the same day, and the shallow roots take off; leave the soil bare and dry and the plant stalls for months.
Plant when the soil is properly wet — at the start of the rains, or after a good watering under irrigation. The young corm must never dry out.
Set the sucker or plantlet in the prepared hole so the corm is covered but the growing point sits at soil level — about a hand's depth. Firm the rich topsoil-and-manure mix around it so there are no air pockets.
Keep the spacing even at about 2.5 m each way (two to three strides) — your recommendation gives the exact spacing for your type.
Mulch heavily straight away: lay a thick mat of dry grass, leaves or old banana trash around the plant, about a hand-span deep, out to arm's length. Mulch holds water for the shallow roots and slowly feeds back potassium, banana's most-needed food.
Leave a hand-span gap between the mulch and the base of the pseudostem (the soft false 'trunk' — really a bundle of rolled leaf-sheaths) — mulch piled against it stays wet and hides weevils.
- Do:
Plant on a dull or rainy day, or in the cool of evening, so the young plant doesn't wilt in the sun before it roots.
- Tip:
Piling mulch right against the stem — it invites weevil and rot. Keep a small clear ring at the base.
- Watch out:
Never let a newly planted mat go dry — its roots are tiny, and one hard dry spell now can set it back for good.
Keep continuously moist Critical
For the first three months the young plant has only a few shallow roots, and it dries out fast. Steady moisture now gives strong, even rooting and a fast start; a dry spell at this stage stunts the plant for the rest of its long life.
Keep the soil around the mat moist at all times — push a finger in past the mulch and water whenever the top of the soil is drying out.
Water every 7–10 days, and more often in heat or on sandy soil that dries quickly. Give roughly a full bucket (a 20-litre debe) at the base each time, and more as the plant grows.
Water onto the mulch, not bare soil — the mulch stops it running off and slows evaporation, so less water does more.
But do not waterlog — banana rots in standing water. If water pools around the corm, open a small channel and drain it away.
- Tip:
Letting the mat dry out even once in these first months — shallow banana roots don't bounce back like a grain crop.
- Watch out:
Water pooling at the base means the drainage is poor — drain it off, or the corm rots.
Scout (weevil, BXW, nematode toppling) Critical
The problems that ruin a banana mat get in early and stay for years — so catching them now, while the plant is small and easy to check, protects the whole plantation. A weevil-tunnelled corm, a leaning plant, or the first wilt symptom seen early can still be dealt with; missed, they spread through the mat.
Walk your young plants about once a month and look closely at each mat.
Weevil: look for plants that are weak or stunted for no clear reason, and scrape the soil at the base for the black adult weevil or tunnels in the corm. Damage here means the planting material carried it in.
Nematode / toppling: look for plants that lean or topple with the corm still in the ground — a sign the roots have been eaten away. Toppled young plants mean nematodes came in on the suckers.
Wilt (BXW): look for yellowing or wilting leaves, and if you cut a suspect stem, a yellow slimy ooze. This is the most dangerous disease of all.
Act on what you find. BXW → cut that whole plant down at soil level today, and sterilise your knife (flame or bleach) before touching another plant. Weevil or nematode toppling → destroy the affected corm, and next time plant only pared, hot-water-treated or tissue-culture material there. If you find nothing wrong, keep walking the field monthly.
- Do:
Carry a knife you can pass through a flame or dip in bleach between plants — a shared dirty blade is the fastest way to spread wilt.
- Watch out:
One leaning plant with a healthy-looking green top usually means the roots below are eaten — dig and check rather than wait.
- Tip:
Moving suckers or soil from a mat where you found weevil, nematode or wilt into a clean part of the field.
Grow the mat, thin the suckers, keep the leaves clean
Now the mother plant builds its frame and throws suckers around it, and the leaves it grows are the factory that will fill the bunch. Three jobs decide the harvest: thin the suckers so the mat isn't crowded (keep about 3 stems), cut off diseased leaves at the first black streaks (Sigatoka), and mulch and feed heavily — banana is very hungry for potassium. And rogue out (pull up and destroy) any plant with wilt the day you see it — there is no cure.
De-sucker to ~3 stems/mat Recommended
A mat left to throw every sucker becomes a crowded clump where nothing gets enough light, water or food, and every bunch comes out small. Keeping about three stems of different ages means one is always feeding a bunch while the next comes up behind — steady harvests off the same mat for years.
Aim for a follow-the-leader mat of three: one mother (the biggest, carrying or about to carry the bunch), one daughter/follower (about half her size), and one peeper (just poking through). That's it.
Every month or so, remove the extra suckers — keep the strong sword suckers (narrow, spear-like leaves) in the right positions and cut out the rest.
To kill a sucker properly, cut it off at ground level and gouge out its growing point in the centre with a sharp spade or a twist of the knife — otherwise it just grows back.
Choose the followers on the side you want the mat to move toward — over the years the mat 'walks' in the direction of the suckers you keep.
- Do:
Sterilise your cutting tool between mats — flame it or dip it in bleach. The same knife plant-to-plant is the number-one way BXW wilt spreads.
- Tip:
Keeping too many stems 'to be safe' — a crowded mat gives many small bunches instead of a few good ones.
- Watch out:
Water suckers (broad leaves, thin corm) make weak plants — favour the spear-leaved sword suckers when you choose which to keep.
De-leaf diseased leaves (Sigatoka) Critical
The leaves are the plant's food factory for the bunch. Black Sigatoka disease kills leaf area with grey-black streaks, and hanging dead leaves spray the disease onto healthy ones — so cutting off the worst leaves keeps the good ones working and slows the disease. Lose too many leaves and the bunch fills poorly and ripens too early on the plant.
Every few weeks, look over the leaves for grey-black streaks and blotches (Black Sigatoka) and for leaves that are dead or hanging brown.
Cut off the badly-spotted and dead leaves where they join the stem, with a clean cut.
Lay the cut leaves flat on the ground as mulch, or bury them — don't leave them hanging, where the disease keeps spraying spores onto healthy leaves.
Don't over-strip. Keep all the healthy green leaves you can — the plant needs plenty of working leaves (especially as the bunch fills) to make a full bunch.
- Do:
Cut diseased leaves early, at the first streaks — it's far easier to stay ahead of Sigatoka than to catch up once the whole plant is spotted.
- Tip:
Stripping off healthy green leaves to 'tidy' the plant — every good leaf you remove is bunch weight lost.
- Watch out:
Wide spacing, good drainage and de-suckering keep the air moving and the leaves drier — that alone slows Sigatoka a lot.
Mulch + feed (K + N) Recommended
Banana is a big feeder, and its number-one need is potassium (K) — the bunch is built from it — with nitrogen (N) next. Feeding K and N through the season, on top of heavy mulch, is what turns a thin plant into one that carries a heavy bunch. Starve it of potassium and the bunch stays small no matter how well you water.
Keep the mulch topped up thickly around the mat — old banana leaves and stems, dry grass, crop residue. As it rots it feeds back a lot of potassium for free and holds moisture.
Feed a potassium fertiliser (such as muriate of potash) and a little nitrogen (urea or CAN, or plenty of well-rotted manure) a few times through the season — your recommendation gives the amounts for your mat.
Spread it in a ring on moist soil about one to two hand-spans out from the stem, over the feeding roots — not against the stem — then cover it with mulch or a little soil.
If you have wood ash, work a couple of handfuls into the mulch ring — it is rich in potassium and helps fill the bunch.
Banana also needs some magnesium (Mg), which well-rotted manure and compost help supply. If the older, lower leaves yellow between the veins while the veins themselves stay green, that is magnesium hunger — feed more manure, or a little magnesium fertiliser (such as Epsom salts) if you can get it.
Feed when the soil is moist (after rain or watering) so the food dissolves down to the roots instead of gassing off or sitting dry.
- Do:
Lean on mulch and wood ash for potassium if fertiliser is dear — banana's biggest need is exactly what banana trash and ash give back.
- Tip:
Tipping fertiliser against the wet stem — it scorches the plant and feeds weevils. Keep it in a ring out on the roots.
- Watch out:
Handle fertiliser with care — wash your hands after, keep it off the leaves, and out of reach of children, food and drinking water.
Scout (Black Sigatoka, BXW, weevil) Critical
This is the stage when the mat's worst enemies show themselves — Black Sigatoka on the leaves, wilt (BXW) and bunchy-top virus in whole plants, and weevil at the base. Several of these have no cure, so the only defence is to spot them early and cut them out before they spread through the mat.
Walk the field about once a month, looking over each mat's leaves, stems and base.
Black Sigatoka: grey-black streaks and blotches on the leaves. Cut off the worst leaves (see the de-leaf task) and keep the air moving.
Wilt (BXW): any plant with yellowing, wilting, uneven early ripening, a blackened male bud, or yellow ooze from a cut. There is no cure — cut the whole stem down at soil level at the first symptom and sterilise your tool between every plant.
Bunchy-top virus: a plant whose new leaves come out short, narrow and upright, bunched into a rosette at the top, with dark-green dot-and-dash streaks — short dots and longer dashes — running along the midribs and leaf stalks. No cure — dig out the whole stool (the mat), corm and all, so it can't regrow or feed the aphids that spread it.
Weevil: stunted plants; scrape the base for the black adult or corm tunnels. Set split-pseudostem traps (a length of cut false trunk laid flat, checked for adults sheltering underneath) to catch adults, and chop up old corms and stems so they can't breed. If nothing is over threshold, keep scouting monthly.
- Do:
Treat the first wilt or bunchy-top plant as an emergency — removing one plant today can save the whole plantation.
- Watch out:
Don't carry suckers, tools or even soil from an infected mat to a clean one — that's how these diseases travel.
- Tip:
Piling cut banana trash and old corms against living stems — it becomes a weevil nursery. Chop it and spread it thin as mulch.
Shooting — the bunch comes out
After many months the plant 'shoots' — the bunch pushes out of the top of the pseudostem and bends down, setting its hands of fingers followed by a purple male bud at the tip. Two jobs now: once the last hands have set, snap off the male bud (with a forked stick, never a knife) to send energy into the fingers and block insects from carrying wilt in through the flower — and scout weekly, because this is when wilt (BXW) spreads fastest.
Debud (remove male bud) Critical
Once the fruit hands have set, the drooping male bud at the tip is just a doorway: insects visiting it can carry wilt (BXW) straight into your bunch, and the bud keeps drawing energy the fingers need. Removing it early protects the bunch from wilt and helps the fingers fill.
Watch the emerged bunch. Once the fruit hands (the fingers) have all set, only the slim stalk and the purple male bud hang below them.
About a hand's length below the last hand, snap the male bud off by hand or knock it off with a forked stick — do not cut it with a knife.
Using a stick and leaving no cutting wound means there is no fresh cut for the wilt bacteria to enter, and no blade to carry disease from plant to plant.
Drop the removed bud away from the mat; don't leave it hanging in the plantation.
- Do:
Remove the male bud with a forked stick, not a knife — no wound and no tool means no way for BXW to get in.
- Watch out:
Do it soon after the last hand sets, while insects are still visiting the open male flowers — that's when the disease risk is highest.
- Tip:
Cutting the bud with the same knife you use elsewhere — a single dirty blade at the flower can infect the bunch you've waited a year for.
Scout (BXW, insects on the male bud) Critical
Shooting is the most dangerous time for wilt (BXW) — insects crawl over the open male flowers and carry the bacteria from plant to plant. Checking weekly now, and acting the day you see a symptom, is what stops one infected bunch becoming a wiped-out field.
Walk the flowering plants every week while bunches are shooting — more often than the rest of the year.
Look at the male bud and flowers for insects, and at the whole plant for a few fingers ripening yellow early while the rest are still green — a classic wilt sign.
If you suspect wilt, cut into the pseudostem: a yellow, slimy ooze confirms BXW.
On any wilt sign, act today: cut the whole affected stem down at soil level, leave it in place (don't carry it out), and sterilise your tool (flame or bleach) before touching another plant.
Check that every shooting plant has had its male bud removed with a forked stick — that alone cuts insect-borne wilt sharply. If all looks clean, keep the weekly walk up through shooting.
- Do:
Keep a lighter or a small bottle of bleach with you at flowering to sterilise your knife between plants.
- Watch out:
A few fingers ripening yellow early on an otherwise green bunch is often the first sign of wilt — check that plant closely.
- Tip:
Leaving the male bud on 'to see if fruit sets' — the open flower is exactly where the disease gets in.
Fill the bunch and hold the plant up
Now the fingers fill out over about 3–4 months (90–140 days) and the bunch gets heavy — heavy enough to topple the whole plant, especially in wind or wet soil. Prop the bunch up, keep the water and mulch coming so the fingers plump instead of staying thin, and keep cutting off Sigatoka-hit leaves so the leaf factory finishes the job.
Prop heavy bunches Recommended
A full banana bunch can weigh as much as a sack of grain, all hanging off one side of a soft, shallow-rooted plant. Without support, a gust of wind or soft wet ground snaps or topples the plant and you lose the whole bunch just before harvest. A simple prop saves it.
As soon as the bunch is clearly heavy and pulling the plant to one side, prop it — don't wait for a storm.
Wedge a forked pole (a Y-shaped stick) under the bunch stalk or against the leaning side of the pseudostem to take the weight.
Or tie the pseudostem with twine or banana fibre to a strong neighbouring plant or a stake, sharing the load.
Angle the prop so the bunch hangs clear of the stem and leaves, so the fingers don't rub and scar.
- Do:
Prop before the winds come — a bunch on the ground is a bunch lost, and it can't be stood back up.
- Watch out:
Soft, waterlogged soil makes toppling far more likely — keep the drainage open as well as propping.
- Tip:
Tying so tight you cut into the soft pseudostem — pad the twine or loop it loosely.
Irrigate + mulch through fill Critical
The fingers are filling with the water and food you give now — this is when the bunch gains its weight. A dry spell during filling leaves you with thin, half-filled fingers and a light bunch, and the shallow roots can't catch up. The plant is still drinking heavily right through from shooting into fill, so don't let it run dry now.
Keep the soil moist right through bunch filling — don't let the plant wilt while it is carrying a bunch.
Water every 7–10 days, more often in heat and on sandy soil; give more now than earlier — a bunch-filling plant drinks a lot.
Keep the mulch thick around the mat; water onto the mulch so it soaks in and doesn't run off, and top it up as it rots down.
Still don't waterlog — keep any pooling water draining away from the corm.
- Do:
If water is short and you must choose, water the flowering and bunch-filling plants first — that's where the yield is decided.
- Watch out:
A hard dry spell as the bunch pushes out can 'choke' it so it never opens properly — keep the water up through shooting and filling.
- Tip:
Feast-and-famine watering — sudden heavy water after a long dry spell can split the filling fingers.
Scout (Sigatoka, weevil) Recommended
Late in the crop, Black Sigatoka on the leaves and weevil at the base attack the bunch you've almost finished growing. Spotting them now lets you keep the leaves working to the end and, if a plant is failing, cut and use the bunch early rather than lose it.
Once a month, check the leaves for fresh grey-black Sigatoka and the base for weevil signs and any leaning.
Cut off badly-spotted and dead leaves, but keep every healthy green leaf — the plant needs them to finish filling the bunch.
Weevil / toppling: if plants lean or you find corm tunnels, prop the bunch, set traps, and plan to destroy that old corm after harvest.
If a plant is clearly failing or toppling with a nearly-full bunch, harvest that bunch early rather than lose it to the ground.
- Do:
Keep propping and de-leafing right up to harvest — the last weeks still add weight to the bunch.
- Watch out:
Heavy Sigatoka late on makes bunches ripen suddenly and unevenly on the plant — check filling bunches often so you aren't caught out.
Cut the bunch at the right moment
One clean cut per stem, about 3–4 months (90–140 days) after shooting. Cut at three-quarters full — the fingers rounded and plump, their sharp ridges flattening, and the skin lightened from dark to yellowish-green — so the bunch travels and stores without splitting. Banana bruises easily, so cut gently and handle it like eggs.
Cut the bunch at ¾-full Critical
Cut at the right ¾-full moment and the bunch fills out yet still travels and ripens well; cut too early and the fingers are thin and starchy, cut too late and they ripen and split on the plant or spoil before market. This one judgement decides whether your year of work reaches the buyer in good shape.
Check the bunch: it's ready at three-quarters full, when the fingers have gone rounded and plump and their sharp lengthwise ridges have flattened, and the skin has lightened from dark to a pale yellowish-green.
To cut a tall plant, have one person notch the pseudostem partway up so it bends over slowly, while another catches the bunch on a padded shoulder — never let it crash to the ground.
Cut the bunch stalk off with a clean knife, leaving a short handle of stalk to carry it by.
Lay the bunch on cushioning (leaves or grass), in the shade — don't stack heavy bunches on each other.
Move it to market or store quickly — banana ripens fast and every knock turns into a black bruise; a bruised, over-ripe bunch fetches far less.
If the fingers are still thin and sharply angular and the skin is still dark green, it isn't ready — leave it another week or two and check again. Only cut early if a threat (wind, wilt, a failing plant) forces you, and expect it to ripen unevenly.
- Do:
Carry the bunch on a padded shoulder or a bed of leaves — every knock becomes a black bruise by the time it reaches the buyer.
- Tip:
Letting a bunch start to yellow on the plant — over-ripe fingers split and rot and won't travel. If it's colouring up, harvest at once.
- Watch out:
Cutting for a distant market? Harvest a touch greener and less full; for eating at home in a day or two, you can let it fill a little more.
Start the next crop (ratoon)
The bunch is off — but the mat is not finished. The stem that fruited will never fruit again, so cut it out; the follower sucker you kept becomes the next crop, and the mat gives you another bunch about every 9–15 months for years. Chop the old stem up as mulch, keep the mat fed and clean, and the plantation keeps paying you back.
Cut out the spent pseudostem Recommended
A pseudostem fruits once and then dies — left standing it just harbours weevils and shades the young follower. Cutting it out and feeding it back as mulch clears the way for the sucker you kept to grow into the next bunch, keeping the mat productive year after year.
After harvest, cut down the spent (mother) pseudostem — the one that carried the bunch. It will never fruit again.
Chop the felled stem into pieces and spread them as mulch around the mat. The soft trash rots fast and returns a lot of potassium and moisture to the soil.
Spread the chopped pieces thin, and keep them off the base of the living stems — a wet pile against a stem is a weevil breeding site.
Check the mat still has its follow-on stems — the daughter now becoming the mother, and a peeper coming behind — and de-sucker back to about three if needed.
Top up mulch and feeding (potassium first) so the ratoon (the next crop off the same mat) starts strong — the mat then repeats flowering to harvest every 9–15 months for several years.
- Do:
Chop the old stem up rather than leaving it whole — whole rotting stems and old corms are where weevils breed.
- Watch out:
When yields finally fall off after several years, replant that mat with fresh clean material in a rested spot — don't nurse a worn-out, weevil-riddled stool forever.
- Tip:
Leaving the cut stem leaning against the living followers — spread it flat as mulch, clear of the stems.
Pests and diseases that attack banana and plantain
-
 Banana bunchy top virus
 -
 Banana weevil
 -
 Banana Xanthomonas wilt
 -
 Black Sigatoka
 -
 Burrowing nematode
 -
 Fusarium wilt
Where to sell banana and plantain
Markets that trade this crop — what each one sells it by, when supply peaks there, and the currency used.
-
 Joburg Market
-
 Mbare Musika
-
 Mile 12 Market
-
 Wakulima Market
-
 Atkilt Tera
-
 Grand Marché de Kinshasa
-
 Kariakoo Market
-
 Kimironko Market
Grow banana and plantain with a plan, not a guess
This guide is the general answer. Divisi works out yours — the week to plant banana and plantain on your soil and your rainfall, and each job dated for your field.


When to plant banana and plantain, country by country
- When to plant banana and plantain in Algeria
- When to plant banana and plantain in Angola
- When to plant banana and plantain in Benin
- When to plant banana and plantain in Botswana
- When to plant banana and plantain in Burkina Faso
- When to plant banana and plantain in Burundi
- When to plant banana and plantain in Cabo Verde
- When to plant banana and plantain in Cameroon
- When to plant banana and plantain in Comores
- When to plant banana and plantain in Congo
- When to plant banana and plantain in Côte d'Ivoire
- When to plant banana and plantain in Egypt
- When to plant banana and plantain in Eritrea
- When to plant banana and plantain in Eswatini
- When to plant banana and plantain in Ethiopia
- When to plant banana and plantain in Gabon
- When to plant banana and plantain in Gambia
- When to plant banana and plantain in Ghana
- When to plant banana and plantain in Guinea Ecuatorial
- When to plant banana and plantain in Guinea-Bissau
- When to plant banana and plantain in Guinée
- When to plant banana and plantain in Kenya
- When to plant banana and plantain in Liberia
- When to plant banana and plantain in Libya
- When to plant banana and plantain in Madagascar
- When to plant banana and plantain in Malawi
- When to plant banana and plantain in Mali
- When to plant banana and plantain in Mauritanie
- When to plant banana and plantain in Mauritius
- When to plant banana and plantain in Morocco
- When to plant banana and plantain in Moçambique
- When to plant banana and plantain in Namibia
- When to plant banana and plantain in Niger
- When to plant banana and plantain in Nigeria
- When to plant banana and plantain in Rwanda
- When to plant banana and plantain in République centrafricaine
- When to plant banana and plantain in République démocratique du Congo
- When to plant banana and plantain in Sao Tome and Principe
- When to plant banana and plantain in Seychelles
- When to plant banana and plantain in Sierra Leone
- When to plant banana and plantain in Somalia
- When to plant banana and plantain in South Africa
- When to plant banana and plantain in South Sudan
- When to plant banana and plantain in Sudan
- When to plant banana and plantain in Sénégal
- When to plant banana and plantain in Tchad
- When to plant banana and plantain in Togo
- When to plant banana and plantain in Tunisie
- When to plant banana and plantain in Uganda
- When to plant banana and plantain in United Republic of Tanzania
- When to plant banana and plantain in Zambia
- When to plant banana and plantain in Zimbabwe
Where banana and plantain scores best
Districts where Divisi's engine currently rates this crop highest, ranked by fit.
-
 Nosy-Varika
 -
 Kole
Kole -
 Ogooue et Lacs
 -
 Bokon
Bokon -
 Calandula
 -
 Mayeye
 -
 San Antonio de Palé
 -
 Mitooma
 -
 Itsandra-Hamanvou
 -
 Praslin
 -
 Butaganzwa
 -
 Huye
Huye
Get Insights by email
A short digest of new Divisi articles. No email on quiet weeks.
Frequently asked questions
How do I grow banana and plantain?
How to grow banana and plantain: 250 cm rows. Also called piesang, kwadu, nthochi, banane, matooke, ibhanana, ndizi, ọ̀gẹ̀dẹ̀, ubhanana.
What is piesang in English?
Piesang is the Afrikaans name for banana and plantain.
What is kwadu in English?
Kwadu is the Akan name for banana and plantain.
What is nthochi in English?
Nthochi is the Chichewa name for banana and plantain.
What is banane in English?
Banane (also banane plantain) is the French name for banana and plantain.
What is matooke in English?
Matooke (also matoke) is the Luganda name for banana and plantain.
What is ibhanana in English?
Ibhanana is the Ndebele and Xhosa name for banana and plantain.
What is banana in English?
Banana is the Portuguese name for banana and plantain.
What is ndizi in English?
Ndizi is the Swahili name for banana and plantain.
What is ọ̀gẹ̀dẹ̀ in English?
Ọ̀gẹ̀dẹ̀ is the Yoruba name for banana and plantain.
What is ubhanana in English?
Ubhanana is the Zulu name for banana and plantain.
What spacing should I use for banana and plantain?
Space banana and plantain rows about 250 cm apart, with roughly 250 cm between plants within the row.
What pests and diseases attack banana and plantain?
The ones covered in this guide are Banana bunchy top virus, Banana weevil, Banana Xanthomonas wilt. Each has its own page explaining how to identify, check for and control it.