 Divisi
How to grow chickpea
Cicer arietinum · Fabaceae
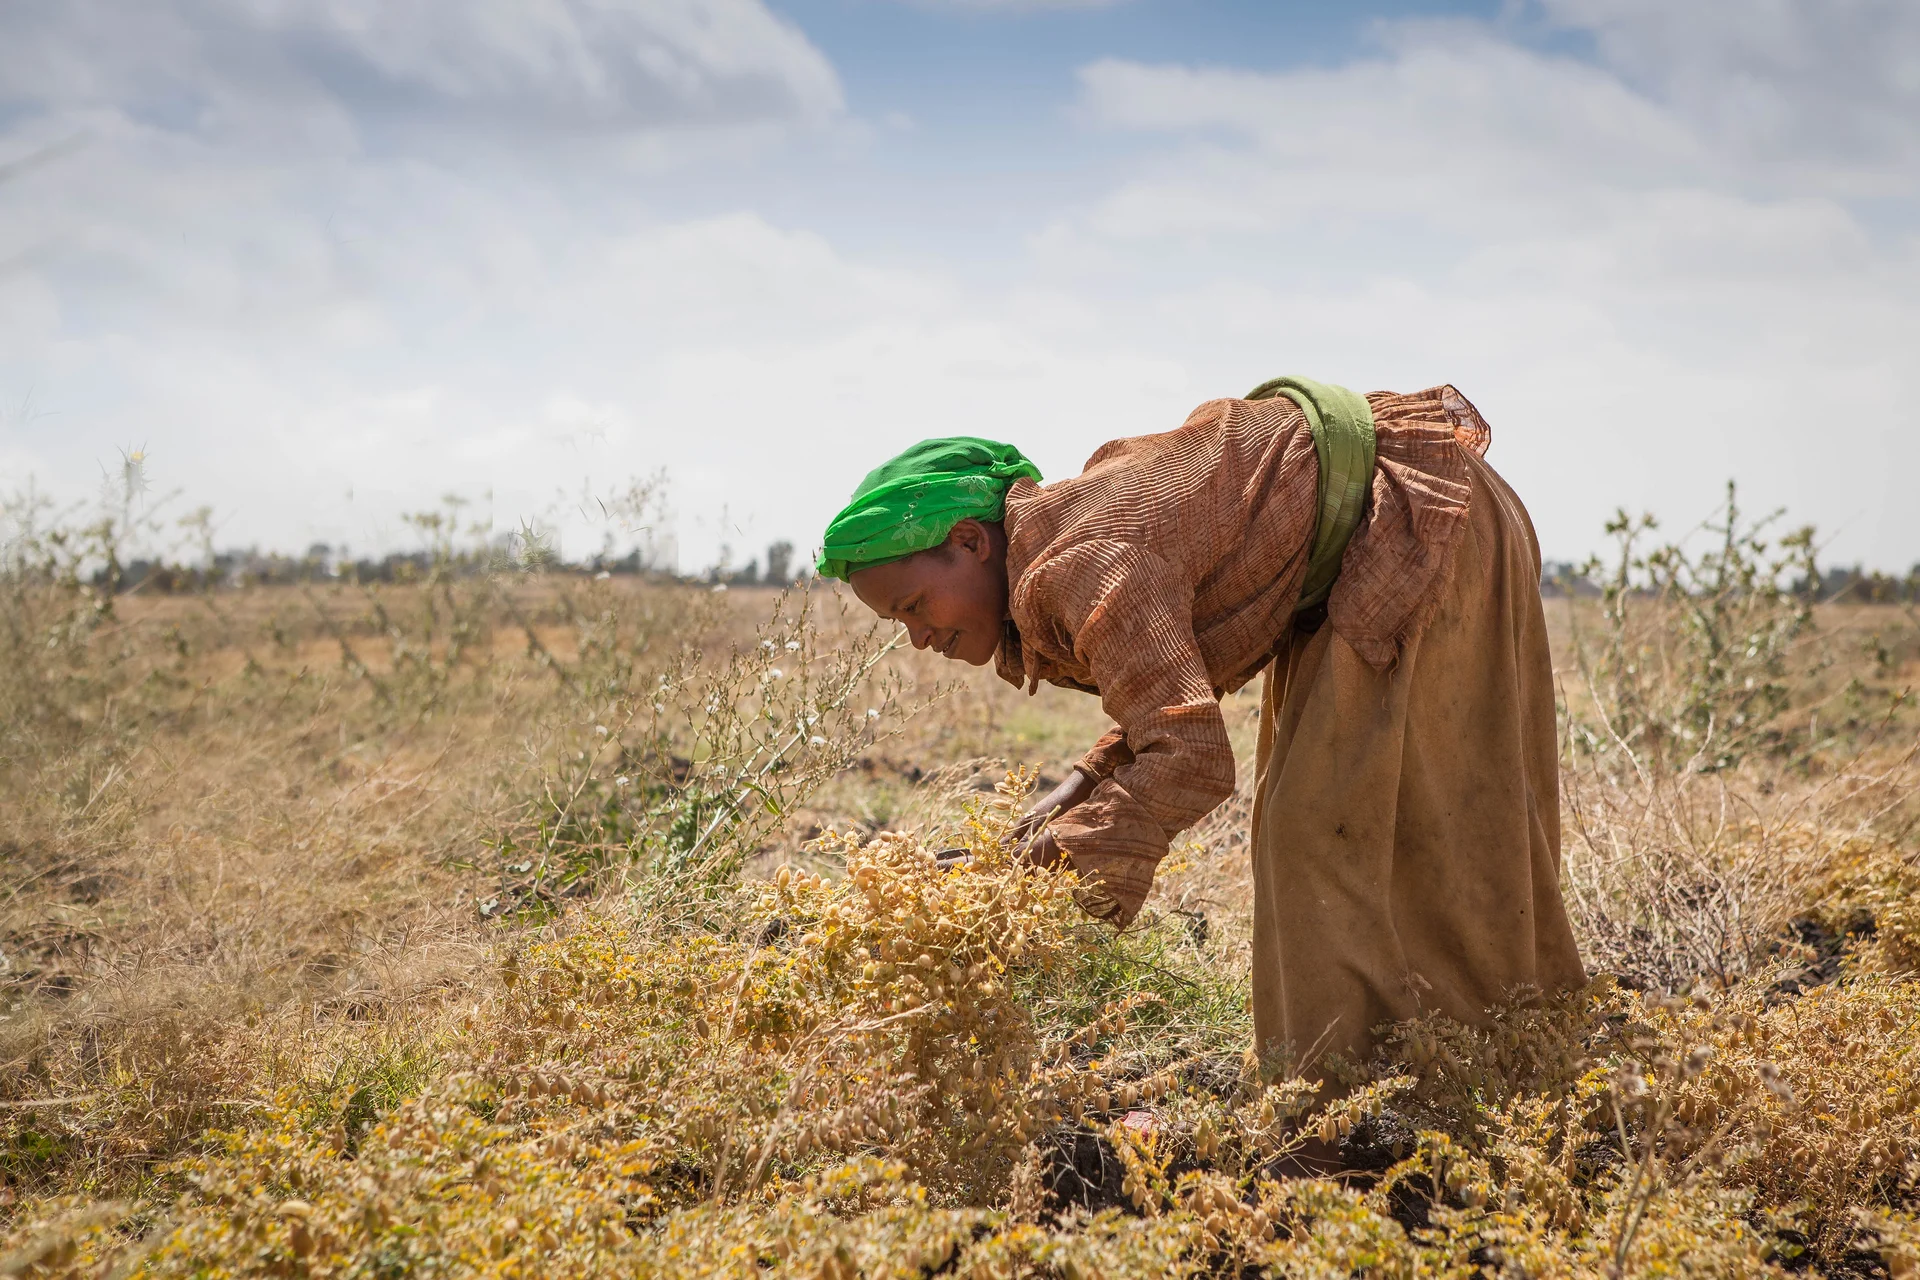
Photo: Swathi Sridharan (ICRISAT) · CC BY-SA 2.0
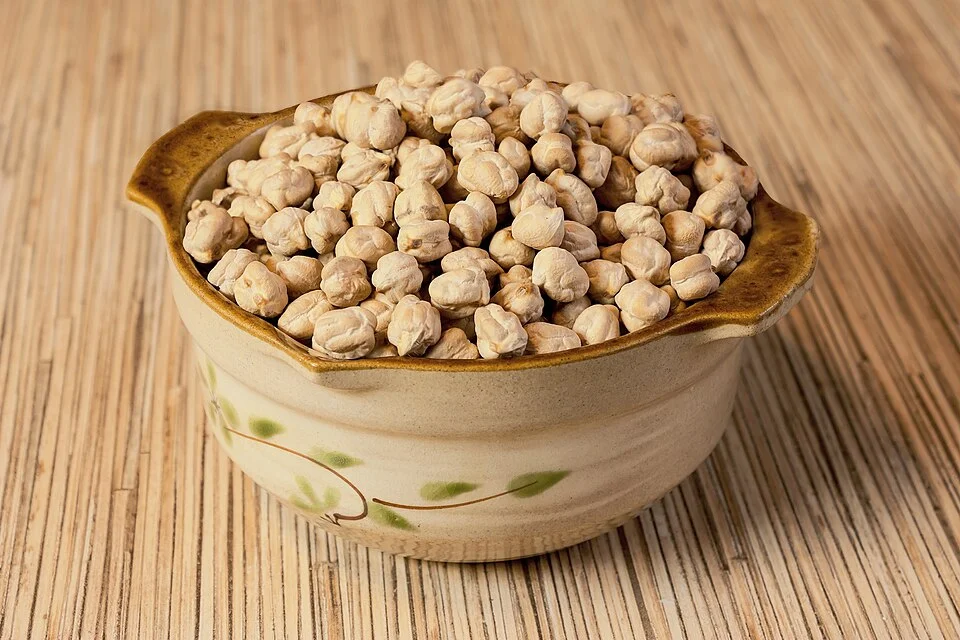
Chickpea is a knee-high, branching legume grown for its round, protein-rich seeds — the pea behind roasted snacks, stews and hummus. It comes in two kinds: desi, with small, dark, tough seeds that shrug off heat and dry weather, and kabuli, with big, cream-coloured seeds that fetch a higher price but want kinder conditions. Like other legumes it makes its own nitrogen from the air, through helpful germs that live in little lumps on its roots, so it barely needs fertiliser — just a little phosphorus. It has one special trick: you sow it as the rains end, and it lives off the water stored deep in the soil, sending roots more than a metre down to reach it. That is why it hates wet feet — in soggy ground the roots simply rot.
AlixSaz · CC BY-SA 4.0 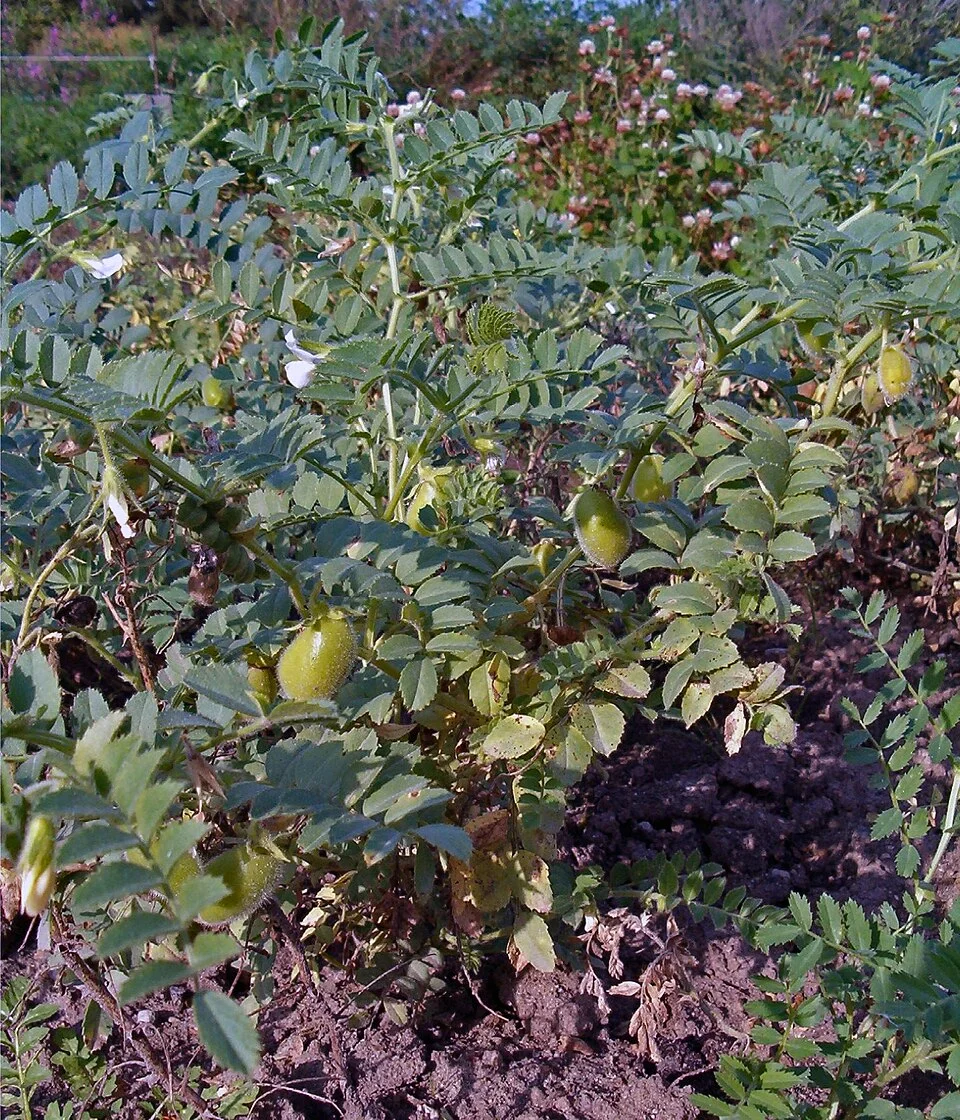
- Days to maturity
- 90–150 days
- Row spacing
- 30 cm
- Plant spacing in the row
- 10 cm
- Sowing depth
- 5–12 cm
These are general figures for the crop, compiled from published agronomic references including FAO and CABI. The right choice for your field depends on your soil, rainfall and the yield you are aiming for.
Will chickpea actually do well on your field? Check your own field against every crop in the catalogue — no signup. Run the crop check →
Also known as
Chickpea is also called garbanzo and Bengal gram.
- English
- garbanzo, Bengal gram
- Amharic
- ሽምብራ (shimbra)
- French
- pois chiche
- Portuguese
- grão-de-bico
- Swahili
- dengu
Working in buckets, bags or paces? The farming glossary turns the measures growers actually use into kilograms and hectares — what a 20 litre bucket of each crop really weighs, and how to size a field by walking it — alongside the Shona, Swahili, Ndebele and Yoruba words used in the field. Open the glossary →
Growing chickpea, stage by stage
Your chickpea season, step by step — sow deep into the leftover moisture as the rains end, keep the field dry and weed-free, beat the pod borer through flowering and podding, then dry the seed rock-hard and seal it away from weevils.
Get ready and time it for the leftover moisture
Chickpea lives on the water stored deep in the soil after the rains stop, so when and how you plant decides your whole season. In the weeks before, pick a well-draining field that has not grown chickpea or other legumes recently (soil wilt lingers there), buy clean disease-resistant seed plus root-germ inoculant, and open a deep, loose seedbed. Aim to sow toward the end of the rains, so the crop flowers and fills on leftover moisture — never on soggy ground.
Plan the field / rotation Recommended
Fusarium wilt is a soil fungus that builds up where chickpea and its cousins (pea, lentil, bean) grow often. Once it is in a field it stays for years and no spray touches it. Choosing a fresh, well-drained field is your cheapest, strongest disease control — and it costs you nothing but a little planning.
Do this early — about 1 to 4 months before you sow, while you can still choose your field.
Pick a field where chickpea, lentil, pea or bean has not grown for at least the last 3–4 seasons — wilt and root-rot fungi build up in the soil under these crops and cannot be sprayed out.
Choose your best-draining field — a gentle rise or slope, not a low, black-cotton dip that holds water. Chickpea roots rot in any ground that floods or stays wet, and that rot has no cure.
Walk the field after a rain and mark where water pools or drains slowly. Cross those low, wet patches off — they are where you lose the crop.
Plan to sow toward the end of the rains, so the crop grows down onto the water stored deep in the soil and flowers after the heavy rain has passed.
Where you can, follow a cereal such as maize or sorghum with your chickpea — it breaks the disease cycle, and the chickpea leaves free nitrogen in the soil for the cereal next time.
- Tip:
Planning to irrigate this crop, or planting in a wet, low spot — chickpea's roots rot in soggy soil, and that root rot has no cure.
- Do:
Rotate with a cereal (maize, sorghum). It starves out the wilt fungus, and the chickpea feeds the next cereal for free.
- Watch out:
Avoid any field where a past chickpea, pea or lentil crop wilted and died in patches — the wilt fungus is still in that soil.
Buy resistant/clean seed + inoculant Critical
The two diseases that wreck chickpea — Fusarium wilt and Ascochyta blight (a leaf-and-pod fungus) — are beaten mainly by the variety you buy, not by spraying. Clean, resistant seed, plus a cheap dose of root-germ powder so the crop can feed itself nitrogen, is the strongest and cheapest start you can give the season. Buy early — the good varieties sell out.
In the 3 weeks before sowing, buy seed of a variety bred to resist Fusarium wilt and Ascochyta blight — ask the dealer or check your recommendation. This resistance is your main defence; no spray fixes wilt.
Choose your market type: desi (small, dark, tough seeds — hardier in heat and dry spells) or kabuli (big, cream seeds — worth more, but they need kinder weather). Keep plump, whole seed; throw out any shrivelled, cracked or holed seed.
If chickpea has never grown in this field, buy a sachet of Mesorhizobium ciceri inoculant — a cheap powder of helpful root germs. It lets the crop pull its own nitrogen from the air, so you barely need fertiliser. Keep it cool, in the shade, and use it before its expiry date.
Buy a small dose of phosphorus (P) fertiliser too (such as single superphosphate) — phosphorus is the one nutrient chickpea really pays back, feeding the roots and the nitrogen-fixing germs. Your recommendation gives the amount. Chickpea needs little or no nitrogen fertiliser.
Store the seed, inoculant and fertiliser dry, off the floor, and away from food, water and children. Keep the label and receipt in case the seed turns out poor.
- Do:
Buy wilt- and Ascochyta-resistant seed — with these two diseases, the right variety does what no spray can.
- Tip:
Buying nitrogen fertiliser (like urea) for chickpea. It is a legume that makes its own nitrogen; extra N just grows soft leaf, wastes money, and can weaken the root lumps where it fixes nitrogen.
- Watch out:
Check the inoculant's expiry date and keep the sachet out of the sun — the germs are alive and die in heat and sunlight.
Prepare a deep seedbed Recommended
Chickpea seed is sown deep — down where the leftover moisture sits — and its roots dive over a metre to chase that water. A deep, loose, well-drained seedbed lets the seed reach moisture and the roots go down. A hard pan or a wet hollow drowns them.
Loosen the soil a spade deep (about 15–20 cm) so the seed can go down to the moist layer and the deep roots can follow.
Break the big clods to a rough, crumbly tilth — but do not work it to a fine dust, which sets into a crust the deep-sown seed cannot push through.
Level out any hollows where water could pool. On a slope, work across the slope so rain soaks in evenly instead of running off.
Do this in the last few weeks before sowing, while the soil is still workable — a seedbed opened too early bakes hard and loses the very moisture you are trying to keep.
- Do:
Keep the seedbed rough and open, not dust-fine — chickpea is sown deep, and a crusted surface stops it breaking through.
- Tip:
Making a low, water-holding basin. Chickpea is the opposite of a paddy crop; the soil must never pond.
Sow deep and get a full stand
This is your one shot at a full stand — chickpea will not tiller or branch out to fill gaps the way a cereal does, so every seed counts. Sow deep into the moist soil, dress the seed with inoculant on new land, then leave the field alone: no watering, no ponding. In these first weeks, watch for seedlings cut off by cutworms and rotted off by damping-off, and keep the crop off any standing water — root rot in wet ground cannot be cured.
Sow deep into moisture + inoculant Critical
Chickpea is unusual — it must be buried deep, down in the moist layer, because it pushes up a strong shoot from that depth and then lives off the stored water. Sow too shallow and the seed sits where the soil dries out, and the crop starves in the first dry spell. Depth, spacing and inoculant set here are the whole foundation — you cannot re-sow later.
Sow as the rains end, when the surface is drying but the soil is still moist at sowing depth — two to three finger-joints down. Push a finger or a stick in and check that damp layer is there before you sow.
Place the seed deep: about 5–8 cm (roughly two finger-joints) in normal soil, and 10–12 cm (about three finger-joints) on dry, rain-fed land — right into the moist soil. Chickpea comes up well from this depth; shallow seed dries out and dies.
Set the spacing: rows about one and a half hand-spans apart (30 cm), and seeds about half a hand-span apart (10 cm) down the row. Your recommendation may fine-tune the seed rate for your variety.
On new land, dampen the seed lightly and dust it with the Mesorhizobium ciceri inoculant (the root-germ powder) just before sowing, in the shade — the germs die in hot sun. Sow the coated seed the same day.
Drop your small dose of phosphorus (P) fertiliser in the furrow, with or just below the seed. Cover and firm the soil. Do not water the field, and do not let it flood — wet soil rots the seed and the young roots. Wash your hands after handling the fertiliser.
- Do:
Push a stick into the soil first, and sow only where you feel moisture two to three finger-joints down — so the deep-set seed lands in damp earth.
- Tip:
Sowing shallow like maize. Chickpea set 5–8 cm down reaches stored water; set 2–3 cm down it bakes and dies in the first dry spell.
- Watch out:
Never mix inoculant in full sun or hours ahead — the live germs cook and die. Coat the seed in shade and sow it the same day.
Scout (cutworms, damping-off) Recommended
The first six weeks set your stand, and chickpea cannot branch out to replace plants it loses. Cutworms can fell rows of seedlings overnight, and damping-off can rot bare patches into the young crop — but only if you fail to catch them. Ten minutes twice a week is the difference between a full field and a gappy one.
From about a week after sowing, walk the field twice a week, in a big 'W' so you cover the four corners and the middle — not just the edge by the path.
Cutworms: look for young plants cut clean off at ground level (worst overnight). Scratch the soil around a fresh-cut plant to find the fat, grey, curled-up caterpillar, and squash it.
Damping-off: look for seedlings that rot and topple at the soil line, leaving bare gaps — worst in wet patches. It is a sign the field is too wet: drain any low spots and never water.
Dry root rot (charcoal rot): on warm, dry patches, look for young plants that yellow and die. Pull one and check the root — dark, shredded, and greyish, sooty-black inside, like charcoal dust.
Count how many plants are up against what you sowed, and note where the gaps are, so you know how the stand is doing.
If cutting spreads night after night, go out after dark to hand-collect and destroy the caterpillars, or bait as your recommendation advises — you cannot re-sow the lost plants.
- Watch out:
Damping-off and root rot both mean the soil is too wet — the cure is drainage, not spray. Wet, low spots are where you lose the crop.
- Do:
Scout in the early morning — that is when cutworms are still at work and fresh overnight cutting is easiest to spot.
The bush builds — weed early, watch for disease
Now the plant builds its bushy frame — the branches that will carry the pods. Two jobs matter: weed early, before weeds smother the low crop, and watch closely for the first spots of Ascochyta blight and the first wilting plants of Fusarium wilt — both run fastest in cool, wet weather. Keep the field on the dry side; soggy soil brings root rot and soft, floppy growth.
Scout (Ascochyta, aphids) Recommended
This is when Ascochyta blight and Fusarium wilt first show — the two diseases that can flatten a chickpea crop. Ascochyta can leap across a wet field in days, and wilt has no cure once a plant has it. Finding the first few plants early lets you pull out wilted plants and stop Ascochyta spreading before it takes the field.
From about 2 weeks after sowing, as the bush starts branching, walk the 'W' twice a week, looking closely at the leaves, stems and growing tips of about 10 plants at several stops.
Ascochyta blight: look for brown spots ringed with tiny black dots (like specks of ground pepper) on leaves, stems and pods. Stems can girdle (rot right around) and snap. It spreads fast in cool, cloudy, wet spells — mark it the moment you see it.
Fusarium wilt: look for single plants or small patches that suddenly droop and dry while the rest stay green. Pull one and split the stem near the ground — a brown or black streak running up inside confirms wilt. Uproot and carry those plants away; do not compost them.
Aphids: look for clusters of tiny soft green or black insects on the shoot tips and under the leaves, with sticky, shiny 'honeydew' and curling tips. A few do little harm; heavy build-ups spread virus — note if they grow.
Phosphorus hunger: dull, dark, stunted plants, sometimes with reddish or purple older leaves, can mean the soil is short of phosphorus — note it for next season's P.
- Watch out:
A run of cool, cloudy, wet days is Ascochyta weather — scout harder then, because that is when it leaps from plant to plant.
- Do:
Pull out and carry away wilted plants. A wilt plant left in the row feeds the fungus that then stays in the soil for years.
- Tip:
Walking or working the crop while the leaves are wet — you carry Ascochyta spores from plant to plant on your legs and hands.
Weeding (early) Recommended
Chickpea is a low, slow-starting bush that weeds smother easily. Weeds in the first few weeks steal its water, light and the little phosphorus it needs, exactly when it cannot fight back. One clean early weeding protects the yield; a weedy start caps it for good.
Weed once the crop is up and the weeds are still small — within the first 2–4 weeks after sowing, before the weeds outgrow the young chickpea.
Hoe shallowly between and within the rows — chickpea's feeder roots are near the surface, and deep hoeing cuts them.
Pull the weeds out roots and all where you can; chop the rest off at the base. In dry areas, leave the pulled weeds lying between the rows as a light mulch to hold moisture.
Try to weed on a dry day with dry leaves, so you do not spread Ascochyta as you move through the crop.
- Do:
Weed while the weeds are still smaller than the crop — a clean field in the first month is the cheapest yield you will ever gain.
- Tip:
Deep, close hoeing that slices the shallow roots and opens the way for root-rot fungi.
- Watch out:
Do not earth up or pile soil against the stems (unlike maize) — damp soil heaped round a chickpea stem invites collar and root rot.
Flowering — guard against heat and the pod borer
Flowering is a make-or-break window. The flowers are fragile to weather — a spell above about 35°C, or a frost, makes them drop without setting pods (this is exactly why you sowed to flower after the worst heat). At the same time the pod borer — the caterpillar that will bore into the coming pods — arrives to lay its eggs. Start pod-borer scouting now, and keep watching for Ascochyta in any wet weather.
Scout (Helicoverpa pod borer, Ascochyta) Critical
The pod borer (Helicoverpa — the caterpillar that chews flowers now and bores into pods later) is the single biggest pest of chickpea. Catching the moths and the first small caterpillars during flowering is what lets you spray at the right moment. Miss it, and they are soon inside the pods where no spray can reach them.
From about 6 weeks after sowing, when the flowers open, walk the 'W' twice a week.
Pod borer: shake a few plants over your open hand or a cloth and look for small green-to-brown caterpillars with pale stripes down the side, and for caterpillars chewing the flowers. Count how many plants carry one.
Hang pheromone traps — small traps baited with the female moth's scent that lure and catch the male moths — and count the moths caught in each trap per night, so you know when a wave is building.
Act when you find about 1 caterpillar per plant, or the traps catch 5–8 moths per trap per night — that is the point where the borer costs you more than the spray does (see the pod-borer control task).
Ascochyta: in cool, wet weather keep checking the leaves and young pods for the brown, black-dotted spots — wet flowering weather lets the fungus onto the pods.
- Watch out:
Heat above about 35°C at flowering ('terminal heat' — late-season heat that scorches the flowers) makes flowers and young pods drop without setting seed. There is nothing to spray for it — it is why the crop is sown to flower in cooler weather.
- Watch out:
A light frost at flowering also kills the open flowers — watch cold, clear nights in frost-prone dips.
- Do:
Check traps and shake plants in the early morning, when caterpillars are out feeding on the flowers and easiest to see.
Pod-borer control (if over threshold) Critical
Once the caterpillars bore into the pods, they eat the very seeds you were growing, and no spray can reach them. Spraying at the threshold — while the caterpillars are still small and out on the flowers and leaves — is the only window that works. Done right, it saves the pods; done late or carelessly, it wastes money and poisons you.
Spray only when scouting hits the threshold — about 1 caterpillar per plant, or traps catching 5–8 moths per trap per night. Do not spray by the calendar; spray on the count.
Choose a caterpillar-only product first: a natural germ spray (Bt — a bacterium that harms only caterpillars) or the caterpillar-virus spray (NPV). These spare the bees and helpful insects. Keep an approved chemical insecticide for a heavy attack only.
Measure the dose with the cap supplied and mix into a full knapsack (15–20 litres); spray to wet the plants and flowers without dripping. Spray in the cool of evening, when caterpillars are out and bees have stopped visiting.
Protect yourself: wear a long-sleeved shirt, cover your nose and mouth, and spray with the wind behind you. Keep children and animals away, keep spray off all food, and wash yourself and the sprayer afterwards.
Respect the pre-harvest interval — the number of days the label says to wait between spraying and picking, so no poison is left on the seed. Never pick inside that window.
If the count is below threshold → do not spray. A needless spray wastes money, kills the borer's natural enemies, and speeds up resistance.
- Do:
Reach for Bt or NPV first — they hit only caterpillars, so the crop's natural helpers keep working on the next wave.
- Tip:
Spraying at midday over open flowers — you knock out the bees, and the spray dries before the caterpillars feed. Spray in the cool.
- Watch out:
Once caterpillars are sealed inside the pods, spraying is wasted — which is why the flowering-time count matters so much.
Filling the pods — peak pod-borer and dry-root-rot
The pods are set and the seeds are filling — this is where your yield's weight comes from, and where the pod borer does its worst, boring straight into the filling pods. Keep controlling it. On plants running out of water, watch for dry root rot creeping up from the ground. And still — keep the crop off any standing water.
Scout (pod borer, dry root rot) Critical
This is the borer's peak — the caterpillars are now boring into filling pods and eating the seed directly, and every holed pod is grain lost. Meanwhile, plants running dry can collapse from dry root rot. Twice-a-week checks tell you when to spray again, and warn you to harvest a drought-hit patch before it dies standing.
Keep walking the 'W' twice a week through podding, from about 9 weeks after sowing.
Pod borer: now look for round holes bored into the pods, often with the caterpillar's rear end sticking out as it eats the seed inside. Count the pods and plants with fresh holes, and keep watching the traps.
Dry root rot (charcoal rot): on dry, hot patches, look for plants that go straw-yellow and die early, from the base up. Pull one — the lower stem and root are dark, shredded, greyish-black and sooty inside. Nothing sprays it; it is a drought-and-heat disease.
If a patch is dying of root rot but the pods are mature and filled, harvest that patch early rather than lose the seed as the pods shatter.
Re-spray for pod borer while the count is still over threshold (see the pod-borer spray task) — but respect the wait before harvest.
- Watch out:
Straw-coloured plants dying in the driest, hottest part of the field are dry root rot, not ripeness — check the roots before you assume the crop is simply maturing.
- Do:
Note which patches are drought-stressed; they mature first and may need harvesting ahead of the rest.
Pod-borer spray (if over threshold) Critical
Pod-borer pressure is at its peak during podding, and a single wave can hole a big share of your pods in a week. Repeat sprays, while the count stays high, protect the filling seed — but you must rotate products so the caterpillars do not become immune, and stay clear of the pre-harvest wait.
Spray again only while the count stays over threshold (about 1 caterpillar per plant, or 5–8 moths per trap per night), leaving about 10–14 days between sprays.
Rotate to a different product group each time (Bt, NPV, and any approved chemical in turn) — using the same one over and over lets the pod borer stop responding to it (become resistant).
Measure with the cap supplied, mix into a full knapsack (15–20 litres), and spray to wet the pods and leaves without dripping, in the cool of evening.
Protect yourself: long sleeves, nose and mouth covered, wind behind you, people and animals kept away, spray off all food, and wash afterwards.
Count back from your likely harvest and stop spraying in time to clear the pre-harvest interval on the label — the wait that keeps poison off the seed you will eat and sell.
If the count has dropped below threshold → skip the spray. Needless sprays cost money and breed resistance in the borer.
- Do:
Change product group between sprays — rotating Bt, NPV and chemicals keeps every spray working.
- Tip:
Spraying right up to harvest — always leave the label's pre-harvest wait, so the seed is safe to eat and sell.
- Watch out:
If the count is below threshold, skip the spray — needless sprays cost money and breed resistance in the borer.
Harvest on time, thresh gently
Bring the crop in as soon as it is ripe. Leave it too long and the dry pods shatter and spill your seed on the ground, while birds and pod borers keep working. The plant tells you it is ready: it yellows, dries and drops its leaves, the pods turn tan / straw-brown, and the hard seeds rattle inside.
Pull/cut and thresh Critical
Timing and handling decide how much of the crop you actually keep. Harvest on time and the pods hold their seed; leave it and the dry pods split and shed onto the ground. And kabuli's big seeds crack if you thresh them hard — cracked seed sells for less and will not store.
Check the crop is ripe: the plant is yellow, dry and has dropped most of its leaves, the pods are tan / straw-brown, and the seeds are hard and rattle in the pod. Bite one — a ripe seed is hard and cracks, not soft. (This comes about 3 months after sowing, but the plant's signs, not the calendar, tell you.)
Pull the whole plants up by hand (chickpea lifts easily from dry soil) or cut them at the base. Do it in the cool of the morning, when the pods are slightly damp with dew and shatter less.
Heap the plants and let them dry a few days on a clean sheet, mat or swept hard floor — never on bare soil, which pushes damp and dirt back in.
Thresh by gently beating the dry plants with a stick or treading them, then winnow the chaff away in the wind. Go gently with kabuli, whose big seeds crack and split under heavy beating.
If the seeds are still soft or dent when bitten, the crop is not ripe → leave it standing a few more days and check again, rather than pulling it green.
- Do:
Thresh kabuli gently — the big cream seeds crack under heavy beating, and cracked seed will not store or sell well.
- Do:
Pull or cut in the cool morning dew — midday-dry pods shatter and spill seed as you handle them.
- Tip:
Leaving a ripe crop standing 'to dry a little more' — every extra day past ripe, more pods shatter and more birds and pod borers feed.
Dry it hard, seal it against weevils
Your crop is grown — now do not feed it to the weevils. Bruchids (pulse beetles / storage weevils) lay their eggs on the pods out in the field, then the grubs eat the seeds hollow from the inside once in store. The two defences are simple: dry the seed rock-hard, then seal it airtight so the beetles suffocate. Damp or open-stored chickpea can be riddled within weeks.
Dry the threshed grain Recommended
Chickpea stored even a little damp goes mouldy, and the seed loses both its market and its power to sprout. Dry seed also holds out far longer against weevils. Drying it hard — until it cracks instead of dents when bitten — is what makes it safe to seal and keep.
Spread the threshed seed in a thin layer on a mat, sheet, rack or clean hard floor in the sun — never on bare soil, which pushes damp and dirt back into it.
Turn it several times a day so it dries evenly, and cover it or bring it in if rain or heavy dew threatens.
Test it: bite a seed. When it cracks sharply rather than dents or squashes, it is dry enough (down to about 13% moisture) to store safely.
If a seed still dents → keep drying for another day or two, and test again before you store any of it.
- Tip:
Drying on bare ground — the seed pulls damp back up and picks up grit, dung and mould. Always dry on a mat, sheet, rack or swept hard floor.
- Do:
Dry it hard before sealing — a seal traps in whatever moisture is present, so damp sealed seed rots instead of keeping.
Bruchid-safe storage Critical
Bruchids ride in from the field, so even clean-looking grain will hatch weevils in store — unless you cut off their air. A hermetic (airtight — sealed so no air gets in) bag or container uses up the trapped oxygen and suffocates the beetles and their grubs, saving the whole store with no chemicals.
Make sure the seed is bone dry first (the bite test cracks, not dents) — sealing damp seed traps moisture and rots it.
Sort out any seed that is already holed, powdery or has beetles in it before you seal — one infested handful can breed thousands.
Seal the dry seed in hermetic bags (PICS / triple-layer — three bags one inside the other) or a clean, airtight container or metal drum, filled near to the top and closed tight, so the trapped air runs out and any weevils inside suffocate.
Store the sealed containers off the floor, away from the wall, in a cool, dry, shaded place. Open them as little as you can — every opening lets in fresh air and beetles.
If you must use ordinary sacks, mix in an approved pulse-storage protectant (follow the label, keep it off seed you will eat within weeks, and wash your hands), and keep the sacks off the floor.
If you open a bag and find fresh holes, fine powder or beetles → sort and re-dry that seed, reseal it airtight, and use that batch up first.
- Do:
Seal the seed hard-dry and clean — airtight storage suffocates weevils for free, but only if the seed went in dry.
- Tip:
Storing chickpea in open sacks or a loose tin — bruchids from the field multiply fast and can hollow out a third of the store.
- Watch out:
Check sealed bags for small round exit-holes and fine powder — the sign that weevils are working inside. Act early.
Pests and diseases that attack chickpea


Where to sell chickpea
Markets that trade this crop — what each one sells it by, when supply peaks there, and the currency used.


Grow chickpea with a plan, not a guess
This guide is the general answer. Divisi works out yours — the week to plant chickpea on your soil and your rainfall, and each job dated for your field.


When to plant chickpea, country by country
- When to plant chickpea in Algeria
- When to plant chickpea in Angola
- When to plant chickpea in Botswana
- When to plant chickpea in Burundi
- When to plant chickpea in Cabo Verde
- When to plant chickpea in Cameroon
- When to plant chickpea in Comores
- When to plant chickpea in Egypt
- When to plant chickpea in Eritrea
- When to plant chickpea in Eswatini
- When to plant chickpea in Ethiopia
- When to plant chickpea in Kenya
- When to plant chickpea in Libya
- When to plant chickpea in Madagascar
- When to plant chickpea in Malawi
- When to plant chickpea in Mali
- When to plant chickpea in Mauritanie
- When to plant chickpea in Mauritius
- When to plant chickpea in Morocco
- When to plant chickpea in Moçambique
- When to plant chickpea in Namibia
- When to plant chickpea in Niger
- When to plant chickpea in Nigeria
- When to plant chickpea in Rwanda
- When to plant chickpea in République démocratique du Congo
- When to plant chickpea in Somalia
- When to plant chickpea in South Africa
- When to plant chickpea in Sudan
- When to plant chickpea in Tchad
- When to plant chickpea in Tunisie
- When to plant chickpea in Uganda
- When to plant chickpea in United Republic of Tanzania
- When to plant chickpea in Zambia
- When to plant chickpea in Zimbabwe
Where chickpea scores best
Districts where Divisi's engine currently rates this crop highest, ranked by fit.
-
 Nyaribari Chache
 -
 Bukavu
 -
 Bomachoge Borabu
 -
 Caconda
 -
 Cankuzo
 -
 Gisagara
 -
 Ngara
Ngara -
 Goma
Goma -
 Shombo
 -
 Cunhinga
 -
 Huye
Huye -
 Kilome
Get Insights by email
A short digest of new Divisi articles. No email on quiet weeks.
Frequently asked questions
How do I grow chickpea?
How to grow chickpea: 90–150 days to maturity, 30 cm rows, 5–12 cm deep. Also called garbanzo, ሽምብራ (shimbra), pois chiche, grão-de-bico, dengu.
What is ሽምብራ (shimbra) in English?
ሽምብራ (shimbra) is the Amharic name for chickpea.
What is pois chiche in English?
Pois chiche is the French name for chickpea.
What is grão-de-bico in English?
Grão-de-bico is the Portuguese name for chickpea.
What is dengu in English?
Dengu is the Swahili name for chickpea.
How long does chickpea take to grow?
Chickpea takes about 90–150 days from sowing to maturity, though the exact length varies with variety, temperature and how the season runs.
What spacing should I use for chickpea?
Space chickpea rows about 30 cm apart, with roughly 10 cm between plants within the row.
How deep should chickpea be planted?
Sow chickpea at about 5–12 cm deep. Shallower risks drying out; deeper wastes seed energy before the shoot reaches light.
What pests and diseases attack chickpea?
The ones covered in this guide are Ascochyta blight, Bollworm complex, Charcoal rot. Each has its own page explaining how to identify, check for and control it.