 Divisi
How to grow pigeon pea
Cajanus cajan · Fabaceae
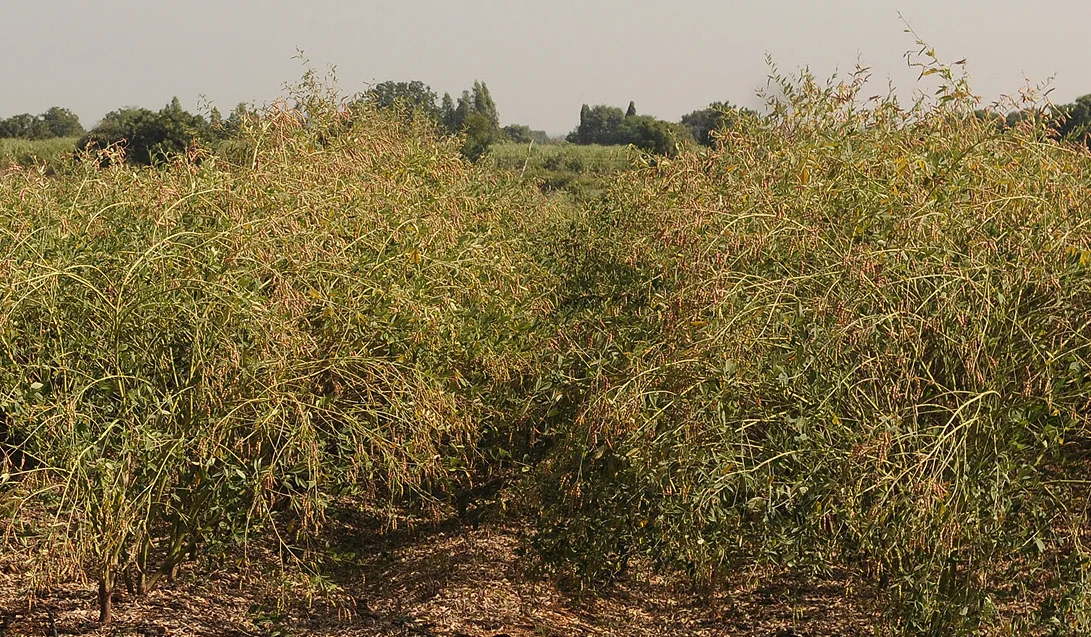
Photo: Ministry of Agriculture and Farmers' Welfare (India) · GODL-India
Pigeon pea (red gram) is a hardy, woody bush bean that sends a taproot two metres deep, so it keeps growing and podding long after other crops burn off in the dry. It feeds itself with nitrogen pulled from the air, so it asks for very little fertiliser and leaves the soil richer for the next crop. It is slow to get going but rewards patience: a short-duration type gives one grain harvest in about 3–5 months, while a tall long-duration type can be cut back after harvest and ratooned — coming again from the same roots for two to five years. The dry peas store and sell as red gram, the green peas cook fresh, and the woody stems make firewood.
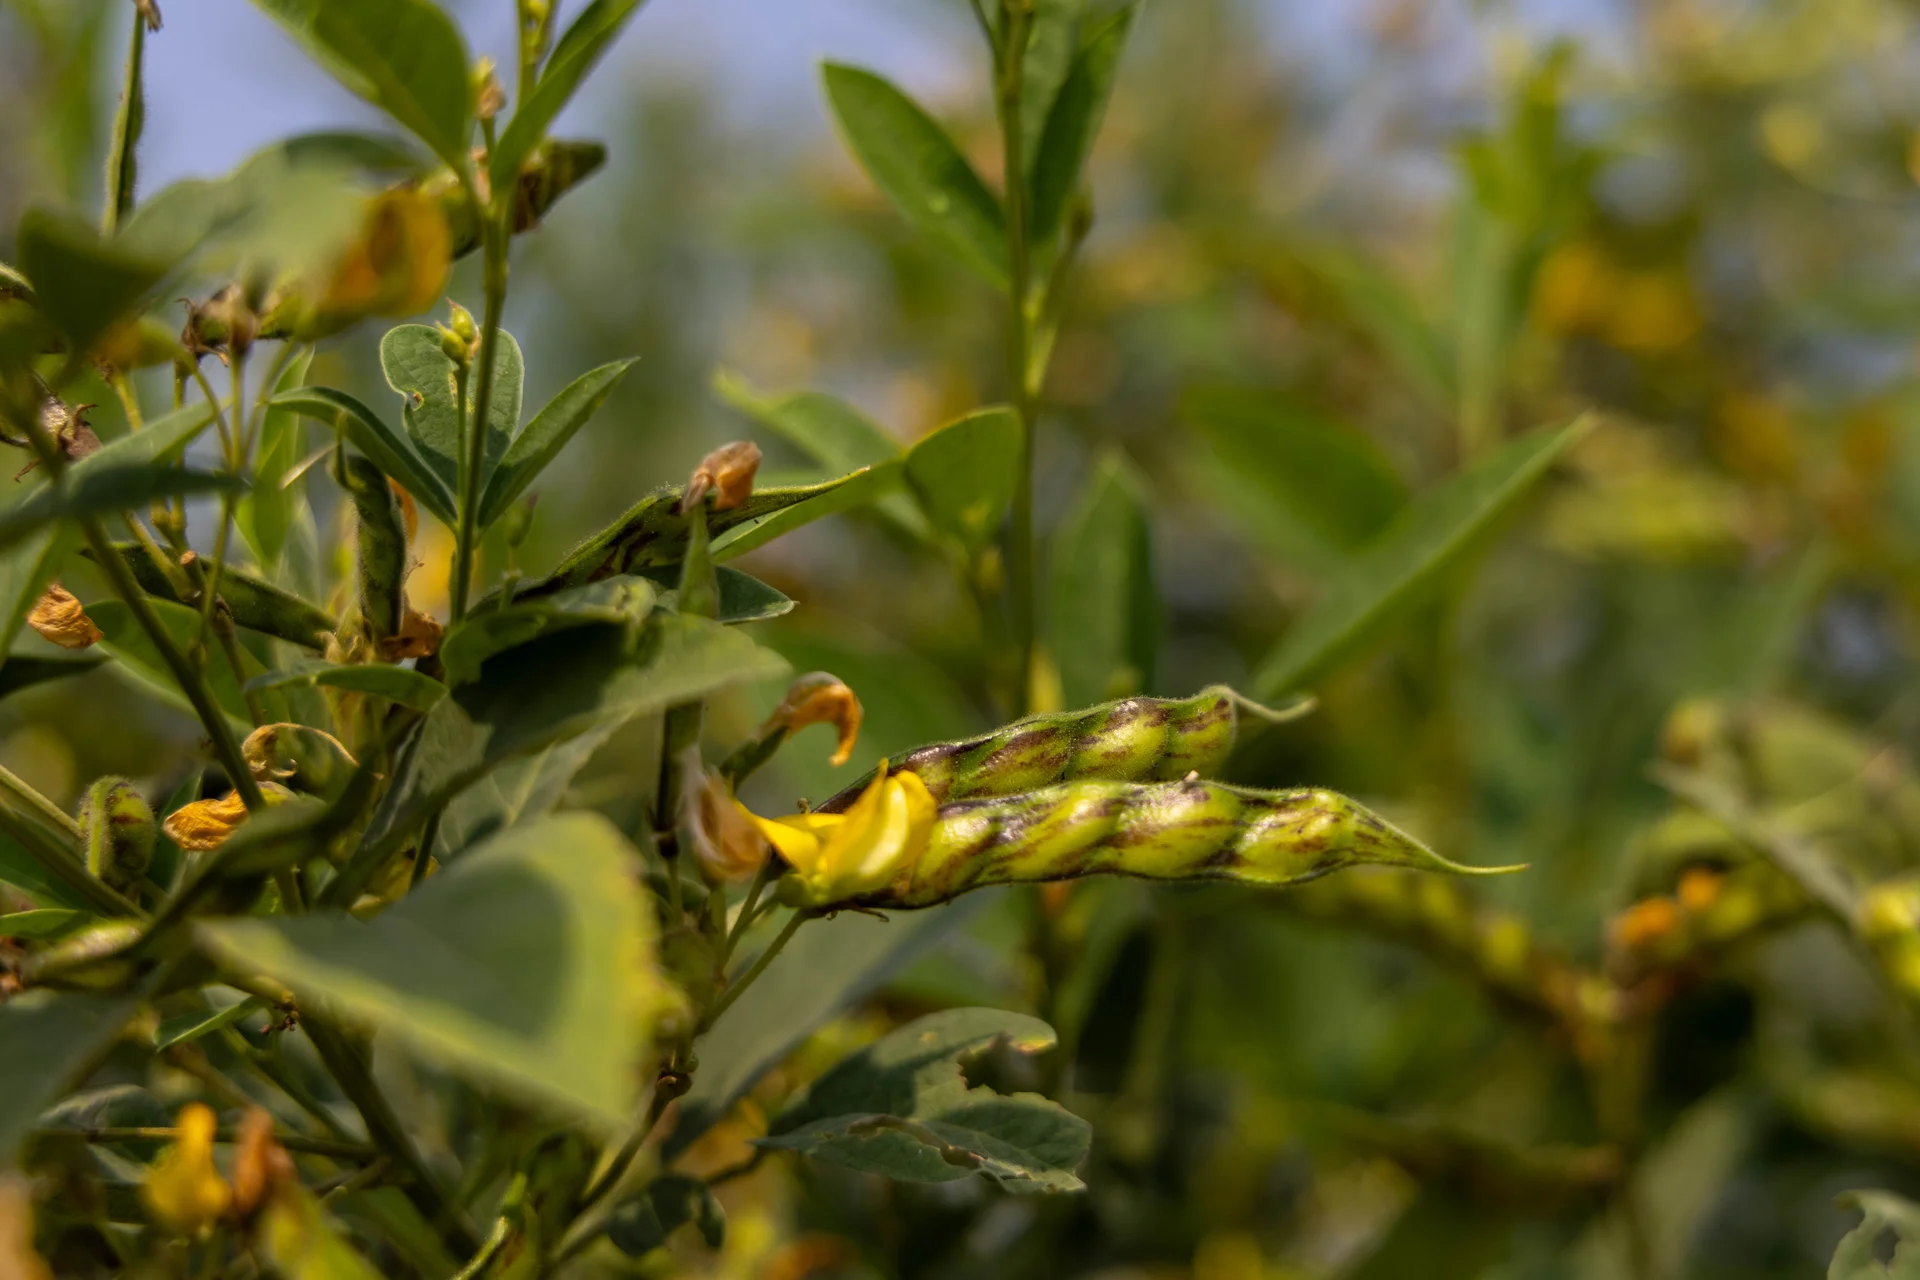
Nanditha Gogate, WELL Labs · CC BY-SA 4.0 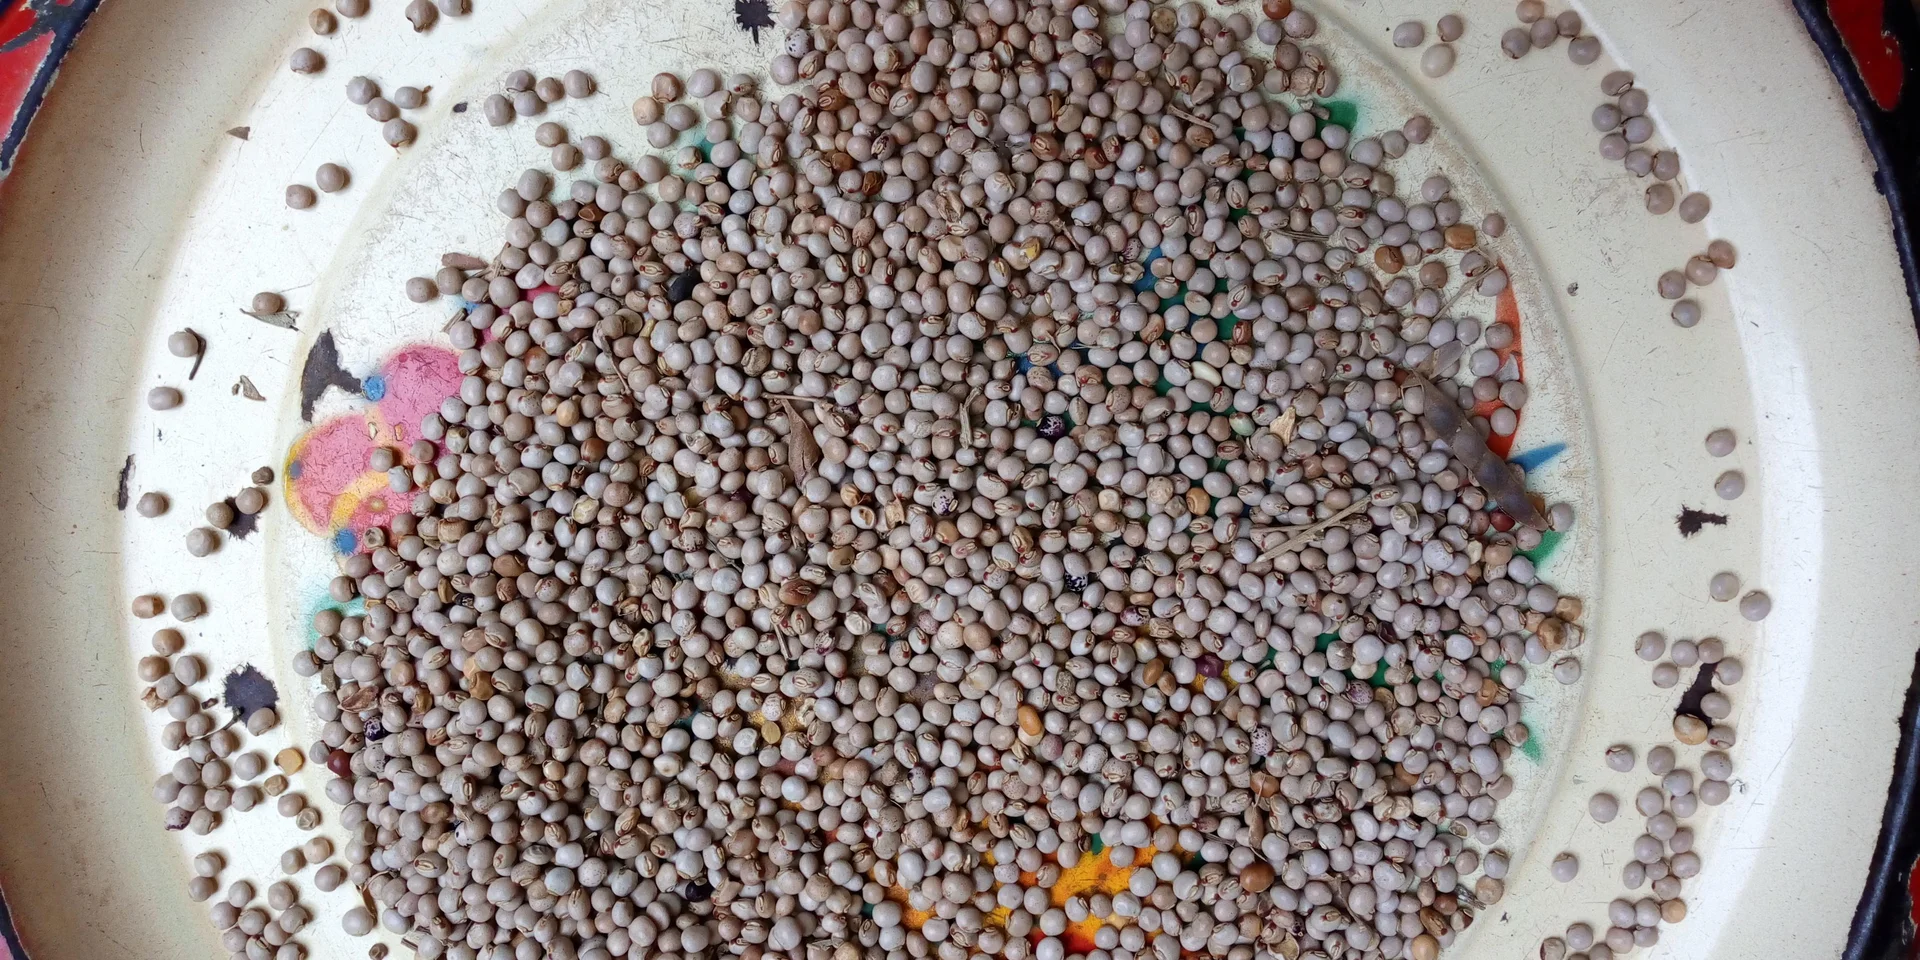
Adoscam · CC BY-SA 4.0
- Days to maturity
- 90–300 days
- Row spacing
- 75 cm
- Plant spacing in the row
- 30 cm
- Sowing depth
- 3–5 cm
These are general figures for the crop, compiled from published agronomic references including FAO and CABI. The right choice for your field depends on your soil, rainfall and the yield you are aiming for.
Will pigeon pea actually do well on your field? Check your own field against every crop in the catalogue — no signup. Run the crop check →
Also known as
Pigeon pea is also called red gram and Congo pea.
- English
- red gram, Congo pea
- Chichewa
- nandolo
- French
- pois d'Angole, pois cajan, ambrevade
- Hausa
- waken-turawa
- Igbo
- fiofio
- Portuguese
- guandu, feijão-guandu
- Swahili
- mbaazi
- Yoruba
- otili
Working in buckets, bags or paces? The farming glossary turns the measures growers actually use into kilograms and hectares — what a 20 litre bucket of each crop really weighs, and how to size a field by walking it — alongside the Shona, Swahili, Ndebele and Yoruba words used in the field. Open the glossary →
Growing pigeon pea, stage by stage
Your pigeon pea crop, step by step — from choosing wilt-beating seed and a free-draining field, through the slow early weeks when weeds do the most harm, to guarding the flowers and pods from borers and storing the grain beetle-free — with a second, ratoon crop still to come.
Get your field and seed ready
Almost everything that protects a pigeon pea crop is decided before you sow. Pick free-draining land — pigeon pea drowns easily, and wet soil kills the root nodules that feed it and brings on root rot. Never plant it where pigeon pea grew last season: the wilt disease that lives in the soil builds up under it. Where wilt or the bushy, flowerless "sterility mosaic" show up locally, a resistant variety is the cheapest protection you can buy. And because it makes its own nitrogen from the air, it needs far less fertiliser than maize — mostly a little phosphorus to build strong roots.
Plan the field & rotation Critical
Fusarium wilt is a fungus that lives in the soil and builds up wherever pigeon pea grows year after year — and once your soil is badly infected, no spray or fertiliser can fix it; the plants just wilt and die before they pod. Choosing the right field and rotation months ahead is your strongest and cheapest defence, and it is a decision you can only make now.
Pick a well-drained field — a gentle slope or raised land where water never sits. Pigeon pea's deep root rots in soggy ground, and waterlogging kills the nitrogen-making nodules on its roots. Avoid low, boggy bottoms.
Never sow pigeon pea where pigeon pea (or beans, cowpea or groundnut) grew last season. Follow a cereal — maize, sorghum or millet — instead. This break starves out the soil-borne wilt fungus.
Come back to the same field only after 3–4 years of other crops.
If wilt, or the bushy, pale, flowerless "sterility mosaic" disease, is common in your area, plan now to buy a resistant variety (next task) — while good seed is still on the shelf.
- Tip:
Pigeon pea after pigeon pea, cowpea, beans or groundnut — the wilt fungus feeds on all of them and builds up in the soil.
- Tip:
Low, waterlogging-prone bottoms — standing water drowns the roots, kills the nodules and invites root rot.
- Do:
Rotate with a cereal (maize, sorghum, millet) — it breaks the wilt cycle and uses up the nitrogen the pigeon pea leaves behind.
Buy resistant seed, basal P & inoculant Critical
The seed you choose decides the season before it starts. A wilt- and sterility-mosaic-resistant variety shrugs off the two diseases that can wipe out an ordinary crop — the single most cost-effective thing you can buy. A little phosphorus, and in new fields a rhizobia inoculant, give the roots and their nitrogen-making nodules a strong start. Buy early: the best varieties sell out, and you want everything in hand before the rains.
Choose a variety that matches your season: a short-duration type (about 3–5 months, one harvest) where the season is short; a medium or long-duration type (5–10 months, picked over weeks, and ratoonable) where you have a long season or year-round warmth.
Where wilt or sterility mosaic occur locally, ask for a resistant variety by name — it costs the same to grow and can save the whole crop.
Buy the basal fertiliser your recommendation gives — the basal is the starter fertiliser placed beside the seed at planting. For pigeon pea this is mostly phosphorus (such as single superphosphate or a compound); it makes its own nitrogen, so you need little or no N.
If you can get rhizobia inoculant — a powder of the friendly bacteria that build the root nodules where the plant makes its own nitrogen — buy a fresh sachet. It helps most where pigeon pea has not grown before. Keep it cool and out of the sun; heat kills the living bacteria.
Store seed and fertiliser dry, off the floor, away from food, water and children. Keep the label and receipt in case the seed turns out poor.
- Do:
Ask for a wilt / sterility-mosaic-resistant variety by name — it is the cheapest disease control there is.
- Tip:
Buying lots of nitrogen fertiliser "to push growth" — it gives leafy bushes with few pods and stops the plant making its own nitrogen.
- Watch out:
Keep any inoculant in the shade and cool right up to sowing; a sachet left in the sun is dead and useless.
Prepare a deep, well-drained seedbed Recommended
Pigeon pea's real power is a taproot that drives about two metres down to find water long after other crops dry out — but only if the soil below is loose enough to let it. A deep, well-broken, free-draining seedbed opens the subsoil for that root and keeps water from pooling around the crown. Hard-packed or crusted soil traps the root shallow and throws away the crop's best drought defence.
In the month before sowing, clear weeds and old crop trash off the planting lines.
Loosen the soil deep — a full spade's depth (about 20–30 cm), a little deeper than you'd dig for maize, to open the subsoil for the taproot.
Break the big clods on top to a crumbly tilth so the small seed sits snugly against moist soil.
Make sure water drains away: level the surface, and on heavy or low ground make ridges or raised beds so the crop never sits in water.
- Do:
On heavy clay or flat land, plant on ridges or a slight mound — pigeon pea will not forgive standing water.
- Do:
Break any hard pan below the topsoil if you can — the deeper the taproot reaches, the harder the crop rides out drought.
Incorporate manure/compost Recommended
Pigeon pea asks for little feeding — it makes its own nitrogen and its deep root scavenges what other crops miss. A light dressing of well-rotted manure or compost is still worth it: it feeds the soil, helps it hold water, and adds the phosphorus and sulphur the crop does respond to. But go easy — too much rich manure gives leafy bushes with few pods, and fresh manure burns young roots and brings weed seeds.
Use only well-rotted manure or compost — dark, crumbly, no sharp smell.
Spread it lightly and evenly — pigeon pea needs far less than a hungry crop like maize, so a thin scatter is plenty.
Work it into the topsoil in the week or two before sowing, so it settles in with the soil.
- Tip:
Heavy manuring — it pushes leaf and stem at the expense of pods and can even hold back the root nodules.
- Tip:
Fresh, raw manure at sowing — it scorches young roots and brings in weed seeds.
- Watch out:
Wash your hands after handling manure.
Sow and get a full stand
Sow into warm, moist soil and get an even stand — this is the one moment the drought-hardy pigeon pea is actually delicate. Space it to suit your variety, place a little phosphorus beside the seed, then guard the young crop: birds dig up seed, and cold wet soil rots seedlings before they even show. Many farmers sow pigeon pea between rows of maize or sorghum — the slow legume carries on and pods up after the cereal is cut, living off the leftover moisture.
Sow + apply basal P Critical
The number of healthy plants you set now is the ceiling on your harvest — you cannot add plants later. Getting the depth, spacing and phosphorus placement right gives an even stand and sends the taproot down fast. This is a one-shot decision, so take the time to get the spacing right for your variety.
Sow when the soil is warm and moist — pigeon pea seed rots in cold, wet ground. Wait for a rain that wets the soil well.
Sow as deep as your first finger-joint (3–5 cm) — a little deeper in dry, sandy soil, shallower in heavy soil.
Space to suit your variety. Short-duration: rows about three hand-spans apart (60–75 cm), plants a hand-span apart (20–30 cm) in the row. Medium/long-duration: rows about a stride apart (90–150 cm), plants two hand-spans apart (30–50 cm) — the big bushes need room.
Drop one or two seeds per station and cover them.
Place the basal phosphorus a hand's width to the side (about 5 cm) of the seed and a little below it — never touching the seed, or it burns the sprout.
If you have inoculant, coat the damp seed with the powder in the shade just before sowing, and sow it the same day.
Cover and firm the soil so the seed sits snug in moist earth.
- Do:
Match the spacing to the variety's habit — a spreading long-duration bush choked into close rows shades itself and pods poorly.
- Tip:
Sowing into cold or waterlogged soil — the seed rots and damping-off sets in.
- Watch out:
Keep the phosphorus off the seed, and wash your hands after handling fertiliser.
Scout Critical
The first month is when the tough pigeon pea is at its softest. Birds pull up sprouting seed, and damping-off rots seedlings in cold, wet patches — and you can only fix gaps if you catch them in the first two weeks. Ten minutes, twice a week, protects the stand that caps your whole harvest.
Twice a week, walk a large "W" across the field so you cover all four corners and the middle — not just the edge by the path.
At about ten stops, look at ten plants: are they coming up evenly?
Birds: look for disturbed stations, pulled-up seedlings and empty seed coats — worst in the first days after sowing. Scare them off and re-cover any exposed seed.
Damping-off: look for seedlings that keel over and rot at the soil line, in patches, in the cold wet spots. Drain the wet, and don't overwater.
Count the gaps (stations with no plant) so you know whether to gap-fill in the next few days.
- Watch out:
Damping-off follows cold, wet, waterlogged soil — if seedlings collapse in patches, drain the spot and ease off watering.
- Do:
Keep a simple note of what you see each visit — it is how you catch a problem while it is still small.
Gap-fill blanks Recommended
Every empty station is a bush's worth of pods lost — and pigeon pea is so slow that a plant sown even two weeks late never catches up. Filling the blanks now, while the crop is only days old, is the only window you get.
About a week and a half after sowing, walk the rows and find the blank stations.
If the soil is still moist, re-sow a couple of seeds into each big gap.
Or lift a spare seedling with a ball of soil in the cool of evening, plant it in the gap, and water it in.
Don't bother filling tiny single-plant gaps — pigeon pea branches out sideways and fills the space itself.
- Do:
Gap-fill within the first two weeks — after that, latecomers stay stunted under the older plants and never pod well.
Irrigate Recommended
Pigeon pea is famously drought-hardy — but only once its taproot has driven deep. In the first month the roots are still shallow, so steady moisture now gives even emergence and a strong start. This is the one stage where a rain-fed crop most misses water.
Keep the topsoil moist but never waterlogged — pigeon pea rots in standing water faster than almost any crop.
Water every few days, more often in heat and on sandy soil that dries fast.
Check with a finger: water when the top few centimetres are dry.
Ease off once the plants are up and growing away — from here the deep root takes over.
- Tip:
Waterlogging the field — drain low spots; wet feet kill the nodules and rot the seedlings.
Weed early — the crop's slowest, weakest weeks
Pigeon pea crawls at first and competes badly with weeds — so weeds in the first six weeks are the single biggest loss you can prevent. Weed twice, early, while the bush is small; once it closes over it shades out weeds on its own and the work drops off. Watch, too, for the two diseases that show now: pull out any bushy, pale, flowerless plant (sterility mosaic) and any that suddenly wilt and die (Fusarium wilt) — they will not recover, and left standing they spread the trouble wider.
Scout Critical
These slow early weeks decide the crop. Weeds are stealing water and light right now, and the two worst diseases — sterility mosaic and Fusarium wilt — first show here. A diseased plant "rogued" (pulled and destroyed) early can't spread; the same plant left standing can cost you a big share of the field.
Twice a week, walk the "W" and look closely at about ten plants at ten stops.
Sterility mosaic: look for bushy, pale light-green plants, extra-branched and leafy, that never flower — a "green wall" of leaf with no pods. Pull them out and burn or bury them.
Fusarium wilt: look for plants that suddenly wilt, yellow and die, often one branch or one side first; split the stem near the base and you'll see brown or black streaks in the wood. Pull and destroy them.
Check whether weeds are getting ahead of the crop — if so, weed now.
- Do:
Weed twice in the first 4–8 weeks — it is the decisive, cheapest yield you will gain all season.
- Watch out:
Rogue sterility-mosaic plants the moment you spot them — one bushy, flowerless plant left standing spreads mites to its neighbours (26–97% loss if ignored).
- Watch out:
Never leave a wilted plant hoping it recovers — it won't, and it only feeds the soil fungus for next season.
1st weeding Critical
This first weeding, about 2–3 weeks after sowing, protects the biggest single slice of your yield — 10–30%. The slow young crop cannot fight weeds for water and light, and weeds left now set the whole season back.
Weed by about 2–3 weeks after sowing, before the weeds get bigger than the crop.
Hoe shallowly between and within the rows — deep hoeing near the plants cuts the young roots.
Pull weeds out roots and all where you can; chopping only the tops lets many regrow.
In dry areas, leave the pulled weeds lying between the rows as a mulch to hold moisture.
- Do:
Weed while the weeds are still small and you can still walk the open rows — a clean field early is the cheapest yield you'll ever gain.
2nd weeding Critical
A second flush of weeds comes just before the bush closes over, while the crop still hasn't shaded the ground. Clearing it now — about 5–6 weeks after sowing — keeps the field clean through the decisive early window; after this, the canopy does the job for you.
Weed again about 5–6 weeks after sowing, before the bushes meet and close the rows.
Hoe shallowly around the now-spreading plants so you don't cut their roots.
This is usually the last weeding you'll need — once the canopy closes, the bush smothers new weeds itself.
- Do:
Get this one done before the canopy closes — after that you can't walk the rows without breaking branches.
Irrigate (only if badly stressed) Optional
By now the taproot is going deep, and this is exactly where pigeon pea earns its drought-hardy name — it usually needs no water at this stage. Save your water for flowering and pod-fill, where it really pays. Only step in if the crop is badly stressed.
In most seasons, leave it alone — the deep root finds its own moisture, and light watering here just wastes water and pushes leaf over pods.
Water only if the plants stay wilted into the cool of the morning — a sign the drought is genuinely biting.
If you do water, give one good soak every 10–14 days, not frequent sips.
- Tip:
Watering out of habit at this stage — over-watered plants make leaf and stem, not pods, and you'll want that water later at flowering.
Flowering — protect the pods-to-be
Every flower is a pod waiting to form, so this is the make-or-break stretch. Two things decide it: water — flowering is one of pigeon pea's two thirstiest windows — and the pod-borer caterpillars that arrive with the flowers to eat them from the inside. Scout weekly, keep the soil moist, and spray only if the borers cross the threshold, starting at 50% flowering (when about half your plants carry open flowers).
Scout flowers (Helicoverpa, Maruca) Critical
The pod-borer caterpillars — Helicoverpa (the bollworm) and Maruca (the legume pod borer) — arrive with the flowers and eat the very buds and pods you are growing. Just one Helicoverpa larva per plant can cost around a tonne per hectare. Scouting weekly catches them at threshold, before they bore inside the pods where no spray can reach.
From the first flowers, walk the "W" once a week and check flowers, buds and any young pods on about ten plants per stop.
Bollworm (Helicoverpa): look for fat green or brown striped caterpillars chewing flowers and buds, and neat round holes bored into young pods with droppings around them.
Legume pod borer (Maruca): look for flowers and young pods webbed together with silk and droppings, with a caterpillar feeding hidden inside the web.
Count how many plants carry larvae or fresh damage. If borers are at or over the local threshold, spray at 50% flowering (next task).
Note what you see each visit, so you can tell whether it is building.
- Watch out:
Once a caterpillar is inside a pod, no spray reaches it — the whole game is to catch and hit them while they're still out on the flowers.
Pod-borer spray at 50% flowering Recommended
If scouting shows borers over threshold, a well-timed spray at 50% flowering saves the pods that make your yield. Hitting the caterpillars while they are still out on the flowers — before they bore into the pods — is the only time a spray really works. A gentle biopesticide first spares the bees and helpful insects that also visit the flowers.
Spray only if scouting is over threshold, and time it for 50% flowering — when about half the plants have opened flowers.
Reach for a biopesticide first — Bt, NPV or neem (soft, natural sprays that hit the caterpillars but spare bees). Keep a different chemical in reserve for any repeat, so the pest doesn't get used to one.
Measure the dose with the cap supplied and mix it into a full knapsack (15–20 litres). Spray to wet the flowers and pods without dripping.
Protect yourself: wear a long-sleeved shirt, cover your nose and mouth, and spray in the cool of the day with the wind behind you. Keep people and animals away, and keep spray off food.
Spray toward evening, once the bees have stopped visiting, to spare the pollinators working your flowers.
Wash yourself and the sprayer afterwards, and wait the number of days the label states before harvesting — this "pre-harvest interval" is the safe gap between the last spray and picking.
- Do:
Rotate to a different product for any repeat spray — using one chemical over and over lets the borers become immune to it.
- Tip:
Spraying in the heat of the day or into the wind — it drifts, wastes product, and poisons you and the bees.
- Watch out:
Respect the pre-harvest interval on the label — grain sprayed too close to picking is unsafe to eat or sell.
Irrigate through flowering Critical
Flowering is one of pigeon pea's two thirstiest windows. Dry soil now makes the plant drop its flowers and young pods, and flowers shed can never become grain — worth 10–30% of your yield. Even a drought-hardy crop needs water here.
Keep the soil moist right through flowering — this is where water pays best.
Water every 7–10 days, more often in heat or on sandy soil.
Don't let the crop wilt while it is in flower — dropped flowers are lost pods.
- Watch out:
If you can water at only one or two stages all season, make flowering and pod-fill the ones — that is where the grain is won or lost.
Podding and pod-fill — guard the grain
The flowers have set into pods, now filling with seed — the second thirsty window, and the last stretch where pests can rob what you've grown. Keep after the pod borer, and watch for two new raiders: the pod fly, whose maggots hide inside the seed where you can't see them, and pod-sucking bugs that shrivel the grain. Spray again at pod set only if scouting still crosses the threshold, and keep the soil moist so the pods fill full.
Scout pods (pod borer, pod fly, pod bugs) Critical
The grain is on the plant now and three pests are after it — the pod borer, the pod fly hidden inside the seed, and pod-sucking bugs. Some do their damage out of sight inside the pod, so weekly scouting — opening a few pods — is the only way to know if you must act before the harvest is quietly eaten.
From about two weeks after flowering started, walk the "W" once a week and check pods on about ten plants per stop.
Pod borer: look again for round holes bored into pods, striped caterpillars, and droppings around the holes.
Pod fly: the pods look fine outside, so open a few suspect pods — inside you'll find shrivelled, part-eaten seeds and a tiny white maggot or brown pupa, and later a small "window" or exit hole on the pod wall.
Pod-sucking bugs: look for green, brown or spiny bugs on the pods, and pods with sunken spots over shrivelled, dark-stained seeds.
If the pod borer is still over threshold, repeat the spray at pod set (next task).
- Watch out:
Judge the pod fly by opening pods, not by looking at them — the outside stays clean while the maggot eats the seed inside.
Repeat pod-borer spray at pod set Recommended
Pods keep coming after the first flush of flowers, so a fresh wave of borers can hit the young pods at pod set (when the flowers turn into pods). A second, well-timed spray — only if scouting is still over threshold — protects that later grain. As before, hit the caterpillars while they're still outside the pod.
Spray only if scouting is still over threshold, timed for pod set — about two weeks after the main flowering.
Rotate to a different product from your first spray — never the same chemical twice running, or the borers stop dying to it.
Measure the dose with the cap supplied and mix into a full knapsack (15–20 litres); spray to wet the pods without dripping.
Protect yourself: long sleeves, cover nose and mouth, spray in the cool with the wind behind you, people and animals away, off food; spray toward evening to spare the bees.
Wash afterwards and — this close to harvest — count the label's pre-harvest interval carefully so the grain is safe to eat and sell.
- Tip:
Repeating the same chemical you used at flowering — swap products so the pest can't shrug it off.
- Watch out:
With pods close to ready, the pre-harvest interval matters most now — don't spray if you'll pick before the safe gap is up.
Irrigate through pod-fill Recommended
The pods are filling with seed, and that seed weight is laid down now — pigeon pea's second thirsty window. Water through pod-fill keeps the pods plump and the grain heavy; let it dry out and the seeds stay small and shrivelled.
Keep the soil moist through pod-fill while the pods are swelling and the leaves are green.
Water every 7–10 days, easing off as the pods start to dry and turn colour.
Stop once most pods have turned brown and dry, so the crop can dry down in the field.
- Do:
Give the pods a steady drink while they fill — this and flowering are the two waterings that most decide your grain weight.
Harvest (and set up a ratoon)
Harvest when the crop tells you it's ready — most pods gone dry and brown, the seeds rattling hard inside. Short-duration types ripen all at once, so you cut the whole field in one go; medium and long types ripen over weeks, so you pick the dry pods a few times. This is also your bonus round: a medium or long-duration crop can be cut back and ratooned — coming again from the same roots for another year or two — so long as you pull out the wilted plants first. Keep the woody stems for firewood.
Harvest dry pods Critical
Harvest at the right moment and you keep every pod you grew; leave it too long and pods shatter, drop and are eaten. Pigeon pea shows its readiness clearly — dry brown pods and hard, rattling seed — so read the crop and get it in before rain and birds take their share.
Harvest when about three-quarters (75–80%) of the pods are dry and brown or straw-coloured, the seeds are hard and rattle in the pod, and the leaves are yellowing and dropping.
Short-duration types: the pods ripen together — cut or strip the whole crop in one go.
Medium/long types: the pods ripen over weeks — pick the dry, brown pods every week or two and leave the green ones to finish filling.
Cut whole plants or strip pods in the cool of the morning to cut down on shattering, then pile them to finish drying.
If most pods are still green and soft, wait — pigeon pea picked wet won't store. Only harvest early if birds or a coming storm force your hand.
- Do:
Pick the dry pods off medium/long bushes in rounds — waiting for the very last pod means the first ones shatter and drop.
- Watch out:
Get dry pods in before rain — wetting and re-drying stains the grain and invites mould.
Ratoon cut-back (medium/long types) Optional
A medium or long-duration crop doesn't have to die after one harvest. Cut it back and it sprouts again from the same roots for one or two more crops over 2–5 years — extra grain with no re-planting, no new seed, and a root system already deep. It is nearly free grain, as long as you start it from healthy plants.
Do this on medium/long-duration types only — short-duration plants are spent after their single harvest and won't ratoon well.
A week or two after harvest, cut the bushes back to about knee-to-hip height (0.5–1 m) with a sharp panga or secateurs.
First pull out and destroy any plant that wilted or looked diseased — a sick plant only comes back sicker and spreads it to the rest.
Give the stumps a light weeding, and if it's very dry a little water, to wake them up.
Save the woody cut stems for firewood.
- Do:
Ratoon only from a healthy, wilt-free stand — never nurse a diseased plant into a second season.
- Watch out:
After 2–3 ratoon cycles yields fall and pests build up — start fresh with new seed in a new field once it's clearly tiring.
Dry and store — beat the bruchid
The crop is grown, now don't let the store eat it. The big enemy is the bruchid — a little beetle whose grubs bore through stored peas and can wreck a whole drum in weeks. Two things stop it: dry the grain rock-hard (mould can't grow and beetles breed slower), and seal it airtight so the beetles suffocate. Thresh, winnow, dry hard, and store sealed in a clean, dry place away from last year's grain.
Thresh, winnow & sun-dry Critical
Grain stored even slightly damp grows mould and feeds storage beetles; drying it rock-hard is the difference between peas that keep a year and peas that spoil in the bag. Threshing and drying well now set up the airtight storage that follows.
Once the pods are dry, thresh by beating them in a sack, or on a clean mat or tarpaulin, to knock the seed out.
Winnow — pour the grain from a height in a light wind to blow away the pod trash, dust and broken bits where pests breed.
Sun-dry the grain hard on a mat, rack or tarpaulin — never on bare ground, which pushes damp back in and adds stones and dirt.
Tooth test: the grain is dry enough when a seed is so hard it won't dent under your tooth (about 10–12% moisture).
If a seed still dents, dry it more — sealing damp grain traps mould and ruins the whole lot.
- Tip:
Storing grain in ordinary bags — bruchid beetles bore straight through and destroy it; dry hard and seal airtight instead.
- Tip:
Drying on bare ground — it adds damp, grit and animal dirt to the grain.
Seal in hermetic storage Recommended
Once the grain is dry, sealing it airtight is what keeps the bruchid out — the beetles and their grubs suffocate with no air, and no chemicals are needed. Clean, hard-dry grain in a sealed drum or airtight bag stays whole to eat and sell right through to the next season.
Check the grain is hard with no dent under a tooth before you seal anything.
For extra safety, spread the dry grain in the hot sun for a few hours just before sealing — the heat kills any beetle eggs already in it.
Seal it in hermetic (airtight) bags — such as PICS triple-layer bags — or a clean, sealed drum. Press the air out and close it tight to suffocate the beetles.
Keep the store clean, dry, off the floor and away from last season's grain, which is where the beetles hide and cross over.
Check once a month for small round holes in the seed, fine powder, or live beetles — a sign the seal has failed; if so, re-dry and re-seal.
- Do:
Store in airtight PICS bags or a sealed drum — it beats the bruchid with no chemicals at all.
- Watch out:
One leak undoes it — a torn bag or a loose lid lets the beetles breathe and breed, so keep the seal whole.
- Tip:
Mixing this year's grain in with last year's — old grain carries the beetles straight into your new harvest.
Pests and diseases that attack pigeon pea
-
 Bollworm complex
 -
 Bruchids (bean and cowpea weevils)
 -
 Fusarium wilt
 -
 Legume pod borer
 -
 Pigeonpea sterility mosaic disease
 -
 Pod fly
 -
 Pod-sucking bugs
Where to sell pigeon pea
Markets that trade this crop — what each one sells it by, when supply peaks there, and the currency used.

Grow pigeon pea with a plan, not a guess
This guide is the general answer. Divisi works out yours — the week to plant pigeon pea on your soil and your rainfall, and each job dated for your field.


When to plant pigeon pea, country by country
- When to plant pigeon pea in Algeria
- When to plant pigeon pea in Angola
- When to plant pigeon pea in Benin
- When to plant pigeon pea in Botswana
- When to plant pigeon pea in Burkina Faso
- When to plant pigeon pea in Burundi
- When to plant pigeon pea in Cabo Verde
- When to plant pigeon pea in Cameroon
- When to plant pigeon pea in Comores
- When to plant pigeon pea in Congo
- When to plant pigeon pea in Côte d'Ivoire
- When to plant pigeon pea in Egypt
- When to plant pigeon pea in Eritrea
- When to plant pigeon pea in Eswatini
- When to plant pigeon pea in Ethiopia
- When to plant pigeon pea in Gabon
- When to plant pigeon pea in Gambia
- When to plant pigeon pea in Ghana
- When to plant pigeon pea in Guinea Ecuatorial
- When to plant pigeon pea in Guinea-Bissau
- When to plant pigeon pea in Guinée
- When to plant pigeon pea in Kenya
- When to plant pigeon pea in Liberia
- When to plant pigeon pea in Libya
- When to plant pigeon pea in Madagascar
- When to plant pigeon pea in Malawi
- When to plant pigeon pea in Mali
- When to plant pigeon pea in Mauritanie
- When to plant pigeon pea in Mauritius
- When to plant pigeon pea in Morocco
- When to plant pigeon pea in Moçambique
- When to plant pigeon pea in Namibia
- When to plant pigeon pea in Niger
- When to plant pigeon pea in Nigeria
- When to plant pigeon pea in Rwanda
- When to plant pigeon pea in République centrafricaine
- When to plant pigeon pea in République démocratique du Congo
- When to plant pigeon pea in Sao Tome and Principe
- When to plant pigeon pea in Seychelles
- When to plant pigeon pea in Sierra Leone
- When to plant pigeon pea in Somalia
- When to plant pigeon pea in South Africa
- When to plant pigeon pea in South Sudan
- When to plant pigeon pea in Sudan
- When to plant pigeon pea in Sénégal
- When to plant pigeon pea in Tchad
- When to plant pigeon pea in Togo
- When to plant pigeon pea in Tunisie
- When to plant pigeon pea in Uganda
- When to plant pigeon pea in United Republic of Tanzania
- When to plant pigeon pea in Zambia
- When to plant pigeon pea in Zimbabwe
Where pigeon pea scores best
Districts where Divisi's engine currently rates this crop highest, ranked by fit.
-
 Buganda
 -
 Shabunda
 -
 Kasulu
 -
 Samba Cajú
 -
 Kicukiro
 -
 Ntungamo
 -
 Mutsamudu
 -
 Uriri
Uriri -
 West Mahe
 -
 Mahanoro
 -
 Kasongo-Lunda
 -
 Mutimbuzi
Get Insights by email
A short digest of new Divisi articles. No email on quiet weeks.
Frequently asked questions
How do I grow pigeon pea?
How to grow pigeon pea: 90–300 days to maturity, 75 cm rows, 3–5 cm deep. Also called red gram, nandolo, pois d'Angole, waken-turawa, fiofio, guandu.
What is nandolo in English?
Nandolo is the Chichewa name for pigeon pea.
What is pois d'Angole in English?
Pois d'Angole (also pois cajan and ambrevade) is the French name for pigeon pea.
What is waken-turawa in English?
Waken-turawa is the Hausa name for pigeon pea.
What is fiofio in English?
Fiofio is the Igbo name for pigeon pea.
What is guandu in English?
Guandu (also feijão-guandu) is the Portuguese name for pigeon pea.
What is mbaazi in English?
Mbaazi is the Swahili name for pigeon pea.
What is otili in English?
Otili is the Yoruba name for pigeon pea.
How long does pigeon pea take to grow?
Pigeon pea takes about 90–300 days from sowing to maturity, though the exact length varies with variety, temperature and how the season runs.
What spacing should I use for pigeon pea?
Space pigeon pea rows about 75 cm apart, with roughly 30 cm between plants within the row.
How deep should pigeon pea be planted?
Sow pigeon pea at about 3–5 cm deep. Shallower risks drying out; deeper wastes seed energy before the shoot reaches light.
What pests and diseases attack pigeon pea?
The ones covered in this guide are Bollworm complex, Bruchids (bean and cowpea weevils), Fusarium wilt. Each has its own page explaining how to identify, check for and control it.