 Divisi
How to grow avocado
Persea americana · Lauraceae
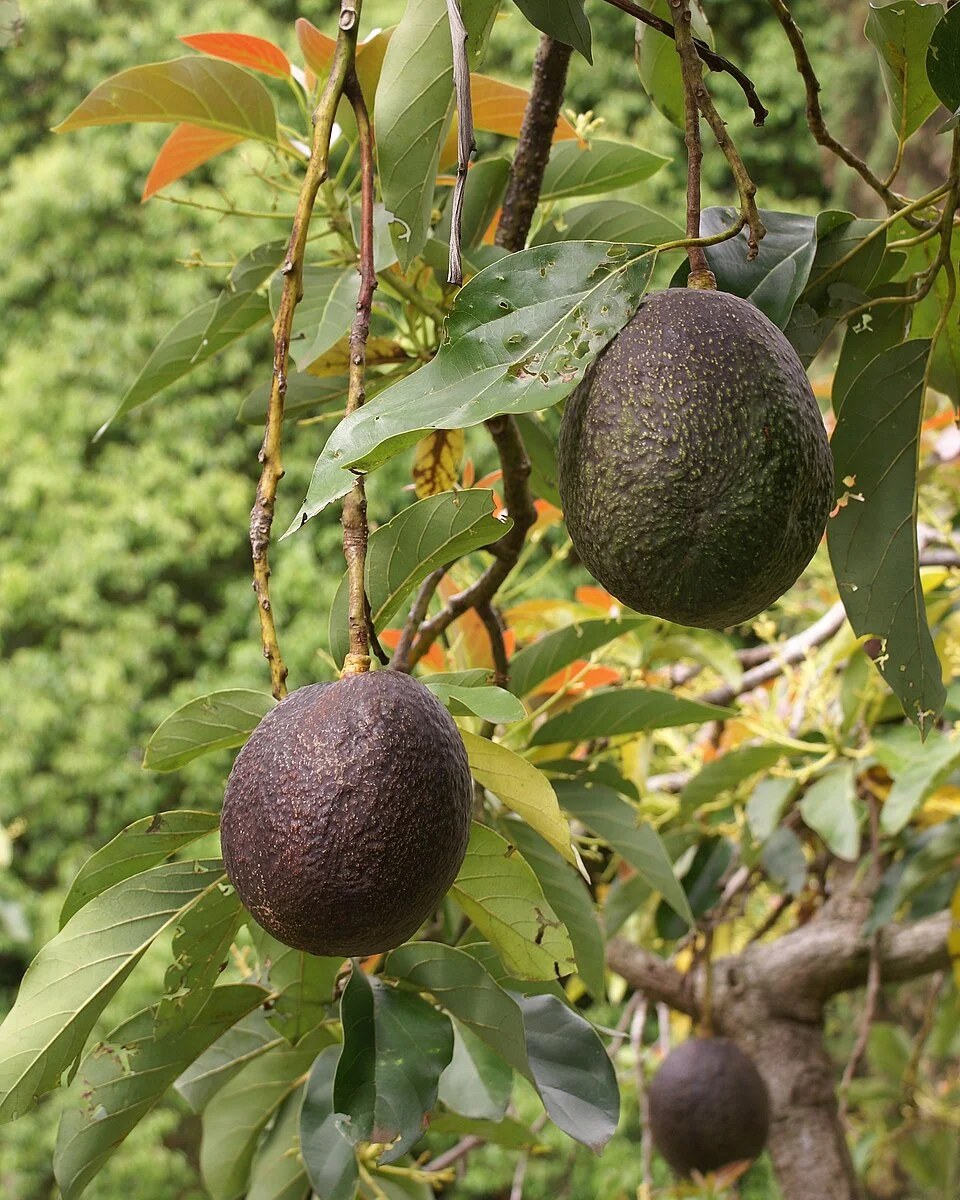
Photo: B.navez · CC BY-SA 3.0
Avocado (Persea americana) is a big evergreen tree that, once settled, can bear fruit for decades — one of the highest-value crops a smallholder can grow, for fresh eating and for export. It behaves nothing like an annual field crop, and three things set it apart. First, it lives or dies on drainage: its roots are shallow and must breathe, and in ground that stays wet a root-rotting water-mould kills it with no cure. Second, it needs a partner tree: each flower opens first as female (ready to catch pollen) for a few hours, then closes and reopens the next day as male (shedding pollen), so a lone tree sets poorly — you plant two flowering types, A and B, side by side and let bees carry pollen between them. Third, you buy grafted trees — a chosen fruiting variety joined onto tough roots — that bear in 2–4 years, and you match the type to your site: Mexican (hardiest), Guatemalan (Hass is one of these), or West Indian (best on hot, low, salty ground). After planting it is steady water, careful feeding (more potassium, zinc and boron than nitrogen), and patience through one of the longest fruit-growing periods of any tree — ending in fruit that ripens only after it is picked.
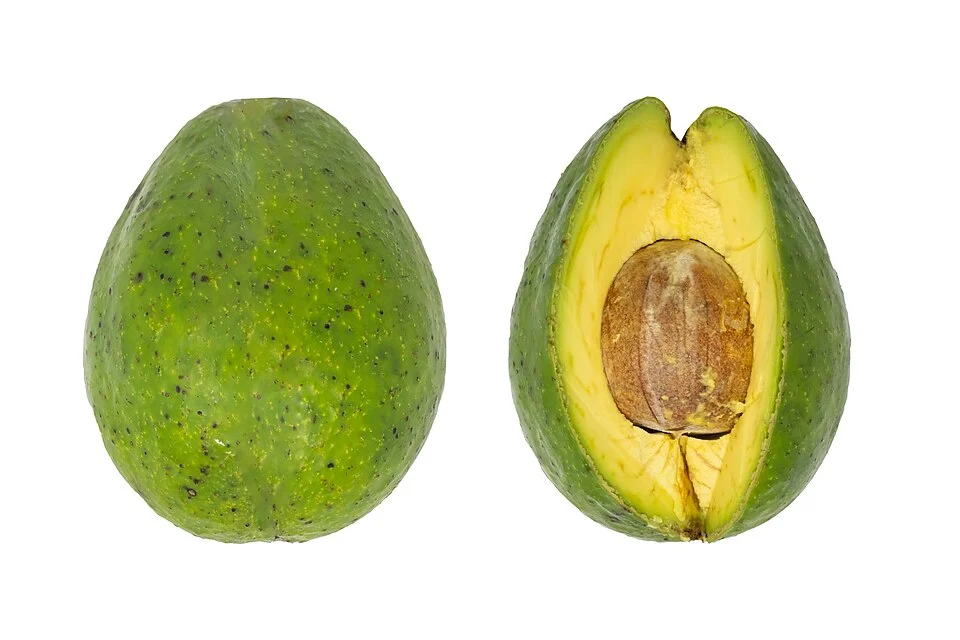
Wilfredor · CC0 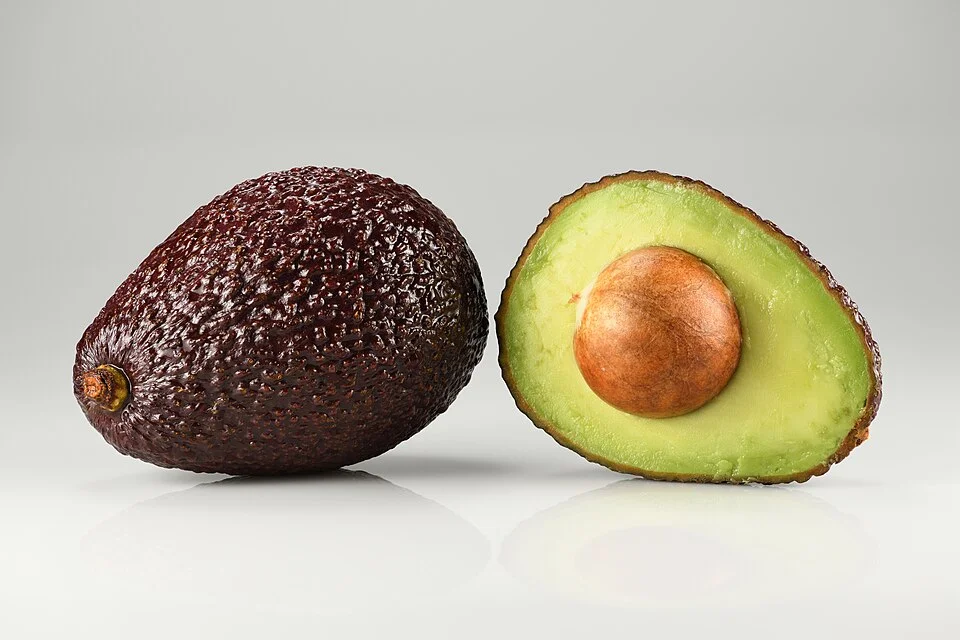
Ivar Leidus · CC BY-SA 4.0
- Row spacing
- 800 cm
- Plant spacing in the row
- 800 cm
These are general figures for the crop, compiled from published agronomic references including FAO and CABI. The right choice for your field depends on your soil, rainfall and the yield you are aiming for.
Will avocado actually do well on your field? Check your own field against every crop in the catalogue — no signup. Run the crop check →
Also known as
- Afrikaans
- avokado
- Amharic
- avocado
- French
- avocat
- Portuguese
- abacate
- Shona
- avhokado
- Swahili
- parachichi, avokado
- Zulu
- ukwatapheya
Working in buckets, bags or paces? The farming glossary turns the measures growers actually use into kilograms and hectares — what a 20 litre bucket of each crop really weighs, and how to size a field by walking it — alongside the Shona, Swahili, Ndebele and Yoruba words used in the field. Open the glossary →
Growing avocado, stage by stage
Your avocado orchard, season by season — from choosing well-drained ground and planting matched partner trees, through the patient years of building strong trees and holding back root rot, to a long fruiting cycle and a careful harvest of fruit that only ripens once you pick it.
Get the site right and plant partner trees
Nearly everything that keeps an avocado alive is decided before it goes in the ground: a well-drained spot (wet roots rot and the tree dies with no cure), two flowering types — A and B — planted together so they pollinate each other, healthy disease-tested young trees, and a thick blanket of mulch. Get these right and the tree can live and crop for decades; get drainage wrong and no amount of later care will save it.
Improve drainage / build mounds Critical
Avocado roots must breathe. In soil that stays wet, a water-mould called Phytophthora root rot (a soil germ that rots roots in wet ground) eats the fine feeder roots and slowly kills the tree — it is avocado's number-one killer, and there is no cure once it takes hold. Drainage is the single biggest thing you control, so build it in before you plant, in the 2–3 months before the rains, while you can still move soil.
Pick the best-drained spot you have — a slope or a rise where water runs off, never a hollow where it pools after rain, and not a heavy clay bottom.
Test the ground: after a heavy rain, watch where puddles sit for hours. Any spot that stays wet needs mounds and drains before a tree goes in.
On heavy or clay soils, plant on a mound or raised bed — about one stride wide (0.9–1.5 m) and knee-high (0.3–0.6 m). The mound lifts the shallow roots up out of the wet.
Dig shallow drains or channels to lead rainwater away from where the trees will stand, especially on flat or low ground.
Check the soil is not too sour: avocado likes a pH of about 6.0–6.5 (mildly sour). If it needs lime, spread it now — lime works slowly and must go on months ahead.
Mark your planting spots 8 strides apart (about 8 m) in every direction, so grown trees have room and air can move through — a crowded, still, damp orchard feeds root rot and leaf disease.
- Do:
Lay out the two flowering types mixed together — set a Type B tree as every third tree in every third row among your Type A trees (or the other way round), so every tree has a pollen partner close by.
- Tip:
Planting in a wet hollow or a clay bottom that holds water — the roots drown and rot, and the tree cannot be saved.
- Watch out:
After heavy rain, walk the whole block and mark every spot where water still stands — those spots need extra drainage or a taller mound before you plant.
Source clean indexed A + B stock Critical
Two incurable diseases can ride in on the young tree itself: Phytophthora root rot (the root-killing water-mould) and sunblotch — a tiny germ, smaller than a virus, that lives inside the tree, cannot be cured, and often hides in trees that look perfectly healthy. Buy tested, certified-clean grafted trees and you keep both out; buy cheap unchecked trees and you can plant a slow death into your orchard. Order early — up to 2 months before planting — because good nurseries sell out.
Buy grafted trees, not seedlings grown from a pip (a seed). A grafted tree is a chosen fruiting variety joined onto a tough root — it fruits in 2–4 years and comes true to type; a pip tree is a gamble and takes far longer to bear.
Buy from a reputable nursery selling certified, disease-tested stock — trees checked free of sunblotch and grown on clean roots. Ask to see the certificate.
Buy both flowering types — Type A and Type B. Each avocado flower is female for only a few hours, then reopens the next day as male, so one tree is almost never catching and shedding pollen at the same moment. A and B trees take turns, so together they pollinate each other and set far more, bigger fruit.
Match the type to your area: cooler, higher ground suits the hardier Mexican and Guatemalan trees (Hass is Guatemalan); hot, low or salty ground suits the West Indian trees. Ask the nursery or check your recommendation.
Look each tree over: a straight single stem, a clean graft join (the low bump where the variety was joined on) with no oozing, healthy green leaves, and no yellow streaks or narrow, twisted, strap-like leaves — those are a sunblotch warning. Reject any doubtful tree.
- Do:
Keep the receipt and the nursery's certificate — your proof the stock was clean if a tree later fails.
- Tip:
Taking free cuttings, budwood or trees from a neighbour's orchard — sunblotch spreads exactly this way, and a healthy-looking tree can still be a hidden carrier.
Plant grafted A + B + mulch heavily Critical
The young tree gets one start. Plant it at the start of the rains so it settles in with steady moisture, keep the graft join above the soil, and cover the shallow roots with a thick blanket of mulch — mulch keeps the soil moist and cool, feeds the surface roots, and grows the good soil life that fights root rot. Your recommendation gives the exact spacing and any planting fertiliser for your soil.
Plant in the first two weeks of the rains, into a moist, well-drained mound or spot, at your 8-stride (≈8 m) spacing.
Dig a hole a little wider than the bag the tree came in, but no deeper — the tree must sit at the same depth it grew in the bag, never lower.
Slip the tree out of the bag without breaking the root ball, set it in, and firm the soil gently. Keep the graft join (the low bump on the stem) a good hand-span (≈20 cm) clear above the soil — if it is buried, rot and trouble follow.
Water it in well to settle the soil around the roots and close any air pockets.
Spread a thick hand-span (≈20 cm) layer of coarse mulch — straw, dry leaves, wood chips, prunings — in a wide ring out to the edge of the branches, but leave a bare gap of a hand-span (≈20 cm) around the trunk so the stem stays dry and does not rot.
- Do:
Stake the young tree in a windy spot, tying it loosely so it can still sway a little.
- Tip:
Piling mulch or soil against the trunk — a wet collar rots the stem. Always leave the hand-span trunk gap.
- Watch out:
Do not plant too deep or bury the graft join — it is the commonest planting mistake, and it sets the tree back for good.
Bring the young trees through the first years
For the first 2–3 years the tree builds its frame — trunk, branches, and the shallow roots it will feed on for decades. Your work now is steady (never soggy) water, shielding the thin young bark from sun and frost, keeping fruit off so all the strength goes into growth, and catching root rot the moment it starts. A strong frame now means heavy crops later.
Careful deep, infrequent irrigation Critical
Young avocado roots are shallow — most sit in the top half-metre (about knee-deep) of soil — and they need water and air. So water deeply but not too often: one big soak that wets the whole root zone, then let the top dry before the next. Constant light watering (or waterlogging) drives the air out and invites root rot. Keep this rhythm every 7–14 days through the first 2–3 years.
When you water, soak deeply — enough to wet the whole shallow root zone (the top half-metre or so), out to the edge of the branches where the feeder roots reach.
Then wait. Let the top of the soil dry before you water again — push a finger in near the branch edge and water only when the top 3–5 cm (a finger-joint or two) are dry.
Water about every 7–14 days — more often in heat and on sandy soil, less in cool or cloudy spells.
Never let water stand around the tree. If it ponds, spread the water wider or fix the drainage — soggy roots rot.
- Do:
Pinch off the early flowers for the first 2–3 years. A young tree that sets fruit too soon starves its own frame — take the blooms off so its strength builds trunk and branches for bigger crops later.
- Tip:
Frequent little sprinklings that only wet the surface — they keep the trunk zone damp and leave the deeper roots thirsty.
- Watch out:
A young tree wilting in wet soil is a root-rot warning, not thirst — check the drainage before you add more water.
Whitewash / shade young trunks Recommended
A young avocado has thin, tender bark. Under strong sun the bare trunk and main branches can scald — the bark heats, cracks and dies on the sunny side, letting in rots and borers. A coat of white bounces the sun off and prevents it. It costs almost nothing and can save the young tree.
In the first two weeks after planting, paint the trunk and the exposed main branches white, from the ground up into the lower canopy.
Use a lime wash (slaked lime stirred into water) or a white water-based (PVA) paint thinned with water — never oil paint, which suffocates the bark.
Coat the side that faces the midday and afternoon sun most heavily, where scald bites hardest.
Re-coat whenever the white wears thin or fades, and after any pruning that opens up bark which used to be shaded.
- Do:
Whitewash again each year while the bark is still young and thin, and any time pruning bares shaded bark to the sun.
- Watch out:
On cold sites, guard young trees against frost too — avocado is killed at about -2°C. Cover small trees on frosty nights and bank mulch around the base.
Scout (Phytophthora, sunburn, frost) Critical
In these first years the tree cannot shout when something is wrong — you have to look. Root rot, sunburn and frost each kill young trees quietly, and each is beatable only if you catch it early. A slow walk once a month is the cheapest insurance in the orchard.
Walk every tree once a month through the first 2–3 years, checking the canopy, the trunk, and the soil around each tree.
Root rot (Phytophthora): look for the canopy thinning out, small pale, yellow-green, wilting leaves, and branch tips dying back — worst on wet, low ground. Scratch the soil at the branch edge: healthy feeder roots are white; rotten ones are black and brittle.
Sunburn: look for pale, scalded, cracked bark on the sun-facing side of the trunk or branches — re-whitewash straight away.
Frost: after a cold night, look for blackened, wilted young leaves and soft, drooping shoot tips — a sign to protect the tree on the next cold nights.
Write down which tree showed what, and act early — a problem caught on one tree is far cheaper than one spread across the whole block.
- Do:
Fix the drainage and start root protection the moment the first tree shows unexplained thinning on wet ground — waiting lets it spread tree to tree.
- Watch out:
Small pale leaves plus wet soil almost always means the roots, not hunger — don't just throw on fertiliser and hope.
Build the canopy and keep root rot out
The tree now grows its leafy canopy in flushes — bursts of new leaves every month or two, a few times a year — the leaf factory that will feed every future crop. Keep it on a balanced diet (but not too much nitrogen, which grows soft leaf instead of fruit) topped up with zinc and boron, keep the root-rot programme going (drainage + root-protectant + mulch), and keep your tools clean so you never carry sunblotch from tree to tree.
Feed (balanced, not excess N) + zinc/boron Recommended
Avocado is only a medium feeder, but it often runs short of zinc and boron — two nutrients it needs in tiny amounts. Too little zinc gives small, mottled leaves (called little-leaf); too little boron gives poor flowering and misshapen fruit. Feed a balanced ration with zinc and boron added every 2–3 months, and go easy on nitrogen — too much nitrogen grows leaf, not fruit. Your recommendation gives the amounts.
Feed roughly every 2–3 months through the growing season, splitting the year's ration into several small feeds rather than one big dump.
Use a balanced fertiliser (not a high-nitrogen one), and add zinc and boron — often as a leaf spray (sprayed onto the leaves), which is how the tree takes these two up best.
Spread granular fertiliser in a ring under the canopy out to the branch tips, where the feeder roots are — not against the trunk — and water it in.
Keep fertiliser off the trunk and off wet leaves, and away from food, water and children; wash your hands afterwards.
- Do:
Read the leaves — small, narrow, yellow-mottled new leaves point to a zinc shortage; correct it with a leaf spray.
- Tip:
Piling on nitrogen to push the tree — it makes lush leaf, delays and drops fruit, and can worsen root problems.
- Watch out:
Spread feed under the whole canopy, never in one heap at the stem — a heap burns the roots it touches and misses most of them.
Phosphonate programme + drainage upkeep Recommended
Root rot is a lifelong threat, so holding it back is a routine, not a one-off. A root-protectant — phosphonate (phosphorous acid), sold as a trunk injection or a leaf spray — keeps the fine roots defended, but it only works if you keep the drainage and mulch right alongside it. Run it 3–4 times a year, through every tree, healthy or not.
Apply the root-protectant (phosphonate) about every 3–4 months, following the product label for the rate and method (trunk injection or leaf spray).
Time leaf sprays to a new flush — when the fresh leaves have hardened off — because the tree carries the protectant down to the roots best then.
Each round, walk the drains and mulch: clear blocked channels, re-shape mounds, and top up mulch. The protectant fails if the roots are sitting in water.
Spray safely: cover your skin, eyes and nose, spray in the cool of the day with the wind at your back, keep it off food, and wash yourself and the equipment afterwards. Respect the pre-harvest interval — the wait between spraying and picking printed on the label.
- Do:
Keep protecting every tree, even healthy-looking ones — by the time the canopy shows decline, the roots are already badly hit.
- Tip:
Leaning on the spray alone — without good drainage and mulch, no product will hold back root rot.
Scout (Phytophthora, scales, mites) Recommended
While the canopy builds, three quiet problems creep in: root rot thinning the tree from the roots up, and scale insects and mites sucking the new leaves. Caught early they are easily managed; left alone they steal the very growth this stage is meant to build. Walk the trees once a month.
Walk the trees once a month, checking the canopy, the new flush of leaves, and the soil at the branch edge.
Root rot (Phytophthora): as before — thinning canopy, small pale leaves, dieback, worst on wet ground; black, brittle feeder roots when you scratch the soil.
Scale insects: look for tiny limpet-like bumps stuck along the stems and leaf veins, often with sticky honeydew (their sugary droppings) and a black sooty mould growing on it, and ants running up the trunk.
Mites: look for fine pale speckling or bronzing on the leaves, and sometimes very fine webbing — worst in hot, dusty, dry spells.
Sunblotch check: glance over the new flush and the bark for yellow, cream or pink streaks, narrow, strap-like, twisted leaves, or rectangular cracking of the bark. Mark any suspect tree, and if it is confirmed, pull it out and destroy it — there is no cure.
- Do:
Disinfect your knife and secateurs (dip them in a bleach solution) between every tree when pruning or taking budwood — dirty tools carry sunblotch from tree to tree.
- Watch out:
A little scale or mite feeds natural enemies and rarely needs spraying — act only if it builds up and the new leaves start to suffer.
Flowering — get a good fruit set
This is why you planted two types. Over a long, overlapping bloom (2–3 months) the A and B trees pollinate each other, and bees carry the pollen across. This window decides how much fruit you set — so keep bees busy, boron topped up, and buffer the flowers against heat, dry wind and cold, which all make them drop.
Ensure bees / hives at bloom Critical
Avocado cannot pollinate itself in still air — it needs bees to carry pollen from a Type A tree to a Type B tree and back. No bees means no fruit, however heavily the trees flower. So make sure bees are working your bloom from 2 weeks before the flowers open through the first month of bloom.
As the flower buds swell (about 2 weeks before bloom), check whether wild bees are already visiting. If few are about, bring in hives and set them among the trees.
Place hives near the block, in the sun and out of the wind, so the bees start early each day and work the flowers hard.
Give bees clean water nearby and keep flowering weeds on the orchard floor cut low, so the bees stay on the avocado bloom rather than on weeds.
Do not spray any insecticide on open flowers — it kills the bees you depend on. If something must be sprayed, do it before bloom or after the petals fall, in the cool of evening when bees are not flying.
- Do:
Aim for plenty of bee traffic — through the warm part of the day you should see bees moving steadily over the flowers.
- Tip:
Spraying insecticide during bloom — it wipes out the pollinators and you lose the very crop you were trying to protect.
Boron adequate for fruit set Recommended
Boron is the nutrient that helps pollen grow and the flower hold its fruit. A leaf spray of boron in the month before the flowers open props up a weak set and helps keep the tiny fruitlets on. It is a small input at exactly the right moment. Your recommendation gives the rate.
Spray boron onto the leaves (a foliar spray, meaning onto the foliage) in the month before the flowers open, while the buds are still forming.
Follow the label rate exactly: boron helps in a tiny dose but harms the tree if overdone, so never guess or double up.
Spray in the cool of the day, wetting the leaves evenly.
Spray safely: cover skin, eyes and nose, keep it off food, keep children and animals away, and wash your hands afterwards.
- Tip:
Overdosing boron — a little too much is toxic to the tree. Measure to the label and don't repeat it more often than told.
- Watch out:
Finish the boron before the flowers open and the bees arrive, so you are never spraying onto open bloom.
Scout (heat stress, thrips) Recommended
During bloom two things rob your set: heat and dry wind, which shrivel the flowers and the pin-head fruitlets, and thrips, tiny insects that scar the young fruit skin — a big loss for fruit you hope to sell fresh or export. Check the bloom every week or so so you can water against heat and act on thrips before they scar the crop.
Walk the flowering trees about once a week through the 2–3 months of bloom.
Heat stress: in hot, dry, windy spells look for flowers and pin-head fruitlets shrivelling and dropping. Keep the soil moist and, where you can, shelter the trees from wind — steady water carries them through the heat.
Thrips: look for tiny slender insects, under 2 mm long, in the flowers and on the youngest leaves — tap a flower over a dark cloth and watch for specks that crawl. On set fruitlets they leave silvery streaks and rough brown scarring on the skin.
Write down what you see. If thrips are building in the flowers or scarring young fruit, open the thrips guide — but remember, do not spray insecticide on open bloom (it kills bees); use bee-safe options and timing.
- Watch out:
Heat or dry wind at bloom threatens your set more than most pests — if you can water at only one time, protect the flowers now.
- Do:
Choose any thrips treatment and timing that spares bees, since you need the pollinators through the whole bloom.
Carry the fruit through a long development
Avocado fruit takes a very long time to grow — about 6 to 15 months (Hass 8–12), one of the longest of any fruit tree. Through all those months the fruit needs even soil moisture (wet–dry swings make it drop and split) and plenty of potassium to fill out, while thrips, false codling moth and fruit fly all go after the fruit you are trying to bring to market.
Even irrigation through development Critical
For the many months the fruit hangs on the tree, steady, even soil moisture is what keeps it growing and holding. Let the soil swing wet then dry and the tree drops fruit and the fruit splits — losses you cannot get back. Keep the moisture even from flowering right through development, watering every 7–14 days. This is one of avocado's two thirstiest stages.
Keep the soil evenly moist across the whole long fruit-growing period — no long dry spells, no sudden floods.
Water every 7–14 days, adjusting for the weather and soil: more often in hot, dry, windy weather and on sandy soil.
Soak deeply each time to wet the whole root zone out to the branch tips, then let the top just begin to dry before the next watering — never leave the roots standing in water.
After a dry spell, do not suddenly flood a thirsty tree — ease the water back on, or the fast swing splits the fruit.
- Watch out:
Wet–dry swings cause fruit drop and splitting — evenness matters more than the total amount. A steady rhythm beats big, irregular soakings.
- Tip:
Letting the trees dry right out and then drowning them — that single swing can crack a whole season's fruit.
K-focused feed through fill Recommended
Filling all that fruit takes a lot of potassium (K) — the nutrient avocado draws on most for fruit size and quality. From about a month after bloom, through the fill, lean the feeding toward potassium (while keeping nitrogen modest) so the fruit sizes up well. Your recommendation gives the amounts.
Start the potassium-focused feeding about a month after bloom, once the fruit has set, and keep it going through the fill (roughly every 2–3 months).
Use a potassium-rich fertiliser, split into several small feeds rather than one heavy load, so it is not washed away and the tree gets a steady supply.
Spread it in a ring under the canopy out to the branch tips, not against the trunk, and water it in.
Keep fertiliser off wet leaves, away from food, water and children, and wash your hands afterwards.
- Do:
Split the potassium into several feeds across the fill — a steady supply sizes fruit better than one big dose.
- Tip:
Loading on nitrogen now — late nitrogen grows leaf and can delay and soften the fruit instead of filling it.
Scout (thrips, false codling moth, fruit fly) Recommended
Now the pests go for the fruit itself. Thrips scar the skin, and two inside feeders — false codling moth and fruit fly — bore or sting into the fruit, rotting it from within and dropping it early. For fruit you mean to sell fresh or export, these decide how much you can market. Check every 2–4 weeks (weekly for export), and clean up every dropped fruit.
Walk the trees every 2–4 weeks (weekly if you are growing for export), checking fruit on the tree and any fruit on the ground.
Thrips: look for silvery streaks and rough brown scarring on the fruit skin — cosmetic damage that downgrades fresh and export fruit.
False codling moth: look for a small entry hole ringed with sawdust-like droppings, and a single fruit colouring early and dropping; cut a suspect fruit open and you will find a pinkish caterpillar and tunnelling inside.
Fruit fly: look for tiny sting punctures that ooze sap and darken, soft rotting patches, and fruit dropping early; cut it open and there are small maggots inside.
Sanitation is your main weapon: collect and destroy every fallen and stung fruit (bury it deep or seal it in a bag in the sun) at least weekly — this breaks the pests' breeding cycle. Hang scent traps (pheromone or food-bait traps that lure and catch the moths and flies) to know when numbers rise, then open the matching pest guide to act.
- Do:
Keep the orchard floor clear of dropped and over-ripe fruit — it is the nursery the moth and fly breed in.
- Watch out:
If you spray near harvest for flies, respect the pre-harvest interval — the days you must wait between spraying and picking, written on the label — so the fruit is safe to sell.
Harvest mature fruit
Avocado is unusual: it does not soften or ripen on the tree — it ripens only after you pick it. So you cannot wait for it to go soft to know it is ready. You judge it mature by full size, the skin just starting to change, and a simple test-ripen — then pick by hand over several passes. The fruit holds on the tree for weeks, so there is no rush to strip it all at once.
Harvest at dry-matter maturity Critical
Pick too early and the fruit shrivels, turns rubbery and never ripens — worthless. Pick it mature and it ripens smoothly into buttery fruit that sells. Because avocado ripens only after picking, you judge maturity by size, skin and a test-ripen, not by softness on the tree. Export buyers measure dry matter — how much oil and solid the flesh holds versus water — usually about 20–24%, depending on the variety.
Wait until the fruit is at full size and the skin is just starting to change — losing its bright gloss, and (on dark varieties like Hass) beginning to turn from green toward a darker shade.
Test-ripen a few sample fruit: pick 3–4 fruit, leave them at room temperature, and watch for 4–10 days. Mature fruit softens smoothly and evenly into good eating; immature fruit shrivels, stays rubbery, or never softens.
Once the samples ripen well, start picking. Cut each fruit off with clippers (never pull it), leaving a short stalk button on the fruit, and lower it gently — never drop it.
Pick in several passes, every 2–3 weeks, taking the biggest, most-mature fruit each time. The rest can safely hang and keep sizing — avocado holds on the tree for weeks.
Handle every fruit like an egg: each knock becomes a bruise that shows only once the fruit ripens, and cuts its value.
If your sample fruit shrivels, stays rock-hard, or turns rubbery instead of softening smoothly → it is not mature yet. Leave the crop on the tree (it holds for weeks) and test another few fruit in 2–3 weeks.
- Tip:
Picking immature fruit to catch an early price — it shrivels, turns rubbery and never ripens, so the fruit is simply wasted.
- Do:
Pick in the cool of the morning and keep picked fruit out of the sun, so it does not heat up before grading.
Grade and cool straight away
Now the fruit ripens off the tree over about 4–10 days — faster in heat, slower in cool. So the day you pick, grade out the damaged fruit and get the good fruit cool to slow the ripening and reach the market in good shape. Correctly-mature fruit ripens evenly; immature or bruised fruit lets you down here.
Grade + cool at once Recommended
Once picked, the clock is running — the fruit ripens over 4–10 days, sooner if it is warm. Grading and cooling the fruit the same day slows ripening, keeps it firm for the journey, and gets more of your crop to market saleable. Warm fruit left in a heap ripens fast and unevenly and can be lost.
The same day you pick, sort the fruit: set aside anything bruised, cut, stung, scarred or undersized for eating or local sale, and keep the clean, sound fruit for market or export.
Handle gently at every step — avocado bruises easily, and the bruise only shows once the fruit ripens.
Cool the fruit quickly — move it into shade and the coolest store you have, out of the sun and heat.
For export or distant markets, keep the fruit cool right through transport — steady cool from orchard to buyer (the cold chain) is what carries it through a long journey.
- Do:
Use the cold chain for export — the long trip needs the fruit kept cool the whole way, plus gentle handling to avoid bruises.
- Tip:
Leaving picked fruit sitting in the sun or in warm heaps — it ripens too fast and unevenly, and you lose it.
Pests and diseases that attack avocado
-
 Algal leaf spot
 -
 Armillaria root rot
 -
 Avocado sunblotch viroid
 -
 False codling moth
 -
 Fruit flies
 -
 Phytophthora root rot
 -
 Stem-end rot
Where to sell avocado
Markets that trade this crop — what each one sells it by, when supply peaks there, and the currency used.
-
 Joburg Market
-
 Atkilt Tera
-
 Kimironko Market
-
 Nakasero Market
-
 Mbeya Market
-
 Mercado Alemanha
-
 Hawassa Market
-
 Jimma Market
Grow avocado with a plan, not a guess
This guide is the general answer. Divisi works out yours — the week to plant avocado on your soil and your rainfall, and each job dated for your field.


When to plant avocado, country by country
- When to plant avocado in Algeria
- When to plant avocado in Angola
- When to plant avocado in Botswana
- When to plant avocado in Burundi
- When to plant avocado in Cabo Verde
- When to plant avocado in Cameroon
- When to plant avocado in Comores
- When to plant avocado in Congo
- When to plant avocado in Côte d'Ivoire
- When to plant avocado in Egypt
- When to plant avocado in Eritrea
- When to plant avocado in Eswatini
- When to plant avocado in Ethiopia
- When to plant avocado in Gabon
- When to plant avocado in Guinea Ecuatorial
- When to plant avocado in Guinée
- When to plant avocado in Kenya
- When to plant avocado in Libya
- When to plant avocado in Madagascar
- When to plant avocado in Malawi
- When to plant avocado in Mauritius
- When to plant avocado in Morocco
- When to plant avocado in Moçambique
- When to plant avocado in Namibia
- When to plant avocado in Nigeria
- When to plant avocado in Rwanda
- When to plant avocado in République centrafricaine
- When to plant avocado in République démocratique du Congo
- When to plant avocado in Sao Tome and Principe
- When to plant avocado in Somalia
- When to plant avocado in South Africa
- When to plant avocado in South Sudan
- When to plant avocado in Sudan
- When to plant avocado in Togo
- When to plant avocado in Tunisie
- When to plant avocado in Uganda
- When to plant avocado in United Republic of Tanzania
- When to plant avocado in Zambia
- When to plant avocado in Zimbabwe
Where avocado scores best
Districts where Divisi's engine currently rates this crop highest, ranked by fit.
-
 Cassongue
 -
 Nandi Hills
 -
 Matana
 -
 Geita
Geita -
 Walikale
 -
 Mitooma
 -
 Kicukiro
 -
 Kefa
Kefa -
 O.R.Tambo
 -
 Andapa
 -
 Mbadjini Ouest
 -
 San Antonio de Palé
Get Insights by email
A short digest of new Divisi articles. No email on quiet weeks.
Frequently asked questions
How do I grow avocado?
How to grow avocado: 800 cm rows. Also called avokado, avocat, abacate, avhokado, parachichi, ukwatapheya.
What is avokado in English?
Avokado is the Afrikaans name for avocado.
What is avocado in English?
Avocado is the Amharic name for avocado.
What is avocat in English?
Avocat is the French name for avocado.
What is abacate in English?
Abacate is the Portuguese name for avocado.
What is avhokado in English?
Avhokado is the Shona name for avocado.
What is parachichi in English?
Parachichi (also avokado) is the Swahili name for avocado.
What is ukwatapheya in English?
Ukwatapheya is the Zulu name for avocado.
What spacing should I use for avocado?
Space avocado rows about 800 cm apart, with roughly 800 cm between plants within the row.
What pests and diseases attack avocado?
The ones covered in this guide are Algal leaf spot, Armillaria root rot, Avocado sunblotch viroid. Each has its own page explaining how to identify, check for and control it.