 Divisi
How to grow okra
Abelmoschus esculentus · Malvaceae
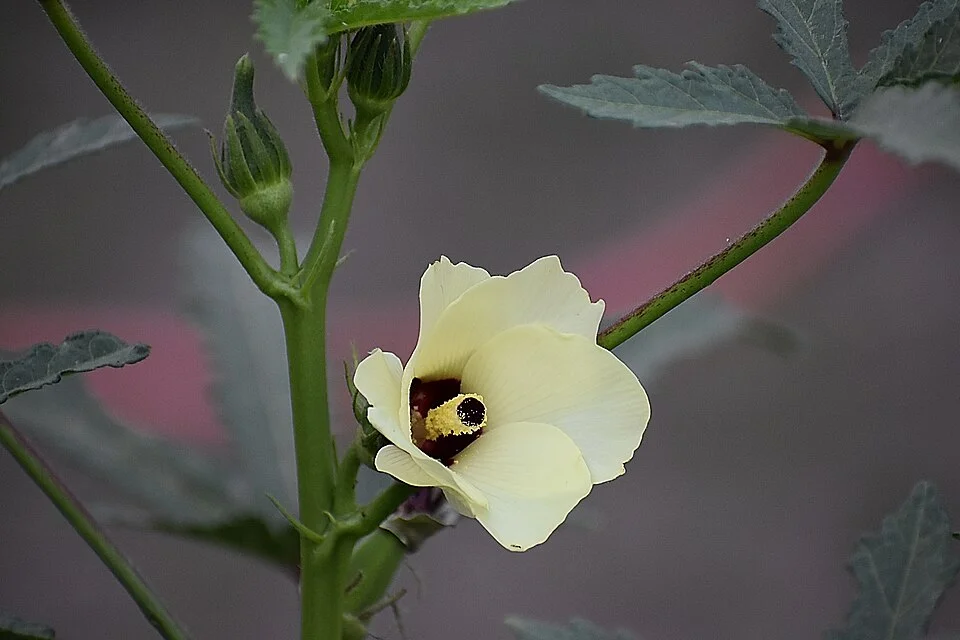
Photo: ADARSHluck · CC BY-SA 4.0
Okra (derere, idelele, lady's finger, gumbo) is a tall, hairy, hot-weather vegetable grown for its tender green pods — the slippery, 'drawing' relish that thickens the pot. It loves heat and forgives poorer soil than most vegetables, but it will not stand cold or wet feet. You sow it straight where it will grow — the taproot hates being moved, so there is no nursery and no second chance at the stand. The seed is hard and slow, sprouting only in warm soil, but once okra starts it pods for months if you keep picking. Okra is really won or lost on three things: weeding early while the plants are small, keeping whitefly and the yellow-vein virus off it, and picking the pods young every 2–3 days. Mind the fine hairs on the pods and the whole plant — they itch, so pick with gloves and long sleeves.
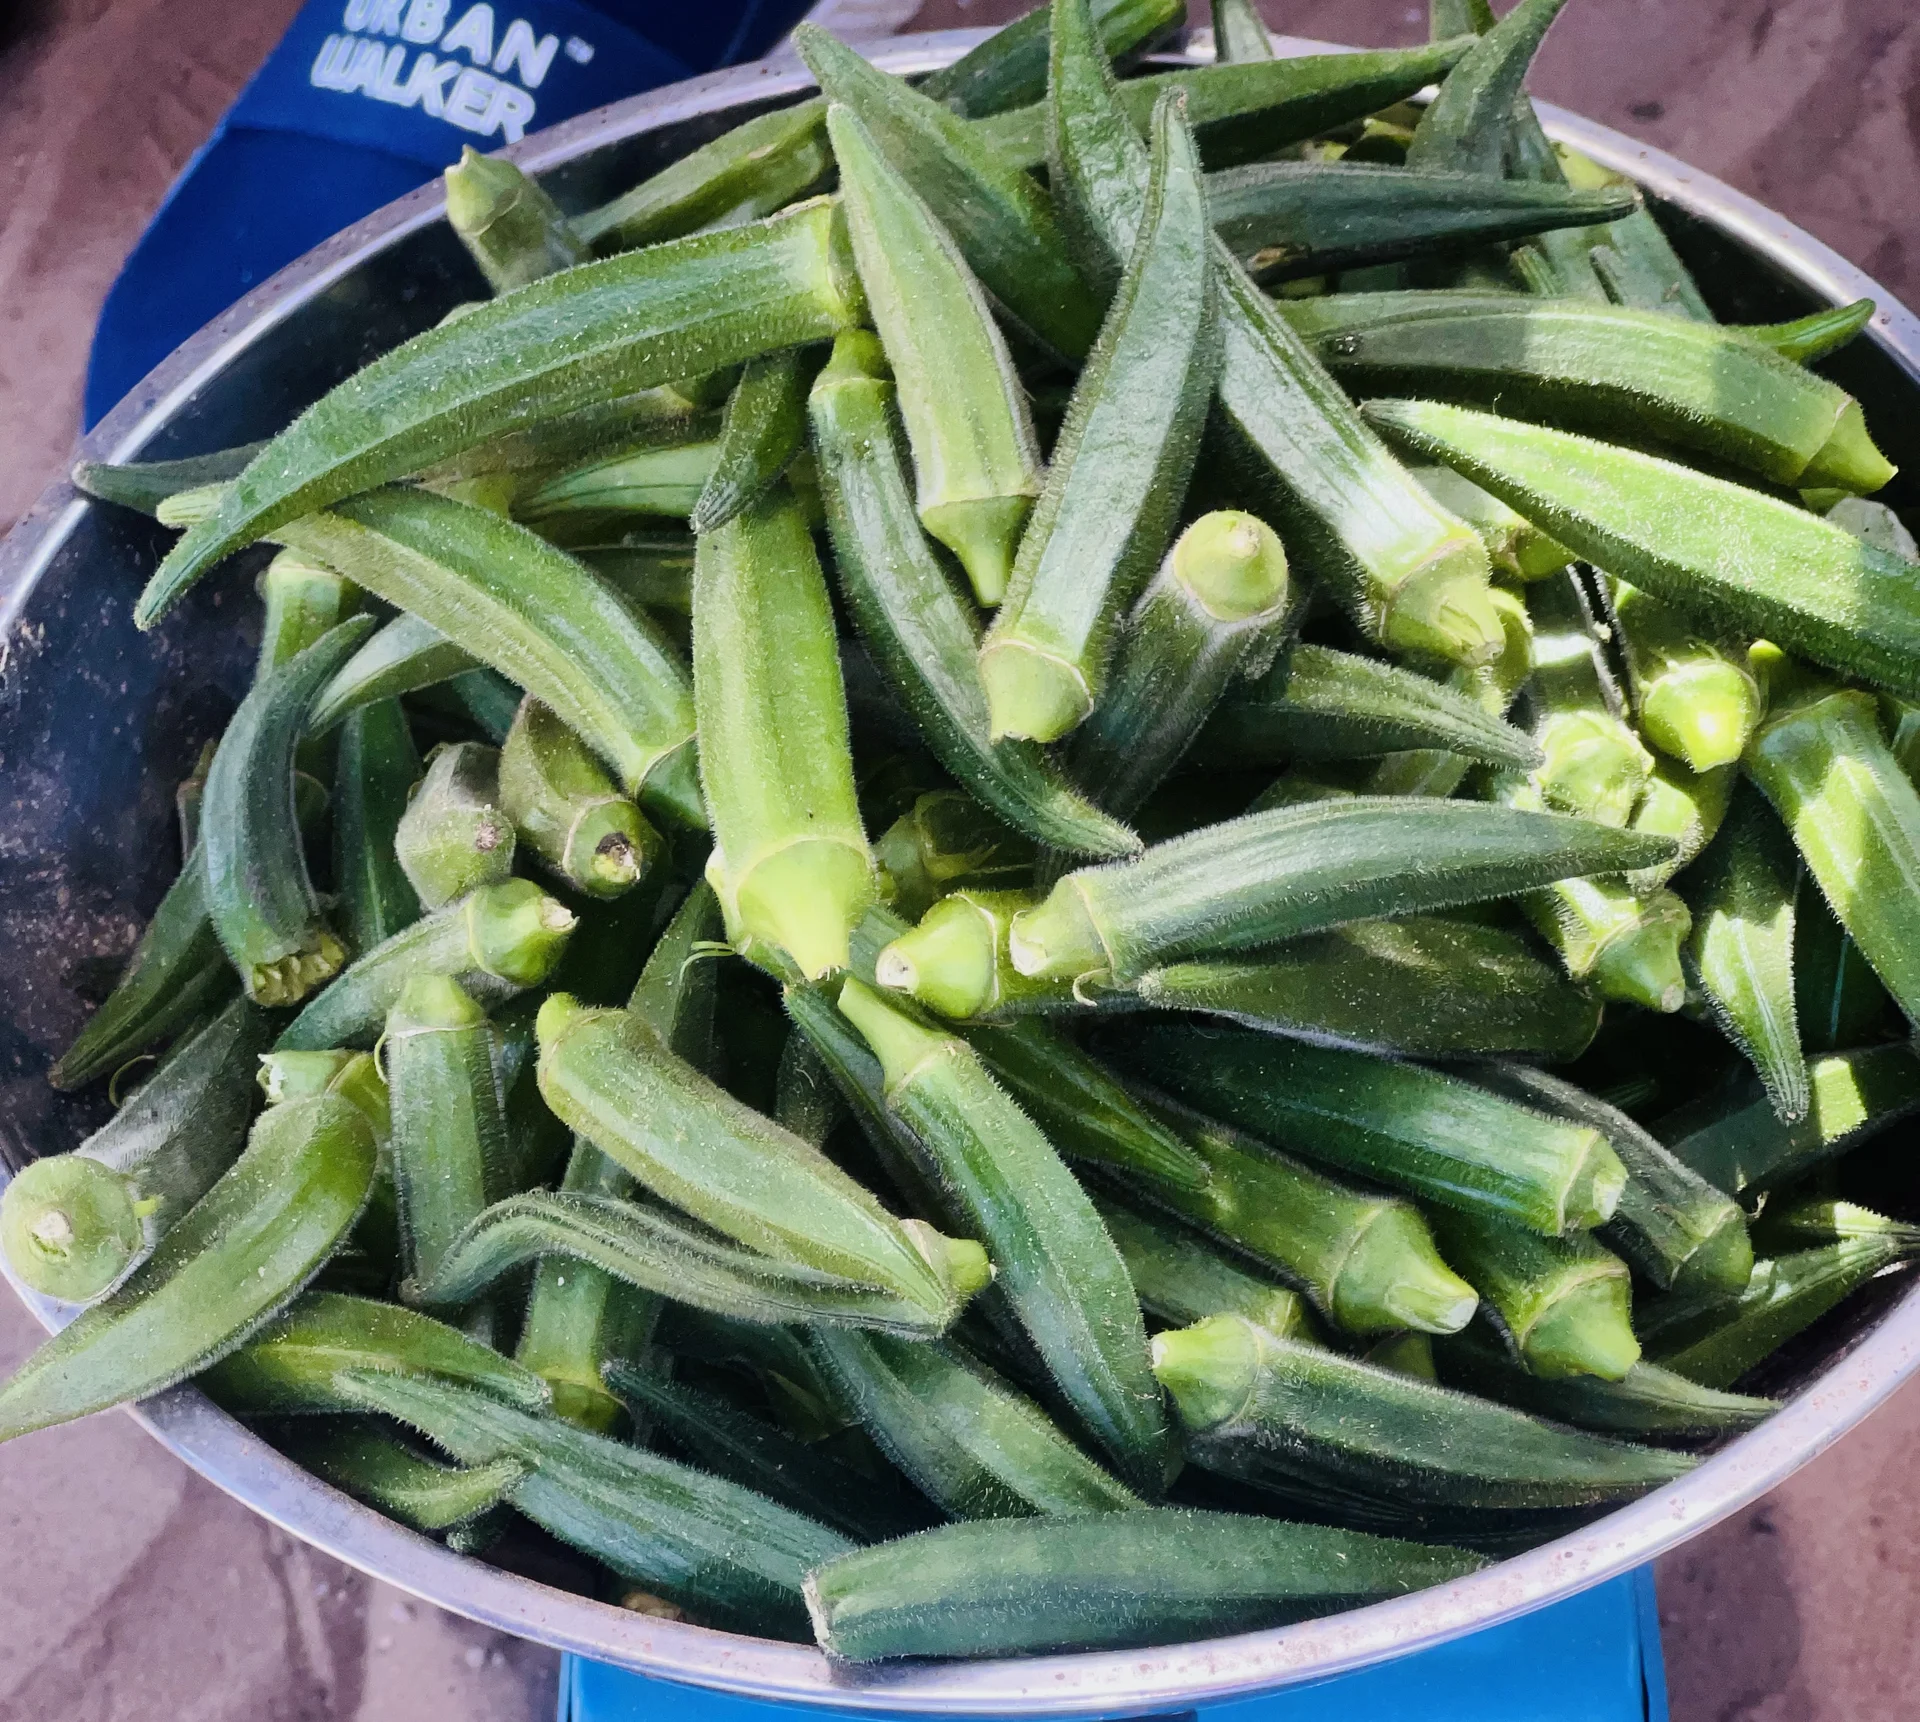
Cheikh cherif · CC BY-SA 4.0 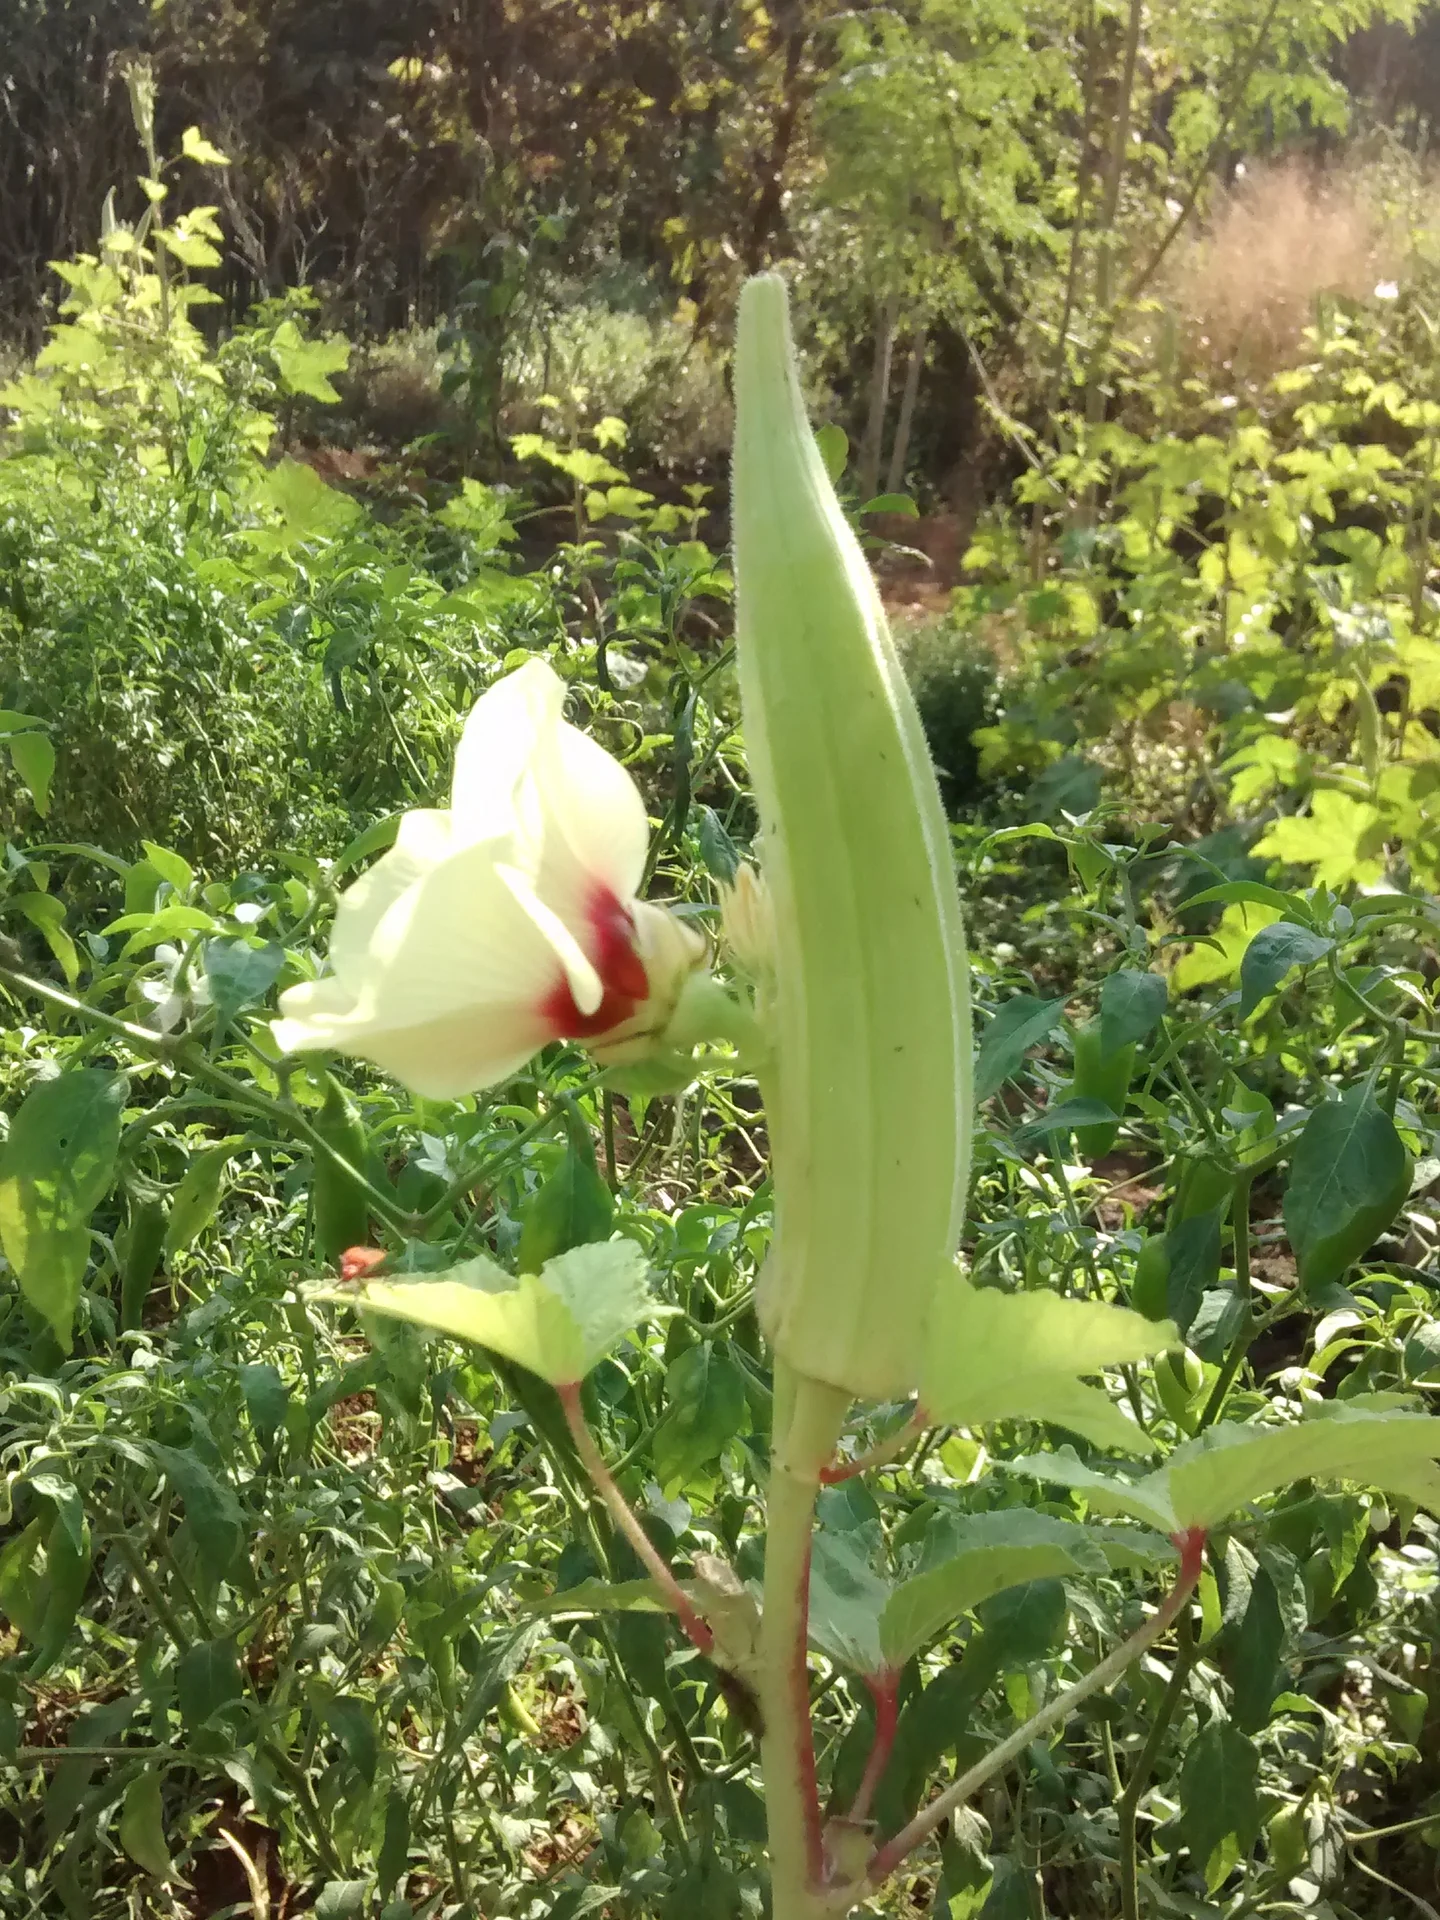
Rohan Pinto · CC BY-SA 4.0
- Days to maturity
- 45–65 days
- Row spacing
- 53 cm
- Plant spacing in the row
- 38 cm
- Sowing depth
- 2–4 cm
These are general figures for the crop, compiled from published agronomic references including FAO and CABI. The right choice for your field depends on your soil, rainfall and the yield you are aiming for.
Will okra actually do well on your field? Check your own field against every crop in the catalogue — no signup. Run the crop check →
Also known as
Okra is also called okro, lady's finger and gumbo.
- English
- okro, lady's finger, gumbo
- French
- gombo
- Hausa
- kubewa
- Igbo
- okwuru
- Ndebele
- idelele
- Portuguese
- quiabo
- Shona
- derere
- Swahili
- bamia, binda
- Yoruba
- ila
Working in buckets, bags or paces? The farming glossary turns the measures growers actually use into kilograms and hectares — what a 20 litre bucket of each crop really weighs, and how to size a field by walking it — alongside the Shona, Swahili, Ndebele and Yoruba words used in the field. Open the glossary →
Growing okra, stage by stage
Your okra season, step by step — from a sunny, free-draining bed and soaked seed, through early weeding and the whitefly / yellow-vein-virus fight, to months of picking tender green pods every 2–3 days.
Get your field and inputs ready
Almost everything that sets your okra crop is decided before the seed goes in: a sunny, free-draining bed, plenty of well-rotted manure with the basal fertiliser worked in, and virus-resistant seed bought in good time. Okra is shallow-rooted, hates wet feet, and cannot be transplanted — so get the spot, the drainage and the seed right now, because you sow once, straight where the plant will grow.
Plan the field / rotation Recommended
Growing okra after okra — or after cotton and other hibiscus-family crops — lets soil troubles build up: root-knot eelworm (a tiny worm that swells the roots), Fusarium wilt (a soil fungus that chokes the plant), and stores of the yellow-vein virus. Moving okra to a fresh, sunny, well-drained spot each season breaks that cycle before you even sow — for free.
Plan the new okra plot in the months before you sow (about 1–4 months ahead), while you can still choose the ground.
Don't plant okra where okra, cotton, hibiscus or roselle grew last season. Leave 2–3 seasons before okra comes back to the same ground.
Avoid any spot that grew a stunted, wilting or sickly okra or cotton crop before — the trouble is still in that soil. Give it a long rest.
Know the two soil troubles that rotation dodges. Root-knot eelworm: knobbly swellings (galls) on the roots, with stunted, yellow, patchy plants above. Fusarium wilt: plants yellow and wilt from the bottom leaves upward, then die.
Pick a sunny, free-draining spot sheltered from strong wind — tall okra is easily rocked loose or snapped.
Plan to direct-sow — okra's taproot resents being moved, so it transplants badly. The seed goes straight where the plant will grow; there is no nursery to fall back on.
- Do:
Plan to direct-seed okra where it will grow — it transplants badly, so there is no nursery and no second try at the stand.
- Tip:
Wet, poorly-drained ground — okra is shallow-rooted and rots in soggy soil; choose a spot where water drains away.
- Watch out:
Old okra or cotton ground — rotate away from it to escape the eelworm, wilt and virus that build up there.
Buy the recommended seed + basal Critical
The right variety, seed and basal (planting) fertiliser, bought in good time, set your whole season. Above all, where the yellow-vein virus is common, a resistant variety is the cheapest, strongest protection you will ever buy — it saves more pods than any spray, against a disease that can take almost the whole crop.
Buy in the 2–3 weeks before you sow, so everything is in hand and you can sow the moment the soil is warm.
Get fresh, good okra seed — okra seed loses its sprouting power as it ages, so old, leftover seed comes up thin and patchy.
Where yellow-vein mosaic virus (the disease that turns the leaf veins yellow and shrivels the pods) is a problem, choose a resistant or tolerant variety. This does more to save your pods than anything else you can buy.
Buy the seed rate and basal fertiliser your recommendation gives for your plot. The basal carries the crop's phosphorus (P), potassium (K) and a first share of its nitrogen (N).
Store seed and fertiliser dry, off the floor, and away from food, water and children. Keep the label and receipt in case the seed turns out poor.
- Do:
Buy a virus-resistant variety where yellow-vein is common — it is the cheapest insurance against your biggest okra disease.
- Tip:
Sowing old, leftover okra seed — it loses vigour with age and comes up thin and patchy.
- Watch out:
Keep fertiliser bone-dry — damp fertiliser sets hard like a rock and won't spread.
Prepare a well-drained fertile bed Recommended
Okra is shallow-rooted and hates wet feet. A fine, fertile bed in full sun, sheltered from wind, with water draining freely away, lets the slow seed come up evenly and the roots breathe. Cloddy or waterlogged ground gives you patchy, sickly plants that never catch up.
In the 2–3 weeks before sowing, choose full sun (okra is a hot-weather crop) on free-draining ground, sheltered from strong wind.
Loosen the soil and break the clods down to a fine, crumbly tilth, so the small seed sits snug against moist earth.
Make sure water drains away. On heavy or low ground, sow on ridges or raised beds so the roots never sit in standing water.
Level the planting lines so water doesn't pool, and clear the weeds off them.
- Do:
Raise beds or ridges on heavy or low ground — okra's shallow roots rot in standing water.
- Tip:
Low, waterlogged spots and deep shade — okra wants heat, sun and free drainage.
- Watch out:
Break the clods fine — slow okra seed comes up patchy in a rough, cloddy bed.
Incorporate well-rotted manure + basal Recommended
Okra is shallow-rooted but feeds hungrily once it starts podding. A big helping of well-rotted manure worked in now builds the soil and holds water for those shallow roots. And because phosphorus (P) and potassium (K) barely move in the soil, the basal must go down in the root zone before you sow — P for strong early roots, K for sturdy stems and well-filled pods.
Use only well-rotted manure or compost — dark, crumbly, no strong smell. Fresh manure burns young roots, steals nitrogen as it rots, and carries weed seeds.
Spread it thick and even — about one heaped wheelbarrow load over every patch five strides by five strides (about 25 m², a generous 20–25 t/ha). Okra loves organic matter.
Add the basal fertiliser your recommendation gives — it carries all the crop's phosphorus and potassium and a first share of its nitrogen (the rest of the nitrogen is side-dressed later).
Work both into the topsoil with a hoe, 1–2 weeks before sowing, so the P and K settle down where the roots will reach them.
Wash your hands afterwards, and keep the fertiliser off any food, water and children.
- Do:
Work the manure and basal into the topsoil — P and K don't move, so basal left on the surface is largely wasted.
- Tip:
Fresh, raw manure at sowing — it scorches young roots, steals nitrogen as it rots, and sows weeds.
- Watch out:
Wash your hands after handling manure and fertiliser, and keep the fertiliser away from food and water.
Plant and get a full stand
Okra seed is slow and fussy — it only sprouts well in warm, moist soil (over 18–20 °C). Soak it first, sow it at the right depth and spacing into warm ground, and keep the bed damp. The stand you get now is the crop you will pick, because okra cannot be transplanted or filled in late — so plant carefully and re-sow any cold, patchy gaps early, while the soil is still warm.
Soak seed + sow + basal Critical
Okra seed is hard-coated and a slow, fussy sprouter — it only comes up well in warm soil (over 18–20 °C), and cold or dry soil leaves gaps. Soaking the seed and sowing into warm, moist soil at the right depth and spacing gives the even, full stand every later pod depends on. Okra does not transplant — this one sowing is your crop.
The day before, soak the seed for 24 hours in warm water — this softens the hard coat and hurries a slow crop along.
Sow on the day, into warm, moist soil (over 18–20 °C). If the soil still feels cold to your hand in the morning, wait — cold soil rots the slow seed.
Sow about a finger-joint deep (2–4 cm) — a touch shallower in heavy, wet soil, a touch deeper in dry, sandy soil.
Space rows about half a stride apart (about 50 cm) and stations two hand-spans apart (about 40 cm) along the row.
Drop 2–3 seeds per station — you will thin to one strong plant later.
Keep the seed off the fertiliser: sow a little to the side of where the basal went in, never touching it, or it burns the sprout.
Firm the soil over the seed so it sits snug in moist earth, and keep the bed moist until the seedlings show.
Re-sow any cold, patchy gaps within a few days, while the soil is still warm, so the stand stays even.
- Do:
Soak the seed 24 hours and sow into warm soil — okra can sprout in about 6 days when warm, but takes up to 27 days when cold.
- Tip:
Transplanting okra — the taproot resents being moved; always direct-sow where it will grow.
- Watch out:
Sowing too deep in cold, wet soil — the slow seed rots before it can reach the light.
Scout (flea beetles, aphids, gaps) Recommended
The first two weeks decide your stand. Slow okra can come up patchy, flea beetles can pepper the tiny seed-leaves, and damping-off can rot seedlings in cold, wet soil. Catch gaps early — you can still re-sow while the soil is warm; once the crop is up you cannot add plants.
From about 5 days after sowing, walk the rows twice a week, checking plants right across the bed — not just the edge by the path.
Count the gaps — stations where nothing came up. Okra is slow (about 6 days in warm soil, up to 27 in cold), so give it time, but re-sow clearly empty stations while the soil is still warm.
Look for flea beetles: tiny dark beetles that jump like fleas when you come near, leaving the young leaves peppered with small round 'shot-holes'. Heavy attacks on just-emerged seedlings set them right back.
Look for damping-off: seedlings that flop over and die, the stem pinched, dark and water-soaked right at the soil line, often in the wettest patches. It comes from cold, soggy, airless soil.
Check the shoot tips for early aphids — small, soft, clustered insects with a sticky, shiny coating (honeydew).
Write down what you find. Keep the bed moist but never waterlogged (damping-off loves wet feet), and act on pests at the thresholds.
- Do:
Re-sow cold, patchy gaps early while the soil is still warm — you can't add plants once the crop is up.
- Tip:
Overwatering the seedbed — soggy soil rots the slow seed and brings damping-off.
- Watch out:
Tiny hopping beetles and small round shot-holes in the seed-leaves mean flea beetles are at work.
Water to keep moist until emergence Recommended
Okra seed is slow and the young roots are shallow, so the seedbed must stay damp for the seed to sprout evenly — but okra hates wet feet, so keep it damp, never swampy.
Keep the topsoil moist but never waterlogged, from sowing until the seedlings are up.
Water little and often — every 2–3 days, more in heat and on sandy soil that dries fast.
Check with a finger: water when the top few centimetres are dry.
Drain any spot where water sits — standing water rots the slow seed and brings damping-off.
- Tip:
Waterlogging the bed — soggy soil rots the seed and brings damping-off; okra hates wet feet.
- Do:
Keep it evenly moist for even emergence — dry patches come up late and thin.
- Watch out:
Sandy soils dry out fast — check them daily in hot weather.
Grow it, weed it, beat the virus
Now the plant builds its frame — and the make-or-break weeks for yellow-vein virus begin. Keep it weed-free early (young okra competes poorly), feed the first nitrogen side-dressing, and above all turn the leaves over to look for whitefly and pull out virus plants the moment they show — an infected plant can't be cured, only removed.
Scout (whitefly/virus, jassid, aphids) Critical
These weeks decide whether the yellow-vein virus takes your crop. Yellow-vein mosaic virus (the leaf-vein-yellowing disease) is carried plant-to-plant by whitefly and can cost up to about 94% of the harvest. You cannot cure an infected plant — you can only pull it out early and keep whitefly numbers down. Jassids and aphids build up now too.
From about 2 weeks after sowing, walk the crop twice a week, checking plants right across the field, not just the edge.
Turn the leaves over and look on the undersides for whitefly — tiny white moth-like flies that rise in a little white cloud when you shake the plant. They are what spread the virus.
Look for yellow-vein virus: the leaf veins turn yellow and stand out in a net or mesh pattern, then the whole leaf yellows; later the pods come pale, small and hard.
Rogue any yellow-vein plant — pull it out and destroy it (burn or bury) the moment you see it, before whitefly carry the virus to its neighbours. Don't leave it standing.
Check the leaf edges for jassid (leafhopper) 'hopper burn' — margins yellow, then curl down and go brown; the small green wedge-shaped hoppers sit under the leaf and run sideways. Act at about 4–5 hoppers per plant.
Check shoot tips and leaf undersides for aphids — clusters of soft green or black insects with sticky honeydew and black sooty mould growing on it. Too much nitrogen brings them.
Write down what you find and act at the thresholds. If you must spray, cover your skin, nose and eyes, spray in the cool with the wind at your back, keep it off any pods, and wash afterwards.
- Do:
Rogue (pull and destroy) yellow-vein plants the instant you see them — early roguing is your single biggest lever against the virus.
- Watch out:
A little white cloud of flies rising from the leaf undersides is whitefly — and whitefly means yellow-vein virus is on the move.
- Tip:
Heavy nitrogen — soft, lush growth pulls in aphids and jassids.
Thin to one strong plant per station Recommended
You sowed 2–3 seeds per station for a safe stand; now one strong plant per station must win. Left crowded, several seedlings fight each other for light and food and all stay thin, spindly and short of pods.
Thin when the seedlings have their first true leaves, about 2 weeks after sowing (day 14–18).
Keep the single strongest seedling at each station and snip the others off at ground level with a knife or your nails.
Don't pull the extras out — pulling drags and tears the roots of the one you are keeping.
While you're there, re-sow any big gaps (if the soil is still warm and it's early) so the stand stays even.
- Do:
Snip the extras off at ground level rather than pulling them, to protect the keeper's roots.
- Tip:
Leaving stations crowded — several weak plants make far fewer pods than one strong one.
- Watch out:
Thin early, before the seedlings' roots tangle together and you damage the keeper.
Weed early (critical) Critical
Young okra competes poorly — for the first few weeks, weeds steal the water, light and food it needs right when it is smallest. Weeding early is worth 10–25% of your harvest; weed late and the damage is already done.
Weed early — from about 2 weeks after sowing (day 14) — and keep the crop clean through the first month, before weeds overtake the little plants.
Hoe shallowly between and along the rows — okra roots are shallow, so deep hoeing near the plants cuts them.
Pull weeds roots and all where you can; slicing off only the tops lets many regrow.
Time a weeding just before you side-dress the nitrogen, so the feed goes to the okra and not the weeds. In dry areas, leave the pulled weeds lying between the rows as a mulch.
- Do:
Weed while the weeds are still small — a clean field in the first month is the cheapest yield you'll ever gain.
- Tip:
Deep hoeing close to the plants — it tears okra's shallow roots.
- Watch out:
Keep the young crop clean the whole first month — that's the window that decides the yield.
1st N top-dress Recommended
Okra needs its nitrogen (N) fed in side-dressings, not all at once. A shallow-rooted crop given one heavy dose loses much of it to the first big rain — and too much N at once brings aphids and soft, leafy growth instead of pods. This first side-dressing, about 3 weeks after sowing, drives strong early growth.
Apply about 3 weeks after sowing (day 18–25), once you've thinned and weeded.
Use the amount your recommendation gives — this is the first side-dressing of nitrogen; a second and final one follows at flowering.
Band it (lay it in a line) a palm's width (about 10 cm) to the side of the plants, not on top of them.
Do it on moist soil and cover or water it in, so it feeds the plant instead of gassing off into the air.
Keep it off the leaves (the grains stick and scorch them) and away from food, water and children, and wash your hands afterwards.
- Tip:
Putting all the nitrogen on in one go — a heavy rain washes it straight past okra's shallow roots, and the lush growth pulls in aphids and jassids.
- Do:
Band it to the side on moist soil and cover it in, so the crop gets it, not the air.
- Watch out:
Keep fertiliser grains off wet leaves, and wash your hands after handling it.
Water in dry spells Recommended
Now the plant is building its frame and pushing roots down. Steady moisture in dry spells keeps it growing strongly toward flowering — without the soft, sappy growth that too much water plus nitrogen would bring.
Water in dry spells, about every 5–7 days, enough to wet the root zone.
Let the top of the soil dry a little between waterings — deeper, less frequent watering now draws the roots down.
Still never waterlog the bed — keep it free-draining.
- Do:
Water deeply but less often to send the roots down after moisture.
- Tip:
Keeping the bed constantly soggy — okra's shallow roots rot in standing water.
- Watch out:
Hot, dry, windy spells — water before the plants wilt.
Flowering — feed and water
Big pale flowers open about two months after sowing and the first pods set. Keep the soil evenly moist (flowering is water-critical — dry soil now drops the flowers), feed the last nitrogen side-dressing, and start watching for the fruit-and-shoot borer that now goes after shoots and pods.
Scout (borers, whitefly, virus) Critical
As the plant flowers and the first pods set, the fruit-and-shoot borer arrives — a caterpillar that bores into shoot tips and into the pods themselves — and the bollworm eats buds and flowers. Damage now is damage to the pods you sell, and the whitefly / virus threat carries on.
From about 6 weeks after sowing, check the crop twice a week. Look first at the shoot tips: a tip that suddenly wilts and droops (a 'dead-heart') has a borer caterpillar tunnelling inside.
Clip off each wilted or bored shoot below the damage and destroy it — caterpillar and all.
Check the flower buds and young pods for borer entry holes plugged with frass (sawdust-like droppings) — a caterpillar is inside and the pod is tunnelled and spoilt.
Look for bollworm caterpillars chewing larger holes in the buds, flowers and pods.
Keep turning the leaves for whitefly, and rogue (pull and destroy) any yellow-vein plants you missed earlier.
Act at the first pod or shoot damage. If you spray (for example spinosad, emamectin, or Bt — Bt is a natural bacterium that kills only caterpillars), cover up, spray in the cool with the wind behind you, keep it off open pods, wash afterwards — and mind the pre-harvest interval (the wait on the label between spraying and picking), because you'll be picking pods within days.
- Do:
Clip and destroy every bored shoot and pod — it removes the caterpillar and cuts the next generation.
- Watch out:
The pre-harvest interval — you pick okra every 2–3 days, so choose a spray that is safe close to harvest and respect its waiting time.
- Tip:
Spraying open flowers in the heat of the day — spray in the cool, off the flowers.
2nd N split Recommended
As okra flowers and sets its first pods (about 6 weeks after sowing) it makes its biggest demand for nitrogen. This second, final side-dressing keeps the leaves green and the plant pushing out flowers and pods for months to come. After this it lives on what is in the soil.
Apply as the first flower buds appear, about 6 weeks after sowing (day 38–45).
Use the amount your recommendation gives — this is the second and last nitrogen feed of the season.
Band it a palm's width (about 10 cm) to the side of the row, on moist soil, and cover or water it in.
Don't keep adding nitrogen once the pods are coming — the plant then lives on the soil while you pick, and extra N now just makes leaves and pulls in pests.
Keep the grains off the leaves and pods, away from food, water and children, and wash your hands afterwards.
- Do:
Time it with the first flowers and water it in — this is when the plant needs nitrogen most.
- Tip:
Over-feeding nitrogen now — too much makes leaves at the expense of pods and pulls in pests.
- Watch out:
Keep the fertiliser grains off the developing pods and leaves, and wash your hands after.
Water even (flowering is water-critical) Critical
Flowering is the crop's most water-hungry time — a water-critical stage. If the soil dries out now, the flowers and young buds drop off, and you lose every pod they would have become.
Keep the soil evenly moist right through flowering — never let it dry out or the plants wilt.
Water about every 5–7 days, more often in heat, keeping it steady — swings from bone-dry to soaked make the buds drop.
If you can water at only one time, water now and through podding — these are the stages that pay you back.
- Do:
Give water at flowering priority over every other stage — it is the top water-critical window.
- Watch out:
Buds and flowers falling off is the sign the crop went short of water — keep the moisture steady.
- Tip:
Letting it dry right out and then flooding it — even, steady moisture sets the most pods.
Podding and pod-fill
Pods set and swell fast, and the plant will keep podding for months if you look after it. Keep water steady (pod-fill is water-critical — thirst makes pods short, tough and twisted), stay on top of borers and pod-sucking bugs, and watch the lower leaves for the white, powdery patches of powdery mildew.
Scout (borers, pod bugs, powdery mildew) Recommended
Through the long podding months, borers keep working the pods, pod-sucking bugs blemish them, and powdery mildew can strip the lower leaves. Each one costs you sellable pods, so keep looking every time you go in to pick.
Every few days as you pick, check the pods for borer holes — small holes plugged with frass (sawdust-like droppings), with a tunnel inside. Remove and destroy every bored pod.
Look for pod-sucking bugs on the pods — shield- or stink-type bugs whose feeding leaves sunken, discoloured spots and can twist the pods. Knock them off, or act if there are many.
Check the leaves — especially the lower, older ones — for powdery mildew: white, powdery patches like a dusting of flour or ash on the surface, spreading until the leaves yellow and dry.
Keep the crop open and airy (not crowded or weedy), and treat spreading mildew with sulphur or an approved fungicide — a resistant variety helps most of all.
Keep removing any over-mature pods and any late yellow-vein plants you spot.
If you spray for anything, cover up, spray in the cool with the wind behind you, keep it off the pods, wash afterwards — and respect the pre-harvest interval (the label wait between spraying and picking), because you are picking every 2–3 days.
- Do:
Keep picking and remove every bored or over-mature pod — it starves the borers and keeps the plant setting new pods.
- Watch out:
White, flour-like patches on the lower leaves are powdery mildew — treat it early before it spreads up the plant.
- Tip:
Letting the crop get crowded and weedy — still, stagnant air is exactly what powdery mildew loves.
Water through pod-fill Recommended
Pod-fill is water-critical too. The pods you pick every few days are mostly water, so steady moisture keeps them coming, tender and well-shaped — while a dry spell makes them short, tough and twisted and slows new set.
Keep watering every 5–7 days through the whole podding period, more often in heat.
Don't let the plants wilt between picks — thirsty plants make small, tough, misshapen pods and set fewer of them.
Ease off only if you are leaving a final seed crop, so the last pods can ripen and dry on the plant.
- Do:
Keep the water steady all through the months of picking — pod-fill needs it as much as flowering.
- Watch out:
Short, tough, twisted pods are the sign the crop went thirsty — water more evenly.
- Tip:
Long dry gaps between waterings — they turn the pods fibrous and cut new set.
Pick, and keep picking
This is where okra is won or lost. From about 6–7 weeks after sowing, pick young, tender pods every 2–3 days — frequent picking keeps every pod sellable and tells the plant to keep flowering and setting more. Miss picks, or leave pods to go woody, and the plant reads 'seeds made, job done' and stops.
Pick pods young Critical
This is the biggest lever on your whole harvest — worth 15–40%. Okra pods go from tender to woody in just a couple of days, so picking young and often keeps every pod sellable and signals the plant to keep flowering and podding. Leave pods to mature and the plant stops setting new ones.
Start picking from about 6–7 weeks after sowing (day 45), then pick every 2–3 days — okra waits for no one.
Pick pods young and tender, about as long as your longest finger (5–10 cm), roughly 7–8 days after the flower opened.
Cut or snap each pod off with a short stalk (a knife, or a clean twist) — don't tear the branch.
Test each pod — bend the tip. If it snaps crisply → it's tender: sell or eat it. If it bends like rubber or feels woody and hard → it's over-mature.
If it fails the snap test, pick that woody pod off and throw it away anyway (feed it to animals if you like) — one maturing pod left on the plant tells it to stop making new ones.
Wear gloves and long sleeves and pick in the cool of the morning — the pods and the whole plant are covered in fine hairs that itch and prickle the skin.
- Do:
Pick every 2–3 days, in the morning, wearing gloves — frequent picking keeps pods tender and the plant setting new pods.
- Tip:
Letting any pod over-mature — it turns fibrous and the plant stops podding.
- Watch out:
The itch — the plant hairs irritate skin, so cover up; and if you have sprayed, respect the pre-harvest interval before you pick.
Cool and sell fresh
Okra pods are highly perishable — they toughen, blacken and wilt within a day in the heat. Get each pick out of the sun, keep it cool, and sell or eat it fast. Leave a few pods to ripen only on healthy, virus-free plants if you want next season's seed.
Cool & market fresh (per pick) Recommended
Okra pods are alive and highly perishable — in the sun they heat up, wilt, toughen and blacken within a day. Careful cooling and quick selling, each time you pick, is the difference between a top price and a wasted pick.
As soon as you pick, get the pods out of the sun — into shade, or a basket under a damp cloth. Heat toughens and blackens them fast.
Handle them gently — pods bruise easily, and the bruises blacken. Don't overfill or press down on sacks.
Keep them cool and a little humid (shade, a damp cloth, or an evaporative cooler if you have one).
Sell or eat them within a day or two — okra does not keep. Take them to market the same day if you can.
For seed: leave a few good pods only on healthy, virus-free plants to ripen and dry hard on the plant, then shell out the dry seed and store it dry.
- Tip:
Storing pods warm or in the sun — they are highly perishable, so cool them promptly and market them fresh.
- Do:
Cool the pods and get them to market the same day for the best price.
- Watch out:
Bruised and heat-blackened pods fetch a poor price — keep them shaded, cool and gently handled from the moment you pick.
Pests and diseases that attack okra
-
 Bollworm complex
 -
 Cotton aphid
 -
 Jassids (leafhoppers)
 -
 Okra yellow vein mosaic virus
 -
 Plant-parasitic nematodes
 -
 Root-knot nematode
 -
 Shoot borer
 -
 Spiny bollworm
Where to sell okra
Markets that trade this crop — what each one sells it by, when supply peaks there, and the currency used.
-
 Marché Gouro d'Adjamé
-
 Marché de Yamoussoukro
-
 Grand Marché de Niamey
-
 Marché Castors
-
 Marché Mfoundi
-
 Makola Market
-
 Marché Kermel
-
 Marché d'Abobo
Grow okra with a plan, not a guess
This guide is the general answer. Divisi works out yours — the week to plant okra on your soil and your rainfall, and each job dated for your field.


When to plant okra, country by country
- When to plant okra in Algeria
- When to plant okra in Angola
- When to plant okra in Benin
- When to plant okra in Botswana
- When to plant okra in Burkina Faso
- When to plant okra in Burundi
- When to plant okra in Cabo Verde
- When to plant okra in Cameroon
- When to plant okra in Comores
- When to plant okra in Congo
- When to plant okra in Côte d'Ivoire
- When to plant okra in Egypt
- When to plant okra in Eritrea
- When to plant okra in Eswatini
- When to plant okra in Ethiopia
- When to plant okra in Gabon
- When to plant okra in Gambia
- When to plant okra in Ghana
- When to plant okra in Guinea Ecuatorial
- When to plant okra in Guinea-Bissau
- When to plant okra in Guinée
- When to plant okra in Kenya
- When to plant okra in Lesotho
- When to plant okra in Liberia
- When to plant okra in Libya
- When to plant okra in Madagascar
- When to plant okra in Malawi
- When to plant okra in Mali
- When to plant okra in Mauritanie
- When to plant okra in Mauritius
- When to plant okra in Morocco
- When to plant okra in Moçambique
- When to plant okra in Namibia
- When to plant okra in Niger
- When to plant okra in Nigeria
- When to plant okra in Rwanda
- When to plant okra in République centrafricaine
- When to plant okra in République démocratique du Congo
- When to plant okra in Sao Tome and Principe
- When to plant okra in Seychelles
- When to plant okra in Sierra Leone
- When to plant okra in Somalia
- When to plant okra in South Africa
- When to plant okra in South Sudan
- When to plant okra in Sudan
- When to plant okra in Sénégal
- When to plant okra in Tchad
- When to plant okra in Togo
- When to plant okra in Tunisie
- When to plant okra in Uganda
- When to plant okra in United Republic of Tanzania
- When to plant okra in Zambia
- When to plant okra in Zimbabwe
Where okra scores best
Districts where Divisi's engine currently rates this crop highest, ranked by fit.
-
 Kouroussa
 -
 Borena
 -
 Niangara
 -
 Bossangoa
 -
 Oyi
Oyi -
 Leewehpea-Mahn
 -
 Madi Okollo
 -
 Allembe
 -
 Kono
Kono -
 Morobo
 -
 Bambadinca
 -
 Ndian
Ndian
Get Insights by email
A short digest of new Divisi articles. No email on quiet weeks.
Frequently asked questions
How do I grow okra?
How to grow okra: 45–65 days to maturity, 53 cm rows, 2–4 cm deep. Also called okro, gombo, kubewa, okwuru, idelele, quiabo, derere, bamia, ila.
What is gombo in English?
Gombo is the French name for okra.
What is kubewa in English?
Kubewa is the Hausa name for okra.
What is okwuru in English?
Okwuru is the Igbo name for okra.
What is idelele in English?
Idelele is the Ndebele name for okra.
What is quiabo in English?
Quiabo is the Portuguese name for okra.
What is derere in English?
Derere is the Shona name for okra.
What is bamia in English?
Bamia (also binda) is the Swahili name for okra.
What is ila in English?
Ila is the Yoruba name for okra.
How long does okra take to grow?
Okra takes about 45–65 days from sowing to maturity, though the exact length varies with variety, temperature and how the season runs.
What spacing should I use for okra?
Space okra rows about 53 cm apart, with roughly 38 cm between plants within the row.
How deep should okra be planted?
Sow okra at about 2–4 cm deep. Shallower risks drying out; deeper wastes seed energy before the shoot reaches light.
What pests and diseases attack okra?
The ones covered in this guide are Bollworm complex, Cotton aphid, Jassids (leafhoppers). Each has its own page explaining how to identify, check for and control it.