 Divisi
How to grow sugarcane
Saccharum officinarum · Poaceae
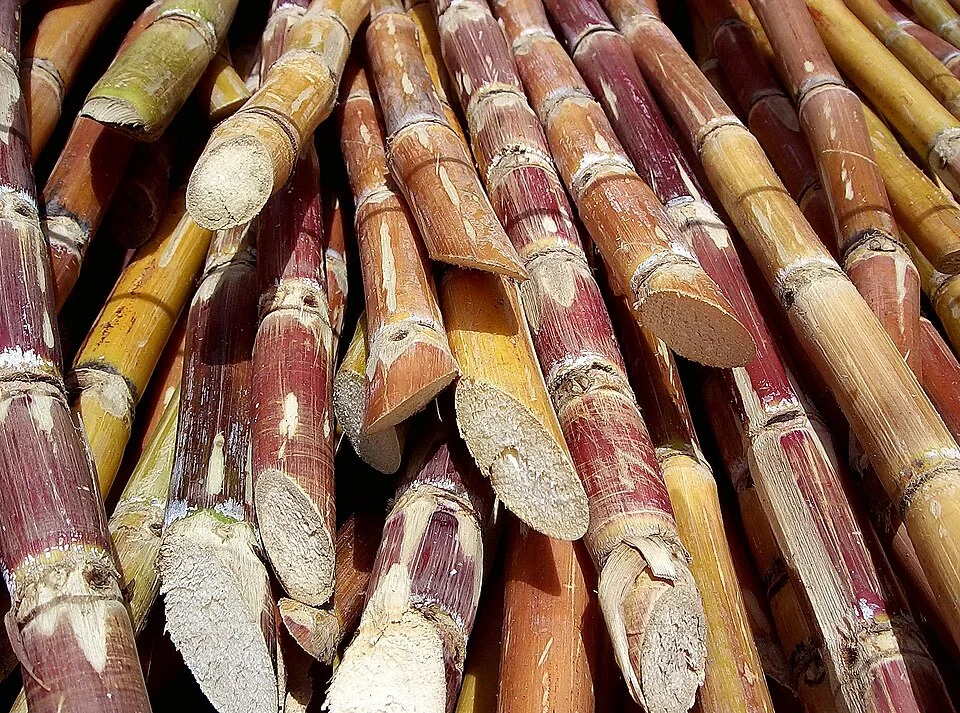
Photo: ruurmo · CC BY-SA 2.0
Sugarcane is a tall, thick, sweet grass grown for the sugar it stores in its stalks. You never plant it from true seed — you plant setts (short lengths of stalk, each carrying a few buds, or "eyes"), and every bud sprouts its own shoot. It is a perennial: you plant once for the first "plant crop", cut it, then let the same roots push up again as a ratoon (the regrowth crop) for 2–4 more harvests before you plough out and replant. Two truths run through the whole crop and shape everything you do — sugarcane is very thirsty, and the moment a stalk is cut its sugar starts to break down, so cut cane must reach the mill fast.
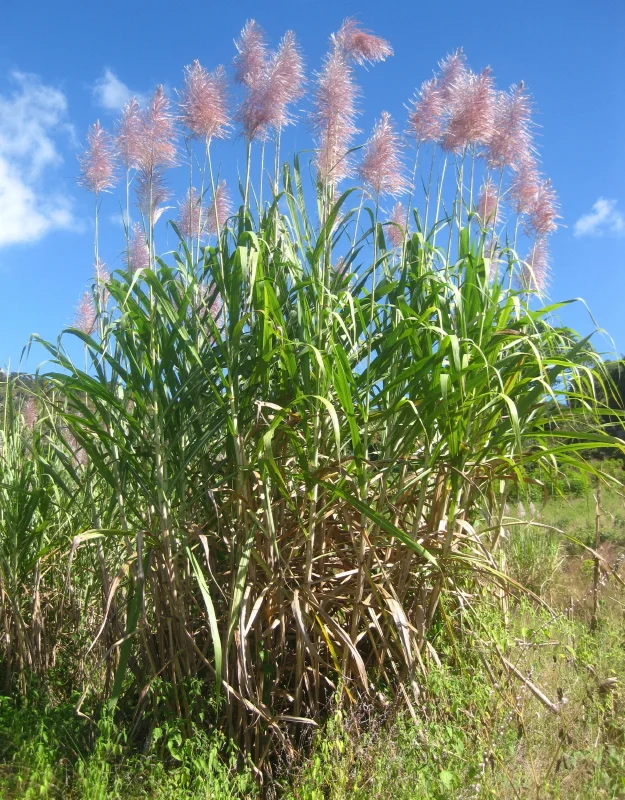
Ton Rulkens · CC BY-SA 2.0 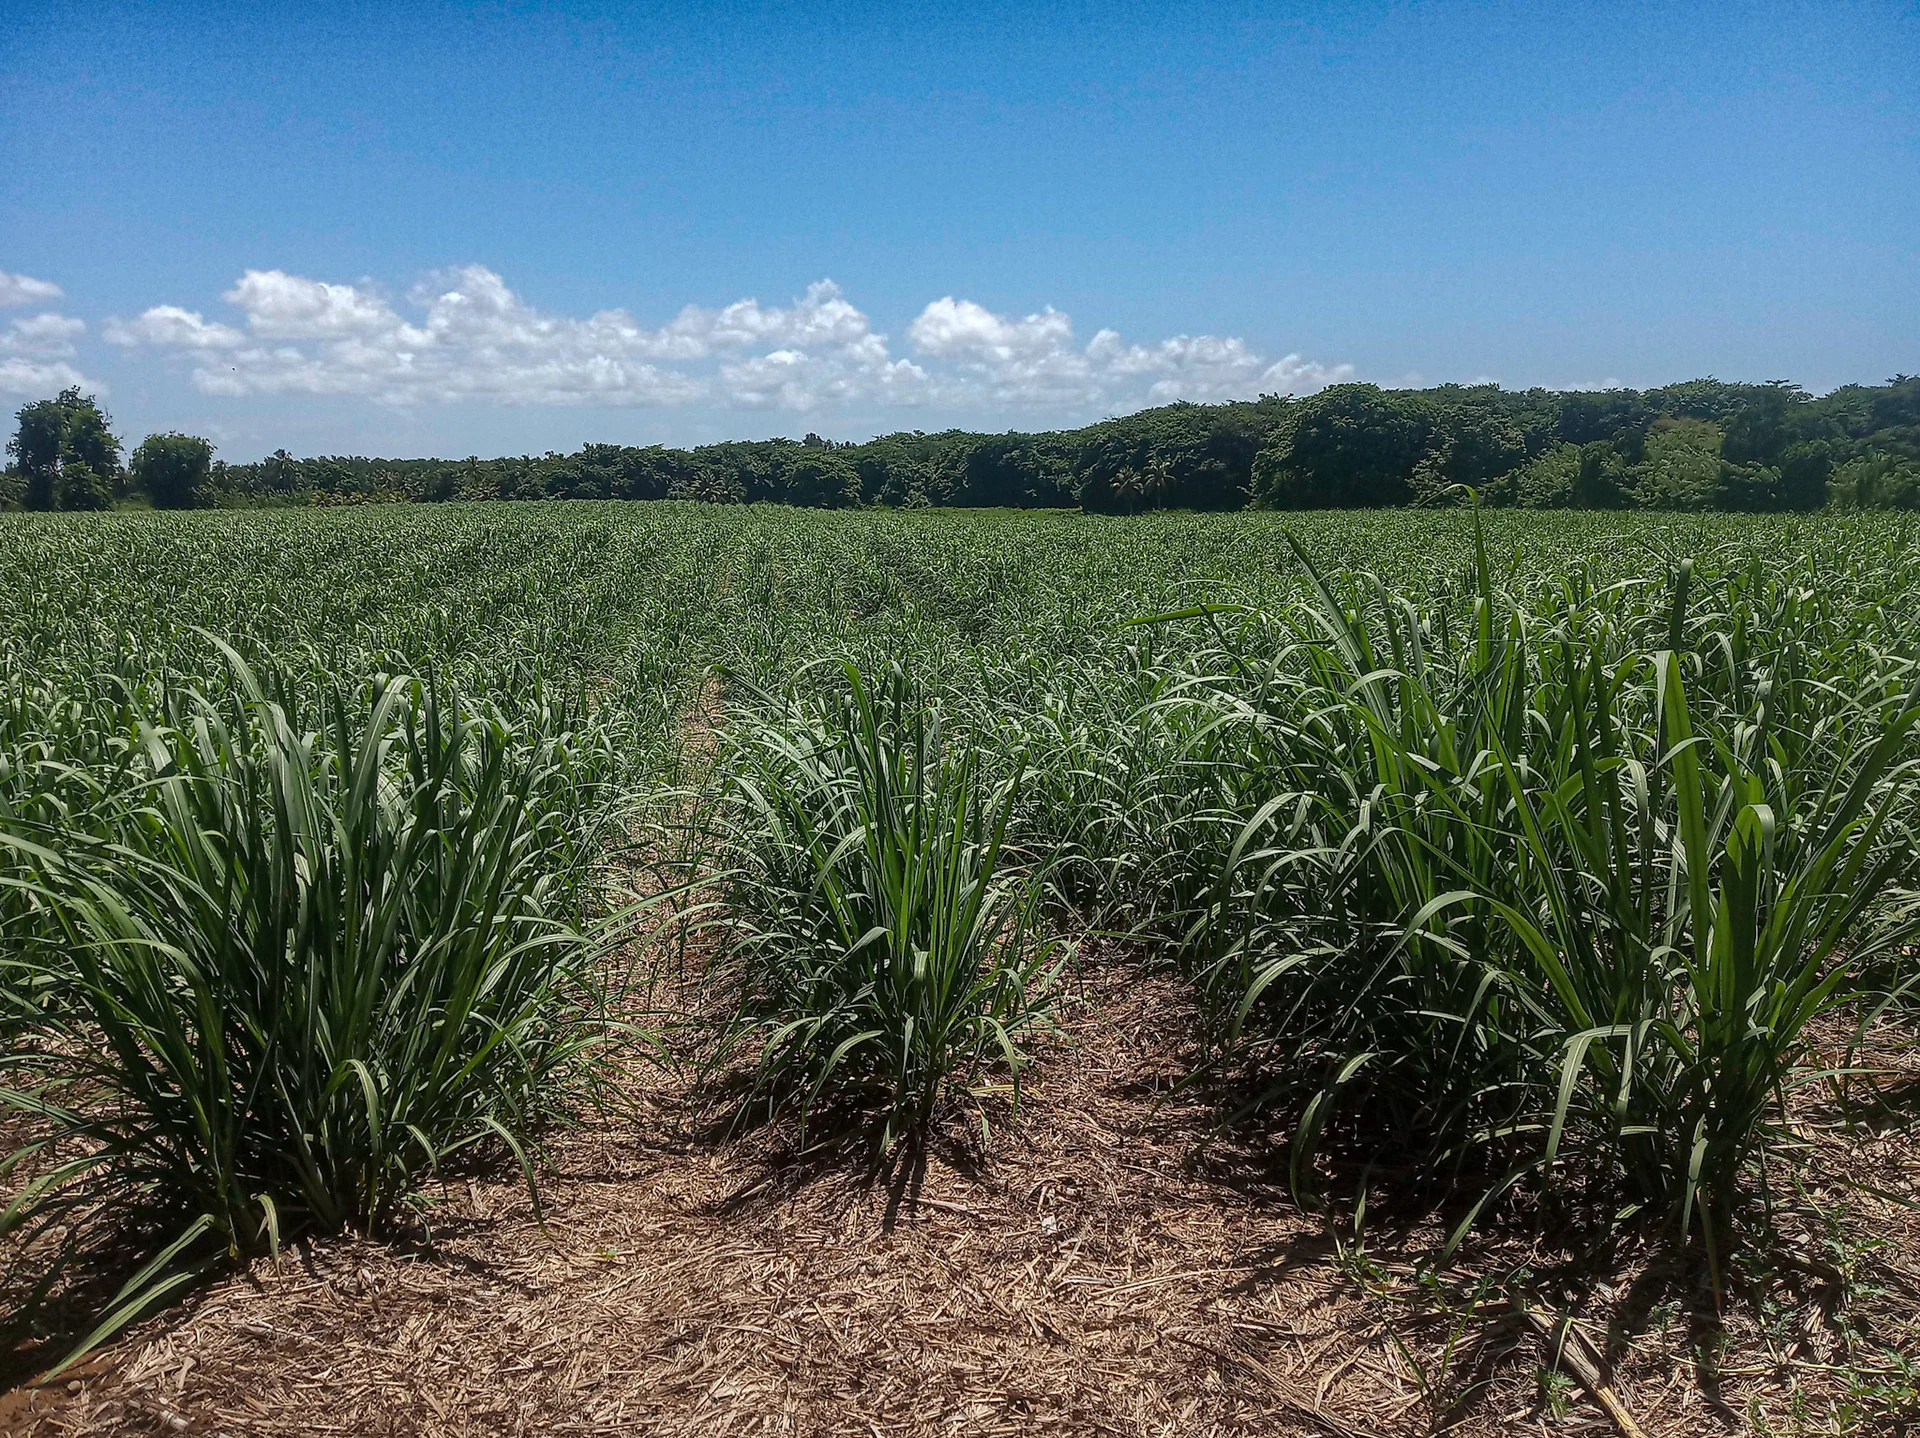
Filo gèn' · CC BY-SA 4.0
- Days to maturity
- 360–540 days
- Row spacing
- 135 cm
- Sowing depth
- 5–10 cm
These are general figures for the crop, compiled from published agronomic references including FAO and CABI. The right choice for your field depends on your soil, rainfall and the yield you are aiming for.
Will sugarcane actually do well on your field? Check your own field against every crop in the catalogue — no signup. Run the crop check →
Also known as
- Afrikaans
- suikerriet
- Chichewa
- nzimbe
- French
- canne à sucre
- Ndebele
- umoba
- Portuguese
- cana-de-açúcar
- Shona
- ipwa, mudzviti
- Swahili
- muwa
- Xhosa
- umoba
- Zulu
- umoba
Working in buckets, bags or paces? The farming glossary turns the measures growers actually use into kilograms and hectares — what a 20 litre bucket of each crop really weighs, and how to size a field by walking it — alongside the Shona, Swahili, Ndebele and Yoruba words used in the field. Open the glossary →
Growing sugarcane, stage by stage
Your sugarcane crop from setts to sugar — lay clean, disease-free seed cane in deep, well-drained soil, weed and feed the thirsty growing stalks hard, cut sweet cane and rush it to the mill, then bring the stubble back as ratoons for several more harvests.
Get the land and clean seed cane ready
Almost everything you can control is decided before you plant. Sugarcane sits in the same field for years, so you loosen the land deep just this once — and because the crop grows from cuttings, clean, disease-free seed cane is the single biggest lever you have. A cheap hot-water bath for the setts cooks out two diseases you can never spray off later.
Deep land prep Recommended
Sugarcane roots dive deep — well past knee depth — and the crop stays in this same field for years, through several ratoons. Loosening the soil deep now lets the roots reach right down for water and stops rain pooling and rotting the buried setts. You get one clean chance to do this — before anything is planted.
Clear the field of weeds, old cane clumps (the leftover "stools") and loose trash, so nothing competes with your young cane or hides pests.
Rip or plough deep — about knee-deep (30–45 cm) — so the roots can drive right down and heavy rain drains away instead of drowning the setts.
Break up the clods and level the field. On a slope, work across the slope, not up and down, and run your furrows along the contour so storm water soaks in instead of washing your soil away.
Open your planting furrows a bit more than one big stride apart (1.2–1.5 m between rows) — wide rows give you room to weed, feed, water and cut this tall, heavy crop for years to come.
- Do:
Do the deep work in the dry weeks before planting, while the soil is workable — ripping sticky-wet soil just smears it into hard clods.
- Watch out:
Pick a field that drains. Sugarcane drinks a lot, but its setts and roots rot in soil that stays waterlogged.
Select clean seed cane + hot-water-treat setts Critical
Your whole crop — and every ratoon after it — grows from these cuttings, so a hidden disease in the seed cane infects the field for years. The two worst hide inside the stalk where no spray can ever reach: ratoon-stunting disease (a bacteria that makes each ratoon come back thinner and weaker) and smut (a fungus that turns the growing tip into a black whip). A cheap hot-water bath kills both — this is the most important thing you do all season.
Take seed cane from a young, healthy, vigorous block, about 6–9 months old. Pick even, well-grown stools (the clumps a cane plant grows in) and reject any that are thin, grassy, stunted, or carry black whips or yellow-mottled leaves.
Cut the cane into setts — short pieces with about 3 buds ("eyes") each. Handle them gently so the buds are not knocked off — a knocked-off bud is a shoot you will never get.
Give the setts a hot-water bath: about 50 °C for 2 hours (or 50 °C for about 30 minutes if smut is your main worry). This gentle cooking kills the ratoon-stunting bacteria and smut hiding deep inside the cutting.
Keep the water steady-warm — hot like a comfortable hand-wash, not boiling. Too hot cooks the buds dead; too cool leaves the disease alive. With no thermometer, err on the cooler side — you can always retreat, but you cannot un-cook a dead bud.
Sterilise your cutting knife between stools — dip the blade in strong disinfectant or pass it through a flame. A dirty knife carries ratoon-stunting disease from plant to plant more surely than anything else in the field.
- Do:
Treat the setts and plant them within a day or two of cutting — cut setts dry out fast and lose their power to sprout.
- Tip:
Grabbing seed cane from a stunted, poor or diseased block just because it is close by — you plant its diseases into your field for years of ratoons.
- Watch out:
Ratoon-stunting disease barely shows on the outside — the tell is thin, stunted, weak stools whose ratoons keep getting poorer. Split a mature stalk down its length and look at the nodes (the joints) for tiny orange-red dots or commas. Hot water and a clean knife are the only fix.
Plant the setts and get a full stand
The number of shoots you get up now is the ceiling on your harvest — you cannot add cane later. Lay the setts end-to-end in moist furrows, cover them lightly, keep the soil damp for even sprouting, and guard the buried buds from termites.
Plant 3-bud setts + cover Critical
These setts are your entire crop — every blank stretch of furrow is cane you will never cut, all year and through every ratoon. Laying them right, at the right depth in moist soil, gives the even, unbroken stand that carries the whole season.
Plant into moist soil. Open your furrows a bit more than a stride apart (1.2–1.5 m between rows) — the same wide spacing you ripped for.
Lay the 3-bud setts end-to-end along the bottom of the furrow, in one continuous line, overlapping the ends a little. This unbroken chain gives you an even, gap-free row of shoots.
Lay them flat with the buds pointing out to the sides (not straight up or down), so every eye can push out its own shoot.
Cover with about two finger-joints of soil (5–10 cm) — shallower in heavy, wet soil; a little deeper in light, sandy, dry soil.
Water in lightly to start an even sprouting. The first shoots push up in about 1–3 weeks.
- Do:
Plant when you have water on hand to keep the soil moist — setts need steady damp to sprout evenly.
- Tip:
Burying setts too deep in cold, wet soil — the buds rot before the shoot can reach the surface.
- Watch out:
Check the buried setts for termite damage in the first weeks (see the scouting task) — termites can hollow out the cuttings before they ever sprout.
Scout (termites, sprouting) Recommended
The first two months set your stand. Termites can hollow out the setts underground and borers can kill young shoots before you see any trouble above the soil — and gaps caught early can still be filled. Ten minutes walking the field, once a week, protects the whole crop.
Once a week, walk the whole field in a big "W" so you cover the corners and the middle, not just the edge by the path.
Check the sprouting: are shoots coming up evenly along the furrows? Mark the blank stretches so you can gap-fill them while the crop is still young.
Termites: look for setts eaten hollow, shoots that wilt and die in patches, and thin sheets or lines of dried mud plastered over the stalk base and stubble. Scratch up a failed sett — if it is eaten out and empty, or you find pale workers in the soil at its base, termites are at work. They hit hardest in hot, dry spells.
Young-shoot "dead heart": look for a central shoot that has gone dead and dry while the outer leaves stay green — tug it and it slides out easily, often with a rotten smell. That is a young stalk borer that has killed the growing point; look for small bore holes and sawdust-like droppings (frass) near the base.
Note where the trouble is and how much of it there is. Small patches you fix by gap-filling; spreading termite damage in a dry spell is your cue to act — ask your extension officer about treating the setts or the soil.
- Watch out:
Fresh, moist frass and a soft, rotten dead heart mean the pest is still inside and feeding now — old, dry, empty holes are a past attack.
- Do:
Walk the field after warm, dry spells — that is exactly when termites move onto the stressed setts.
Gap-fill + light irrigation Recommended
Every blank stretch of furrow is cane you will never harvest — all year and through the ratoons. Filling gaps while the crop is young, and keeping the soil moist for even sprouting, turns a patchy stand into a full one.
Walk the rows 2–6 weeks after planting and find the blank stretches where no shoots came up.
Fill them by planting fresh 3-bud setts into the gaps — or lift a clump of extra shoots with a ball of soil, in the cool of the evening, drop it in, and water it well.
Water lightly and often enough to keep the topsoil moist — steady damp brings on an even flush of shoots and helps the gap-fills catch up.
Do it early: gap-fills planted now can still catch the main crop; started late, they stay small and shaded and never catch up.
- Do:
Keep some spare hot-water-treated setts back at planting, so you have clean, disease-free material ready to gap-fill with.
- Tip:
Letting the field dry out during sprouting — dry soil gives you the very patchy stand you are trying to fix.
Tillering — build the stalk count
Each planted shoot now throws up a clump of side-shoots called tillers, and this is what sets how many millable stalks you will cut. Three things matter now: keep the field dead clean of weeds (young cane is slow and easily smothered), start feeding nitrogen and potassium, and pull out any smut whip the moment you see it.
Scout (smut whips, mosaic) Critical
Smut and mosaic are diseases you cannot spray away — you beat them by pulling out sick plants early and by planting clean seed cane. One black smut whip left standing showers the field with spores that ride on into every ratoon. Catching them now protects this crop and the next.
Walk the field in a "W" once a week, looking hard at the growing tops and the youngest leaves.
Smut: look for a long, curved, black, whip-like growth pushing out of the top of a shoot, like a black horse-tail — often on thin, grassy, spindly stools. That black dust is millions of spores.
When you find a whip, do not shake or slash it. Slip a bag or cloth over it first, cut the whole shoot off low, and carry it right out of the field to burn or bury — never leave it lying between the rows.
Mosaic: look on the young leaves near their base for a pattern of pale-green and yellow-green patches or stripes mixed with normal green (a "mosaic" of light and dark), sometimes with narrowed leaves and stunting.
Rogue (pull out and remove) badly diseased stools, and plan to plant clean, hot-water-treated setts next season — that, not spraying, is the real cure.
- Do:
Carry a bag and a knife on your scouting walk, so you can bag-and-remove a smut whip on the spot, before it sheds its spores.
- Tip:
Shaking, slashing or brushing a smut whip in the field — you blow spores across the whole crop and into next year's ratoon.
- Watch out:
Thin, grassy, over-tillered stools that never make a proper thick stalk are often smut or mosaic — pull them, don't nurse them.
Weeding — critical Critical
Young cane grows slowly and sits low for weeks, so weeds shoot up and steal the water, light and fertiliser you paid for — right when the crop is least able to fight back. A field kept clean now is the cheapest yield you will ever gain; weeds left now cut straight into your stalk count.
Start weeding early, while the weeds are still small and the cane rows have not yet closed over.
Hoe shallowly between and along the rows — deep hoeing close to the stools cuts the cane's own feeding roots.
Weed again every 3–4 weeks until the cane canopy closes over and shades the ground itself — that shade then does the weeding for you.
Time a weeding just before you feed fertiliser, so the nitrogen goes into the cane and not into a fresh flush of weeds.
In dry areas, leave the pulled weeds lying between the rows as a mulch to hold soil moisture.
- Do:
Get the field clean before the canopy closes — once the tall rows meet overhead, you can barely get in to weed.
- Tip:
Deep hoeing right against the stools — you tear the shallow feeding roots and set the cane back.
N + K + irrigation Recommended
Tillering is hungry work. Nitrogen drives the flush of side-shoots that become your stalks, and potassium builds strong stems and starts the sugar machinery — sugarcane takes up more potassium than almost anything else. Feeding now, with water to carry it in, sets how many stalks you grow.
Feed once the crop is tillering well — throwing up its clumps of side-shoots. Your recommendation gives the amount for your field.
Use a compound fertiliser carrying both nitrogen (N) and potassium (K) — an NPK blend.
Band it in a line about a hand-span (20 cm) to the side of the row, not on top of the shoots, then cover it or water it in so the nitrogen soaks down instead of gassing off into the air.
Water after feeding, and keep watering. Tillering is one of the two thirstiest windows of the whole crop (grand growth is the other), so don't let the young cane go dry now — dry soil locks up the fertiliser and starves off the tillers, and every tiller lost here is a stalk you never cut.
Safety: keep fertiliser off wet leaves (it sticks and scorches them), away from food, water and children, and wash your hands after.
- Do:
Feed onto moist soil and water it in — fertiliser left sitting on dry ground is money wasted.
- Tip:
Tipping fertiliser right against the stools — banded to the side, it feeds without burning the young shoots.
- Watch out:
Tillering is a water-critical stage: if a dry spell hits now, water the cane even before you worry about feeding it — thirsty cane stops throwing tillers, and a thin stand of stalks here can never be made up later.
Grand growth — grow long, heavy stalks
This is the big-growth stage: the stalks shoot up and lay down their longest sections (internodes — the lengths of stalk between the joints), and this is where most of your tonnage and sugar is built. The crop is now at its thirstiest and hungriest — its water need peaks here. Feed heavy nitrogen and potassium, water hard, strip the dead lower leaves, and keep a sharp watch for the stalk borer.
Scout (Eldana & other stalk borers) Recommended
Stalk borers — the eldana borer and others — tunnel up inside the cane, eating the very sugar-storing stalk you are growing and opening the door to rot. You cannot spray a caterpillar that is already deep inside the stalk, so you catch the attack early and act before it spreads.
Every 4 weeks or so, walk the field and check stalks right across the block, not just along the edges.
Look for: small bore holes in the stalk, reddish-brown, sawdust-like droppings (frass) spilling from the holes or tucked into the leaf sheaths, and dead, dry central tops ("dead hearts") on the younger shoots.
Split open a damaged stalk: red-stained tunnels running through the internodes, often with a pinkish caterpillar inside, confirm borer.
Count the damage: on a sample of stalks, work out the share of internodes that are bored. Act when about 2 in every 100 internodes (2%) are bored — tall, over-mature cane carries the most borer, so don't leave ripe cane standing too long.
Also watch for white grubs while you are in the field: patches of cane that yellow, wilt and pull up easily with chewed roots. Dig down about 20–30 cm — a hand-span or a little more — at the base and you may find fat, white, C-shaped grubs eating the roots.
Where borer is over threshold, cut out and destroy the worst-bored stalks, clear the trashy weeds where the moths shelter and lay their eggs, and ask your extension officer about releasing parasitic wasps rather than trying to spray larvae you cannot reach.
- Watch out:
Fresh, moist frass means a borer is feeding right now — old, dry holes are a past attack, not worth chasing.
- Do:
Cut and burn the heavily-bored stalks and clear old trash and grassy weeds — that is where the moths hide and lay.
Heavy N + K + irrigation Critical
This is the peak-demand window — the stalks are growing fastest and drinking and eating the most. Heavy nitrogen and potassium plus steady water now build the long, heavy, sugar-filled stalks that are your whole harvest. Skimp here and the stalks stay short and light — you cannot make up the tonnage later.
Feed right through the grand-growth stage, splitting the fertiliser into more than one round rather than dumping it all at once. Your recommendation gives the amount and the rounds for your field.
Use a nitrogen-and-potassium compound (NPK): nitrogen to push the stalks up, potassium for strong stems and sugar.
Band it about a hand-span (20 cm) to the side of the row and cover it or water it in, so heavy rain or irrigation doesn't wash the nitrogen straight past the roots.
Water hard and regularly — this is the thirstiest stage of the whole crop. Never let the cane wilt now. If a dry spell forces you to choose, watering here beats watering at any other stage.
Safety: keep fertiliser off wet leaves, away from food, water and children, and wash your hands after.
- Do:
Split the nitrogen into rounds — a single heavy dose is half-washed away by the next big rain or irrigation.
- Tip:
Letting the crop go dry during grand growth — this is the stage that makes your tonnage; a wilt here is yield gone for good.
- Watch out:
Finish the heavy nitrogen during grand growth. Nitrogen fed late keeps the cane green and watery instead of letting it ripen into sugar.
De-trash Optional
As the canopy closes, the lower leaves die and hang on the stalks as dry "trash". Stripping them lets light and air in, gives borers and rats fewer places to hide, and makes the eventual cutting quicker and cleaner. It is a worthwhile extra, not a must-do.
Once the canopy has closed and the lower leaves have gone dry and brown, strip these dead leaves off the lower stalk by hand.
Leave the green top leaves alone — those are still feeding the plant and building your sugar.
Lay the stripped trash between the rows as a mulch — it holds soil moisture and smothers weeds.
Don't overdo it: a light strip of only the dead lower leaves is enough.
- Do:
Spread the stripped leaves as mulch between the rows — free moisture-keeping and weed control.
- Watch out:
A tangle of dead trash clinging to the stalks is exactly where borers and rats shelter — clearing it exposes them.
- Tip:
Stripping green, living leaves — you cut straight into the plant's own food factory and slow its growth.
Ripening — let the cane build sugar
Growth now slows on purpose. By easing off water and nitrogen — especially in cool, dry weather — you stop the cane making new leaf and force it to pack sugar into the stalks it already has. Watch the ripening signs so you cut at peak sweetness.
Reduce/stop water & nitrogen Recommended
Lush, well-fed, well-watered cane keeps making leaf and stores watery juice, not sugar. Deliberately starving it of water and nitrogen near the end — "drying it down" — is what pushes the sugar up in the stalk. This is how you turn tonnage into sweetness and get paid for it.
In the last couple of months before cutting, cut back the irrigation, then stop it — let the crop dry down.
Stop all nitrogen now. Late nitrogen keeps the cane green and watery instead of sweet.
Cool, dry weather in this window helps most — it naturally checks the growth and ripens the cane, so time your dry-down for it if you can.
Watch the crop: the lower leaves yellowing and the stalk firming up are the signs the ripening is working (see the maturity check).
- Do:
Time the dry-down for the cool, dry part of the year if you can — the weather ripens the cane for you, for free.
- Tip:
Feeding nitrogen or watering heavily right up to harvest — you end up with heavy, watery cane that carries little sugar and pays little.
Check maturity (Brix / taste) Recommended
Cut too early and the stalks are still watery with little sugar; cut too late and past-ripe cane can lose sugar or run to flower. This simple taste-and-feel test tells you the cane has packed its sugar and is ready for the knife.
From about 12 months, test a few stalks from different parts of the field.
Feel: the lower and middle sections of the stalk should be hard and woody, and the lower leaves should be yellowing and drying — signs growth has stopped and sugar has moved in.
Taste: cut a lower section and suck or chew the juice — ripe cane tastes very sweet right at the bottom of the stalk, not watery. (In sugar terms this is a Brix of about 18–20% — "Brix" just means how much sugar is dissolved in the juice; watery, half-ripe cane is well below this.)
The base ripens and sweetens first. When the bottom, middle and top all taste evenly sweet, the whole stalk is ripe.
If it passes → the cane is ripe. Move to cutting and get it straight to the mill.
If it fails (still soft, watery, or not sweet at the base) → wait, keep the dry-down going, and re-test in a couple of weeks before you cut.
- Do:
Taste the bottom of the stalk, not the top — the base ripens and sweetens ahead of the rest.
- Watch out:
Cane that runs to flower (throws a feathery "arrow" at the top) has stopped storing sugar — cut it without delay.
Cut and rush it to the mill
Ripe cane is a race against time: the moment a stalk is cut, its sugar begins to break down. Cut cleanly at ground level — the base is the sweetest part, and the buds for the next ratoon sit there — and get the cane to the mill within a day or two, or turn it into jaggery yourself.
Cut stalks + deliver to mill Critical
A whole year's work is stored as sugar in these stalks — but once cut, that sugar quickly starts to break down ("invert") and is lost within hours to a couple of days. Cutting low, clean and fast, and getting the cane straight to the mill, is what turns your standing crop into paid tonnage — and a clean low cut leaves healthy stubble for the ratoon.
Cut each stalk right down at ground level with a sharp cane knife or machete — the bottom of the stalk holds the most sugar, and cutting low leaves good buds in the stubble for the ratoon.
Strip off the leaves and cut off the green, low-sugar top. You can either burn the standing field just before cutting ("burnt cane", which clears the leaves and chases out snakes) or cut it green — either way, top and de-leaf each stalk.
Bundle the cut cane and get it to the mill within 24–48 hours. The sugar (sucrose) inverts and drains away fast once the stalk is cut, so every extra day standing in the heat is lost sugar and lost money.
No mill nearby? Keep the cut cane shaded and cool to slow the loss, and crush and boil the juice down into jaggery (solid brown sugar) yourself rather than let it sit and spoil.
- Do:
Cut at the very base — the lowest section is the sweetest, and a low, clean cut sets up a strong ratoon.
- Tip:
Letting cut cane lie in the sun for days — the sugar drains away and the mill pays less, or turns the load away.
- Watch out:
Cut only as much as you can move to the mill in a day or two — never cut faster than you can deliver.
Bring back the ratoon
The best thing about sugarcane: you don't replant every year. The cut stubble sprouts a fresh crop — the ratoon — from the same roots, cheaper and faster than a new planting. Tidy the stubble, feed and water it hard to drive vigorous regrowth, and take 2–4 ratoon crops before you plough out and replant with clean seed cane.
Trim stubble + manage trash Recommended
The ratoon grows from the buds left in the stubble, so how you treat the stubble right after cutting decides how strongly the next crop comes back. A quick tidy now — cutting down ragged stumps and sorting the trash — wakes up an even, vigorous regrowth.
Within a few weeks of harvest, walk the rows and cut any high, ragged stumps down flush to the ground with a sharp knife — high stubble sprouts weak, and its buds sit exposed to sun and pests.
Where the soil is cool or wet, rake the trash off the rows so the sun can warm the stubble and the new shoots come away evenly.
Where the soil is hot and dry, do the opposite — leave a blanket of trash over the rows to hold moisture and hold down weeds.
Fill any stools that have died out with fresh hot-water-treated setts, so the ratoon starts as a full stand.
- Do:
Cut high stumps down flush — low, clean stubble sprouts far stronger than tall, ragged stumps.
- Watch out:
Count how many stools fail to sprout. Once too many gaps appear (usually after 2–4 ratoons), it's time to plough out and replant with fresh, clean seed cane.
Re-fertilise the ratoon (N + K) Recommended
The ratoon has to build a whole new crop from the old roots, and it does it fast — so it needs feeding just as much as the plant crop did, if not more. Nitrogen and potassium right after cutting drive the vigorous regrowth that keeps your ratoon yields up instead of sliding downhill year after year.
Feed soon after harvest, as the ratoon starts back into growth. Your recommendation gives the amount for your field.
Use a nitrogen-and-potassium compound (NPK): nitrogen to push the new shoots, potassium for strong stalks and sugar.
Band it about a hand-span (20 cm) to the side of the row along the stubble and cover it or water it in, so it soaks down to the roots instead of gassing off.
Water it in and keep the ratoon moist — the regrowth stage is thirsty, and fertiliser on dry soil is wasted.
Repeat this feed at the start of each ratoon year, for the 2–4 ratoons you take before replanting.
Safety: keep fertiliser off wet leaves, away from food, water and children, and wash your hands after.
- Do:
Feed the ratoon promptly after cutting — the sooner it's fed, the stronger it comes back.
- Tip:
Skimping on the ratoon feed — starved ratoons yield less each year and force you to replant sooner.
- Watch out:
If yields keep falling even with good feeding, the stools are worn out or disease-ridden — plough out and replant with clean seed cane.
Pests and diseases that attack sugarcane
-
 Cereal stem borers
 -
 Eldana stalk borer
 -
 Fall armyworm
 -
 Ratoon stunting disease
 -
 Sugarcane mosaic virus
 -
 Sugarcane smut
 -
 Termites
 -
 White grubs
Grow sugarcane with a plan, not a guess
This guide is the general answer. Divisi works out yours — the week to plant sugarcane on your soil and your rainfall, and each job dated for your field.


When to plant sugarcane, country by country
- When to plant sugarcane in Algeria
- When to plant sugarcane in Angola
- When to plant sugarcane in Benin
- When to plant sugarcane in Botswana
- When to plant sugarcane in Burkina Faso
- When to plant sugarcane in Burundi
- When to plant sugarcane in Cabo Verde
- When to plant sugarcane in Cameroon
- When to plant sugarcane in Comores
- When to plant sugarcane in Congo
- When to plant sugarcane in Côte d'Ivoire
- When to plant sugarcane in Egypt
- When to plant sugarcane in Eritrea
- When to plant sugarcane in Eswatini
- When to plant sugarcane in Ethiopia
- When to plant sugarcane in Gabon
- When to plant sugarcane in Gambia
- When to plant sugarcane in Ghana
- When to plant sugarcane in Guinea Ecuatorial
- When to plant sugarcane in Guinea-Bissau
- When to plant sugarcane in Guinée
- When to plant sugarcane in Kenya
- When to plant sugarcane in Liberia
- When to plant sugarcane in Libya
- When to plant sugarcane in Madagascar
- When to plant sugarcane in Malawi
- When to plant sugarcane in Mali
- When to plant sugarcane in Mauritanie
- When to plant sugarcane in Mauritius
- When to plant sugarcane in Morocco
- When to plant sugarcane in Moçambique
- When to plant sugarcane in Namibia
- When to plant sugarcane in Niger
- When to plant sugarcane in Nigeria
- When to plant sugarcane in Rwanda
- When to plant sugarcane in République centrafricaine
- When to plant sugarcane in République démocratique du Congo
- When to plant sugarcane in Sao Tome and Principe
- When to plant sugarcane in Seychelles
- When to plant sugarcane in Sierra Leone
- When to plant sugarcane in Somalia
- When to plant sugarcane in South Africa
- When to plant sugarcane in South Sudan
- When to plant sugarcane in Sudan
- When to plant sugarcane in Sénégal
- When to plant sugarcane in Tchad
- When to plant sugarcane in Togo
- When to plant sugarcane in Tunisie
- When to plant sugarcane in Uganda
- When to plant sugarcane in United Republic of Tanzania
- When to plant sugarcane in Zambia
- When to plant sugarcane in Zimbabwe
Where sugarcane scores best
Districts where Divisi's engine currently rates this crop highest, ranked by fit.
-
 Douigni
 -
 Dorbor
 -
 Tabou
Tabou -
 Brazzaville
 -
 Sainte Marie
 -
 Micheweni
 -
 Mitsamiouli-Mboudé
 -
 Bokungu
 -
 Micomeseng
 -
 Buco Zau
 -
 Tarkwa Nsuaem
 -
 West Mahe
Get Insights by email
A short digest of new Divisi articles. No email on quiet weeks.
Frequently asked questions
How do I grow sugarcane?
How to grow sugarcane: 360–540 days to maturity, 135 cm rows, 5–10 cm deep. Also called suikerriet, nzimbe, canne à sucre, umoba, cana-de-açúcar, ipwa.
What is suikerriet in English?
Suikerriet is the Afrikaans name for sugarcane.
What is nzimbe in English?
Nzimbe is the Chichewa name for sugarcane.
What is canne à sucre in English?
Canne à sucre is the French name for sugarcane.
What is umoba in English?
Umoba is the Ndebele, Xhosa and Zulu name for sugarcane.
What is cana-de-açúcar in English?
Cana-de-açúcar is the Portuguese name for sugarcane.
What is ipwa in English?
Ipwa (also mudzviti) is the Shona name for sugarcane.
What is muwa in English?
Muwa is the Swahili name for sugarcane.
How long does sugarcane take to grow?
Sugarcane takes about 360–540 days from sowing to maturity, though the exact length varies with variety, temperature and how the season runs.
How deep should sugarcane be planted?
Sow sugarcane at about 5–10 cm deep. Shallower risks drying out; deeper wastes seed energy before the shoot reaches light.
What pests and diseases attack sugarcane?
The ones covered in this guide are Cereal stem borers, Eldana stalk borer, Fall armyworm. Each has its own page explaining how to identify, check for and control it.