 Divisi
How to grow sweet potato
Ipomoea batatas · Convolvulaceae
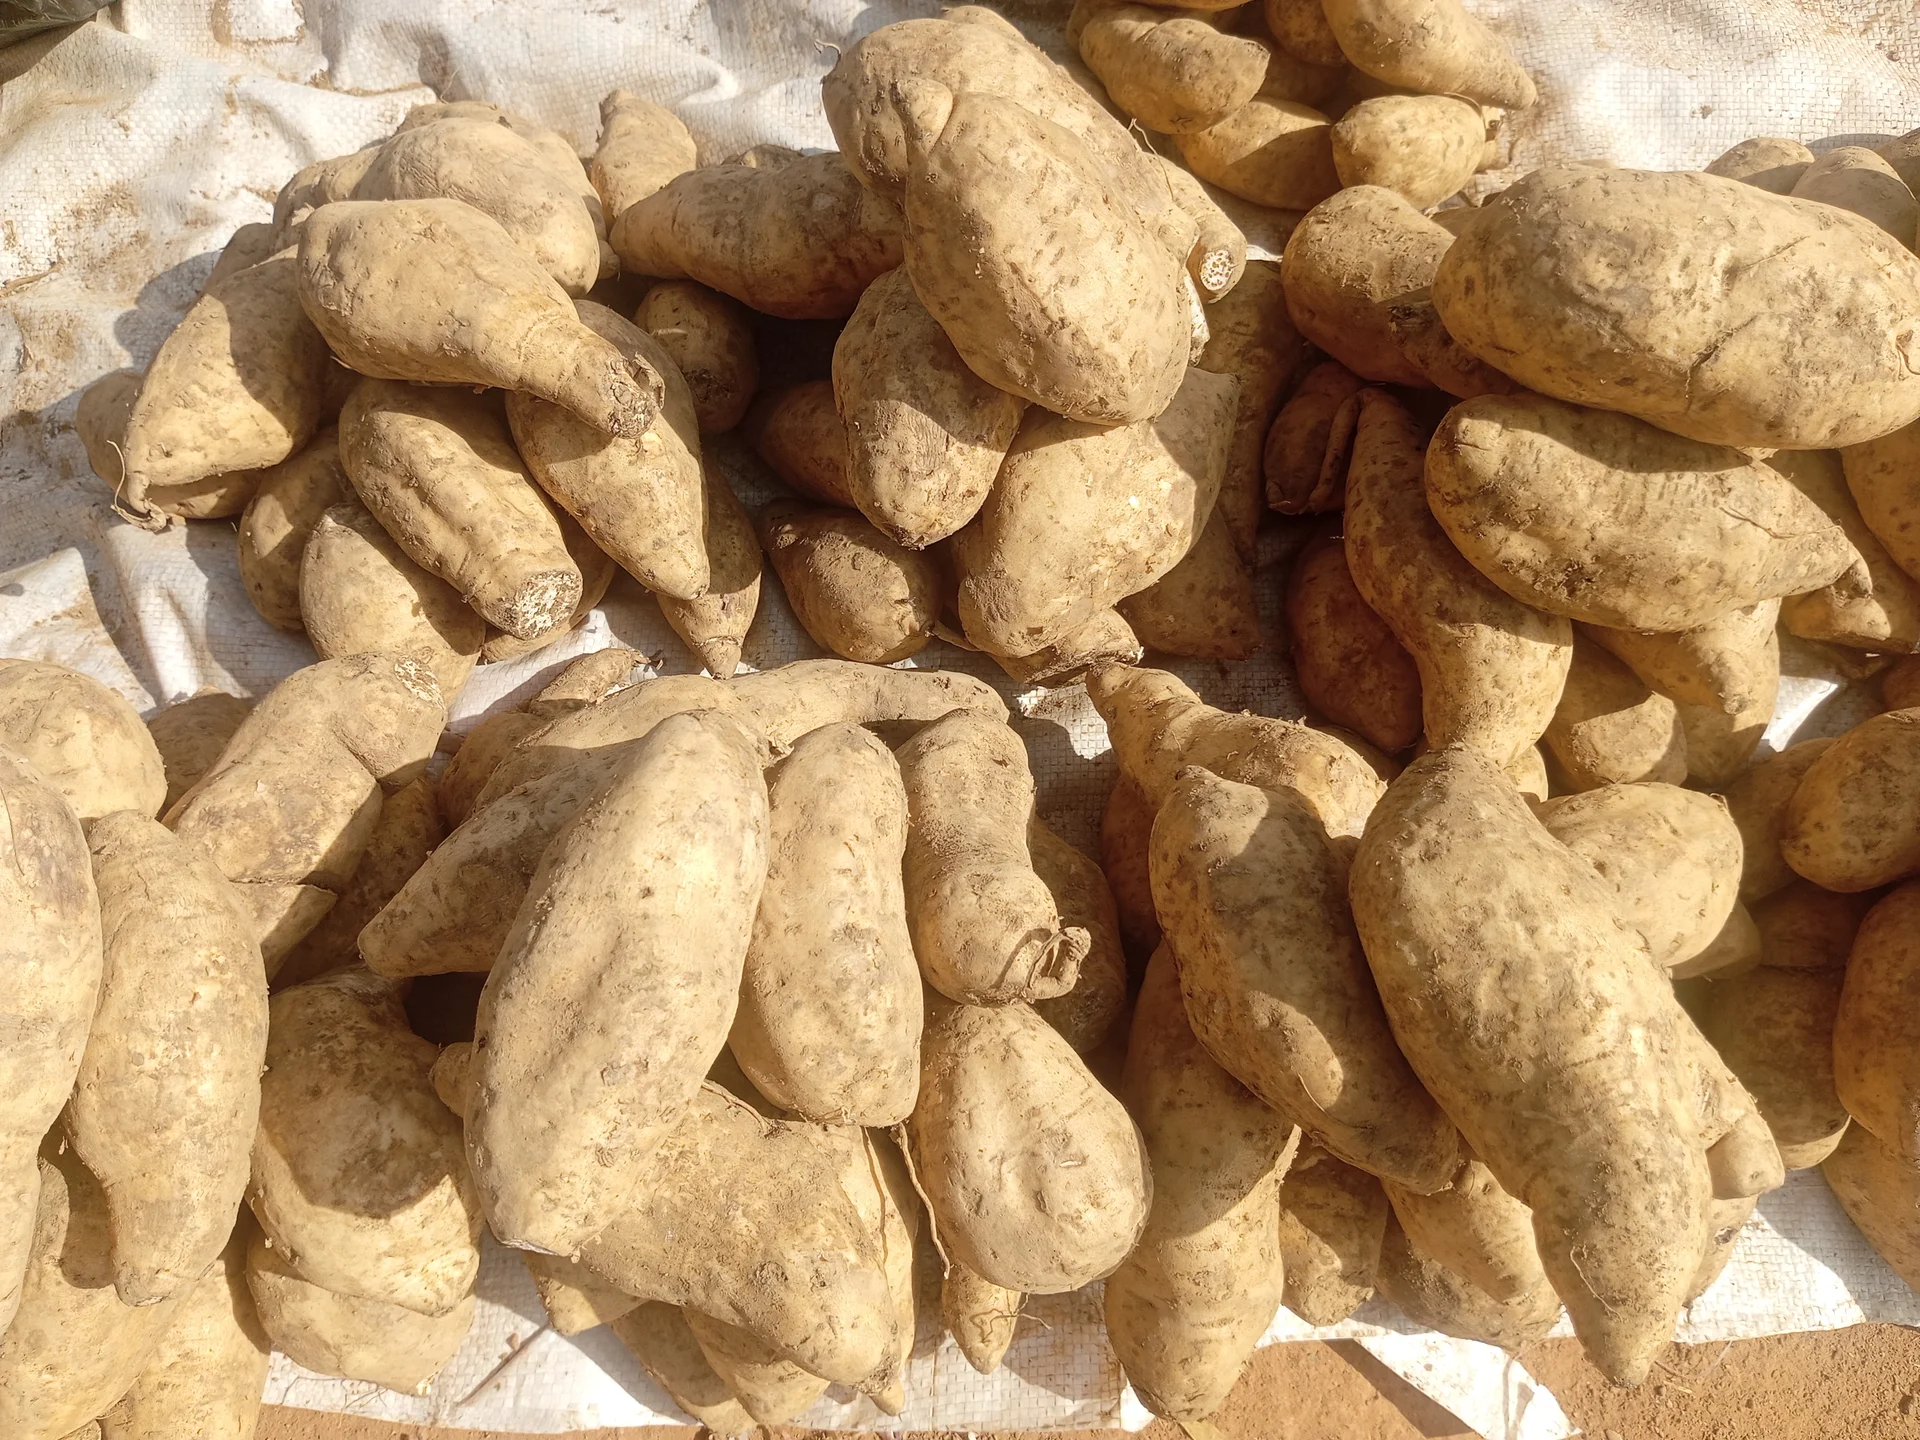
Photo: Samsule2 · CC BY-SA 4.0
Sweet potato is a trailing vine you grow from vine cuttings (slips), not from seed and not by planting the root. The roots swell underground into the food you dig. It is a hardy, drought-tolerant crop that will give you something to eat even in a poor year, which is why it is a food-security crop across the region. The orange-fleshed types (OFSP) are rich in vitamin A and good for children. White-, yellow- and orange-fleshed types are grown the same way. Two things decide your crop above all else: planting clean, healthy cuttings (whatever sickness is in the vine goes into every plant), and beating the sweetpotato weevil by keeping the roots covered with soil. Note: this is a different plant from the Irish (round) potato.
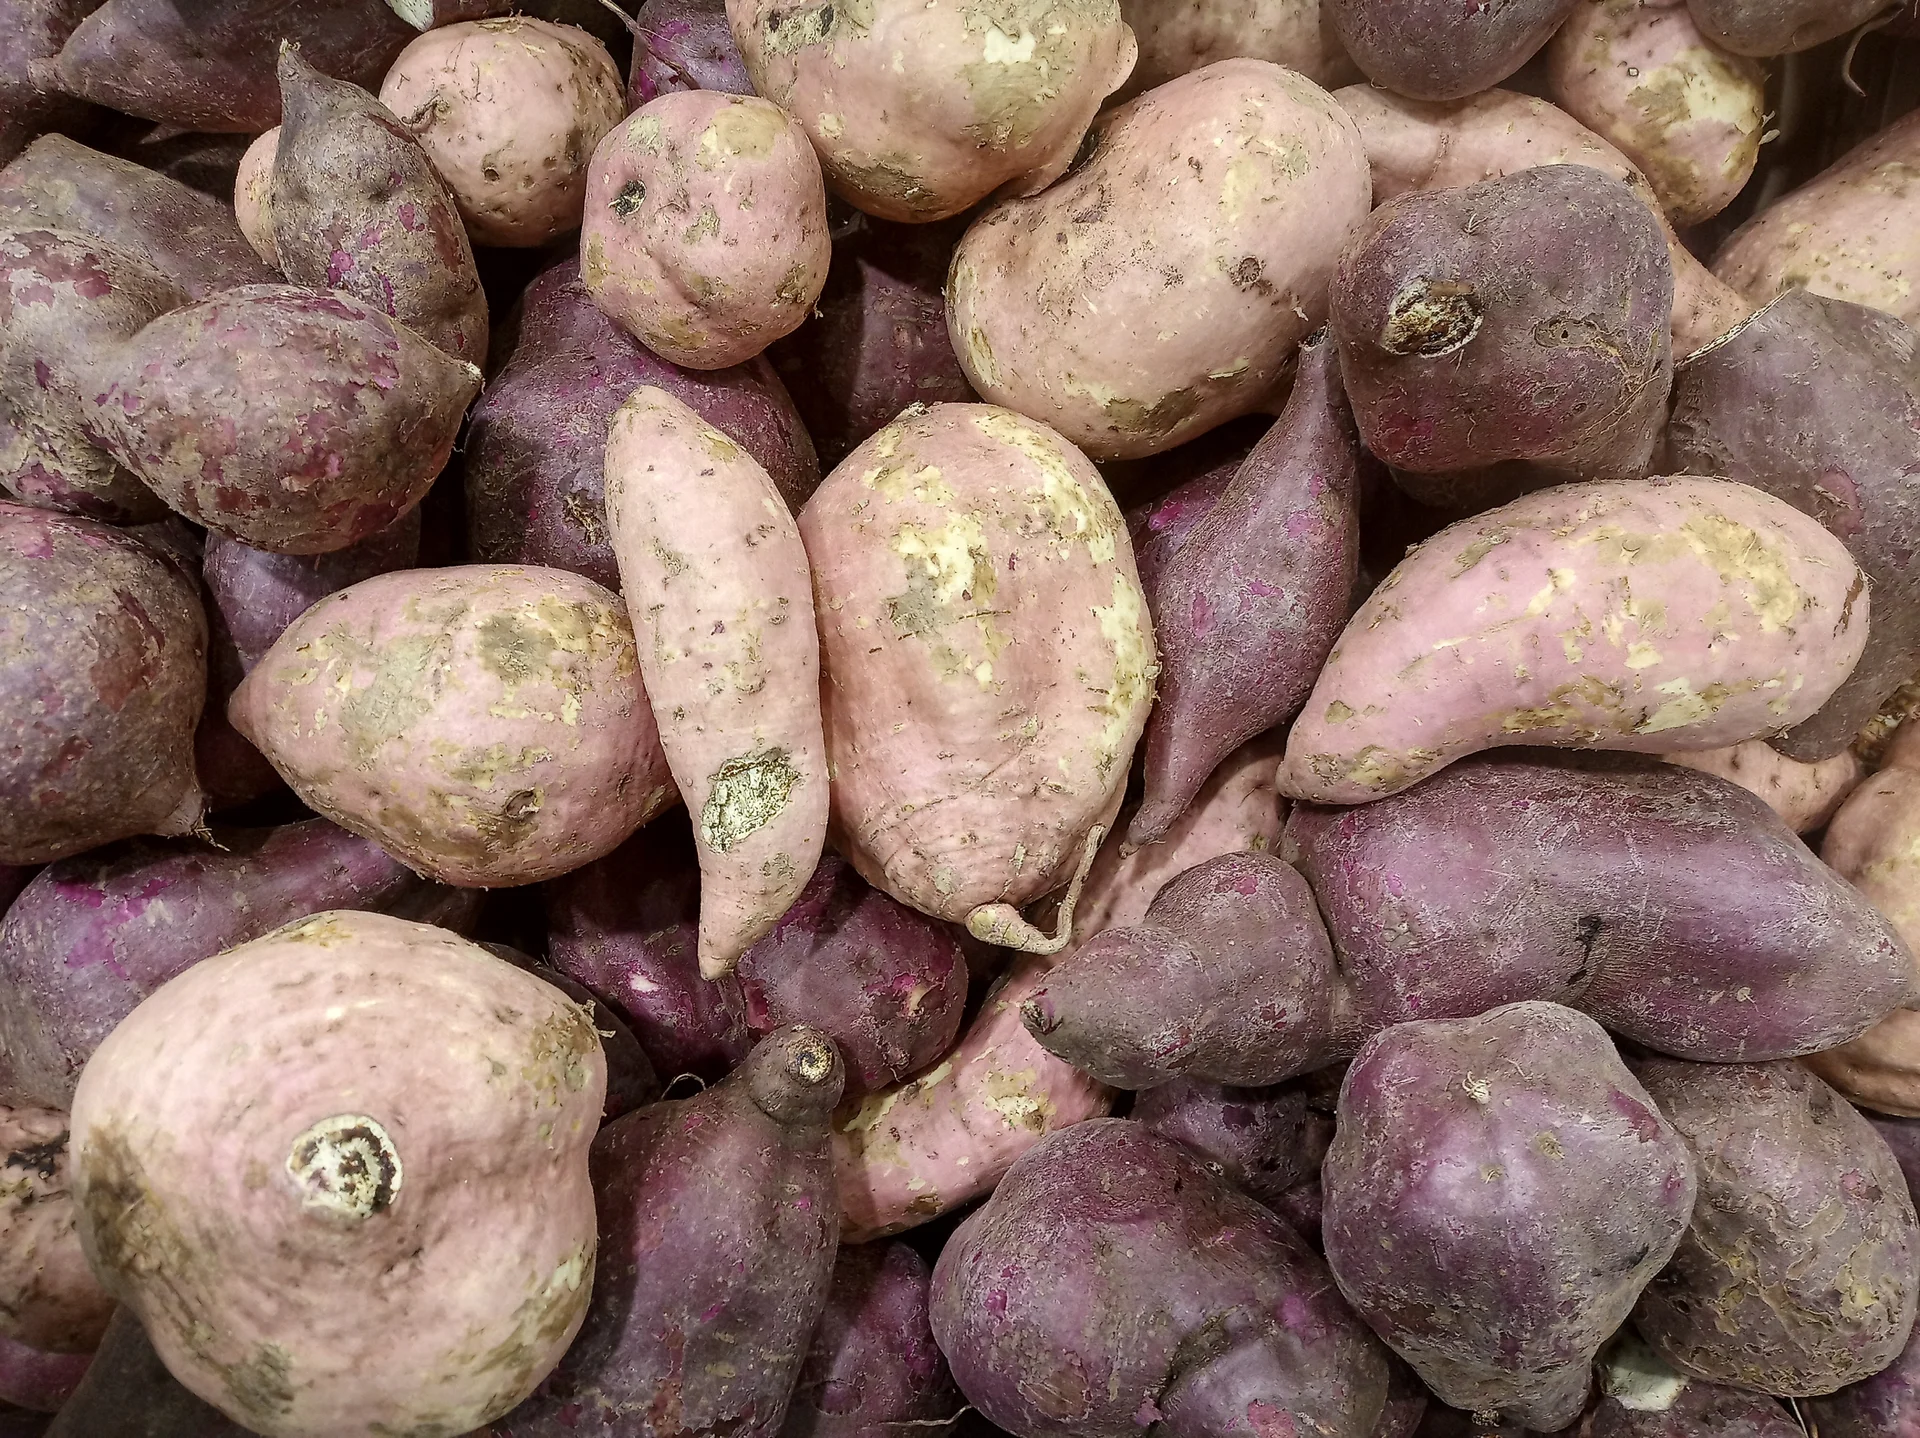
Filo gèn' · CC BY-SA 4.0 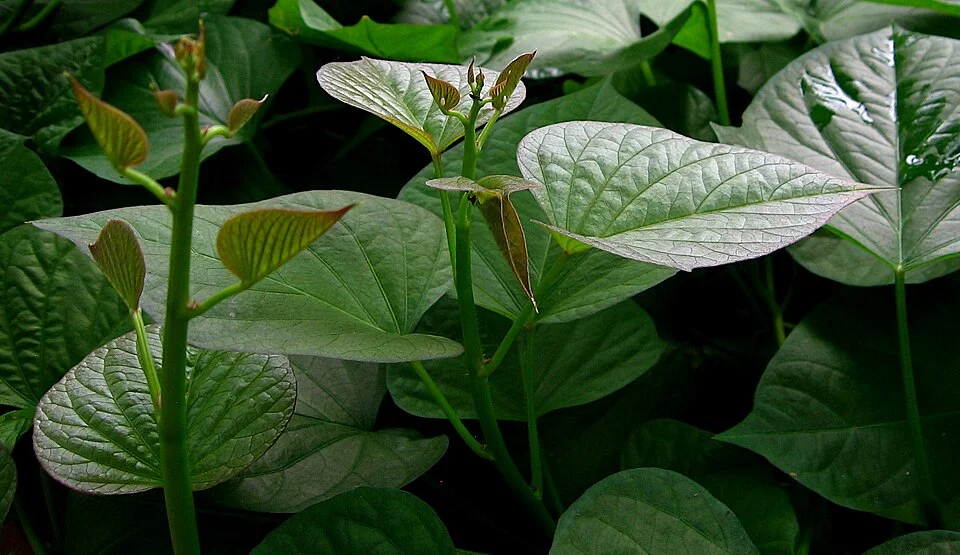
Kostka Martin · CC0
- Days to maturity
- 90–150 days
- Row spacing
- 100 cm
- Plant spacing in the row
- 30 cm
- Sowing depth
- 5–10 cm
These are general figures for the crop, compiled from published agronomic references including FAO and CABI. The right choice for your field depends on your soil, rainfall and the yield you are aiming for.
Will sweet potato actually do well on your field? Check your own field against every crop in the catalogue — no signup. Run the crop check →
Also known as
- Afrikaans
- patat
- Chichewa
- mbatata
- French
- patate douce
- Luganda
- lumonde
- Ndebele
- ubhatata
- Portuguese
- batata-doce
- Shona
- mbambaira
- Swahili
- kiazi kitamu, viazi vitamu
- Xhosa
- ubhatata
- Yoruba
- anamo, ọ̀dùnkún
- Zulu
- ubhatata
Working in buckets, bags or paces? The farming glossary turns the measures growers actually use into kilograms and hectares — what a 20 litre bucket of each crop really weighs, and how to size a field by walking it — alongside the Shona, Swahili, Ndebele and Yoruba words used in the field. Open the glossary →
Growing sweet potato, stage by stage
Your sweet potato season, step by step — from taking clean vine cuttings and building high ridges, through planting and hilling-up soil to keep the weevil out, to lifting the roots gently and curing them so they store for months.
Get clean vines and your land ready
Almost everything that decides this crop is set before you plant. The number-one lever is clean planting material — a virus in the vine you plant is a virus in every root. So choose a well-drained, sandy-loam field, move away from last year's sweet potato to starve out the weevil and root worms, build high, loose ridges, and feed them with well-rotted manure and potassium — the food that fills the roots. Do this in the weeks before planting so you can plant clean, fresh cuttings the moment the soil is moist.
Choose a well-drained sandy-loam site Recommended
The weevil and the root worms (nematodes) that ruin sweet potato live on in the soil and in old crop leftovers. Planting on fresh ground, well away from last year's sweet potato, starves them out before you even begin. A well-drained, light soil lets the roots swell big and lift out clean, instead of rotting or coming out small and forked.
Pick a well-drained field where water soaks away and does not sit — sweet potato roots rot in wet ground.
The best soil is light, sandy to sandy-loam. Roots swell easily and pull out clean; heavy, sticky clay gives small, twisted roots.
Choose ground that did not grow sweet potato last season (or the one before). Old sweet-potato land is already stocked with the weevil and root worms.
Keep the new field well away from any old or still-standing sweet-potato patch — the weevil walks and the virus-carrying insects fly across from there.
Clear out any volunteer sweet-potato plants nearby (self-sprouted from last year's leftover roots) — they are a bridge that carries the weevil and virus into your new crop.
- Tip:
Planting back onto last season's sweet-potato ground — it already holds the weevil and root worms waiting for the new crop.
- Do:
Rotate with a cereal or a legume (maize, beans, groundnut) for a season or two — it breaks the weevil and root-worm cycle in the soil.
- Watch out:
Low, wet spots and heavy clay — roots there rot or come out small and forked. Plant those areas last, or not at all.
Select clean tip cuttings from healthy mothers Critical
Sweet potato is grown from vine cuttings, so whatever is in the vine goes straight into your crop. A cutting off a sick mother carries the virus into every plant and can cut your roots by up to 8 in 10. Clean cuttings from healthy mothers are the single biggest thing you control — more than any fertiliser.
Take only the top of the vine — the last forearm's length (≈25–30 cm), about 3–4 leaf-joints from the growing tip. The virus builds up lower down the old vine, so the tips are the cleanest part.
Cut only from mother plants that look strong, dark-green and healthy. Never cut from a plant that is stunted, or whose leaves are mottled, puckered, yellow-veined or crinkled — those are the sick ones.
Before you cut, walk your seed-vine patch and mark the best plants — vigorous, heavy-vining, disease-free ones make the best mothers (this is called positive selection).
Take cuttings fresh, the day you plant, if you can. If you must hold them a day or two, stand them in a cool, shaded place out of the sun — wilted, sun-dried cuttings root poorly.
Where the dry season is long and the vines die back, carry a few clean roots through it buried in dry sand, and sprout them early for vines. This is the 'Triple S' method — Store in Sand and Sprout — and it gives you clean planting material ahead of the rains.
- Do:
Take tip cuttings only, from healthy heavy-vining mothers — this one habit does more for your yield than any input you can buy.
- Tip:
Cutting from a plant with mottled, puckered or yellow-veined leaves — you would plant the virus into the whole field.
- Watch out:
Cuttings left heaped in the sun — they wilt and dry out fast. Keep them shaded and moist, and plant them quickly.
Make ridges/mounds + incorporate manure Recommended
Roots swell best in loose, mounded soil. A high ridge gives the roots deep, soft earth to grow into and lets water drain away so they don't rot — and that thick soil over them is your first defence against the weevil. Well-rotted manure feeds the crop slowly all season and helps the ridge hold moisture.
Make ridges or mounds about one metre apart (a long stride), running across the slope so they catch the rain and don't wash away.
Build each ridge loose and high — about shin-high (≈20–30 cm). High, loose ridges give bigger, better-shaped roots and keep them well covered from the weevil.
Spread well-rotted manure or compost along the ridge line and mix it into the ridge — aim for about 5–10 t/ha. That is a thin scatter, not a heap: roughly one full wheelbarrow-load (about 50 kg) worked in along every 50–90 long strides (≈50–90 m) of ridge. Spread it thin; never dump a whole barrow on one spot.
Use only dark, crumbly, well-rotted manure. On sandy soil that dries fast, a little extra helps the ridge hold water; on heavier soil it keeps the ridge open so roots can swell.
- Do:
Build ridges high and loose — the softer and deeper the soil, the bigger and straighter the roots you dig.
- Tip:
Fresh, raw manure — it can burn the young cuttings, brings weed seeds, and robs the soil as it rots. Let it rot to dark crumbs first.
- Watch out:
Wash your hands well after handling manure, and keep it away from drinking water and food.
Apply basal fertiliser (esp. K) Recommended
Sweet potato is a potassium (K) crop above all else — potassium is what drives the roots to swell and fill. Working it into the ridge before planting puts that food where the roots will form. Go easy on nitrogen here: too much nitrogen grows a jungle of leaf and vine but few roots.
Work the basal fertiliser into the top of the ridge a few days before planting, so it sits where the young roots will find it. Your recommendation gives the amount for your field.
Favour a fertiliser that is high in potassium (K) and low in nitrogen — potassium fills the roots, nitrogen mostly grows vines.
No bought fertiliser? Clean wood ash is a good local source of potassium — scatter a few handfuls along each stride of ridge and mix it in.
Mix it into the soil, not left on top, and keep the ridge moist so the food is there when the roots begin to set (around 6–9 weeks).
- Do:
Lean on potassium — manure and wood ash — rather than nitrogen. Potassium is what turns vines into roots.
- Tip:
Piling on nitrogen fertiliser — you get lush leaves and a poor dig of small roots.
- Watch out:
Keep fertiliser and ash off your skin and eyes, away from food, water and children, and wash your hands after handling it.
Plant your cuttings and get a full stand
Now you turn clean cuttings into a full stand of rooted vines. The buried leaf-joints (nodes) grow roots within 1–2 weeks. A complete, even, healthy stand of clean vines is the foundation of the whole crop — plant into moist soil, keep it watered while it roots, and pull out any sick plant the moment it shows.
Plant tip cuttings Critical
This is where the crop is made or lost. Every cutting that roots well is a plant's worth of roots; every one that fails, or that carries the virus, is a gap or a spreader. Getting the depth, spacing and moisture right now sets your whole harvest.
Plant into moist soil — after a good planting rain, or, under irrigation, after wetting the ridge. Cuttings root fast in damp, warm soil.
Use tip cuttings about a forearm long (≈25–30 cm) with a few leaves at the top.
Bury the lower 2–4 leaf-joints (nodes) — about 5–10 cm of stem — laid slanting or flat along the ridge, leaving 2 or more leaves above the soil. Roots grow from every buried joint, so more buried joints means more roots.
Space plants about a foot-length apart (≈30 cm) along the ridge, with ridges about a metre apart (one long stride).
Firm the soil around each buried stem so it sits snug in moist earth. Loose cuttings dry out and fail.
- Do:
Plant on a cool, cloudy day or in the late afternoon — cuttings settle in with far less wilting than in the midday heat.
- Tip:
Planting into dry, dusty ridges — the buried joints won't root and the stand comes up thin and patchy.
- Watch out:
Plant a little deeper (nearer 10 cm) on sandy, fast-drying soil; shallower on heavy, wet soil.
Scout (SPVD symptoms, gaps) Critical
The first month sets your stand. Sweet potato virus disease (SPVD) does its worst damage early, and one sick plant left standing feeds the virus to its neighbours through aphids and whiteflies. Spotting sick plants and gaps now is the only time you can still fix them.
Walk the field about once a week through the first month — cover the whole field in a big "W", not just the edge by the path.
Look for sick plants: stunted, with small, puckered, crinkled leaves, yellowing along the veins (vein-clearing), mottled light-and-dark, or oddly purple. That is SPVD.
Turn a few leaves over and look underneath for whitefly (tiny white flies that lift off in a little cloud when disturbed) and aphids (small soft insects clustered on the shoots) — their build-up is what spreads the virus.
Count the gaps — cuttings that wilted or failed to root — so you know where to gap-fill.
Mark any sick plant to pull out now (see the roguing task). If whitefly and aphid numbers are building, the virus can spread fast — rogue hard (pull out and destroy every sick plant) and keep new plantings well away from old fields.
- Do:
Check every week without fail in the first month — this is the window when roguing still saves the crop.
- Watch out:
Tiny white flies rising off the underside of the leaves in a little cloud — that is whitefly, the carrier of the worst virus.
Rogue SPVD plants Critical
A plant with the virus will never make a decent crop — and left standing it infects the healthy plants around it, so one sick plant becomes many. Pulling out and destroying sick plants in the first month stops the virus in its tracks. SPVD can cut a crop by up to 8 in 10 roots.
As soon as a plant shows stunting, puckered or vein-cleared leaves, mottling or purpling, dig it out — root and all.
Carry it right out of the field and burn it or bury it deep. Never leave pulled plants lying on the ridge or the field edge.
Do this every week through the first month, whenever a new sick plant appears.
Never take cuttings from a plant that has shown these symptoms — not now, and not at harvest.
If sick plants keep appearing even after roguing → your planting material was infected. Mark this field's vines as unfit for seed and get clean, virus-tested cuttings for next season.
- Do:
Pull sick plants the day you see them — waiting a week lets the virus spread to the neighbours.
- Tip:
Heaping rogued plants at the field edge or in the compost — burn or bury them, or the virus and its insects stay right beside your crop.
Gap-fill Recommended
Every empty station is a plant's worth of roots lost. In the first two weeks you can still fill gaps with fresh cuttings that catch up; leave it later and the replacements stay small and behind.
About 1–2 weeks after planting, walk the ridges and find the gaps where cuttings wilted, dried or failed to root.
Plant a fresh clean tip cutting into each gap, into moist soil, the same depth and way as before.
Do it while the soil is still moist and the crop is only a week or two old, so the new plants are not left behind.
Take the replacement cuttings from healthy mothers only — never fill a gap with a cutting off a sick plant, or you seed the virus back in.
- Do:
Keep a few spare clean cuttings shaded and moist at planting, ready for gap-filling in the first fortnight.
- Tip:
Gap-filling late — cuttings put in after the stand has taken off never catch up; they just crowd in small.
Irrigate Recommended
Fresh cuttings have no roots yet and dry out fast. Keeping the ridge moist for the first couple of weeks is what lets the buried joints root and the stand come up even and full.
Keep the ridge moist for the first 2 weeks while the cuttings root — push in a finger and water when the top few centimetres are dry.
Water gently every 5–7 days, more often in heat or on sandy soil that dries quickly.
Don't waterlog the ridge — cuttings sitting in soggy soil rot instead of rooting.
Ease off once the cuttings have taken and new leaves are growing — established vines are drought-hardy and need much less.
- Tip:
Flooding the ridges — standing water rots the cuttings before they can even root.
- Watch out:
The first new leaves unfolding — that is the sign the cutting has rooted, and you can start watering less often.
Grow the vines, weed and hill up
The vines run out and cover the ground, closing the canopy by about 6–8 weeks. Two jobs decide the crop now: weed hard before the canopy closes (after that the vines smother weeds themselves), and hill up the ridges to cover any cracks so the weevil can't reach the swelling roots. Watch too for leaf blight in warm, wet weather.
Scout (SPVD, weevil, Alternaria) Critical
Now three problems can start: the weevil (your worst pest) begins working the vine bases, sweet potato virus disease (SPVD) can still spread, and Alternaria leaf blight spots the leaves in warm, wet weather. Catching each one early — and hilling up as you go — keeps the crop clean and the roots protected.
Walk the field in a "W" about once a week, checking the vines, the leaves and the base of the plants.
Weevil: look at the vine bases and stems for small, slender, long-snouted weevils and feeding scars, and for any cracks in the soil opening down toward the roots.
Leaf blight (Alternaria): look on the older, lower leaves for dark brown spots with rings inside them (like a target) and a yellow halo — worst after warm, humid, wet spells. Pick off the worst-spotted leaves and keep the canopy open so leaves dry quickly. If the spots keep spreading through the canopy despite this → spray a protectant fungicide (one that coats the leaf to shield it from new infection, such as mancozeb), as the label directs.
SPVD: keep pulling any plant that turns up stunted, mottled or vein-cleared (see the roguing task).
If you see soil cracks or the first weevils, hill up straight away to cover the roots — closing cracks is your main weevil defence.
- Do:
Mound soil up over the ridge as you scout — closing every crack denies the weevil the way in to your roots.
- Watch out:
Target-like ringed spots on the lower leaves after humid, wet weather — that is Alternaria. Pick off badly-spotted leaves and keep the canopy airy; if it keeps spreading, a protectant fungicide (e.g. mancozeb) checks new spots.
1st + 2nd weeding Critical
Before the vines cover the ground, weeds steal the water, light and food your crop needs to build roots. Two weedings in the first ~6 weeks — before the canopy closes — protect the crop; after that the vines shade out most weeds themselves.
Do the first weeding by about 2 weeks, while the weeds are small and the vines are still short.
Do the second weeding by about 4 weeks, and hill up the ridge at the same time (see the hilling task) — one pass does both jobs.
Hoe shallowly, and keep the hoe away from the plant bases — deep hoeing near the vines cuts the young feeding roots.
Once the vines meet and cover the ground, stop hoeing — the canopy now suppresses weeds, and walking in disturbs the roots.
- Do:
Pair the second weeding with hilling-up — you weed and close the weevil's cracks in a single trip through the field.
- Tip:
Hoeing deep near the vines — you cut the very roots that are about to swell into your harvest.
Hilling-up Critical
The sweetpotato weevil reaches the roots through cracks in the soil. Mounding loose soil over the ridge to cover those cracks — before the roots swell — is the single most effective thing you can do against it. There is no cure once a root is tunnelled: it turns bitter and inedible.
Around the second weeding (~4 weeks), draw loose soil up over the ridge to cover the plant bases and close any cracks.
Look for the cracks that open along the top of the ridge as the soil dries and the roots swell — these are the weevil's doorways.
Re-cover every crack with soil; where you can, water the ridge afterwards to help the soil settle and close.
Keep the storage roots covered by soil at all times — any root shoulder poking into the air or a crack is an open invitation to the weevil.
- Do:
Hill up early and keep at it — covered roots stay clean; exposed roots get tunnelled and go bitter.
- Watch out:
In dry spells the ridge cracks more — check and re-cover the cracks often when it is hot and dry.
Irrigate Recommended
This is one of the crop's two most water-important stages — root-bulking (next stage) is the other and the bigger of the two. The vines are building the leaf canopy that feeds the roots, and the first storage roots are being set now, so a real dry spell here costs you roots you can never win back. Sweet potato is hardier than most crops and shrugs off short dry periods on its own — but don't let it go thirsty through a long one. Steady moisture also keeps the ridge from cracking open to the weevil.
In a dry spell, water every 7–12 days and don't let the growing vines wilt for more than a day — in normal rains you needn't water, as the vines cope on their own.
Aim for steady, even moisture rather than dry-then-flood; big swings crack the ridge and stress the plant.
A light watering also closes soil cracks — a bonus against the weevil in hot, dry weather.
Never waterlog — sweet potato roots rot in soggy ground.
In a hard, drawn-out dry spell now, water if you possibly can — the leaf canopy and the first root-set are being decided, so this is second only to root-bulking as the time water turns into yield.
- Do:
In a dry year, spend your water here and at root-bulking — these are the crop's two water-critical stages, and skipping water now costs roots you can't get back.
- Tip:
Heavy watering that leaves the ridges soggy — waterlogged roots rot in the ground.
- Watch out:
Big wet-dry swings — the ridge cracks as it dries and lets the weevil in. Even moisture keeps it closed.
Bulk the roots — the harvest is made now
This is the harvest being made underground. The storage roots set and swell fastest from about 60–90 days, driven by potassium, steady moisture and the shortening days. Keep the moisture even, keep the cracks closed against the weevil, and hold back on nitrogen — late nitrogen grows vines, not roots.
Scout (weevil in dry cracks) Critical
This is the weevil's prime time — the roots are swelling and, in dry, cracked soil, the weevil tunnels straight into them. Even light damage makes roots bitter and unsellable, and it can take up to 9 in 10 roots. There is no cure, so scouting and closing cracks is everything.
Check the ridges every 1–2 weeks, and more often in hot, dry weather when the soil cracks most.
Look for cracks opening down to the roots, for root shoulders poking out, and for the small long-snouted weevils on the vines and soil.
Re-cover every crack with loose soil the moment you find it (see the re-hilling task).
Check any root you expose — a bitter smell, dark pin-holes or winding tunnels mean the weevil is in. Cull those roots; never store them.
If the weevil is building up → harvest promptly once the roots are mature, rather than leaving them in dry, cracked soil — and set pheromone traps if you can get them.
- Tip:
Late or heavy nitrogen now — it gives lush vines and few, small roots. The roots want potassium and steady water, not nitrogen.
- Watch out:
Every crack in the ridge during a dry spell — each one is a door to the weevil. Close them fast.
Re-hill / close cracks Critical
As the roots swell and the soil dries, the ridge keeps cracking open — and each crack lets the weevil reach the roots. Re-covering the cracks right through bulking keeps the roots sealed away and clean. Once a root is tunnelled it is lost, so prevention is the only tool.
Every 2–3 weeks through bulking, walk the ridges and mound loose soil over any cracks and exposed roots.
Focus on dry spells — that is when the ridge cracks most and the weevil is most active.
Where you can, water lightly after re-hilling to help the soil settle and the cracks close.
Keep every storage root fully under soil right up to harvest.
- Do:
Make re-hilling a habit every couple of weeks in the dry — it is the cheapest weevil control there is.
- Watch out:
Roots pushing their shoulders up out of the ridge — cover them. An exposed root greens up and feeds the weevil.
Irrigate through initiation/early bulking Recommended
The roots are filling now, and this is one of the crop's thirstiest, most important stages. Steady moisture through root-set and early bulking gives more and bigger roots; a bad dry spell now cuts both their number and size — but waterlogging rots them.
Keep the soil evenly moist through root-set and early bulking (roughly 45–100 days) — this is when water pays back the most.
Water about every 7–10 days, more often in heat and on sandy soil.
Avoid the dry-then-flood pattern — steady moisture makes smooth roots; big swings crack the roots and crack the ridge.
Ease off near maturity so the roots firm up and their skins set for lifting and storage — but never let the crop bake bone-dry and crack open.
- Do:
If you can water at only one stage, water now — root-set and bulking is where water turns into yield.
- Tip:
Waterlogging — soggy ridges rot the very roots you are trying to grow.
Check the roots are ready
The roots reach full size and their skins begin to set. Test-dig a hill from about 80 days to check: mature roots are at a good size, and a cut root's milky sap dries quickly on the surface. Some older leaves may start to yellow. Lift before the weevil builds up or the dry-season cracks widen — and you can lift a few hills at a time over several weeks as you need food.
Check maturity (test-dig) Recommended
Digging at the right time means full-sized roots that store well, before the weevil and the widening dry-season cracks eat into them. A quick test-dig tells you whether the crop is ready — no guessing, no tools needed.
From about 80 days, gently dig up one or two hills from different parts of the field to check.
Look at the roots: they should be at a good eating size for your variety, with firm, set skin that does not rub off easily.
Cut a root across: on a mature root the milky sap beads up and dries quickly on the cut; on an immature root it stays wet and runny.
Watch the crop too — some yellowing of the older leaves is a sign the roots are finishing.
If the roots are still small and the sap stays wet and runny → they are not ready. Cover the test hills back up, wait 1–2 weeks, and dig-test again. But if the weevil is building or the soil is cracking badly, lift now anyway rather than lose roots.
- Do:
Lift roots a few hills at a time as you need them — sweet potato keeps best in the ground until the weevil or cracks force your hand.
- Watch out:
Don't leave a mature crop sitting in hot, dry, cracking soil — that is exactly when the weevil moves in.
Lift the roots gently
Lift the roots by hand on a dry day, gently — sweet potato roots bruise and snap easily, and every bruise or cut is a doorway for rot and the weevil. Sort as you go: keep the sound roots, cull the damaged and weevil-holed ones, and save clean tip vines from your best healthy plants for next season's cuttings.
Hand-lift roots gently Critical
A root is a whole season's work — and it bruises far more easily than you'd think. Careful lifting and sorting decides how much of your crop reaches the pot and the market, and how well it stores. Weevil-holed roots left in with sound ones will spoil the whole store.
Lift on a dry day, when the soil is neither dust-dry nor muddy — roots come out cleaner and bruise less.
Loosen the ridge with a hoe or fork from the side, well away from the crown, then lift the roots out by hand. Digging straight down spears and cuts them.
Handle roots gently — don't throw or heap them hard. Every bruise, cut and torn skin invites rot and the weevil.
Sort as you lift: sound, unbroken roots in one basket; damaged, cut, cracked and weevil-holed roots (bitter smell, pin-holes, tunnels) kept separate to eat first — never stored with the good ones.
Save clean tip vines from your best, healthiest plants for next season's cuttings, or keep a few sound clean roots to sprout in sand (Triple S).
- Do:
Save planting vines only from strong, disease-free plants at harvest — it is next year's clean start.
- Tip:
Piling roots roughly or leaving them in the hot sun after lifting — bruised, sun-scalded roots rot fast. Keep them in the shade.
- Watch out:
Weevil-holed or bitter-smelling roots — cull them out as you sort. One infested root spoils a whole store.
Cure and store so they keep
Fresh roots are perishable and bruise-prone — but curing heals them and makes them keep for months. Cure first: hold the roots warm and humid (about 29–30 °C and 85–90% humidity) for 5–7 days to heal the skin cuts and set the skin. Low-tech way: pile them under grass or leaves in a warm, shaded, airy spot. Then store the cured roots cool, dry, dark and airy (about 13–15 °C) — well-cured roots keep for months. Never store weevil-holed or bruised roots with the sound ones — they rot and spread the weevil. Keep the store rodent-proof (raised, and closed with metal or tight mesh), because rats gnaw stored roots.
Pests and diseases that attack sweet potato
-
 Alternaria leaf blight
 -
 Bacterial soft rot
 -
 Flea beetles
 -
 Shoot borer
 -
 Sweet potato virus disease
 -
 Sweetpotato weevil
 -
 Tuber rots
 -
 Whitefly
Where to sell sweet potato
Markets that trade this crop — what each one sells it by, when supply peaks there, and the currency used.
-
 Mbare Musika
-
 Mercado Treinta
-
 Nakasero Market
-
 New Soweto Market
-
 Kalerwe Market
-
 Marché Central de Bujumbura
-
 Gulu Main Market
-
 Hawassa Market
Grow sweet potato with a plan, not a guess
This guide is the general answer. Divisi works out yours — the week to plant sweet potato on your soil and your rainfall, and each job dated for your field.


When to plant sweet potato, country by country
- When to plant sweet potato in Algeria
- When to plant sweet potato in Angola
- When to plant sweet potato in Benin
- When to plant sweet potato in Botswana
- When to plant sweet potato in Burkina Faso
- When to plant sweet potato in Burundi
- When to plant sweet potato in Cabo Verde
- When to plant sweet potato in Cameroon
- When to plant sweet potato in Comores
- When to plant sweet potato in Congo
- When to plant sweet potato in Côte d'Ivoire
- When to plant sweet potato in Egypt
- When to plant sweet potato in Eritrea
- When to plant sweet potato in Eswatini
- When to plant sweet potato in Ethiopia
- When to plant sweet potato in Gabon
- When to plant sweet potato in Gambia
- When to plant sweet potato in Ghana
- When to plant sweet potato in Guinea Ecuatorial
- When to plant sweet potato in Guinée
- When to plant sweet potato in Kenya
- When to plant sweet potato in Lesotho
- When to plant sweet potato in Liberia
- When to plant sweet potato in Libya
- When to plant sweet potato in Madagascar
- When to plant sweet potato in Malawi
- When to plant sweet potato in Mali
- When to plant sweet potato in Mauritanie
- When to plant sweet potato in Mauritius
- When to plant sweet potato in Morocco
- When to plant sweet potato in Moçambique
- When to plant sweet potato in Namibia
- When to plant sweet potato in Niger
- When to plant sweet potato in Nigeria
- When to plant sweet potato in Rwanda
- When to plant sweet potato in République centrafricaine
- When to plant sweet potato in République démocratique du Congo
- When to plant sweet potato in Sao Tome and Principe
- When to plant sweet potato in Sierra Leone
- When to plant sweet potato in Somalia
- When to plant sweet potato in South Africa
- When to plant sweet potato in South Sudan
- When to plant sweet potato in Sudan
- When to plant sweet potato in Sénégal
- When to plant sweet potato in Tchad
- When to plant sweet potato in Togo
- When to plant sweet potato in Tunisie
- When to plant sweet potato in Uganda
- When to plant sweet potato in United Republic of Tanzania
- When to plant sweet potato in Zambia
- When to plant sweet potato in Zimbabwe
Where sweet potato scores best
Districts where Divisi's engine currently rates this crop highest, ranked by fit.
-
 Bailundo
 -
 Gisuru
 -
 Ngoma
Ngoma -
 Loumo
Loumo -
 Tigania West
 -
 Kalangala
 -
 Ogooue-Letili
 -
 Kabeya-Kamwanga
 -
 Bukoba
 -
 Ugu
Ugu -
 Mongomeyen
 -
 Mobaye
Get Insights by email
A short digest of new Divisi articles. No email on quiet weeks.
Frequently asked questions
How do I grow sweet potato?
How to grow sweet potato: 90–150 days to maturity, 100 cm rows, 5–10 cm deep. Also called patat, mbatata, patate douce, lumonde, ubhatata, batata-doce.
What is patat in English?
Patat is the Afrikaans name for sweet potato.
What is mbatata in English?
Mbatata is the Chichewa name for sweet potato.
What is patate douce in English?
Patate douce is the French name for sweet potato.
What is lumonde in English?
Lumonde is the Luganda name for sweet potato.
What is ubhatata in English?
Ubhatata is the Ndebele, Xhosa and Zulu name for sweet potato.
What is batata-doce in English?
Batata-doce is the Portuguese name for sweet potato.
What is mbambaira in English?
Mbambaira is the Shona name for sweet potato.
What is kiazi kitamu in English?
Kiazi kitamu (also viazi vitamu) is the Swahili name for sweet potato.
What is anamo in English?
Anamo (also ọ̀dùnkún) is the Yoruba name for sweet potato.
How long does sweet potato take to grow?
Sweet potato takes about 90–150 days from sowing to maturity, though the exact length varies with variety, temperature and how the season runs.
What spacing should I use for sweet potato?
Space sweet potato rows about 100 cm apart, with roughly 30 cm between plants within the row.
How deep should sweet potato be planted?
Sow sweet potato at about 5–10 cm deep. Shallower risks drying out; deeper wastes seed energy before the shoot reaches light.
What pests and diseases attack sweet potato?
The ones covered in this guide are Alternaria leaf blight, Bacterial soft rot, Flea beetles. Each has its own page explaining how to identify, check for and control it.