 Divisi
How to grow pearl millet
Pennisetum glaucum · Poaceae
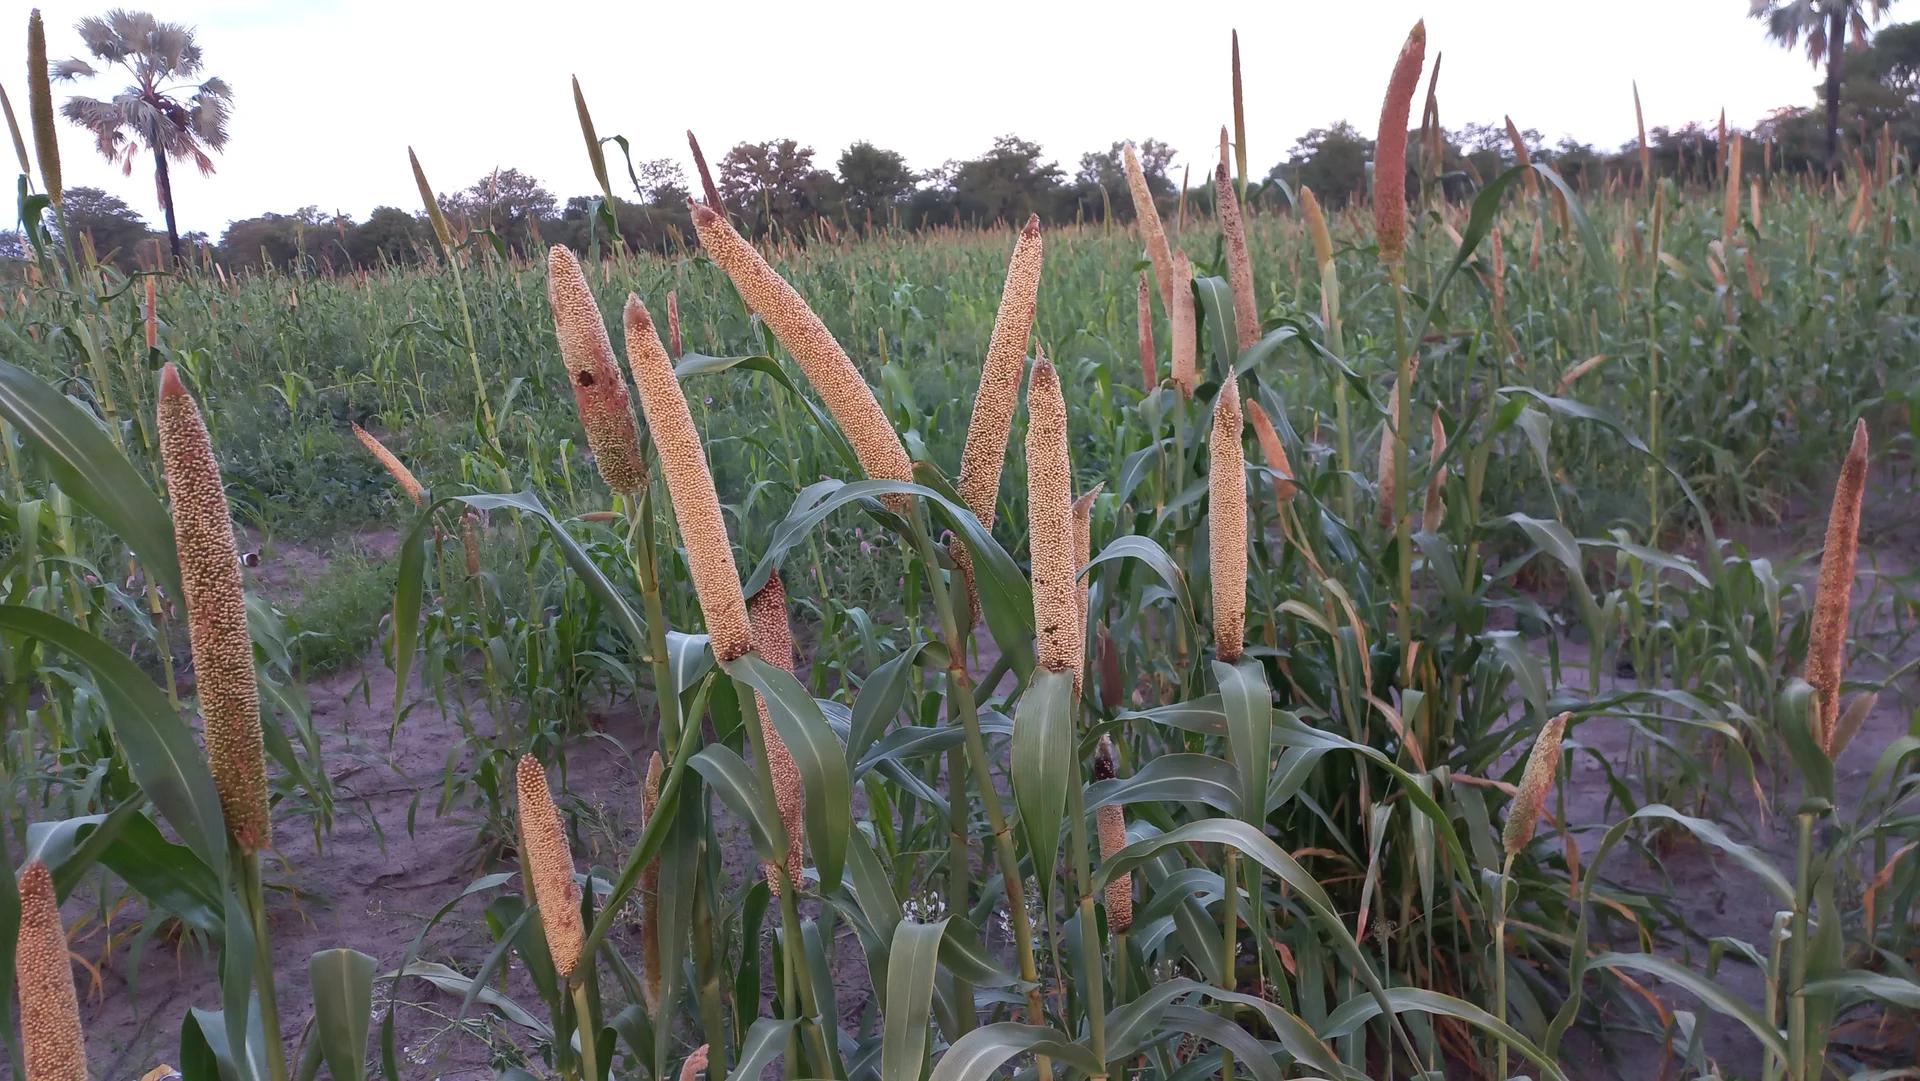
Photo: Shikoha Tautiko · CC BY-SA 4.0
Pearl millet (Pennisetum glaucum) is the toughest grain you can grow. It is the staple of the driest, sandiest land — where maize burns up and even sorghum gives in, millet still fills a head. Each plant carries a thick, cylindrical head that stands up like a candle, ripens fast (a medium type in about 90 days), and throws many tillers (side-shoots from the base, each carrying its own head). Give it as little as 250 mm of rain on poor sand and it will still feed your family. One quirk to respect: the wind carries its pollen from plant to plant, and each head's female parts open a few days before its own pollen sheds — so every field is a natural mix. Buy fresh, disease-treated seed each season rather than saving grain that has crossed with a neighbour's field. Grown for grain, or sown thicker and cut green for fodder.
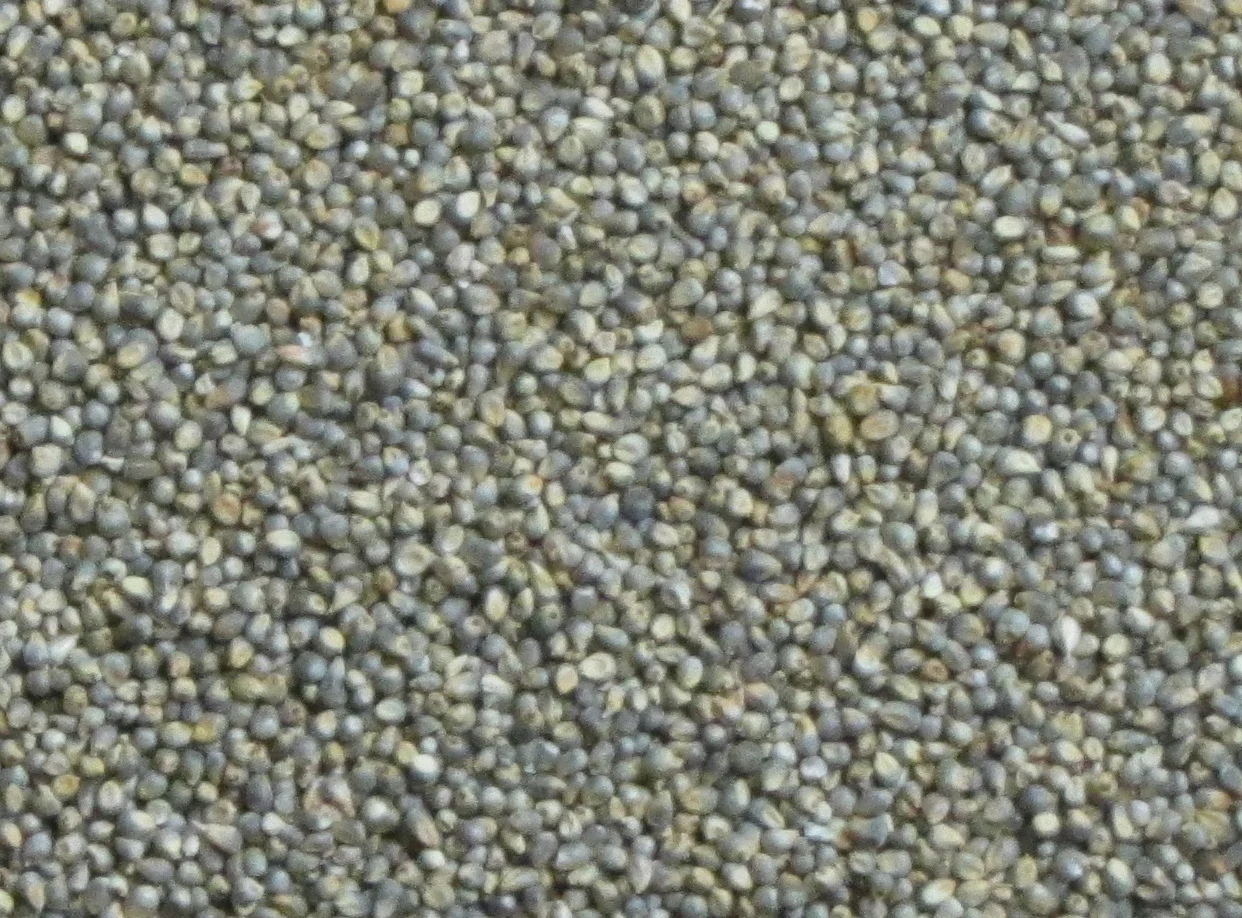
Sengai Podhuvan · CC BY-SA 3.0 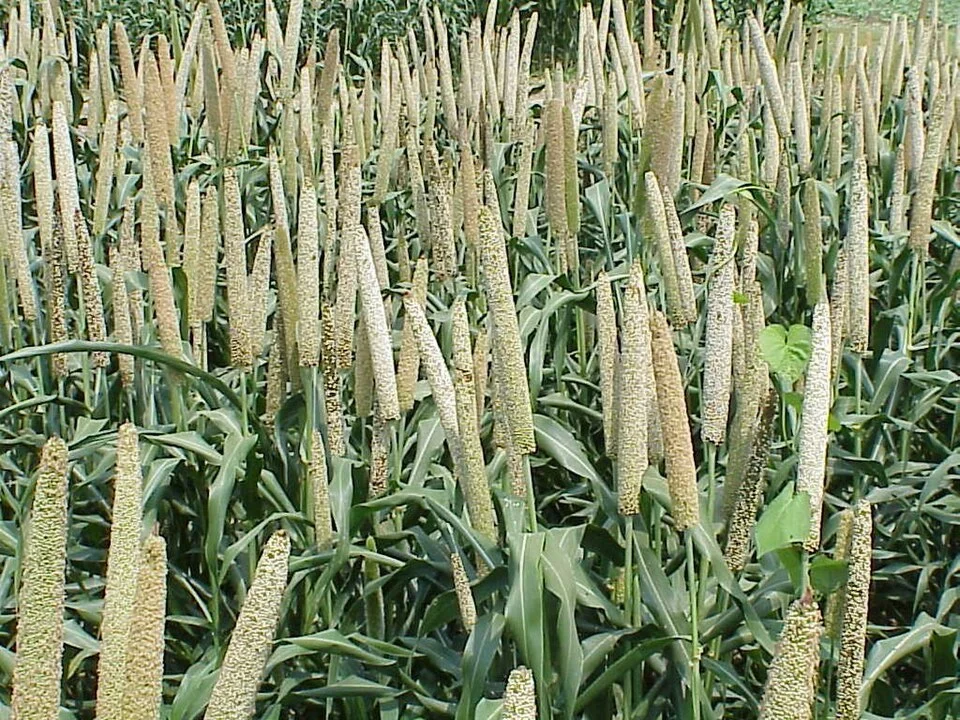
- Days to maturity
- 60–120 days
- Row spacing
- 60 cm
- Plant spacing in the row
- 12 cm
- Sowing depth
- 3.5–5 cm
These are general figures for the crop, compiled from published agronomic references including FAO and CABI. The right choice for your field depends on your soil, rainfall and the yield you are aiming for.
Will pearl millet actually do well on your field? Check your own field against every crop in the catalogue — no signup. Run the crop check →
Also known as
Pearl millet is also called bulrush millet and cattail millet.
- English
- bulrush millet, cattail millet
- Arabic
- dukhn
- Bambara
- sanyo, suna
- French
- mil, mil à chandelle, petit mil
- Fula
- gawri, gauri
- Hausa
- gero
- Portuguese
- milho painço, babala
- Setswana
- lebelebele
- Shona
- mhunga
- Swahili
- uwele, mawele, mwele
- Wolof
- dugub
Working in buckets, bags or paces? The farming glossary turns the measures growers actually use into kilograms and hectares — what a 20 litre bucket of each crop really weighs, and how to size a field by walking it — alongside the Shona, Swahili, Ndebele and Yoruba words used in the field. Open the glossary →
Growing pearl millet, stage by stage
Your pearl millet season, step by step — from a fine, firm seedbed and clean, disease-treated seed, through a full even stand, early weeding and one small, well-timed feed, to daily bird-scaring from the milk stage and dry, sealed storage. It is the hardiest grain there is — if you protect the few weeks that truly matter.
Get your field and seed ready
Almost everything that decides your millet harvest is set before the first seed goes in: clean, disease-treated seed of the right variety, a fine and firm seedbed for the tiny seed, and a plan to beat Striga. Do this in the dry weeks before the rains so you can sow the moment a real soaking rain falls.
Plan the field / rotation Recommended
Millet's two worst enemies build up when you grow it on the same land year after year: Striga (a purple parasitic weed — it clamps onto the roots underground and bleeds the crop) and downy mildew (a disease carried on seed and in the soil). Planning a rotation now, months ahead, is the cheapest control you will ever get — it costs you nothing but a decision.
Decide months ahead — this runs from about 4 months down to 1 month before sowing — which field will carry the millet, and remember what grew there last season.
Rotate with a legume — cowpea, groundnut or a bean — the season before. A legume plays a trick on Striga: its roots make the buried Striga seeds wake up and sprout, but with no millet root to feed on they starve and die. The legume also leaves free nitrogen in the soil for the millet.
Don't follow millet with millet on land where Striga or mildew has been a problem. If you have no choice, plan to intercrop a legume between the millet rows this season instead.
Line up downy-mildew-treated seed now (see the next task) — it is your single best defence against the disease, and the good varieties sell out early.
- Do:
Ask for downy-mildew-treated seed — a metalaxyl (a fungicide) seed dressing gives about 87% protection for the first ~5 weeks, exactly when the crop is most at risk.
- Do:
Grow a legume the season before, or between the rows this season — it starves Striga and feeds the soil at no cost.
Buy the recommended seed + basal Critical
Clean, disease-treated seed of the right variety, plus the basal (planting) fertiliser, is the strong, even start your whole season stands on. Buy it early — before the rains — so nothing holds you back on the day the first soaking rain falls, and so you get treated seed before it sells out.
Buy certified, downy-mildew-treated seed from a registered dealer — a sealed, labelled bag, not grain scooped from a sack. The treatment is usually a coloured coating on the seed; it guards the seedling through its most dangerous first weeks.
Choose a variety that matches your rains: a short-season type (60–90 days) where the rains are short, a longer one where they last. Millet is a short-day plant — it flowers as the days grow shorter — so sow local long-season types on time, or they flower too late and the heads meet the dry, cold weather.
Plan your sowing date so the crop flowers after the worst heat has passed — flowering falls about 6–8 weeks (40–55 days) after sowing, and heat above about 40 °C while the head flowers leaves it half-empty. Count back from your hottest, driest weeks and pick a variety whose flowering lands in cooler, moister weather.
Buy the basal fertiliser your recommendation gives — for millet this is mostly phosphorus (P), which drives early root and tiller growth. Millet needs far less fertiliser than maize, so don't overbuy.
Store seed and fertiliser dry, off the floor, and well away from food, water and children. Keep the label and receipt in case the seed turns out poor.
- Do:
Buy treated seed in a sealed, labelled bag — loose grain from a sack is often old, untreated, or crossed with a neighbour's field, and comes up unevenly.
- Tip:
Eating the coated (treated) seed or feeding it to animals — the fungicide dressing is not food. Keep it well apart from your grain store.
- Watch out:
Check the packing date is for this season, and keep fertiliser dry — damp fertiliser sets hard as a rock and won't spread.
Clear & prepare a fine, firm seedbed Recommended
Millet seed is tiny — about thirty seeds weigh less than a single maize seed. It can only sprout evenly if it sits in fine, firm, moist soil. A rough, cloddy bed swallows the little seed in air pockets and gives you a patchy, gappy stand you cannot repair later.
In the weeks before the rains, clear weeds and old crop trash off the planting lines (you can leave some trash between the rows to hold moisture and slow the wind).
Loosen the topsoil and break the clods to a fine crumb — aim for soil like coarse flour on top. The finer the tilth, the more evenly the tiny seed comes up.
Firm the bed lightly so the fine seed will meet solid, moist soil underneath instead of dropping into deep cracks. On loose sand, a light press with your foot or a plank is enough.
Level the surface. On a slope, work across the slope, or make small basins or tied ridges — millet lives on little rain, so catch every drop you can.
- Do:
Make the bed finer than you would for maize — the smaller the seed, the finer the soil it needs to sprout evenly.
- Watch out:
Avoid a loose, fluffy bed or big clods — the seed then drops too deep or dries out, and comes up in patches.
Incorporate manure/compost Recommended
A little well-rotted manure or compost feeds millet slowly, helps thin sandy soil hold water, and makes your small dose of bought fertiliser work harder. But fresh manure burns young roots and brings in weed seeds — it must be well rotted first.
Use only well-rotted manure or compost — dark, crumbly, no strong smell. Fresh, strawy dung needs more time to break down.
Spread it thin and even across the whole field — about a wheelbarrow-load every few strides, never heaps in one spot. Millet has a low fertility need, so a little goes a long way; follow your recommendation for the exact amount.
Work it into the topsoil about 1–2 weeks before you sow (roughly 14 days out), so it settles in and starts feeding the soil.
- Tip:
Fresh or raw manure at sowing — it scorches the tiny seedlings, robs nitrogen as it rots, and sows weeds.
- Watch out:
Wash your hands after handling manure, and keep it out of drinking water.
Sow and get a full stand
The number of healthy plants you set now is the ceiling on your harvest — you cannot add plants later. Sow the tiny seed on a soaking rain, mixed with dry sand so it spreads evenly, with the basal phosphorus placed below the seed and covered. Then rogue out any diseased seedlings, thin, and weed early — millet is a poor fighter against weeds in its first weeks.
Sow + apply basal P Critical
A full, even stand is the single biggest thing you control. Millet seed is so fine that sowing it well — the right depth, an even spread, and fertiliser that never touches the seed — is the whole difference between a thick, even crop and a thin, gappy one you cannot repair.
Sow on a soaking rain — push your hand into the soil and it should be moist to about 20 cm down, as deep as your hand, not just damp on top. Millet needs little rain overall, but the seed must still reach moisture to sprout.
Mix the fine seed with a few handfuls of dry sand, ash or dry soil before sowing — about one part seed to four parts sand. This is the only way to spread such tiny seed evenly by hand and stop it clumping.
Sow a finger-joint deep (3.5–5 cm) in rows about three hand-spans apart (≈60 cm) — anywhere from 45 to 90 cm is fine. On loose, dry sand sow toward the deeper end to reach moisture; on firmer soil, shallower.
Place the basal phosphorus below the seed and cover it with a little soil first — the seed burns and dies if the fertiliser touches it. Your recommendation gives the amount.
Sow a little thick — the tiny seed never all comes up, and you will thin to the strongest plants later. Cover lightly and firm the soil so the seed sits snug in moist earth.
At 25–30 °C the seedlings break ground fast — in just 2–3 days. Be ready to start scouting and rogueing from the end of the first week.
- Do:
Sow on a real soaking rain, not the first light shower — a false start leaves the fine seed to bake or rot.
- Do:
Mix the seed with dry sand before you sow — it is the one trick that spreads tiny millet seed evenly by hand.
- Tip:
Letting the basal fertiliser touch the seed — always keep a layer of soil between them, or the seed burns and never comes up.
- Watch out:
Keep fertiliser out of the seed furrow and off wet leaves, and wash your hands after handling it.
Scout (downy-mildew seedlings, gaps) Critical
The first three weeks set your stand. Downy mildew can spread from a few sick seedlings to ruin the whole crop, and gaps can only be filled while the plants are still tiny. Ten minutes, twice a week, protects the whole season.
From about 5 days after sowing, walk the field twice a week (every 3–4 days). Cross it in a big “W” so you cover the corners and the middle, not just the edge by the path.
Look for downy mildew: seedlings with pale, yellow-streaked leaves and a white, powdery felt on the underside of the leaf (clearest in the cool of the morning). It is carried on seed and in soil and spreads fast — mark these plants to pull (next task).
Look for Striga starting as tiny plants at the base of the millet, and pull any you see on sight, before they take hold.
Count the gaps — stretches of row with no plants — so you know where to move thinnings into later.
Check that the greening is even across the rows. Patchy emergence warns of poor seed contact or a crusted seedbed.
- Do:
Scout in the early morning — the white downy felt under mildewed leaves shows best when there is dew on it.
- Watch out:
A few sick seedlings today become many next week — never leave a downy-mildew plant standing.
Rogue downy-mildew plants Critical
To rogue means to pull out and destroy diseased plants. A downy-mildew plant makes no grain and showers the soil with spores that can infect your crop for years. Pulling them early, before they seed the soil, is the very heart of millet disease control.
From about a week after sowing (day 7), and every 5–7 days after that, walk the rows and pull out every seedling with pale, yellow-streaked leaves and white felt underneath.
Pull the whole plant, roots and all, and carry it right out of the field — don't drop it between the rows.
Burn it or bury it deep. Never leave pulled plants to dry on the field, feed them to animals, or put them in compost — any of these spreads the spores.
Keep at it as new cases show, up to about 5 weeks after sowing. Later, watch also for a “green ear” — a head that comes out leafy, twisted and grainless — and cut and destroy those the same way.
- Do:
Pull mildewed plants on sight — one destroyed today saves many next season.
- Tip:
Composting or feeding out mildewed plants — burn or bury them, or the disease comes straight back next year.
Thin to target spacing Recommended
You sowed thick to be sure of a stand; now too many plants crowded in one hill fight each other for water and food, and every one of them makes a small head. Thinning to the strongest few, and moving the spares into gaps, evens out the crop for bigger heads.
At about 10–18 days after sowing, once the seedlings are a few finger-joints tall and you can tell the strong from the weak, thin each hill.
Leave the two strongest plants per hill, with hills about a hand-span apart (≈20 cm) along the row. Nip out the extras at ground level rather than yanking them, so you don't disturb the roots you are keeping.
Move healthy thinnings into the gaps: lift each one with a little ball of moist soil, in the cool of evening, set it at the right spacing, and firm it in. Water them if you can.
Never keep or transplant a mildewed seedling — those get pulled and destroyed, not moved.
- Do:
Transplant spare seedlings into gaps the same evening you thin, with soil around the roots, so they take hold.
- Tip:
Leaving crowded hills — a bunch of plants packed together all make small, poor heads.
1st weeding Critical
Young millet is a poor fighter — it grows slowly at first while weeds race ahead, stealing the water and food the crop needs. Weeds in these first weeks do more damage than at any other time, so the field must be clean early.
Weed by about 2–3 weeks after sowing (14–21 days), before the weeds grow bigger than the millet.
Hoe shallowly between and along the rows — millet's feeding roots sit near the surface, and deep hoeing cuts them.
Pull the weeds close to the plants by hand, so you don't uproot the young millet along with them.
In dry areas, leave the pulled weeds lying between the rows as a light mulch (a cover of dead plant matter) to hold moisture.
- Do:
Weed while the weeds are still small — a clean field now is the cheapest yield you will ever gain.
- Watch out:
Hoe shallow near the plants — millet's feeding roots are close to the surface and easily cut.
Water until established Recommended
Millet is drought-hardy once it roots down, but the tiny seedling has shallow roots and dries out fast. If you irrigate, small, steady waterings now give an even stand; heavy floods drown the seed or crust over the fine seedbed.
For irrigated fields only. Give small amounts, often rather than a flood — millet hates sitting in water, and the fine seedbed crusts over if you flood it.
Check with a finger: water when the top is dry to a finger-joint (3–5 cm), roughly every 5–7 days, and more often on hot days and loose sand.
Ease off as the plants take hold — millet is built to grow on little, and over-watered plants root shallow and soft.
- Tip:
Flooding the fine seedbed — it crusts over and the tiny seedlings can't push up through the hard cap.
- Watch out:
Check with your finger before every watering — millet is easy to over-water, and wet roots rot.
Tillering and feeding
Now the plant throws tillers — side-shoots from the base, each growing its own head — and builds the size of those heads. Two things pay off most: keep the field weed-free through the critical first 3–5 weeks (weeds here can cost 30–70% of your yield), and give one small, well-timed feed of nitrogen, which both lifts yield and starves Striga.
Scout (stem borer, Striga, head miner) Critical
As the crop shoots up, new enemies arrive: stem borers tunnel into the stalks, Striga breaks ground and bleeds the roots, and hunger shows in the leaves. Catch them now while you can still act — a borer already inside the stem, or a Striga gone to seed, cannot be undone.
From about 3 weeks after sowing (20–40 days), twice a week (every 3–4 days), walk the “W” and look closely at about 10 plants at several stops.
Stem borer: look for neat rows of small “shot-holes” across the unfolding leaves, and deadheart — the central shoot dries out and pulls free easily when you tug it. You may see moist, sawdust-like droppings where a caterpillar has bored in.
Striga (witchweed): look for small, bright purple or pink flowering weeds at the base of the millet; the crop above stays stunted and yellow even where you have fed it. Pull them (see the Striga task).
Millet head miner: the small moths are about now and lay their eggs on the crop; their caterpillars attack the heads later. Note where they are worst so you watch those heads closely at flowering.
Colour: pale, yellowing lower leaves mean nitrogen hunger — a sign it is time to top-dress (next task).
Count how many of 10 plants show fresh borer damage. If about 1 in 20 to 1 in 10 (5–10 in every 100) show fresh deadheart or whorl feeding, you are at threshold — treat the whorls now, while the grubs are still small and feeding in the whorl and before they tunnel into the stem where nothing can reach them.
- Do:
Feed nitrogen well — it both lifts yield and starves Striga, which does its worst on hungry, low-nitrogen crops.
- Watch out:
If you spray for stem borer, cover your skin, nose and eyes, spray in the cool of the day with the wind at your back, keep it off food, and wash well after — and never spray closer to harvest than the label's pre-harvest interval (the number of days that must pass between spraying and eating).
2nd weeding Critical
The crop still hasn't closed over the ground, so a second flush of weeds keeps stealing water and food. Keeping millet clean through its critical first 3–5 weeks protects the biggest single slice of your yield — weeds here can cost 30–70%.
Weed again at about 4–5 weeks after sowing (25–35 days), before the weeds seed or grow taller than the crop.
Hoe shallowly, and pull the weeds close to the plants by hand.
Time it just before you top-dress the nitrogen, so the feed goes to the millet and not to the weeds.
- Do:
Get this weeding done inside the first 5 weeks — after that, the weeds have already done their worst to the yield.
N top-dress Recommended
One small, well-timed feed of nitrogen (N) during fast growth builds head size and keeps the leaves green — and it starves Striga, which thrives on hungry crops. But millet needs little: too much N grows soft, leafy plants that fall over and waste your money.
Feed at about 3–4 weeks after sowing (22–30 days), on moist soil (after a weeding or a light rain), so the nitrogen washes in instead of gassing off into the air.
Band it in a line about a hand's width (≈10 cm) to the side of the row and cover it with soil — never on top of the plants or on wet leaves.
Keep the dose small. Millet has a low fertility need, and micro-dosing — a tiny measured pinch of NPK or DAP per hill (share one bottle-cap between several hills) — is the most cost-effective way to feed it. Your recommendation gives the amount.
Don't feed again after this. More nitrogen late only grows leaf and makes the plant lodge — fall over — in the wind.
- Tip:
Over-doing the nitrogen — soft, leafy millet lodges in the wind and wastes your money. A little, placed well, is plenty.
- Watch out:
Keep fertiliser off the leaves and out of reach of children and animals, and wash your hands after handling it.
Hand-pull Striga Critical
Striga (witchweed) is a parasite: it clamps onto millet roots underground and drinks the crop's water and food, so the millet stays stunted and yellow no matter how you feed it. Every Striga plant left to flower drops thousands of seeds that stay alive in the soil for years — so pull it before it seeds.
From about 3 weeks after sowing (day 20), and every 5–7 days, walk the rows and pull every small purple or pink Striga plant you find at the base of the millet.
Pull it before the flowers open and set seed — this is the whole point. Once it seeds, you have fed the soil with Striga for years to come.
Carry the pulled Striga out of the field and burn or bury it — never leave it to dry and shed seed, and never put it in compost.
Remember the real cure runs in the background: a well-fed crop and a legume rotation make Striga far weaker. Hand-pulling just mops up what is left.
- Do:
Pull Striga before it flowers — after it seeds, the problem lasts for years.
- Tip:
Leaving pulled Striga lying on the ground — it can still ripen and shed seed. Burn or bury it.
Water when dry (millet tolerates mild dryness here) Recommended
In this leafy, tiller-building stage millet is at its most drought-hardy — a little dryness now even pushes the roots deeper. So water only when it is genuinely dry, and save your effort and water for flowering, which is what really counts.
For irrigated fields only. Water only when the crop is truly dry — you can stretch it to every 7–12 days; mild dryness here does little harm and toughens the plant.
Check with a finger before watering, and don't keep the soil constantly wet.
Save your water and effort. The stage that must never go dry is flowering, and it is coming next.
- Do:
Let millet feel a little dryness now — it roots deeper and stands drought better later in the season.
Booting and flowering — protect the head
The head — the candle — first swells inside the top leaf (this is booting), then pushes out and flowers. This sets how many grains the head will carry, and it is the crop's make-or-break window. Millet flowers oddly: each head's female parts open 3–4 days before its own pollen sheds, so the wind carries pollen from plant to plant. Guard moisture above all else, scout the heads daily, and cut out any diseased heads. Heat above about 40 °C, or a dry spell now, empties the head.
Scout the heads daily (head miner, ergot, smut) Critical
For these two weeks the head is everything, and its enemies work fast. Head miner hollows out the grain, ergot poisons it, and smut turns grain to black dust. Checking every day lets you cut out a sick head before it spreads or seeds the soil.
Once the heads start to show, check them every day — walk the crop and look closely at heads across the whole field, not just the edge.
Millet head miner: look for a caterpillar tunnelling along the head, leaving a spiralling scar and bare patches with no grain, and fine droppings on the spike.
Ergot: look for sticky, sweet, pinkish droplets (“honeydew”) oozing from the flowers; later these harden into dark, curved bodies in place of grains. Ergot is poisonous — never eat affected grain. Cut and destroy these heads.
Smut: look for scattered grains swollen into shiny green-black sacs that burst to a black powder. Cut and destroy these heads too.
Cut any ergot or smut head straight into a bag on the spot (don't shake spores over the crop), then burn or bury it — see the cut-heads task.
- Watch out:
Water stress, or heat above about 40 °C at flowering, empties the head — never let the crop stress now, even for a single day.
- Do:
Carry a bag when you scout, so you can cut and bag a diseased head on the spot without spreading spores.
Water through flowering Critical
This is the one stage millet cannot do dry. A dry spell or heat while it flowers means the grains never set and the head comes out half-empty — a loss of up to half your crop. If you can water at only one time all season, water now.
Keep the soil moist right through booting and flowering — from about 6 to 8 weeks after sowing (40–55 days).
Water every 5–7 days, and more often in heat. This one watering beats watering at any other stage.
Never let the crop wilt here, even for a single day — every wilted day at flowering costs grains that will never form.
- Watch out:
Flowering is the top water priority of the whole season — give water here before any other stage.
Final Striga pull Recommended
This is your last chance to stop Striga seeding the field. Any witchweed that flowers and seeds now drops thousands of seeds that will haunt the land for years — a few minutes pulling now saves you seasons of trouble.
Walk the rows one last time around flowering (6–8 weeks after sowing) and pull every remaining Striga plant at the base of the millet.
Get them before the purple flowers set seed — that is the whole point of this pass.
Carry them out and burn or bury them; never leave them to ripen and shed seed on the ground.
- Do:
Even a handful of Striga left to seed now means years of it later — clear the very last of it before it flowers.
Cut & destroy ergot/smut heads Recommended
Ergot is toxic — it can poison the people and animals that eat the grain — and both ergot and smut shower the field with spores that infect next year's crop. Cutting out the few sick heads early and often protects both this harvest and the next.
Every 2–3 days during flowering, cut out any head showing ergot (sticky honeydew, or hard dark bodies in place of grain) or smut (green-black sacs of black powder).
Hold a bag under the head and cut it straight into the bag, so you don't shake spores over the healthy crop.
Burn or bury the cut heads deep, away from the field and the animals. Do not eat, sell, or feed out ergot- or smut-affected grain — ergot is poisonous.
Remember that at storage you can also float off the light ergot and smut bodies in salty water before saving any seed (see the storage task).
- Tip:
Eating, selling or feeding out ergot-affected grain — the dark bodies are poisonous. When in doubt, throw it out.
- Watch out:
Don't shake or thresh diseased heads over the crop — bag them first, then burn or bury.
Fill the grain, beat the birds
The grains fill and harden — milk stage (soft and milky) at about 8–9 weeks, then dough (firm), then hard-ripe. This is where the weight of your harvest is laid down. Now the biggest thief is birds — pearl millet is a magnet for them — followed by any late head miner and by plants lodging (falling over). Start scaring birds the moment grain reaches the milk stage and keep it up to harvest; taper off any watering and let the heads dry.
Bird-scaring (daily from milk stage) Critical
Birds are the single biggest loss now. Flocks of Quelea (small weaver birds that swarm in their thousands) and sparrows can strip a millet field in days once the grain turns soft and sweet. Daily scaring, from the milk stage until harvest, can save 20–50% of your grain.
Start the day grain reaches the milk stage — pinch a grain and a milky liquid comes out (about 8 weeks / 55 days after sowing) — and keep going every day until harvest.
Be out in the field at the birds' busiest times — early morning and late afternoon. This is a daily job that cannot be skipped.
Use noise and movement: shout, bang tins, crack a whip or a cloth, and rig scare-lines — strips of cloth, old cassette tape or plastic bags strung across the field that flap and flash in the wind.
Move your scarecrows and rattles around every few days — birds quickly learn that a thing which never moves is harmless.
Share the watch with neighbours whose millet ripens at the same time — many fields guarded together lose far less than one field guarded alone.
- Watch out:
Birds are the biggest loss now — pearl millet draws Quelea and sparrows like nothing else. A field left unguarded at milk stage can be stripped in days.
- Do:
Keep changing your scares and moving them about — birds ignore anything that stays still and silent.
Scout (late head miner, lodging) Recommended
Late problems attack the grain you have already grown. A late run of head miner, plants lodging (falling over) after storms, or the first birds — spotting them lets you act, or harvest the affected part early, before you lose it.
From about 8 weeks after sowing (55–90 days), once a week, walk the field, check a sample of heads, and look over the standing crop.
Head miner: check heads for late tunnelling and bare, grainless patches, and note if it is spreading.
Lodging: after wind or storms, look for plants leaning or flattened — heads on the ground rot and feed rats and birds. Prop up or harvest badly lodged plants early.
Birds and rats: watch the field edges for feeding damage as the grain hardens, and step up your scaring where they hit hardest.
If a patch is lodged or heavily mined, cut and carry those heads early rather than lose them.
- Do:
Harvest a lodged or badly-mined patch early — grain on a fallen plant only rots or feeds the birds.
Water early in fill, then stop Recommended
Grain weight is laid down early in the fill, so a little water while the leaves are still green helps fill the grain. But as the heads harden the crop needs to dry down — watering late only invites rot and delays your harvest.
For irrigated fields only. Keep light water coming through the milk and early dough stages while the upper leaves are still green — every 7–10 days.
As the leaves yellow and the heads harden, taper off the watering.
Stop watering well before maturity so the heads can dry down in the field.
- Do:
Stop watering as the heads dry — a proper dry-down in the field means grain that stores safely.
Check maturity Recommended
Knowing the crop is truly ripe tells you when to bring the harvest in. Cut too early and you get soft grain that shrivels and moulds; wait too long and you feed the birds and risk the heads shattering (dropping their grain) or lodging.
From about 11–13 weeks (80–90 days) after sowing, check a few heads from different plants.
The crop is ripe when the leaves have yellowed and dried, the grains are hard and pop out cleanly when you pinch the head, and a dark layer has formed at the base of the grain — the plant's own sign that filling is finished.
Bite a grain: ripe grain is hard and cracks, not soft or doughy.
If the grains are still soft, milky or doughy and bend when bitten → they are not ready: wait a few more days, keep scaring birds, and check again. Cut early only if storms or heavy bird pressure threaten — then dry the heads under cover.
- Watch out:
Don't cut on the calendar alone — check the grain. Soft grain shrivels and moulds; over-ripe heads shatter and feed the birds.
Harvest — cut the candles
Bring the heads in as they ripen — about 3–4 weeks after flowering — before birds, storms and shattering eat into what you grew. Because the tillers flower later than the main stem, the heads do not all ripen at once, so expect to pick more than once.
Cut the candles Critical
This is the payoff for the whole season — but only if you cut at the right moment and get the heads off the field. Cut too green and the grain shrivels and moulds in store; leave it too long and birds, storms and shattering steal it.
Harvest when the leaves yellow and dry, the grains are hard and pop out cleanly when you pinch the head, and a dark layer has formed at the grain base (about 20% moisture — hard and cracking, not doughy).
Cut the candles (the heads) by hand with a knife or sickle, leaving most of the stalk standing, and carry them to a clean, dry place to finish drying.
The crop ripens in waves — cut the ripe main-stem heads first, then come back every 7–10 days for the later tiller heads as they harden. Expect two or more picks.
Handle ripe heads gently and carry them in baskets or on a sheet — knocking or dragging them shatters grain onto the ground.
If the grains are still doughy or soft → they are not ready: leave those heads to ripen and keep scaring birds. Cut early only if storms or heavy bird pressure force your hand — then dry the heads well under cover.
- Do:
Expect more than one pick — the main-stem heads ripen before the tiller heads. Come back for the rest as they harden.
- Watch out:
Handle ripe heads gently — rough handling shatters grain onto the ground and feeds the birds.
Dry, thresh and store
The crop is grown — now don't lose it in the store. Most millet is lost to grain kept damp (which moulds) or unprotected (which weevils bore into). Dry the heads hard on a clean, raised surface, thresh and winnow clean, float off any ergot or smut bodies before saving seed, and store sealed against weevils.
Dry, thresh & store sealed Recommended
Grain stored damp grows mould; grain stored open is bored through by weevils — small dark beetles that tunnel into the grain and turn it to powder. Drying it hard and sealing it tight is the difference between grain that keeps for a year and grain that spoils in weeks.
Dry the heads or threshed grain on a clean raised surface, mat or tarpaulin — never on bare soil, which pushes damp back in and adds mould, grit and animal dirt. Spread it thin, turn it often, and cover it if rain threatens.
Bite test: the grain is dry enough to store when it is hard and cracks or shatters — not bends or dents — under your teeth (below about 13% moisture; below 12% if you're keeping it longer than 6 months). If it bends or dents, it is still too wet → dry it more before sealing.
Thresh the dry heads (beat them gently in a bag or on a mat), then winnow — pour the grain in a breeze so the wind carries off the light chaff and dust — because pests breed fastest in the trash.
Before saving any seed, float the clean grain in salty water (salty enough to float an egg): the light ergot and smut bodies and empty grains rise to the top — skim and destroy them, then rinse and re-dry the good seed.
Store sealed: put the dry, clean grain in airtight bags (hermetic, or PICS bags) or a clean, sealed granary or drum, off the floor and away from the wall, in a cool dry place. A tight seal suffocates weevils with no chemicals.
Check the store once a month for warmth, moths, or grain with small round holes and fine powder (weevils) — act early if you see any.
- Tip:
Drying on bare soil, or storing damp grain — dry on a clean raised surface, and seal only once the grain cracks under your teeth.
- Do:
Float off ergot and smut bodies in salty water before saving seed — a few minutes now keeps the disease out of next year's crop.
- Watch out:
If you use a grain protectant dust, follow the label, keep it off grain you'll eat within weeks, and wash your hands after.
Pests and diseases that attack pearl millet
-
 Cereal stem borers
 -
 Ergot
Ergot -
 Fall armyworm
 -
 Grain-eating birds
 -
 Grasshoppers
 -
 Millet head miner
 -
 Pearl millet blast
 -
 Smut
Smut -
 Sorghum grain mould
 -
 Sorghum shoot fly
 -
 Striga (witchweed)
Where to sell pearl millet
Markets that trade this crop — what each one sells it by, when supply peaks there, and the currency used.
-
 Dawanau International Grains Market
-
 Grand Marché de Bamako
-
 Kibaigwa Maize Market
-
 GMB Aspindale Depot
-
 Marché Katako
-
 Marché de Kaolack
-
 Marché de Maradi
-
 Rood Woko
Grow pearl millet with a plan, not a guess
This guide is the general answer. Divisi works out yours — the week to plant pearl millet on your soil and your rainfall, and each job dated for your field.


When to plant pearl millet, country by country
- When to plant pearl millet in Algeria
- When to plant pearl millet in Angola
- When to plant pearl millet in Benin
- When to plant pearl millet in Botswana
- When to plant pearl millet in Burkina Faso
- When to plant pearl millet in Burundi
- When to plant pearl millet in Cabo Verde
- When to plant pearl millet in Cameroon
- When to plant pearl millet in Comores
- When to plant pearl millet in Congo
- When to plant pearl millet in Côte d'Ivoire
- When to plant pearl millet in Egypt
- When to plant pearl millet in Eritrea
- When to plant pearl millet in Eswatini
- When to plant pearl millet in Ethiopia
- When to plant pearl millet in Gabon
- When to plant pearl millet in Gambia
- When to plant pearl millet in Ghana
- When to plant pearl millet in Guinea Ecuatorial
- When to plant pearl millet in Guinea-Bissau
- When to plant pearl millet in Guinée
- When to plant pearl millet in Kenya
- When to plant pearl millet in Liberia
- When to plant pearl millet in Libya
- When to plant pearl millet in Madagascar
- When to plant pearl millet in Malawi
- When to plant pearl millet in Mali
- When to plant pearl millet in Mauritanie
- When to plant pearl millet in Mauritius
- When to plant pearl millet in Morocco
- When to plant pearl millet in Moçambique
- When to plant pearl millet in Namibia
- When to plant pearl millet in Niger
- When to plant pearl millet in Nigeria
- When to plant pearl millet in Rwanda
- When to plant pearl millet in République centrafricaine
- When to plant pearl millet in République démocratique du Congo
- When to plant pearl millet in Sao Tome and Principe
- When to plant pearl millet in Seychelles
- When to plant pearl millet in Sierra Leone
- When to plant pearl millet in Somalia
- When to plant pearl millet in South Africa
- When to plant pearl millet in South Sudan
- When to plant pearl millet in Sudan
- When to plant pearl millet in Sénégal
- When to plant pearl millet in Tchad
- When to plant pearl millet in Togo
- When to plant pearl millet in Tunisie
- When to plant pearl millet in Uganda
- When to plant pearl millet in United Republic of Tanzania
- When to plant pearl millet in Zambia
- When to plant pearl millet in Zimbabwe
Where pearl millet scores best
Districts where Divisi's engine currently rates this crop highest, ranked by fit.
-
 Kono
Kono -
 Yumbe
Yumbe -
 Ethiope West
 -
 Kokoyah
 -
 Bayanga
 -
 Luba
Luba -
 Plateaux
 -
 Kabeya-Kamwanga
 -
 Divenie
 -
 Nhacra
 -
 Zouan-Hounien
 -
 Kitui Central
Get Insights by email
A short digest of new Divisi articles. No email on quiet weeks.
Frequently asked questions
How do I grow pearl millet?
How to grow pearl millet: 60–120 days to maturity, 60 cm rows, 3.5–5 cm deep. Also called bulrush millet, dukhn, sanyo, mil, gawri, gero, milho painço.
What is dukhn in English?
Dukhn is the Arabic name for pearl millet.
What is sanyo in English?
Sanyo (also suna) is the Bambara name for pearl millet.
What is mil in English?
Mil (also mil à chandelle and petit mil) is the French name for pearl millet.
What is gawri in English?
Gawri (also gauri) is the Fula name for pearl millet.
What is gero in English?
Gero is the Hausa name for pearl millet.
What is milho painço in English?
Milho painço (also babala) is the Portuguese name for pearl millet.
What is lebelebele in English?
Lebelebele is the Setswana name for pearl millet.
What is mhunga in English?
Mhunga is the Shona name for pearl millet.
What is uwele in English?
Uwele (also mawele and mwele) is the Swahili name for pearl millet.
What is dugub in English?
Dugub is the Wolof name for pearl millet.
How long does pearl millet take to grow?
Pearl millet takes about 60–120 days from sowing to maturity, though the exact length varies with variety, temperature and how the season runs.
What spacing should I use for pearl millet?
Space pearl millet rows about 60 cm apart, with roughly 12 cm between plants within the row.
How deep should pearl millet be planted?
Sow pearl millet at about 3.5–5 cm deep. Shallower risks drying out; deeper wastes seed energy before the shoot reaches light.
What pests and diseases attack pearl millet?
The ones covered in this guide are Cereal stem borers, Ergot, Fall armyworm. Each has its own page explaining how to identify, check for and control it.