 Divisi
How to grow tobacco
Nicotiana tabacum · Solanaceae
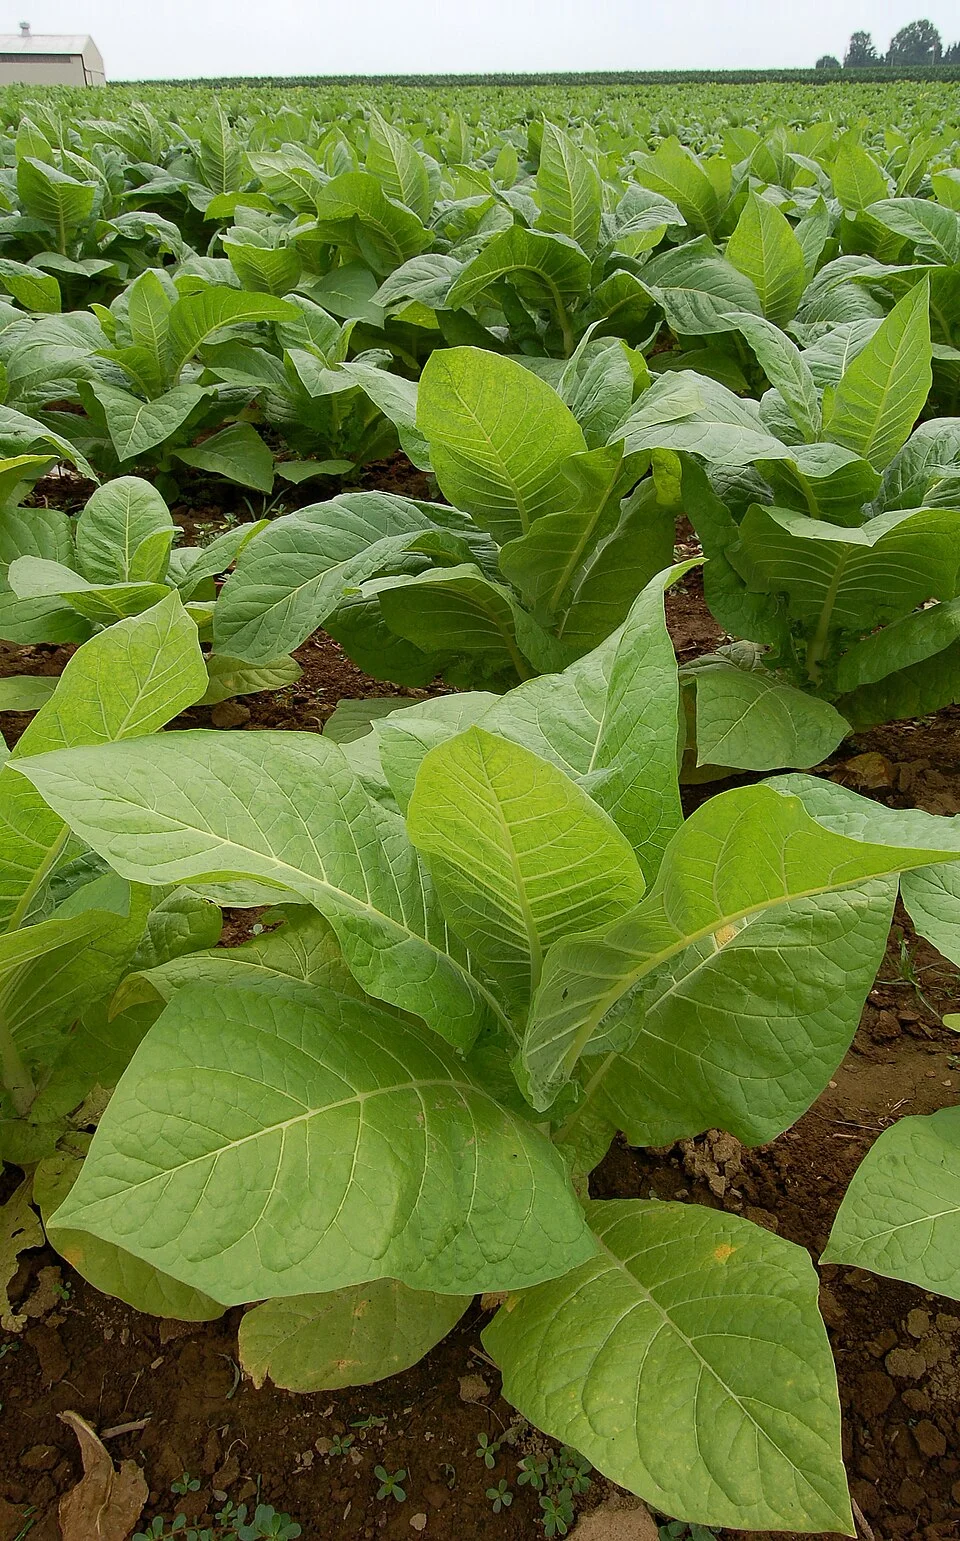
Photo: Photo by and (c)2006 Derek Ramsey (Ram-Man) · CC BY-SA 4.0
Tobacco is a tall, broad-leaved plant in the same family as tomato and potato, grown not for food but for its leaves, which are dried and cured, then sold by weight and grade. The seed is finer than dust, so the crop is raised first in a nursery and then moved (transplanted) into the field. Two things make or break the money. First, keep the plant food low and controlled — especially nitrogen — and the fertiliser free of chloride (salt), or the leaf grows coarse and green and will not ripen or burn. Second, cure the picked leaf properly: barn heat for flue-cured (Virginia) leaf, or slow air-drying for burley. Get the curing wrong and a fine crop becomes cheap leaf.
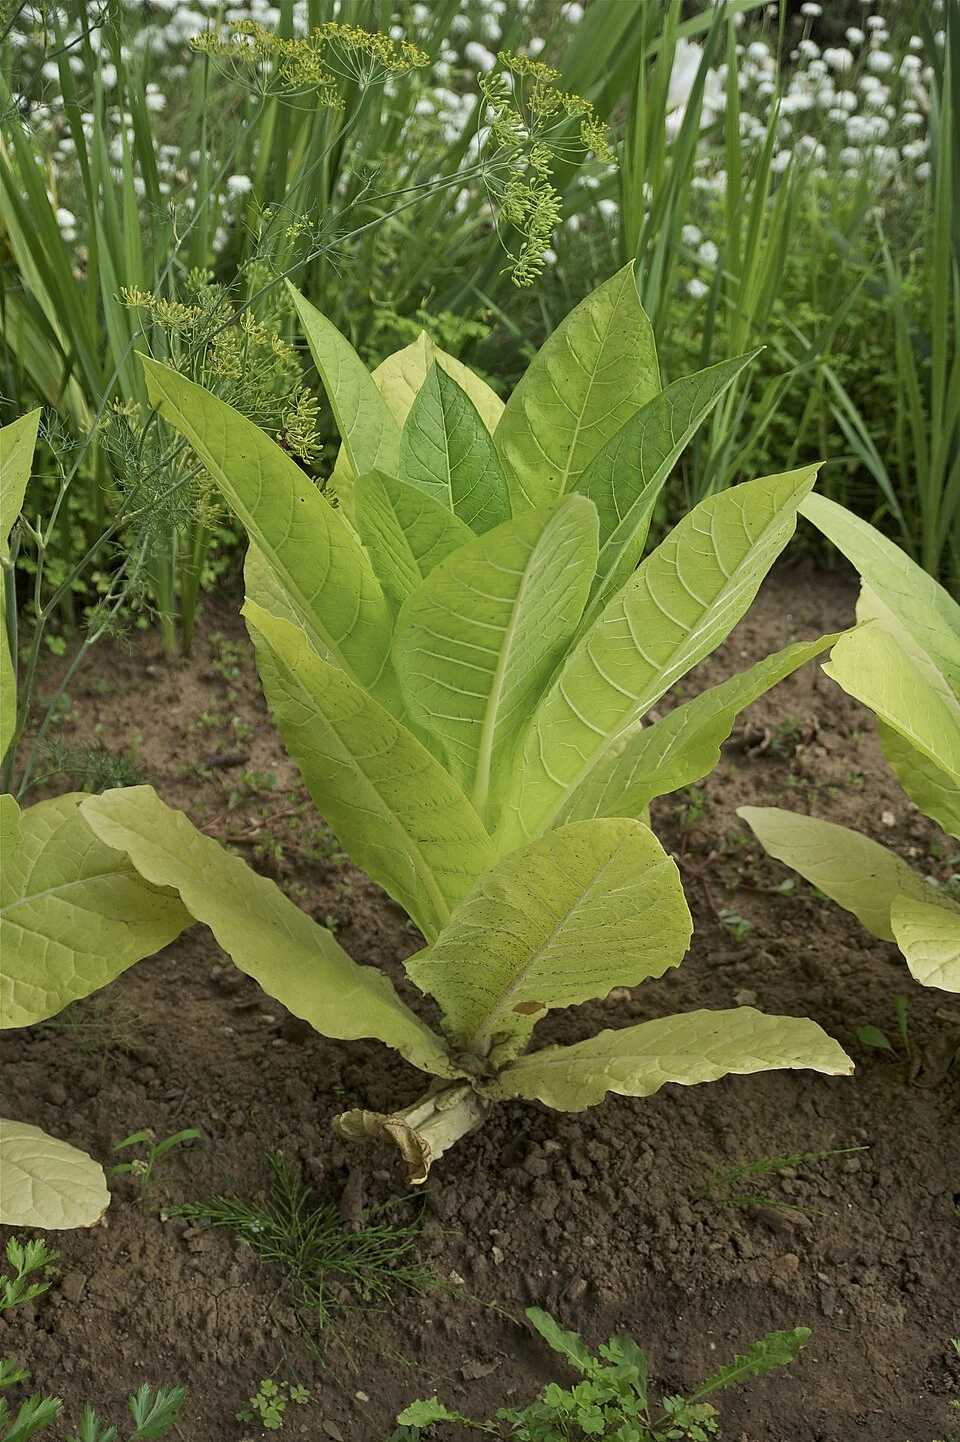
Jebulon · CC0 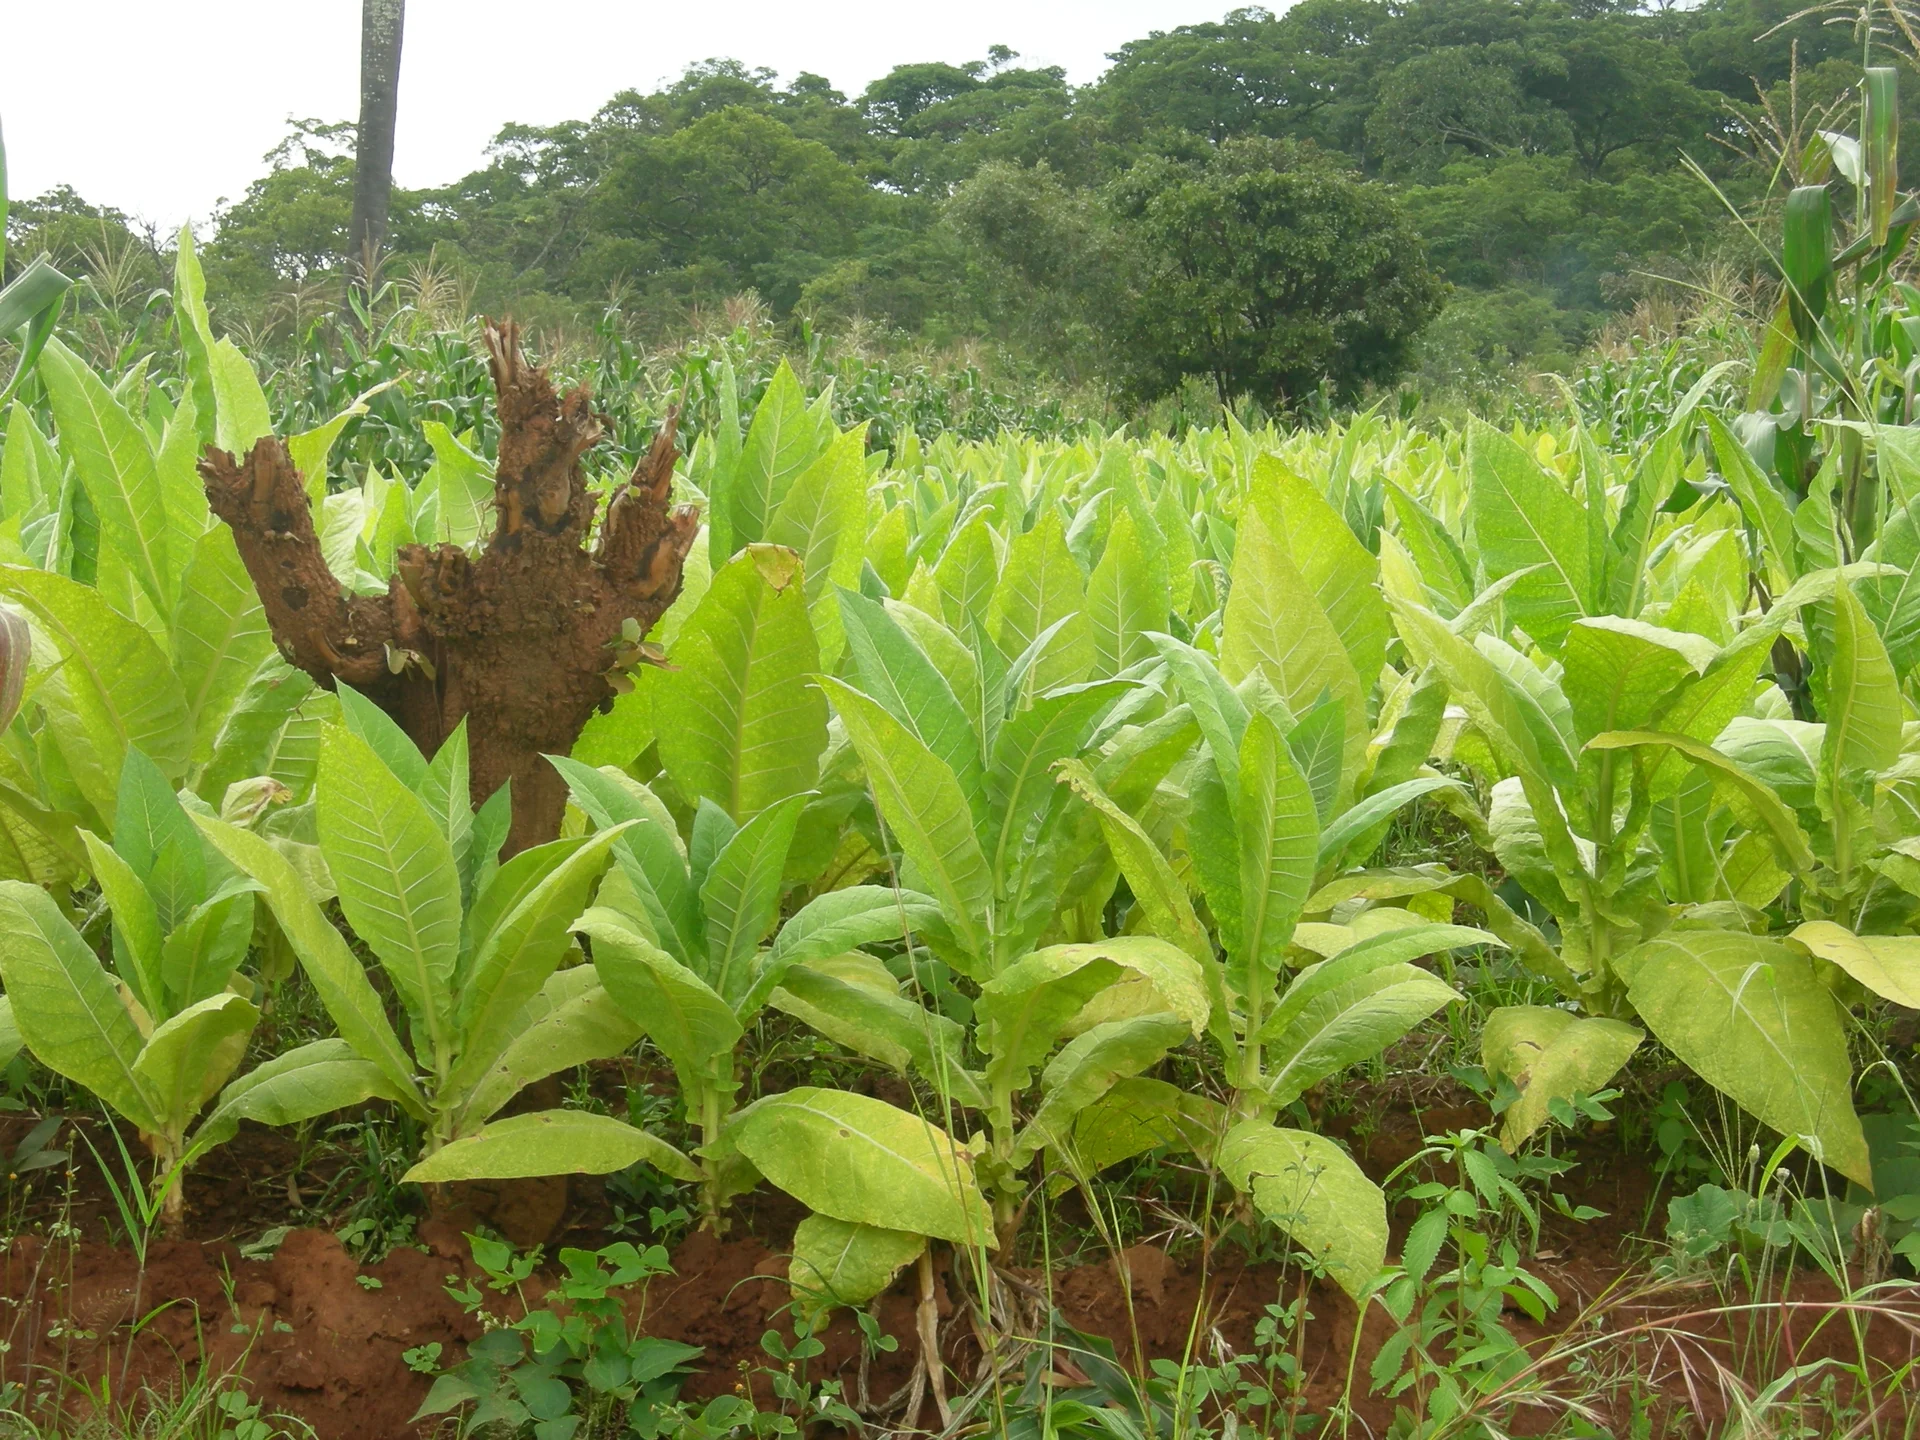
Joachim Huber · CC BY-SA 2.0
- Days to maturity
- 90–120 days
- Row spacing
- 120 cm
- Plant spacing in the row
- 55 cm
These are general figures for the crop, compiled from published agronomic references including FAO and CABI. The right choice for your field depends on your soil, rainfall and the yield you are aiming for.
Will tobacco actually do well on your field? Check your own field against every crop in the catalogue — no signup. Run the crop check →
Also known as
- Afrikaans
- tabak
- Chichewa
- fodya
- French
- tabac
- Ndebele
- ugwayi
- Portuguese
- tabaco
- Sesotho
- koae
- Setswana
- kwae
- Shona
- fodya
- Swahili
- tumbaku
- Xhosa
- ugwayi
- Zulu
- ugwayi
Working in buckets, bags or paces? The farming glossary turns the measures growers actually use into kilograms and hectares — what a 20 litre bucket of each crop really weighs, and how to size a field by walking it — alongside the Shona, Swahili, Ndebele and Yoruba words used in the field. Open the glossary →
Growing tobacco, stage by stage
From a dust-fine seed in the nursery to cured, baled leaf — raise strong seedlings, transplant and feed lightly, top and sucker for big clean leaves, then pick only ripe leaf and cure it right.
Nursery — raise strong seedlings
Tobacco seed is finer than dust and cannot fight weeds or disease in the open field, so you raise it for 6–8 weeks in a clean, protected bed and move only the strongest plants out. A clean nursery is your first line of defence against the diseases that follow the crop all season — start it right and you start the whole season right.
Sterilise the seedbed Critical
Tobacco seed is finer than dust and its seedlings are defenceless — a dirty bed hands them damping-off, nematodes (tiny root worms) and weed competition before they have even sprouted. Sterilising the bed weeks before you sow is the cheapest insurance in the whole nursery, and a clean nursery is your first line of defence against the diseases that follow the crop all season.
Do this in the 2–3 weeks before you sow. Pile dry grass and trash over the seedbed and burn it off, or cover the damp bed with clear plastic for a few weeks of hot sun (solarise it). Either kills the tiny fungi that rot seedlings, plus nematodes and weed seeds.
Clean float trays sitting on nutrient water are the modern alternative — no soil-borne disease to sterilise away in the first place, at the cost of buying trays and nutrient solution.
Site the bed on well-drained, sunny ground, away from any land that grew tobacco, tomato, potato, pepper or eggplant recently — those crops share tobacco's soil diseases.
- Do:
Sterilise the seedbed (burn or solarise) before sowing — it kills the damping-off fungi, nematodes and weed seeds that ruin nurseries.
- Tip:
Siting the nursery on land that recently grew tobacco or another Solanaceae crop — you sow straight into their soil diseases.
- Watch out:
A wet, airless bed breeds damping-off before you ever sow a seed — get the drainage and sterilising right first.
Sow the dust-fine seed Critical
Tobacco seed is finer than dust — a matchbox holds enough for a big nursery — and it needs light to sprout. Buried seed simply never comes up, and thick, uneven sowing gives you thin, spindly seedlings that fight each other and catch damping-off. This one sowing decides how many strong plants you have to transplant, six to eight weeks from now.
Sow the seed on the surface — do not bury it. The seed is dust-fine and needs light to sprout.
Mix it with a little dry sand or ash so you can scatter it thinly and evenly across the bed — this stops you dumping it all in one clump.
Press it in gently — a whisker of fine soil on top is plenty, no more.
Water immediately with a soft sprinkle (a fine rose), never a splash that washes the tiny seed away or bunches it up.
- Do:
Mix the dust-fine seed with dry sand or ash before sowing — it is the easiest way to spread it thinly and evenly by hand.
- Tip:
Burying the seed. It is dust — sow it on the surface and press it in. Buried tobacco seed simply never comes up.
- Watch out:
A heavy splash of water straight after sowing washes the seed into clumps and bare patches — always use a fine rose.
Tend the nursery to lifting size Critical
Tobacco seed is finer than dust — a matchbox holds enough for a big nursery. It cannot compete with weeds or shrug off disease on its own, so you nurse it for 6–8 weeks in a clean, protected bed and move only the strongest plants to the field. A weak or diseased nursery hands you a weak, diseased crop.
Keep the bed moist and lightly shaded, watering with a soft sprinkle (a fine rose), never a splash that washes seedlings out. Give it air by day so the leaves dry — a stuffy, wet nursery breeds disease.
As the seedlings crowd, thin out (pull) the weak ones so the keepers stand about a finger-joint apart (3–4 cm) and grow stocky, not spindly.
In the last 2 weeks, harden them off (see the next task) so they can stand sun and wind once they are in the field.
Lift only seedlings that are about a hand-span tall (≈15 cm), with a stem as thick as a pencil and 4–6 leaves. Leave the runts behind.
- Do:
Water with a fine rose in the morning and let the leaves dry by day — a stuffy, wet nursery breeds disease.
- Tip:
Leaving the bed crowded — thin promptly so the keepers grow stocky, not spindly.
- Watch out:
Damping-off: patches where seedlings suddenly flop and rot right at the soil line mean the bed is too wet and airless. Ease off the water and open it up to air.
Harden off the seedlings Recommended
Seedlings raised soft and shaded will wilt and stall the moment they hit the open field. Toughening them over the last ~2 weeks before transplant teaches them to hold water and take the sun, so they get away fast instead of sulking for weeks.
Start about 2 weeks before you plan to transplant — roughly 4 weeks after sowing the nursery.
Water less. Let the bed dry a little between waterings so the plants toughen up. Harden them, don't starve them bone-dry.
Open the nursery to full sun and wind — lift or pull back the shade a bit more each day.
Some growers clip the tops lightly with shears to make the stems stocky and even; wipe the blade clean between beds so you don't carry disease.
A hardened seedling is short, stocky and pencil-thick, not tall and floppy — that is the plant that transplants well.
- Do:
Harden gradually over the full two weeks — a little less water and a little more sun each day.
- Tip:
Lifting soft, lush, over-watered seedlings straight from shade into hot sun — they collapse and take weeks to recover, if they recover at all.
Scout the nursery Recommended
Disease in a crowded, damp nursery spreads in days and can wipe out your whole planting before it ever reaches the field. A two-minute look every few days is the cheapest insurance you have.
From about a week after sowing, look the nursery over closely every 3–4 days (twice a week) until you lift.
Blue mould: look for pale yellow patches on top of the leaves with a blue-grey, velvety mould on the underside, in cool damp weather. It races across a wet nursery — improve airflow, ease off the water, and treat early.
Angular leaf spot: look for small brown, straight-edged (angular) spots boxed in by the little leaf veins, often ringed with yellow. It follows splashing water — don't over-water.
Cutworms: look for seedlings cut clean off at the soil line, worst overnight. Scratch the soil nearby to find the fat, curled grey caterpillar.
Pull out and destroy any sick seedlings, and never transplant a diseased one — you would carry the trouble straight to the field.
- Watch out:
A wet, airless, over-crowded nursery is what starts most of this — more air and less water prevent more disease than any spray.
- Tip:
Watering late in the day. Leaves that stay wet all night are where blue mould and leaf spot take hold.
Prepare the field while the nursery grows
While the nursery raises seedlings (or while you line up seedlings to buy), get the field ready — and for tobacco this is a big job. Choose the field on rotation away from tobacco and its Solanaceae relatives, then rip or plough deep to break the hardpan, ridge for the free drainage tobacco must have, and work in a chloride-free basal feed. If you are not raising your own nursery, source clean, hardened, disease-free seedlings now.
Plan a ≥3–4-year rotation Critical
Tobacco's worst enemies — bacterial wilt, black shank and nematodes (tiny root worms) — live in the soil and build up wherever tobacco or its cousins have grown. No spray cures them. A long break is the only real control, so choose the field before you plant, at least a month ahead.
Plant tobacco only where no tobacco, tomato, potato, pepper or eggplant — its plant family, the Solanaceae — has grown for 3–4 years. They all share the same soil diseases.
Choose well-drained land. Wet, low ground rots the roots and feeds black shank.
Avoid any field with a known wilt or nematode history. A grass or cereal break crop (like maize or a small grain) grown in between helps clean the soil.
Do this planning in the weeks before transplanting — you cannot undo a bad field choice once the crop is in the ground.
- Do:
Rotate a cereal or grass crop through the field between tobacco crops — it starves out the soil diseases that tobacco builds up.
- Tip:
Following tomato or potato with tobacco — they pass on the very same wilts and root diseases.
Rip or plough deep, ridge, and apply basal Critical
Tobacco roots need to run deep, and most smallholder fields have a hardpan — a compacted layer left by years of shallow ploughing — sitting just below the surface. Break it now with deep tillage and the roots reach real depth all season; leave it and every dry spell hurts more than it should. Ridging on top gives the crop the free drainage it needs — two days waterlogged kills tobacco — and the basal feed gets phosphorus and potassium down where the young roots can find them.
Do this in the 2–3 weeks before transplanting, once you have chosen a field on the rotation (previous task).
Rip or plough deep — to about 25–30 cm — to break the hardpan below the topsoil. This is the single biggest thing you can do for root depth and drought resilience all season.
Build ridges or raised beds about 15–20 cm high so rain drains away fast — tobacco's roots rot within two days in standing water.
Work in well-rotted manure or compost if you have it, to build the soil's water-holding capacity for the dry spells ahead.
If the field is strongly acid (below pH 5.0), lime it now, well ahead of transplanting — lime works slowly and tobacco tolerates moderate acidity, so only correct a genuinely sour field.
Work in the basal phosphorus and potassium — your recommendation gives the amounts. Use sulphate of potash, never muriate of potash (KCl) — the chloride in it ruins the leaf's burn later. Nitrogen stays light and comes later (see Start nitrogen).
- Do:
Rip or plough deep enough to break the hardpan — shallow tillage year after year is why smallholder tobacco struggles in dry spells.
- Tip:
Any chloride fertiliser (muriate of potash / KCl) in the basal dressing — the chloride carries through to harvest and spoils the cured leaf's burn.
- Watch out:
Low, flat ground that holds water after rain — ridge it properly or move to better-drained land; waterlogging kills tobacco fast and feeds black shank.
Source healthy seedlings Critical
If you are not raising your own nursery, the seedlings you buy are your crop — and with tobacco, a batch carrying bacterial wilt or black shank can wipe out the field you just spent a month preparing. Buy hardened, disease-free plants from a trusted grower in the week before you transplant.
Buy stocky, pencil-thick seedlings about a hand-span tall (≈15 cm) with 4–6 leaves — not tall, thin or floppy ones.
Check the batch closely: no wilting, no black rot at the stem base, no mottled or distorted leaves — signs of the soil diseases and viruses that have no cure once they're in your field.
Buy from a grower who sterilises or solarises their seedbed (or uses float trays) and has hardened the seedlings off — soft, unhardened plants sulk for weeks after transplanting.
Transplant them within a day or two of buying, keeping them shaded and moist until you do.
- Do:
Pick short, stocky, pencil-thick seedlings from a grower with a clean, sterilised nursery — they root fast and arrive disease-free.
- Tip:
Buying cheap, unhardened or wilting seedlings — you may be buying bacterial wilt or black shank straight into a field you've just prepared.
Transplant and settle the crop in
This is the move from nursery to field. Get the seedlings in on a cool, moist day, water each one in by hand, and keep the soil damp but never waterlogged — two days under water kills tobacco. Start feeding lightly. The soil-borne killers (bacterial wilt, black shank) are decided by your rotation and drainage, so plant into clean, well-drained land.
Transplant + water in Critical
This is the plant's whole start in the field. Seedlings moved on a hot day into dry soil with no water sulk for weeks or die. Set them at the right spacing, water each one in, and firm the soil so the roots meet damp earth and take off.
Transplant seedlings about a hand-span tall (≈15 cm), pencil-thick, with 4–6 leaves — the ones you hardened off.
Work in the cool of the evening or on an overcast day, into moist soil, so the seedlings don't wilt in the heat.
Set the rows about a long stride apart (≈120 cm) and the plants about half a stride apart (≈55 cm) along the row. This open spacing lets the big leaves breathe and dry, which keeps disease down.
Make a hole, set the seedling to the same depth it grew in the nursery, and firm the soil around the roots so there are no air pockets.
Water every plant in — about a cup (half a litre) at the base of each — even if rain is coming. This settles the soil tight against the roots.
Keep the soil just moist over the next days. A little dryness now pushes roots down, but never let it flood — two days waterlogged and tobacco dies.
- Do:
Transplant in the cool of the day and water each plant in individually — a hand-watered transplant beats a rain-soaked one that was never firmed in.
- Tip:
Planting into a low, wet or waterlogged patch — tobacco roots rot fast, and black shank thrives there.
- Watch out:
The first few days for seedlings that don't stand up — replace (gap-fill) any that die while the crop is still even.
Start nitrogen (controlled, chloride-free) Recommended
Young tobacco needs a small, early feed to get going — but for quality flue-cured (Virginia) leaf the nitrogen must stay low and controlled: too much and the leaf grows thick, dark and green and won't ripen or cure. Just as important, the fertiliser must be chloride-free — chloride, the salt in cheap potash, makes cured leaf hold damp and refuse to burn.
Feed within the first 2 weeks after transplanting. Use the amount on your recommendation — don't guess, because tobacco is very easy to over-feed.
Band it in a line about a hand-span (≈20 cm) to the side of the plants — not touching the stems — then cover it or water it in.
Tobacco needs a lot of potassium for a good burn, so for potash use sulphate of potash (potassium sulphate) — never muriate of potash / potassium chloride (KCl), which carries the chloride that ruins the cure.
Keep the total nitrogen low for flue-cured leaf (burley can take a little more), and aim to have the soil nitrogen running out by topping time so the leaf ripens clean.
- Tip:
Over-feeding nitrogen — dark, thick, green leaf that won't ripen or cure is the classic sign of too much N.
- Tip:
Any chloride fertiliser — muriate of potash / KCl — on tobacco. The chloride spoils the burn, so a cured leaf won't stay alight.
- Watch out:
Wash your hands after handling fertiliser, keep it off the wet leaves, and keep it away from food, water and children.
Scout Critical
The first three weeks show whether your new crop is healthy or already carrying a soil killer. Bacterial wilt and black shank take plants out one by one, and cutworms fell fresh transplants overnight. Catch it early — you can still replace a few plants and stop cutworms before they clear a patch.
From a few days after transplanting, walk the field twice a week (every 3–4 days). Walk a big "W" so you cover the corners and the middle, not just the edge by the path.
Bacterial wilt: look for plants that wilt in the heat of the day and don't recover by morning, often wilting on one side first, then yellowing. Cut the base of a suspect stem and a milky slime oozes out. There is no cure — pull and remove sick plants.
Black shank: look for a black rot creeping up the stem from the ground while the plant wilts. Split the stalk — the pith inside looks dry and stacked like dark discs (a coin-stack). It is worst in wet soil.
Cutworms: look for transplants cut clean off at ground level, worst in the morning. Scratch the soil nearby to find the fat, curled grey caterpillar.
Replace (gap-fill) any dead plants in the first days while the crop is still even, and act on cutworms before they clear a patch. Open the matching pest or disease guide when you find trouble.
- Watch out:
Wilt that comes back cool overnight is just heat; wilt that STAYS wilted overnight is disease.
- Tip:
Moving soil or tools from a wilt-struck patch onto clean ground — you spread the disease on your feet and hoe.
Vegetative growth — build the leaf
Now the plant throws out its big leaves fast — this is the crop you will sell. Keep it weed-free and shallow-hoed, keep the moisture steady (but never waterlogged), and keep the nitrogen low and tapering so the leaf will ripen. Sap-sucking pests move in now, and some carry virus, so scout hard.
Weeding + nitrogen management Critical
In the weeks after transplanting, weeds steal the water, light and light feeding your young tobacco needs to build its frame. Weed early and shallow — and at the same time keep the nitrogen set to taper off, so the leaf ripens instead of staying green.
Weed from about 3 weeks after transplanting, before the weeds get bigger than the crop. A second pass a couple of weeks later is often needed.
Hoe shallowly — tobacco roots run near the surface, and deep hoeing close to the plant cuts them.
Ridge up a little soil around the base of each plant as you weed — it steadies the tall plant to come and covers the feeder line.
Keep the nitrogen low and early: finish feeding in this window so the soil nitrogen is running down by topping. Green, over-fed leaf will not ripen or cure.
In dry spells, leave the pulled weeds lying between the rows as a light mulch to hold moisture.
- Tip:
Using tobacco (smoke or chew) in the field — it spreads mosaic virus onto the plants. Rotate chemical groups when you spray so pests don't get used to one.
- Do:
Weed shallow and early — a clean field in the first weeks is the cheapest leaf you will ever gain.
- Watch out:
If you or your workers use tobacco, wash your hands with soap (or milk) before touching the plants, or you carry mosaic virus straight onto the crop.
Scout budworm, aphids, whitefly Critical
As the plant builds its big leaves, sap-suckers and leaf-eaters move in — and some, like aphids and whitefly, carry virus as they feed. This is the leaf you will sell, so protect it now while the damage is still small.
Twice a week (every 3–4 days), walk the "W" and look closely at about 10 plants — the bud, the growing tip, and under the top leaves.
Budworm: look for ragged holes chewed in the bud and the youngest top leaves, with a green or brown caterpillar tucked into the bud.
Aphids: look for clusters of tiny soft green insects on the underside of the top leaves, and a sticky shine (honeydew) on the leaf below. They breed fast and spread virus.
Whitefly: shake a plant — if a cloud of tiny white flies rises up, you have them. They spread virus too.
Tobacco mosaic virus: look for leaves mottled light-and-dark green, puckered and distorted, on stunted plants. There is no cure — pull out and remove affected plants, and keep tobacco and dirty hands off the crop.
Note what you find and where; if a pest is spreading past a few plants, open its guide and act.
- Watch out:
Watch aphids and whitefly especially — the virus they carry costs you far more than their feeding does.
- Tip:
Handling healthy plants right after touching sick ones (or after using tobacco) — wash first, or you spread virus down the row.
Irrigate Recommended
This is one of tobacco's thirstiest stages — the plant is throwing out big leaves fast. Steady moisture now builds the leaf you will sell. But tobacco hates wet feet, so water enough, not too much.
If you irrigate, water about every 7–10 days through weeks 3–7 after transplanting — more often in heat and on sandy soil that dries fast.
Keep the soil moist to a spade's depth, but let the very top dry a little between waterings — the roots must breathe.
Never leave water standing — drain any low spots. Two days waterlogged kills the crop and feeds black shank.
- Tip:
Over-watering and waterlogging — soggy soil rots tobacco roots faster than a little dryness ever hurts them.
- Do:
Water in the cool of the day so less is lost to the sun.
Top and sucker for big, clean leaves
When the flower bud shows, you make the key quality move: topping — snapping off the flower head so the plant pours its strength into the leaves instead of seed. That triggers a rush of side-shoots (suckers) from every leaf-joint, which you must keep removing right up to harvest. Keep the soil nitrogen running down so the leaf ripens clean. This is one of the crop's thirstiest stages, so keep the water steady.
Top the flower head Critical
Left alone, the plant spends itself making flowers and seed. Topping — breaking out the flower head — turns all that strength back into the leaves, making them bigger, thicker and heavier. It is worth 20–50% of your leaf, the single biggest quality-and-yield move of the season.
Top when about 1 in 10 plants (10%) is showing flower — roughly 7–10 weeks after transplanting. Too early stunts the plant; too late wastes strength on flowers.
Snap out the flower head by hand, breaking it off cleanly at the top.
Leave about 18–22 leaves on a flue-cured plant (about 20 for burley) — count down from the top and take the tiny useless top leaves off with the head.
Top in dry conditions and try not to bruise the leaves you keep; sap-wet wounds and bruises invite disease and spread virus.
Topping wakes up a sucker at every leaf-joint — go straight into suckering (next task) and keep it up to harvest, or you lose what you just gained.
- Do:
Top at about 10% flowering — this one timing decides your leaf size and quality.
- Tip:
Topping with hands fresh from tobacco (smoke or chew) — you press mosaic virus straight into the open wound.
- Watch out:
Leaving too many leaves gives thin, poor leaf; too few wastes the plant. Stay near 18–22.
Sucker regularly Critical
Once topped, the plant tries to grow a sucker (side-shoot) from every leaf-joint. Left to grow, suckers steal the food meant for your leaf and can badly cut both yield and quality. Keeping them off is a job you repeat every week to harvest.
Start suckering as soon as you top (about 8 weeks after transplanting) and repeat every 7–10 days until you finish harvesting.
By hand, snap out each sucker while it is small — a few finger-joints long (under about 5 cm) — from the notch where a leaf meets the stem. Small ones break off clean; big ones tear the plant and have already stolen growth.
For a big crop you can use a suckercide (a sucker-killing chemical): a contact type burns off the small suckers where it lands, and maleic hydrazide — a systemic (it moves inside the plant) — stops them regrowing. Follow the label rate and the pre-harvest interval (the wait between spraying and picking).
Don't let any sucker get long. A field of leafy suckers is a field of light, cheap leaf.
- Do:
Sucker little and often — small suckers snap off clean and cost you nothing.
- Tip:
Letting suckers run — they undo the whole point of topping.
- Watch out:
The pre-harvest interval on any suckercide — never pick leaf inside the waiting time printed on the label, and cover skin and eyes when you spray.
Ripening — let the leaf come good
The leaves now ripen from the bottom up, and the first picking overlaps this stage. Keep suckering, and ease off the water so the leaf ripens — a little dryness now is exactly what you want. Watch the lowest leaves for brown spot as they age.
Scout brown spot on lower leaves Recommended
As the lowest leaves ripen and age, brown spot (a leaf fungus) can rot them — and those bottom leaves are your first harvest. Spotting it tells you to pick promptly before the disease eats the value.
Once a week from about 9 weeks after transplanting, check the lowest, oldest leaves.
Brown spot: look for brown circular spots with rings inside them (like a target), each ringed with a yellow halo, worst on over-ripe leaf.
If you see it, prime (pick) those ripe lower leaves promptly rather than let them hang and rot — an over-ripe leaf left on the plant is where it starts.
Keep the field open and airy (your wide spacing and suckering both help) so the leaves dry fast after dew and rain.
- Watch out:
Brown spot loves over-ripe leaf left too long on the plant — pick ripe leaf on time and you starve it.
- Do:
Keep suckering right through — a clean, open plant dries quicker and rots less.
Ease water at ripening Recommended
At ripening you actually want the plant a little thirsty. A mild water shortage now stops it pushing new green leaf and helps the existing leaf ripen evenly — which is exactly what cures well. Too much water here keeps the leaf green and drags out the harvest.
From about 9 weeks after transplanting, as the lower leaves start to yellow and ripen, cut back the watering.
Let the crop run on a mild deficit (a little dryness) — but don't let it wilt hard or bake.
This checks new leaf growth and draws the crop toward ripe, ready for priming and curing.
- Do:
Ease off the water as the bottom leaves begin to ripen.
- Tip:
Heavy watering at ripening — it holds the leaf green and makes it hard to cure.
Harvest — pick only ripe leaf, bottom-up
Tobacco is not harvested all at once. Flue-cured leaf is primed — the ripe leaves picked a few at a time from the bottom up, over several passes; burley is cut whole once most of the plant is ripe. A ripe leaf tells you it is ready: it yellows, hangs down, goes rough and sticky, and snaps crisply. Green leaf will not cure.
Prime ripe leaves (bottom-up) Critical
Only ripe leaf cures well — pick green and it cures a poor, muddy colour and loses you money; leave it too long and brown spot and weather take it. Picking the right leaves at the right moment, over several passes, is where the season's work turns into graded, sellable leaf.
How to read a ripe leaf: it turns from deep green to a paler yellow-green, its tip and edges yellow, the surface goes rough and slightly sticky, the leaf droops and hangs down, and it snaps off crisply with a clean click.
Flue-cured (Virginia): prime (pick) only the lowest ripe leaves first — about 2–3 per plant each pass — working bottom-up over 5–7 pickings, every 5–7 days. The leaves ripen upward, so you climb the plant pass by pass.
Burley: instead of priming, cut the whole plant once most leaves are ripe, spear the stalks onto sticks, and let them wilt in the field 2–4 days before hanging to air-cure.
Pick in the cool of the day, handle the leaf gently to avoid bruising, and keep the picked leaf out of the hot sun so it doesn't scorch before it reaches the barn or shed.
If a leaf is still green or only greenish — leave it. Green leaf will not cure; give it a few more days and take it on the next pass.
- Do:
Judge each leaf by ripeness, not the calendar — pick only what is truly ripe on each pass.
- Tip:
Picking green leaf just to 'get it over with' — it cures muddy and sells cheap.
- Watch out:
The lowest leaves for over-ripening and brown spot — pick them before they rot on the plant.
Cure, grade and bale
Curing is where the money is made or lost. A well-grown leaf badly cured becomes cheap leaf. Flue-cured leaf is dried in a barn with applied heat in careful steps over ~5–7 days; burley is air-dried in an open shed over ~4–8 weeks with no heat. Then you re-moisten (condition), grade by quality, bale, and store it dry.
Cure the leaf (type-specific) Critical
Curing is the single biggest thing that decides your price — more than how the crop grew. Done right it fixes a bright, even colour and a good burn; done wrong, a fine crop cures dull, blotchy or mouldy and sells cheap. Each type cures its own way, so match the method to your tobacco.
Flue-cured (Virginia) — in a barn with applied heat, over ~5–7 days, in steps:
1. Yellow the leaf at 30–40 °C with the barn kept humid — hold it until the green turns fully yellow (the starch is turning to sugar).
2. Fix the colour and dry the blade — the flat part of the leaf, the lamina — at 40–50 °C, to lock in the yellow and dry the leaf out.
3. Dry the midrib — the thick central vein — at 65–75 °C; the midrib holds the most water and dries last.
4. Condition (bring it 'into order'): let a little moisture back so the leaf is soft and pliable, not powdery, and can be handled without shattering.
Burley — air-cured, no heat, over ~4–8 weeks: hang the speared stalks in an open, ventilated shed and let the leaf go green → yellow → brown slowly. Work the vents — open them in dry weather, close them in damp — so the leaf dries steadily without moulding.
Whichever type, store the cured leaf dry — cured leaf soaks damp back up and moulds fast.
- Tip:
Poor curing — it is the biggest single quality loss in the whole crop. Store cured leaf dry to avoid mould.
- Watch out:
Rushing the heat on flue-cured leaf before it has yellowed SETS the green, and you cannot fix it afterwards — let it yellow first.
- Do:
Manage the moisture (humidity and vents), not just the temperature — if leaf goes brown and slimy instead of yellowing, it is too damp and airless: add air, and for flue-cured a little gentle heat, before it moulds.
Grade & bale; store dry Recommended
Buyers pay by grade — leaf sorted into even lots of the same colour, size and quality fetches far more than a mixed, dirty bale. A little care sorting and baling turns the same leaf into more money.
After each barn or shed is cured, let the leaf come 'into order' (soft enough to handle without crumbling) before you work it — bone-dry leaf shatters.
Sort (grade) the leaf into even lots by position on the plant, colour and quality — bright ripe leaf kept apart from green, damaged or brown-spotted leaf. Buyers pay for uniform lots.
Take out the trash — torn, mouldy, diseased or off-colour leaf — so it doesn't drag down a good bale.
Bale or bundle each grade separately, label it, and store it dry and off the floor, away from damp and pests, until sale.
- Do:
Grade into clean, even lots — uniform leaf of one colour and quality sells for the most.
- Tip:
Baling leaf too dry (it crumbles) or too damp (it moulds) — bale it 'in order', just pliable.
- Watch out:
Stored bales for damp and mould, and keep them raised off the ground.
Pests and diseases that attack tobacco
-
 Black shank
 -
 Blue mould
 -
 Broomrape
 -
 Cutworms
 -
 Damping-off
 -
 Frogeye leaf spot
 -
 Potato tuber moth
 - Tobacco angular leaf spot
-
 Tobacco brown spot
 -
 Tobacco budworm
 -
 Tobacco mosaic virus
Where to sell tobacco
Markets that trade this crop — what each one sells it by, when supply peaks there, and the currency used.
-
 Kanengo Auction Floors
-
 Boka Tobacco Auction Floors
-
 Songea Market
-
 Chinkhoma Auction Floors
-
 Mzuzu Auction Floors
Grow tobacco with a plan, not a guess
This guide is the general answer. Divisi works out yours — the week to plant tobacco on your soil and your rainfall, and each job dated for your field.


When to plant tobacco, country by country
- When to plant tobacco in Algeria
- When to plant tobacco in Angola
- When to plant tobacco in Benin
- When to plant tobacco in Botswana
- When to plant tobacco in Burkina Faso
- When to plant tobacco in Burundi
- When to plant tobacco in Cabo Verde
- When to plant tobacco in Cameroon
- When to plant tobacco in Comores
- When to plant tobacco in Congo
- When to plant tobacco in Côte d'Ivoire
- When to plant tobacco in Egypt
- When to plant tobacco in Eritrea
- When to plant tobacco in Eswatini
- When to plant tobacco in Ethiopia
- When to plant tobacco in Gabon
- When to plant tobacco in Gambia
- When to plant tobacco in Ghana
- When to plant tobacco in Guinea Ecuatorial
- When to plant tobacco in Guinea-Bissau
- When to plant tobacco in Guinée
- When to plant tobacco in Kenya
- When to plant tobacco in Lesotho
- When to plant tobacco in Liberia
- When to plant tobacco in Libya
- When to plant tobacco in Madagascar
- When to plant tobacco in Malawi
- When to plant tobacco in Mali
- When to plant tobacco in Mauritanie
- When to plant tobacco in Mauritius
- When to plant tobacco in Morocco
- When to plant tobacco in Moçambique
- When to plant tobacco in Namibia
- When to plant tobacco in Niger
- When to plant tobacco in Nigeria
- When to plant tobacco in Rwanda
- When to plant tobacco in République centrafricaine
- When to plant tobacco in République démocratique du Congo
- When to plant tobacco in Sao Tome and Principe
- When to plant tobacco in Seychelles
- When to plant tobacco in Sierra Leone
- When to plant tobacco in Somalia
- When to plant tobacco in South Africa
- When to plant tobacco in South Sudan
- When to plant tobacco in Sudan
- When to plant tobacco in Sénégal
- When to plant tobacco in Tchad
- When to plant tobacco in Togo
- When to plant tobacco in Tunisie
- When to plant tobacco in Uganda
- When to plant tobacco in United Republic of Tanzania
- When to plant tobacco in Zambia
- When to plant tobacco in Zimbabwe
Where tobacco scores best
Districts where Divisi's engine currently rates this crop highest, ranked by fit.
-
 Opobo/Nkoro
 -
 Karluway #2
 -
 Kaniama
 -
 Océan
Océan -
 Calandula
 -
 Gasorwe
 -
 Tsiaki
 -
 Geita
Geita -
 Dola
Dola -
 Gisagara
 -
 Kitagwenda
 -
 Lalangina
Get Insights by email
A short digest of new Divisi articles. No email on quiet weeks.
Frequently asked questions
How do I grow tobacco?
How to grow tobacco: 90–120 days to maturity, 120 cm rows. Also called tabak, fodya, tabac, ugwayi, tabaco, koae, kwae, tumbaku.
What is tabak in English?
Tabak is the Afrikaans name for tobacco.
What is fodya in English?
Fodya is the Chichewa and Shona name for tobacco.
What is tabac in English?
Tabac is the French name for tobacco.
What is ugwayi in English?
Ugwayi is the Ndebele, Xhosa and Zulu name for tobacco.
What is tabaco in English?
Tabaco is the Portuguese name for tobacco.
What is koae in English?
Koae is the Sesotho name for tobacco.
What is kwae in English?
Kwae is the Setswana name for tobacco.
What is tumbaku in English?
Tumbaku is the Swahili name for tobacco.
How long does tobacco take to grow?
Tobacco takes about 90–120 days from sowing to maturity, though the exact length varies with variety, temperature and how the season runs.
What spacing should I use for tobacco?
Space tobacco rows about 120 cm apart, with roughly 55 cm between plants within the row.
What pests and diseases attack tobacco?
The ones covered in this guide are Black shank, Blue mould, Broomrape. Each has its own page explaining how to identify, check for and control it.