 Divisi
How to grow mango
Mangifera indica · Anacardiaceae
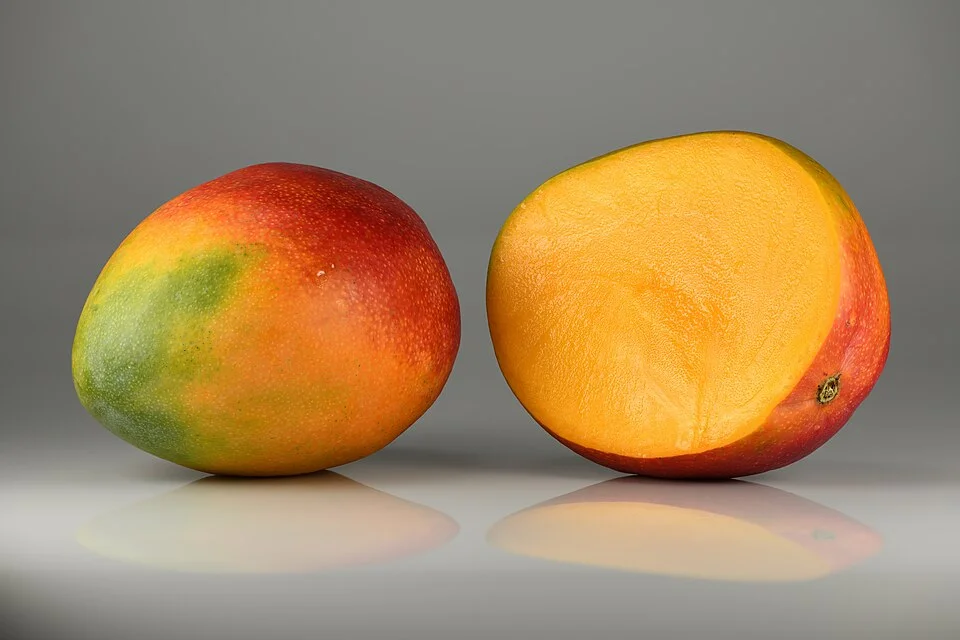
Photo: Ivar Leidus · CC BY-SA 4.0
Mango is a big, long-living evergreen tree that, once planted, can feed your family and earn money for decades. A grafted tree (the good fruiting variety joined onto a tough rootstock) starts bearing in about 3–5 years and gives fruit exactly like its parent; a tree grown from a seed takes longer (5–8 years) and may not come true. It flowers in big branched sprays called panicles, and only a few flowers on each spray become fruit — so a light-looking flowering can still fill your baskets. Mango often bears heavy one year and light the next, which is normal. Its whole crop comes down to two things you control: giving the tree a dry rest so it flowers well, and keeping anthracnose disease and fruit flies off the flowers and fruit.
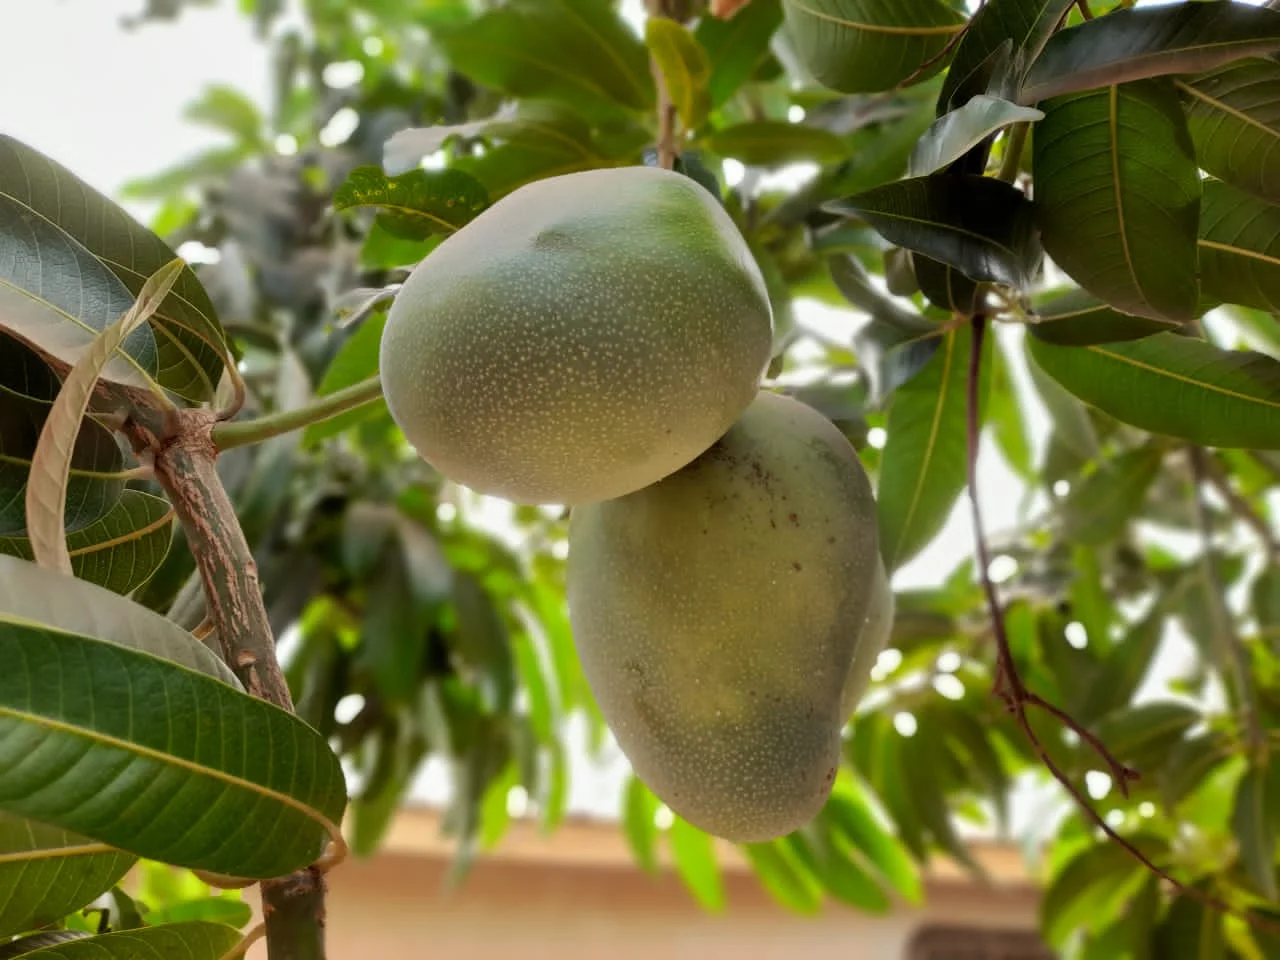
daSupremo · CC BY-SA 4.0 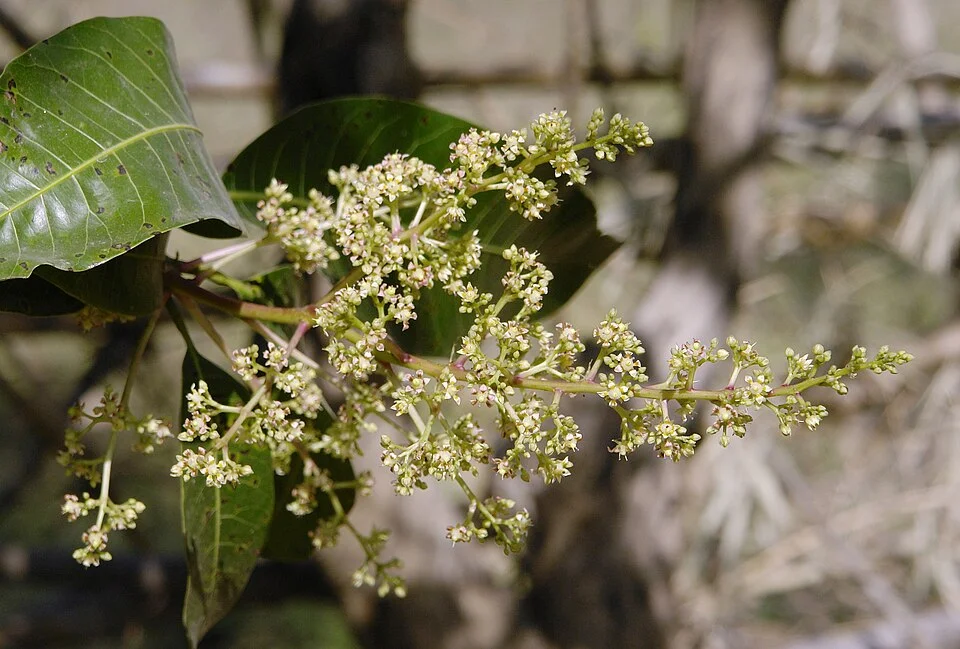
Yann (talk) · CC BY-SA 4.0
- Row spacing
- 900 cm
- Plant spacing in the row
- 900 cm
These are general figures for the crop, compiled from published agronomic references including FAO and CABI. The right choice for your field depends on your soil, rainfall and the yield you are aiming for.
Will mango actually do well on your field? Check your own field against every crop in the catalogue — no signup. Run the crop check →
Also known as
- Amharic
- mango
- French
- mangue, manguier
- Hausa
- mangoro
- Ndebele
- umango
- Portuguese
- manga
- Shona
- mango
- Swahili
- embe
- Xhosa
- umango
- Zulu
- umango
Working in buckets, bags or paces? The farming glossary turns the measures growers actually use into kilograms and hectares — what a 20 litre bucket of each crop really weighs, and how to size a field by walking it — alongside the Shona, Swahili, Ndebele and Yoruba words used in the field. Open the glossary →
Growing mango, stage by stage
Your mango, from planting a young grafted tree to a yearly crop of fruit — plant it far apart in a big well-fed pit, shape it in the early years, then each season give it a dry rest to flower well and guard the flowers and fruit from the two crop-killers: anthracnose and fruit fly.
Plant your tree well and shape it (the first years)
Almost everything about a mango is decided in the first years, and you get one chance. A mango grows into a huge tree that stands for decades, so you plant it far apart, in a big well-fed pit, and you spend the early years training it into a strong, open frame. Get the spot, the spacing and the young shape right now — you cannot change them later.
Dig & fill big pits Critical
A mango sends down a deep taproot and lives for decades, so it needs a big, soft, well-fed pocket of soil to start in — a small hole scratched in hard ground stunts the tree for life. Digging early and filling with topsoil and well-rotted manure gives the young roots a soft bed and lets the manure finish rotting before the tree goes in.
Pick a well-drained spot that never floods and is not a frost pocket — a young mango is killed at about −2 °C, and cold air pools in low hollows. Avoid the bottoms of valleys and dips.
Mark the pits out nine full strides apart each way (about 9 m) — a mango becomes a big tree, and crowding gives you shade, disease and little fruit. That spacing gives about 135 trees per hectare. Decide it now, because you can never move a planted tree.
Dig each pit big — about one long stride across each way (roughly 1 m) and knee-to-hip deep — which takes out about 0.5–1 m³ of soil. Keep the dark topsoil in one pile and the poorer subsoil in another.
Mix the topsoil back with one to three full 20-litre tins of well-rotted manure (about 10–50 kg per pit) — dark, crumbly, no strong smell — and refill the pit with this good mix. Water it and let it settle.
Do this well ahead of planting — from about two months down to a week before — so the manure finishes rotting and the loose soil settles into a firm, ready bed.
- Do:
Plant one tree per pit and stake it — a tall young whip catches the wind and rocks its new roots loose.
- Tip:
Frost pockets and low, wet hollows — young mangoes die at about −1 to −3 °C and rot in standing water.
- Watch out:
Use only well-rotted manure, and wash your hands after — fresh manure burns young roots and can carry disease and weed seeds.
Plant grafted tree + stake Critical
This is the day the tree's whole life starts. Planting a grafted tree — the good fruiting variety joined onto a tough rootstock — means fruit true to the parent in 3–5 years instead of a gamble over 5–8. Set it at the right depth with the graft join clear of the soil, or the tree sulks, roots badly, or rots at the join.
Plant at the start of the rains, into the pit you already dug, filled and let settle. Water the pit the day before so the soil is moist right through, not just wet on top.
Set the tree at the same depth it grew in the nursery — no deeper. Keep the graft union (the knuckle-like bulge low on the stem where the good variety was joined to the rootstock) a hand-span (about 20 cm) above the soil, never buried.
Firm the soil gently around the roots and build a water basin — a low ring of soil about a stride (1 m) across — to hold water over the root zone.
Stake the young tree to a strong pole so wind can't rock it and tear the new roots. Tie it loosely in a figure-of-eight so the tie doesn't cut into the bark.
Water it in well, then 2–3 times a week while it settles. Lay a mulch ring of dry grass or leaves a stride out from the trunk, but keep the mulch a hand-span clear of the stem so the bark doesn't stay wet and rot.
- Do:
Keep the graft union above the soil — bury it and the top variety grows its own roots, and you lose the toughness of the rootstock.
- Tip:
Planting deeper than it stood in the nursery — a buried stem rots. And don't plant on the first light shower if the pit is still dry below.
- Watch out:
Check the tie every few weeks and loosen it as the stem thickens, or it will strangle the trunk.
Formative pruning Recommended
The shape you build in the first three years is the tree you keep for life. Training to a single trunk and 3–4 well-spaced main branches gives an open, airy frame that carries fruit within reach and lets sun and air through — and airy canopies get far less anthracnose, the black rot that destroys flowers and fruit in damp weather.
For the first three years, check the young tree every 5–6 months. First, grow a single clear trunk to about hip height (0.75–1 m) — rub off any shoots below that.
Then choose 3–4 strong branches that point outwards and are spread around and up the trunk (not all bunched at one spot). These become the main frame; cut the rest back.
Always cut back to a bud or a branch, and cut cleanly — ragged stubs die back and let in rot.
On older, bearing trees, prune lightly after each harvest: take out dead, crossing and inward-growing shoots to keep the middle open, and hold the tree at a height you can still reach and pick.
- Do:
Prune after harvest, not at flowering — cutting near flowering throws away next season's crop.
- Tip:
Topping the tree hard or letting it become a dense thicket — a crowded, shady canopy is a nest for anthracnose and gives little fruit.
- Watch out:
Keep an eye on big cuts — dieback (brown death creeping down from a bad cut) can kill a whole branch.
Weed-free mulched ring Recommended
A young mango can't fight grass and weeds for water and food, and a clean, mulched, weed-free circle around it is the difference between a tree that races away and one that crawls. Weeds against the trunk also hide pests and hold damp on the bark.
Keep a clear, weed-free ring around the trunk — out to at least a stride (1 m) while the tree is small, and wider as the canopy spreads — always out past the drip line (the circle on the ground under the outer leaves, where the feeding roots sit).
Weed the ring by hand or hoe shallowly every month or so — deep hoeing near the trunk cuts the surface feeding roots.
Cover the cleared ring with a thick mulch of dry grass, leaves or straw to hold moisture and smother weeds.
Keep the mulch a hand-span (about 20 cm) clear of the trunk — mulch piled against the bark stays wet and rots the stem.
- Do:
Pull grass right back past the drip line — grass is a young mango's worst rival for water in the dry months.
- Tip:
Piling mulch against the trunk (it rots the bark) or hoeing deep near the tree (it cuts feeding roots).
Grow a strong young tree
For the first few years the tree isn't cropping — it is building the frame and roots that every future harvest depends on. Feed and water it to push strong growth flushes (bursts of new leaves and shoots), watch the tender shoots for small sap-suckers, and take off the very first fruit so the young tree can finish building itself before it carries a crop.
Scout the young tree Critical
A young mango's soft new shoots are a magnet for sap-sucking pests, and one monthly walk catches them while they're a few insects, not an infestation. Left alone they weaken the growth flushes, coat the leaves in sticky black mould, and can make shoot tips die back.
Once a month, walk to each tree and look closely at the new shoots, leaf undersides and stems.
Mango hoppers: small wedge-shaped insects on the shoots that hop away when you shake the branch, with sticky honeydew and black sooty mould (a soot-like coating) on the leaves below.
Scale insects: tiny fixed bumps or discs stuck to twigs and leaf undersides — they don't move — with the same sticky leaves and sooty mould.
Mealybugs: white, cottony, waxy blobs tucked into the leaf-joints and shoot tips, often with ants running to the honeydew.
Look for dieback (shoot tips going brown and dying back) and for small, narrow, bunched 'little leaves' on short shoots — a sign of zinc (ZN) shortage.
A few pests on a strong tree are fine — act only if they're spreading or the sooty mould is climbing. Wipe off small colonies, or open the matching pest guide.
- Watch out:
Ants streaming up the trunk usually mean sap-suckers (hoppers, scale or mealybugs) above — follow them to find the colony.
- Do:
Check the tender new flush especially — that's where hoppers and mealybugs gather first.
Water & feed the young tree Recommended
In these building years, steady water and light feeding push the strong growth flushes that build the tree's frame fast — the bigger the frame now, the sooner and heavier it crops. Nitrogen (N) is the nutrient that drives this leafy frame growth.
Water young trees 2–3 times a week while they're small, easing off as they establish and their roots go deep. Keep the basin soil moist, never waterlogged.
Feed little and often during the growing flushes: spread a small handful of a nitrogen-rich compound fertiliser in a ring on the moist soil at the drip line (under the outer leaves), and a bit more each year as the tree grows.
Keep fertiliser off the trunk and off wet leaves, and cover it or water it in so it doesn't blow off or gas away.
If you see 'little-leaf' — small, narrow, bunched leaves, a zinc (ZN) shortage — a zinc spray on the new flush corrects it.
- Do:
Feed on moist soil (after watering or rain) and water it in — fertiliser on dry soil just sits and gases away.
- Tip:
Dumping fertiliser against the trunk — it scorches the bark and roots. Ring it at the drip line instead.
- Watch out:
Wash your hands after handling fertiliser and keep it away from children, food and the water source.
Remove first fruits Optional
When a young tree first tries to fruit, a heavy early crop stunts its frame and can lock it into bearing heavy-then-light forever. Pinching off that first flush of fruit for a year or two lets the tree finish building itself, so it crops bigger and more steadily for the rest of its long life.
In the third or fourth year, when the young tree first flowers and sets a few fruit, pull off the little fruits (and most of the flower panicles) by hand while they're still small.
Let the tree put that strength into wood, leaves and roots instead of a handful of early fruit.
From the next year, let it start carrying a light crop and build up from there.
- Do:
Be patient — a tree you let build up for a year crops far better for decades. One early basket of fruit is a poor trade.
Trigger flowering and guard the flowers
A mango flowers well only after a dry, cool rest of about three months — the dry spell brings all the flower sprays (panicles) out together. This stage is a knife-edge: rain or watering now gives leaves instead of flowers and poor fruit set, and damp weather on the open flowers feeds anthracnose and powdery mildew, the diseases that can wipe out the crop before it even sets. Hold back water, watch the panicles, and be ready to spray and trap.
Withhold irrigation Critical
The dry rest is what makes a mango flower. Watering (or unlucky rain) in the three months before flowering pushes the tree into a leafy flush instead of flowers, and the few flowers that do come set badly. Holding back water is the single biggest thing you do to get a heavy, even flowering.
From about three months before your trees normally flower, stop watering and let the tree go dry and 'rest'. In most places this lines up with the cool, dry season.
Let the soil dry down and the leafy growth pause — this dry, cool stress is the signal that tells the tree to flower all at once rather than in dribs and drabs.
Hold off water right up to flowering. Only start again after the fruit has set (the next stage).
If rain falls during this rest you can't stop it — but don't add to it, and be ready to protect the flowers from disease if the weather turns damp.
- Tip:
Irrigating through flowering — it gives poor set and a leafy flush instead of a crop.
- Watch out:
A wet flowering left unsprayed for anthracnose can destroy the whole crop — if the weather is damp, get the protective spray on (next task).
Scout the panicles Critical
The open flowers are the most fragile, most valuable part of the whole year, and disease can run through a panicle in days. Checking every few days through flowering is how you catch anthracnose, mildew or hoppers before they turn a heavy flowering into an empty tree.
From when the panicles (the big branched flower sprays) start to show, check several trees every 6–8 days.
Anthracnose: black, sunken spots on the flower stalks and flowers, and whole panicles turning black and dying (this is called blossom blight). It runs fastest in wet, humid weather.
Powdery mildew: a white, powdery dust on the flowers, flower stalks and young leaves; affected flowers dry up and drop, leaving bare stalks.
Mango hoppers: small wedge-shaped insects that hop off the panicle when you tap it, plus honeydew and black sooty mould — heavy hoppers strip the flowers.
If disease is starting and the weather is damp, start the protective spray (next task); if hoppers are heavy on the flowers, treat for them.
- Watch out:
Damp, still, cloudy weather at flowering is the danger sign for anthracnose — that's when to have the copper spray ready.
- Watch out:
If flowers and tiny fruit drop heavily, a boron (B) shortage can be part of it — a boron spray at flowering helps the flowers set fruit.
Preventive fungicide (humid areas) Recommended
Anthracnose is a protectant fight — the spray works by coating the flowers before the disease lands, not by curing them after. In humid areas, a spray on the open panicles every week or two is the difference between fruit and a black, empty tree.
Spray only if your area is humid or the weather turns damp at flowering — in a dry flowering you may not need it at all. Your recommendation gives the product and amount for your trees.
For anthracnose, use a copper spray; for powdery mildew (the white dust), use a sulphur spray. Start as the flowers open and repeat every 10–14 days while the weather stays damp.
'Protectant' means it must be on the flowers before the disease arrives — so spray ahead of wet spells, not after the panicles have already blackened.
Cover the whole panicle with a fine, even mist, to the point of run-off.
Spray safely: cover your skin, eyes, nose and mouth; spray in the cool of the day with the wind behind you; keep it off food and the water source; and wash yourself and your clothes afterwards.
- Do:
Get the spray on before a wet spell — a protectant already on the flower is worth far more than one applied after the rain.
- Tip:
Spraying in the heat of the day or drenching in strong sun — that can scorch the tender flowers.
- Watch out:
Respect the pre-harvest interval — the wait on the label between the last spray and picking, so no chemical is left on the fruit. (At flowering you're far from harvest, but keep the habit.)
Deploy fruit-fly traps Recommended
Fruit flies are the pest that decides whether your fruit is clean or maggoty. Hanging traps at flowering, before there's any fruit to attack, tells you when the flies arrive and how many — so you act the moment pressure builds, not after they've already stung the crop.
As flowering begins, hang fruit-fly traps in the shade of the canopy — a few per tree, or spread through the orchard.
Use a methyl-eugenol lure for the Bactrocera fruit flies, or a terpinyl-acetate lure for the Ceratitis (Natal / Mediterranean) flies — these lures pull in and drown the male flies.
Check the traps each time you scout: a rising catch is your early warning that fruit-fly season is starting.
Keep the traps going right through fruit development, topping up or replacing the lure as directed.
- Do:
Hang traps before the fruit forms — you want to be catching and counting flies early, so nothing takes you by surprise.
- Watch out:
A sudden jump in the trap catch means start baiting and sanitation now (next stage) — don't wait for the first stung fruit.
Set, grow and protect the fruit
Only a few flowers on each panicle become fruit — that is normal, so don't panic at heavy flower-drop. Once the little fruits have set, bring water back and keep it steady through fruit fill (the tree's thirstiest, most important water stage). Then it's a straight fight to harvest against the fruit fly and the fruit diseases — keep scouting, trapping, baiting and clearing fallen fruit.
Resume irrigation through fruit fill Recommended
Now that the fruit has set, water becomes the fuel that fills it. This fruit-fill stretch is the mango's most water-sensitive stage — steady moisture now means big, well-filled fruit, while a drought now means small fruit and heavy drop.
Wait until the little fruits have set (about a month after flowering) before you start watering again — watering earlier, during flowering, spoils the set.
Then water steadily every 7–10 days through fruit development and fill, more often in heat and on sandy soils that dry fast.
Aim for even, steady moisture — don't swing between bone-dry and flooded, which cracks and drops fruit.
Keep it up until close to harvest, then ease off as the fruit matures.
- Do:
Keep the water steady once you restart — it's the swings from dry to soaked that split fruit and cause drop.
- Tip:
Restarting water too early, during flowering — you'll trade a leafy flush for your fruit.
Scout fruit fly & black spot Critical
From set to harvest the fruit is under attack — fruit flies sting it, and black spot and rots mark it. Twice-weekly checks catch the first stings and the first spots, the only moment you can still save the crop by baiting and clearing fallen fruit.
From fruit-set onwards, check the developing fruit and the traps every 6–8 days.
Fruit-fly stings: tiny sunken punctures oozing a bead of sap on the fruit — inside, a maggot is starting. Stung fruit later softens, rots and drops.
Bacterial black spot: black, angular, slightly raised spots — often with star-shaped cracks — on the fruit skin and along the leaf veins, sometimes oozing.
Anthracnose on fruit: black, sunken spots that spread, especially as the fruit begins to ripen.
Mango seed weevil: you often can't see it from outside — cut open a fallen fruit and look for tunnels or a grub in the flesh and seed. If you find it, clearing every fallen fruit is your main weapon.
On the first stings or a rising trap catch, start baiting (next task), and collect and bury all fallen fruit twice a week to break the pests' cycle.
- Watch out:
Fallen fruit on the ground is a fruit-fly and weevil nursery — every rotting mango left there breeds the next wave. Clear them twice a week.
- Do:
Where fruit-fly pressure is high, harvest at mature-green (next stage) — picking firm and green beats the fly to the fruit.
Bag fruit (high fruit-fly pressure) Optional
Where fruit flies are bad, a bag over each fruit is a simple wall the fly can't cross — no sting, no maggot, and cleaner skin — with no spray at all. It's extra work, so it's for your best fruit or small trees.
When the fruits are about marble-to-egg size (roughly 6–10 weeks after flowering), slip a paper or newspaper bag (or a purpose-made fruit bag) over each one and tie it loosely at the stalk.
Leave a small open corner or hole at the bottom so rain drains out and damp doesn't build up inside.
Choose healthy, unstung fruit and handle the little fruit gently so you don't knock it off.
Leave the bags on right up to harvest.
- Do:
Bag your best, biggest fruit first — it gives the clearest payback for the work.
- Tip:
Sealing the bag tight at the bottom — trapped damp brings rot instead of stopping it.
Fruit-fly management Recommended
Traps tell you the flies are here; protein bait is how you knock them down. A bait is a sticky food-spot the flies come to feed on and die. Used from the first stings, with strict clearing of fallen fruit, it keeps the crop clean where bagging isn't practical.
Start when scouting shows the first stings or the trap catch climbs — usually from the small-fruit stage on.
Protein bait is a mix of a protein food the flies love plus a small dose of insecticide. Spot-spray it as coin-sized patches on the shady side of the tree — the flies come to feed and die. You don't spray the whole tree or the fruit.
Repeat the bait spots every 7–10 days, and again after heavy rain washes them off.
Sanitation is half the battle: collect and bury (or feed to animals) all fallen and stung fruit twice a week so no maggots finish their cycle in your orchard.
Spray safely: cover skin, eyes and nose; keep bait off the fruit and off food; and respect the pre-harvest interval (the label's wait between the last treatment and picking) as harvest nears. Wash afterwards.
- Do:
Bait and clear fallen fruit together — either one alone leaks flies; the two together clean up the orchard.
- Watch out:
As harvest gets close, mind the pre-harvest interval on any bait or spray, so no chemical is left on the fruit you pick.
- Tip:
Blanket-spraying the whole tree or the fruit with insecticide — bait spots do the job with a fraction of the chemical.
Pick at the right moment
Mango is ready about 100–150 days (3.5–5 months) after flowering, and the fruit on a tree doesn't all mature together — so you pick over several passes. Read the maturity signs, leave a short stalk to cut sap-staining, and where fruit flies are bad, pick mature-green to beat the fly.
Harvest by hand or pole Critical
Pick too early and the fruit never ripens sweet; pick too late and the fruit fly, birds and bruising eat your profit. Reading the maturity signs — and picking mature-green where fruit flies are bad — gets clean fruit off the tree at the right moment, over several passes as each one ripens.
Start checking for maturity from about 3.5 months after flowering (100 days). Look for the fruit filling out: the shoulders (the two humps beside the stalk) rise level with or above the stalk, and the beak (the little nose at the tip) fills.
Look for the colour break — the skin lightening from dark to lighter green, and the flesh near the seed turning yellow or orange when you cut one open.
Float test: a mature fruit sinks or floats low in a bucket of water. An immature one bobs high on the surface — if it bobs high and the shoulders haven't filled, it's not ready: leave it on the tree another week and check again.
Cut or snap each fruit leaving a short stalk stub about a finger-joint long (3–5 cm) — this slows the sap that stains the skin. Use a pole-picker with a bag for high fruit so it doesn't bruise on the ground.
Pick over several passes, every 5–10 days, taking the ready fruit each time and leaving the rest to fill. Handle gently — mango bruises easily — and keep picked fruit out of the sun.
- Do:
In fruit-fly country, pick at mature-green (firm, full, colour just breaking) to beat the fly — it ripens fine off the tree.
- Tip:
Letting the sap run onto the fruit — hold or lay picked fruit stalk-down so the milky sap doesn't dribble over the skin and scar it.
- Watch out:
Pick in the cool of the morning and never drop fruit into a hard bucket — bruises surface as black patches days later.
Desap, treat and ripen
The crop is picked — now don't lose it to sapburn and rot in the first hour. Desap each fruit straight away (the milky sap scars the skin), give it a hot-water dip to stop anthracnose and stem-end rot and kill any fruit-fly eggs, then ripen it under control. Handle it gently the whole way — mango bruises at a touch.
Desap & hot-water treat Recommended
In the first minutes after picking, the milky sap runs from the stalk and burns dark scars into the skin (this is sapburn) that buyers reject. Desapping stops that, and a hot-water dip stops the anthracnose and stem-end rot (rot spreading from the stalk end) that would otherwise ruin the fruit in the box a week later.
Desap within minutes of picking. Either leave the short stalk stub on and lay the fruit stalk-down so the sap drips away from the skin, or dip the fruit briefly in a mild lime, alum or detergent solution to break the sap so it can't scar.
Keep the fresh sap off the skin of every fruit — one dribble leaves a black scar.
Then give a hot-water dip: about 50–55 °C for 20–30 minutes. This controls anthracnose and stem-end rot and kills fruit-fly eggs in the skin. Use a thermometer — too hot cooks the fruit, too cool does nothing.
Ripen under control in a cool, airy, shaded place, and sort out any bruised or diseased fruit so one rotten mango doesn't spoil the rest.
- Do:
Work fast and gently — desap in the first few minutes and treat the fruit as if it bruises at a touch, because it does.
- Watch out:
Hold the hot water in the 50–55 °C band with a thermometer — guessing scalds the fruit or wastes the treatment.
- Tip:
Piling fruit deep or leaving it in the sun after picking — heat and weight bruise and rot it.
Pests and diseases that attack mango
-
 Algal leaf spot
 -
 Anthracnose
 -
 Armillaria root rot
 -
 Bacterial black spot
 -
 Fruit flies
 -
 Mango hopper
 -
 Mango seed weevil
 -
 Powdery mildew
 -
 Scale insects
 -
 Shoot borer
 -
 Stem-end rot
Where to sell mango
Markets that trade this crop — what each one sells it by, when supply peaks there, and the currency used.
-
 Kariakoo Market
-
 Kongowea Market
-
 Marché de Thiaroye
-
 Marché de Sikasso
-
 Mercado Quatro
-
 Grand Marché de Bobo-Dioulasso
-
 Marché Castors
-
 Marché Kermel
Grow mango with a plan, not a guess
This guide is the general answer. Divisi works out yours — the week to plant mango on your soil and your rainfall, and each job dated for your field.


When to plant mango, country by country
- When to plant mango in Algeria
- When to plant mango in Angola
- When to plant mango in Benin
- When to plant mango in Botswana
- When to plant mango in Burkina Faso
- When to plant mango in Burundi
- When to plant mango in Cabo Verde
- When to plant mango in Cameroon
- When to plant mango in Comores
- When to plant mango in Congo
- When to plant mango in Côte d'Ivoire
- When to plant mango in Egypt
- When to plant mango in Eritrea
- When to plant mango in Eswatini
- When to plant mango in Ethiopia
- When to plant mango in Gabon
- When to plant mango in Gambia
- When to plant mango in Ghana
- When to plant mango in Guinea Ecuatorial
- When to plant mango in Guinea-Bissau
- When to plant mango in Guinée
- When to plant mango in Kenya
- When to plant mango in Liberia
- When to plant mango in Libya
- When to plant mango in Madagascar
- When to plant mango in Malawi
- When to plant mango in Mali
- When to plant mango in Mauritanie
- When to plant mango in Mauritius
- When to plant mango in Morocco
- When to plant mango in Moçambique
- When to plant mango in Namibia
- When to plant mango in Niger
- When to plant mango in Nigeria
- When to plant mango in Rwanda
- When to plant mango in République centrafricaine
- When to plant mango in République démocratique du Congo
- When to plant mango in Sao Tome and Principe
- When to plant mango in Seychelles
- When to plant mango in Sierra Leone
- When to plant mango in Somalia
- When to plant mango in South Africa
- When to plant mango in South Sudan
- When to plant mango in Sudan
- When to plant mango in Sénégal
- When to plant mango in Tchad
- When to plant mango in Togo
- When to plant mango in Tunisie
- When to plant mango in Uganda
- When to plant mango in United Republic of Tanzania
- When to plant mango in Zambia
- When to plant mango in Zimbabwe
Where mango scores best
Districts where Divisi's engine currently rates this crop highest, ranked by fit.
-
 South Imenti
 -
 Ogoulou
 -
 Songololo
 -
 Mananjary
 -
 Potupo
 -
 Kiryandongo
 -
 Allembe
 -
 Samba Cajú
 -
 Arochukwu
 -
 Ebebiyin
 -
 Nyong-et-Kellé
 -
 Tarime
Get Insights by email
A short digest of new Divisi articles. No email on quiet weeks.
Frequently asked questions
How do I grow mango?
How to grow mango: 900 cm rows. Also called mangue, mangoro, umango, manga, embe.
What is mango in English?
Mango is the Amharic and Shona name for mango.
What is mangue in English?
Mangue (also manguier) is the French name for mango.
What is mangoro in English?
Mangoro is the Hausa name for mango.
What is umango in English?
Umango is the Ndebele, Xhosa and Zulu name for mango.
What is manga in English?
Manga is the Portuguese name for mango.
What is embe in English?
Embe is the Swahili name for mango.
What spacing should I use for mango?
Space mango rows about 900 cm apart, with roughly 900 cm between plants within the row.
What pests and diseases attack mango?
The ones covered in this guide are Algal leaf spot, Anthracnose, Armillaria root rot. Each has its own page explaining how to identify, check for and control it.