 Divisi
How to grow soybean
Glycine max · Fabaceae
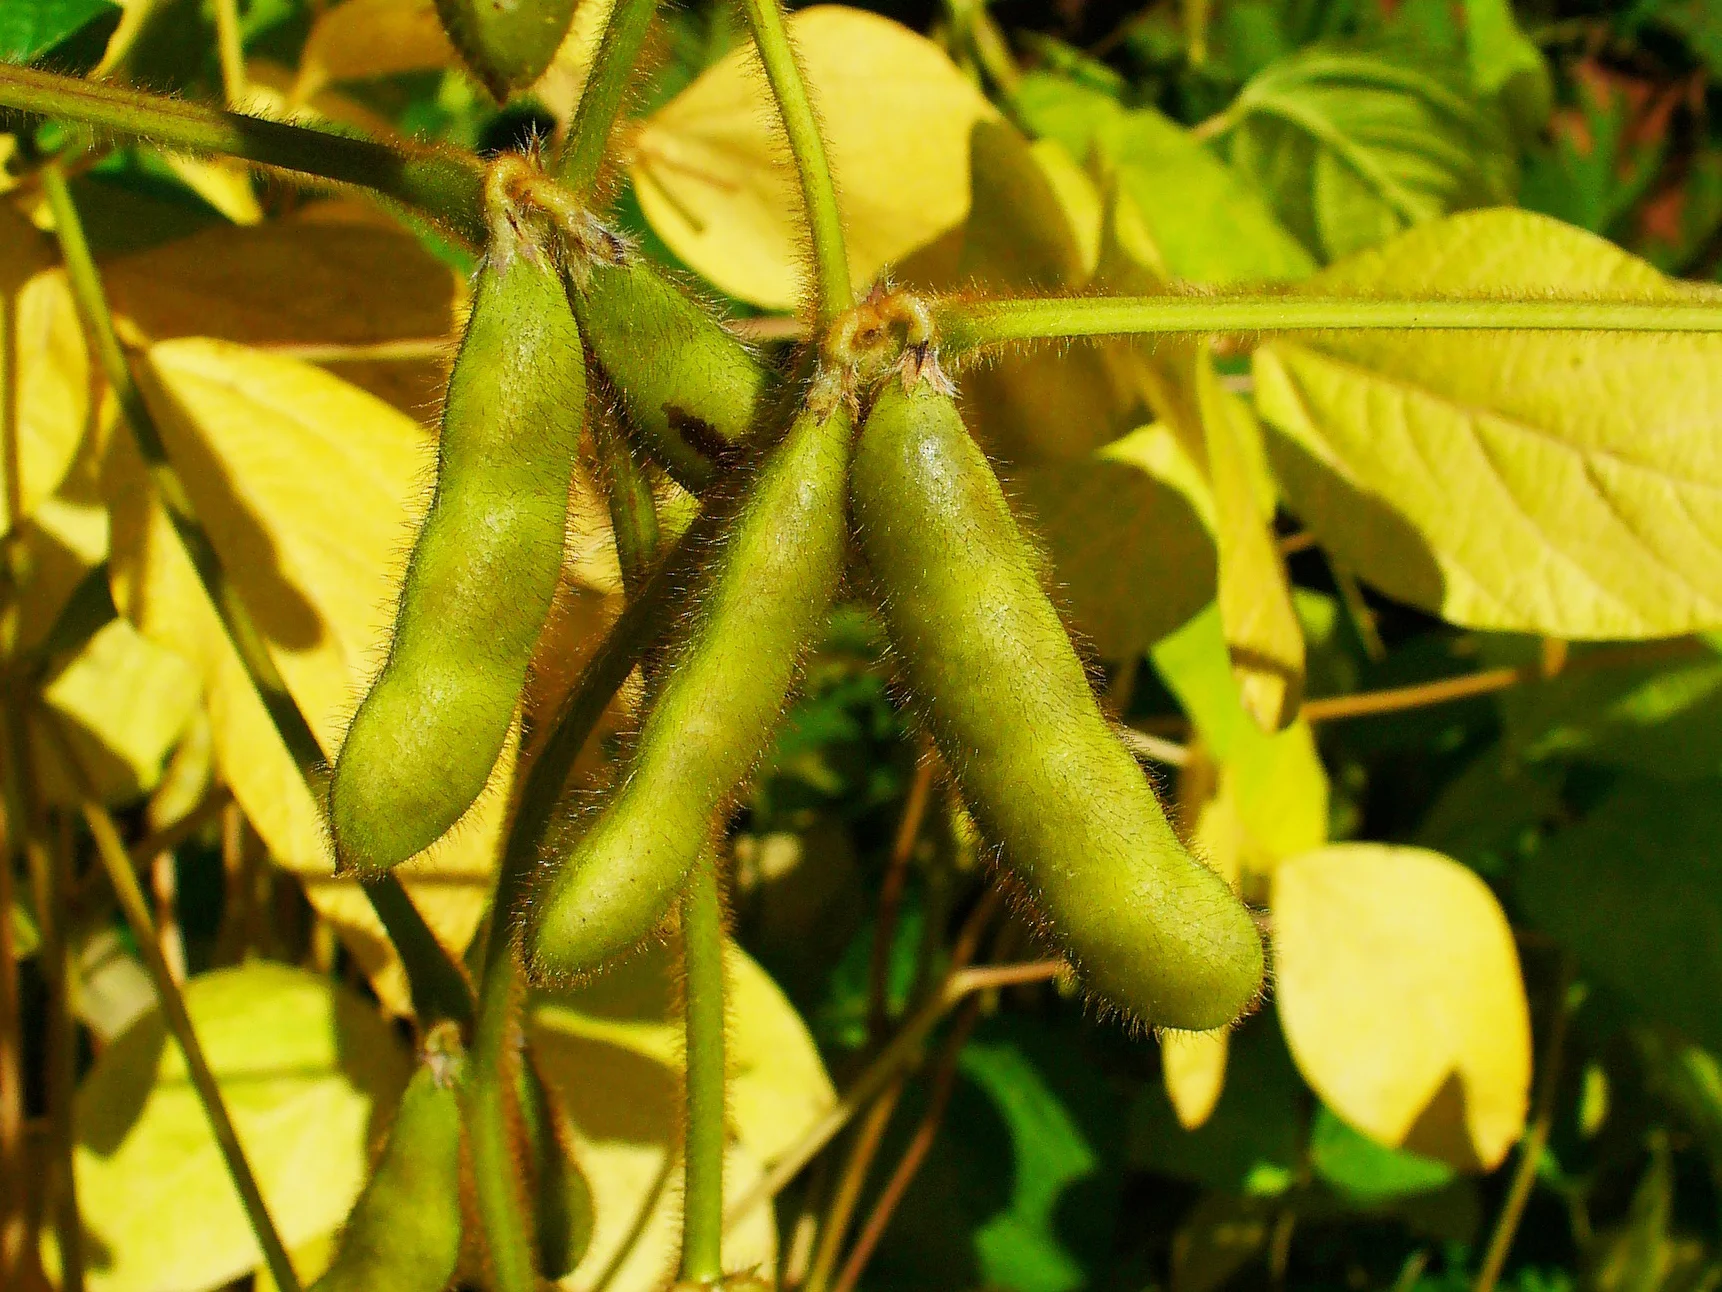
Photo: H. Zell · CC BY-SA 3.0
Soybean (Glycine max) is a bushy, knee-high bean grown for a seed that is rich in protein and oil — good to eat, good to sell, and it leaves the soil richer for whatever you plant next. Its secret is underground: tiny helper germs called rhizobia live in little lumps (nodules) on its roots and pull nitrogen straight out of the air, so a well-nodulated crop feeds itself and needs almost no nitrogen fertiliser. Two things decide your season — soil that is not too sour (sour, acid soil starves the crop and stops the root germs working), and coating the seed with the right germ powder (inoculant) on sowing day. Get those right, keep the young crop weed-free until its leaves close over, water it through flowering and pod-fill, and guard the leaves against rust while the pods fill.
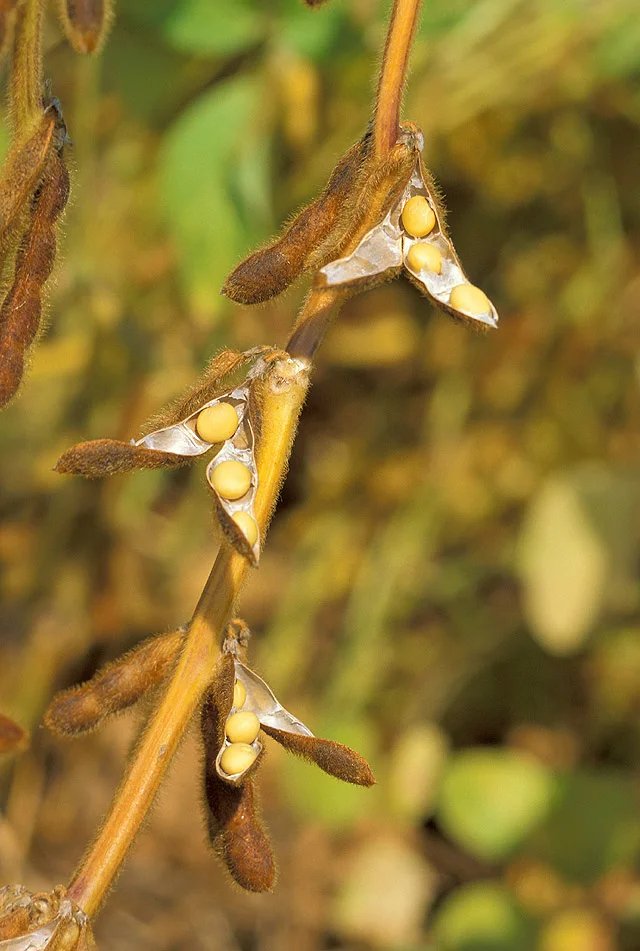
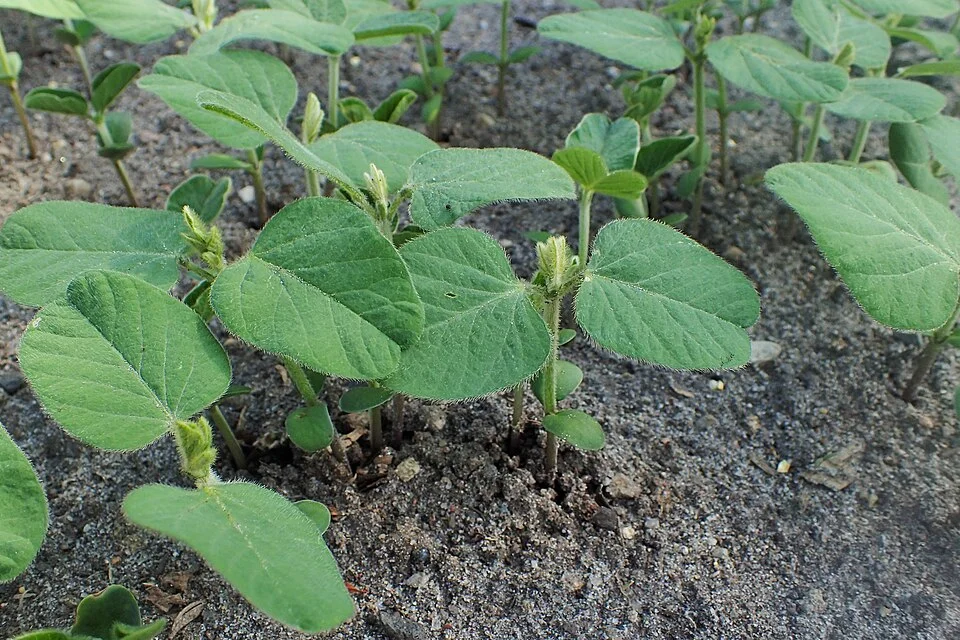
Krzysztof Ziarnek, Kenraiz · CC BY-SA 4.0
- Days to maturity
- 90–150 days
- Row spacing
- 50 cm
- Plant spacing in the row
- 6 cm
- Sowing depth
- 3–4 cm
These are general figures for the crop, compiled from published agronomic references including FAO and CABI. The right choice for your field depends on your soil, rainfall and the yield you are aiming for.
Will soybean actually do well on your field? Check your own field against every crop in the catalogue — no signup. Run the crop check →
Also known as
Soybean is also called soya bean.
- English
- soya bean
- Afrikaans
- sojaboon
- French
- soja
- Portuguese
- soja
- Swahili
- soya
Working in buckets, bags or paces? The farming glossary turns the measures growers actually use into kilograms and hectares — what a 20 litre bucket of each crop really weighs, and how to size a field by walking it — alongside the Shona, Swahili, Ndebele and Yoruba words used in the field. Open the glossary →
Growing soybean, stage by stage
Your soybean season from field to store: sweeten sour soil months ahead, coat the seed with its helper germs on sowing day, keep it weed-free until the leaves close over, water it hard through flowering and pod-fill, catch leaf rust early, then harvest gently and seal the dry beans before storage beetles get in.
Get your field, seed and root-germ ready
Almost everything that decides your soybean yield is set before you sow. Soybean hates sour (acid) soil, so if yours is sour, lime it 2–3 months ahead to give it time to work. Prepare a fine, firm seedbed with no hard pan underneath, and buy good seed plus the root-germ powder (inoculant) that lets the crop make its own nitrogen. Test that the seed will really grow. Do all this in the weeks before the rains, so you can sow the moment a real planting rain falls.
Apply the recommended lime Recommended
In sour (acid) soil, soybean roots can't take up the phosphorus you buy, and the helper root germs that feed the crop won't grow — so the plants stay small and yellow no matter what you spend. Lime sweetens the soil, but it works slowly, so it must go on 2–3 months before you sow to help this crop.
Only lime if a soil test — or past crops that stayed small and yellow even with fertiliser — tells you the soil is sour. Your recommendation gives the exact amount for your field.
Spread it evenly over the whole field, like sprinkling flour by hand. Patches give patchy results — some plants nodulate and thrive, the rest stay starved.
Work it into the topsoil with a hoe or plough. Lime only helps the soil it is mixed into; left on top it does almost nothing.
Do it 2–3 months before you sow — a good time is right after clearing the last crop. Lime is slow, so late liming won't help this season.
- Do:
Spread lime and manure a few weeks apart, not on the same day — give each time to work in.
- Tip:
Thinking lime alone is enough on land new to soybean — without the root-germ powder the crop is still starved of nitrogen, however sweet the soil.
- Watch out:
Wash your hands after handling lime, and keep the dust out of your eyes and nose.
Buy seed, inoculant & basal fertiliser Critical
The right seed, the root-germ powder (inoculant) and a phosphorus/potash basal give the strong, even start that sets your whole season. Buy them early and together — the inoculant is a living powder that is easy to forget and hard to find at the last minute, and without it the crop can't make its own nitrogen.
Buy the variety and seed amount your recommendation gives. Soybean is fussy about day-length — the wrong variety flowers too early or too late — so your plan has already matched the variety to your area and season length.
Ask for Bradyrhizobium inoculant — the powder of living root germs (rhizobia) that lets soybean feed itself. Check it is in date and has been kept cool and out of the sun; the germs are alive, and heat kills them.
Buy the basal your recommendation gives. Soybean wants phosphorus and potash (and sulphur if it's listed), but almost no nitrogen, because it makes its own. Don't let a dealer sell you a high-nitrogen compound for it.
Store seed and fertiliser dry, off the floor, away from food, water and children, and keep the inoculant in the coolest, darkest place you have — a fridge if you can — until sowing day.
- Do:
Buy the inoculant and seed on the same trip, and plan to sow within the inoculant's use-by date.
- Tip:
Buying a nitrogen-heavy fertiliser — spare nitrogen makes the plant lazy, and it stops forming the nodules that would feed it for free.
- Watch out:
Keep the inoculant out of the sun on the way home — an afternoon baking in a bag can kill the germs before you ever use them.
Confirm seed quality Critical
Soybean seed is fragile — it cracks easily and loses its life in storage faster than maize — so a bag can look fine and still be half-dead. Weak seed leaves gaps you can never fill, and a thin stand lets weeds in. Ten minutes now tells you whether to sow this seed or swap it.
Count out 100 seeds at random from the bag. Handle them gently — soybean seed bruises and cracks if you pour or drop it hard.
Lay them on a wet cloth or newspaper, roll it up loosely, and keep it warm and damp (not dripping) for about a week; wet it again if it dries out.
Unroll it and count how many have sprouted a root or shoot and look normal — throw out the twisted or rotten sprouts.
80 or more out of 100 → good seed, sow it. If your count is only just over 80, sow a little thicker to make up for it.
If it fails — fewer than 80 sprout — don't sow this seed. Take it back to the dealer or buy fresh certified seed, or you'll get a thin, gappy crop you can't fix later.
- Do:
Run this test about a week before you plan to sow, so there's still time to swap out bad seed.
- Watch out:
Handle soybean seed gently at every step — rough pouring cracks the skin and kills the sprout inside.
Prepare a fine, firm seedbed Recommended
Soybean starts by pushing its two seed-leaves up out of the ground (it doesn't leave them buried like maize does), so it can't fight through a hard crust, big clods or a compacted layer. A fine, firm, level seedbed gives even emergence and lets the shallow roots and nodules spread.
Clear weeds and old crop residue off the planting lines so the small seed meets firm, clean soil.
Loosen the soil to about 15–20 cm — a spade's depth — and break any hard pan underneath so roots and water can go down.
Break the clods to a fine, crumbly tilth, then firm the surface lightly. Seed sown into big clods or loose fluff comes up patchy.
Level the surface so water can't pool — soybean roots rot in standing water. On a slope, work across the slope and make ties or ridges to hold the rain.
- Do:
Leave crop residue between the rows as a mulch — it holds moisture and slows weeds while the crop is small.
- Tip:
Leaving a smooth, hard crust on top — the seed-leaves can't punch through it, and the stand comes up thin.
Incorporate manure/compost Recommended
Well-rotted manure or compost feeds the soil slowly, helps it hold water, and makes your bought phosphorus work harder. But fresh manure burns young roots, brings weed seeds, and its rush of nitrogen makes the crop skip forming nodules — so it must be well rotted first.
Use only well-rotted manure or compost — dark, crumbly, no strong smell. Fresh, strawy manure needs more time to rot down.
Spread it evenly and thinly — about one wheelbarrow-load over a patch 10 strides by 10 strides (≈100 m²), which comes to the 5–10 tonnes a hectare your plan is built on.
Work it into the topsoil 1–2 weeks before you sow, so it settles in with the soil.
- Tip:
Fresh, raw manure at sowing — it scorches young roots, robs the soil of nitrogen as it rots, and brings in weed seeds.
- Watch out:
Wash your hands after handling manure.
Coat the seed, sow, and get a full stand
Sowing day is when the crop's nitrogen partnership begins. Coat the seed with the root-germ powder in the shade and sow it the same day — never leave coated seed in the sun or overnight, or the germs die. Sow on a real planting rain, at the right depth and spacing, with the phosphorus/potash basal in the furrow. The number of healthy plants you set now is the ceiling on your harvest — you can't add plants later.
Inoculate + sow + basal P/K Critical
This one task starts both the stand and the crop's free nitrogen supply. Coating the seed with the living root-germ powder (inoculant) lets soybean pull nitrogen from the air all season; on land new to soybean, skipping it turns the crop yellow and cuts yield hard. The right depth and spacing then give an even stand that shades out weeds.
Work in the shade. Make a little sticky water — a spoon of sugar in a cup of clean water — and dampen the seed just enough for the powder to cling.
Sprinkle on the Bradyrhizobium powder (the living root germs) and turn the seed gently until every seed is coated dark. Use all the powder the packet gives for your seed amount — more is better — and keep handling it gently so you don't crack the seed.
Sow the same day, ideally within a few hours. Never leave coated seed in the sun or overnight — heat and sunlight kill the germs.
Sow on a real planting rain that wets the soil a spade deep. Open furrows about 50 cm apart — half a stride — and drop seed about 3–4 cm deep — one finger-joint — no deeper, because the seed-leaves must push up out of the ground.
Space the seed about 6 cm apart — two finger-joints, roughly 16 seeds along each stride (1 m) of row. Run the basal phosphorus/potash along the furrow and cover it with a little soil, so it sits near the seed but not caked against it.
Cover and firm the soil gently, so each seed sits snug in moist earth and comes up strongly.
- Do:
Coat the seed in the shade and sow the same day — treat the powder as living, because it is.
- Tip:
Sowing too deep, or into a wet field that will crust over — both stop the seed-leaves reaching the light and thin your stand.
- Watch out:
If the seed came already treated with a pink or blue chemical dressing, ask whether it is safe with inoculant — some dressings kill the root germs.
Scout Critical
The first month decides your stand. Cutworms can cut young plants off overnight, and damping-off can rot whole patches of seedlings — and you can only fill gaps if you catch them early. Ten minutes, twice a week, protects the whole season.
Twice a week, walk a large "W" across the field so you cover the corners and the middle, not just the edge by the path.
At about 10 stops, look closely at 10 plants — the growing tip and the stem right at ground level.
Cutworms: look for young plants cut clean off at ground level, worst in the morning. Scratch the soil nearby to find the fat, grey, curled caterpillar.
Damping-off: look for seedlings that have rotted or pinched thin at the soil line and toppled over, often in damp patches or where the soil has crusted. The stem stays rotted-but-attached — not sliced clean like a cutworm's.
Count the gaps (stations with no plant) so you know whether to gap-fill, and write down what you see and where.
- Do:
Go out in the early morning for cutworms — that's when the fresh-cut plants show and the caterpillars are still near the surface.
- Watch out:
Damping-off spreads worst in wet, crusted, cold soil — patches of collapsed seedlings are a warning not to over-water and not to sow too deep.
Check emergence Critical
A thin or patchy stand caps your yield — but you can still fix small gaps in the first two weeks. After that, late-filled plants are too far behind to catch up, so check now while you can still act.
About 7 to 12 days after sowing (a week to 10 days), walk the rows and count how many plants are up against the number of seeds you sowed.
Work out the share that came up — for example, 85 plants where you sowed 100 = 85%.
85% or more → a good, even stand — carry on.
If it fails — below 85% — gap-fill the biggest blanks in the next few days, while the soil is still moist and the crop is only days old. Leave it, and the gaps become weed patches you can't recover.
- Do:
Check emergence and gap-fill on the same walk — the window to put it right is only a few days.
Gap-fill blanks Recommended
Empty stations are lost pods and open doors for weeds. Filling the biggest blanks early, while the rest of the crop is only days old, keeps the stand even and the canopy closing on time.
Re-sow only the biggest gaps while the soil is still moist and the crop is only about a week old — later fills never catch up with the rest.
Coat the fill-in seed with the root-germ powder just like the first sowing, and sow it the same day.
Sow at the same 3–4 cm depth — one finger-joint — and firm the soil so the seed meets moisture.
- Do:
Fill only the large blanks — chasing every single missing plant this late does more harm than the gap itself.
- Watch out:
Water the fill-in spots if the topsoil is drying, so they come up with the rest of the crop.
Irrigate Recommended
Young soybean roots are shallow and dry out fast. Steady moisture now gives even emergence and a strong, uniform start — but soybean also rots in standing water, so keep it moist, not soaked.
Keep the topsoil moist but not waterlogged from sowing through the first few weeks.
Water every 5–7 days, more often in heat and on sandy soils that dry fast.
Check by pushing a finger in: water when the top few centimetres are dry. Drain any low spots where water pools.
- Tip:
Flooding or waterlogging the seedbed — soybean roots and the young nodules suffocate in standing water.
Grow the frame, keep it clean, check the roots
Now the plant builds leaves and stems and — underground — the nodules (little lumps on the roots where the helper germs live and make nitrogen). Young soybean competes poorly with weeds, so keeping it clean until the leaves close over and shade the ground (canopy closure — roughly the first 3–6 weeks after sowing) is your biggest job after inoculation. Dig a plant to check the nodules are pink inside and working.
Scout Critical
This is when weeds, root-knot nematode, soybean mosaic virus and aphids first bite, and when you can confirm the nodules are working. Catching trouble early — before the canopy closes — keeps the leaf factory building the pods to come.
Twice a week, walk the "W" and check about 10 plants at 10 stops — the leaves, the growing tips, and now and then a root.
Soybean mosaic virus: look for leaves that are mottled light-and-dark green, puckered and crinkled, on stunted plants. There's no cure — pull out and carry off badly affected plants so aphids don't spread it further.
Aphids: look for tiny soft green or black insects clustered on the shoot tips and leaf undersides, with sticky leaves and black sooty mould. A few do no harm; only act if they build up fast, since they also spread the mosaic virus.
Root-knot nematode: where plants are stunted and yellow in patches, dig one up and look for knobbly swellings that are part of the root itself (galls) — different from the good nodules, which are loose beads on the side of the root that rub off cleanly.
Write down what you see and where, so you can tell whether it's spreading.
- Do:
While you're digging, slice a nodule open — pink or red inside means it's making nitrogen; pale or grey means it isn't.
- Tip:
Weeding late — soybean is a weak early competitor, so weeds that beat it to the light cost you the most yield.
Weeding — keep clean to canopy closure Critical
Weeds in the first 3–6 weeks after sowing steal the water, light and nutrients the crop needs, exactly when soybean is least able to fight back — worth 10–30% of your yield. Keep it clean until the leaves close over and shade the ground.
Start early — by about 10 days to 2 weeks after sowing — and weed again every 10–14 days until the canopy closes (roughly 6 weeks after sowing).
Hoe shallowly between and within the rows. Soybean roots and nodules sit near the surface, so deep hoeing close to the plants tears them and cuts the nitrogen supply.
Pull big weeds close to the plants by hand, rather than chopping near them with the hoe.
In dry areas, leave the pulled weeds lying between the rows as a mulch to hold moisture.
- Do:
Weed while the weeds are still small — a clean field before canopy closure is the cheapest yield you'll ever gain.
- Tip:
Deep cultivation close to the plants — it breaks the shallow roots and knocks off the nitrogen-fixing nodules.
Check nodulation Recommended
The nodules are the crop's own nitrogen factory — if they're working, soybean feeds itself and needs no nitrogen fertiliser. Checking at 3–4 weeks after sowing tells you whether the root germs took, while there's still time to rescue a crop that didn't nodulate.
About 3 to 4 weeks after sowing, gently dig up one or two plants with a ball of soil — don't pull them, or you'll strip the nodules off and leave them in the ground.
Wash the roots and look for pea-sized lumps (nodules). A good crop carries plenty, especially on the main root.
Slice a few nodules open. Pink or red inside = they're making nitrogen — do nothing, the crop is fed.
If it fails — few or no nodules, or they're pale, grey or green inside — they aren't working. Top-dress a little nitrogen to carry the crop, and next season use fresh, well-kept inoculant. If the leaves are pale and yellow too, act sooner rather than later.
- Watch out:
Don't mistake root-knot galls (hard swellings the root grows through) for nodules (soft beads on the side that rub off) — galls are a pest, not a help.
- Do:
Dig, don't pull — pulling leaves the nodules behind in the soil and fools you into thinking there are none.
Irrigate Optional
This is the crop's least thirsty stage — it can take a little dryness now without losing yield. If your water is limited, save it for flowering and pod-fill, which matter far more.
Water only every 7–12 days through this stage, and let the crop lean a little dry rather than keeping it soaked.
Don't let it wilt badly, but this is the time to stretch your water if supply is short.
Keep your water back for the flowering and pod-fill stages ahead — that's where every drop pays back most.
- Do:
If water is tight, conserve it here — the plant forgives a dry spell now far more than at flowering.
Flowering — protect the pods you're about to set
The first flowers open and the crop starts setting pods — and its thirstiest, most yield-sensitive period begins. This is also when Asian soybean rust, the crop's most dangerous disease, arrives. Rust must be caught early: spray before 1 leaf in 10 shows it, because once it's past that the spray barely helps.
Rust scouting Critical
Asian soybean rust can strip the leaves and empty the pods, but it's beatable if you catch it before it spreads. Spraying before 1 leaf in 10 shows rust works; waiting until it's obvious does not. Weekly checks of the lower leaves are how you win this.
From the first flowers (about 6 weeks after sowing), check weekly — and every few days in warm, wet, cloudy weather, which rust loves.
Look low in the canopy first, at the undersides of the older leaves near the ground, where rust starts.
Rust looks like: many tiny tan or brown raised bumps (pustules) on the leaf underside, later with yellow blotches on top and leaves dropping early. Rub one and a fine rust-coloured powder smears off on your finger.
Frogeye leaf spot may show too: small round spots with pale grey centres and reddish-brown rings, like little frog eyes, on the upper leaves.
The moment you find rust on even a few plants — before 1 leaf in 10 is spotted — spray (see the fungicide task). After that point the spray can't save the crop.
- Watch out:
Inspect the lower, inner leaves weekly — rust always starts down low and hidden, not on the top leaves you notice first.
- Do:
In humid, rust-prone areas, plan a preventive spray at first flower rather than waiting to find rust.
Preventive fungicide (rust-prone areas) Recommended
In rust-prone, humid areas a well-timed fungicide at flowering keeps the leaves green and the pods filling. Sprayed early — at or just after first flower, before 1 leaf in 10 shows rust — it protects the whole yield-forming period; sprayed late, it's money wasted.
Spray at first flower (about 6–8 weeks after sowing) in rust-prone areas, or the moment scouting first finds rust.
Measure the dose with the cap supplied and mix it into a full knapsack (15–20 L). Follow the label — more is not better.
Spray to wet the leaves, including the undersides where rust lives, until they glisten but don't drip.
Protect yourself: wear a long-sleeved shirt, cover your nose and mouth, spray in the cool of the day with the wind behind you, and keep children and animals off the field.
Wash yourself and the sprayer afterwards, and keep the spray off any food crops growing nearby.
Respect the pre-harvest interval — the number of days the label says to wait between spraying and harvest, so the chemical fades from the crop before you eat or sell it. Don't harvest early after spraying.
- Do:
One well-timed early spray beats three late ones — time it to first flower, not to obvious rust.
- Watch out:
Never spray in wind or midday heat, and never with the wind blowing the spray back into your face.
Irrigate through flowering Critical
Dry soil or heat during flowering makes the plant drop its flowers and young pods, and those never come back — it can cut yield by up to half. This is one of the two times water matters most in the whole season.
Keep the soil moist right through flowering — water every 5–7 days, more often in heat.
Never let the crop wilt now, even for a day — wilting at flowering sheds pods you can't get back.
If your water is limited, this stage and pod-fill come first — take water from the vegetative stage, not from here.
- Watch out:
Flowers or tiny pods yellowing and dropping is the crop telling you it's too dry or too hot — water now.
Fill the pods and finish clean
Pods set and the seeds swell with protein and oil — this is where your weight comes from, and the seed-filling window is the most water-sensitive of all. Rust and pod-feeders keep working, so keep the canopy green and the pods protected until the crop turns and dries down.
Scout (rust, pod-sucking bugs, borers) Critical
Now rust, pod-sucking bugs and pod borers go after the seeds you've already grown. A bug or caterpillar in the pod shrivels or eats the beans inside, so checking the pods during fill is what protects the actual harvest.
From about 8 weeks after sowing, check every few days through pod-fill — the leaves, and now the pods themselves.
Rust: keep checking the undersides of the lower leaves for the tan-brown pustules, and spray again if it's still spreading (see the second-fungicide task).
Pod-sucking bugs: look for green or brown shield-shaped bugs on the pods; they leave shrivelled, flat or spotted seeds and give off a foul smell when squashed.
Pod borers (bollworm): look for round holes chewed in the pods, caterpillars eating the seeds inside, and dark droppings left on the pods.
Squeeze a few pods to feel whether the seeds are filling plump, and note anything that's spreading so you can act.
- Watch out:
A few chewed pods at the edge can become many fast — check the field middle too, not just the border rows.
2nd fungicide if rust pressure Recommended
If rust keeps climbing through pod-fill, a second spray about 2–3 weeks after the first keeps the leaves alive long enough to fill the pods. Green leaves through pod-fill are what put the weight into the seed.
Spray again about 2–3 weeks after the first fungicide (roughly 9–11 weeks after sowing) — but only if scouting shows rust is still spreading.
Measure with the cap supplied, mix into a full knapsack (15–20 L), and spray to wet the leaves and their undersides without dripping.
Cover up as before — long sleeves, nose and mouth covered, wind behind you, people and animals off the field — and wash yourself and the sprayer afterwards.
Mind the pre-harvest interval (the wait between spraying and harvest that the label sets). With harvest getting close, count the days left before you'd cut — if there aren't enough, don't spray.
- Do:
Only spray a second time if rust is truly still climbing — don't spray by the calendar.
- Watch out:
This late in the season the pre-harvest interval matters most — check the days to harvest before you even mix.
Irrigate through pod-fill (R5–R6) Critical
The pods are filling with seed now, and dry soil here shrivels the beans — light, wrinkled seed that weighs little and sells low. Together with flowering, this is the top priority for water in the whole season.
Keep the soil moist through pod-fill — water every 5–7 days, more often in heat.
Don't let the crop wilt while the pods are filling; the seeds shrink and never recover the weight.
Only once the lower leaves start to yellow and the pods begin to turn should you ease off, to let the crop dry down for harvest.
- Watch out:
Wrinkled, thin beans at harvest are the mark of a dry spell during pod-fill — protect your water here above almost anywhere else.
Check maturity Recommended
Harvesting at the right moment saves the crop from shattering — dry pods bursting open and spilling the beans on the ground, where they're lost. This check tells you the seed has finished filling and the crop is ready to come off.
From about 3.5 months (14 weeks) after sowing, watch the crop turn: the leaves yellow and fall, and the pods change from green to brown or tan.
Shake a plant — when about 95% of the pods are brown and rattle with loose, hard seed inside, the crop is mature.
Bite a seed: at readiness it cracks rather than dents (about 13–15% moisture — 13 to 15 parts water in every 100).
If it's not there yet — still green and soft — wait a few days and check again; seed cut early won't keep. Once it's ready, harvest promptly before the pods dry too far and shatter.
- Watch out:
Once the pods rattle, don't dawdle — every hot, dry day past readiness risks pods bursting and spilling your beans.
Harvest before the pods shatter
Cut soybean at about 13–15% seed moisture — when the pods are brown and rattle, and a seed cracks rather than dents when you bite it. Harvest in the cooler, slightly damp part of the day (early morning): bone-dry pods handled in the midday heat shatter — they burst open and spill the beans on the ground, and spilled seed is gone. Cut or pull the whole plants gently, carry them carefully, and thresh gently — beating too hard cracks the seed and ruins it for both eating and sowing. Don't let a ready crop stand: every hot, dry day past readiness loses more beans to shattering.
Dry gently and seal against beetles
The crop is grown — now don't lose it in store. Dry the beans to about 12–13% moisture (a seed cracks, not dents, when bitten) so they don't mould — but don't over-dry below about 11%, or the seed splits and cracks as you handle it. Then store clean, dry beans in sealed, airtight (hermetic) containers. Watch for bruchids — small storage beetles that leave neat round holes in the beans — which start infesting the pods while the crop is still in the field; sealing the beans in starves the beetles of air. Store off the floor in a cool, dry place, and check monthly for holes, dust or beetles. Well-dried, sealed beans keep their taste, their selling weight, and — if you're keeping seed — their power to grow.
Pests and diseases that attack soybean
-
 Asian soybean rust
 -
 Bean fly
 -
 Bollworm complex
 -
 Cercospora leaf blight
 -
 Charcoal rot
 -
 Collar rot
 -
 Frogeye leaf spot
 -
 Leaf-eating caterpillar
 -
 Legume pod borer
 -
 Mungbean yellow mosaic virus
 -
 Pod-sucking bugs
 -
 Root rot
 -
 Soybean mosaic virus
Where to sell soybean
Markets that trade this crop — what each one sells it by, when supply peaks there, and the currency used.
-
 Dawanau International Grains Market
-
 New Soweto Market
-
 GMB Aspindale Depot
-
 Mercado Alemanha
-
 GMB Bulawayo Depot
-
 GMB Chinhoyi Depot
-
 Kitale Market
-
 Lilongwe Old Town Market
Grow soybean with a plan, not a guess
This guide is the general answer. Divisi works out yours — the week to plant soybean on your soil and your rainfall, and each job dated for your field.


When to plant soybean, country by country
- When to plant soybean in Algeria
- When to plant soybean in Angola
- When to plant soybean in Benin
- When to plant soybean in Botswana
- When to plant soybean in Burkina Faso
- When to plant soybean in Burundi
- When to plant soybean in Cabo Verde
- When to plant soybean in Cameroon
- When to plant soybean in Comores
- When to plant soybean in Congo
- When to plant soybean in Côte d'Ivoire
- When to plant soybean in Egypt
- When to plant soybean in Eritrea
- When to plant soybean in Eswatini
- When to plant soybean in Ethiopia
- When to plant soybean in Gabon
- When to plant soybean in Gambia
- When to plant soybean in Ghana
- When to plant soybean in Guinea Ecuatorial
- When to plant soybean in Guinea-Bissau
- When to plant soybean in Guinée
- When to plant soybean in Kenya
- When to plant soybean in Lesotho
- When to plant soybean in Liberia
- When to plant soybean in Libya
- When to plant soybean in Madagascar
- When to plant soybean in Malawi
- When to plant soybean in Mali
- When to plant soybean in Mauritanie
- When to plant soybean in Mauritius
- When to plant soybean in Morocco
- When to plant soybean in Moçambique
- When to plant soybean in Namibia
- When to plant soybean in Niger
- When to plant soybean in Nigeria
- When to plant soybean in Rwanda
- When to plant soybean in République centrafricaine
- When to plant soybean in République démocratique du Congo
- When to plant soybean in Sao Tome and Principe
- When to plant soybean in Seychelles
- When to plant soybean in Sierra Leone
- When to plant soybean in Somalia
- When to plant soybean in South Africa
- When to plant soybean in South Sudan
- When to plant soybean in Sudan
- When to plant soybean in Sénégal
- When to plant soybean in Tchad
- When to plant soybean in Togo
- When to plant soybean in Tunisie
- When to plant soybean in Uganda
- When to plant soybean in United Republic of Tanzania
- When to plant soybean in Zambia
- When to plant soybean in Zimbabwe
Where soybean scores best
Districts where Divisi's engine currently rates this crop highest, ranked by fit.


Get Insights by email
A short digest of new Divisi articles. No email on quiet weeks.
Frequently asked questions
How do I grow soybean?
How to grow soybean: 90–150 days to maturity, 50 cm rows, 3–4 cm deep. Also called soya bean, sojaboon, soja, soya.
What is sojaboon in English?
Sojaboon is the Afrikaans name for soybean.
What is soja in English?
Soja is the French and Portuguese name for soybean.
What is soya in English?
Soya is the Swahili name for soybean.
How long does soybean take to grow?
Soybean takes about 90–150 days from sowing to maturity, though the exact length varies with variety, temperature and how the season runs.
What spacing should I use for soybean?
Space soybean rows about 50 cm apart, with roughly 6 cm between plants within the row.
How deep should soybean be planted?
Sow soybean at about 3–4 cm deep. Shallower risks drying out; deeper wastes seed energy before the shoot reaches light.
What pests and diseases attack soybean?
The ones covered in this guide are Asian soybean rust, Bean fly, Bollworm complex. Each has its own page explaining how to identify, check for and control it.