 Divisi
How to grow rice
Oryza sativa · Poaceae
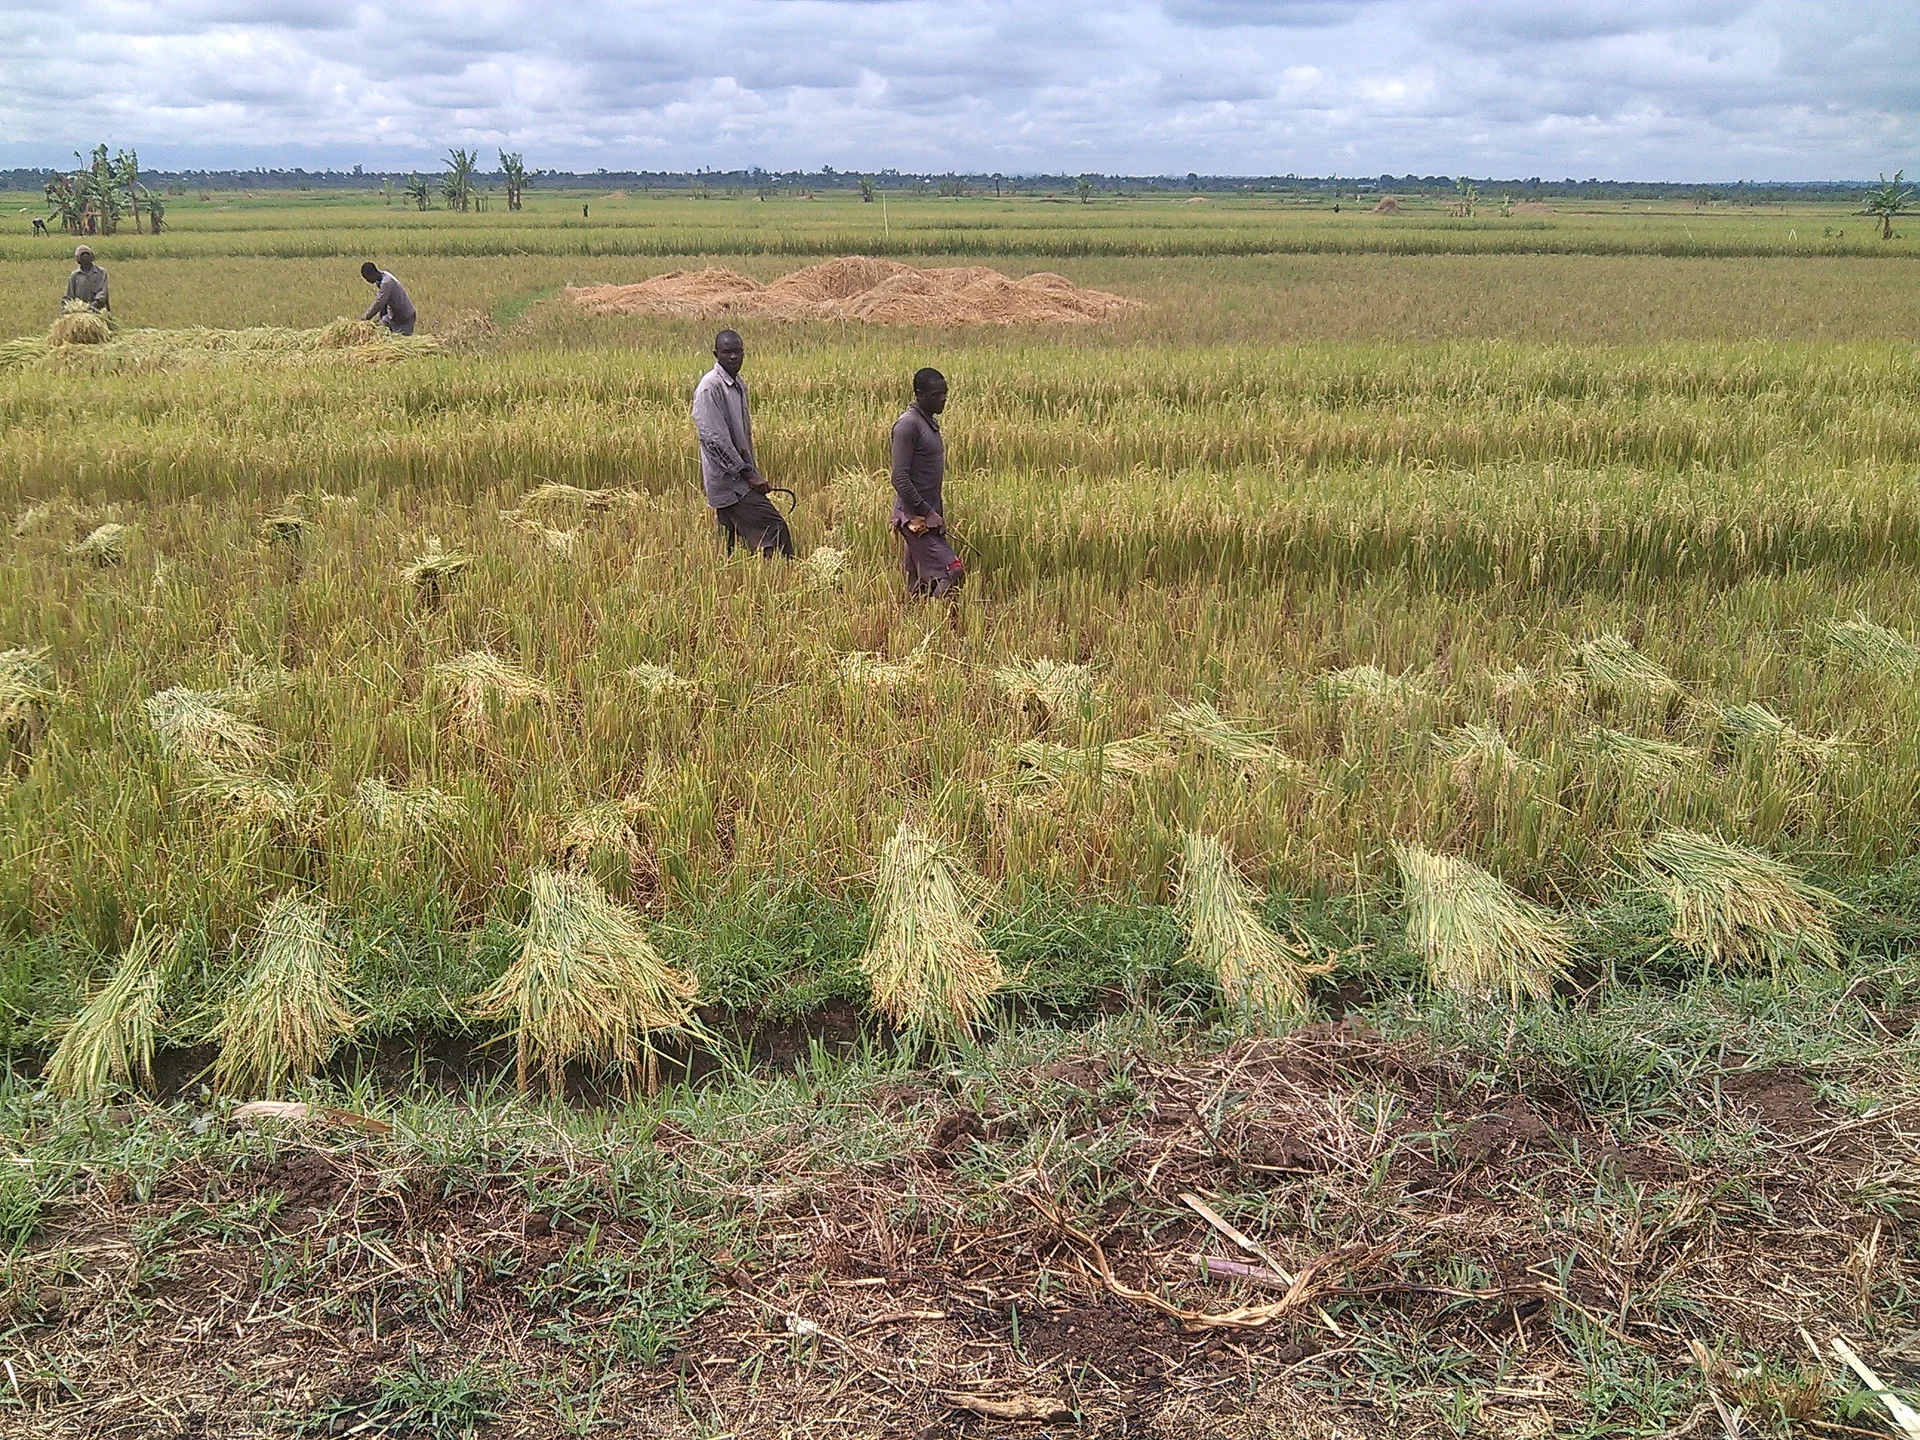
Photo: Haumbaeric · CC BY-SA 4.0
Rice is a grass that lives on water. Unlike your other crops, it thrives with its feet wet. Many farmers grow it in flooded fields — paddy (lowland) — held by low mud walls called bunds; others grow it rain-fed on ordinary dry land — upland — with no standing water, much like maize. Both are the same plant: it sprouts, throws side-shoots called tillers that each carry a head of grain (a panicle), flowers, then fills and ripens golden. This guide covers both ways. Where they differ — how you plant, how you water, how you weed — it tells you clearly which path to follow, so you can run whichever one fits your land.
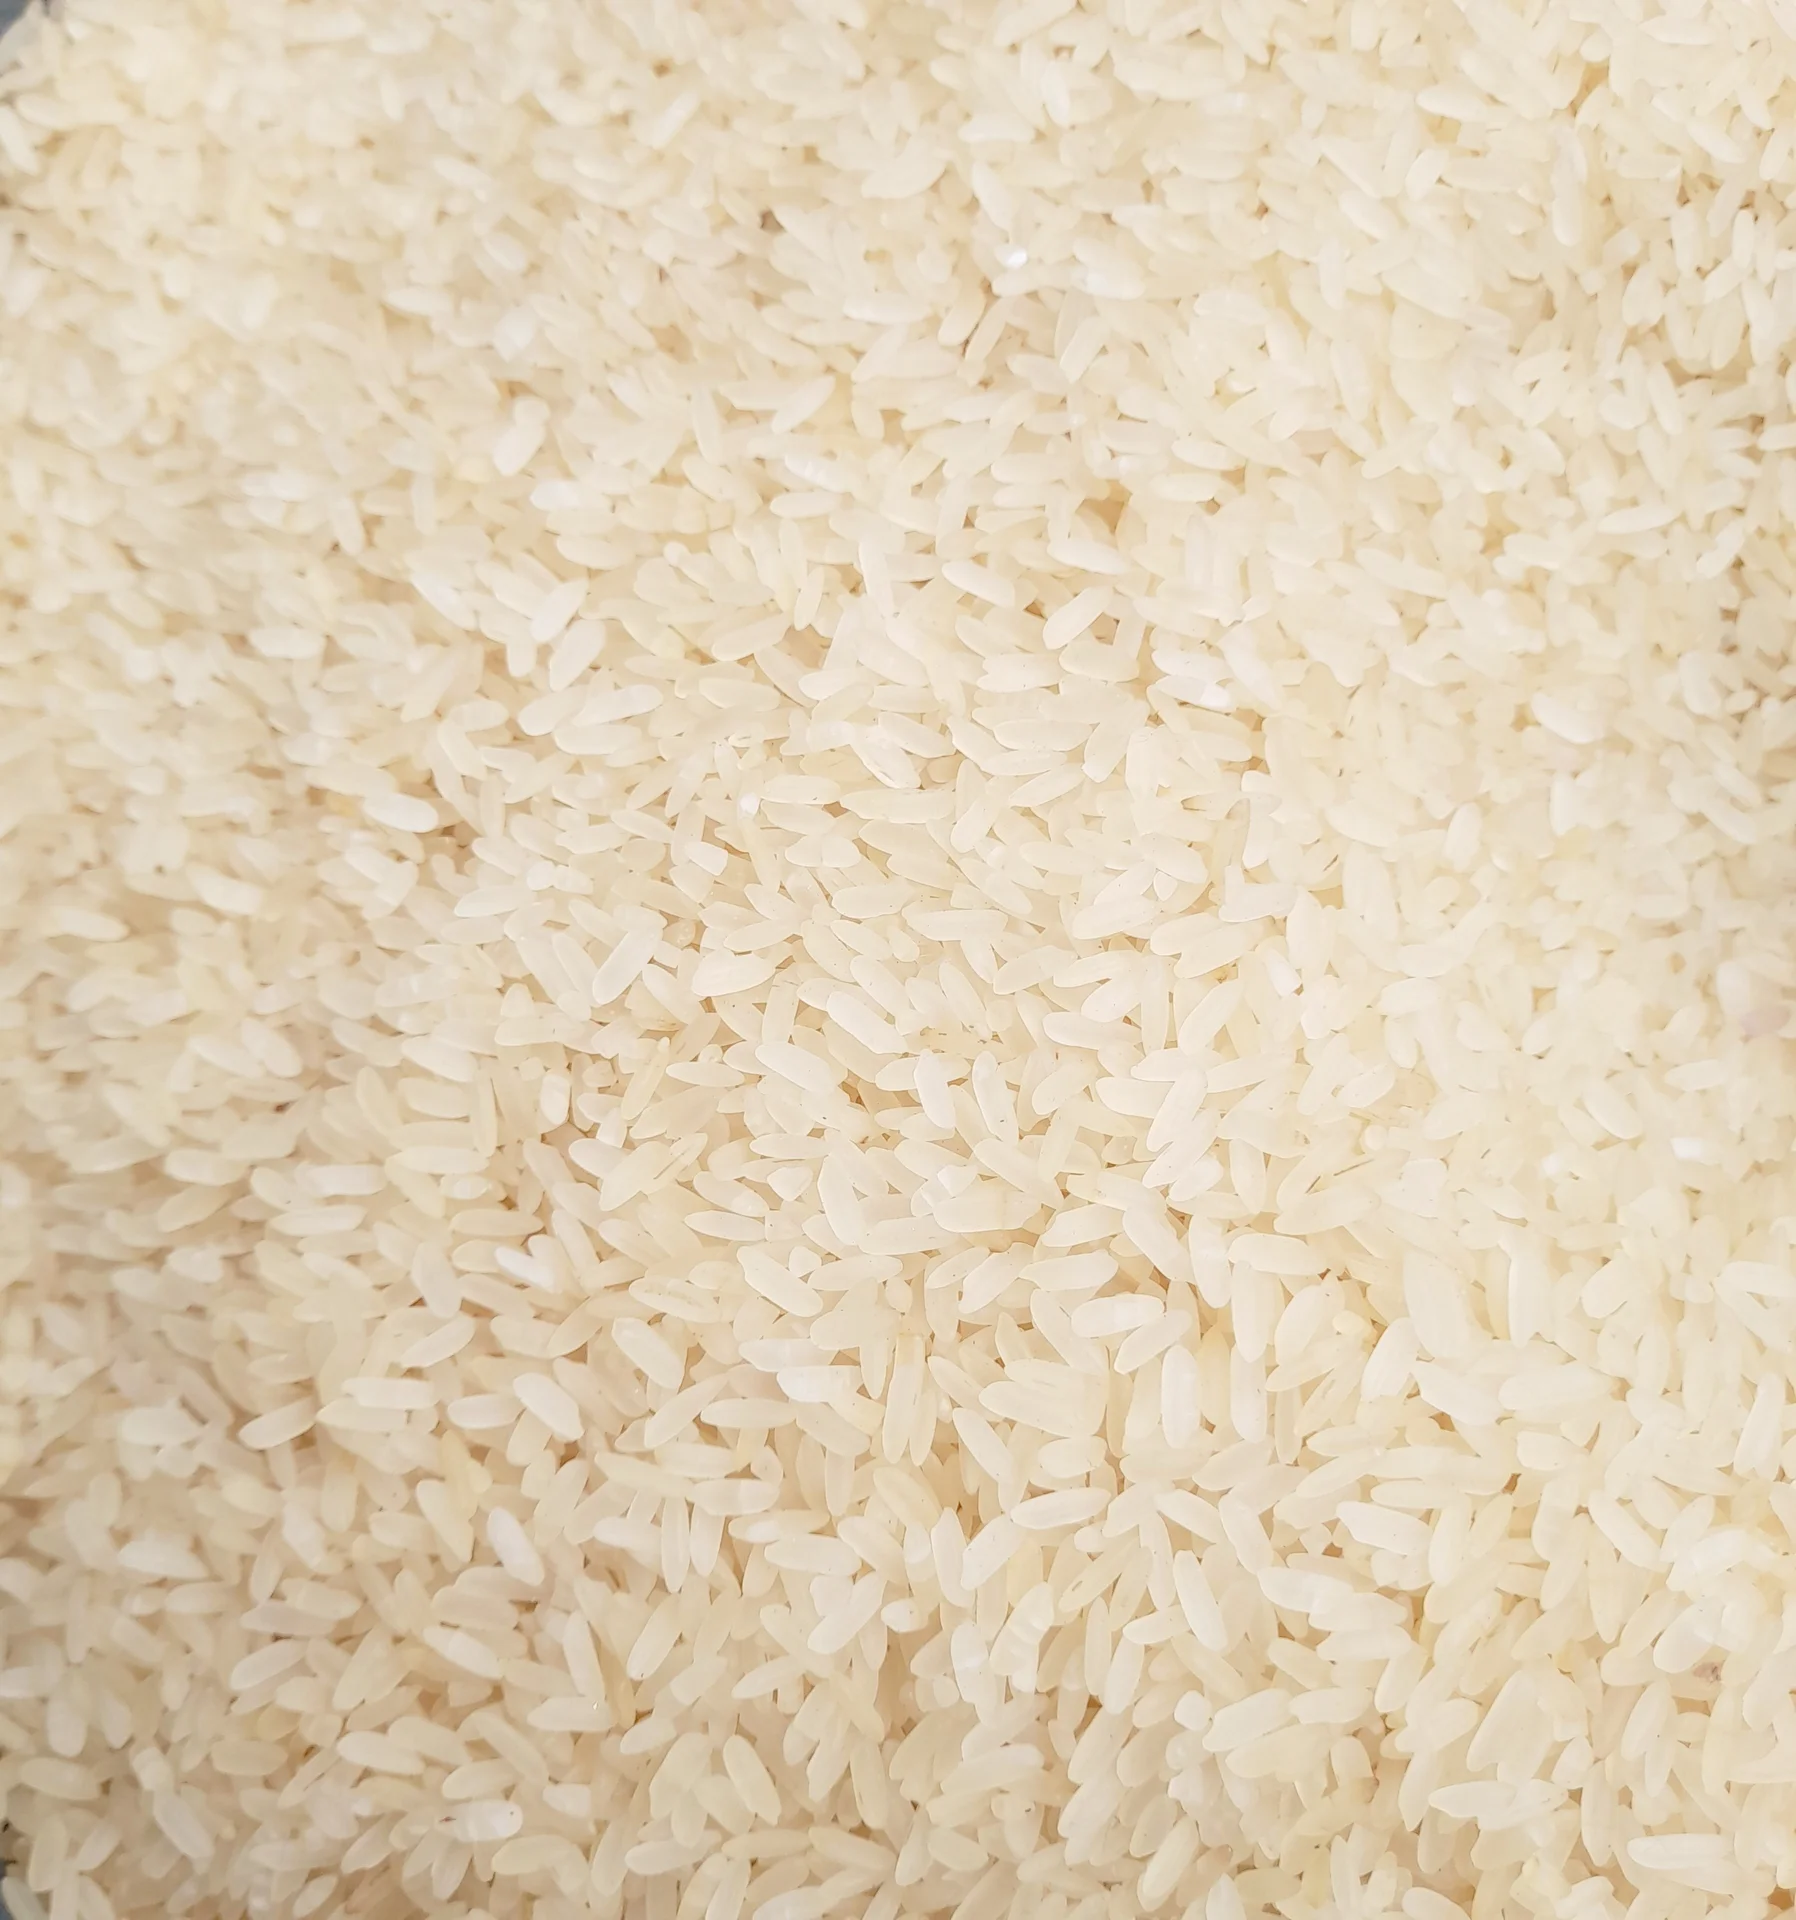
Hajia Hijjah · CC BY-SA 4.0 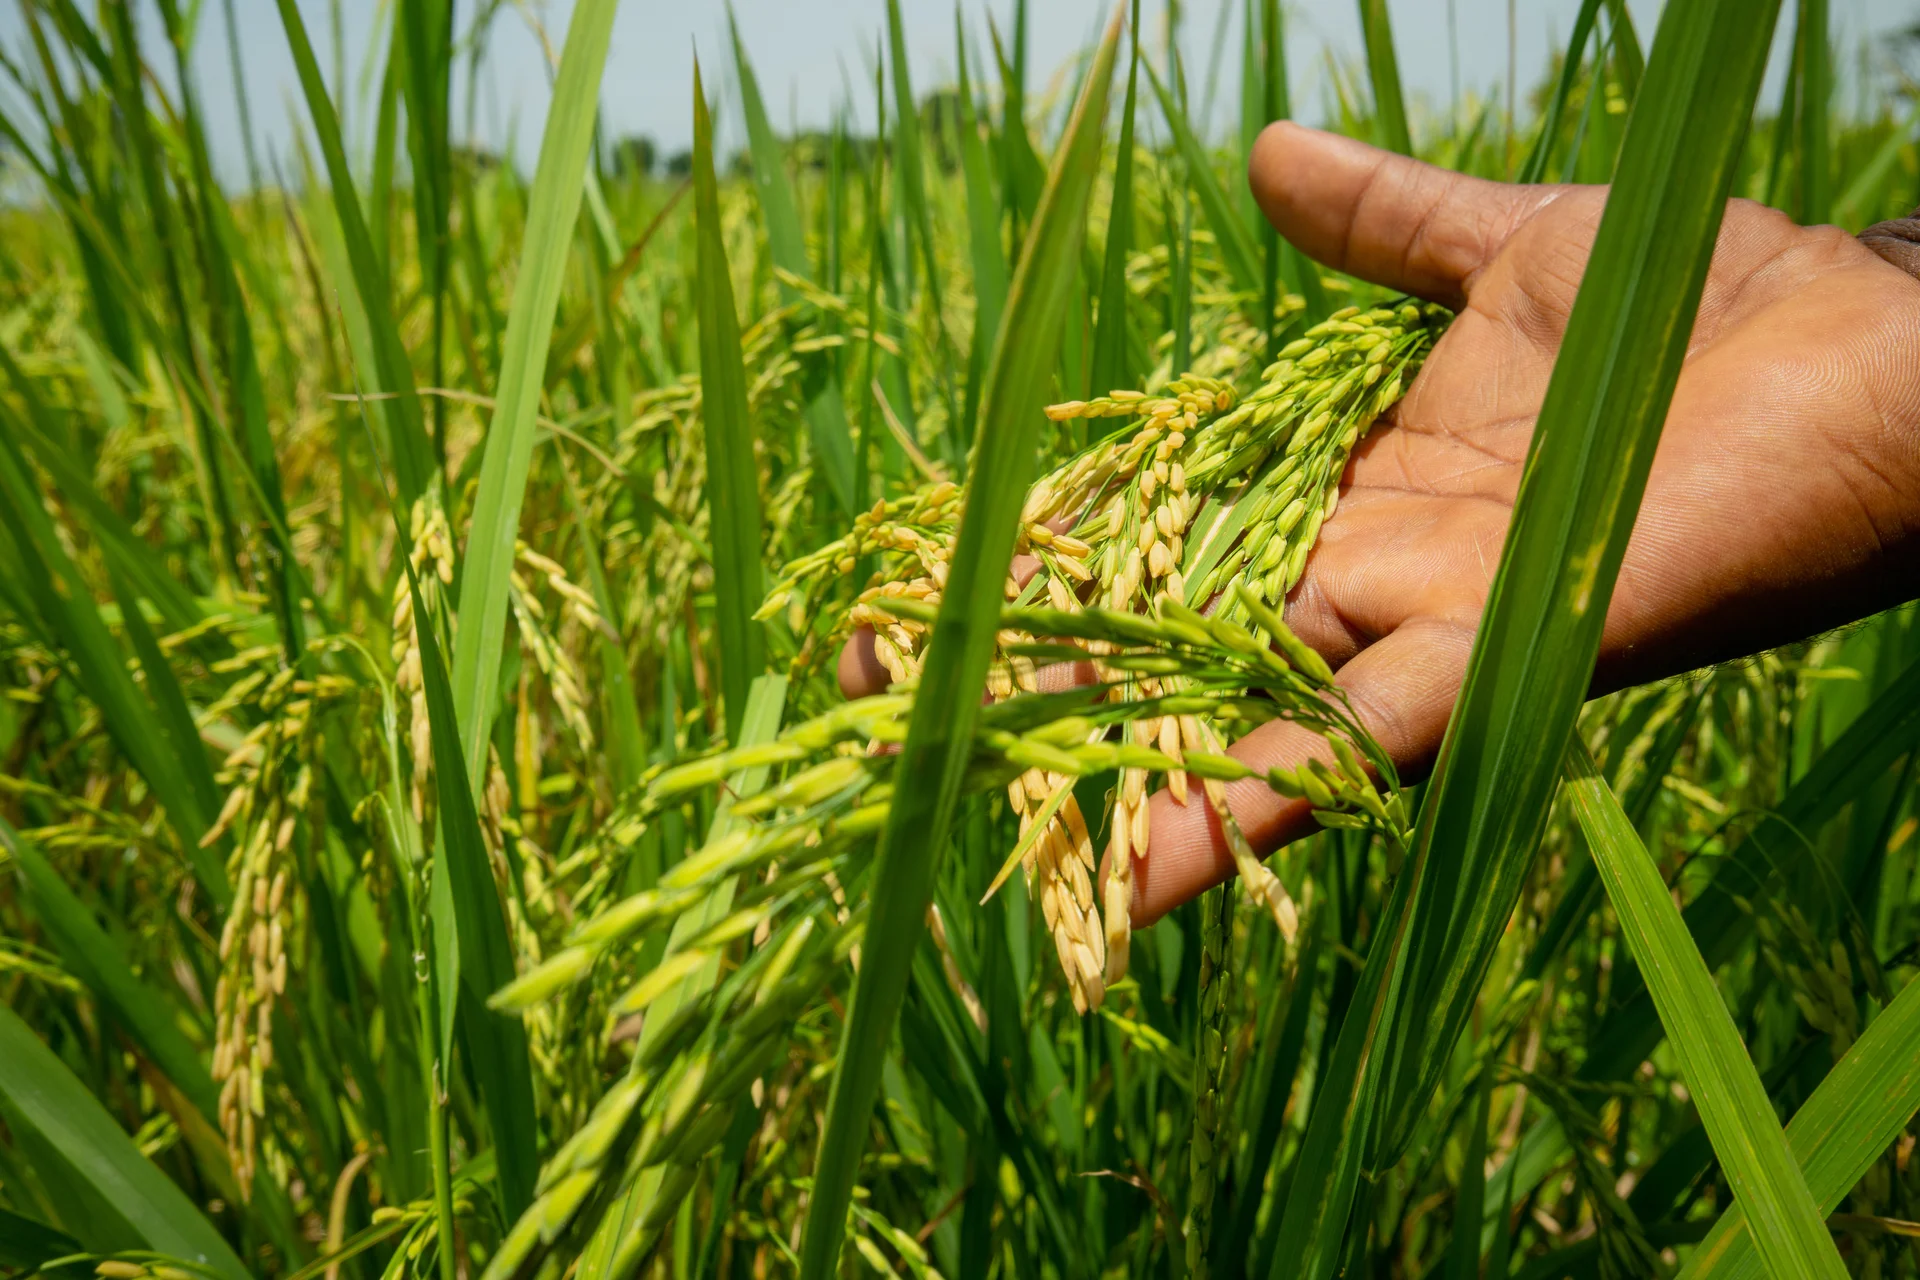
Photobyamin · CC BY-SA 4.0
- Days to maturity
- 90–150 days
- Row spacing
- 20 cm
- Plant spacing in the row
- 20 cm
- Sowing depth
- 2–3 cm
These are general figures for the crop, compiled from published agronomic references including FAO and CABI. The right choice for your field depends on your soil, rainfall and the yield you are aiming for.
Will rice actually do well on your field? Check your own field against every crop in the catalogue — no signup. Run the crop check →
Also known as
Rice is also called paddy.
- English
- paddy
- Afrikaans
- rys
- Bemba
- mpunga
- Chichewa
- mpunga
- French
- riz
- Hausa
- shinkafa
- Ndebele
- ilayisi
- Portuguese
- arroz
- Swahili
- mchele, mpunga
- Xhosa
- ilayisi
- Zulu
- ilayisi
Working in buckets, bags or paces? The farming glossary turns the measures growers actually use into kilograms and hectares — what a 20 litre bucket of each crop really weighs, and how to size a field by walking it — alongside the Shona, Swahili, Ndebele and Yoruba words used in the field. Open the glossary →
Growing rice, stage by stage
Your rice season, step by step — whether you flood a paddy or grow it rain-fed on dry land — from readying the field and water, through planting, feeding and keeping the water right, to drying and storing every grain.
Get your field, water and seed ready
Rice is won or lost before you plant. Two big jobs. First, get clean, certified seed — blast, bacterial blight and the rice yellow mottle virus (RYMV) all ride in on dirty seed, and weedy 'red' rice hides among the grains. Second, get the ground right for your system. Paddy: flood the field to drown weeds, churn it to soft mud (puddle), level it flat, build the mud walls (bunds) that hold your water, and sow a nursery. Upland: work a fine, level, well-drained seedbed like you would for maize. Do this in the weeks before planting so you can plant on time.
Plan the field / destroy weedy rice Recommended
Weedy 'red' rice is the same plant as your crop, so no weedkiller can tell them apart — once it's in a field it comes back every season, drops its seed early, and mixes red, poor grain into your harvest. Old rice stubble and volunteer plants also shelter the rice yellow mottle virus (RYMV) and the gall midge between crops. Cleaning up now is far easier than fighting them in a growing crop.
Pick a field where rice did not grow last season if you can — a break with a legume or vegetable starves rice pests and RYMV of a host, and cuts down weedy rice.
Walk the field, bunds and channels and pull or hoe out any volunteer rice and grassy weeds before they seed — these are where the virus and the gall midge hide over the dry season.
Flood-and-till (paddy) or plough early (upland) to sprout a first flush of weeds, then destroy it before you plant — this 'false seedbed' empties the weed bank.
Never carry seed, straw or mud in from a field known to have red/weedy rice — that is exactly how it spreads to clean land.
- Watch out:
Red rice looks just like your crop until it heads — then it stands taller, carries reddish grain, and sheds its seed the moment it ripens. Pull it out the instant you spot it, before it drops seed.
- Watch out:
A plant carrying RYMV shows yellow-to-orange streaks and mottling running along the leaves, and stays stunted, throwing only a few tillers. Pull out and burn such volunteers, ratoons and old stubble — they carry the virus straight into your new crop.
- Do:
Clean your tools, feet and animals when moving from a weedy field to a clean one — weedy-rice seed travels in mud.
Buy certified seed + fertiliser Critical
Blast, bacterial blight and the rice yellow mottle virus (RYMV) can all travel inside the seed — dirty grain planted is disease planted. Certified seed is clean, true to name, and free of weedy red rice. And the right variety for your system decides everything: an upland type for dry land, a lowland type for a paddy, a short-season type where rains are short. Buy early — good seed sells out.
Buy certified seed in a sealed, labelled bag from a registered dealer, showing the variety name and this season's packing date. This is your guard against seed-borne blast, blight and virus, and against weedy red rice.
Match the variety to your system: an upland (rain-fed) variety if you have no standing water, a lowland/paddy variety if you flood. Ask for a short-season type where rains are short or unreliable. Your recommendation names the type and the seed rate.
Buy enough fertiliser for your field: a compound (for phosphorus P and potassium K) and urea (nitrogen) to go in together at the basal dressing, plus more urea for the two nitrogen top-dressings later in the season. If your recommendation lists zinc (zinc sulphate), buy that too — flooded paddies often run short of it. Your recommendation gives every amount.
Store seed and fertiliser dry, off the floor, away from food, water and children. Keep the label and receipt in case the seed grows poorly.
- Tip:
Planting grain kept from last season, or 'seed' scooped loose from a sack — it carries disease and weedy red rice, and often grows thin and patchy.
- Watch out:
Keep fertiliser bone-dry — once it draws damp it sets hard as a rock and won't spread evenly.
- Do:
Choose a variety your neighbours grow well and that suits your water and rains — a good fit beats a 'famous' name that doesn't match your land.
Paddy: flood, puddle, level, repair bunds Recommended
In a paddy, your water is your weedkiller, your fertiliser-saver and your crop's lifeline — so the field must hold it. Puddling (churning the flooded soil to soft mud) seals the ground so water doesn't leak away. Levelling flat means the water sits the same depth everywhere, so weeds drown evenly and no seedling is left high and dry or too deep. Strong bunds keep it all in.
Flood the field and let it soak for about two weeks if you can — standing water sprouts and then drowns a whole flush of weeds before you ever plant.
Churn the wet soil to a soft, even mud (puddling) with a hoe, plough or animal-drawn puddler — this smears the soil shut so it holds water and gives seedling roots an easy grip.
Level the mud as flat as you can — drag a plank or log across it, then check by eye that no humps break the surface of the water. Flat ground means even water and even weed control.
Build up and patch the bunds (mud walls) to at least a hand-span high (20 cm), press them firm, and plug any rat holes or leaks so they hold water without seeping away.
- Do:
Puddle and level while the soil is soft and wet — it is far easier, and a well-levelled field saves you water and weeding all season.
- Watch out:
Walk the bunds after the first fill and again after rain — a single rat hole or crack can drain your whole paddy overnight.
Paddy: sow the nursery Critical
In paddy rice you don't sow the field directly — you first raise young plants in a small nursery bed, then move them. A nursery lets you pamper the seed on a small patch, protect it, and transplant only strong, even 15–21-day seedlings. Weak or uneven seedlings never catch up, so this small bed quietly sets your whole crop.
Sow the nursery about three weeks before you plan to transplant. A patch roughly a tenth of your field's size raises enough seedlings for the whole field.
Soak the seed in water for about a day and drain it — some let it just start to sprout — so it comes up fast and even.
Make a wet, well-worked mud bed and sow the seed thickly but not piled up. Keep the bed just moist to shallowly flooded — not deep water, which rots young seedlings.
Guard the bed from birds and snails, and pull out any weedy red rice or grassy seedlings while they are tiny and easy to tell apart.
Seedlings are ready at 15–21 days old, about a hand tall with 4–5 leaves. Young seedlings root fast and tiller well; old, tall ones sulk after moving.
- Do:
Transplant on the young side (15–21 days). Overgrown seedlings settle slowly and throw far fewer tillers — and tillers are heads of grain.
- Tip:
Flooding the nursery deep — young seedlings need air; deep water drowns and rots them. Keep it just moist to a thin film.
Incorporate manure + basal Recommended
The basal dressing is the crop's first meal — phosphorus (P) for strong early roots, potassium (K) for sturdy, disease-resistant stems (rice pulls a lot of K from the soil), and the first — and biggest — share of the season's nitrogen (about half of it). Rice on flooded paddy and limy (high-pH) soils also often runs short of zinc, so this is where any zinc goes in. Well-rotted manure worked in feeds the soil slowly and helps it hold every bit. And in a flooded paddy, fertiliser left on top escapes into the air and water — so it must be mixed into the mud.
Spread well-rotted manure or compost — dark, crumbly, no strong smell — evenly a week or two ahead and work it in. Fresh manure burns young roots and brings weed seeds.
At the final land prep (the last day or two before planting), spread the basal compound (the P and K fertiliser) together with the first nitrogen split — about half the season's urea — evenly over the field. Your recommendation gives the amounts.
If your recommendation calls for zinc (as zinc sulphate — flooded paddies and limy soils often run short), spread it now with the basal. Zinc put in at planting heads off the shortage before the young crop ever feels it.
Work it into the mud or soil — in paddy, puddle it into the top layer; in upland, rake or hoe it in. Nitrogen left on the surface of a flooded field is lost to the air within days.
Do the final levelling right after, so the fertiliser is mixed evenly through the rooting layer.
- Watch out:
Wash your hands after handling fertiliser and manure, and keep both away from food, drinking water and children.
- Do:
In paddy, mix nitrogen into the mud rather than scatter it on top — buried in the mud it feeds the crop for weeks; the same nitrogen on the surface can be half gone in a few days.
Plant and get a strong, even stand
Now you set your stand — and in rice, a clean even start decides how many tillers (side-shoots), and so how many heads, each plant throws. A strong, level crop also shades out weeds later. Paddy: move your 15–21-day seedlings into the puddled field at a hand-span spacing, into shallow water. Upland: sow seed straight into the fine, moist seedbed. Then watch closely for the first two weeks — snails, blast and gaps.
Transplant (paddy) / direct-seed (upland) Critical
This is the moment your stand is set, and a full, even stand is the ceiling on your harvest — you can't add plants later. Right spacing lets each plant throw plenty of tillers; too crowded and they starve each other, too thin and weeds move in. Get depth and water right and the crop roots fast and grows away strongly.
Paddy — transplant your 15–21-day seedlings the same day you pull them, so they never dry out.
Set 2–3 seedlings per hill, a hand-span apart each way (about 20 × 20 cm), in straight rows — straight rows make weeding and walking far easier all season.
Push them in shallow — no deeper than your first finger-joint (2–3 cm) — into only about 3 cm of water (two finger-widths). Planted deep, they tiller poorly.
Upland — direct-seed into the fine, moist seedbed at the rate your recommendation gives (roughly 60–100 kg for a hectare), in rows a hand-span apart or evenly broadcast.
Cover the seed shallow — about 2–3 cm — and firm the soil so it sits snug in moist earth and comes up evenly.
Make sure the basal nitrogen is down in the mud or soil beside the plants, not sitting on top where it is lost.
- Do:
Transplant into only shallow water (about 3 cm) — deep water at planting drowns small seedlings and holds back tillering.
- Tip:
Planting old, tall seedlings, or burying any seedling deep — both cut the number of tillers, and each lost tiller is a lost head of grain.
- Watch out:
In upland, sow onto a firm, moist seedbed and cover evenly — seed left on clods or too shallow comes up patchy and lets weeds in.
Scout (gaps, snails, early blast) Critical
The first two weeks make or break your stand. The golden apple snail can shear off newly-transplanted seedlings overnight, blast can start in the leaves, and gaps can only be filled while the crop is young. Ten minutes twice a week protects the whole season.
Twice a week, walk right across the field in a big 'W' so you cover the corners and the middle, not just the edge by the path.
Snails: look for bright pink egg clusters on stems, bunds and weeds just above the water, and for seedlings cut off at the base and gone. They do the most harm in the deepest, warmest water.
Blast: look on the leaves for small grey-green, eye- or diamond-shaped spots with brown edges — the first sign of blast, and worse where nitrogen is heavy.
Gaps: count the dead hills and bare patches, so you know whether to gap-fill.
Weedy rice: watch for seedlings that look like your rice but grow taller and faster — rogue them out early.
If snails are cutting seedlings → crush the pink egg clusters, drain to shallow water, and open the snail guide. If blast is spreading → ease off the nitrogen and open the blast guide.
- Watch out:
Pink egg clusters just above the waterline mean snails are breeding — crush them and act before the young crop is cut down.
- Do:
Keep the water shallow (about 3 cm) in the first two weeks — deep water is where snails do the most damage to small seedlings.
Gap-fill dead hills/patches Recommended
Every dead hill or bare patch is a clump of missing heads. You can only fill them while the crop is still young and even — replacements put in later never catch up. Filling now keeps your stand full and your yield ceiling high.
About a week after planting, walk the rows and find the dead hills, thin spots and bare patches.
Paddy: lift spare seedlings from your nursery (or from the thickest hills) and transplant 2–3 into each gap, at the same hand-span spacing.
Upland: drop a few fresh seeds into each gap if the soil is still moist and the crop is only a few days old.
Do it in the cool of evening and keep the water shallow, so the new seedlings settle in without stress.
- Do:
Leave a corner of the nursery unpulled for a week as your ready supply of gap-fill seedlings.
- Tip:
Filling gaps late — seedlings put in after the crop is a few weeks up stay small, get shaded out, and waste your effort.
Water: paddy ~3 cm / upland keep moist Recommended
Water is the paddy farmer's main tool, but at establishment less is more. A shallow film lets young seedlings root, keeps them warm, and holds weeds back — while deep water this early drowns them and stops them tillering. Upland rice simply needs steady moisture.
Paddy: keep only a shallow layer, about 3 cm (two finger-widths), over the field for the first two weeks.
Let it fall to damp mud between top-ups rather than pile it deep — shallow water helps seedlings root and tiller.
Upland: keep the topsoil moist but never waterlogged; water every few days in dry spells, more often on sandy soil and in heat.
Check the bunds and inlets after rain, so the paddy doesn't suddenly go deep and swamp the young crop.
- Tip:
Flooding deep over small seedlings — deep water this early drowns them and cuts tillering. Keep it shallow until they are well rooted.
- Do:
Fix leaks and keep the water shallow and even — an even water depth gives an even, weed-free stand.
Tillering — grow the heads, beat the weeds
Now the plant throws tillers — side-shoots that each grow their own head of grain — so this stage sets how many heads you will cut. Two jobs decide it: beat the weeds (they steal the most now, and in upland rice weeding is the season's biggest job), and feed nitrogen at mid-tillering to push out strong tillers. Watch for the gall midge, which turns tillers into useless hollow 'onion-leaf' tubes.
Scout (gall midge, stem borer, blast) Critical
While the plant is throwing tillers, three enemies go straight for them. The gall midge twists a tiller into a hollow, silvery 'onion leaf' tube that never makes a head. The stem borer kills the central shoot, leaving a 'deadheart' you can pull out easily. And blast spreads fast on lush, over-fed growth. Each tiller lost is a head lost, so catch them early. While you are down among the tillers, check the lower leaves for the rusty bronzing of zinc shortage, too — it strikes early and stunts the crop.
Twice a week, walk the 'W' and look closely at tillers and leaves right across the field.
Gall midge: look for a tiller pulled into a long, hollow, silvery tube like an onion leaf ('silver shoot') in place of a normal leaf blade — that tiller will never head.
Stem borer: tug the central leaf of a tiller — if it slides out dead and brown (a 'deadheart') while the outer leaves stay green, a borer is inside.
Blast: look for grey, eye-shaped leaf spots with brown edges spreading and joining up, worst on the darkest, most heavily-fed plants.
Weeds: check for barnyard grass — it hides by mimicking young rice almost exactly — and for weedy red rice standing taller than the crop.
Zinc shortage: about two to four weeks after planting, look for rusty-brown spots and blotches on the older, lower leaves — often spreading up from the leaf base and along the midrib — with new leaves pale between the veins and whole patches stunted and slow to tiller. It bites hardest in flooded paddy and on limy (high-pH) soils.
If many tillers show onion-leaf tubes or deadhearts → note it, keep the crop clean, and plan a resistant variety next season (open the gall midge / stem borer guide). If blast is spreading → ease off the nitrogen and open the blast guide. If the crop is bronzing with zinc shortage → spray a zinc (zinc sulphate) foliar feed, drain the paddy for a few days to air the soil, and top-dress zinc if your recommendation gives it.
- Do:
Weed early — in upland rice this is the season's biggest job; about 25 barnyard-grass plants in a stride-square (per m²) can halve your yield.
- Watch out:
Keep nitrogen balanced. Pushing on extra N to 'green up' the crop feeds blast and makes the plants soft and likely to fall over later.
Weeding (critical, esp. upland) Critical
This is the costliest weeding of the season — weeds rob water, light and fertiliser right when the crop is building its tillers, and a weedy field can lose anywhere from a tenth to half its yield. In upland rice, where water can't do the job for you, hand-weeding now is the single biggest task you'll do all season.
Start weeding by about 2–3 weeks after planting, before weeds outgrow the rice, and again a few weeks later — keep the crop clean right through tillering.
Upland: hoe or hand-pull between and within the rows, taking weeds out by the roots; work shallow near the plants so you don't cut rice roots.
Paddy: keep a steady, even shallow flood — this is your best weedkiller — and hand-pull or run a rotary push-weeder between the rows for the rest.
Pull barnyard grass and weedy red rice by hand — no weedkiller can separate these grasses from your rice, so lifting them out before they seed is the only sure way.
In upland fields, leave the pulled weeds lying between the rows as a light mulch to hold moisture.
- Do:
In paddy, keep the water on and even — a proper flood smothers most weeds and cuts your hand-weeding right down.
- Watch out:
Weedy red rice and barnyard grass must come out by hand before they seed — miss them and they reseed the field for years.
- Tip:
Deep hoeing close to the plants — rice roots run shallow and are easily cut.
Mid-tillering N split Recommended
A feed of nitrogen now, while the plant is throwing tillers, pushes out more tillers — and every extra tiller is another head of grain. Splitting the nitrogen across the season, rather than dumping it all at once, means the rain and the flooded soil waste far less of it and more reaches the crop.
Apply the mid-tillering nitrogen — about a quarter of the season's N, the amount your recommendation gives — at roughly 2–3 weeks after planting, while the crop is actively tillering.
Paddy: drop the water to a thin film or damp mud first, spread the fertiliser evenly, then re-flood a day later — this traps the nitrogen in the mud instead of losing it to the water and air.
Upland: spread it evenly when the soil is moist (after a weeding or a light rain), and hoe or rain it in.
Spread it evenly across the whole field — streaks and skips give patchy, uneven growth.
- Do:
Weed just before you feed — so the nitrogen goes to your rice and not to the weeds.
- Watch out:
Keep fertiliser off wet leaves (it scorches them) and out of your eyes, and wash your hands afterwards; store it away from food, water and children.
- Tip:
Broadcasting urea onto deep standing water — much of it floats off and is lost. Drain to a thin film first, then re-flood after spreading.
Water: paddy 5→10 cm / upland keep moist Recommended
As the crop tillers it can take deeper water — about 5 cm rising toward 10 cm — which holds down weeds and carries the growing plants. If water is scarce, this is where you can begin an alternate wet-and-dry (AWD) cycle to save water without losing yield. Upland rice just needs to stay moist.
Paddy: raise the water to about 5 cm (four fingers) and up toward 10 cm (a hand-width) as the tillers grow — enough depth to keep weeds down.
To save water, use a safe AWD cycle: after the flood soaks in, let the water level fall to about 15 cm below the soil surface before you re-flood back to about 5 cm. A cheap gauge makes it easy — sink a perforated tube or an open length of bamboo into the mud and watch the water drop inside it, then re-flood once it is about 15 cm down but the soil is still moist, not yet cracking. During tillering this costs no yield.
Upland: keep the topsoil moist; never let the crop wilt during this fast-growth stage.
Keep the bunds sound and the depth even, so every tiller gets the same water.
- Do:
Try alternate wet-and-dry now if water is short — drain to wet mud, then re-flood. It saves water and firms the roots against lodging.
- Tip:
Letting the paddy go bone-dry and crack — that stresses the crop and lets weeds surge. 'Wet-and-dry' means wet mud, not dust.
Panicle to flowering — the make-or-break window
The head (panicle) now forms hidden inside the stem, then pushes out and flowers. This is where the plant fixes how many grains it will carry — and it is the thirstiest, most delicate stage of all. Dry soil, cold nights (below 20 °C) or fierce heat (above 35 °C) right now leave the heads full of empty grains. Give it the panicle-initiation nitrogen, keep the water on, and never let it stress.
Scout (neck blast, borer whiteheads, rice bugs) Critical
Now the enemies go for the head itself. Neck blast rots the neck just below the panicle, so the whole head dies and hangs white and empty. Stem borers cut the head from inside, leaving an upright 'whitehead' of blank grains. And rice bugs move in at flowering to suck the soft grains dry. Each attack is grain you will never fill.
Twice a week, walk the 'W' and check the emerging and flowering heads closely.
Neck blast: look for a black-brown rotted band on the neck just below the panicle, with the head above it dead, whitish, and often bent over — the most damaging blast of all.
Whiteheads (borer): look for whole panicles standing upright, white and empty while the rest are green and bowing with grain — tug and the stem pulls free, cut through by a borer.
Rice bugs: look in the early morning for shield-shaped bugs on the heads and for grains that are flat, spotted or empty; a foul smell over the field is another clue.
If neck blast or whiteheads are spreading → keep the water on, add no more nitrogen, and open the blast / stem borer guide. If rice bugs are on the heads → open the rice bug guide.
- Watch out:
Never let the crop stress here — if you can water at only one stage all season, water now, at flowering.
- Do:
Scout in the early morning for rice bugs — they are active and easy to see then, and hide down in the crop by midday.
Panicle-initiation N split Recommended
A feed of nitrogen just as the head starts to form lifts the number of grains per head and keeps the top leaves green to fill them. But this is a fine balance: too much nitrogen now feeds neck blast and makes the crop fall over. Give the recommended amount — no more — and make it the last nitrogen of the season.
Apply the panicle-initiation nitrogen — about a quarter of the season's N, the amount your recommendation gives — as the head begins to form, roughly 6 weeks (around 40 days) after planting.
To check the timing, split a main tiller near the base and look for the tiny green, feathery panicle, about the size of a rice grain, starting inside — that's the moment.
Paddy: drop to a thin film of water, spread evenly, then re-flood after a day so the nitrogen stays locked in the mud.
Do not exceed the recommended amount — extra nitrogen here brings neck blast and lodging, and no more grain.
- Tip:
Adding 'a bit extra' nitrogen to green up the crop — at this stage it buys you blast and flattened plants, not yield.
- Watch out:
Keep fertiliser off wet leaves and out of your eyes, and wash your hands afterwards. This is the last nitrogen — none after flowering; it won't reach the grain.
Keep flooded (paddy) / irrigate (upland) Critical
This is the one water window you must never miss. From panicle to flowering the crop cannot bear to dry out — even a short thirst now leaves the heads full of empty grains, and can cost anywhere from 15% up to half your yield. Water here beats water at any other stage.
Paddy: hold a steady flood of about 5 cm (four fingers) right through heading and flowering — do not let it dry out now, even to save water.
Stop any alternate wet-and-dry cycle for this stage — keep continuous water from panicle initiation until flowering has finished.
Upland: water is now the top priority — irrigate to keep the soil moist through flowering, never letting the crop wilt, even for a single day.
If water is short and you must choose, water at flowering first and let the other stages wait.
- Watch out:
Cold nights (below 20 °C) or fierce heat (above 35 °C) at flowering also cause empty grains — keeping water on helps the crop ride out the heat.
- Do:
Keep the flood steady and even through flowering — this single stage carries the most yield of the whole season.
Fill the grain and guard it to the finish
The grains now fill with starch, harden and turn golden — this is where your weight and quality come from. The biggest threat is no longer pests but birds, which can strip a field from the milky stage on. Scare them daily, watch for late rice bugs and for a crop starting to fall over (lodge), and — in paddy — let the water fall and drain the field 7–10 days before harvest so the ground firms up.
Bird-scaring from the milk stage Critical
Once the grain turns milky, flocks of birds — the little quelea worst of all — can pour in and strip a field in days. For many rice growers this is the single biggest loss of the whole season. Scaring has to be daily, dawn to dusk, through the whole soft-grain stage, and works far better when the whole neighbourhood plants and guards together.
Start scaring the day the grain goes milky (press a grain — a milky liquid comes out), and keep it up every day until harvest.
Guard from a raised platform at the worst times — early morning and late afternoon — when the flocks feed hardest.
String scare-lines across the field — rag or cloth flags, old tape, rattling tins — and move them often so the birds don't get used to them.
Net small or seed plots if you can, and clear roosting bushes and tall weeds around the field.
Plant and guard with your neighbours — a lone ripe field in a green landscape draws every bird for miles; fields that ripen together share the pressure.
- Do:
Change your scare tactics often — move the flags, vary the noise, walk the field. Birds quickly learn to ignore anything that stays the same.
- Watch out:
The milk-to-dough stage is the danger window; guard hardest at dawn and dusk, when the flocks come to feed.
Scout (rice bugs, lodging) Recommended
Even as the crop ripens, rice bugs can still suck the softer grains and leave them flat and spotted, and a heavy, over-fed or storm-hit crop can lodge — fall flat — dropping the heads into the mud where they rot and sprout and are hard to cut. Spotting either lets you act, or harvest early, rather than lose grain.
Once a week, look over the ripening heads and the standing crop.
Rice bugs: in the milky stage, check in the early morning for shield-shaped bugs on the heads and for empty, spotted grains; a foul smell is a clue.
Lodging: look for patches leaning or flattened after wind or rain, worst where the nitrogen was heavy — heads lying in water rot and sprout within days.
If a lodged patch is nearly ripe → harvest that part early rather than let it spoil in the mud.
- Watch out:
Lodged heads lying in water sprout and rot within days — get them cut as soon as they are ripe enough.
- Do:
Note where the crop lodged and where nitrogen was heaviest — next season, ease off the N there and choose a shorter, stiffer-strawed variety.
Drain 7–10 days before harvest Recommended
Toward the end, let the water go. Draining the paddy 7–10 days before harvest firms up the mud so you (and any helpers or machines) can walk and cut without bogging down, evens out the ripening, and lets the crop start drying in the field. A wet paddy at harvest means a slow, muddy, spoiled job.
Once the grains in the lower part of the heads are hardening, stop adding water and open the bunds to let the paddy drain.
Aim to have the field drained and firming about 7–10 days before you expect to cut.
Upland: keep the soil moist through the milky stage, then simply let it dry down as the grain hardens.
Don't drain too early — cutting off water while many upper grains are still soft and milky shrinks and chalks the grain.
- Tip:
Draining while the upper grains are still milky — the grain fills poorly and ends up small and chalky.
- Do:
Time the drain so the ground is just firm at harvest — dry enough to walk and cut, not so dry the soil cracks.
Harvest — cut and thresh on time
Harvest at the right moment — about 30 days after the field was in full flower (once half or more of the heads had flowered, not just the first) — when the heads have gone golden and the grains are firm. Cut too green and the grain is chalky and light; leave it too long and it shatters onto the ground and the birds finish it. Cut with a sickle, let it dry a little, then thresh onto a clean surface.
Cut & thresh Critical
Cutting at the right moment is the difference between full, heavy, whole grain and a light, chalky or shattered crop. Harvest when the heads are ripe but before the grain drops — from here, every extra day standing means more lost to shattering and to birds.
Check ripeness first: the head is ready when about 80–85% of its grains have turned straw-gold and the grains low on the head are hard when you bite them (about 20–25% moisture). The top grains ripen first, the bottom last.
If most heads are still green, or the lower grains are soft and milky → wait a few days and check again — cutting green gives chalky, light grain.
Cut the stalks with a sickle in the cool of the day, a handful at a time; cut high (just the heads) or low (whole straw), as you prefer.
Stack or lay the cut crop to dry briefly — about a day — with the heads shaded from harsh sun, before threshing.
Thresh by beating the heads against a bar, drum or wooden rack, or by treading them, onto a clean tarpaulin or mat — never bare ground, which mixes in soil, stones and damp.
Winnow off the empty grains, chaff and dust in the wind, so only clean, filled grain goes on to dry.
- Do:
Harvest promptly once it's ripe — standing rice shatters its grain onto the ground and feeds the birds a little more every day you wait.
- Tip:
Threshing on bare soil — it works in grit, stones and damp that lower the grade and start mould. Always use a tarpaulin or mat.
- Watch out:
Cut in the cool of the morning to lose less grain to shattering, and get the crop off the field before rain or a bird flock finds it.
Dry hard and store safe
The crop is grown and cut — now don't lose it. Rice must be dried fast but gently: start it drying within a day of threshing, down to a hard, storable dryness, but not so fast or hot that the grain cracks and breaks when it's milled. Then store it clean, dry and sealed, so weevils and the grain moth can't get in.
Dry within 24 h to ≤14% Critical
Fresh-threshed rice is wet and will mould, heat and yellow within a day if it just sits. But rice is fussy: dry it too fast or too hot and the grains crack, then shatter into broken bits when milled — and broken rice sells for far less. The trick is to start within a day, and dry steadily and evenly to a hard, safe dryness.
Start drying within a day (24 hours) of threshing — wet rice left in a heap heats, moulds and turns yellow fast.
Spread it in a thin layer on a clean tarpaulin, mat or hard floor — never on bare soil, which pushes damp and dirt back into the grain.
Turn it every hour or so, with your feet or a rake, so it dries evenly top and bottom.
In fierce midday heat, cover or shade it for the hottest hours — drying too fast and hot cracks the grain so it breaks when milled.
Bite test: the grain is dry enough (about 14% or below) when it cracks and shatters rather than bends between your teeth.
If the grain still bends or dents instead of shattering → it's too wet; keep drying and re-test before you bag it. For grain you'll keep as seed, dry a little further (to about 12%).
- Tip:
Drying on bare soil, or too fast in fierce sun — you get damp, dirt, and cracked grain that breaks and loses value when milled.
- Do:
Dry in a thin layer and turn it often — even drying gives whole, unbroken grain and the best price.
- Watch out:
If you can't finish before dark or rain, gather the grain into a covered heap and spread it again next morning — don't leave it out to soak up the dew.
Store in sealed/hermetic bags Recommended
Dry rice stored sealed keeps for months; stored damp or open, it is quickly bored through by rice weevils and the grain moth. An airtight (hermetic) container starves the pests of air and kills them without chemicals — and keeps any grain you're saving for seed alive to plant.
First be sure the grain is fully dry — a grain shatters, not bends, when bitten (about 14%; 12% for seed). Damp grain sealed up will only mould.
Store clean, dry grain in hermetic (airtight) bags — such as PICS bags — or a clean, sealed drum or metal silo. Airtight storage suffocates weevils and grain moth with no chemicals needed.
If you must use ordinary sacks, keep them off the floor and away from the walls in a cool, dry, airy store, and mix in a recommended grain protectant.
Keep seed rice separate, in its own labelled hermetic container, dried that bit harder, so it stays alive to plant next season.
Check the store once a month for heating, moths, or grain dust with small holes (weevils) — act early if you see them.
- Do:
Seal the bag properly — press out the air and tie both the inner liner and the outer bag. An airtight bag does the pest control for you.
- Tip:
Bagging grain that isn't bone-dry, or storing on a damp floor against a wall — both bring mould and weevils.
- Watch out:
If you use a storage dust, follow the label, keep it off grain you'll eat within weeks, and wash your hands afterwards.
Pests and diseases that attack rice
-
 African armyworm
 -
 Angoumois grain moth
 -
 Bacterial blight
 -
 Brown spot
 -
 Cereal stem borers
 -
 Fall armyworm
 -
 Golden apple snail
 -
 Grain-eating birds
 -
 Maize weevil
 -
 Rice blast
 -
 Rice bugs
 - Rice gall midge
-
 Rodents
Where to sell rice
Markets that trade this crop — what each one sells it by, when supply peaks there, and the currency used.
-
 Dawanau International Grains Market
-
 Mile 12 Market
-
 Grand Marché de Bamako
-
 Grand Marché de Kinshasa
-
 Kariakoo Market
-
 Onitsha Main Market
-
 Marché Central de Bujumbura
-
 Marché Katako
Grow rice with a plan, not a guess
This guide is the general answer. Divisi works out yours — the week to plant rice on your soil and your rainfall, and each job dated for your field.


When to plant rice, country by country
- When to plant rice in Algeria
- When to plant rice in Angola
- When to plant rice in Benin
- When to plant rice in Botswana
- When to plant rice in Burkina Faso
- When to plant rice in Burundi
- When to plant rice in Cabo Verde
- When to plant rice in Cameroon
- When to plant rice in Comores
- When to plant rice in Congo
- When to plant rice in Côte d'Ivoire
- When to plant rice in Egypt
- When to plant rice in Eritrea
- When to plant rice in Eswatini
- When to plant rice in Ethiopia
- When to plant rice in Gabon
- When to plant rice in Gambia
- When to plant rice in Ghana
- When to plant rice in Guinea Ecuatorial
- When to plant rice in Guinea-Bissau
- When to plant rice in Guinée
- When to plant rice in Kenya
- When to plant rice in Liberia
- When to plant rice in Libya
- When to plant rice in Madagascar
- When to plant rice in Malawi
- When to plant rice in Mali
- When to plant rice in Mauritanie
- When to plant rice in Mauritius
- When to plant rice in Morocco
- When to plant rice in Moçambique
- When to plant rice in Namibia
- When to plant rice in Niger
- When to plant rice in Nigeria
- When to plant rice in Rwanda
- When to plant rice in République centrafricaine
- When to plant rice in République démocratique du Congo
- When to plant rice in Sao Tome and Principe
- When to plant rice in Seychelles
- When to plant rice in Sierra Leone
- When to plant rice in Somalia
- When to plant rice in South Africa
- When to plant rice in South Sudan
- When to plant rice in Sudan
- When to plant rice in Sénégal
- When to plant rice in Tchad
- When to plant rice in Togo
- When to plant rice in Tunisie
- When to plant rice in Uganda
- When to plant rice in United Republic of Tanzania
- When to plant rice in Zambia
- When to plant rice in Zimbabwe
Where rice scores best
Districts where Divisi's engine currently rates this crop highest, ranked by fit.


Get Insights by email
A short digest of new Divisi articles. No email on quiet weeks.
Frequently asked questions
How do I grow rice?
How to grow rice: 90–150 days to maturity, 20 cm rows, 2–3 cm deep. Also called paddy, rys, mpunga, riz, shinkafa, ilayisi, arroz, mchele.
What is rys in English?
Rys is the Afrikaans name for rice.
What is mpunga in English?
Mpunga is the Bemba and Chichewa name for rice.
What is riz in English?
Riz is the French name for rice.
What is shinkafa in English?
Shinkafa is the Hausa name for rice.
What is ilayisi in English?
Ilayisi is the Ndebele, Xhosa and Zulu name for rice.
What is arroz in English?
Arroz is the Portuguese name for rice.
What is mchele in English?
Mchele (also mpunga) is the Swahili name for rice.
How long does rice take to grow?
Rice takes about 90–150 days from sowing to maturity, though the exact length varies with variety, temperature and how the season runs.
What spacing should I use for rice?
Space rice rows about 20 cm apart, with roughly 20 cm between plants within the row.
How deep should rice be planted?
Sow rice at about 2–3 cm deep. Shallower risks drying out; deeper wastes seed energy before the shoot reaches light.
What pests and diseases attack rice?
The ones covered in this guide are African armyworm, Angoumois grain moth, Bacterial blight. Each has its own page explaining how to identify, check for and control it.