 Divisi
How to grow cotton
Gossypium hirsutum · Malvaceae
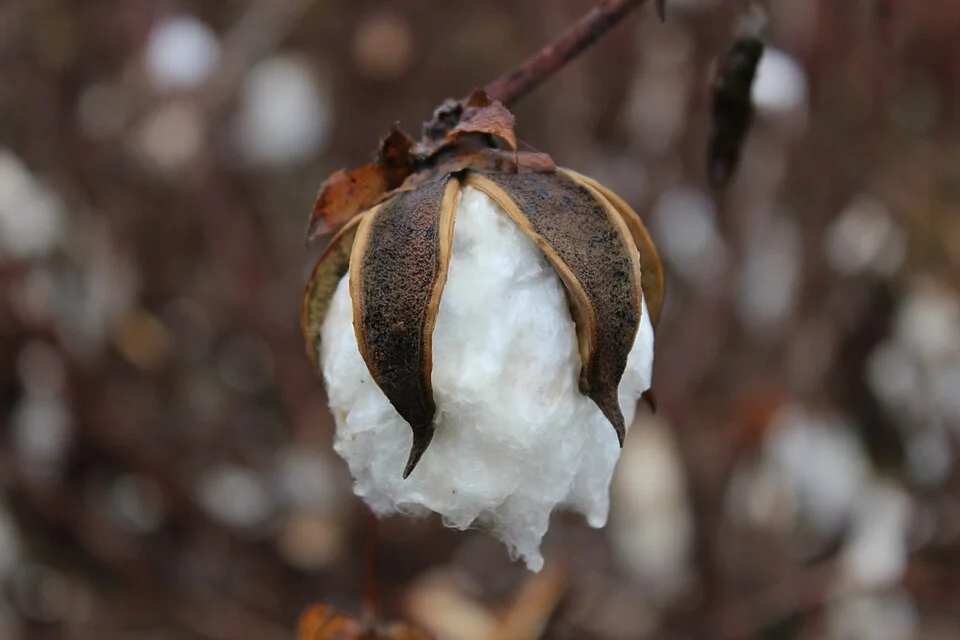
Photo: Michael Bass-Deschenes(Commons User Mike Bass-Deschênes) · CC BY 2.0
Cotton is grown for one thing: the soft white fibre — the lint — that grows wrapped around the seeds inside a pod called a boll. It is a warmth-loving, deep-rooted bush that flowers and fruits at the same time over a long season of about five to seven months, so the plant is always doing two jobs at once — pushing out new branches and filling the bolls it has already set. When the bolls split open into fluffy white, you hand-pick the lint; later a machine combs it off the seed (ginned), the lint goes to thread and cloth, and the leftover cottonseed gives cooking oil and stock-feed cake. One pest decides most cotton crops — the bollworm, caterpillars that bore into the bolls where your fibre is forming — so watching your field closely (scouting) and spraying at exactly the right moment run right through the season.
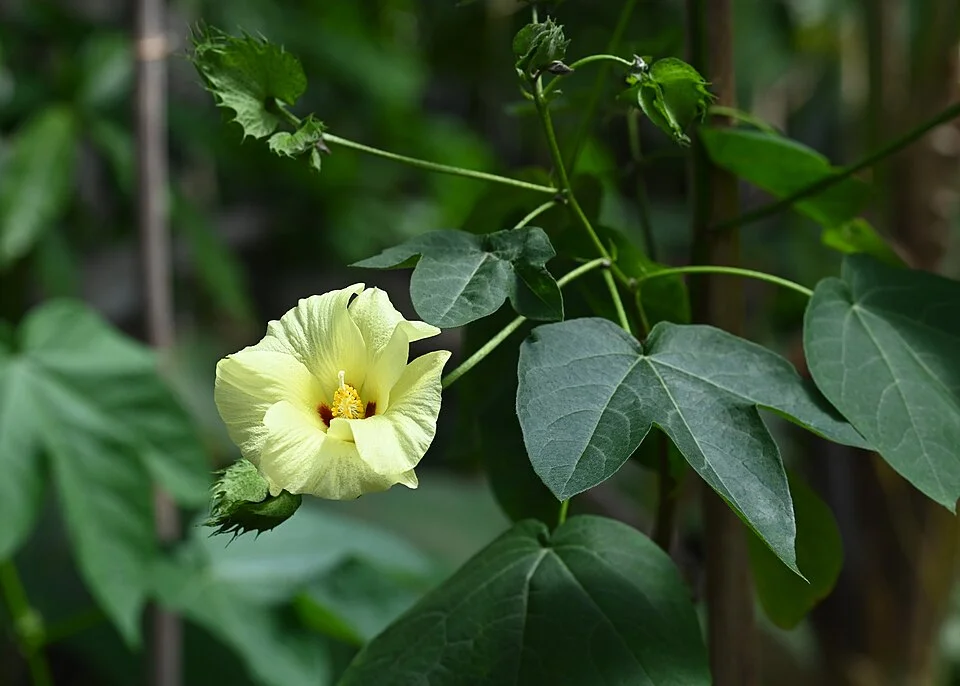
Krzysztof Ziarnek, Kenraiz · CC BY-SA 4.0 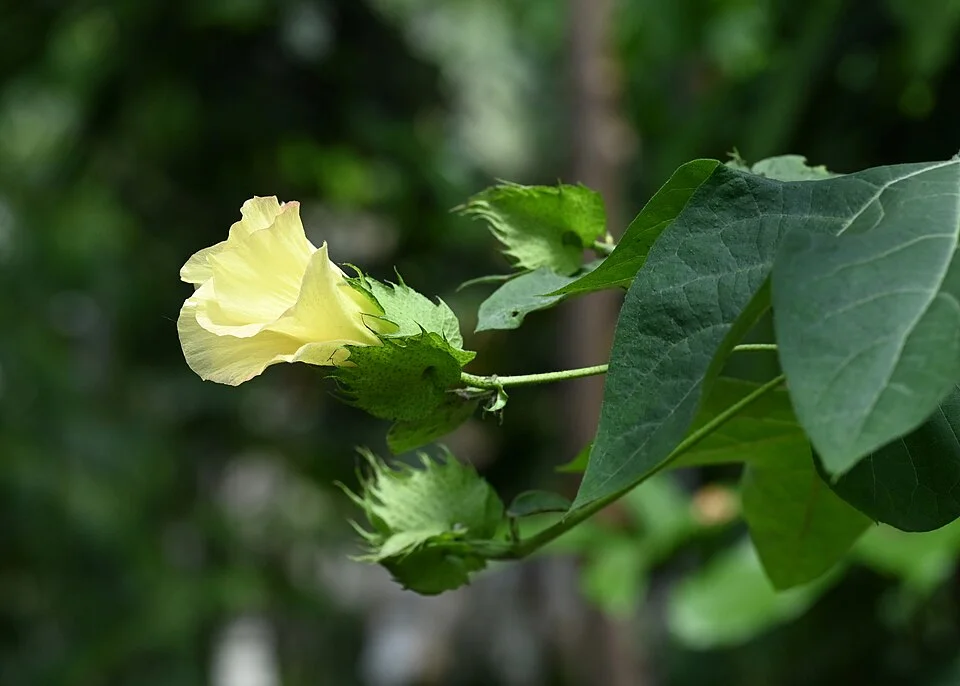
Krzysztof Ziarnek, Kenraiz · CC BY-SA 4.0
- Days to maturity
- 150–210 days
- Row spacing
- 90 cm
- Plant spacing in the row
- 25 cm
- Sowing depth
- 3–5 cm
These are general figures for the crop, compiled from published agronomic references including FAO and CABI. The right choice for your field depends on your soil, rainfall and the yield you are aiming for.
Will cotton actually do well on your field? Check your own field against every crop in the catalogue — no signup. Run the crop check →
Also known as
- Afrikaans
- katoen
- Amharic
- tit
- Chichewa
- thonje
- French
- coton
- Hausa
- auduga
- Portuguese
- algodão
- Shona
- donje, thonje
- Swahili
- pamba
Working in buckets, bags or paces? The farming glossary turns the measures growers actually use into kilograms and hectares — what a 20 litre bucket of each crop really weighs, and how to size a field by walking it — alongside the Shona, Swahili, Ndebele and Yoruba words used in the field. Open the glossary →
Growing cotton, stage by stage
Your cotton season, step by step — from a warm-soil start and a full, even stand, through balanced feeding and beating the bollworm at flowering, to clean, dry hand-picking that keeps your lint white and top-grade.
Get your field and inputs ready
Cotton lives on a long, warm season, so most of what decides your yield is set before the first seed goes in. Buy clean, treated seed and the basal (starter) fertiliser your plan gives, make a fine, firm, well-drained seedbed, and rotate away from last year's cotton — following cotton with cotton only feeds the pests and wilts that overwinter in the old stalks. Do it all in the weeks before the rains, so you can sow the moment the soil is warm and moist.
Buy treated seed & basal fertiliser Critical
Fresh, treated seed and the right basal fertiliser give the strong, even start a long cotton season needs. Cotton is a hungry crop — it eats nitrogen, and even more potash (potassium) than nitrogen, plus a little boron to hold its bolls — so the basal you buy now is the foundation of the whole crop. Buy early, in the three weeks before you sow, so everything is in hand the moment the soil is warm enough.
Buy certified, treated seed from a registered dealer — a sealed, labelled bag with the variety name and this season's packing date. The seed dressing (a chemical coat on the seed) shields the young seedling from the first sap-sucking pests, thrips and jassids.
Choose a variety that suits how long your rains last. If bollworm is bad in your area and it is sold near you, ask about a Bt variety — its leaves carry built-in bollworm protection — but know you still scout and still spray for the pests Bt does not stop (jassids, whitefly, stainers).
Buy enough basal fertiliser for your field — your recommendation gives the exact type and amount. Cotton wants nitrogen and plenty of potash; a compound that also carries a little boron helps the plant keep its squares (flower buds) and bolls.
Store seed and fertiliser dry, off the floor, and away from food, water and children. Keep the label and receipt in case the seed comes up poorly.
- Do:
Rotate — never follow cotton with cotton. A break with a cereal or a legume starves the wilts (Fusarium and Verticillium — soil diseases that block the plant's water pipes so it wilts) and knocks back the bollworm and stainers that overwinter in old cotton.
- Do:
Buy clean, treated seed in a sealed, labelled bag; loose seed scooped from a sack is often old or mixed and comes up thin and gappy.
- Watch out:
Check the packing date before you buy, and keep the fertiliser bone-dry — once it sets hard like a rock it will not spread evenly.
Prepare a fine, firm, well-drained seedbed Recommended
Small cotton seed needs firm, moist soil pressed against it to sprout evenly, and cotton's deep taproot (the main root, which can drive well over a metre down) needs loose, well-drained soil to chase water in the dry spells ahead. A rough, cloddy or waterlogged bed gives a patchy stand you can never fix later.
In the month before sowing, clear weeds and old cotton stalks off the planting lines. Chop and work the old stalks in early — they shelter bollworm and stainers right through the off-season.
Loosen the soil to about 15–20 cm — a spade's blade deep — so the taproot can drive down and rain can soak in.
Break the clods on top to a fine, crumbly tilth. Seed dropped into big clods sits in air pockets and comes up in gaps.
Level the bed and make sure water drains away — cotton hates wet feet. On a slope, work across the slope and make ridges or basins to catch the rain; in low, wet spots, sow on a ridge so the roots sit above standing water.
- Do:
Work old cotton stalks in well before sowing — it breaks the pest-and-disease bridge from last season's crop to this one.
- Tip:
A low, poorly drained bed — cotton seedlings stall and rot in waterlogged soil, and boll rot follows later in the season.
Plant and set a full stand
The number of healthy plants you set now is the ceiling on your crop — you cannot add plants later, and an even stand is your first defence against the sap-sucking pests that hit young cotton. Sow 3–5 cm deep into warm, moist soil in rows about 90 cm apart, let it come up in 5–10 days, and thin to one strong plant per station about 13 days after it emerges.
Sow into warm soil Critical
A full, even stand at the right spacing is the single biggest thing you control — and cotton will only sprint out of the ground if the soil is truly warm. Sown into cold soil it comes up slow, thin and gappy, straight into the jaws of thrips and jassids. Getting warmth, depth and spacing right on sowing day pays back all season.
Sow into warm, moist soil. Cotton needs real warmth to sprout — below about 15 °C it barely moves. Simple check at dawn: the soil feels warm, not cold, to the back of your hand, and the cold snaps have passed. When in doubt, wait a few days rather than sow into cold ground.
Open your rows about 90 cm apart — a good stride — wide enough to walk, spray and pick between later.
Sow along the row about 3–5 cm deep — one finger-joint — a touch deeper in dry, sandy soil, shallower in heavy soil. Drop a few seeds per station (you will thin to one later) and space the stations about 25 cm apart — a hand-span.
Cover and firm the soil over the seed so it sits snug in moist earth. It should come up in 5–10 days — slower if the soil is on the cool side.
- Do:
Sow into warm, moist soil; below about 15 °C growth stalls and emergence is slow and uneven.
- Tip:
Sowing too deep in heavy soil — the little seedling runs out of strength before it reaches the light.
- Watch out:
Treated seed is coated with chemical — handle it with care, keep it off food and out of children's reach, and wash your hands after sowing.
Scout Critical
The first two weeks decide your stand. Thrips and jassids attack young cotton first, and a seedling checked now never fully catches up. Ten minutes, twice a week, protects the very plants your whole crop is built on.
From about a week after sowing, walk the field twice a week. Cross it in a big "W" so you cover the corners and the middle, not just the edge by the path.
At about 10 stops, look closely at 10 plants — the growing tip and the undersides of the young leaves, where the sap-suckers hide.
Thrips: look for silvery or bronze scarring on the young leaves, leaves that curl upward, crinkle and pucker, and stunted, ragged seedlings. The insects are tiny slivers, hard to see — the leaf damage is your signal.
Jassids (leafhoppers): look for small, wedge-shaped green hoppers that dart sideways when you touch a leaf, and leaf edges that yellow, then turn bronze-red and curl downward — this scorched look is called "hopperburn". Act at about 2–3 nymphs (young hoppers) per leaf.
Also count the gaps — stations with no plant — so you know whether the stand is thin.
Write down what you find and where. If thrips or jassids are over threshold, open the matching pest guide and act; if the stand is thin, plan to keep every seedling when you thin.
- Watch out:
The seed dressing usually carries the seedling through the worst of the early thrips and jassids — but that protection fades after a few weeks, so keep scouting.
Thin to final stand Critical
Cotton often comes up with several seedlings crowded in one station. Left together they fight for light and food and all grow into weak, low-boll plants. Thinning to one strong plant per station sets the even, well-spaced stand that fruits heavily — and it is yield you cannot recover if you skip it.
Thin about 13 days after the seedlings come up — once they are big enough to handle, but before they crowd each other.
At each station, pick out the single strongest, healthiest seedling to keep.
Snip or pinch the extra seedlings off at ground level — do not pull them, or you tear the roots of the one you are keeping.
Aim for one plant per station, evenly spaced about a hand-span (25 cm) apart down the row.
- Do:
Thin on a still, moist day and firm the soil back gently around the plant you keep.
- Tip:
Leaving doubles "for insurance" — two plants in one station both end up small and carry few bolls.
Build the frame and protect the squares
Now the plant builds its branches and starts making squares — the little flower buds that each become a boll. Two things protect them: keep the field weed-free through the critical early window, and feed nitrogen and potash in balance — too much nitrogen alone makes the plant run to leaf and shed its squares. This is where jassids, aphids and the first bollworm arrive, so scouting now begins in earnest.
Scout (bollworm eggs, jassids) Critical
As the plant makes its squares, jassids and aphids drain its sap and the first bollworm eggs appear. A square lost to pests or shed under stress is a boll you will never pick. Catching trouble early — while numbers are still low — is the cheapest control you will ever do.
From about two weeks after sowing, keep walking the "W" twice a week, checking about 10 plants at each of 10 stops.
Bollworm (first eggs): on the top leaves and near the squares, look for tiny, round, ridged, creamy-white eggs laid one at a time, for young caterpillars, and for squares that yellow, flare open and drop to the ground.
Jassids: check leaf undersides for small green wedge-shaped hoppers and edges that yellow and curl down; act at about 2–3 nymphs (young hoppers) per leaf.
Cotton aphids: look for clusters of small, soft green or black insects on the undersides of leaves and on the tips, a sticky, shiny film (honeydew) on the leaves below, ants running up the stems, and later a black sooty mould growing on the stickiness.
Note the counts and where. If any pest is over its threshold, open its guide and act; otherwise leave the natural enemies to keep working.
- Tip:
Piling on nitrogen — it drives rank growth (all leaf and stem, few bolls), delays fruiting and makes the plant shed squares. Feed it in balance with potash.
- Watch out:
A few aphids and a little honeydew often draw in ladybirds and other helpers that clean them up — do not reach for spray over light aphid numbers.
Weeding (critical clean window) Critical
Weeds in the first weeks steal the water, light and fertiliser you paid for, just when young cotton is slow and cannot fight back — and they shelter jassids and other pests. Keeping this critical clean window weed-free is worth 10–30% of your crop.
Weed early, between about two and five weeks after sowing, before the weeds grow taller than the cotton.
Hoe shallowly between and along the rows — deep hoeing close to the plants cuts cotton's spreading feeder roots.
Pull or hoe weeds out roots and all where you can; slashing only the tops lets many spring straight back.
Time this weeding just before you feed the crop, so the fertiliser goes to the cotton and not the weeds. In dry areas, leave the pulled weeds lying between the rows as a mulch to hold moisture.
- Do:
Weed while the weeds are small — a clean field in the critical window is the cheapest yield you will ever gain.
- Watch out:
Keep the hoe shallow near the stems; cotton's feeder roots run just under the surface and are easily cut.
Apply N + K at squaring Recommended
As the first squares (flower buds) form — about a month after sowing — the plant's hunger climbs. Nitrogen builds the frame and potash (potassium), which cotton needs even more of than nitrogen, fills and holds the bolls to come. Balanced feeding now sets a heavy-fruiting plant; nitrogen alone makes it run to leaf and drop its squares.
Feed when the first squares appear, about 30–40 days after sowing.
Use the type and amount your recommendation gives — a balanced compound carrying nitrogen and potash. As a rough picture it is about a bottle-cap beside each plant, but follow your plan for the exact rate.
Band it in a line about a hand's width (10 cm) to the side of the row — never on top of the plants — on moist soil, then cover it or scratch it in so it does not gas off or wash away.
Keep fertiliser off wet leaves (the grains stick and scorch them), keep it away from food, water and children, and wash your hands afterwards.
- Tip:
Heavy nitrogen on its own — it drives rank, leafy growth, delays maturity and sheds squares. Always balance it with potash.
- Watch out:
Cotton needs boron to set and hold its bolls — more than most crops. A compound or a foliar feed carrying a little boron at squaring and flowering helps the plant keep the bolls it makes.
Protect flowering — beat the bollworm
The squares open into creamy flowers that turn pink and drop, leaving young bolls behind — the yield-forming window and the peak of bollworm pressure. Water demand is at its highest now, and heat above about 35–37 °C sheds pollen and young bolls. So through flowering: scout every 2–3 days, spray only when a pest crosses its threshold (and rotate the chemical group each time so pests never learn to survive the spray), and keep the water coming.
Scout (bollworm complex, stainers, whitefly) Critical
Flowering is when the bollworm complex hits hardest — its caterpillars bore straight into the squares, flowers and young bolls where your fibre forms, and whitefly and stainers pile on. Scouting every 2–3 days is what lets you spray at the right moment, not a day late when the caterpillar has already tunnelled out of reach.
From the first flowers, walk the field every 2–3 days — bollworm moves fast now. Check about 10 plants at each of several stops.
Bollworm complex: on the top leaves and near the squares, look for tiny, round, ridged eggs, small caterpillars, and the tell-tale round bore-holes in squares and young bolls — often with wet droppings at the hole and shed squares on the ground underneath. Spray at about 1 caterpillar per plant, 5–10 damaged squares or bolls in 100, or when about 1 plant in 10 carries small caterpillars.
Whitefly: brush a plant — if a cloud of tiny white flies lifts off the leaf undersides, check the count. Act at about 5–10 adults per leaf. Look too for sticky leaves and black sooty mould below.
Stainers: look on and around opening bolls for clustered red-and-black bugs. Act at about 3 bugs per metre of row, and clean up trash and stray plants they breed in.
Write down the counts at every stop. Spray only what has crossed its threshold — and rotate the chemical group each time.
- Watch out:
This is peak bollworm pressure — scout every 2–3 days and spray on the threshold, rotating chemical groups so the caterpillar never learns to survive the spray.
- Watch out:
Heat above about 35–37 °C at flowering sheds pollen and young bolls, giving poor set — keep the soil moist to help the plant ride out the heat, and never add drought stress on top.
Threshold sprays (rotate groups) Critical
A bollworm caterpillar that reaches a boll and bores in is beyond any spray — it is eating your fibre from the inside. Spraying at the threshold, before they tunnel in, is worth 20–50% of your crop. But spray the same group too often and the bollworm stops dying — so you rotate groups every time, and spray only what scouting says truly needs it.
Spray only when scouting shows a pest has crossed its threshold (about 1 bollworm caterpillar per plant, 5–10% damaged squares or bolls, or a sucking pest over its count) — not by the calendar.
Measure the dose with the cap supplied and mix it into a full knapsack (15–20 litres) of water. More chemical than the label says does not kill more — it just poisons you and breeds resistance.
Spray to wet the plants all over, undersides too, until just before it drips — that is where the eggs, young caterpillars and whitefly sit.
Rotate the chemical group every spray (the bollworm complex builds resistance fast). Ask the dealer which group each product belongs to and keep a simple note of what you used.
Spare the helpers: spray in the cool of early morning or evening when bees and useful insects are less active, and only spray what needs it.
Protect yourself: wear a long-sleeved shirt, cover your nose and mouth, spray with the wind behind you, keep people and animals out of the field, and wash with soap afterwards. Keep spray off any food crops.
Respect the pre-harvest interval — the number of days the label says to wait between your last spray and picking, so no poison stays on the lint and seed.
- Do:
Rotate chemical groups every spray and spray strictly on threshold — this is how you keep the sprays working all the way to harvest.
- Tip:
Spraying by the calendar or "just to be safe" — needless sprays kill the caterpillars' natural enemies and let whitefly and aphids flare up worse than before.
- Watch out:
Never mix stronger than the label; wear cover, keep the wind behind you, keep it off food, and wait out the pre-harvest interval before you pick.
Irrigate through flowering Critical
Flowering is cotton's thirstiest, most water-sensitive stage — the one time a water shortage costs you the most. A plant that goes dry now sheds its flowers and young bolls to save itself, and those are gone for good. If you can water at only one stage all season, water now.
Keep the soil moist right through flowering — water every 5–7 days, more often in heat and on sandy soil that dries fast.
Never let the crop wilt at flowering, even for a day; a wilted plant drops its youngest bolls first.
Water in the cool of the day to lose less to the sun, and drain any low spots — cotton fruits badly in both drought and waterlogging.
- Watch out:
If a hot spell (above about 35 °C) lands during flowering, keep the soil moist — steady water helps the plant hold its bolls through the heat.
- Tip:
Big swings between bone-dry and soaked — steady moisture holds the bolls, while a sudden drought after wet shocks them off.
Fill the bolls and hold the grade
The bolls now swell and pack with fibre and seed — the heaviest demand for potash and water of the whole season, setting both how much lint you pick and its grade (quality). Keep scouting and spraying the bollworm and stainers — they now bore into the filling bolls — feed potash to carry fibre quality, and hold the water steady. Late boll rot in a dense, damp canopy can turn bolls black instead of white.
Scout (bollworm, stainers, whitefly) Critical
The bolls you are filling are the crop, and bollworm and stainers now bore straight into them, while boll rot sets in where the canopy is dense and damp. A bored or rotted boll is lint you will never pick — so keep watching right through the fill.
From about a month after first flower through boll fill, walk the field twice a week, checking about 10 plants at several stops — squares, flowers and especially the bolls.
Bollworm in bolls: look for round bore-holes in the filling bolls, wet droppings at the hole, and caterpillars inside. Spray at about 1 caterpillar per plant or 5–10 bored bolls in 100.
Stainers: look for clustered red-and-black bugs on the bolls and, on any open bolls, yellow-brown stains on the lint with shrivelled, stained seed inside. Act at about 3 bugs per metre, and clear away trash and stray plants.
Boll rot: search the lower, shaded, crowded part of the plant — worst after rain — for bolls that turn brown or black, slimy or hard and rot shut instead of opening white.
Note counts and where. Spray the bollworm and stainers on threshold; for boll rot, open up a rank canopy and pick off and remove the rotted bolls before it spreads.
- Do:
Keep feeding potash through boll fill — it is what carries fibre weight and quality into the lint.
- Watch out:
Boll rot rides in on rank, over-fed, crowded plants — one more reason not to overdo the nitrogen.
Potassium feed through boll fill Recommended
Boll fill is when cotton eats the most potash (potassium) of the whole season — more than it eats nitrogen — and potash is what fills the fibre and carries its quality into the lint. Feeding it now is worth 10–25% of your crop, in both weight and grade.
Feed potash as the bolls start to fill — from about a month after first flower — using the type and amount your recommendation gives.
Band it a hand's width (10 cm) to the side of the row on moist soil, then cover or scratch it in so it reaches the roots and does not wash off.
Keep it off wet leaves and away from food, water and children, and wash your hands afterwards.
- Do:
Do not stop feeding potash too early — the plant's potash hunger peaks right through boll fill, not before it.
- Watch out:
On sandy soils potash washes down quickly, so feeding it around boll-set (rather than all up front) puts it where the filling bolls can reach it.
Irrigate through boll fill Recommended
The filling bolls still need steady water to pack on fibre and seed weight; let the crop go dry now and the bolls stay small and light. Later in the fill, though, easing off helps the crop open cleanly and keeps the picked lint dry.
Keep watering through boll fill — every 7–10 days, depending on heat and soil — while the plant is still green and setting weight into the bolls.
As the lower leaves yellow and the first bolls crack open, ease off the water so the opening lint stays dry and clean.
Stop watering once most bolls are mature and opening, so the crop can dry down for a clean pick.
- Tip:
Watering onto open, fluffy bolls — wet lint stains, discolours and loses grade.
- Watch out:
Drain any waterlogged spots; wet feet late in the season feeds boll rot.
Pick clean, pick dry
The first bolls split open into fluffy white lint about 105–130 days after sowing. Start your first pick when about 60% of the bolls are open, then come back for a second and third pick over the following weeks as the rest open (picking can run to about 200 days). Pick like this: go through in the dry heat of the day; take only fully open, dry bolls; and pull the lint out clean — leave behind green bolls, dried leaf, bits of stalk and any yellow-stained lint, because trash and stain drop your grade and your price. Keep every pick dry: never bag damp or dew-wet lint, and keep the picked cotton off the ground and out of the dust. If rain is coming or the lint is still damp, wait for it to dry before you pick or bag — wet-picked cotton heats, yellows and loses a grade.
Keep it clean and dry to the gin
Cotton is not finished when it is picked — its value is the white, unstained lint, and that is lost in the store, not the field. Keep your seed cotton (the picked lint still on its seed) clean and bone-dry until it is ginned (run through a machine that combs the lint off the seed): store it off the ground on a clean mat or in clean bags, away from moisture, dust, oil, cooking smoke and animals, and keep out leaf, stalk and any stainer-marked lint that would pull down the grade. Damp seed cotton heats, yellows and can rot; contaminated or stained lint is downgraded and paid less. After ginning, the lint is baled for sale and the seed goes on for oil and stock-feed cake — so clean handling now pays you twice. If the seed cotton has picked up damp, spread it thin in the sun to dry again before you store or sell it.
Pests and diseases that attack cotton
-
 Aphids
 -
 Bacterial blight
 -
 Boll rot
 -
 Bollworm complex
 -
 Broad mite
 -
 Cotton aphid
 -
 Cotton stainers
 -
 Fusarium wilt
 -
 Grasshoppers
 -
 Jassids (leafhoppers)
 -
 Leaf-eating caterpillar
 -
 Mealybugs
 -
 Red spider mite
 -
 Thrips
 -
 Tobacco budworm
 -
 Whitefly
Where to sell cotton
Markets that trade this crop — what each one sells it by, when supply peaks there, and the currency used.


Grow cotton with a plan, not a guess
This guide is the general answer. Divisi works out yours — the week to plant cotton on your soil and your rainfall, and each job dated for your field.


When to plant cotton, country by country
- When to plant cotton in Algeria
- When to plant cotton in Angola
- When to plant cotton in Benin
- When to plant cotton in Botswana
- When to plant cotton in Burkina Faso
- When to plant cotton in Burundi
- When to plant cotton in Cabo Verde
- When to plant cotton in Cameroon
- When to plant cotton in Comores
- When to plant cotton in Congo
- When to plant cotton in Côte d'Ivoire
- When to plant cotton in Egypt
- When to plant cotton in Eritrea
- When to plant cotton in Eswatini
- When to plant cotton in Ethiopia
- When to plant cotton in Gabon
- When to plant cotton in Gambia
- When to plant cotton in Ghana
- When to plant cotton in Guinea Ecuatorial
- When to plant cotton in Guinea-Bissau
- When to plant cotton in Guinée
- When to plant cotton in Kenya
- When to plant cotton in Liberia
- When to plant cotton in Libya
- When to plant cotton in Madagascar
- When to plant cotton in Malawi
- When to plant cotton in Mali
- When to plant cotton in Mauritanie
- When to plant cotton in Mauritius
- When to plant cotton in Morocco
- When to plant cotton in Moçambique
- When to plant cotton in Namibia
- When to plant cotton in Niger
- When to plant cotton in Nigeria
- When to plant cotton in Rwanda
- When to plant cotton in République centrafricaine
- When to plant cotton in République démocratique du Congo
- When to plant cotton in Sao Tome and Principe
- When to plant cotton in Seychelles
- When to plant cotton in Sierra Leone
- When to plant cotton in Somalia
- When to plant cotton in South Africa
- When to plant cotton in South Sudan
- When to plant cotton in Sudan
- When to plant cotton in Sénégal
- When to plant cotton in Tchad
- When to plant cotton in Togo
- When to plant cotton in Tunisie
- When to plant cotton in Uganda
- When to plant cotton in United Republic of Tanzania
- When to plant cotton in Zambia
- When to plant cotton in Zimbabwe
Where cotton scores best
Districts where Divisi's engine currently rates this crop highest, ranked by fit.
-
 Kalemie
 -
 Kalungu
 -
 Rutana
 -
 Bukoba
 -
 Bailundo
 -
 Kirehe
 -
 Kajiado South
 -
 Vatomandry
 -
 Liranga
 -
 Opala
Opala -
 Rukungiri
 -
 Cassongue
Get Insights by email
A short digest of new Divisi articles. No email on quiet weeks.
Frequently asked questions
How do I grow cotton?
How to grow cotton: 150–210 days to maturity, 90 cm rows, 3–5 cm deep. Also called katoen, tit, thonje, coton, auduga, algodão, donje, pamba.
What is katoen in English?
Katoen is the Afrikaans name for cotton.
What is tit in English?
Tit is the Amharic name for cotton.
What is thonje in English?
Thonje is the Chichewa name for cotton.
What is coton in English?
Coton is the French name for cotton.
What is auduga in English?
Auduga is the Hausa name for cotton.
What is algodão in English?
Algodão is the Portuguese name for cotton.
What is donje in English?
Donje (also thonje) is the Shona name for cotton.
What is pamba in English?
Pamba is the Swahili name for cotton.
How long does cotton take to grow?
Cotton takes about 150–210 days from sowing to maturity, though the exact length varies with variety, temperature and how the season runs.
What spacing should I use for cotton?
Space cotton rows about 90 cm apart, with roughly 25 cm between plants within the row.
How deep should cotton be planted?
Sow cotton at about 3–5 cm deep. Shallower risks drying out; deeper wastes seed energy before the shoot reaches light.
What pests and diseases attack cotton?
The ones covered in this guide are Aphids, Bacterial blight, Boll rot. Each has its own page explaining how to identify, check for and control it.