 Divisi
How to grow cowpea
Vigna unguiculata · Fabaceae
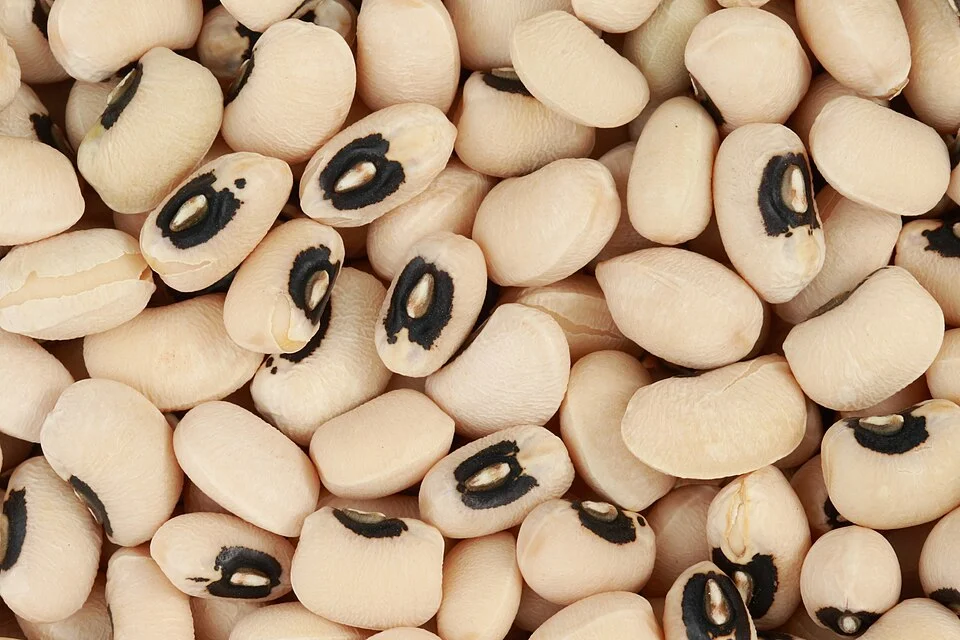
Photo: Toby Hudson · CC BY-SA 3.0
Cowpea (nyemba, kunde, niébé, black-eyed pea) is a tough, drought-beating legume for warm country. Give it a little phosphorus and it feeds itself — friendly bacteria on its roots pull nitrogen from the air, so it needs almost no nitrogen fertiliser and even leaves the soil richer for the next crop. One planting gives you three harvests: tender leaves to eat as relish from just two weeks, green pods soon after flowering, and dry grain — the black-eyed pea — at the end. It handles heat and dry spells better than almost any other pulse, but it lives or dies by two things: guarding the flowers and young pods from insects, and keeping the storage weevil out of the dry grain.
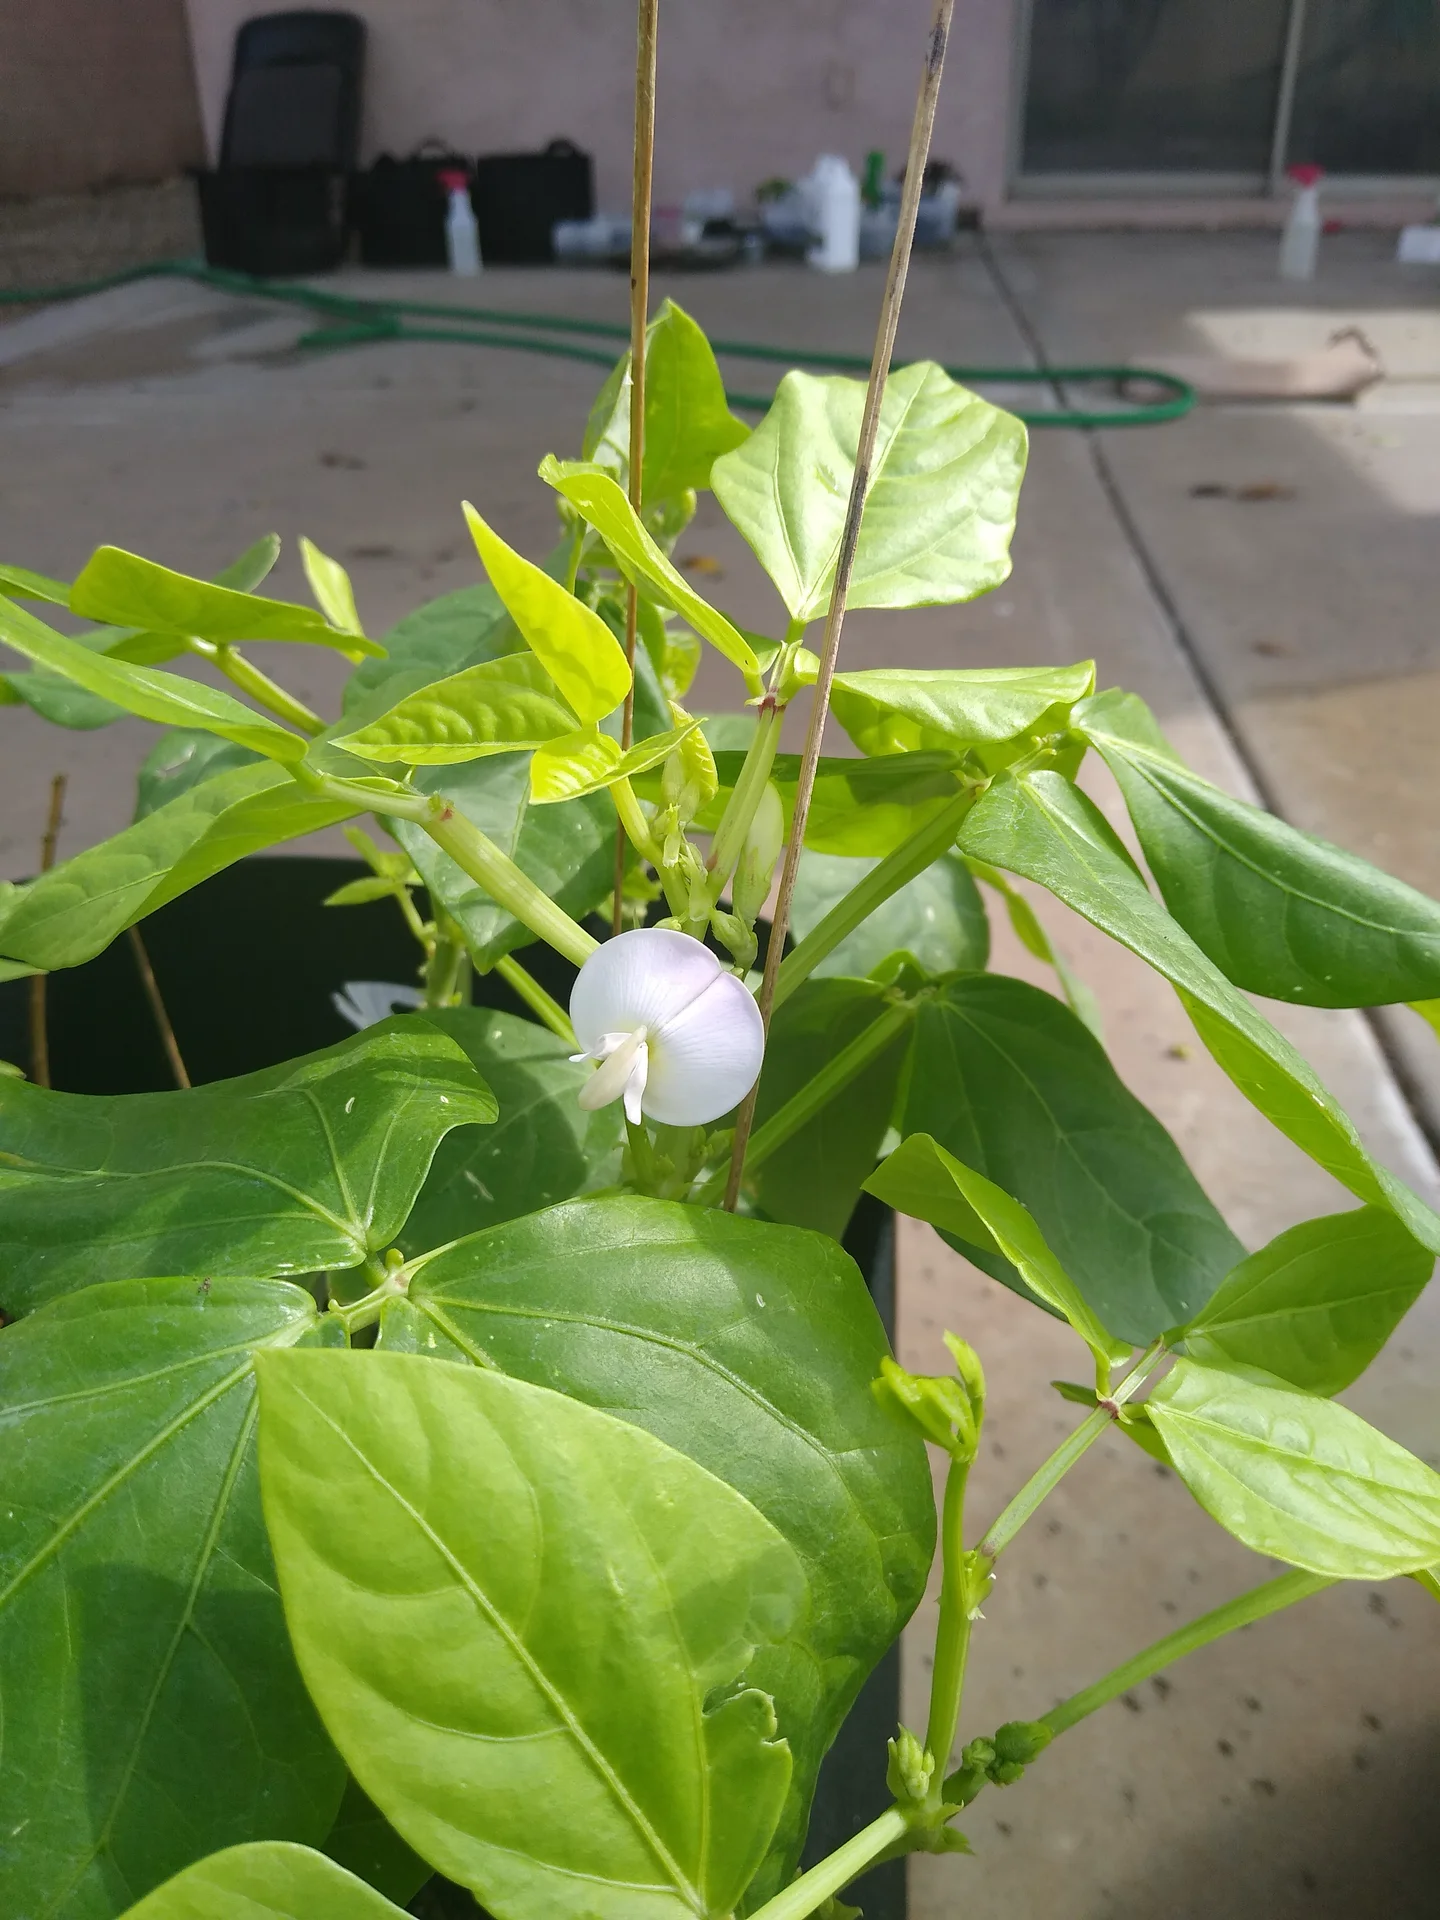
Prahlad balaji · CC BY-SA 4.0 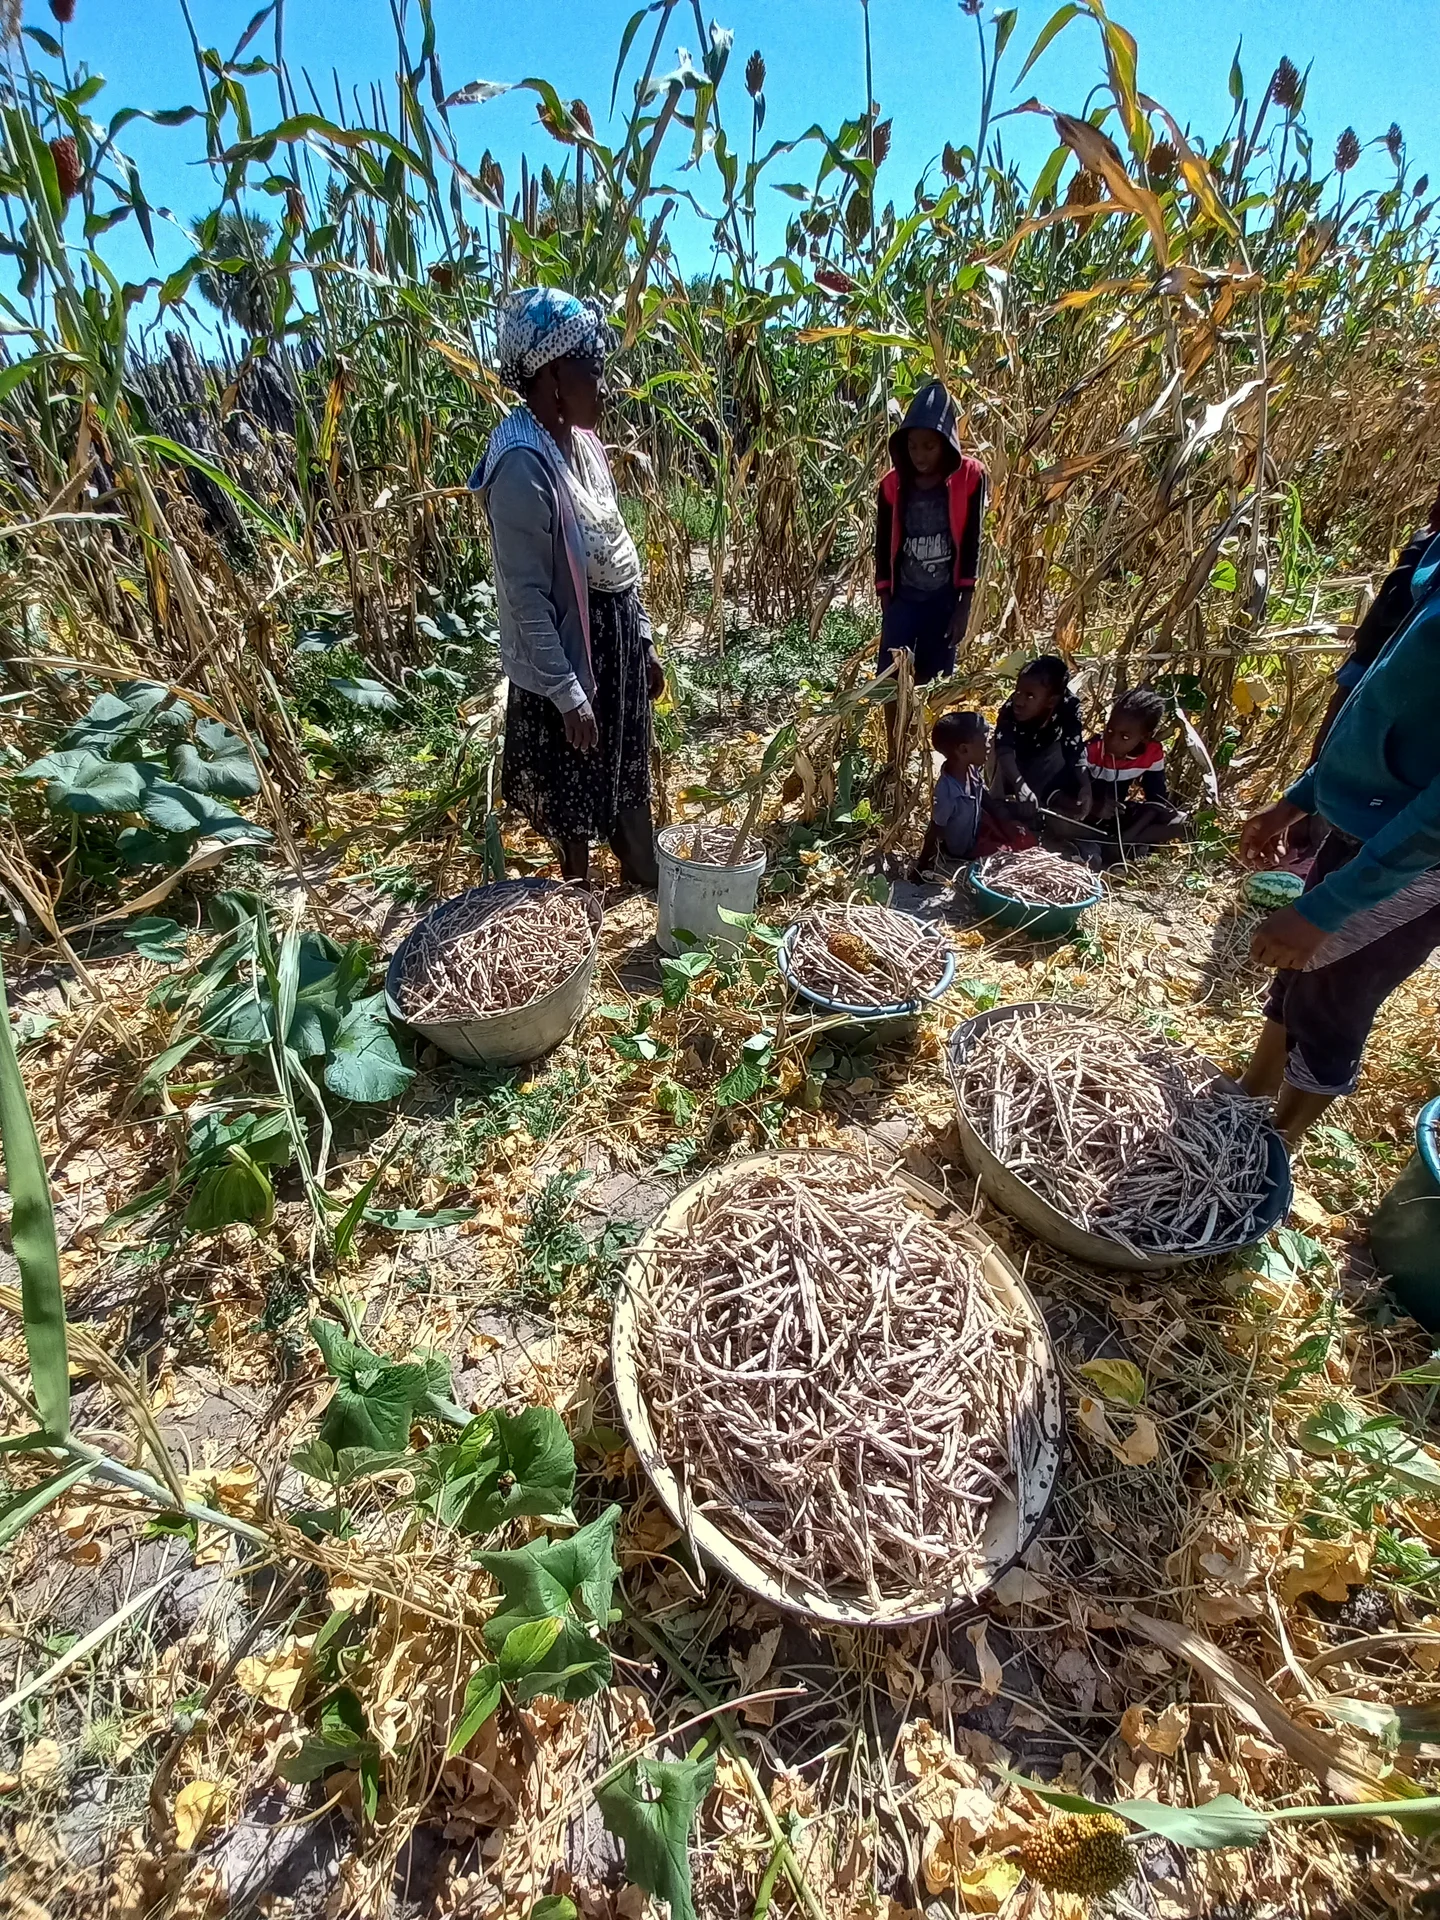
Shikoha Tautiko · CC BY-SA 4.0
- Days to maturity
- 60–120 days
- Row spacing
- 75 cm
- Plant spacing in the row
- 25 cm
- Sowing depth
- 2.5–3.8 cm
These are general figures for the crop, compiled from published agronomic references including FAO and CABI. The right choice for your field depends on your soil, rainfall and the yield you are aiming for.
Will cowpea actually do well on your field? Check your own field against every crop in the catalogue — no signup. Run the crop check →
Also known as
Cowpea is also called black-eyed pea, southern pea and crowder pea.
- English
- black-eyed pea, southern pea, crowder pea
- French
- niébé
- Hausa
- wake
- Igbo
- agwa
- Portuguese
- feijão-frade
- Sesotho
- nawa
- Setswana
- nawa
- Shona
- nyemba
- Swahili
- kunde
- Yoruba
- ewa
- Zulu
- indumba
Working in buckets, bags or paces? The farming glossary turns the measures growers actually use into kilograms and hectares — what a 20 litre bucket of each crop really weighs, and how to size a field by walking it — alongside the Shona, Swahili, Ndebele and Yoruba words used in the field. Open the glossary →
Growing cowpea, stage by stage
Your cowpea season, step by step — plant early into warm soil, feed the roots with phosphorus and let the plant make its own nitrogen, guard the flowers and pods through the make-or-break spray window, then dry and store the grain so the weevil can't touch it.
Get your field and inputs ready
Almost everything that decides your cowpea crop is set before the first seed goes in: clean certified seed, a little phosphorus fertiliser (not nitrogen — cowpea makes its own), inoculant for new land, and a well-drained seedbed. Plant early — early sowing is the single cheapest way to dodge the worst insect attacks later. Buy and prepare in the weeks before the rains so you can plant the moment a good rain falls.
Buy seed, basal P/K & inoculant Critical
Cowpea is a legume — it doesn't need nitrogen fertiliser, it makes its own. What it does need is clean certified seed (blight, anthracnose and mosaic virus ride inside dirty seed), a little phosphorus and potassium to grow strong roots and pods, and — on new land — inoculant, the friendly bacteria that let the roots pull nitrogen from the air. Buy early: the best varieties sell out, and you want everything in hand before the rains.
Buy certified seed from a registered dealer — a sealed, labelled bag with the variety name and this season's packing date. Clean seed is your cheapest insurance: blight, anthracnose and mosaic virus all travel inside dirty grain.
Choose a variety to match your rains and your plan — a quick (60–70 day) type where rains are short, a medium one where they last; an erect grain type for dry peas, or a spreading type for lots of leaves and pods to eat. Ask the dealer or check your recommendation.
Buy the basal fertiliser your recommendation gives — a phosphorus (P) and potassium (K) compound, such as single superphosphate or a low-nitrogen compound. Do not buy nitrogen top-dressing (urea or AN) the way you would for maize — cowpea makes its own nitrogen, and extra N just grows soft leaf and feeds aphids.
For new land, or a field that has never grown cowpea, groundnut or pigeonpea, ask for Bradyrhizobium inoculant — a small packet of living bacteria that lets the roots fix their own nitrogen. (Those three are cowpea-family legumes that carry the same friendly bacteria, so a field that grew them recently may already have it; a past common bean crop doesn't count, because bean uses a different bacteria.) Keep it cool and shaded, never in the sun or a hot pocket, and use it before its expiry date.
Store seed and fertiliser dry, off the floor, away from food, water and children. Keep the label and receipt in case the seed turns out poor.
- Do:
Rotate cowpea with cereals like maize or sorghum — it starves out cowpea Striga, root-knot nematode and the aphid-borne viruses that build up when you grow cowpea on the same land year after year.
- Do:
Use clean, certified seed — blight, anthracnose and mosaic virus all travel inside the seed, so cheap grain sold as seed can carry next season's disease.
- Tip:
Buying nitrogen top-dressing to 'push it along' — cowpea fixes its own nitrogen, and extra N grows leaf that draws aphids and gives you fewer pods.
- Watch out:
Keep the inoculant packet cool and shaded and check its expiry date — heat and sun kill the living bacteria, and dead inoculant does nothing.
Prepare a well-drained seedbed Recommended
Cowpea hates wet feet — standing water rots the seed, drowns the roots and stops the nitrogen-fixing nodules working. A loose, well-drained seedbed (sandy loam is perfect) lets rain soak away and gives the small seed firm, moist soil to sprout into.
In the week or two before you plant, clear weeds and old crop trash off the planting lines so the small seed meets clean, firm soil.
Loosen the soil about 15–20 cm — a spade's depth — so roots go down and water soaks in; cowpea's roots and nodules need air, not a hardpan.
Break the big clods to a fine crumb. Small cowpea seed dropped among big clods sits in air pockets and comes up patchy.
Make sure water can drain away. On flat or heavy land, plant on ridges or low mounds so the plants sit above any standing water. On a slope, work across the slope to catch the rain without waterlogging.
- Do:
Choose your lightest, best-draining field for cowpea — a sandy loam that never puddles is ideal.
- Tip:
Planting in a low, wet spot or a dambo that floods — waterlogging rots the seed and kills the root nodules that feed the crop.
Incorporate manure/compost Optional
Cowpea is a light feeder and makes its own nitrogen, so it needs little. But on poor, sandy soil a little well-rotted manure or compost helps the ground hold water and supplies the phosphorus and potassium cowpea does like. Fresh manure, though, burns young roots and brings weed seeds.
Use only well-rotted manure or compost — dark, crumbly, no strong smell. Skip this altogether on already-fertile land; cowpea needs very little.
Spread it thinly and evenly over the seedbed — a light dressing is plenty; too much rich manure grows leaf instead of pods.
Work it into the topsoil about 1–2 weeks before planting so it settles in with the soil.
- Tip:
Fresh, raw manure at planting — it scorches young roots and, being high in nitrogen, pushes leaf instead of pods on a crop that feeds itself.
- Watch out:
Wash your hands after handling manure.
Plant and set your stand
The stand you set now is the ceiling on your harvest — you cannot add plants later. Sow 2 seeds per hill, about one finger-joint deep, into warm soil, with the phosphorus fertiliser beside the seed and inoculant on it where you need it. Then the nitrogen-fixing partnership begins underground — and you guard the seedlings against aphids, which also carry mosaic virus.
Inoculate + sow + basal P/K Critical
This one job sets your whole crop — the plant population, the phosphorus that drives strong roots and pods, and the inoculant that lets cowpea feed itself with free nitrogen all season. Get the spacing, depth and seed-coating right here and the crop pays you back to harvest.
Plant into warm, moist soil — warmer than about 21 °C (the season's warm rains, not the first cold shower). Cowpea seed rots in cold, wet ground.
Inoculate where needed (new land, or land that hasn't grown cowpea, groundnut or pigeonpea): tip the Bradyrhizobium powder into a little clean water or thin sugar-water, stir it through the seed until every seed is coated dark, and keep the coated seed in the shade.
Plant the coated seed the same day — the bacteria are alive and die in sun and heat, so don't coat more seed than you'll sow today.
Drop 2 seeds per hill, about one finger-joint deep (2.5–3.8 cm) — a little deeper in dry sand so the seed reaches moisture, shallower in heavy, wet soil.
Space by the plant's habit: for erect grain types, a stride between rows (≈75 cm) and a hand-span between hills (about 25 cm); for spreading types, give them room — about two hand-spans between hills (about 50 cm) — so the vines don't choke each other.
Place the basal P/K — about one bottle-cap per hill — a hand's width (about 5 cm) to the SIDE of the seed and a little below, never touching it, or the fertiliser burns the sprout. Cover and firm the soil so the seed sits snug in moist earth.
- Do:
Sow into soil warmer than about 21 °C, and inoculate the seed just before sowing and plant it the same day — the nitrogen-fixing bacteria are alive and won't wait.
- Tip:
Letting the coated seed or the inoculant packet sit in the sun — heat kills the bacteria and you lose the free nitrogen.
- Watch out:
Keep the basal fertiliser out of the seed hole and off the seed itself — a hand's width to the side is close enough, touching is too close. Wash your hands after handling it.
Scout (aphids, damping-off, gaps) Recommended
The first two weeks decide your stand. Black cowpea aphids can swarm a seedling in days — and worse, they inject mosaic virus as they feed, a disease you cannot cure. Damping-off can rot seedlings off at the soil line. Catch it all early, while you can still gap-fill and still stop the aphids.
Walk the young crop twice a week. Look along the rows for gaps and for seedlings toppling over.
Check the shoot tips and the undersides of the first leaves for black aphid colonies — small, soft, shiny-black insects clustered on the stem, often with sticky honeydew and ants.
Watch for damping-off: seedlings that flop over with a dark, pinched, rotten patch right at the soil line, worst in the damp, crowded spots.
Look for mosaic virus: young leaves mottled light-and-dark green, puckered or curled. Pull out and destroy these plants at once — they are the source the aphids spread from.
Count the gaps (hills with no seedling up) so you know whether to gap-fill in the next few days.
Act at the first aphid colonies — a knock-back with soapy water or neem, or a selective aphicide on a bad patch — before they build up. If a whole patch damps off or the stand is thin → gap-fill or re-sow while the soil is still moist.
- Do:
Rogue out mottled, virus-sick plants the moment you see them — one sick plant is the seed-bed the aphids spread from.
- Watch out:
Damping-off loves wet, crowded, poorly-drained soil — thin doubled seedlings and improve drainage rather than reaching for a spray.
Gap-fill Recommended
Empty hills are empty of pods — every gap is a plant's worth of grain lost. In the first week or so you can still fill them; after that a late seedling is too far behind the others to ever catch up.
About a week after planting, walk the rows and find the hills where nothing came up.
While the soil is still moist and the crop is only a few days old, re-sow 2 fresh seeds (inoculated, if you inoculated the first sowing) into each blank hill.
Firm the soil over them so they sit in moist earth, and water them in if the top is drying.
If it is already two weeks or more since planting → leave the gaps. A seedling started that late stays small and shaded and gives almost nothing; don't waste the seed.
- Do:
Keep a little spare inoculated seed back at planting so you can gap-fill within days, not weeks.
Irrigate Recommended
Cowpea is drought-hardy once it's up, but the seed still needs steady moisture to sprout and the young roots are shallow. Even moisture now gives even emergence and a strong start — without drowning it, which cowpea hates.
Keep the topsoil just moist until the crop is up and established — moist, not wet. Push a finger in: water when the top few centimetres are dry.
Water little and often on sandy soils that dry fast; less on heavier soils.
Never leave water standing. Cowpea drowns and its root nodules die in a waterlogged field — drain any low spots.
- Tip:
Over-watering — cowpea needs far less than maize and rots in wet feet. When in doubt, water less.
Grow the frame and check the roots feed themselves
Now the plant builds leaves and — underground — its nitrogen-fixing nodules. Two jobs matter most: get the first weeding done early (weeds now cost you the most), and check the roots have made healthy nodules so the crop truly is feeding itself. Keep guarding against aphids and mosaic virus, and pull Striga before it seeds.
Scout (aphids, leaf feeders, virus) Critical
This is when you find out whether the nitrogen-fixing partnership actually took — and when aphids, mosaic virus and Striga can still be stopped cheaply. A few minutes twice a week keeps the leaf factory clean and the roots feeding the crop.
Walk the crop twice a week. Scan the shoot tips and leaf undersides for black aphid colonies and their sticky honeydew.
Look for mosaic virus — mottled, puckered, light-and-dark leaves. Pull and destroy sick plants; don't let them seed the aphids.
Check leaf colour. Healthy cowpea is a deep green. Evenly pale, yellow plants can mean the nodules aren't fixing nitrogen — dig one up to check.
Dig up one plant about 3–4 weeks after planting and look at the roots. Good nodules are round bumps that are pink or red inside when you cut one open — that colour means they are fixing nitrogen.
Watch for Striga (a small witchweed with purple-pink flowers) coming up near the cowpea, and for caterpillars and beetles chewing the young leaves.
Act at the thresholds: knock back aphid patches early, and hand-pull Striga before it flowers. Don't blanket-spray for a few chewed leaves — a healthy plant carries light leaf damage. If the nodules are white, grey or absent → fixation failed: give a light dose of nitrogen to carry the crop, and use fresh inoculant next season.
- Do:
Check nodulation about 3–4 weeks after planting — cut a nodule open; pink or red inside means it's fixing nitrogen, pale or empty means inoculation failed and the crop needs a little starter nitrogen.
- Tip:
Blanket-spraying the whole field for a few aphids — it kills the ladybirds and wasps that hold aphids down for free.
- Watch out:
A patch of evenly pale, stunted plants may be failed nodulation, not hunger for fertiliser — check the roots before you spend on nitrogen.
1st weeding (critical) Critical
Weeds in the first few weeks rob the young cowpea of water, light and the phosphorus you paid for, exactly when it is smallest and weakest. This first weeding is worth 10–30% of your yield — the cheapest yield you will ever gain.
Weed early — about 2–3 weeks after planting, before the weeds get taller than the cowpea.
Hoe shallowly between and along the rows. Cowpea's feeder roots and nodules sit close to the surface — deep hoeing near the plants cuts them.
Pull out Striga and any climbing weeds by hand, roots and all, before they flower and set seed.
In dry areas, leave the pulled weeds lying between the rows as a light mulch to hold moisture.
- Do:
Get this first weeding done on time even if you do nothing else — a clean field in the first few weeks matters more than any later job.
- Tip:
Deep, close hoeing — it slices the shallow roots and the nitrogen nodules and sets the plant back.
2nd weeding Recommended
A second flush of weeds will still steal from the crop until the leaves close over and shade the ground. Clearing them now keeps the field clean right into flowering, when the plant needs everything for buds and pods.
Weed again about 5 weeks after planting, before flowering starts.
On spreading types, work carefully — lift the trailing vines aside and hoe shallowly so you don't tear the runners or bury the shoots.
Once the crop closes its canopy and shades the ground, it smothers most new weeds itself — this is usually the last weeding you need.
- Do:
Finish weeding before the flowers open — tramping through and disturbing the crop during flowering knocks off flowers and young pods.
- Watch out:
Spreading vines hide the soil — part them gently to find and pull weeds rather than chopping blindly.
Protect the flowers — the make-or-break window
Buds and flowers now decide how many pods you get — and this is exactly when the three worst cowpea insects (thrips, Maruca pod borer and pod bugs) move in. From bud to full flower is the critical spray window: Spray 1 at bud initiation stops Maruca before it webs the flowers shut; Spray 2 at half-flowering hits the thrips. Keep the soil evenly moist — flowering is the most water-sensitive stage of the whole crop.
Scout (thrips in flowers, Maruca webbing, pod bugs) Critical
The buds and flowers are under attack from insects you can barely see — thrips inside the flower and Maruca caterpillars webbing and boring the buds shut. What you find here tells you exactly when to spray; miss it and the flowers drop without ever setting a pod.
Walk the crop every 2–3 days through budding and flowering — more often than at any other stage.
Open a few flowers and buds over your palm and tap them. Look for tiny dark slivers that crawl or jump — thrips — and judge roughly how many per flower.
Look for Maruca: flowers and buds webbed together with silk, a small pale caterpillar with dark spots boring inside, and browning buds that won't open.
Check the young shoots for lingering black aphids and their honeydew.
Write down what you find. This is the spray window, so act on it: spray if thrips are building in the flowers or you see the first Maruca webbing (see the spray tasks).
- Watch out:
The three worst insects — thrips, Maruca pod borer and pod-sucking bugs — all attack from bud through podding. This short window is where you win or lose the crop.
- Do:
Scout and spray in the cool of the morning when the flowers are open and the insects are inside them — and rotate chemical groups between sprays so pests don't grow resistant.
- Watch out:
Once Maruca has webbed itself inside a flower, spray can't reach it — you must hit it as the buds form, before the webbing.
Spray 1 — bud initiation Critical
This first spray is the most important of the season — worth 20–60% of your yield. It hits Maruca before the caterpillar webs the flowers shut and bores in where no spray can follow, plus the early thrips. Miss this window and the pods are lost before they ever form.
Time it at bud initiation — when the first flower buds appear, just before the flowers open (about 5 days before you expect flowering).
Measure the dose with the cap supplied and mix it into a full knapsack (15–20 L) of clean water — right dose, no guessing.
Spray to wet the buds and flowering shoots without dripping, in the cool of the morning when the flowers are open.
Dress for it: long-sleeved shirt, cover your nose and mouth, spray with the wind behind you, and keep children and animals away.
Respect the pre-harvest interval — wait the number of days on the label before you pick any leaves, green pods or grain. This matters most on cowpea, whose leaves and green pods you eat.
Wash yourself, your clothes and the sprayer afterwards. If Maruca webbing keeps appearing after this spray → rotate to a different chemical group for the next spray rather than repeat the same one.
- Do:
Spray at bud stage, before the flowers open and the webbing starts — timing beats dose for Maruca.
- Tip:
Spraying in the heat of the day or into the wind — you lose the chemical and dose yourself.
- Watch out:
Respect the days-to-harvest on the label before eating leaves or green pods — this crop goes straight to the pot.
Spray 2 — 50% flowering Critical
At full flowering the thrips are at their peak inside the open flowers, aborting them before they set pods — and thrips are best beaten right now. This second spray also keeps knocking back Maruca as more flowers open.
Time it at about half-flowering — when roughly 1 in 2 plants has open flowers (about a week after Spray 1).
Rotate to a different chemical group from Spray 1 so the pests don't build resistance. Measure with the cap into a full knapsack (15–20 L).
Spray to wet the open flowers and shoots in the cool of the morning, when thrips are active inside the flowers.
Wear long sleeves, cover your nose and mouth, spray with the wind behind you, keep people and animals off, and wash afterwards.
Respect the pre-harvest interval before picking leaves, green pods or grain. If thrips are still heavy in the flowers after this spray → check you sprayed in the morning with flowers open, and rotate the product again.
- Do:
Spray in the morning with the flowers open — thrips hide deep inside the flower and closed flowers shield them.
- Watch out:
Don't just repeat Spray 1's chemical — rotating groups is what stops resistance.
Irrigate through flowering Critical
Flowering is the most water-sensitive stage of the whole cowpea crop. Dry soil now makes the plant drop its flowers before they set pods — and dropped flowers are pods you'll never get. If you can water at only one stage, water now.
Keep the soil evenly moist right through budding and flowering — no swings from bone-dry to soaked.
Water every 5–7 days, more often in heat or on sandy soil.
Never let the crop wilt during flowering, even for a day — a check now costs you flowers and pods.
Still don't waterlog it — keep it moist and steady, not flooded.
- Watch out:
Flower-drop after a hot, dry spell is water stress — a bare, dry-soil flowering crop sheds the very flowers that make your pods.
Fill the pods and beat the pod bugs
The pods are set and filling with seed — this is where the weight and the quality come from. Now pod-sucking bugs move in to stab the tender young pods, shrivelling and staining the seed, while Maruca finishes off inside the pods. Spray 3 guards the young pods; keep the moisture coming through pod-fill, then ease off so the grain can dry down.
Scout (pod-sucking bugs) Critical
Young, tender pods (about a week old) are the pod bugs' favourite — they stab in and suck, leaving shrivelled, blotched, half-empty seed that won't sell or store. Catching them at the threshold tells you whether Spray 3 is worth it.
Walk the crop every 2–3 days through early podding.
Look on and around the young green pods for pod-sucking bugs — bigger brown or green shield- or stick-shaped bugs — and gently shake a plant over your hand to count how many drop.
Count bugs per metre of row. The action point is 2 or more bugs per metre.
Squeeze a few young pods — soft, flat, dimpled spots mean bugs have already fed and the seed inside is shrivelling.
Keep an eye out for Maruca still boring into pods, and for the first pods starting to dry.
If you count 2 or more pod bugs per metre of row → spray (Spray 3). Below that, keep scouting.
- Watch out:
Pod-sucking bugs do the most damage on tender, roughly 8-day-old pods — that's the window to protect.
- Do:
Scout in the early morning when the bugs are slow and easy to see and count.
Spray 3 — early podding Critical
This spray protects the seed you have already grown. It targets pod-sucking bugs on the tender young pods and mops up any Maruca still working in the pods — so the seed fills plump and clean instead of shrivelled and stained.
Spray at early podding when scouting shows 2 or more pod bugs per metre of row — don't spray on the calendar, spray on the count.
Rotate to a different chemical group again. Measure with the cap into a full knapsack (15–20 L).
Spray to wet the pods and podding shoots in the cool of the morning.
Cover your skin, nose and mouth, spray with the wind behind you, keep people and animals away, and wash afterwards.
Respect the pre-harvest interval — this is the strictest one, because green pods and grain are close to eating. Wait the label's days before you pick or harvest. If bugs return above threshold and you can't meet the interval → stop spraying and harvest the ready pods instead.
- Do:
Spray by the count (2+ bugs per metre), not the calendar — an unneeded spray costs money and kills the helpful insects.
- Watch out:
With harvest close, the days-to-harvest rule is tightest now — never eat or sell pods sprayed inside the waiting period.
Irrigate through pod-fill Recommended
Water during pod-fill puts the weight into the seed — steady moisture now means plump, full pods. Toward the end, though, easing off helps the grain dry down in the field for safe storage.
Keep watering every 5–7 days while the pods are filling and the leaves are still green.
As the lower pods turn from green to tan and the plant starts to yellow, reduce the water.
Stop watering once most pods are drying, so the grain dries down cleanly. (For a leaf or green-pod crop you keep picking, carry on watering instead — you're not drying grain.)
- Do:
Taper off the water as the pods colour up — a wet finish invites pod rot and seed that sprouts in the pod.
Harvest — grain, and leaves along the way
Cowpea gives you more than one harvest. Dry grain is ready when the pods turn from green to tan or brown and go dry and brittle — the seeds rattle inside; pick before the pods split and spill, because cowpea pods shatter easily. Since pods ripen unevenly, you'll usually pick in several passes over a couple of weeks — early types from about 60–70 days, medium types 90–125 days. For the leaf crop, pick young tender leaves from about 2–3 weeks onward (best around 50 days), and pick green pods about two weeks after flowering — always leaving enough leaf for the plant to keep growing.
Dry hard and store weevil-proof
The crop is grown — now don't feed it to the weevil. The cowpea storage weevil (bruchid) can destroy a whole store of grain, and it often starts from eggs already laid on the pods in the field. First dry the grain hard — to about 12–13% (seed near 8%), when a seed cracks rather than dents as you bite it — then thresh gently. Then store it weevil-proof: airtight PICS/hermetic bags (which suffocate the weevil), or solar-heat it (spread it on black plastic under a clear sheet until it reaches 52–65 °C to kill the eggs), or mix wood ash or dry sand through the grain to block the weevils. Check the store monthly for small round exit holes and dust.
Pests and diseases that attack cowpea
-
 Aphids
 -
 Asian soybean rust
 -
 Bacterial blight
 -
 Bean fly
 -
 Bollworm complex
 -
 Bruchids (bean and cowpea weevils)
 -
 Charcoal rot
 -
 Cowpea aphid
 -
 Cowpea mosaic virus
 -
 Fusarium wilt
 -
 Grasshoppers
 -
 Legume pod borer
 -
 Mungbean yellow mosaic virus
 -
 Pod-sucking bugs
 -
 Root rot
 -
 Striga (witchweed)
Where to sell cowpea
Markets that trade this crop — what each one sells it by, when supply peaks there, and the currency used.
-
 Dawanau International Grains Market
-
 Mile 12 Market
-
 Grand Marché de Bamako
-
 Konkomba Yam Market
-
 Onitsha Main Market
-
 Marché Arzèkè
-
 Marché Dantokpa
-
 Marché Katako
Grow cowpea with a plan, not a guess
This guide is the general answer. Divisi works out yours — the week to plant cowpea on your soil and your rainfall, and each job dated for your field.


When to plant cowpea, country by country
- When to plant cowpea in Algeria
- When to plant cowpea in Angola
- When to plant cowpea in Benin
- When to plant cowpea in Botswana
- When to plant cowpea in Burkina Faso
- When to plant cowpea in Burundi
- When to plant cowpea in Cabo Verde
- When to plant cowpea in Cameroon
- When to plant cowpea in Comores
- When to plant cowpea in Congo
- When to plant cowpea in Côte d'Ivoire
- When to plant cowpea in Egypt
- When to plant cowpea in Eritrea
- When to plant cowpea in Eswatini
- When to plant cowpea in Ethiopia
- When to plant cowpea in Gabon
- When to plant cowpea in Gambia
- When to plant cowpea in Ghana
- When to plant cowpea in Guinea Ecuatorial
- When to plant cowpea in Guinea-Bissau
- When to plant cowpea in Guinée
- When to plant cowpea in Kenya
- When to plant cowpea in Lesotho
- When to plant cowpea in Liberia
- When to plant cowpea in Libya
- When to plant cowpea in Madagascar
- When to plant cowpea in Malawi
- When to plant cowpea in Mali
- When to plant cowpea in Mauritanie
- When to plant cowpea in Mauritius
- When to plant cowpea in Morocco
- When to plant cowpea in Moçambique
- When to plant cowpea in Namibia
- When to plant cowpea in Niger
- When to plant cowpea in Nigeria
- When to plant cowpea in Rwanda
- When to plant cowpea in République centrafricaine
- When to plant cowpea in République démocratique du Congo
- When to plant cowpea in Sao Tome and Principe
- When to plant cowpea in Seychelles
- When to plant cowpea in Sierra Leone
- When to plant cowpea in Somalia
- When to plant cowpea in South Africa
- When to plant cowpea in South Sudan
- When to plant cowpea in Sudan
- When to plant cowpea in Sénégal
- When to plant cowpea in Tchad
- When to plant cowpea in Togo
- When to plant cowpea in Tunisie
- When to plant cowpea in Uganda
- When to plant cowpea in United Republic of Tanzania
- When to plant cowpea in Zambia
- When to plant cowpea in Zimbabwe
Where cowpea scores best
Districts where Divisi's engine currently rates this crop highest, ranked by fit.
-
 Bangui-Rapides
 -
 Mweka
Mweka -
 Garraway
 -
 Yala
Yala -
 Bukomansimbi
 -
 Etimboue
 -
 Igembe North
 -
 Saurimo
 -
 Achiase
 -
 Macenta
 -
 Dongou
 -
 Bubaque
Get Insights by email
A short digest of new Divisi articles. No email on quiet weeks.
Frequently asked questions
How do I grow cowpea?
How to grow cowpea: 60–120 days to maturity, 75 cm rows, 2.5–3.8 cm deep. Also called black-eyed pea, niébé, wake, agwa, feijão-frade, nawa, nyemba, kunde.
What is niébé in English?
Niébé is the French name for cowpea.
What is wake in English?
Wake is the Hausa name for cowpea.
What is agwa in English?
Agwa is the Igbo name for cowpea.
What is feijão-frade in English?
Feijão-frade is the Portuguese name for cowpea.
What is nawa in English?
Nawa is the Sesotho and Setswana name for cowpea.
What is nyemba in English?
Nyemba is the Shona name for cowpea.
What is kunde in English?
Kunde is the Swahili name for cowpea.
What is ewa in English?
Ewa is the Yoruba name for cowpea.
What is indumba in English?
Indumba is the Zulu name for cowpea.
How long does cowpea take to grow?
Cowpea takes about 60–120 days from sowing to maturity, though the exact length varies with variety, temperature and how the season runs.
What spacing should I use for cowpea?
Space cowpea rows about 75 cm apart, with roughly 25 cm between plants within the row.
How deep should cowpea be planted?
Sow cowpea at about 2.5–3.8 cm deep. Shallower risks drying out; deeper wastes seed energy before the shoot reaches light.
What pests and diseases attack cowpea?
The ones covered in this guide are Aphids, Asian soybean rust, Bacterial blight. Each has its own page explaining how to identify, check for and control it.