 Divisi
How to grow wheat
Triticum aestivum · Poaceae
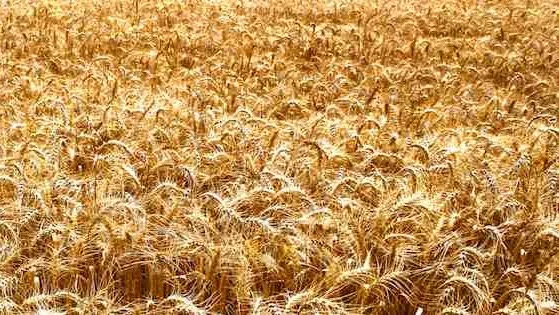
Photo: Yyanay · CC BY-SA 3.0
Wheat is a cool-season cereal — a grass grown for its grain, and in many ways a cousin of maize that loves the cold instead of the heat. In our region it does best in the cool highlands, or in the cool, dry season under irrigation, because heat is its enemy: a hot spell while the grain is filling leaves you with small, shrivelled seed. Its other great enemy is rust — a fungus that dusts orange-to-brown powder over the leaves and can eat a whole crop. You sow it straight into the ground from seed, with no nursery, and it feeds its own flowers, so unlike maize you never have to keep it away from other fields. Grow a rust-resistant variety, feed the nitrogen in splits rather than all at once, and keep water on it when the heads push out (heading), and it will reward you.
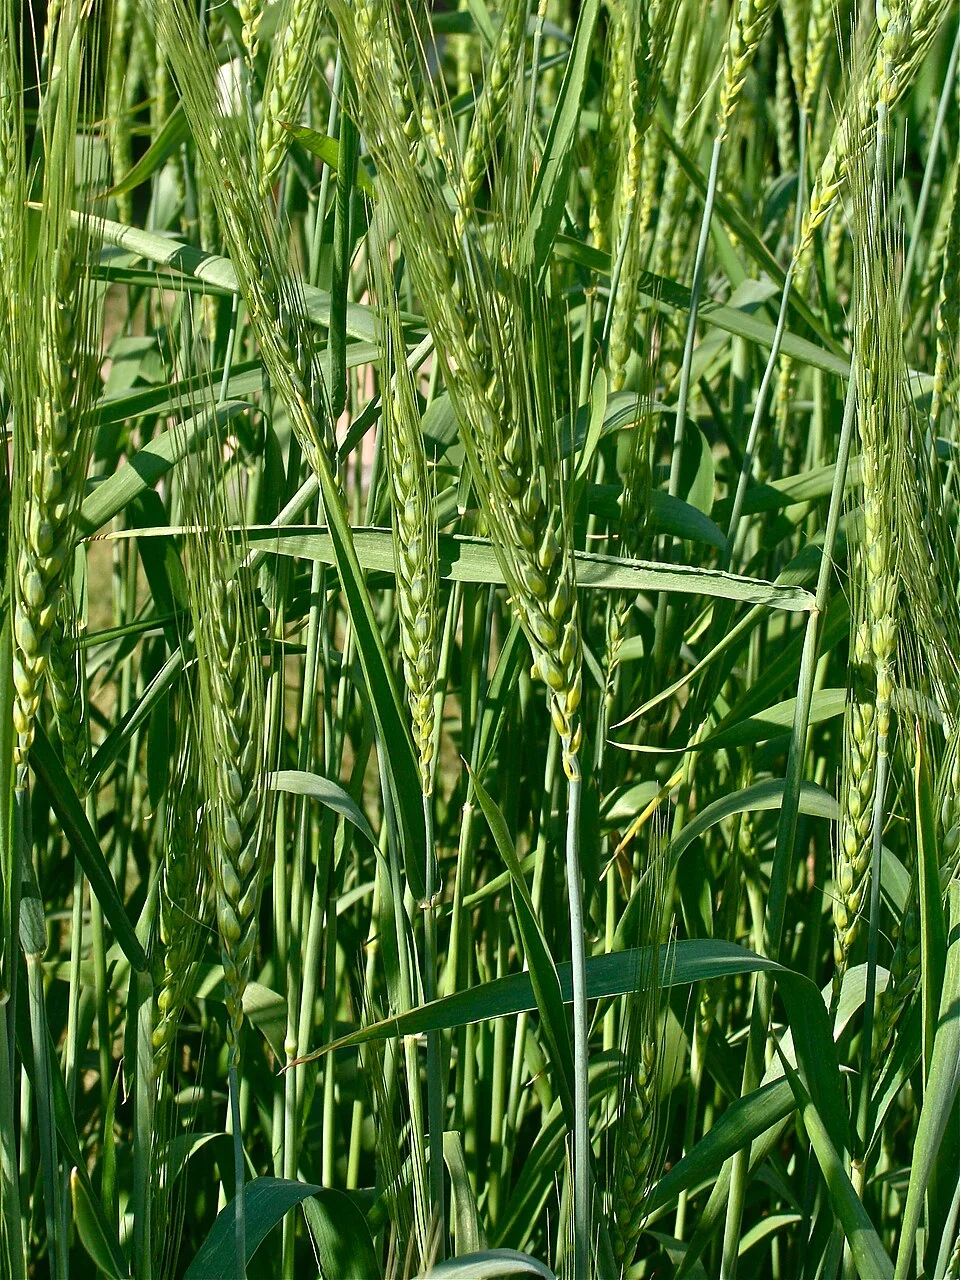
Jebulon · CC BY-SA 3.0 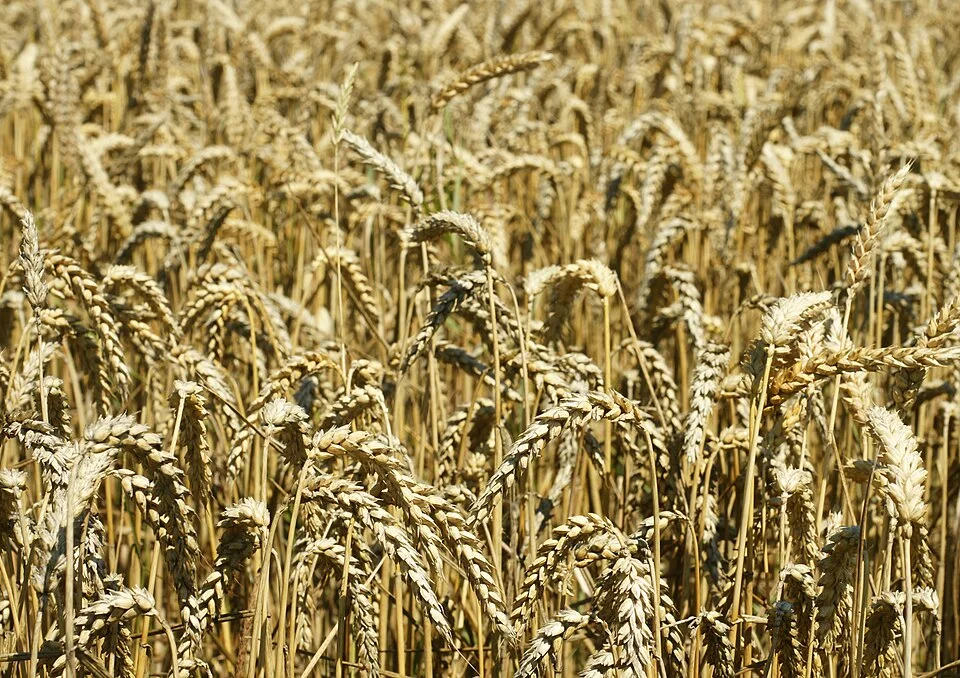
Hans Hillewaert · CC BY-SA 3.0
- Days to maturity
- 100–150 days
- Row spacing
- 20 cm
- Sowing depth
- 3–5 cm
These are general figures for the crop, compiled from published agronomic references including FAO and CABI. The right choice for your field depends on your soil, rainfall and the yield you are aiming for.
Will wheat actually do well on your field? Check your own field against every crop in the catalogue — no signup. Run the crop check →
Also known as
- Afrikaans
- koring
- Amharic
- ስንዴ (sinde)
- French
- blé
- Portuguese
- trigo
- Sesotho
- koro
- Setswana
- korong
- Shona
- gorosi
- Swahili
- ngano
Working in buckets, bags or paces? The farming glossary turns the measures growers actually use into kilograms and hectares — what a 20 litre bucket of each crop really weighs, and how to size a field by walking it — alongside the Shona, Swahili, Ndebele and Yoruba words used in the field. Open the glossary →
Growing wheat, stage by stage
Your wheat season, step by step — ready the field, sow a thick, even carpet, feed the nitrogen in splits, guard the flag leaf from rust at heading, and get the grain dry and sealed before heat, birds or weevils take their share.
Before you sow: ready the field and inputs
Most of your yield is won or lost before the first seed goes in. Pick a field where wheat did not grow last season (to starve the rust), work down a fine, firm, level bed, sweeten sour soil with lime, and buy a rust-resistant variety of clean, treated seed in good time. Get everything ready in the weeks before your sowing date so you can sow on time — wheat lives or dies by hitting its cool window.
Plan the field / rotation Recommended
Rust and leaf-spot fungus survive between seasons on living wheat — a 'green bridge' (a living link the disease walks across from last crop to this one). Sowing wheat where wheat or barley grew last season hands the disease a running start. Moving to a fresh field breaks that bridge, and it costs you nothing.
In the two months before you sow, pick a field where wheat or barley did not grow last season — better still, not for two seasons. A break crop like beans, peas or an oilseed, or a clean, well-weeded fallow, starves the rust and the root diseases.
Clear out any volunteer wheat — self-sown plants that sprang up from grain spilled at last harvest — in and around the field. These keep rust and aphids alive between crops.
Follow wheat with a legume (beans, peas, lentils) where you can — it breaks the disease cycle and leaves some nitrogen in the soil, so you feed a little less.
If you have no choice but to grow wheat on the same land again, at least switch to a different, resistant variety and be ready to spray — repeat wheat is where rust builds up worst.
- Do:
Follow wheat with beans or peas — it breaks the disease cycle and puts nitrogen back into the soil.
- Tip:
Wheat after wheat on the same field two years running — rust and root-rot build up until they cost you the crop.
Buy rust-resistant seed + basal fertiliser Critical
The rust-resistant variety is your single biggest weapon — a resistant crop shrugs off a rust attack that would flatten a non-resistant one, and it is far cheaper than spraying your way out of trouble. Buy clean, certified, fungicide-treated seed too: untreated seed can carry loose smut, a fungus that turns whole heads into black dust instead of grain. And buy early — good varieties sell out, and you want everything in hand to sow on your cool-window date.
Ask your extension officer or dealer for the variety that resists the rusts in your area right now — rusts keep changing, so this season's best variety may differ from last year's. This one choice matters more than any spray.
Buy certified seed in a sealed, labelled bag showing the variety name and this season's packing date — not grain scooped loose from a sack, which is often old, mixed or untreated.
Choose fungicide-treated seed (the grains are usually dyed a bright colour). The dressing stops loose smut — the fungus that would turn whole heads into black powder instead of grain at heading — and gives the seedlings a clean start.
Buy your basal fertiliser at the same time. Wheat is a hungry crop that responds to phosphorus (P) and sulphur (S) as well as nitrogen (N), so pick a compound that supplies P (and some S), plus a nitrogen fertiliser for the top-dressings. Your recommendation gives the amounts for your field.
Store seed and fertiliser dry, off the floor, away from food, water and children. Keep the label and receipt in case the seed turns out poor.
- Do:
Buy treated (coloured) seed in a sealed, labelled bag — it is clean of smut and true to variety.
- Tip:
Eating treated seed or feeding it to animals — the coloured dressing is poison. It is for sowing only.
- Watch out:
Match the variety to today's rust — ask locally which one is holding up this season, because rust keeps changing.
Prepare a fine, firm, level seedbed Recommended
Wheat seed is small and sown shallow, so it needs a fine, firm, level bed with soil pressed snugly around each seed to sprout evenly. A rough, cloddy or hollow bed gives patchy emergence, uneven ripening and a weedy crop — and wheat, sown thick, cannot be gap-filled plant by plant later.
In the month before sowing, plough or dig to loosen the soil about 10–15 cm deep — roughly a spade-blade — so roots go down and water soaks in. Wheat does not need a deep-dug bed like a root crop; it needs a fine, even one.
Break the clods to a fine, crumbly tilth (soil broken down into small, even crumbs) — lumps the size of your fist leave air pockets where small wheat seed dries out and fails.
Level the surface with a rake, board or branch drag so water spreads evenly and the seed all goes in at one depth — even depth gives even emergence and even ripening.
Firm the bed (a light roll, or tread it down) so it is settled, not fluffy. Seed drilled into loose, fluffy soil sits in air pockets and comes up in patches. On a slope, work across the slope to hold the soil and the rain.
- Do:
Aim for a fine, firm, level bed — small seed and shallow sowing need smooth, settled ground.
- Tip:
A cloddy or freshly-fluffed bed at sowing — the seed lands at all depths and comes up ragged.
Apply lime (if acid) + basal P Recommended
In sour (acid) soil, wheat roots cannot pull up the fertiliser you buy — you pay for food the crop cannot eat, and the plants sit yellow and stunted. Lime sweetens the soil, but it works slowly, so it must go on 2–3 months before sowing to help this crop. At the same time, phosphorus (P) placed early builds strong roots and plenty of tillers (side-shoots) — wheat is very responsive to P.
Only lime if a soil test — or past crops that stayed yellow and stunted even with fertiliser — says your soil is sour. Wheat likes soil that is neither sour nor chalky. Your recommendation gives the amount for your field.
Spread the lime evenly over the whole field, like sprinkling flour by hand as you walk — patches give patchy results — then work it into the topsoil with a hoe or plough. Lime only helps the soil it is mixed into; left on top it does almost nothing.
Do the liming 2–3 months before you sow (about 2 weeks before at the very latest). Lime is slow, so late liming will not help this season's crop.
Work the basal phosphorus (and any sulphur) into the root zone as you prepare the bed, so it is down where the young roots will find it before the seed goes in. Keep lime and fertiliser a few weeks apart, not on the same day.
- Do:
Lime early — 2–3 months ahead — because it needs time and rain to sweeten the soil.
- Watch out:
Wash your hands after handling lime, and keep the dust out of your eyes and off your skin.
Sow and get a thick, even stand
The plants you get up now set the ceiling on your harvest. Wheat is sown thick — a dense carpet, not spaced stations like maize — so you cannot add plants later or fill gaps one by one. Drill clean, treated seed 3–5 cm deep into a firm, moist bed with the basal fertiliser, aim for a full, even carpet of seedlings, and keep the bed moist until the crop is up (about 7–10 days).
Drill seed + basal P & starter N Critical
A thick, even stand is the foundation of a wheat crop — too thin and weeds move in and yield drops; too deep and the seed never reaches the light. Getting the depth, seed rate and moisture right on sowing day pays back all season, and you get only one chance at it.
Sow on your planting date into a firm, moist bed. Wheat's whole season is timed so the grain fills before the heat comes, so do not sow late. If rain-fed, sow into good moisture; if irrigating, water the bed first.
Drill or place the seed 3–5 cm deep — about one finger-joint — in rows 15–25 cm apart (about a hand-span, ≈20 cm). Even depth and spacing give even emergence and ripening.
Sow thick: about 100–125 kg of seed per hectare, aiming for a dense stand of roughly 200–300 plants per square metre — a closed green carpet, not spaced plants. Along the row the seed should fall roughly a finger-width (≈2 cm) apart.
Place the basal phosphorus and a little starter nitrogen with the seed as you drill, to feed the young roots. Keep back most of the nitrogen for the top-dressings — a quarter now at sowing, half at tillering, a quarter at booting — so rain does not wash it away.
Cover and firm the soil over the seed so it sits snugly in moist earth. A firm bed and good seed-to-soil contact give strong, even emergence in about 7–10 days.
- Do:
Sow on time and sow thick — an even, dense carpet shades out weeds and carries the yield.
- Tip:
Sowing deeper than about 5 cm (one finger-joint) — the shoot runs out of food before it reaches the light and the stand comes up thin.
- Watch out:
Keep the starter fertiliser mixed along the drill row, not heaped on the seed, and wash your hands after handling it.
Scout emergence, aphids, cutworms Recommended
The first two to three weeks decide your stand. Aphids can move onto the young leaves (and carry a yellowing virus), and cutworms can chop seedlings off at the ground overnight. A few minutes every few days lets you catch trouble while you can still act.
Starting about a week after you sow (as the shoots break ground), walk the field every 3–4 days in a large 'W' so you cover the corners and the middle, not just the edge by the path.
Check that the seedlings are coming up evenly along the rows in a thickening green haze, and note any long bare runs where the drill blocked or the seed failed.
Aphids: look for small, soft green or black insects clustered on the young leaves and stems, with sticky, shiny 'honeydew' (their sugary droppings) where they feed. A few are normal; dense colonies on a small crop need watching.
Cutworms: look for young shoots cut clean off at ground level (worst in the morning). Scratch the soil nearby to find the fat, grey, curled caterpillar.
Note what you see and where, so you know whether the stand is thickening well and whether any pest is spreading.
- Watch out:
A thin, ragged line of seedlings now is your early warning — check the stand and decide on re-sowing while the sowing window is still open.
Check the stand Recommended
A thin or gappy stand caps your yield and lets weeds in — and because wheat is sown thick, you can only fix it by re-sowing while the window is still open, never plant by plant. Ten minutes now tells you whether this stand will carry the season.
About 10–16 days after sowing, when the seedlings are up, walk the rows and look along them: a good stand is an even, thickening carpet of green with few bare stretches.
Judge roughly what share of the row has filled in. A rule of thumb: if about 8 in 10 (80%) or more of the row is well covered, that is a good stand — carry on.
Look for the cause of any thin patches — seed too deep, a dry or cloddy bed, a blocked drill, cutworms — so you can put it right if you re-sow.
If it fails — the stand is below about 80%, with long bare runs → re-sow the bare patches (or the whole field) now, while there is still time in your sowing window. A thin wheat stand cannot be gap-filled plant by plant later.
- Do:
Judge the whole field in a 'W', not just the good strip along the edge by the gate — the edge is often the best part and flatters the rest.
Irrigate — keep the seedbed moist Recommended
Young wheat roots are shallow and dry out fast. Steady moisture from sowing until the crop is up gives even emergence and a strong, uniform carpet — the base of everything that follows. Wheat's water need is low at this stage, so water lightly and often, not heavily.
Keep the seedbed moist (not waterlogged) from sowing until the crop is fully up — water every 5–7 days, more often on sandy soils and in dry heat.
Water gently so you do not wash the shallow seed out or cake the surface into a crust the young shoots cannot push through.
Check by pushing a finger in: water when the top few centimetres are dry. Wheat hates sitting in water, so drain any low spots.
- Tip:
Flooding a young wheat crop — waterlogged roots starve of air and the seedlings yellow and die. Keep it moist, not swamped.
Tillering — feed it and keep it clean
Now each plant sends up tillers — side-shoots from its base — and each strong tiller can carry its own head of grain, so this stage sets how many heads your crop will have. Two things matter most: the first big nitrogen feed at tillering (the crop's hungriest moment), and keeping the field weed-free through the early weeks. This is also when the first rust usually shows, so start looking closely.
1st N top-dress (tillering) Recommended
Tillering — about 4–5 weeks after sowing — is when wheat is hungriest for nitrogen and is deciding how many heads to carry, so this is the feed that drives both yield and grain protein. Splitting the nitrogen (a quarter at sowing, half now, a quarter at booting) means less is washed away by rain and more reaches the crop — worth 10–25%.
Top-dress when the crop is tillering — about 4–5 weeks after sowing — when you can see side-shoots coming from the base of the plants.
Scatter (broadcast) the nitrogen evenly over the whole crop, walking at a steady pace and sweeping it out by the handful like feeding chickens. Wheat is a dense carpet, so you feed the field, not each plant. Your recommendation gives the amount.
Feed onto a moist crop, just before rain or irrigation, so the fertiliser washes in instead of gassing off into the air and going to waste. Using sulphate of ammonia for some of the nitrogen also supplies the sulphur (S) wheat needs.
Spread it when the leaves are dry, and do not heap it — fertiliser grains sitting on wet leaves scorch them. Wash your hands afterwards, and keep it off food and water.
- Tip:
Dumping all the nitrogen on at once — a heavy rain washes it straight past the roots, and too much at once makes the crop tall and soft so it lodges (falls flat). Split it.
- Do:
Feed just before rain or irrigation so the nitrogen soaks in and is not lost to the air.
Weeding (critical) Critical
In the first few weeks (roughly 3–5 weeks after sowing) weeds steal the water, light and fertiliser you paid for, exactly when young wheat is least able to fight back. A thick wheat stand shades out weeds later, but early on it cannot — so a clean field now is one of the cheapest slices of yield you will ever gain.
Weed by about 3–5 weeks after sowing, before the weeds grow taller than the wheat, and just before you top-dress so the nitrogen feeds the crop and not the weeds.
In a thick, drilled crop you usually hand-pull, or hoe very shallowly between the rows — deep hoeing tears the wheat's own shallow roots.
Get out the strong-growing weeds first — wild oats, ryegrass and broadleaf weeds — because these rob the most and can shelter rust and aphids.
In dry areas, leave the pulled weeds lying between the rows as a light mulch (a soil cover that holds in moisture).
- Do:
Weed early and time it just before the nitrogen feed — a clean crop in the first weeks pays back most.
- Tip:
Deep hoeing close to the plants — you cut the shallow wheat roots you are trying to feed.
Scout rusts starting, aphids Critical
This is when rust usually first appears, and rust is wheat's number-one disease — it can strip the leaves that feed the grain. Catching the first few spots early means a single well-timed spray can save the crop; miss it and rust explodes across the field. Aphids build up now too.
From about 3 weeks after sowing, walk the field every 3–4 days in a 'W', and look closely at the leaves of about 10 plants at several stops — turn leaves over and check the lower, older ones.
Rust shows as small powdery blisters (pustules) that rub off as coloured dust on your finger. Learn the three: stem rust — reddish-brown, brick-red blisters on stems and leaves; yellow (stripe) rust — yellow-orange dust in stripes along the veins, in cool weather; leaf (brown) rust — orange-brown round spots scattered on the upper leaf.
Rub a leaf with your thumb: if it comes away orange, yellow or rusty-brown, rust is starting — note where and how much.
Aphids: look again for clusters of small green or black insects on leaves and stems with sticky honeydew; heavy numbers can spread a yellowing virus.
If rust is starting on a non-resistant variety, act — this is the very moment the flag-leaf fungicide is aimed at. Note anything over threshold and open the matching guide.
- Watch out:
Yellow (stripe) rust loves cool, moist weather and heavy dew — after a run of cool, damp days, look harder for yellow dust in lines along the leaves.
- Do:
Check the lower, older leaves and shaded patches first — rust and aphids start there before spreading up.
Irrigate at early tillering Recommended
Steady water through tillering keeps the crop building tillers and leaves — the frame that will carry the heads. Do not let it wilt now, but wheat's need is still only moderate here; the big thirst comes at heading (when the heads push out).
Water every 7–10 days through tillering, depending on heat and soil — enough to keep the crop growing without wilting.
A good watering at early tillering in a dry spell helps the crop set plenty of head-bearing tillers.
Check the soil with a finger before watering; wheat still dislikes waterlogging, so do not over-water — save the heaviest watering for booting and flowering.
- Do:
Keep water steady through tillering, but hold your biggest effort for the booting-to-flowering window, when it counts most.
Booting to flowering — protect the head
The head forms, pushes out and flowers now — the make-or-break stage. It is the crop's thirstiest moment, the time heat does the most damage, and the window to protect the flag leaf from rust. The flag leaf — the last, top leaf below the head — makes most of the grain's food, so keeping it green and rust-free here is worth more than anything else you do. Put on the final nitrogen at booting (when the head swells inside the top leaf, like a foot inside a boot) and keep the water coming.
Flag-leaf fungicide Critical
The flag leaf — the last leaf below the head — and the head itself make most of the grain's food. One well-timed fungicide here, protecting that flag leaf from rust through flowering, is the highest-payback spray of the season — worth 10–40% of your yield on a crop under rust pressure. Miss the window and rust eats the very leaf that fills your grain.
Time the spray to flag-leaf emergence through heading — about 8–10 weeks after sowing — when the top leaf is fully out and the head is pushing up. This one timing protects the leaf that matters most.
Spray at the first rust pustules (blisters) on a non-resistant variety (or as soon as stripe rust reaches a few spots per plant) — do not wait for it to spread. A fully resistant variety may need no spray at all; your scouting tells you.
Choose a fungicide that both kills the rust already there and protects the new growth (a systemic — one that moves inside the plant — mixed with a protectant that shields the leaf surface), and mix and measure it strictly to the label — more is not better.
Spray to wet the leaves all over without dripping, aiming at the flag leaf and the head. Spray in the cool of morning or evening, with the wind behind you so the mist blows away from your face.
Cover your skin, eyes, nose and mouth, keep other people, food and animals out of the field, and respect the pre-harvest interval — the number of days the label says you must wait between spraying and harvest so the chemical breaks down. Wash yourself and your clothes afterwards.
- Do:
Aim the spray at the flag leaf and the head — that is the food factory for the grain you are protecting.
- Watch out:
Spray early — the first few rust spots are the signal. Once rust covers the leaves, spraying cannot undo the damage already done.
- Tip:
Spraying in the heat of the day, into the wind, or ignoring the pre-harvest interval — you poison yourself or leave chemical in the grain.
Final N top-dress (booting) Recommended
The last quarter of the nitrogen, put on at booting (when the head is swelling inside the top leaf sheath, like a foot inside a boot — about 8–9 weeks after sowing), keeps the flag leaf green through grain fill and lifts the grain's protein, which buyers pay for. After flowering it is too late — the grain can no longer use it.
Apply at booting — about 8–9 weeks after sowing — as the head swells inside the top leaf sheath, just before it pushes out.
Broadcast it evenly over the whole crop onto moist soil, just before rain or irrigation so it washes in. This is the final nitrogen of the season — none after flowering.
Keep the dose modest — this feed is for grain filling and protein, not more growth. Too much late nitrogen makes the crop soft and prone to lodging (falling flat).
Spread it when the leaves are dry, keep it off food and water, and wash your hands afterwards.
- Tip:
A heavy late nitrogen feed — it will not add grain, but it can flatten the crop and delay ripening.
- Watch out:
If the crop already looks lush, dark and tall, go light here — lush wheat lodges.
Irrigate at booting & flowering Critical
This is the most important water of the whole season. Wheat's thirst peaks at booting, heading and flowering, and dry soil or heat now sets fewer, smaller grains — a hit you can never recover. If you can water well at only one stage, water now.
Keep the soil moist right through booting, heading and flowering — about 8–12 weeks after sowing. Never let the crop wilt at this stage, even for a day.
Water every 7–10 days, and more often in a hot, dry spell — heat plus dry soil at flowering is the single worst thing for wheat.
Water in the cool of morning or evening to lose less to evaporation, and wet the full root depth, not just the surface.
- Watch out:
Heat and dry soil at flowering shrivel the grain more than any other stress — this watering outranks every other.
- Do:
If water is short, save it for this window — booting to flowering beats both establishment and ripening.
Scout rusts, head blight risk Critical
Rust is still your top threat right through flowering — and now fusarium head blight can strike the heads if the weather is warm and wet at flowering, making a hidden poison in the grain. Watching closely now guards the flag leaf and head that carry your yield.
Keep walking the 'W' every 3–4 days from about 8 to 12 weeks after sowing, checking the flag leaf and the head on about 10 plants at several stops.
Rust: keep rubbing leaves for orange, yellow or brown dust — rust on the flag leaf now hits yield hardest. This is exactly what the flag-leaf fungicide defends.
Fusarium head blight (head scab): in warm, damp weather at flowering, look for bleached, straw-white spikelets (the little grain-bearing pods on the head) on an otherwise green head, sometimes with a pink or salmon tinge at the base. It leaves a mycotoxin — a hidden natural poison in the grain — so mark badly affected patches to keep them separate at harvest.
Check that the heads are filling evenly, and after wind or storms look for lodged (fallen or leaning) plants.
If rust or head blight is spreading, act on the matching guide — for head blight, a spray timed at early flowering is the only real window.
- Watch out:
Warm plus wet at flowering is the danger sign for head blight — that weather is when to look hardest at the heads.
Fill the grain and beat the heat
The grains fill with starch and harden — this is where the weight of your harvest is made. Heat and drought here are the single biggest yield-killer: they shrivel the grain into light, pinched seed. Most of that filling comes from the flag leaf, so keep it green as long as you can — water through early fill, then taper off. Guard against late rust, armyworm and birds, which all eat into grain you have already grown.
Scout late rust, armyworm, birds Recommended
In the last weeks the enemies go after the grain itself: late rust on the flag leaf, armyworm caterpillars stripping the leaves, and birds (quelea) tearing into the ripening heads. Spotting them early lets you protect or harvest the affected part before it is lost.
From about 12 weeks after sowing until harvest, walk the crop once a week and look over the standing heads and leaves.
Late rust: keep checking the flag leaf for fresh orange-brown pustules (blisters) — late rust still robs grain weight while the leaves are green.
Armyworm: look for green-to-dark striped caterpillars chewing the leaves, often arriving in numbers overnight and leaving ragged, stripped foliage. Search low in the crop by day, when they hide.
Birds (quelea — small birds that come in huge flocks): watch the field edges for flocks stripping grain from the heads — they can clear patches fast as the grain hardens. Emptied, torn spikelets and droppings are the signs.
If armyworm is stripping leaves or birds are hitting hard, act — scare or protect the crop, and if the grain is nearly hard, bring the harvest forward rather than feed the birds.
- Watch out:
Bird damage starts at the edges and on early-ripening patches — that is where to look, and where to scare them from first.
- Do:
Once the grain is hard, get it off the field promptly — every extra day standing feeds birds and risks shatter (heads breaking and dropping grain).
Irrigate through early fill, then taper Recommended
Early grain fill still needs water to pack weight into the grain while the leaves are green — but as the crop ripens you must ease off, then stop, so it can dry down in the field for a clean, safe harvest. Water too long and you delay drying and invite disease; cut off too early and you starve the filling grain.
Keep watering every 7–10 days through early grain fill (about 12–18 weeks after sowing), while the leaves and heads are still green and the grain is soft and milky.
As the lower leaves and heads turn from green to gold and the grain firms up, reduce the watering.
Stop watering once the crop is turning golden all over and the grain is going hard, so it can dry down in the field for harvest.
- Do:
Water through early fill for grain weight, then taper as it turns gold so it dries evenly.
- Tip:
Watering right up to harvest — it delays dry-down, encourages late disease, and can make the ripe crop lodge (fall flat).
Check maturity Recommended
This check is your go signal for harvest. Cut too early and the grain is soft and shrivels in store; wait too long and ripe heads shatter (break and drop their grain), or birds and a late rain that sprouts (re-germinates) the grain in the head rob you. Reading ripeness right protects the whole crop at the finish line.
From about 130–150 days after sowing, check the crop: it is ripe when the whole plant is golden or straw-coloured — no green left in the heads or stems.
Pick a few grains and press with a thumbnail: ripe grain is hard — your nail cannot dent it, and it cracks rather than squashes. Soft, doughy grain that dents is not ready.
When the whole field is golden and the grain is hard, it has reached full ripeness (physiological maturity — the grain has stopped filling and needs no more water) and is ready to cut and thresh.
If it fails — you still see green in the heads or stems, or the grain still dents under your nail → it is not ready; wait a few days and check again. But if storms, birds or shattering threaten, cut now rather than lose it.
- Watch out:
Ripe wheat waits for no one — once it is golden and hard, harvest promptly before it shatters or sprouts.
Harvest
Cut at full ripeness — the whole plant golden and the grain hard (a bite cracks it, does not dent it) — and get the crop in promptly. Every extra day the ripe crop stands, you risk losing grain to shatter (heads breaking and dropping grain), sprouting after rain, and birds.
Cut and thresh (or combine) Critical
Harvest is the payoff — but ripe wheat is fragile. Cut and thresh promptly at hard-ripe to beat shatter (heads breaking and dropping grain), bird loss and a rain that sprouts the grain in the head. Threshing clean and at the right dryness keeps the grain whole and sellable.
Harvest when the crop is hard-ripe — golden all over and the grain cracks (not dents) under a bite or thumbnail — about 130–150 days after sowing. Do not leave a ripe crop standing.
Cut the crop (by hand with a sickle, or by combine if you have one), ideally in the cool of morning when the heads are less brittle, so fewer heads shatter and drop grain.
If cutting by hand, stook or stack the cut wheat (stand the tied bundles up in the field) to finish drying for a few days if needed, then thresh — beat, tread or machine the grain free of the heads over a tarpaulin or clean floor, not bare earth.
Winnow the grain — pour it slowly in a breeze so the light chaff and straw blow away and the heavy clean grain drops into your container — aiming to bag it at about 13–14% moisture (hard, cracking grain). Get the harvest under cover before any rain.
- Do:
Cut in the cool of the morning — ripe heads are brittle in the midday heat and shatter more, spilling grain on the ground.
- Tip:
Threshing or heaping the grain on bare ground — it picks up damp, stones, soil and mould. Use a tarpaulin, mat or clean floor.
- Watch out:
Bring it in before rain — a shower on the standing ripe crop shatters heads and can sprout the grain, cutting both your yield and your price.
Dry hard and store sealed
The crop is grown — now do not lose it in store. Most storage loss is grain kept too wet (it heats and moulds) or unprotected (weevils bore into it). Dry the grain hard — to about 12–13% moisture — then store it clean, cool and sealed so the pests cannot breathe, and check it every month.
Dry to ≤13% and store sealed Recommended
Grain stored too damp (above about 13% moisture) heats and grows mould, and unprotected grain is bored through by weevils — either way your harvest rots or is eaten before you can eat or sell it. Drying hard and sealing it well is the difference between a crop that keeps for months and one that spoils.
After harvest (from about 145 days after sowing), dry the grain further on a tarpaulin, mat, rack or clean floor — never on bare ground, which pushes damp back in and adds mould, stones and animal dirt. Turn it so it dries evenly, and cover it if rain threatens.
Bite test: the grain is dry enough (about 12–13% moisture) when it is hard and cracks — not bends or squashes — between your teeth.
Salt-bottle check (optional): seal a handful of grain with a spoon of dry salt in a clean, dry bottle for 15 minutes. If the salt sticks to the glass, the grain is still too wet → dry it more before you seal it.
Store the dry, clean grain in hermetic (airtight) bags or a clean, sealed metal silo — airtight storage suffocates weevils with no chemicals. If you use ordinary bags, mix in an approved grain protectant and keep the bags off the floor and away from the walls, cool and dry.
Check the store once a month for heating, moths, or grain with small round holes and flour-like dust (weevils) — act early if you see them. If a grain bends or squashes rather than cracks when you bite it → it is still too wet; dry it more before sealing.
- Tip:
Storing damp grain — dry it hard to about 12–13% (grain cracks, not bends) and seal it, or weevils and mould will take it.
- Do:
Store in airtight bags or a sealed silo — it starves weevils of air and needs no chemicals.
- Watch out:
If you use a storage dust or protectant, follow the label, keep it off grain you will eat within weeks, and wash your hands.
Pests and diseases that attack wheat
-
 African armyworm
 -
 Angoumois grain moth
 -
 Aphids
 -
 Ergot
Ergot -
 Foot rot
 -
 Fusarium head blight
 -
 Grain-eating birds
 -
 Leaf blotch
 -
 Leaf rust
 -
 Loose smut
 -
 Maize weevil
 -
 Rodents
 -
 Rust
Rust -
 Smut
Smut -
 Stem rust
 -
 Termites
 -
 Yellow rust
Where to sell wheat
Markets that trade this crop — what each one sells it by, when supply peaks there, and the currency used.
-
 Yehil Berenda
-
 Adama Market
-
 Bahir Dar Market
-
 Eldoret Market
-
 GMB Aspindale Depot
-
 GMB Bulawayo Depot
-
 GMB Chinhoyi Depot
-
 Hawassa Market
Grow wheat with a plan, not a guess
This guide is the general answer. Divisi works out yours — the week to plant wheat on your soil and your rainfall, and each job dated for your field.


When to plant wheat, country by country
- When to plant wheat in Algeria
- When to plant wheat in Angola
- When to plant wheat in Botswana
- When to plant wheat in Burkina Faso
- When to plant wheat in Burundi
- When to plant wheat in Cabo Verde
- When to plant wheat in Cameroon
- When to plant wheat in Comores
- When to plant wheat in Côte d'Ivoire
- When to plant wheat in Egypt
- When to plant wheat in Eritrea
- When to plant wheat in Eswatini
- When to plant wheat in Ethiopia
- When to plant wheat in Gambia
- When to plant wheat in Guinea Ecuatorial
- When to plant wheat in Guinea-Bissau
- When to plant wheat in Guinée
- When to plant wheat in Kenya
- When to plant wheat in Lesotho
- When to plant wheat in Liberia
- When to plant wheat in Libya
- When to plant wheat in Madagascar
- When to plant wheat in Malawi
- When to plant wheat in Mali
- When to plant wheat in Mauritanie
- When to plant wheat in Mauritius
- When to plant wheat in Morocco
- When to plant wheat in Moçambique
- When to plant wheat in Namibia
- When to plant wheat in Niger
- When to plant wheat in Nigeria
- When to plant wheat in Rwanda
- When to plant wheat in République centrafricaine
- When to plant wheat in République démocratique du Congo
- When to plant wheat in Sierra Leone
- When to plant wheat in Somalia
- When to plant wheat in South Africa
- When to plant wheat in South Sudan
- When to plant wheat in Sudan
- When to plant wheat in Sénégal
- When to plant wheat in Tchad
- When to plant wheat in Tunisie
- When to plant wheat in Uganda
- When to plant wheat in United Republic of Tanzania
- When to plant wheat in Zambia
- When to plant wheat in Zimbabwe
Where wheat scores best
Districts where Divisi's engine currently rates this crop highest, ranked by fit.



Get Insights by email
A short digest of new Divisi articles. No email on quiet weeks.
Frequently asked questions
How do I grow wheat?
How to grow wheat: 100–150 days to maturity, 20 cm rows, 3–5 cm deep. Also called koring, ስንዴ (sinde), blé, trigo, koro, korong, gorosi, ngano.
What is koring in English?
Koring is the Afrikaans name for wheat.
What is ስንዴ (sinde) in English?
ስንዴ (sinde) is the Amharic name for wheat.
What is blé in English?
Blé is the French name for wheat.
What is trigo in English?
Trigo is the Portuguese name for wheat.
What is koro in English?
Koro is the Sesotho name for wheat.
What is korong in English?
Korong is the Setswana name for wheat.
What is gorosi in English?
Gorosi is the Shona name for wheat.
What is ngano in English?
Ngano is the Swahili name for wheat.
How long does wheat take to grow?
Wheat takes about 100–150 days from sowing to maturity, though the exact length varies with variety, temperature and how the season runs.
How deep should wheat be planted?
Sow wheat at about 3–5 cm deep. Shallower risks drying out; deeper wastes seed energy before the shoot reaches light.
What pests and diseases attack wheat?
The ones covered in this guide are African armyworm, Angoumois grain moth, Aphids. Each has its own page explaining how to identify, check for and control it.