 Divisi
How to grow cabbage
Brassica oleracea var. capitata · Brassicaceae
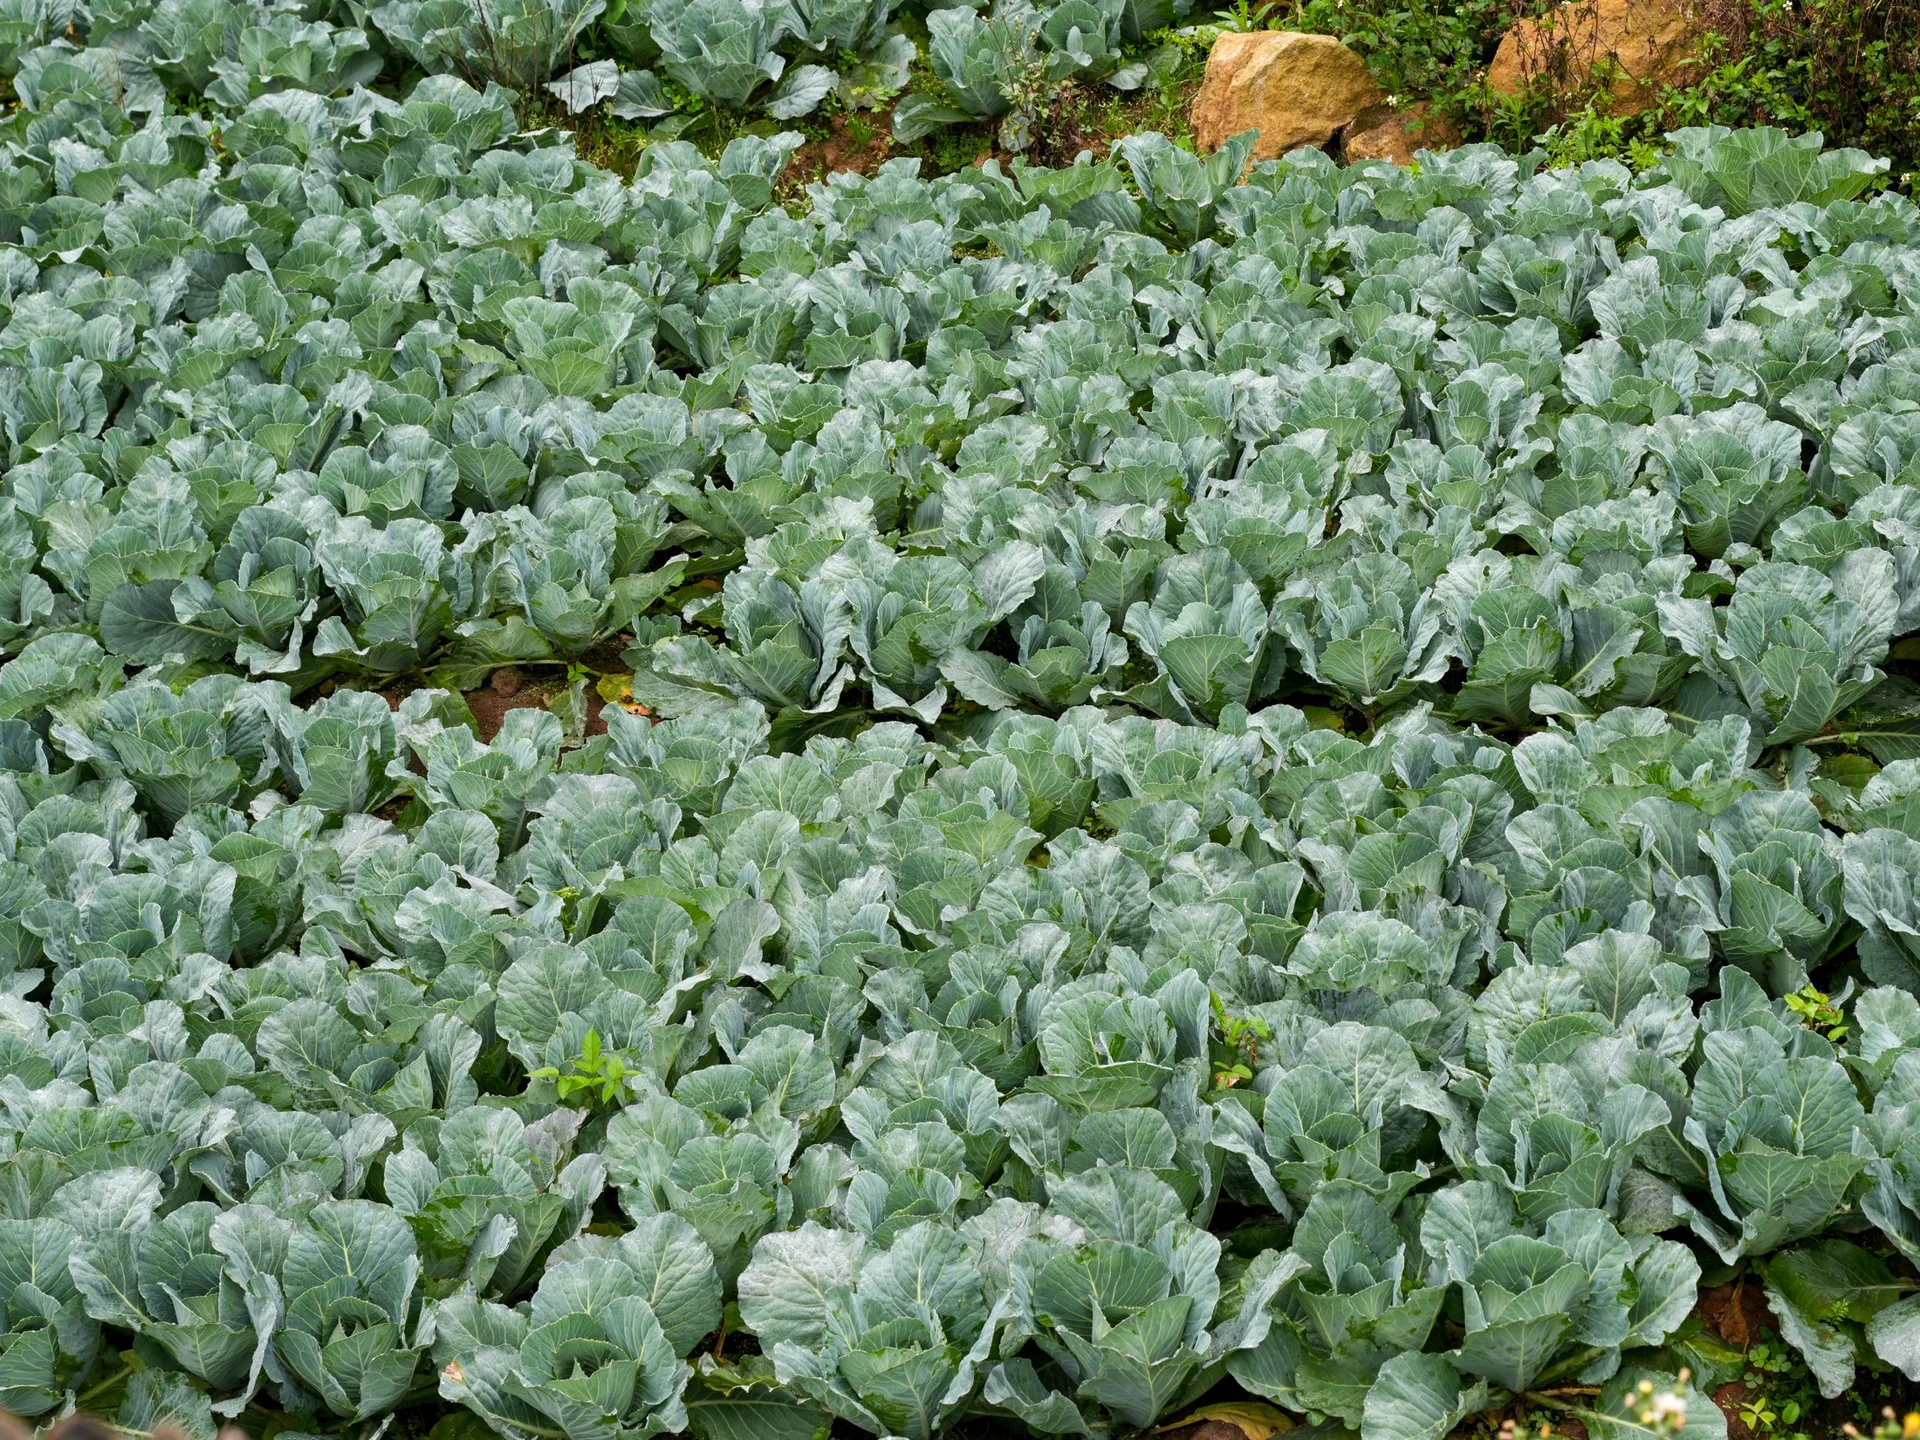
Photo: Timothy A. Gonsalves · CC BY-SA 4.0
Cabbage is a cool-season leafy vegetable that packs its whole harvest into one dense, round head on a short stem. You don't sow it straight into the field — you first raise seedlings in a nursery for about 4–6 weeks, then move the strongest into a rich, well-drained bed. From there it is a steady crop: it likes cool weather (heads fill best at 15–20 °C), drinks often because its roots are shallow, and is a heavy feeder that needs as much potash (potassium) as nitrogen to firm up the head. Its big enemies are the diamondback moth — a small caterpillar that resists sprays fast — and the soil diseases clubroot and black rot, which is why clean seed, liming, and rotating away from all cabbage-family crops matter so much.
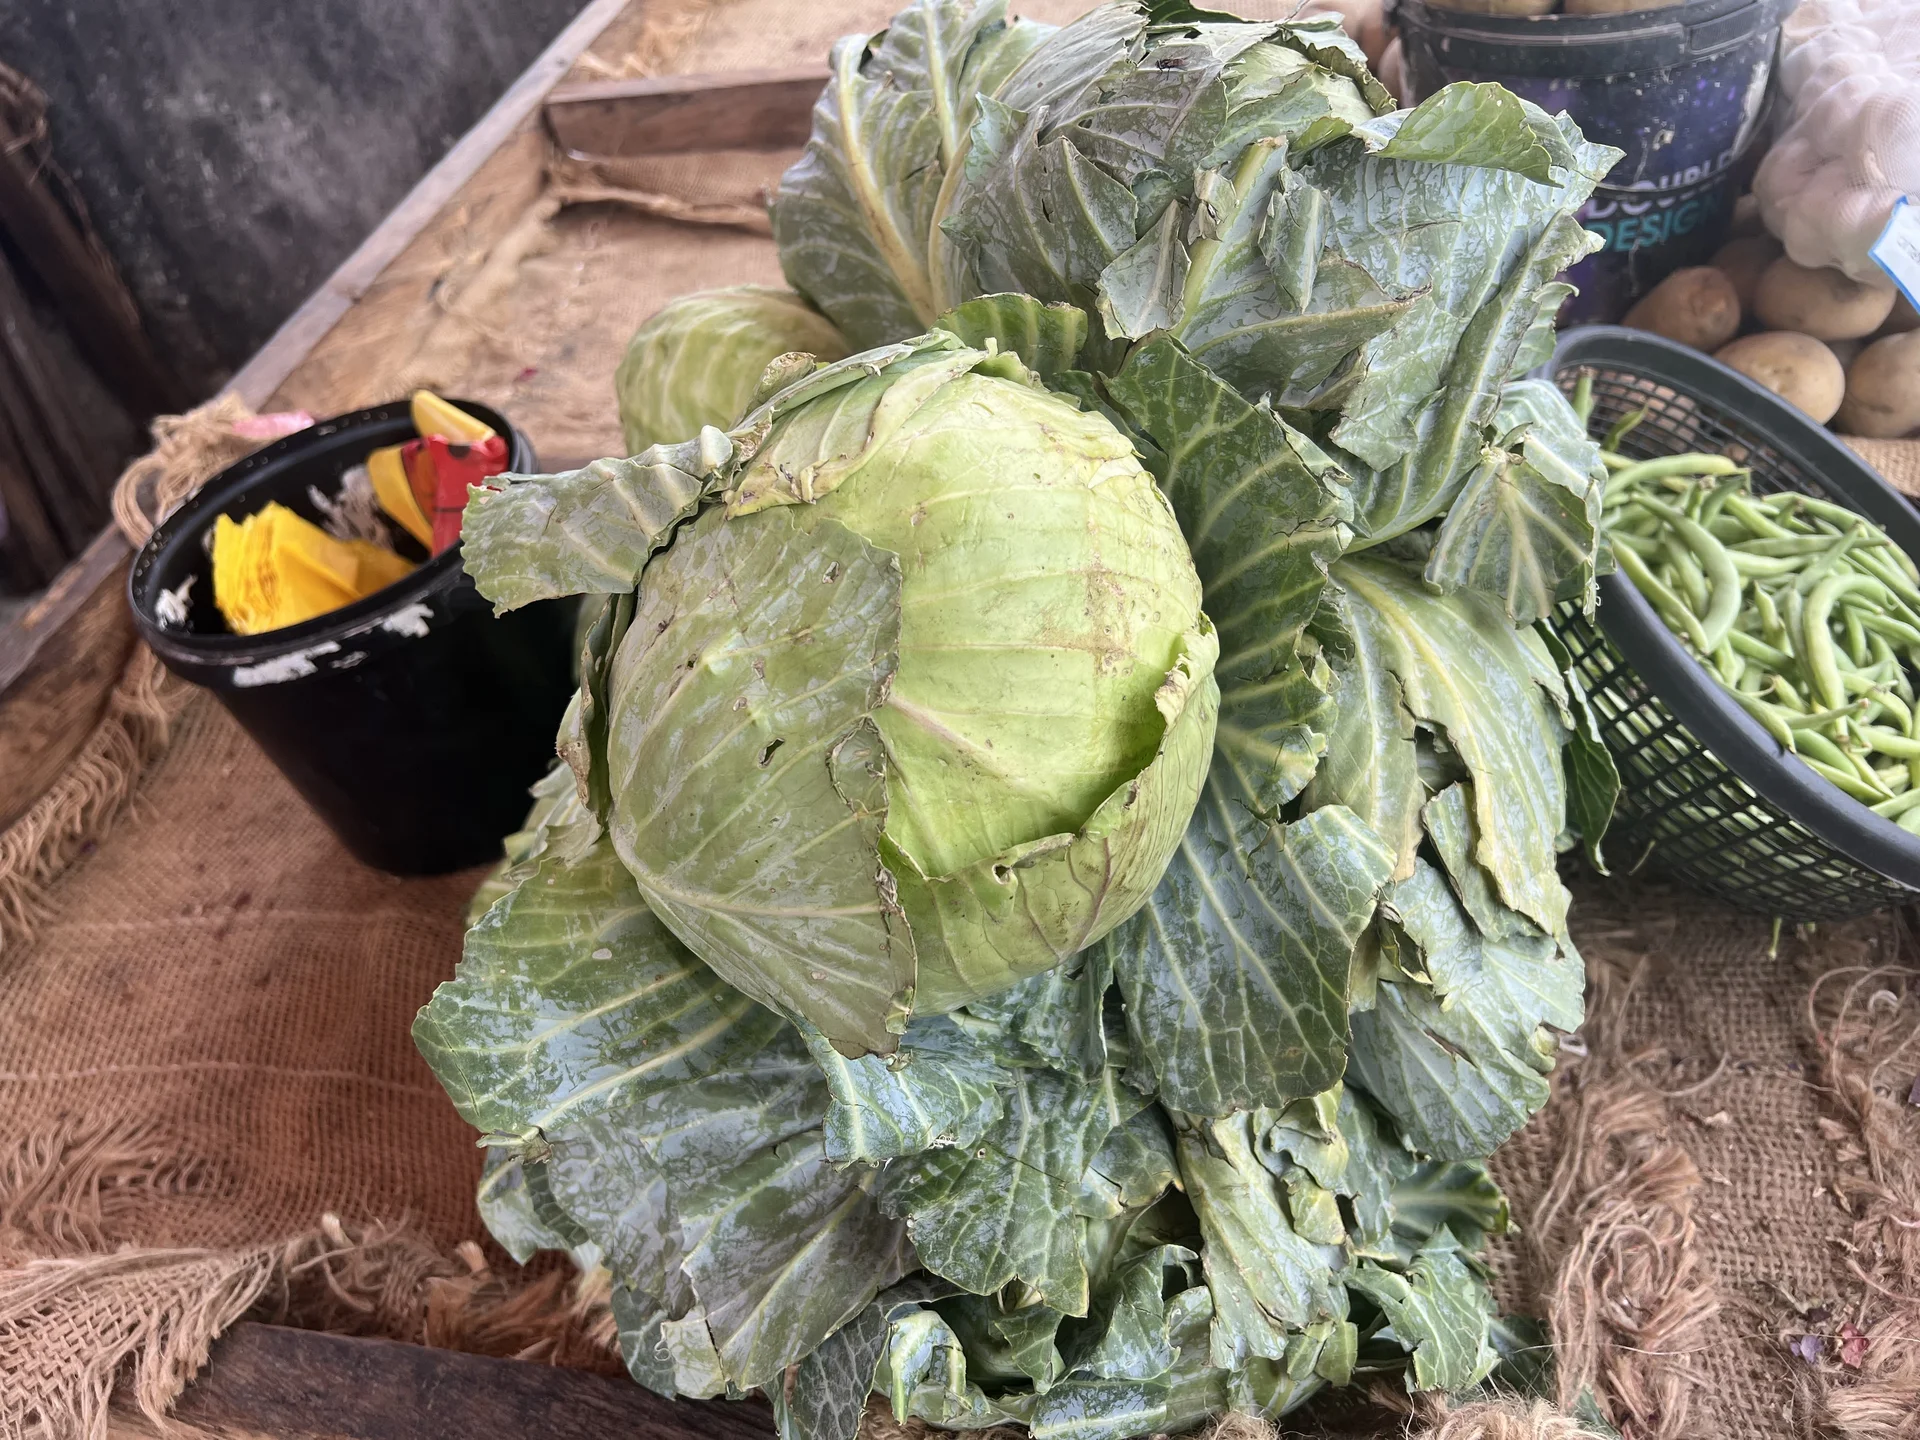
Iwai-Dialax · CC BY 4.0 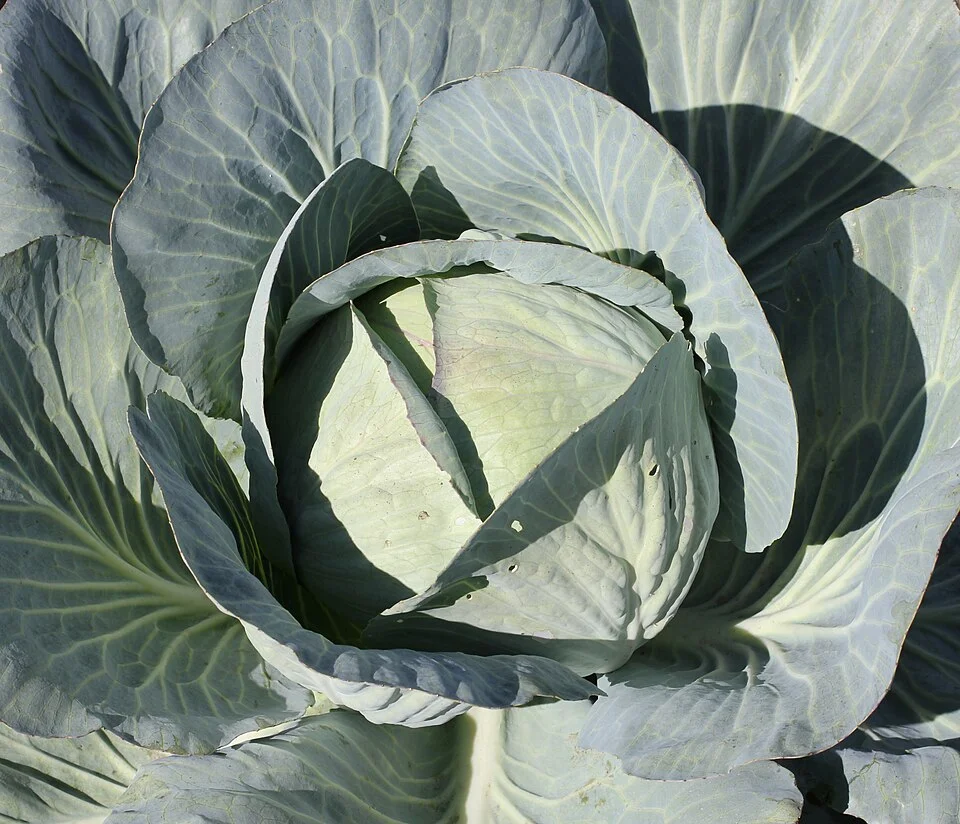
George Chernilevsky · Public domain
- Days to maturity
- 60–140 days
- Row spacing
- 65 cm
- Plant spacing in the row
- 40 cm
- Sowing depth
- 1–1.5 cm
These are general figures for the crop, compiled from published agronomic references including FAO and CABI. The right choice for your field depends on your soil, rainfall and the yield you are aiming for.
Will cabbage actually do well on your field? Check your own field against every crop in the catalogue — no signup. Run the crop check →
Also known as
Cabbage is also called head cabbage.
- English
- head cabbage
- Afrikaans
- kool
- Amharic
- ጥቅል ጎመን (tikil gomen)
- Chichewa
- kabichi
- French
- chou pommé
- Hausa
- kabeji
- Ndebele
- ikhabishi
- Portuguese
- repolho, couve
- Sesotho
- khabetjhe
- Setswana
- kgabeche
- Shona
- kabichi
- Swahili
- kabichi, kabeji
- Xhosa
- ikhaphetshu
- Zulu
- ikhabishi
Working in buckets, bags or paces? The farming glossary turns the measures growers actually use into kilograms and hectares — what a 20 litre bucket of each crop really weighs, and how to size a field by walking it — alongside the Shona, Swahili, Ndebele and Yoruba words used in the field. Open the glossary →
Growing cabbage, stage by stage
Your cabbage season, step by step — raising strong seedlings in the nursery, transplanting into a rich, cool-season bed, then feeding, watering and guarding the crop steadily so every plant makes one big, firm head.
Raise your seedlings and ready the beds
Cabbage is not sown where it will grow — you first raise seedlings in a small nursery for about 4–6 weeks, then move the best ones to the field. Almost everything you decide now — clean seed, a sweet (limed) soil, and a rich, well-drained bed — sets up the whole crop. Get two things right by hand before you start: rotate at least 3 years away from all cabbage-family crops (cabbage, rape, covo, kale, mustard, canola) to break clubroot and black rot, and use clean, certified seed.
Sow the nursery Critical
Your whole field crop is only as good as the seedlings you raise now. Strong, stocky seedlings transplant well and grow away into even, firm heads; thin, leggy, pampered ones get a shock in the field and give small, loose or split heads. A good nursery takes about 4–6 weeks and needs clean soil to keep out damping-off.
Make a raised nursery bed or use trays with clean, fresh media — never soil from an old cabbage patch, which carries damping-off and clubroot.
Sow the seed about 1 cm deep — just cover it, about one fingertip deep. Space seeds 2–3 cm apart, or in rows a hand-width (≈10 cm) apart.
Keep the bed warm, around 25–30 °C, and lightly moist to sprout — seedlings usually show in 5–10 days.
Water in the morning and only enough to stay damp, not soggy — too much water gives leggy seedlings and damping-off (seedlings collapse at the soil line).
When seedlings crowd, prick out (thin) the weakest so the rest grow stocky, with room and light.
Your seedlings are ready to transplant at 4–6 true leaves, stem about pencil-thick, roughly 4–6 weeks old.
If seedlings go thin and leggy → give them more sun and less water, and thin the crowded ones so each has room to firm up.
- Do:
Use clean, fresh media and a fresh site — most nursery losses are damping-off carried in old brassica soil.
- Tip:
Overwatering — soggy media rots the stems (damping-off) and grows soft, leggy seedlings that transplant badly.
- Watch out:
Tiny shot-holes in the seed leaves (flea beetles) or grey-green colonies (aphids) — cover the nursery with a light net or check daily while seedlings are small.
Harden off seedlings Recommended
A seedling raised soft in a sheltered nursery will wilt and stall when thrown straight into open sun and wind. Hardening off toughens it over the last week so it roots away fast with no growth check. A checked seedling makes a small head — or none at all (it 'buttons' into a tiny useless head).
Starting about 7 days before transplant, give the seedlings more sun each day and move them into open conditions.
Cut back the watering — let them feel a little dry between waterings so their stems toughen (but never wilt to the point of drooping badly).
Stop feeding during this week — you want tough, not lush, seedlings.
You will see the leaves go a little tougher and bluer-green — that is the seedling toughening up.
Water the nursery well the evening before you lift, so the seedlings go into the field full of moisture and lift with soil on their roots.
If a seedling wilts badly during hardening → ease back: the aim is tough, not starved. Give a little water and harden more gently.
- Do:
Harden gradually across the whole week — a sudden jump to full sun scorches soft seedlings.
- Tip:
Transplanting soft, lush seedlings straight from the shade — they wilt, check, and make small heads.
- Watch out:
Don't over-harden into starvation — seedlings should be firm and slightly hungry, not yellow and stunted.
Prepare the beds and get your seedlings
While the nursery grows, get the field ready. Cabbage is a heavy feeder with shallow roots, so the whole job here is a deep, rich, well-drained bed — sweetened with lime where the soil is sour, built up with well-rotted manure, and fed its first (basal) fertiliser high in potash. If you're not raising your own seedlings, buy strong, clean ones now.
Apply the recommended lime Recommended
Cabbage is a brassica, and its worst soil disease — clubroot, which swells the roots into useless clubs so the plant wilts and never heads — thrives in sour (acid) soil. Sweetening the soil with lime toward pH 7.2 starves clubroot, and it also helps the roots take up the heavy calcium, potassium and molybdenum this crop needs. Lime works slowly, so it must go on 2–3 months before you transplant to help this crop.
Only lime if a soil test — or past crops that stayed yellow, stunted or wilted even with fertiliser — says your soil is sour. Your recommendation gives the amount for your field.
For cabbage, aim a little sweeter than usual (toward pH 7.2) where clubroot is known, not just to the normal growing range — the extra sweetness is what holds clubroot back.
Spread it evenly over the whole bed, like sprinkling flour by hand — patches give patchy results and leave sour spots where clubroot hides.
Work it into the topsoil with a hoe. Lime only helps the soil it is mixed into; left on top it does almost nothing.
Do it 2–3 months before transplanting (a good time is right after clearing the last crop) — lime is slow, so late liming won't help this season.
- Tip:
Cabbage after cabbage (or after rape, covo, kale, mustard) on sour soil — it invites clubroot and black rot. Rotate at least 3 years away from all cabbage-family crops.
- Do:
Spread lime and manure a few weeks apart, not on the same day — give each time to work into the soil.
- Watch out:
Wash your hands after handling lime and keep the dust out of your eyes and nose.
Prepare beds: land prep + manure + basal Critical
Cabbage is a heavy feeder with shallow roots, so it needs a deep, loose, rich and well-drained bed, ready about 1–2 weeks before you transplant. Rotted manure feeds the soil all season and helps it hold the steady moisture cabbage demands, while the basal fertiliser gives the frame its first food. Good drainage is not optional — waterlogged beds breed clubroot and rot.
Do the bed work about 1–2 weeks before you transplant — dug, manured and fertilised — so the soil settles before the seedlings come out of the nursery.
Choose a bed on land that has not grown any cabbage-family crop for at least 3 years, and that drains well.
Dig and loosen the soil deeply and break the clods to a crumbly tilth, so the shallow roots spread easily and water soaks in.
Work in well-rotted manure or compost — dark, crumbly, no strong smell — about a wheelbarrow every few strides. Fresh, strawy manure burns roots and brings weed seeds.
Apply the basal fertiliser your recommendation gives — cabbage needs a compound high in potash (potassium), not just nitrogen, to build firm heads.
On heavy or wet soil, make raised beds or ridges so water never stands around the stems.
Level the surface so watering is even, and keep basal fertiliser out of the exact spots where seedling stems will sit.
- Do:
Make raised beds or ridges on heavy soil — cabbage roots rot and clubroot spreads in standing water.
- Tip:
Fresh, raw manure at bed-making — it scorches young roots, robs nitrogen as it rots, and brings weed seeds. Use only well-rotted manure.
- Watch out:
Wash your hands after handling manure or fertiliser, and keep both away from food, water and children.
Source healthy seedlings Critical
If you're not raising your own, the seedlings you buy are your crop — a sick or leggy transplant never fully recovers, and one carrying black rot or aphids can seed trouble through the whole bed. Buy strong, clean plants from a trusted nursery in the week before you transplant.
Buy stocky, dark-green seedlings with 4–6 true leaves and a stem about pencil-thick — not tall, thin, pale or pot-bound (roots coiled tight in the tray).
Check each one: no yellow V-shaped patches with black veins (black rot), no aphid colonies in the heart, and no wilting. Reject the whole batch if many look sick.
Buy from a nursery that raises seedlings on clean, fresh media, well away from any old cabbage-family patch — that's how black rot and clubroot travel.
Transplant them within a day or two of buying, and keep them shaded and watered until you do.
- Do:
Pick short, stocky, dark-green seedlings — they root fast and catch up quickly.
- Tip:
Buying cheap, leggy or yellowing seedlings, or any with black-veined leaf spots — you're buying a poor crop and maybe a disease.
Transplant and get every seedling growing
The number of healthy plants you establish now is the ceiling on your harvest — every seedling that dies is a head you can never get back. Move sturdy, hardened seedlings (4–6 true leaves) into the field in the cool of the day, at the right spacing and the right depth, and water them in at once. An even, unchecked start gives even, uniform heads.
Transplant + water in Critical
Moving from nursery to field is the biggest shock of the crop's life. Set each seedling at the right depth and spacing and water it in straight away, and it roots fast and grows away evenly. A rough, dry, midday transplant checks the plant — and a checked cabbage makes a small or loose head.
Transplant in the cool of the day — a cloudy day, or late afternoon/evening — never in the hot midday sun.
Water the nursery first so seedlings lift with a ball of soil on the roots; disturb the roots as little as you can.
Make a hole at the recommended spacing — about 65 cm between rows (roughly three hand-spans) and 40 cm between plants (two hand-spans).
Set each seedling to the same depth it grew in the nursery — firm soil around the roots, but never bury the growing point (the little heart in the centre).
Water in at once — a cupful or two at the base of each plant — so the soil settles snugly around the roots with no air pockets.
If a seedling wilts flat and doesn't recover by the next morning → replace it from your spares while there is still time to catch up (keep a few spare seedlings in the nursery for this).
- Tip:
Transplanting in the heat of the day — set out in the cool and water in at once, or seedlings wilt and check.
- Do:
Firm the soil gently around each seedling so there are no air pockets, then water — loose soil dries the roots.
- Watch out:
Keep a handful of spare seedlings back in the nursery to fill the ones that fail in the first week.
Water to keep steadily moist; replace failures Critical
A fresh transplant has a tiny root system and cannot yet reach for water. Keeping the soil steadily moist for the first two weeks is the difference between rooting away and dying. Replacing failures early, from your spares, keeps the stand full and even.
Keep the topsoil steadily moist — not waterlogged — while the seedlings root; water every 2–3 days, more often in heat or on sandy soil that dries fast.
Water gently at the base of the plants, in the cool of the day.
Check by pushing a finger in: water when the top few centimetres feel dry.
Replace any dead or failed seedlings within the first week or two, from your spares, so the replacements can still catch up with the rest.
If gaps are left unfilled → the crop matures unevenly: fill them early, while spares are still the same age as the field.
- Do:
Keep spare seedlings in the nursery so you can fill failures fast and keep the stand even.
- Tip:
Waterlogging the bed — soggy soil rots the young roots and invites clubroot. Drain low spots.
- Watch out:
A seedling that wilts at midday but recovers by evening is only thirsty; one still flat next morning is failing — replace it.
Mulch Recommended
Cabbage feeds from shallow roots in the top layer of soil, which dries and heats up fast. A mulch keeps that soil cool and evenly moist, stops it cracking, and smothers weeds. Steady soil moisture from mulch also helps head off tip-burn and splitting later in the season.
Once the soil is moist and the seedlings are in, spread dry grass, straw or leaves between the plants.
Lay it about a hand-thick so it shades the soil and holds the damp.
Keep the mulch a hand's width off the stems — mulch piled against the stem stays wet and rots it, and hides slugs.
Top up the mulch as it rots down through the season.
- Do:
Mulch to hold even moisture — steady soil moisture is your cheapest guard against tip-burn and split heads later.
- Tip:
Piling mulch against the stems — it traps damp, rots the stem, and shelters slugs and snails.
- Watch out:
Check under the mulch and in the heart for slugs and snails, especially in wet weather.
Scout (transplant shock, cutworms) Critical
The first three weeks decide your stand. Cutworms cut young transplants clean off at ground level overnight, and transplant shock shows up now. Catching gaps and pests early — while spares can still fill in — protects the number of heads you will cut.
Every 3–4 days, walk a large "W" across the field so you cover all corners and the middle, not just the edge by the path.
Cutworms: look for seedlings cut clean off at soil level (worst in the morning). Scratch the soil around the stump to find the fat, grey, curled caterpillar and squash it.
Check for wilting or checked transplants that are struggling to root, and count the gaps where seedlings have died.
Turn a few leaves over and look for early flea-beetle shot-holes (tiny round holes) and grey-green aphid colonies.
If cutworms are cutting plants → act now: hand-pick at night, put a cardboard or tin collar around stems, or use a recommended bait, and replace the cut seedlings from your spares.
- Watch out:
Cutworms do most damage in the first 2 weeks and at night — check stumps each morning.
- Do:
Replace failed or cut seedlings from your spares straight away so the stand stays full and even.
- Tip:
Mistaking a cut plant (lying severed on the soil) for a wilted one — a cutworm-cut plant won't recover; go find the caterpillar.
Build the leaf frame that feeds the head
Now the plant builds its big open rosette of leaves — the leaf factory that will fill the head later. A strong frame comes from steady nitrogen (fed in splits so rain doesn't wash it away), even moisture, and shallow weeding that spares the surface roots. This is also where the diamondback moth and black rot first build — scout weekly from the start.
1st N top-dress Recommended
The plant is now building the leaf frame that will feed the head, and it eats most of its nitrogen during this fast growth. Splitting the nitrogen — half now, half at cupping — means less is washed away by rain and more goes into the crop. Keep potash (potassium) high alongside it: cabbage needs as much potash (K) as nitrogen (N) to firm the head.
Apply when the plants have taken and are growing away — new leaves opening, about 4 weeks after transplant.
Band about half the nitrogen (ammonium nitrate, sold as 'AN', or urea) a hand's width to the side of the plants, not on top of them.
Do it on moist soil (after a weeding or light rain) and water it in or cover it, so it doesn't gas off and go to waste.
Keep the fertiliser out of the heart and off wet leaves — grains lodged in the heart or stuck to wet leaves scorch them.
Remember cabbage needs as much potash as nitrogen — make sure your programme keeps potassium going in, not just N.
Wash your hands afterwards and keep fertiliser away from food and water.
If the lower leaves are pale and the plant is small → it is hungry: don't skip or delay this feed.
- Tip:
Dropping fertiliser into the heart or onto wet leaves — it scorches the growing point and the leaves.
- Do:
Keep potash (potassium) high through the crop, not just nitrogen — it is what firms and weights the head.
- Watch out:
Wash your hands after handling fertiliser, and keep it off the heads you will later eat.
Shallow weeding Recommended
Weeds steal the water, light and fertiliser you paid for, exactly while the frame is building. But cabbage roots run shallow and wide, so deep hoeing near the plants cuts them and checks the crop. Weed early and shallow — a clean field now is the cheapest yield you'll gain.
Weed by about 2–3 weeks after transplant, before the weeds get bigger than the cabbage.
Hoe shallowly between and within the rows — the roots are just under the surface.
Close to the plants, pull the weeds by hand rather than hoeing deep against the stems.
Time this weeding just before you top-dress, so the nitrogen feeds the cabbage and not a fresh flush of weeds.
In dry areas, leave the pulled weeds lying between the rows as a mulch to hold moisture.
- Do:
Weed shallow — cabbage's surface roots are easily cut, and a cut root checks the plant.
- Tip:
Deep hoeing or earthing up over the growing point — you slice roots and can smother the heart.
- Watch out:
Don't tug young plants loose while weeding — hold the soil around them as you pull nearby weeds.
Water to keep moisture even Recommended
The frame stage sets how big the leaves get, and even moisture keeps them expanding steadily. Cabbage's shallow roots dry out fast, so a dry-then-wet swing now stunts the frame and quietly sets up tip-burn and splitting later. Steady is the whole game.
Water every 5–7 days — more often in heat or on sandy soil — to keep the soil evenly moist to a spade's depth.
Aim for steady, not feast-or-famine — big swings between bone-dry and flooded are what cause trouble later.
Check with a finger: water when the top few centimetres are dry, before the plants wilt.
Don't waterlog — cabbage roots rot and clubroot spreads in standing water. Drain low spots.
If the crop has dried out and wilted → bring the water back gently over a day or two, not in one flood, or you shock the plants.
- Do:
Keep moisture even and steady — it is the single biggest thing you control against tip-burn and splitting.
- Tip:
Big dry-then-wet swings — they stunt the frame now and split the heads later.
- Watch out:
Standing water in heavy soil — root rot and clubroot follow. Drain, ridge, or lift the beds.
Scout (diamondback moth, aphids, black rot, N) Critical
This is where the diamondback moth builds and black rot enters — either can wreck the crop. The diamondback moth resists sprays faster than almost any pest, so you must catch it early and switch chemical group each time. Black rot spreads in wet weather and has no cure — spotting it early is the only way to slow it.
Walk the crop weekly in a "W", turning leaves over and looking into the open heart where pests hide.
Diamondback moth: small green caterpillars and "window-pane" grazing — thin, papery patches where only the underside skin of the leaf is left. Disturbed, the caterpillars wriggle and drop on a thread.
Cabbage aphids: grey-green, waxy colonies packed on the growing point and leaf undersides.
Black rot: yellow, V-shaped patches running in from the leaf edge, with black veins inside the V. Worst in warm, wet weather.
Leaf miners: pale, wiggly tunnels traced inside the leaf.
Threshold: when about 2 plants in every 10 show fresh caterpillar damage, spray Bt (a caterpillar-only spray) or a registered product, covering the leaf undersides, and switch to a different chemical group each spray (the group is marked on the label as a number — ask your agro-dealer which group a product is in, and rotate to a different one each time).
Spray safely: cover your skin, eyes and nose, spray in the cool of the day with the wind behind you, keep spray off food, and wash afterwards. Never spray closer to harvest than the product's pre-harvest interval — the number of days you must wait between the last spray and cutting the heads (printed on the label; ask your agro-dealer if you're unsure), because you eat this crop.
If you find black rot → remove the worst plants, stop working the rows while the leaves are wet, and water at the base (not over the top) to slow its spread.
- Do:
Switch to a different chemical group each diamondback-moth spray — it builds resistance to a single group very fast, so ask your agro-dealer which group each product is in.
- Tip:
Walking through or handling the crop while the leaves are wet — that is how black rot spreads plant to plant.
- Watch out:
Aphids massing on the growing point — they curl and stunt the young heart. Hit them early, into the leaf undersides.
Cup and start the head — the make-or-break window
The wrapper leaves now fold inward and cup, and the head begins to form in the centre. This is the thirstiest, most important stage: steady water and the last of the nitrogen decide head size and firmness. Hold moisture dead-steady, complete the feeding, and guard the heart — the diamondback moth now bores straight into it.
2nd N top-dress at start of cupping Recommended
As the leaves start to cup and the head begins to form, the plant makes its heaviest demand. This last feed fills out the head, while high potash (potassium) firms it and adds weight. If hollow, brown stem is a known problem locally, a little boron now prevents it. This is the last nitrogen — too much late gives soft heads that split and rot.
Apply as the youngest leaves start to fold inward and cup like a loose bowl — around 7–8 weeks after transplant.
Band the last nitrogen split to the side of the plants, on moist soil, and water it in.
Keep potash high into the head — it is what makes the head firm, heavy and good to store.
If hollow or brown stem (boron shortage) is a known problem in your area, apply the small amount of boron your recommendation gives, spread very evenly — too much boron harms the crop, so never guess the dose.
This is the last nitrogen of the season — more N after this gives soft, loose heads that split and rot in storage.
Keep fertiliser off the head and out of the heart, and wash your hands afterwards.
If you're unsure whether to add more nitrogen late → don't: steady potash and steady water do more for the head now than extra N.
- Watch out:
Swings between dry and wet split heads — hold the moisture dead-steady, especially as the head firms.
- Tip:
Heavy late nitrogen — it puffs up soft heads that split in the field and rot in store.
- Do:
Keep potash (potassium) high right into heading — firm, heavy heads come from potassium, not extra nitrogen.
Water even & uninterrupted Critical
Head formation is the most water-critical stage of the whole crop. Steady, uninterrupted moisture now decides head size and firmness. A dry spell here — especially followed by a big drink — is the classic cause of tip-burn (inner leaves scorching) and, later, split heads.
Keep the soil constantly moist through cupping and heading — water every 3–5 days, more often in heat.
Never let the crop wilt at this stage, even for a day.
Water at the base, early or late in the day — soaking the heads late keeps them wet overnight and invites disease.
Above all, keep it even — no bone-dry spells followed by floods.
If the crop has been left dry → bring the water back gradually over a day or two, never in one heavy soak, or the sudden swell causes tip-burn and splitting.
- Do:
Hold moisture dead-steady now — this stage builds the head, and steadiness is what makes it firm and whole.
- Tip:
A sudden heavy soak after a dry patch — the head swells too fast and scorches (tip-burn) or splits.
- Watch out:
Inner leaf margins turning brown and papery (tip-burn) — a sign of uneven water, not a pest. Steady the water.
Scout (DBM peak, aphids, mildew, tip-burn, clubroot) Critical
The diamondback moth peaks now and bores into the forming heart, where sprays struggle to reach; aphids hide in the cupping leaves; and downy mildew and clubroot show. Damage to the heart now is damage to the very head you will sell — and any spray you use must respect the pre-harvest interval, because the head is nearly food.
Walk the crop weekly, gently opening the cupping leaves to check inside the heart, where the caterpillars now feed.
Diamondback moth: green caterpillars and window-pane grazing, now down in the folding leaves and heart.
Cabbage aphids: grey-green colonies tucked inside the cupping leaves.
Downy mildew: yellow patches on the upper leaf with a grey-purple fuzz underneath, worse in cool, damp weather.
Clubroot: plants that wilt in the day and recover at night — lift one and check the roots; swollen, clubbed roots mean clubroot.
Tip-burn: browning inner-leaf edges — this is water/calcium, not a pest; fix it by steadying the moisture.
Bolting: a plant stretching upward to throw a flower stalk instead of heading — usually from a cold spell; note it but it can't be reversed.
Threshold + safe spraying: at about 2 plants in 10 with fresh caterpillar damage, spray Bt or a registered product into the heart and under the leaves, switch to a different chemical group each time (ask your agro-dealer which group each product is in, and rotate to a new one), cover skin/eyes/nose, spray in the cool with the wind behind you, and never spray inside the product's pre-harvest interval — the days you must wait between the last spray and cutting the head (on the label, or ask your agro-dealer).
If you find clubroot → lift and burn the affected plants, don't plant any cabbage-family crop there again for years, and lime that ground.
- Do:
Spray into the heart and under the leaves, in the cool of the day with the wind behind you — the diamondback moth hides where a careless spray never reaches.
- Tip:
Spraying close to harvest — respect the pre-harvest interval on every product, because this head goes on a plate.
- Watch out:
Day-wilting that recovers overnight — lift a plant and check for swollen, clubbed roots (clubroot).
Fill and firm the head to market density
The head now fills out and firms to marketable density. Your job is to hold steady, even water to the end — because this is exactly when a swing splits heads — and to start checking heads for firmness so you can plan your harvest passes. Watch for aphids trapped in the head and the first soft rot.
Water steady & even to the end Recommended
The head is filling and firming, and steady water builds its weight. But this is the stage a swing does the most damage: a dry spell followed by a big drink makes the inside grow faster than the skin, and the head splits and loses its market value overnight.
Keep water steady and even right to harvest — water every 3–5 days, adjusting for heat.
Never give a sudden heavy soak after a dry spell — that is what bursts a firm head.
Once heads are firm, you can ease the water back a little to slow splitting while you cut in passes.
If you must taper off before harvest, do it gradually, not all at once.
If firm heads are at risk of splitting (after rain, or a firm head you can't cut yet) → hold the water back a little and harvest those heads first.
- Do:
Keep water even all the way to the end — steadiness protects the firm head you've grown.
- Tip:
A heavy soak or heavy rain after dryness — firm heads split overnight when the inside swells too fast.
- Watch out:
Firm heads after a downpour — they are the first to split, so cut them first.
Check head firmness Recommended
A head that squeezes soft is still filling; a firm, solid head is ready to cut. This simple squeeze tells you when to start harvesting — and warns you which heads are about to split if you leave them. Heads don't all mature together, so you test and cut in passes.
From about day 80 after transplant, squeeze a few heads across the field with your open palm.
Firm and solid all the way through → ready to cut (this is your signal to start harvesting).
Still soft, loose or spongy → not ready: give it more time.
Note which heads are firmest — those get cut first.
Look on top for the first fine cracks, the sign a head is about to split.
If a head is still soft → leave it, keep the water steady, and squeeze again in a few days. If it is firm and starting to crack → cut it now, before it splits.
- Do:
Test several heads across the whole field — they mature at different times, so harvest is done in passes.
- Tip:
Leaving firm heads standing too long — an over-held head splits and loses its value.
- Watch out:
A crack on top means the head is about to burst — cut that one first.
Scout (splitting, aphids in head, soft rot) Recommended
Late problems attack the head you've already grown: aphids get trapped deep inside where you can't wash them off before sale, soft rot turns heads to foul slime, and splitting opens the door to both. Spotting them means harvesting the affected heads early rather than losing them.
Walk the crop weekly, checking the tops and the outer wrapper leaves of the heads.
Splitting: look for fine cracks on top of firm heads — cut these at once.
Aphids in the head: grey-green colonies trapped in the wrapper leaves and outer head, hard to remove before market.
Soft rot: soft, slimy, foul-smelling wet patches on the head — a bacterial rot that spreads fast in warm, wet weather.
Lift out and remove any rotting heads from the field — don't leave them to infect the rest.
If soft rot is spreading → cut out the affected heads, improve drainage, and don't cut or handle heads while they are wet, which spreads the rot.
- Watch out:
Heads splitting after rain — harvest those first before they spoil.
- Tip:
Cutting or handling heads while wet — it smears soft-rot bacteria from head to head.
- Do:
Cut out and carry off any slimy, rotting heads to protect the sound ones around them.
Cut the heads at their peak
Cut when heads are firm and solid to a gentle squeeze and at market size — wait too long and they split and lose value. Heads mature over about 1–3 weeks, so you cut in several passes in the cool of the day, leaving a few wrapper leaves on each head to protect it on the way to market.
Cut heads in passes Critical
Cut at the right moment — firm, solid heads at market size — and you get top weight and top price. Wait too long and heads split and spoil; cut too early and they are light and loose. Because heads don't all mature together, cutting in passes lets you take each head at its best.
Check the head is firm and solid to a gentle squeeze and at market size before you cut it.
Cut the stem just below the head with a sharp knife.
Leave a few wrapper leaves on the head — they protect it from bruising and drying on the way to market.
Cut in the cool of the day (early morning is best) and keep cut heads out of the sun.
Work in passes every 5–7 days, taking the firmest, most mature heads each time.
If you have sprayed recently, make sure the product's pre-harvest interval — the number of days to wait between the last spray and cutting — has fully passed before you cut heads to eat or sell (the days are printed on the label; ask your agro-dealer if you're unsure).
If a head isn't firm yet → leave it and come back in a few days; if it is firm and cracking → cut it now, before it splits.
- Tip:
Waiting past firmness — over-held heads split and lose their market value.
- Do:
Cut in the cool of the day and get the heads into shade at once — sun-warm heads wilt and spoil faster.
- Watch out:
Respect the pre-harvest interval after any spray before cutting heads to eat or sell.
Trim, grade and cool for market
The head is grown — now don't lose its value. Trim the loose outer leaves, grade by size and firmness so each pack is uniform, and cool the heads out of the sun fast. Handle them gently: bruised heads rot in transit. Firm storage types can hold for weeks kept cool and humid; early types should move to market quickly.
Trim, grade & cool Recommended
A good crop only becomes a good sale if you protect it after cutting. Bruised, dirty, sun-warm heads rot in transit and fetch less, while one rotting head can spoil a whole pack. Trimming, grading and cooling turn firm heads into money — and let good storage types keep for weeks.
Trim the loose and damaged outer leaves, leaving a few clean wrapper leaves for protection.
Grade by size and firmness so each bag or crate holds uniform heads — buyers pay more for an even pack.
Handle gently — don't drop or throw heads; every bruise becomes a rot spot.
Get the heads out of the sun quickly and keep them cool and humid (near 0–4 °C for firm storage types; early types should go to market fast).
Stack so air can move between heads — don't seal warm, damp heads in a tight bag, or they heat and rot.
If a head is soft, split or damaged → sell or eat it first and keep it out of the packed, sound heads, so it doesn't rot the rest.
- Do:
Cool the heads out of the sun quickly and keep them cool and humid — near 0–4 °C for storage types.
- Tip:
Rough handling — tossed and dropped heads bruise, and bruised heads rot on the way to market.
- Watch out:
Don't pack soft or split heads in with sound ones — a single rotting head spoils the whole pack.
Pests and diseases that attack cabbage
-
 Alternaria leaf blight
 -
 Aphids
 -
 Bacterial soft rot
 -
 Bagrada bug
 -
 Black rot
 -
 Cabbage aphid
 -
 Cabbage webworm
 -
 Clubroot
 -
 Cutworms
 -
 Damping-off
 -
 Diamondback moth
 -
 Downy mildew
 -
 Flea beetles
 -
 Leaf miners
 -
 Leaf-eating caterpillar
 -
 Slugs and snails
 -
 Thrips
 -
 Whitefly
Where to sell cabbage
Markets that trade this crop — what each one sells it by, when supply peaks there, and the currency used.
-
 Joburg Market
-
 Mbare Musika
-
 Wakulima Market
-
 Atkilt Tera
-
 Marché de Foumbot
-
 Marché de Thiaroye
-
 Mercado Grossista do Zimpeto
-
 Nakasero Market
Grow cabbage with a plan, not a guess
This guide is the general answer. Divisi works out yours — the week to plant cabbage on your soil and your rainfall, and each job dated for your field.


When to plant cabbage, country by country
- When to plant cabbage in Algeria
- When to plant cabbage in Angola
- When to plant cabbage in Botswana
- When to plant cabbage in Burundi
- When to plant cabbage in Cabo Verde
- When to plant cabbage in Cameroon
- When to plant cabbage in Comores
- When to plant cabbage in Egypt
- When to plant cabbage in Eritrea
- When to plant cabbage in Eswatini
- When to plant cabbage in Ethiopia
- When to plant cabbage in Guinea Ecuatorial
- When to plant cabbage in Kenya
- When to plant cabbage in Lesotho
- When to plant cabbage in Libya
- When to plant cabbage in Madagascar
- When to plant cabbage in Malawi
- When to plant cabbage in Mali
- When to plant cabbage in Mauritanie
- When to plant cabbage in Mauritius
- When to plant cabbage in Morocco
- When to plant cabbage in Moçambique
- When to plant cabbage in Namibia
- When to plant cabbage in Niger
- When to plant cabbage in Nigeria
- When to plant cabbage in Rwanda
- When to plant cabbage in République démocratique du Congo
- When to plant cabbage in Somalia
- When to plant cabbage in South Africa
- When to plant cabbage in South Sudan
- When to plant cabbage in Sudan
- When to plant cabbage in Tchad
- When to plant cabbage in Tunisie
- When to plant cabbage in Uganda
- When to plant cabbage in United Republic of Tanzania
- When to plant cabbage in Zambia
- When to plant cabbage in Zimbabwe
Where cabbage scores best
Districts where Divisi's engine currently rates this crop highest, ranked by fit.
-
 Les Eucalyptus
 -
 Prefecture de Skhirate Temara
 -
 Bizerte
 -
 Salah Bouchaour
 -
 Prefecture de Fes
 -
 Nabeul
 -
 Djisr Ksentina
 -
 Province de Fquih Ben Saleh
 -
 Zaghouan
 -
 Almarj
 -
 Ainabkoi
 -
 Hambou
Get Insights by email
A short digest of new Divisi articles. No email on quiet weeks.
Frequently asked questions
How do I grow cabbage?
How to grow cabbage: 60–140 days to maturity, 65 cm rows, 1–1.5 cm deep. Also called head cabbage, kool, ጥቅል ጎመን (tikil gomen), kabichi, chou pommé.
What is kool in English?
Kool is the Afrikaans name for cabbage.
What is ጥቅል ጎመን (tikil gomen) in English?
ጥቅል ጎመን (tikil gomen) is the Amharic name for cabbage.
What is kabichi in English?
Kabichi (also kabeji) is the Chichewa, Shona and Swahili name for cabbage.
What is chou pommé in English?
Chou pommé is the French name for cabbage.
What is kabeji in English?
Kabeji is the Hausa name for cabbage.
What is ikhabishi in English?
Ikhabishi is the Ndebele and Zulu name for cabbage.
What is repolho in English?
Repolho (also couve) is the Portuguese name for cabbage.
What is khabetjhe in English?
Khabetjhe is the Sesotho name for cabbage.
What is kgabeche in English?
Kgabeche is the Setswana name for cabbage.
What is ikhaphetshu in English?
Ikhaphetshu is the Xhosa name for cabbage.
How long does cabbage take to grow?
Cabbage takes about 60–140 days from sowing to maturity, though the exact length varies with variety, temperature and how the season runs.
What spacing should I use for cabbage?
Space cabbage rows about 65 cm apart, with roughly 40 cm between plants within the row.
How deep should cabbage be planted?
Sow cabbage at about 1–1.5 cm deep. Shallower risks drying out; deeper wastes seed energy before the shoot reaches light.
What pests and diseases attack cabbage?
The ones covered in this guide are Alternaria leaf blight, Aphids, Bacterial soft rot. Each has its own page explaining how to identify, check for and control it.